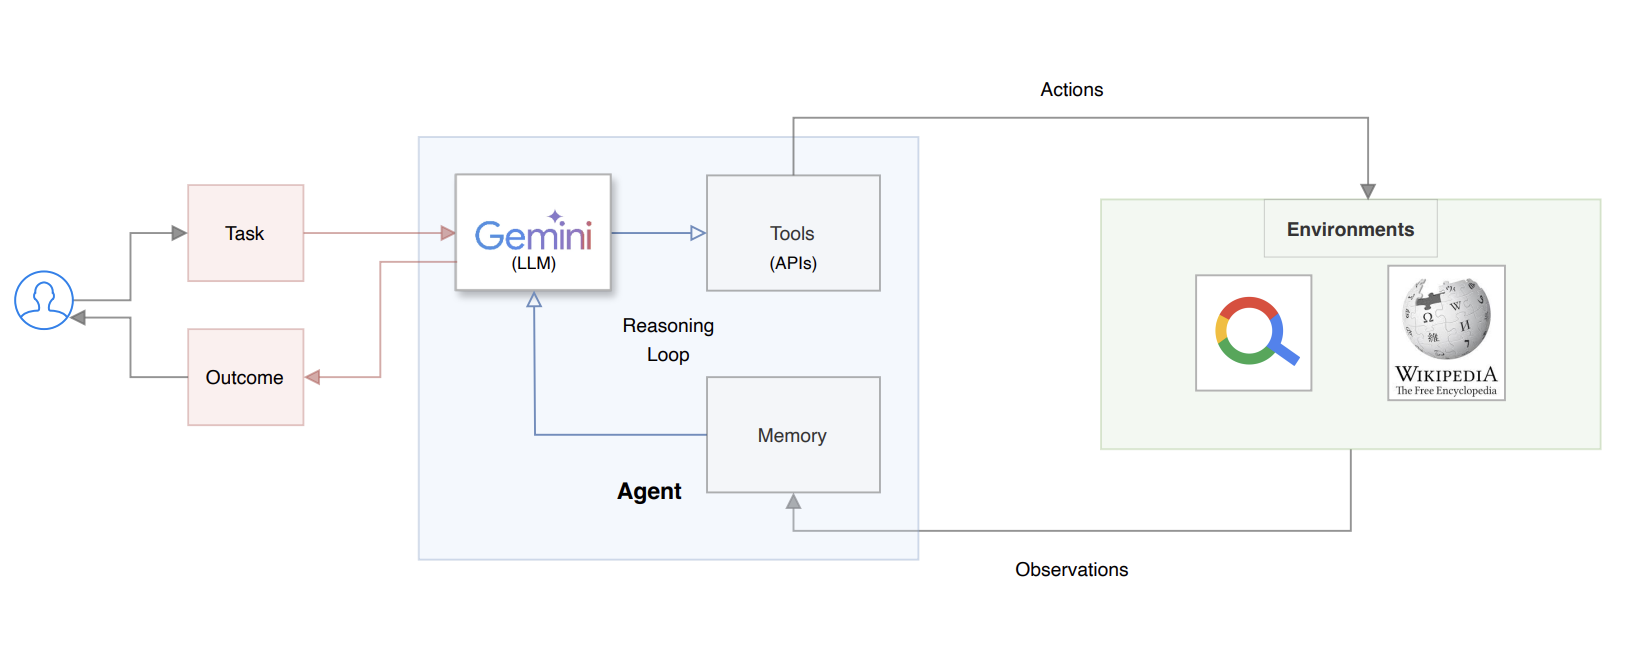
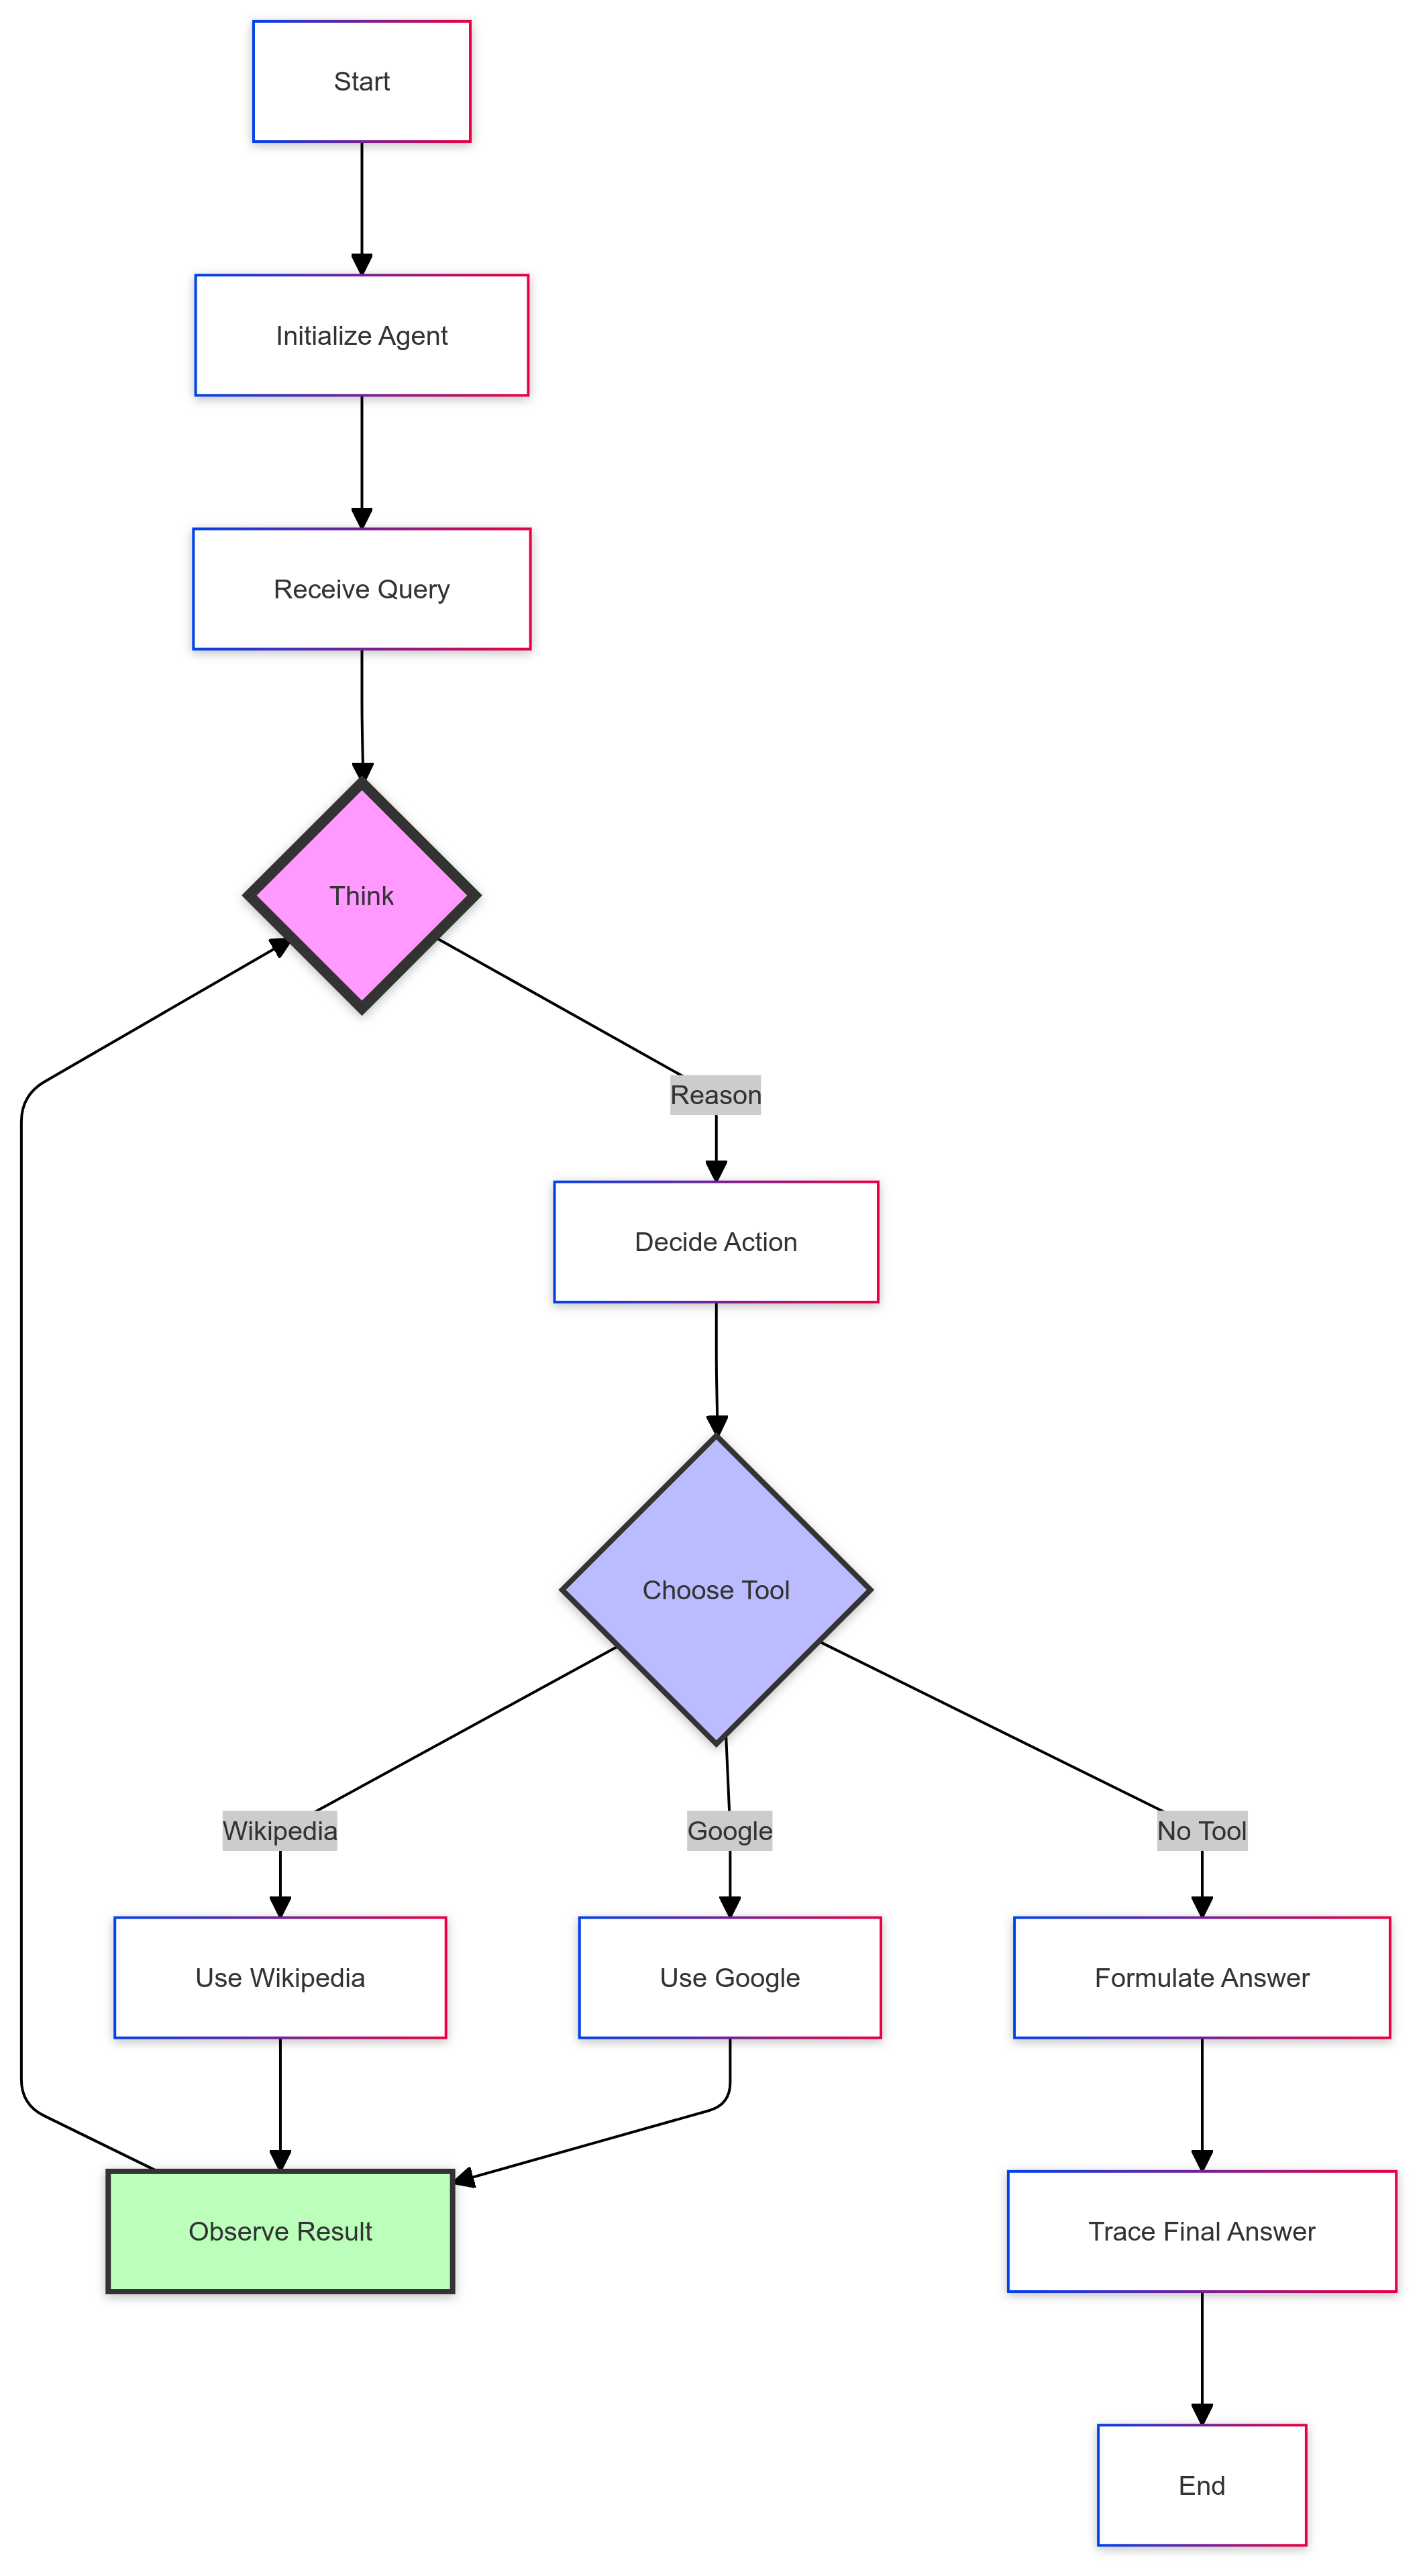
This repository provides a comprehensive guide and implementation for creating ReAct (Reasoning and Acting) agents from scratch using Python and leveraging Google's Gemini as the Large Language Model (LLM) of choice.
- Step-by-step implementation of the ReAct pattern
- Multiple examples showcasing ReAct agents in action
- Optimizations specific to the Gemini model
- Tools integration (Google Search and Wikipedia)
- Python 3.8+
- Git
- Poetry (for dependency management)
-
Clone the repository:
git clone https://github.com/username/react-agents-from-scratch.git cd react-agents-from-scratch -
Set up a virtual environment:
python -m venv .venv source .venv/bin/activate # On Windows, use `.venv\Scripts\activate` -
Install Poetry (if not already installed):
pip install poetry -
Install project dependencies:
poetry install -
Set up environment variables:
export PYTHONDONTWRITEBYTECODE=1
export PYTHONPATH=$PYTHONPATH:.
-
Create a
credentialsfolder in the project root:mkdir credentials -
Set up GCP service account credentials:
- Go to the Google Cloud Console (https://console.cloud.google.com/).
- Create a new project or select an existing one.
- Navigate to "APIs & Services" > "Credentials".
- Click "Create Credentials" > "Service Account Key".
- Select your service account, choose JSON as the key type, and click "Create".
- Save the downloaded JSON file as
key.jsonin thecredentialsfolder.
-
Set up SERP API credentials:
- Sign up for a SERP API account at https://serpapi.com/.
- Obtain your API key from the dashboard.
- Create a file named
key.ymlin thecredentialsfolder. - Add your SERP API token in the following format:
serp:
  key: your_serp_api_key_here
Note: The credentials folder is included in .gitignore to prevent sensitive information from being committed.
src/tools/: Contains implementations for Google Search (via SERP API) and Wikipedia search.src/react/: Houses the core ReAct agent implementation.data/input/: Stores input prompts for the ReAct agent.data/output/: Contains output traces from example runs.
-
Ensure you're in the project root directory with your virtual environment activated.
-
Run the ReAct agent:
python src/react/agent.py -
The agent uses the prompt from
./data/input/react.txtand generates output traces in./data/output/. -
To run individual tools:
- Google Search:
python src/tools/serp.py - Wikipedia Search:
python src/tools/wiki.py
- Google Search:
-
For a non-agentic approach with programmatic routing:
python src/tools/manager.py
We welcome contributions! Please see our CONTRIBUTING.md for details on how to submit pull requests, report issues, or request features.
This project is licensed under the MIT License. See the LICENSE file for details.
For a detailed explanation of the ReAct pattern and this implementation, check out our accompanying Medium article: [Building ReAct Agents from Scratch: A Hands-On Guide using Gemini]

