The echo server receives the packets, decrypts them, converts the character to upper case and send it back, encrypted, using the same TLS connection that was initiated by the client (to send the string).
The server uses a self-signed X.509 certificate, i.e. the server creates a fake CA and fake root CA certificate. This fake CA signs the server’s own certificate signing request (CSR).
The programs uses OpenSSL library’s TLSv1.2 methods, i.e. you must ensure that TLSv1.2 is being used by the client and the server. Further, only ephemeral DH key exchange, or allied methods are used for the connection.
-
Generate private key for CA :
openssl genrsa 2048 > ca-key.pem -
Generate the X509 certificate for the CA:
openssl req -new -x509 -nodes -days 365000 -key ca-key.pem -out ca-cert.pem -
Create Server Certificate and keys
- Generate the private key and certificate request:
openssl req -newkey rsa:2048 -nodes -days 365000 -keyout server-key.pem -out server-req.pem- Dont forget to keep Common Name as , here it is localhost
- Generate X509 certificate for the server :
openssl x509 -req -days 365000 -set_serial 01 -in server-req.pem -out server-cert.pem -CA ca-cert.pem -CAkey ca-key.pem
- Generate the private key and certificate request:
-
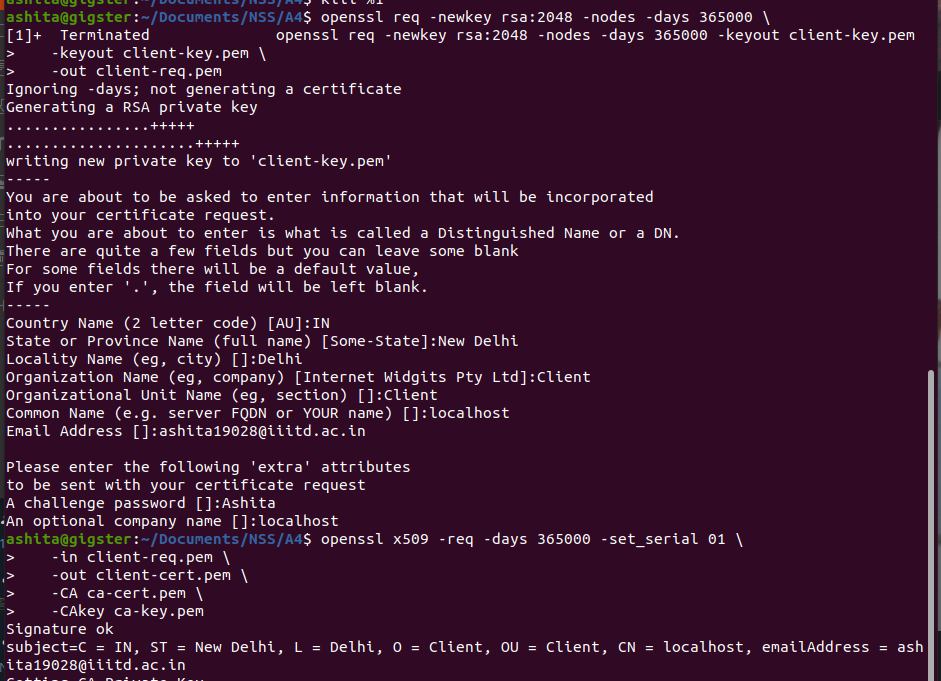
Create Client Certificate and keys
- Generate the private key and certificate request:
openssl req -newkey rsa:2048 -nodes -days 365000 -keyout client-key.pem -out client-req.pem- Dont forget to keep Common Name as , here it is localhost
- Generate X509 certificate for the client :
openssl x509 -req -days 365000 -set_serial 01 -in client-req.pem -out client-cert.pem -CA ca-cert.pem -CAkey ca-key.pem
- Generate the private key and certificate request:
-
Sample output
- Construct SSL context
ssl_init(), include all algorithms, TLS method, error strings and then returns context pointer , for furthur understanding can refer this.TLSv1_2_server_method():The TLS server method is used to establish a server that will negotiate the highest version of SSL/TLS enabled by the client it is connecting to.
- After that, the context is set up by specifying the certificate and private key to be used using
send_certificates() - Created socket to listen to connections as shown in
create_socket(). We call accept as normal whenever we get a new connection. - To deal with TLS, we establish a separate SSL structure that stores information about this specific connection using :
SSL_new() - Start verification of the connection, for more info go here
- SSL_CTX_set_verify : This guarantees that the chain is verified in accordance with RFC 4158 and that information about the Issuer and Subject can be printed.If no custom processing need to be done to the certificate (as in our case, callback can be set NULL).
- SSL_CTX_set_verify_depth : To set the depth or the extent to verify the parent issuer.
- SSL_CTX_set_options: Sets flags such as SSL_OP_ALL, SSL_OP_NO_SSLv2, SSL_OP_NO_SSLv3, SSL_OP_NO_COMPRESSION which removes SSL protocols leaving only TLS.
- SSL_CTX_load_verify_locations: Loads certificate chain of the host.Need to pass CA certificate and CA key .
- SSL_get_peer_certificate: To get the certificate , and see its subject and Issuer
- SSL_get_verify_result: To verify the certificate with the provided CA.Returns various verfication codes and returns 0 if verification is done correctly.
- Last two methods are mentioned in
function vertify_certs() - To notify openssl the file descriptor to utilise for communication, we use SSL set fd. We use
SSL accept()to handle the server side of the TLS handshake in this example, thenSSL write()****to transmit our message. Here the server converts the recieved message to uppercase and writes to the client using ssl write. - Connection is persistent, various clients can connect to it, client is also verified before connection establishment.
- Last but not least, we clean up the various structures.
- Every function is same as mentioned above till 6th point
- Server is verified before connection established as mentioned in 5th point in server code.
- To connect to the connection we use
ssl_connect()once connected , send the message usingSSLwrite()and recieve messsage usingSSLread() - Once we recieve data connection is closed and all structures are freed using
SSL_free()
gcc -Wall -o client client.c -L/usr/lib -lssl -lcrypto gcc -Wall -o server server.c -L/usr/lib -lssl -lcrypto
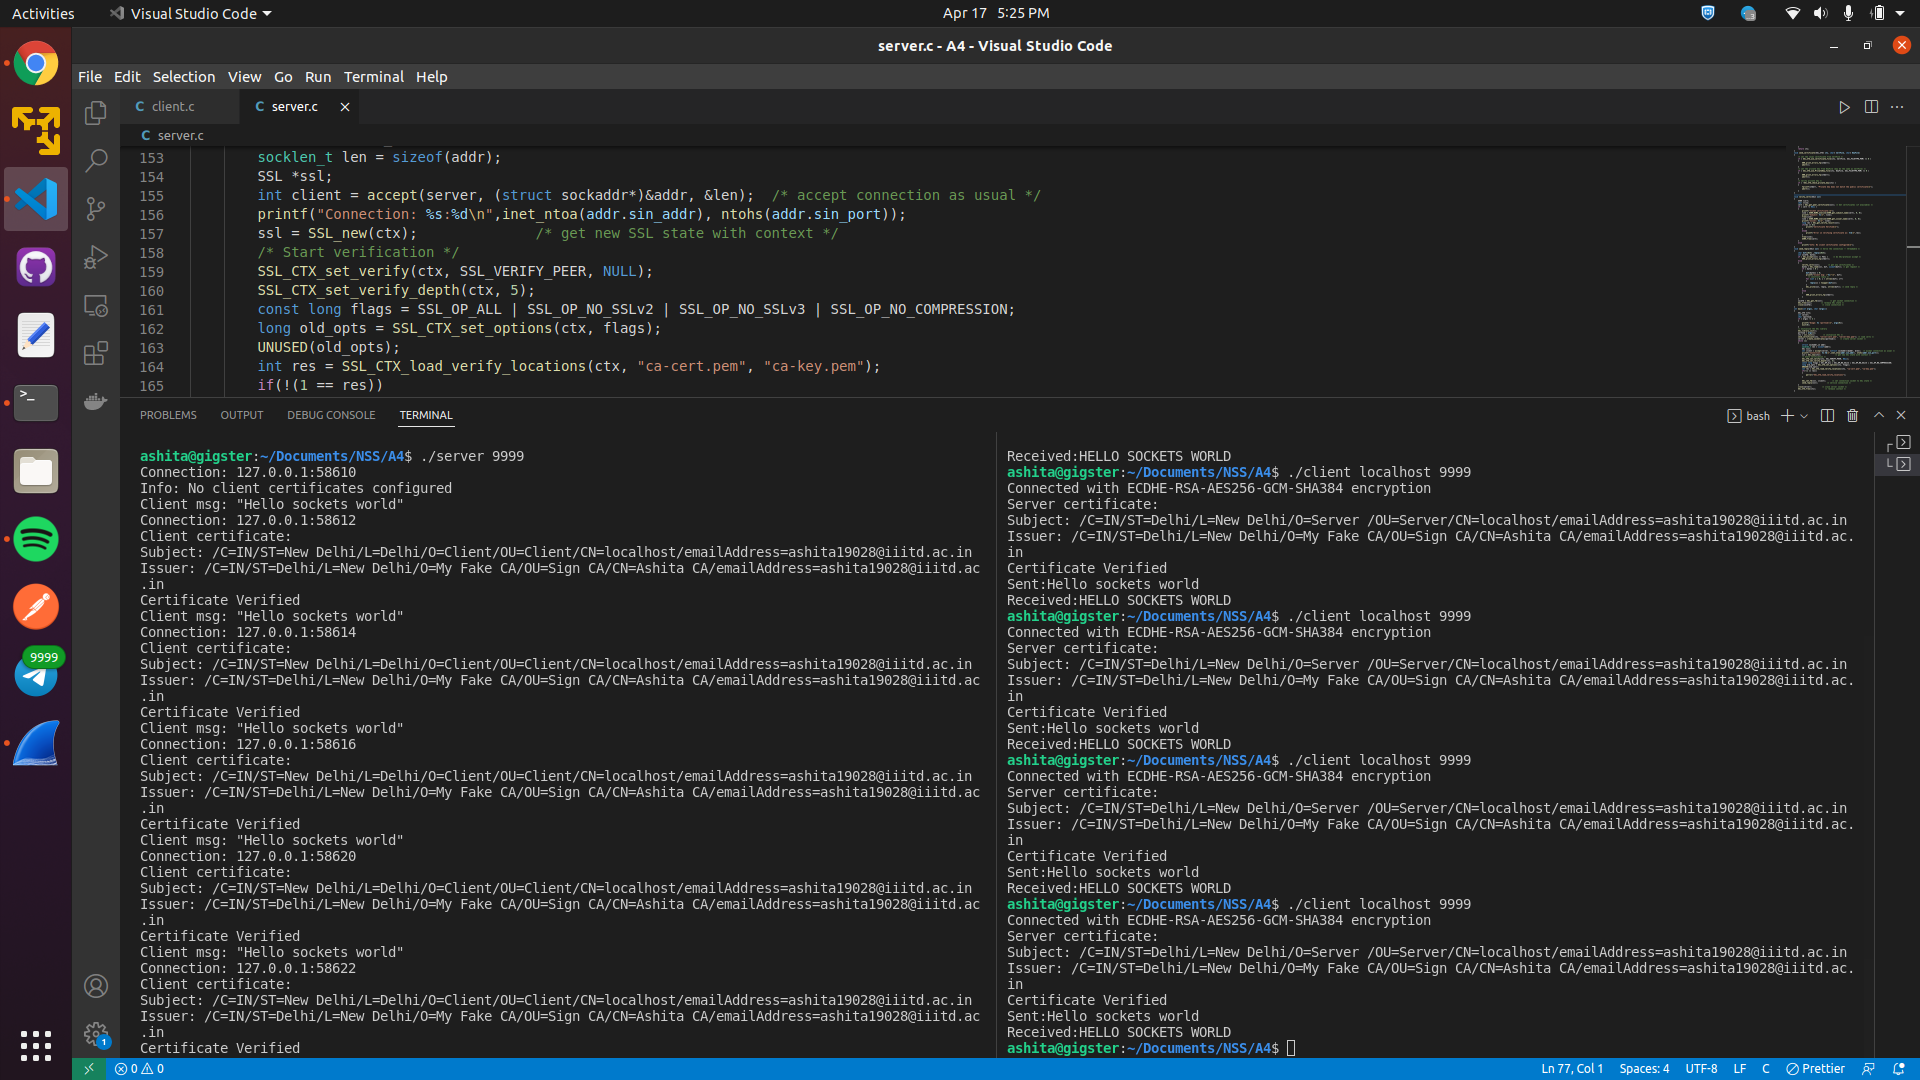
Here we can see, client is verfied by server and server is verified by client.
-
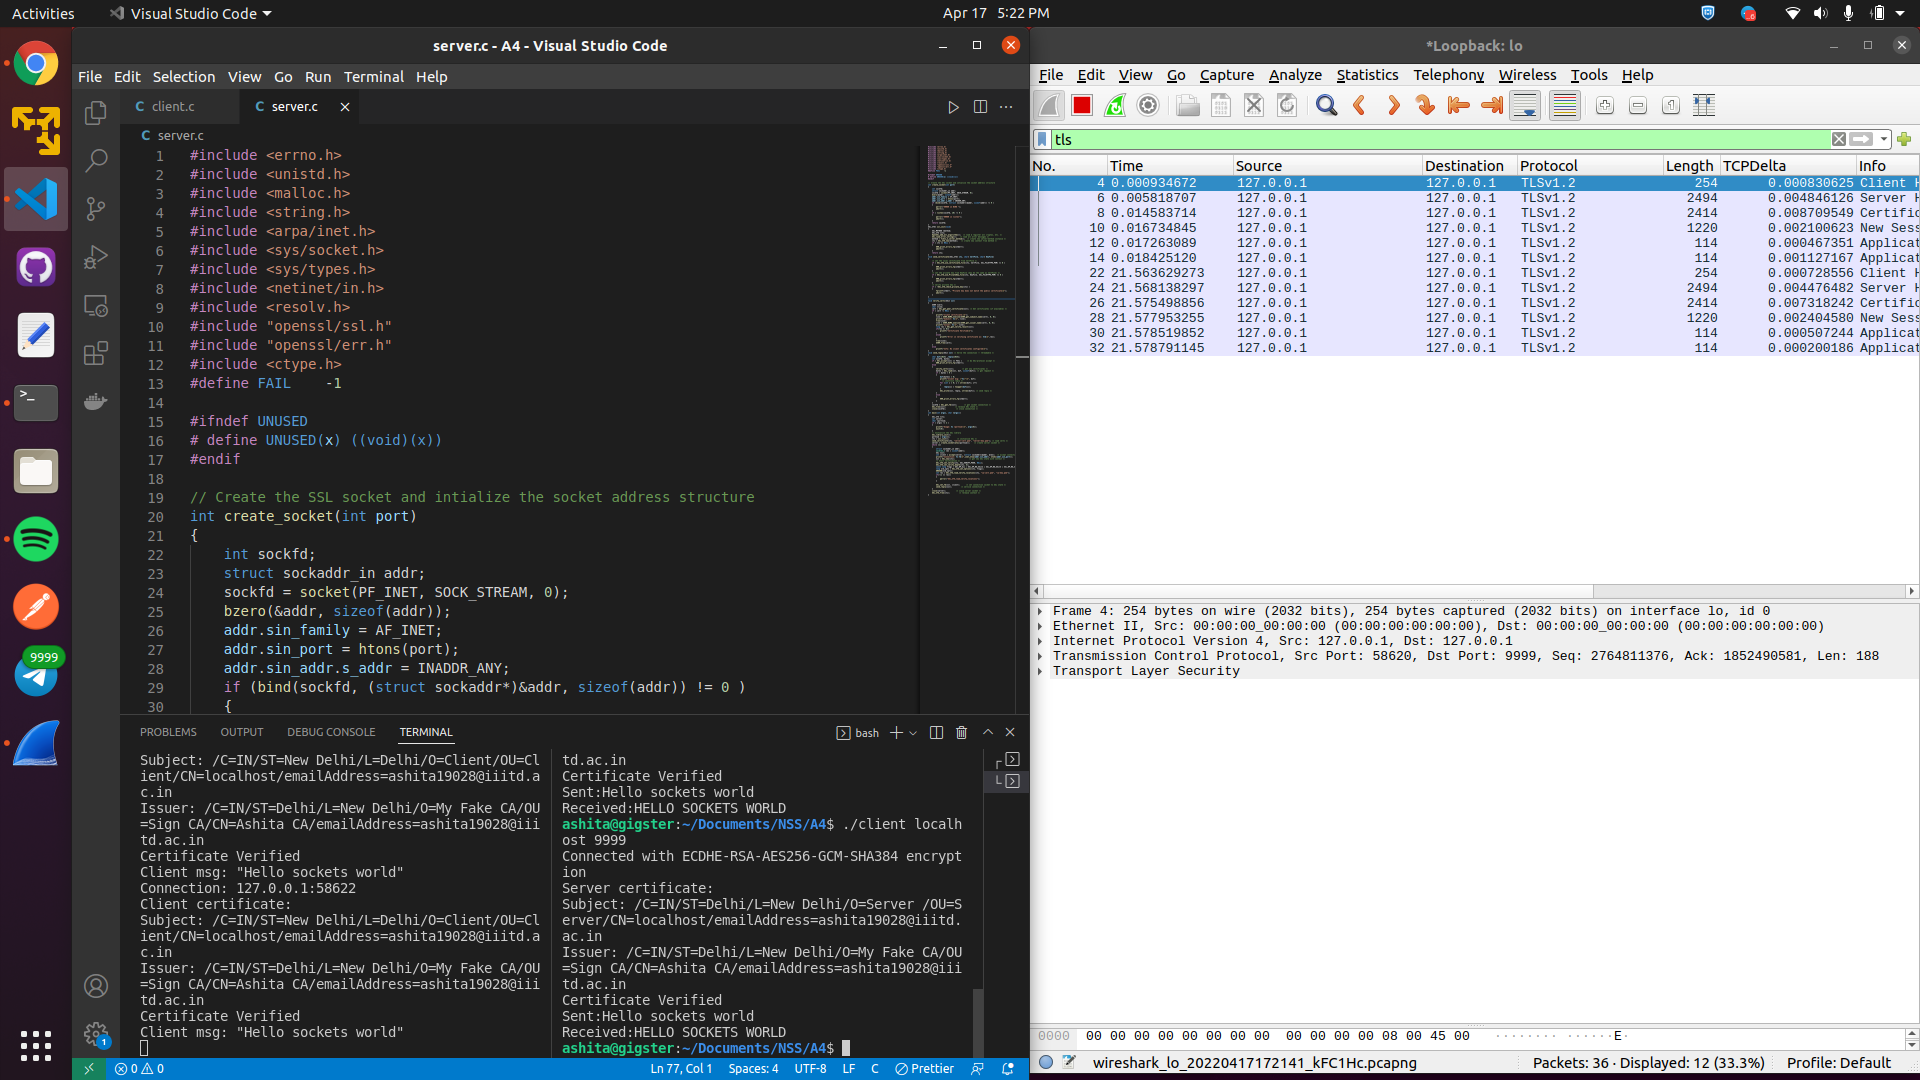
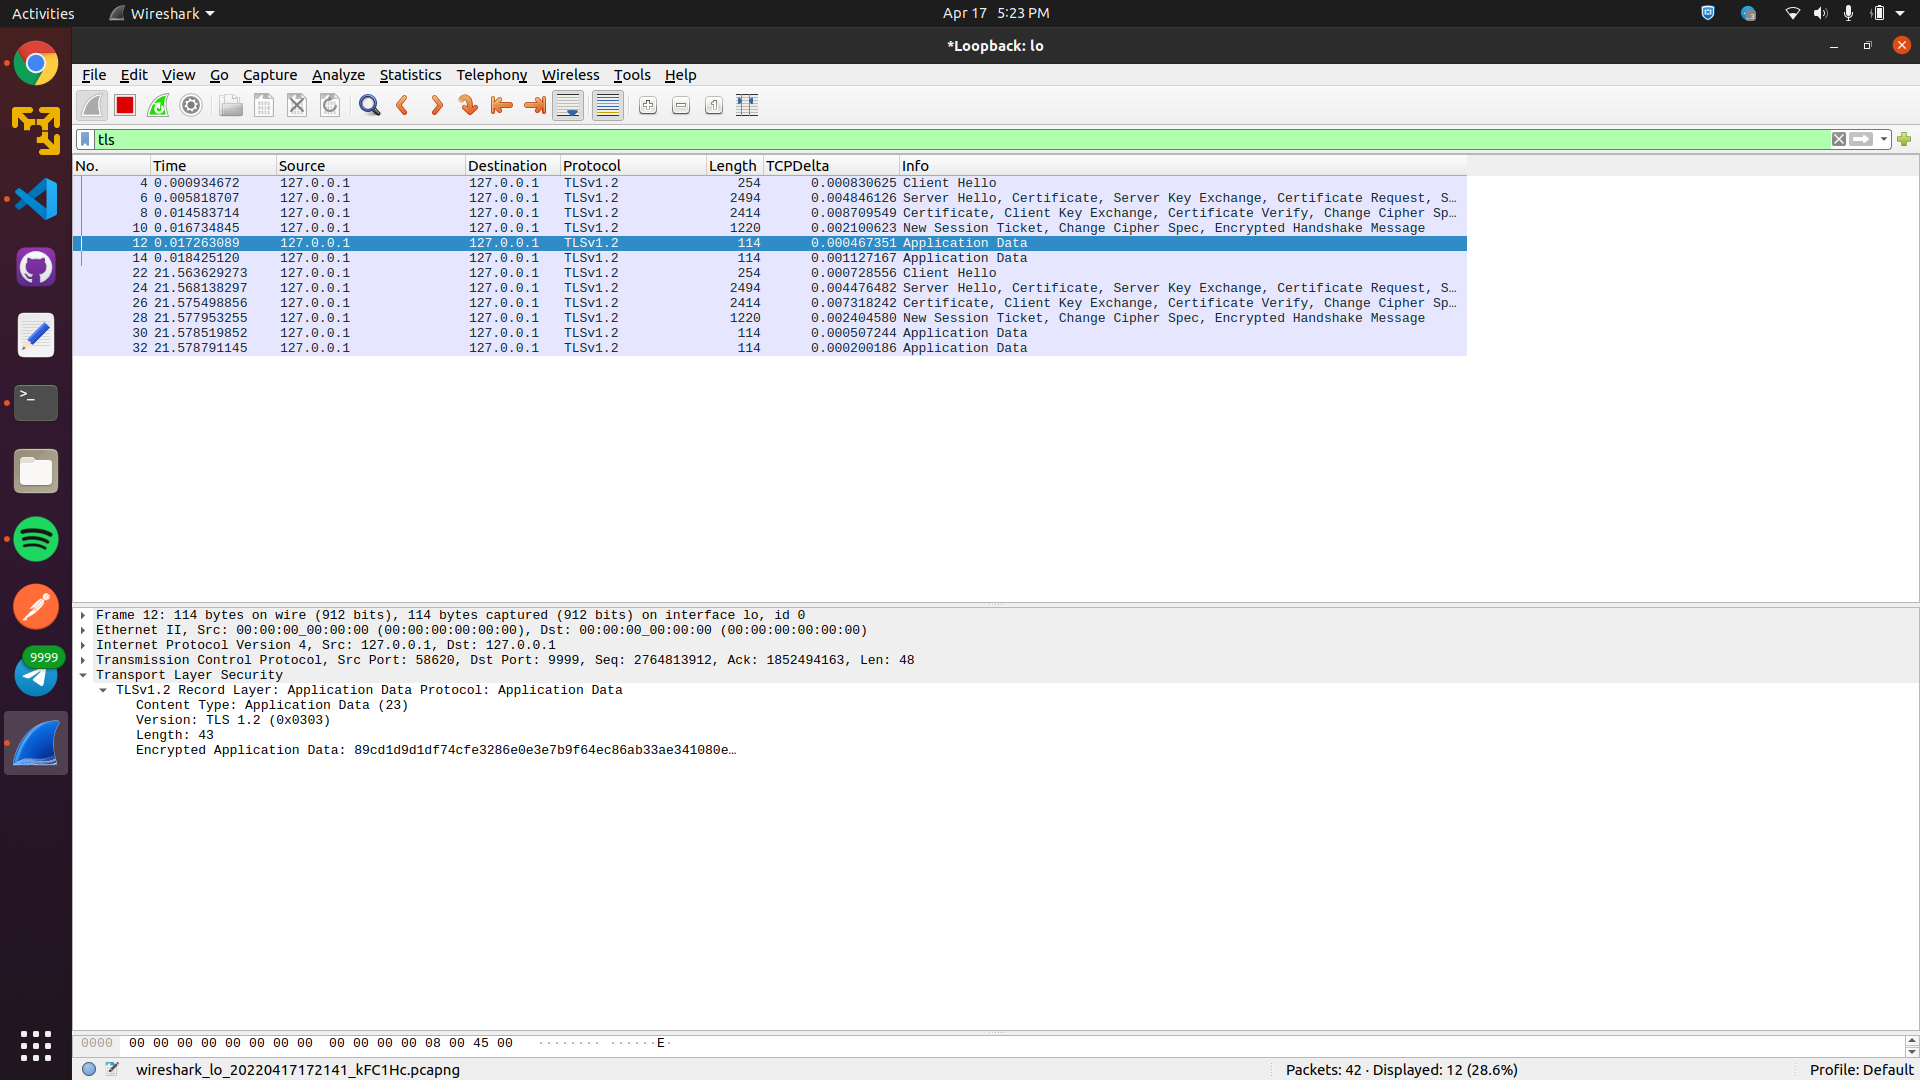
The moment a client connects to server , a new tls handshake is done
-
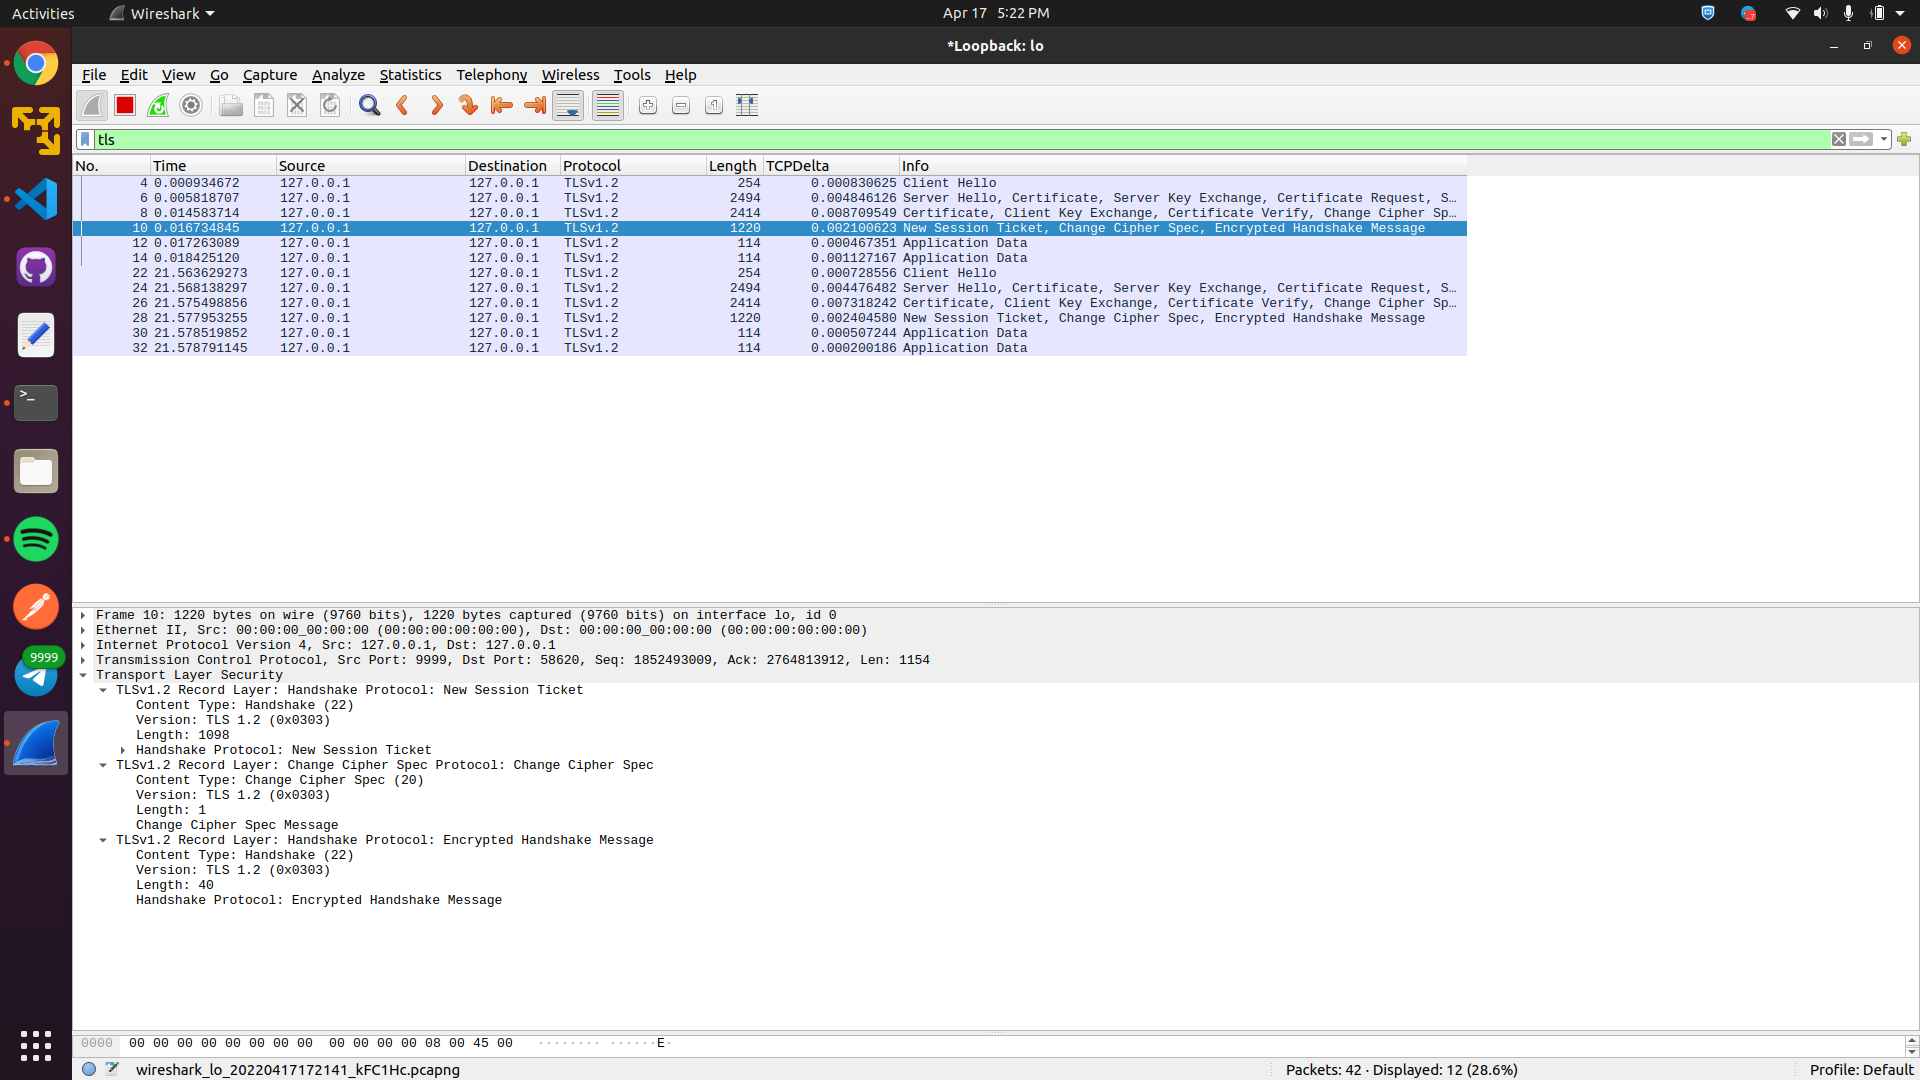
Opening the row , we can see the protocol with version specified : TLS 1.2v
-
Looking the application data, we can see its encrypted
https://wiki.openssl.org/index.php/Simple_TLS_Server
https://gist.github.com/kylelemons/1135155/feef1024cc97952de7b7e24d0875b695de12cbea
https://aticleworld.com/ssl-server-client-using-openssl-in-c/
http://simplestcodings.blogspot.com/2010/08/secure-server-client-using-openssl-in-c.html
