| page_type | products | languages | description | urlFragment | extensions | |||||||||||
|---|---|---|---|---|---|---|---|---|---|---|---|---|---|---|---|---|
sample |
|
|
Huddle developer templates built on the Microsoft Teams platform help drive quality and care outcomes by enabling collaboration. |
ms-teams-huddle |
|
Improving quality of care depends on many things – process, patient care, and research planning. Huddle developer templates built on the Microsoft Teams platform, help drive quality and care outcomes by enabling collaboration with more effective huddle teams. With the huddle sample solutions, you can:
- Measure and visualize impactful best practices across your organization.
- Identify patient care issues and potential causes.
- Share ideas with your health team using natural conversations.
Table of content
Enable and Create Microsoft Teams
Create SharePoint Site and Lists
Generate a self-signed certificate
- Generate certificate with PowerShell
- Get keyCredential
- Export the Certificate and Convert to Base64 String
Create App Registrations in AAD
- Get Tenant Id
- Create App Registration for the Bot Web App
- Create App Registration for the Metric Web App
- Create App Registration for the MS Graph Connector
- Add keyCredential to App Registrations
Register Microsoft App for Bot Registration
Deploy Azure Components with ARM Template
- Add Reply URL and Admin Consent Bot Web App
- Add Reply URL and Admin Consent Metric Web App
- Add Reply URL to MS Graph Connector App Registration
- Customize and Configure the Bot
- Authorize Planner API Connection
- Authorize Teams API Connection
- Authorize Microsoft Graph API Connection
- Start Conversation with The Bot
- Create Teams App Package and Side-load It
- Add Metric Input Tab
- Add Idea Board Tab
This document will guide you to deploy the solution to your environment.
First, an Azure AAD is required to register the app registrations. In this document, the Azure AAD will be called "Huddle AAD", and an account in Huddle AAD will be called Huddle work account.
-
All app registrations should be created in the Huddle AAD.
-
Bot/Luis/Microsoft App should be registered with a Huddle work account.
-
SharePoint lists should be created on SharePoint associating with Huddle AAD.
An Azure Subscription is required to deploy the Azure components. We will use the ARM Template to deploy these Azure components automatically.
Please download files in /Files folder to your computer.
To learn more about the huddle solutions in Microsoft Teams and Microsoft O365, visit the Microsoft developer blog.
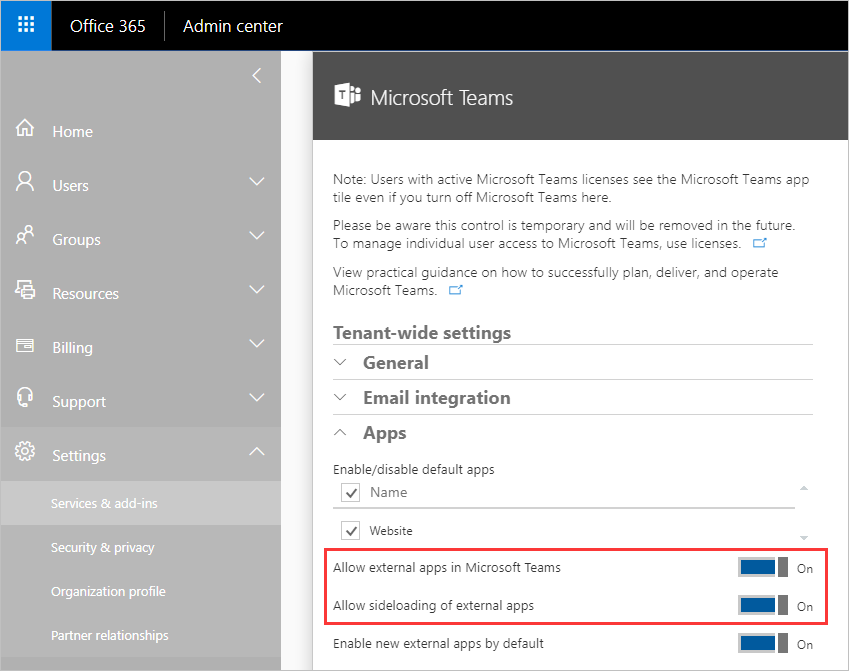
Please follow Enable Microsoft Teams features in your Office 365 organization.
Make sure the following options are turned on:
In this section, we will connect to Microsoft Teams in PowerShell with a Huddle work account, and execute some PowerShell scripts to create teams from an Excel file.
Note: after you finish this section, teams will be created right away. But their owners and members will take up to an hour to show in Teams. Refer to Add-TeamUser for more details.
-
First, let open and edit
/Files/Teams.xlsx. Input the teams and related information.Note:
- AccessType:
- Private: Private teams can only be joined if the team owner adds you to them. They also won't show up in your teams gallery.
- Public: public teams are visible to everyone from the teams gallery and you can join them without getting approval from the team owner.
- Owners and Members:
- Please use UPN (User Principle Name) instead of email.
- Use ";" to separate multi-users.
- The Huddle work account used to connect to Microsoft Teams will be added as the owner of each team automatically, no matter it is in the owners column or not.
- AccessType:
-
Run PowerShell as Administrator, and execute the commands below to install required modules:
Install-Module -Name MicrosoftTeams
Install-Module -Name ImportExcel
-
Navigate to the
/Filesfolder in PowerShellcd <Path to Files folder> # For example: cd "c:\Users\Admin\Desktop\Huddle\Files\"
-
Connect to Microsoft Teams with a Huddle work account.
$connection = Connect-MicrosoftTeams -
Execute the commands below which reads data from the Excel file and create teams:
function Coalesce($a, $b) {
    if ($a -ne $null) { $a } else { $b }
}

$index = 0;
$splitOption = [System.StringSplitOptions]::RemoveEmptyEntries
$teams = Import-Excel teams.xlsx -DataOnly
$count = Coalesce $teams.Count 1

Foreach($team in $teams) {
    $accessType = Coalesce $team.AccessType "Private"
    $owners = (Coalesce $team.Owners "").Split(';', $splitOption)
    $members = (Coalesce $team.Members "").Split(';', $splitOption)

    Write-Progress -Activity "Creating Teams" -Status 'Progress->' -PercentComplete ($index * 100 / $count) -CurrentOperation ("Creating Team " + $team.Name)
    $t = New-Team -AccessType $accessType -DisplayName $team.Name

    Write-Progress -Activity "Creating Teams" -Status 'Progress->' -PercentComplete (($index + 0.5) * 100 / $count) -CurrentOperation ("Adding owners and members to " + $team.Name)
    Foreach ($owner in $owners) {
        if ($owner -eq $connection.Account.Id) { continue }
        Try {
            Add-TeamUser -GroupId $t.GroupId -User $owner -Role Owner
        }
        Catch {
            $ErrorMessage = $_.Exception.Message
            Write-Host "Could not add $owner to $team.Name as owner: $ErrorMessage"
        }
    }

    Foreach ($member in $members) {
        if ($member -eq $connection.Account.Id) { continue }
        Try {
            Add-TeamUser -GroupId $t.GroupId -User $member -Role Member
        }
        Catch {
            $ErrorMessage = $_.Exception.Message
            Write-Host "Could not add $member to $team.Name as member: $ErrorMessage"
        }
    }
    $index++
}
For each team you created, please active the default planer and create 4 buckets:
-
Open https://www.office.com, sign in.
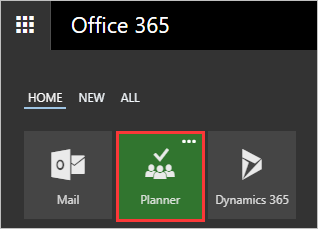
Click Planner.
Find the planner which has the same name as the team, then click it.
-
Create the following buckets:
- New Idea
- In Progress
- Completed
- Shareable
-
Open https://www.luis.ai/, then sign in with a Huddle work account.
-
Finish or skip the welcome page. Then go to the applications page:
-
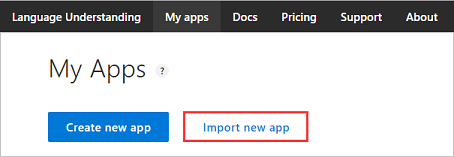
Click Import New App.
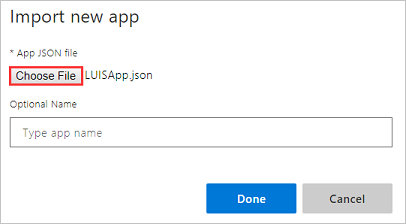
- Click Choose File, and select
/Files/LUISApp.json. - Click Done.
- Click Choose File, and select
-
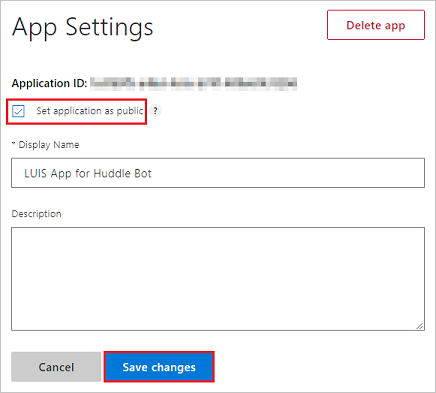
Click SETTINGS.
Copy aside the Application ID. It will be used as the value of the Luis App Id parameter of the ARM Template.
-
On the settings page, check Set application as public.
-
Click Save changes.
Note: you might need to input some description to enable the Save changes button.
-
Open a web browser and go to SharePoint Administration Center.
https://<YourTenant>-admin.sharepoint.com/_layouts/15/online/SiteCollections.aspx -
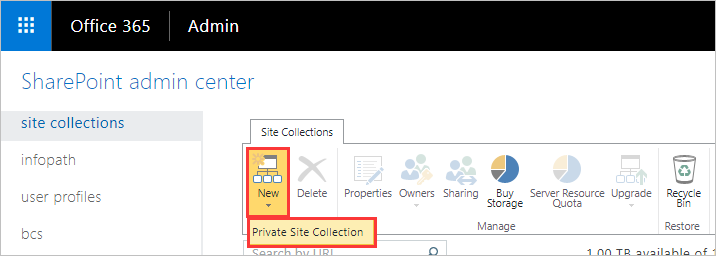
Click New -> Private Site Collection.
-
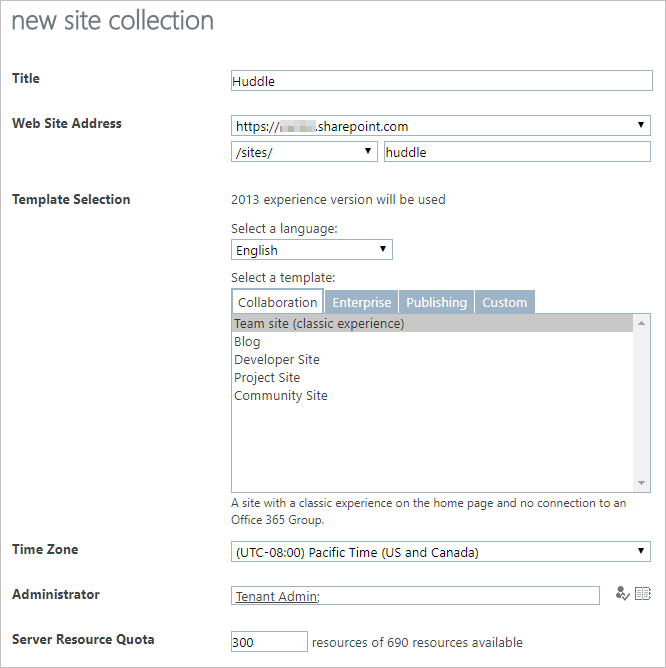
Fill in the form:
- In the Title field, enter site title.
- In the Web Site Address field, enter hospital site URL.
- Select a language: English
- In the Template Selection section, select Team Site as site template.
- Choose a Time Zone.
- Administrator should be the alias of the individual you want to have full administrator rights on this site.
- Leave Server Resource Quota at 300. (This value can be adjusted later if needed)
-
Click OK.
-
Copy aside the URL of the site collection. It will be used as the value of Base SP Site Url parameter of the ARM Template.
-
Install SharePointPnPPowerShellOnline module, if you have not installed it.
Please follow: https://msdn.microsoft.com/en-us/pnp_powershell/pnp-powershell-overview#installation
-
Open Power Shell, then execute the command below to connect to the site you just created:
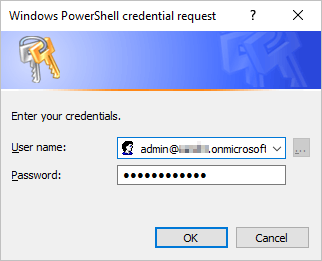
Connect-PnPOnline -Url https://<Tenant>.sharepoint.com/sites/<Site> -Credentials (Get-Credential)
Note: Please replace
<Tenant>and<Site>. -
Login in with an admin account.
-
Navigate to
/Filesfolder in PowerShell, then execute the following command:Apply-PnPProvisioningTemplate -Path PnPProvisioningTemplate.xml
Add some categories to the Categories list, for example:
- Safety/Quality
- Access
- Experience
- Finance
- People
Run PowerShell as administrator, then execute the commands below:
$cert = New-SelfSignedCertificate -Type Custom -KeyExportPolicy Exportable -KeySpec Signature -Subject "CN=Huddle App-only Cert" -NotAfter (Get-Date).AddYears(20) -CertStoreLocation "cert:\CurrentUser\My" -KeyLength 2048Note: please keep the PowerShell window open until you finish the steps below.
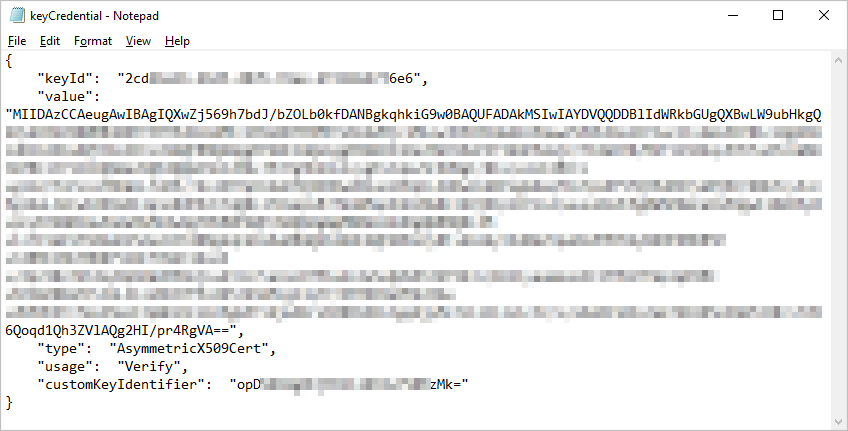
Execute the commands below to get keyCredential:
Note: Feel free to change the file path at the end of the command.
$keyCredential = @{}
$keyCredential.customKeyIdentifier = [System.Convert]::ToBase64String($cert.GetCertHash())
$keyCredential.keyId = [System.Guid]::NewGuid().ToString()
$keyCredential.type = "AsymmetricX509Cert"
$keyCredential.usage = "Verify"
$keyCredential.value = [System.Convert]::ToBase64String($cert.GetRawCertData())
$keyCredential | ConvertTo-Json > c:\keyCredential.txt
The keyCredential is in the generated file, and will be used to create App Registrations in AAD.
The following commands will export the certificate and convert it to a base64 string.
$password = Read-Host -Prompt "Enter password" -AsSecureString
$bytes = $cert.Export([System.Security.Cryptography.X509Certificates.X509ContentType]::Pfx, $password)
[System.Convert]::ToBase64String($bytes) | Out-File 'c:\cert-base64.txt'
You will be prompted to input a password to protect the certificate. Please copy aside the password. It will be used as the value of the Certificate Pfx Password parameter of the ARM Template
The base64 string of the certificate is in the generated text file, and will be used as the value of the Certificate Pfx Base64 parameter of the ARM Template.
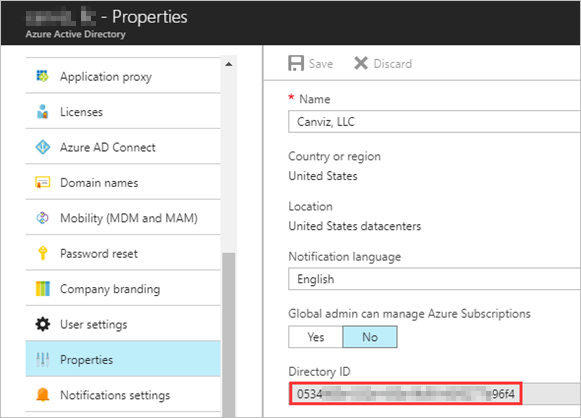
Open the AAD in Azure Portal, then get the Directory ID.
The Directory ID will be used as the value of Tenant Id parameter of the ARM Template.
-
Create a new App Registration:
-
Name: Huddle Bot Web App
-
Application Type: Web app/API
-
Sign-on URL: https://huddle/bot-web-app
-
Permissions:
API Permission Type Permissions Office 365 SharePoint Online
(Microsoft.SharePoint)Application Read and write items and lists in all site collections Microsoft Graph Delegated Read and write all groups
Read all users' full profiles
-
-
Copy aside the Application Id. It will be used as the values of Bot Client Id parameter of the ARM Template.
-
Create a new Key and copy aside its value. The key value will be used as the value of Bot Client Secret parameter of the ARM Template.
-
Create a new App Registration:
-
Name: Huddle Metric Web App
-
Application Type: Web app/API
-
Sign-on URL: https://huddle/metric-web-app
-
Permissions:
API Permission Type Permissions Office 365 SharePoint Online
(Microsoft.SharePoint)Application Read and write items and lists in all site collections Windows Azure Active Directory
(Microsoft.Azure.ActiveDirectory)Delegated Read directory data
Sign in and read user profileMicrosoft Graph Delegated Read and write all groups
Read all groups
Read and write all users' full profiles
-
-
Copy aside the Application Id. It will be used as the values of Metric Client Id parameter of the ARM Template.
-
Create a new Key and copy aside its value. The key value will be used as the value of Metric Client Secret parameter of the ARM Template.
-
Create a new App Registration:
-
Name: Huddle MS Graph Connector
-
Application Type: Web app/API
-
Sign-on URL: https://huddle/ms-graph-connector
-
Permissions:
API Permission Type Permissions Microsoft Graph Delegated Read and write all groups
Read all users' full profiles
-
-
Copy aside the Application Id. It will be used as the values of Graph Client Id parameter of the ARM Template.
-
Create a new Key and copy aside its value. The key value will be used as the value of Graph Client Secret parameter of the ARM Template.
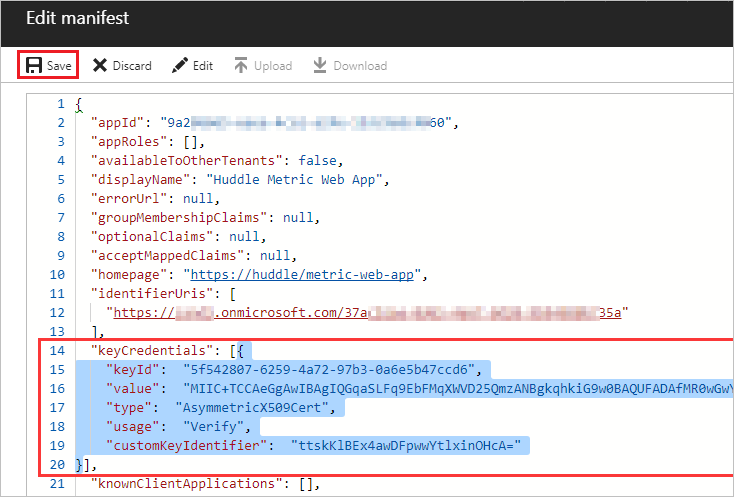
Follow the steps below to add keyCredential to App Registrations of the Bot Web App and Metric Web App
-
Open an App Registration
-
Click Manifest
-
Insert the keyCredential into the square brackets of the keyCredentials node.
-
Click Save.
-
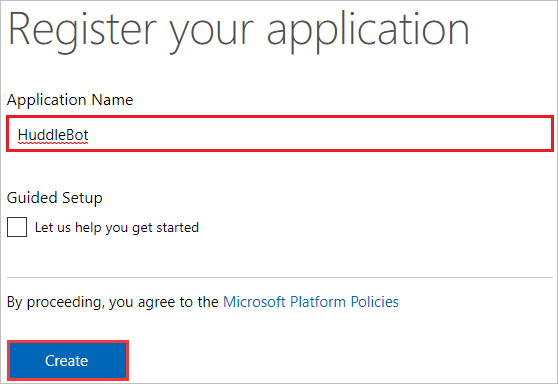
Open https://apps.dev.microsoft.com/portal/register-app in a browser, then sign in with the Huddle work account.
-
Fill the field Application Name, then click Create.
-
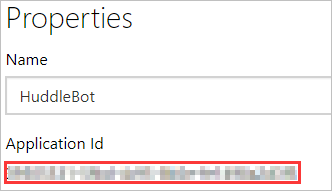
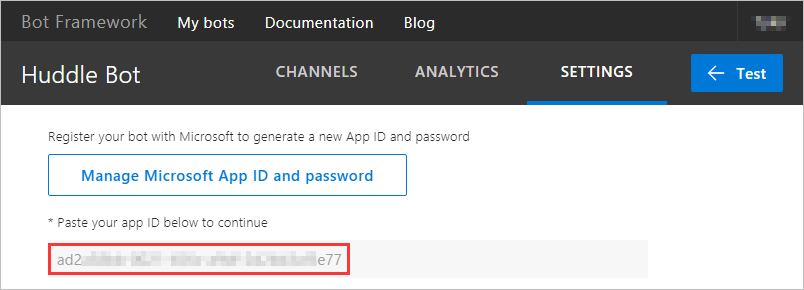
Copy the Application Id. It will be used as Microsoft App Id parameter of the ARM Template.
-
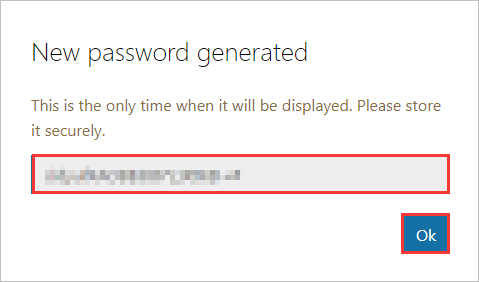
Click Generate New Password in Application Secrets section.
-
Copy the key then click OK. The key will be used as Microsoft App Password parameter of the ARM Template.
-
Scroll down to the end. Click Save.
-
Generate Token
-
Open https://github.com/settings/tokens in your web browser.
-
Sign into your GitHub account where you forked this repository.
-
Click Generate Token.
-
Enter a value in the Token description text box.
-
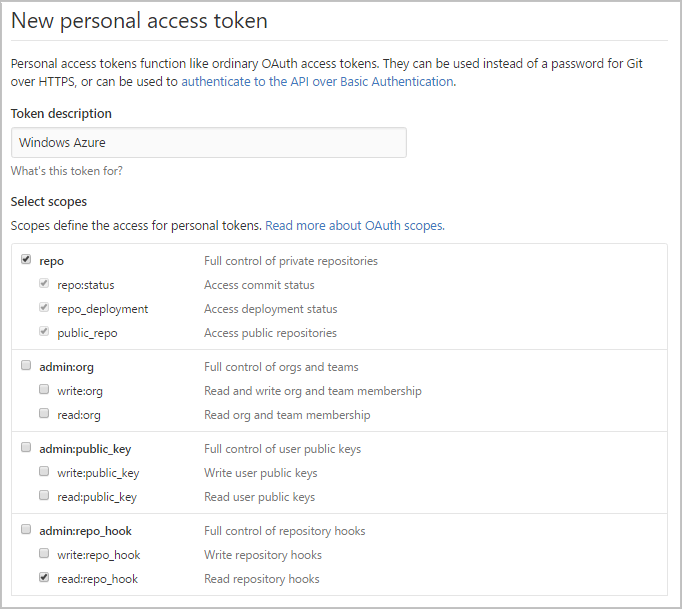
Select the following s (your selections should match the screenshot below):
- repo (all) -> repo:status, repo_deployment, public_repo
- admin:repo_hook -> read:repo_hook
-
Click Generate token.
-
Copy the token.
-
-
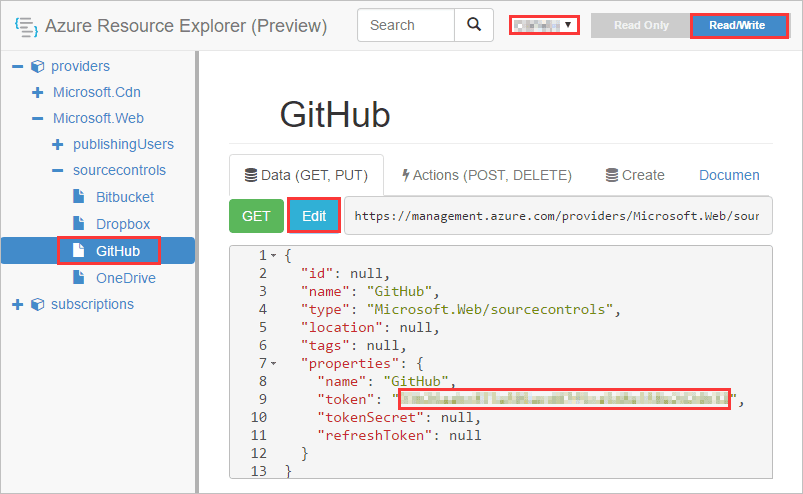
Add the GitHub Token to Azure in the Azure Resource Explorer
-
Open https://resources.azure.com/providers/Microsoft.Web/sourcecontrols/GitHub in your web browser.
-
Log in with your Azure account.
-
Selected the correct Azure subscription.
-
Select Read/Write mode.
-
Click Edit.
-
Paste the token into the token parameter.
-
Click PUT.
-
-
Fork this repository to your GitHub account.
-
Click the Deploy to Azure Button:
-
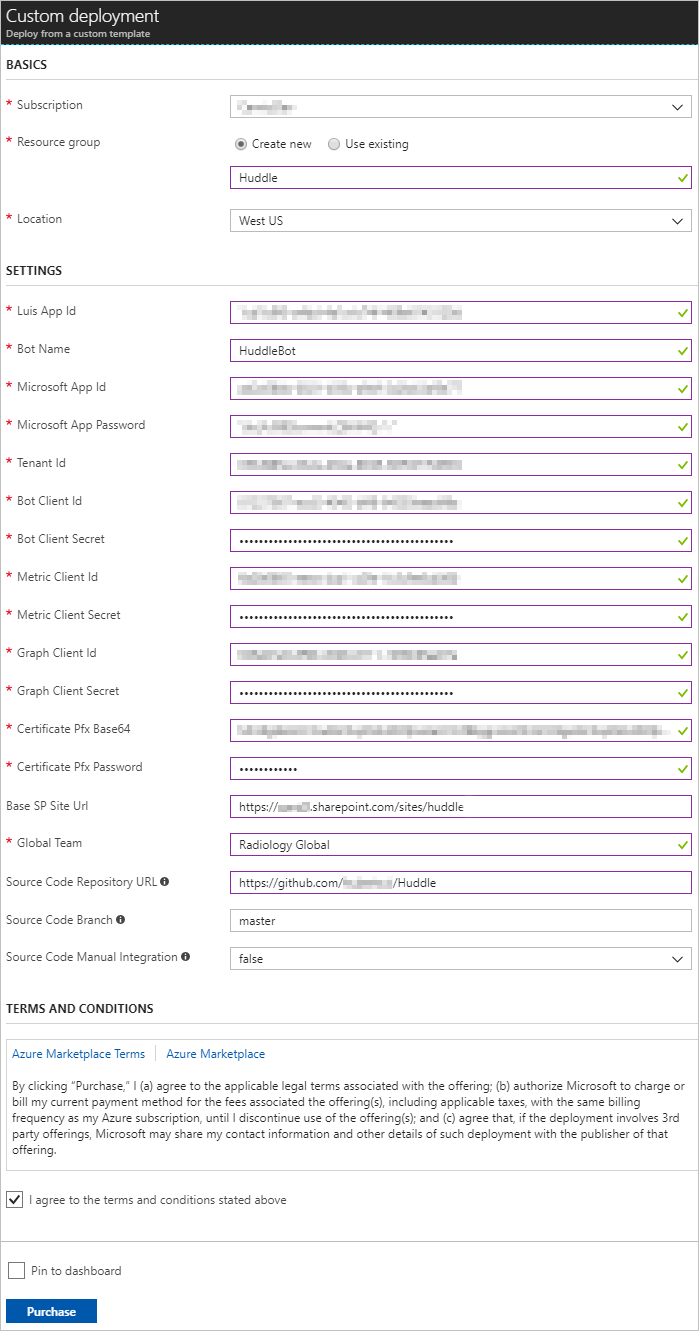
Fill in the values on the deployment page:
You have collected most of the values in previous steps. For the rest parameters:
- Bot Name: the name of the bot, will be used as Display Name of Bot Registration.
- Global Team: the name of the global team.
- Source Code Repository: use the URL of the repository you just created -
https://github.com/<YourAccount>/Huddle - Source Code Branch: master
- Source code Manual Integration: false
- Check I agree to the terms and conditions stated above.
Tips:
You can click Edit Parameters on top of the template after filled all parameters.
Then click Download to save parameters on your local computer in case of deployment failure.
-
Click Purchase.
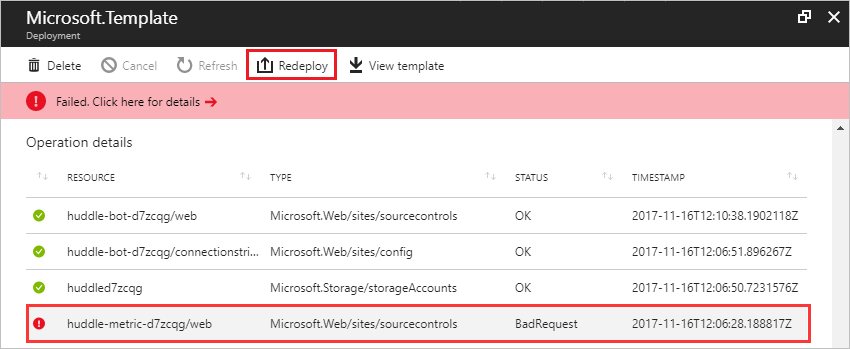
If the deployment started, but failed as below - one or two errors of sourcecontrols resources:
Please Redeploy with the same parameters and to the same resource group.
-
Get the URL of the Bot Web app, and change the schema to https, we will get a base URL.
For example:
https://huddle-bot.azurewebsites.net -
Append
/to the base URL, we will get the replay URL.For example:
https://huddle-bot.azurewebsites.net/Add it the Bot App Registration.
-
Append
/admin/consentto the base URL, we will get the admin consent URL.For example:
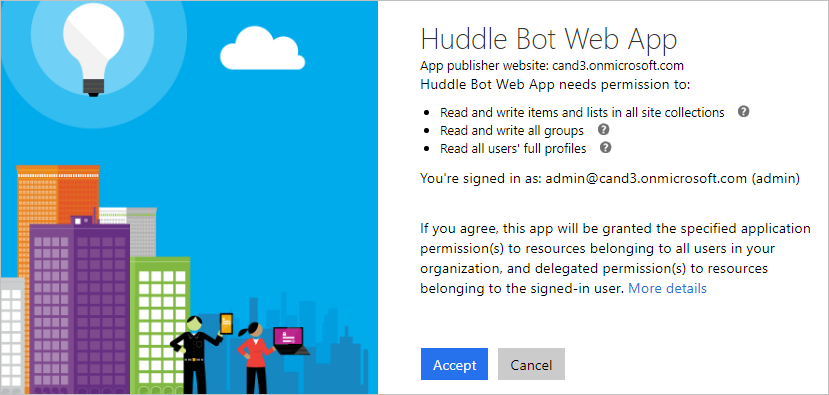
https://huddle-bot.azurewebsites.net/admin/consentOpen it in a browser, sign in with a Huddle admin account.
Click Accept.
Follow the similar steps in the previous chapter to add the reply URL and admin consent.
-
Get the redirect URL from the Microsoft graph connector.
- Click the connector, then click Edit:
-
Add it to reply URLs of the MS Graph Connector App Registration.
-
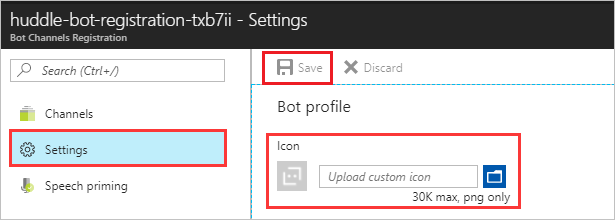
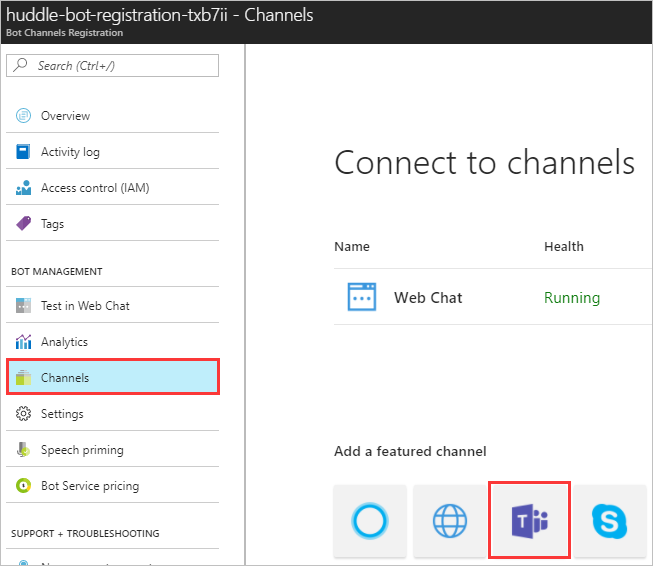
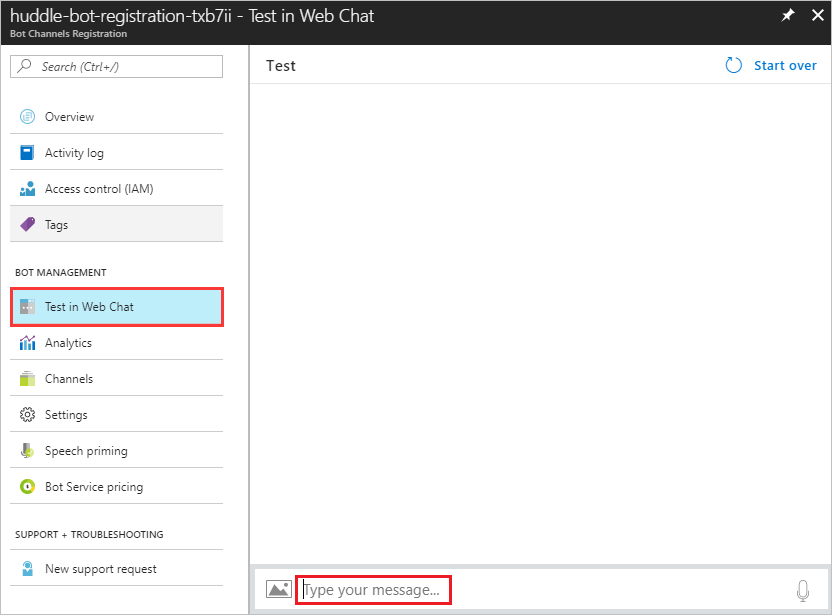
Navigate to the Bot Channels Registration you created.
-
Upload an icon:
-
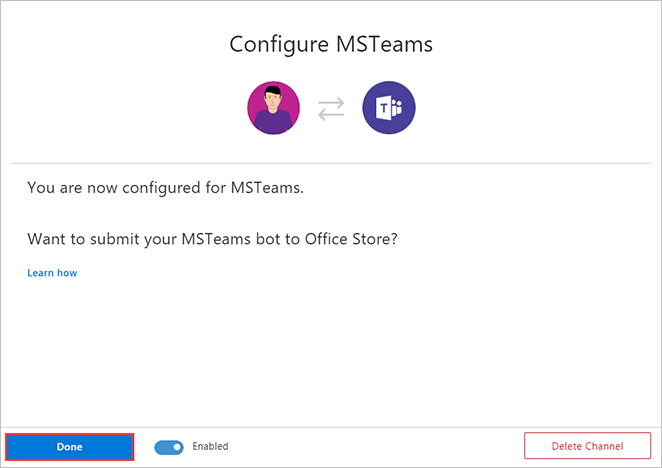
Add Microsoft Teams Channel:
-
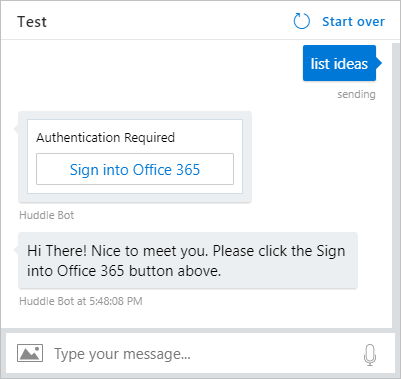
Verify the Bot:
-
Navigate to the resource group.
-
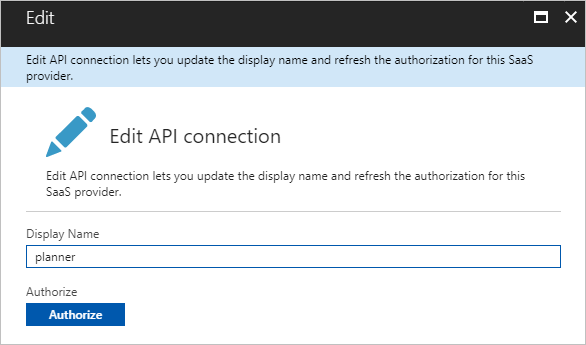
Click the planner API Connection.
-
Click This connection is not authenticated.
-
Click Authorize.
Pick up or input the Huddle work account. The user account should be in every team.
Sign in the account.
-
Click Save at the bottom.
Follow the similar steps in the previous chapter to authorize the teams API Connection.
Follow the similar steps in the previous chapter to authorize the microsoft-graph API.
Follow the step below to start 1:1 conversation with the Bot in Microsoft Teams
-
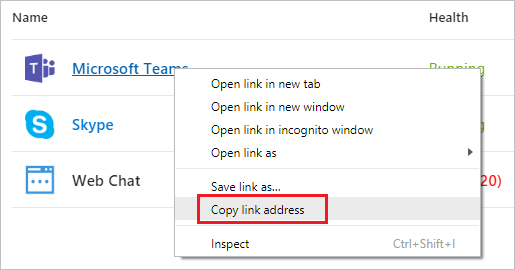
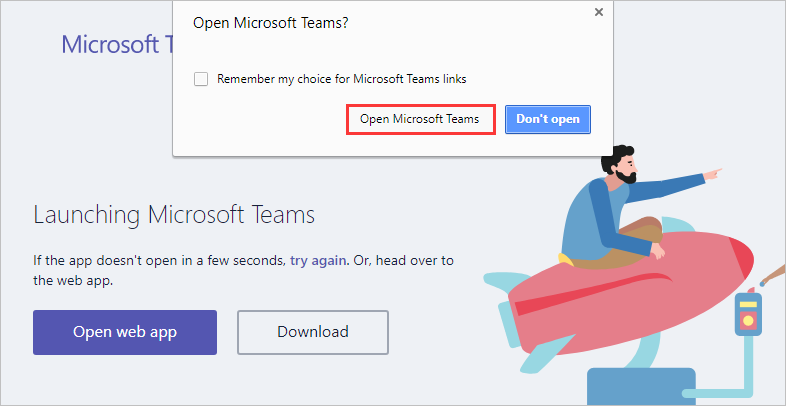
Find the URL of Microsoft Teams Channel of the Bot,
Then open it in your browser:
-
Click Open Microsoft Teams.
Another way to start 1:1 talk is using the MicrosoftAppId of the Bot:
-
Open
/Files/TeamsAppPackage/manifest.jsonwith a text editor. -
Replace the following 2 placeholders with the corresponding values you got in previous guides:
-
Save the changes.
-
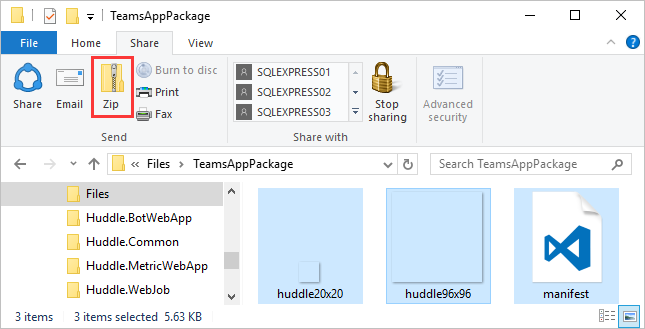
Zip the files in
/Files/TeamsAppPackagefolder.Name it HuddleTeamsApp.zip.
-
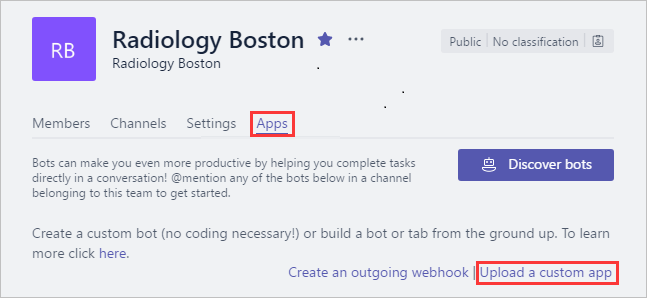
Right-click a team in Microsoft Teams, then click Manage team.
-
Click the Apps tab.
-
Then click Upload a custom app.
-
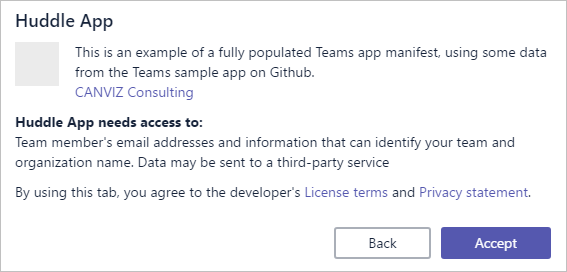
Select the HuddleTeamsApp.zip.
-
Click a team.
-
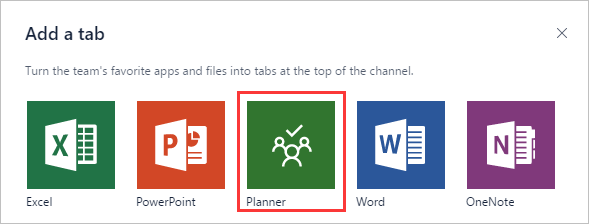
Click +
-
Click Planner.
-
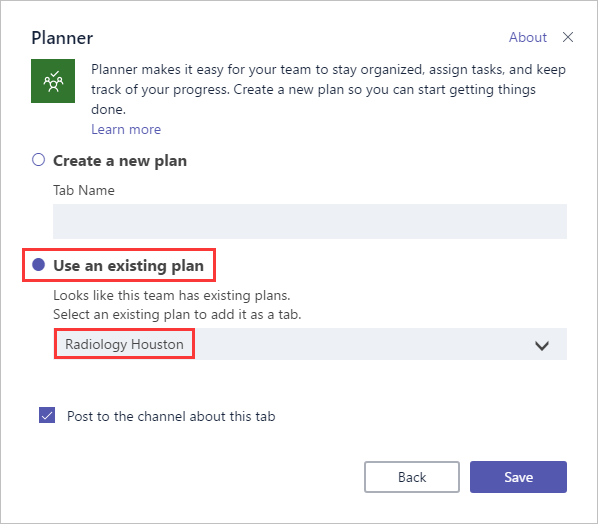
Sign in with the Huddle work account.
Choose Use an existing plan, then select the plan which has the same name as the team.
-
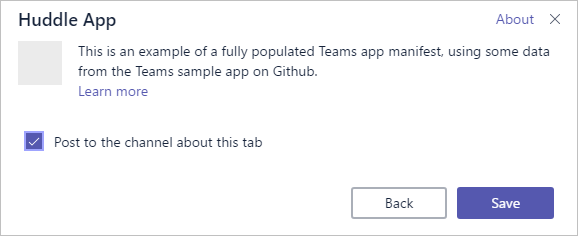
Click Save.
-
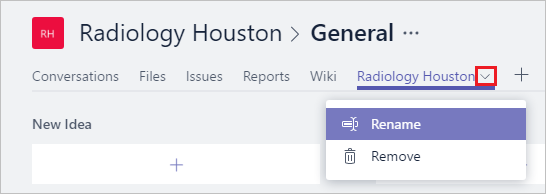
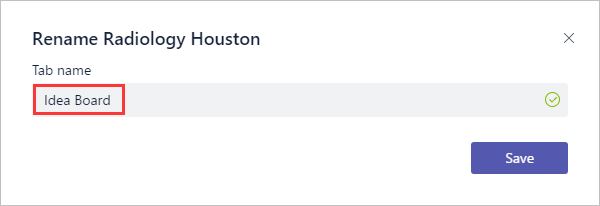
Click the dropdown icon, then click Rename.
Input: IdeaBoard
-
Click Save.
Copyright (c) 2018 Microsoft. All rights reserved.
