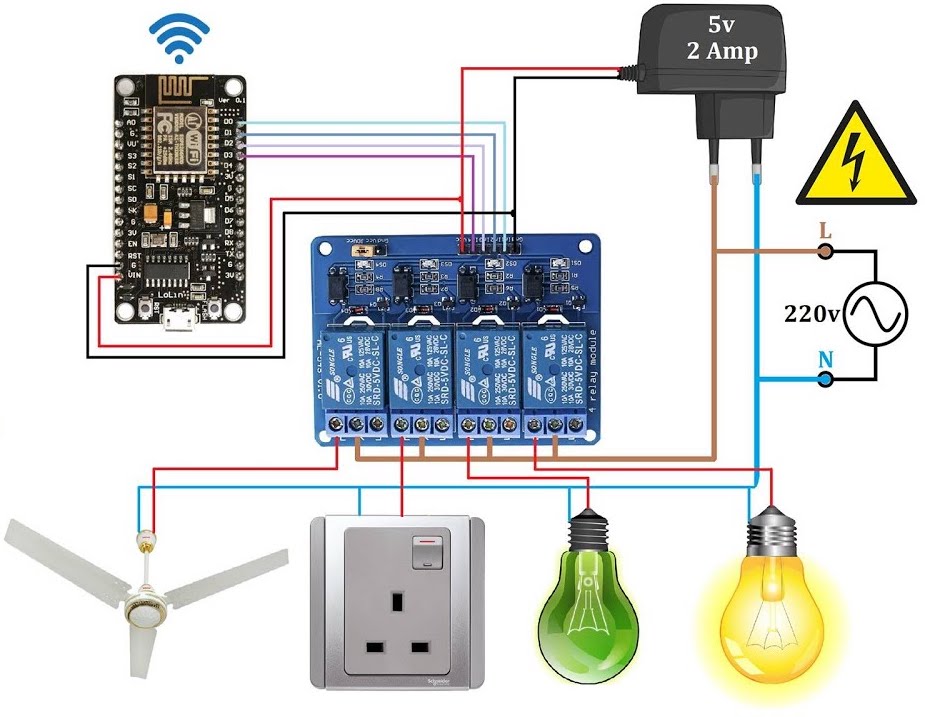
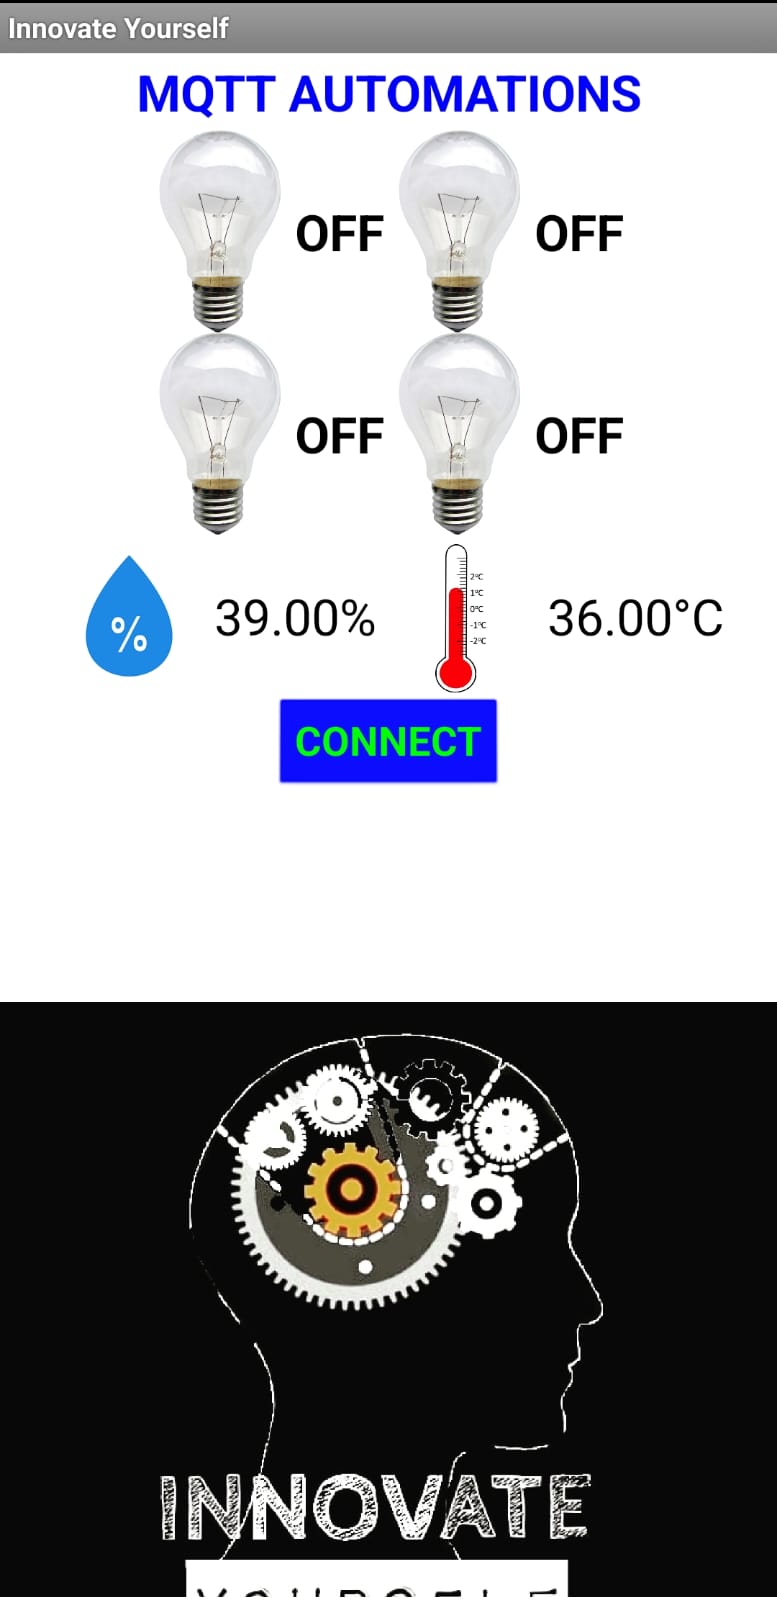
This project demonstrates how to use MQTT to control 4 AC bulbs using the MIT App Inventor platform and NodeMCU. MQTT is a lightweight messaging protocol that is ideal for IoT applications, and NodeMCU is an open-source firmware that allows you to program the ESP8266 Wi-Fi module.
- 4 AC bulbs
- NodeMCU
- MIT App Inventor account
- MQTT broker (e.g. Mosquitto)
-
Install the latest version of the Arduino IDE on your computer.
-
Install the MQTT library in Arduino IDE by navigating to
Sketch > Include Library > Manage Libraries. Search for "PubSubClient" and install the library. -
Connect the NodeMCU to your computer via USB.
-
Open Arduino IDE and navigate to
File > Preferences. In the "Additional Boards Manager URLs" field, add the following link:http://arduino.esp8266.com/stable/package_esp8266com_index.jsonClick "OK" to save the changes.
-
Navigate to
Tools > Board > Boards Manager. Search for "ESP8266" and install the package. -
Select the NodeMCU board from
Tools > Board > NodeMCU 1.0 (ESP-12E Module). -
Set the upload speed to
115200fromTools > Upload Speed. -
Enter the SSID and password for your Wi-Fi network from
Tools > Port > /dev/cu.SLAB_USBtoUART. -
Download the sample code for the NodeMCU from this repository and open the
.inofile in Arduino IDE. -
Replace the MQTT broker details with your own broker details, including the broker IP address and port number.
-
Connect the AC bulbs to the NodeMCU by following the circuit diagram provided in this repository.
-
Upload the code to the NodeMCU by clicking the "Upload" button in the Arduino IDE.
-
Once the code is uploaded, open the Serial Monitor from
Tools > Serial Monitor. -
Verify that the NodeMCU has connected to the Wi-Fi network and MQTT broker by checking the Serial Monitor output.
-
Create a new project on MIT App Inventor and import the
.aiafile provided in this repository. -
Modify the MQTT broker details in the MIT App Inventor project to match your own broker details.
-
Build the app by clicking the "Build" button in MIT App Inventor.
-
Install the app on your mobile device.
-
Open the app and verify that you can control the AC bulbs by tapping the on/off buttons.
- Make sure to use caution when working with electricity.
- Always unplug the NodeMCU before making any modifications to the circuit.
- If you're having trouble connecting to the MQTT broker, make sure that your broker is configured to allow external connections.
- If you're having trouble uploading the code to the NodeMCU, try pressing and holding the "FLASH" button on the NodeMCU while uploading the code.

