This Homebridge plugin allows you to add your Unifi Protect Cameras (and their Motion Sensors) to Homekit.
It is based on the very popular FFmpeg Homebridge plugin plugin, with Unifi-specific conveniences added to it. It is not necessary to have that plugin installed alongside this one, though they can be installed at the same time if you have non-Unifi Protect cameras as well.
This plugin will automatically discover all of the Unifi Protect cameras from your Protect installation, and provide the following sensors for each one that it finds:
- Camera, for viewing live RTSP streams
- Motion sensor, for sending push-notifications when there is movement
- A Switch, for easily enabling and disabling motion detection (on by default)
Motion is detected by the Unifi Protect API and is used to generate a Motion Event in Homekit. This plugin can use one of two methods to generate these events:
- The "score" of the Unifi Protect motion event
- The "score" plus additional object detection step by use of a Tensorflow model. This logic/model runs on-device, and no data is ever sent to any online/external/cloud source or service. It is based on this project.
Before installing this plugin, please make sure all of the prerequisites are completely first. Consult the readme and the wiki before proceeding.
First, this plugin requires node-canvas:
- Raspberry Pi / Ubuntu / Debian Linux:
- install:
sudo apt-get install build-essential libcairo2-dev libpango1.0-dev libjpeg-dev libgif-dev librsvg2-dev
- install:
- Mac OS:
- install via homebrew:
brew install pkg-config cairo pango libpng jpeg giflib librsvg
- install via homebrew:
- Other OSes:
Next, to install this plugin simply type:
sudo npm install homebridge-unifi-protect-camera-motion -g --unsafe-perm=true
Next, open the config.json that contains your Homebridge configuration, and add a block like the following one to the platforms array:
{
    "platform": "UnifiProtectMotion",
    "name": "Unifi protect cameras & motion sensors",
    "unifi": {
        "controller": "https://protect-ip:controller-ui-port",
        "controller_rtsp": "rtsp://protect-ip:controller-rtsp-port",
        "username": "username",
        "password": "password",
        "motion_interval": 5000,
        "motion_repeat_interval": 30000,
        "motion_score": 50,
        "enhanced_motion": true,
        "enhanced_motion_score": 50,
        "enhanced_classes": ["person"],
        "debug": false,
        "save_snapshot": true,
        "upload_gphotos": false
    },
    "videoConfig": {
        "vcodec": "h264_omx",
        "audio": true,
        "maxStreams": 2,
        "maxWidth": 1024,
        "maxHeight": 576,
        "maxFPS": 15,
        "mapvideo": "0:1",
        "mapaudio": "0:0",
        "maxBitrate": 3000,
        "packetSize": 376,
        "additionalCommandline": "-protocol_whitelist https,crypto,srtp,rtp,udp"
    }
}
You can verify the correctness of your config file by using jsonlint.
The config must be valid or Homebridge will fail to restart correctly.
If you are using Homebridge Config X, it will do its best to alert you to any syntax errors it finds.
| Field | Type | Required | Default value | Description |
|---|---|---|---|---|
| platform | string | yes | / | UnifiProtectMotion |
| name | string | yes | / | Name of the plugin that shows up in the Homebridge logs |
| unifi | object | yes | / | Wrapper object containing the unifi configuration |
| videoConfig | object | yes | / | Wrapper object containing the video configuration for FFmpeg |
| videoProcessor | string | no | ffmpeg | Contains the path to an custom FFmpeg binary |
| Field | Type | Required | Default value | Description |
|---|---|---|---|---|
| controller | string | yes | / | Contains the URL to the CloudKey or UDM with UnifiOS, or as legacy the URL to the Unifi Protect web UI, including port (no / at the end) |
| controller_rtsp | string | yes | / | Contains the base URL to be used for playing back the RTSP streams, as seen in the RTSP configuration (no / at the end) |
| username | string | yes | / | Contains the username that is used to login in the web UI |
| password | string | yes | / | Contains the password that is used to login in the web UI |
| motion_interval | number | yes | / | Contains the interval in milliseconds used to check for motion, a good default is 5000 milliseconds |
| motion_repeat_interval | number | no | / | Contains the repeat interval in milliseconds during which new motion events will not be triggered if they belong to the same ongoing motion, a good default is 30000 to 60000 milliseconds. This will prevent a bunch of notifications for events which are longer than the motion_interval! Omit this field to disable this functionality |
| motion_score | number | yes | / | Contains the minimum score in % that a motion event has to have to be processed, a good default is 50% |
| enhanced_motion | boolean | yes | / | Enables or disables the enhanced motion & object detection detection with Tensorflow |
| enhanced_motion_score | number | sometimes | / | This field is required if the enhanced_motion field is set to true and contains the minimum score/certainty in % the enhanced detection should reach before allowing an motion event to be triggered |
| enhanced_classes | string[] | sometimes | [] | This field is required if the enhanced_motion field is set to true and contains an array of classes (in lowercase) of objects to dispatch motion events for. The array should not be empty when using the enhanced detection! Look in look in src/coco/classes.ts for all available classes |
| debug | boolean | no | false | Contains a boolean indicating whether or not to enable debug logging for the plugin and FFmpeg |
| save_snapshot | boolean | no | false | Contains a boolean indicating whether or not to save each detection to a jpg file in the .homebridge directory. When using enhanced mode the image is annotated with the class/score that was detected. |
| upload_gphotos | boolean | no | false | Contains a boolean indicating whether or not to upload each detection to a google photos album. When using enhanced mode the image is annotated with the class/score that was detected. |
| Field | Type | Required | Default value | Description |
|---|---|---|---|---|
| upload_gphotos | boolean | no | false | Set this to true to enable uploading of snapshots to Google Photos |
| auth_clientId | string | sometimes | / | This field is required when the upload_gphotos is set to true. Fill in the Client ID you generated for OAuth2 authentication |
| auth_clientSecret | string | sometimes | / | This field is required when the upload_gphotos is set to true. Fill in the Client Secret you generated for OAuth2 authentication |
| auth_redirectUrl | string | sometimes | / | Fill in 'http://localhost:8080/oauth2-callback' as a default, if you change this value to something else, also change it when creating the OAuth2 credentials! |
To enable the upload to Google Photos functionality:
- Go to the Google Cloud Platform developer console
- Create a new project
- You will be redirected to the first page, here select the newly created project from the dropdown on the top left
- Select the
OAuth consent screenfrom the left sidebar menu - Select
Externaland continue - On the next screen only fill in a name for the application and click
save - Select the
Credentialsfrom the left sidebar menu - Click
Create credentialsfrom the top and selectOAuth Client IDfrom the dropdown options - Select
web application, give it a name and fill in the callback URLs with:http://localhost:8080for the first andhttp://localhost:8080/oauth2-callbackfor the second entry (make sure the press return/enter to submit the values, as multiple ones are possible), then clickcreateat the bottom of the page - Copy your Client ID and Client secret and store them safely
- Open your config.json, and add a
googlePhotosand as described in the table above - Start your homebridge instance, it will print out an url, open it in a browser an follow the login instructions
- The page where you will be redirected will display an error unless you are running Homebridge on the same machine as you are running the browser
- Copy the full url, replace the localhost in the address bar with the ip-address of your raspberry pi, visit the page, you should get the following message:
OAuth2 callback handled! - You are now authenticated, and the refresh token has been saved to the previously created config file.
- The plugin will then create an album named
Homebridge-Unifi-Protect-Motion-Captures, it will also store the ID of this album so the next time it is not created again (you can rename this album to anything you want) - Any detected motions (both normal and enhanced) will now be uploaded to the previously created album
This config object is the same as used in the Homebridge-Camera-FFmpeg plugin. Consult the documentation for more details: FFmpeg configuration.
- Make sure the fields
sourceandstillImageSourceare omitted from the config object as these will be generated by the plugin itself! - Make sure that your Unifi camera has anonymous snapshots enabled and that preferably only one RTSP stream is enabled, otherwise it might not work correctly!
- To enable anonymous snapshots: Login on the camera itself (visit the camera's ip address)
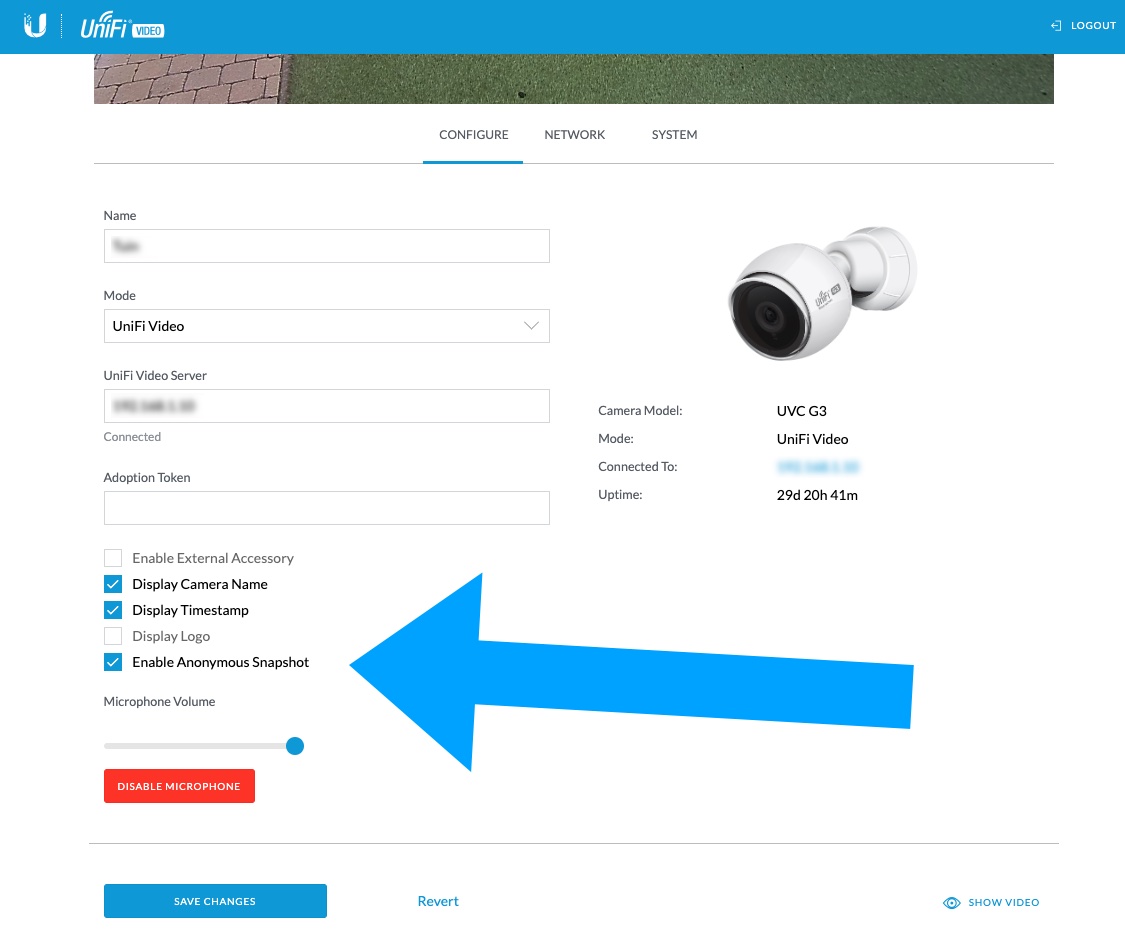
- To enable an RTSP stream: Login on the Protect web UI and go the settings of the camera and open the manage tab
Make sure that all your cameras have the same port for the RTSP stream!
For optimal results it is best to assign a static ip to your cameras
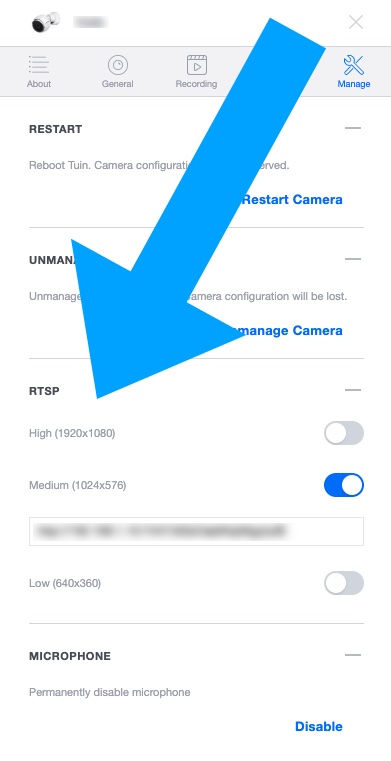
- To enable anonymous snapshots: Login on the camera itself (visit the camera's ip address)
The enumerated cameras (and the motion sensors) will not show up automatically, you need to add them in by yourself:
- Open the Home app
- Click the (+) icon on the top
- Select
Add Accessory - In the next screen select
I Don't Have a Code or Cannot Scan - Your cameras should show up in the next screen, select one
- Enter the code for your Homebridge in the prompt, the camera will be added
- Repeat for all the cameras you want to add
- Go to the settings of the camera view in the Home app
- Each camera has an accompanying motion sensor
- Enable notifications for the camera
- Whenever motion is detected you will get a notification from the home app with a snapshot from the camera
- Raspberry Pi 3B with Node 11.15.0 as Homebridge host
- Raspberry Pi 4B 4GB with Node 12.14.0 as Homebridge host
- Macbook Pro with Node 12.13.1 as Homebridge host
- Windows 10 with Node 12.13.0 as Homebridge host
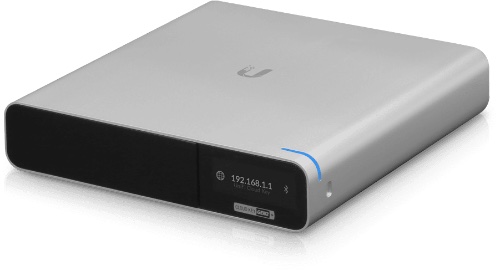
- Ubiquiti UniFi CloudKey Gen2 Plus - Cloud Key with Unifi Protect functionality
- 2x Ubiquiti UniFi Video UVC-G3-AF - PoE Camera
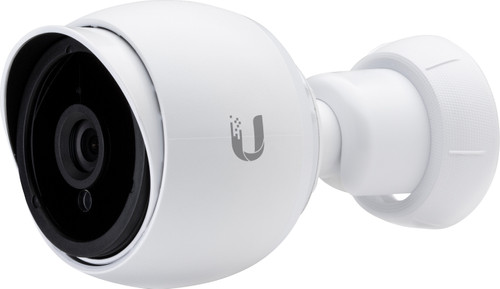
- 2x Ubiquiti Unifi Video UVC-G3-Flex - PoE Camera
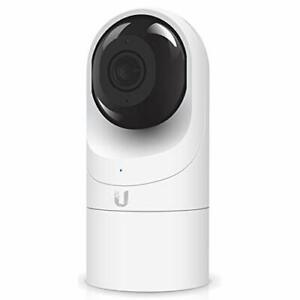
- Running this plugin on CPUs that do not support AVX (celerons in NAS, ...) is not supported because there are no prebuilt Tensorflow binaries. Compiling Tensorflow from scratch is out of scope for this project!
- Run it on a RBPI or MacOS/Windows/Linux (Debian based)
- Previews in notifications are requested by the Home app, and can thus be "after the fact" and show an image with nothing of interest on it.
- The actual motion detection is done with the snapshot that is requested internally.
- Unifi Protect has a snapshot saved for every event, and there is an API to get these (with Width & Height) but the actual saved image is pretty low res and is upscaled to 1080p. Using the Anonymous snapshot actually gets a full res snapshot (better for object detection).
- There is no way to know what motion zone (from Unifi) a motion has occurred in. This information is not present is the response from their API.
- The enhanced object detection using CoCo is far from perfect and might not catch all the thing you want it to.
- Add more unit and integration tests
- Upgrade tfjs-node, now held back because newer versions will not install correctly on RBPI
Implement required changes to make this work with Unifi OS (In progress)Figure out how to get higher res streams on iPhone (only iPad seems to request 720p streams)(Not possible)Extend documentation & wiki(Done)
- Checkout the git repo
- Run
npm installin the project root folder - Adjust the dummy config under
resources/test-config/config.json - use
npm run homebridgeto start a Homebridge instance that points to the local config
This plugin is provided free of charge and without any warranty of its functionality.
The creator cannot be held responsible for any damages, missed motion notifications that cause damage or harm.