NVIDIA Bright Cluster Manager instructions for installing on a VM and using NVIDIA GPUs.
Much of the information provided relies on NVIDIA Bright Cluster Manager documentation.
NVIDIA Bright Cluster Manager offers fast deployment and end-to-end management for heterogeneous high-performance computing (HPC) and AI server clusters at the edge, in the data center, and in multi/hybrid-cloud environments. It automates provisioning and administration for clusters ranging in size from a couple of nodes to hundreds of thousands, supports CPU-based and NVIDIA GPU-accelerated systems, and enables orchestration with Kubernetes.
This repository will include the instructions for installing and running Bright Cluster Manager on VMware vSphere VMs and using vGPUs.
- Bright Cluster Manager license.
- vGPU license.
- Download Bright's ISO file from Bright's download page.
- Architecture:
x86_64/amd64. - Linux Base Distribution:
Ubuntu 20.04. - Hardware Vendor:
Generic / Other. - Additional Features: mark
Include CUDA Packages.- Note: mark
Include OFED and OPA PackagesandInclude NVIDIA DGX A100 software imageif needed. This will create an additional software image for the DGX.
- Note: mark
- Architecture:
- Upload the ISO file to vSphere's datastore.
- Create a new VM with the following settings:
- Name (optional):
bright_head_node. - Guest OS:
Linux - Ubuntu (64-bit). - Virtual Hardware:
- CPU: >=
4 CPUs. - Memory: >=
16 GB. - Hard disk: >=
128 GB.- Note: external storage might be used.
- Create two network adapters:
- An external network.
- An internal network.
- CD/DVD drive: Datastore ISO File.
- Select Bright's ISO file.
- Mark the
"Connected"and"Connect At Power On"checkboxes.
- CPU: >=
- VM Options:
- Boot Options: Firmware -
EFI.
- Boot Options: Firmware -
- Name (optional):
- Launch the VM and connect to it (recommended through the remote console).
- Follow Bright's Graphical installer and note the following:
- Workload manager:
None.- Note: A workload manager will be installed later. This is due to the fact that Pyxis and Enroot will NOT be installed if Slurm is chosen in this stage.
- Network topology:
Type1. - Head node:
- Hardware manufacturer:
Other.
- Hardware manufacturer:
- Networks:
- externalnet:
- Keep
DHCPmarked.
- Keep
- internalnet.
- Note: make sure the correct networks are set.
- externalnet:
- Head node interfaces:
- External network:
- Network:
externalnet. - IP address:
DHCP.
- Network:
- Internal network:
- Network:
internalnet.
- Network:
- Note: make sure the correct networks are set.
- External network:
- Compute nodes interfaces:
- Interface:
BOOTIF. - Network:
internalnet.
- Interface:
- Additional software: mark the
CUDAcheckbox.- Note: mark the
OFEDcheckbox if needed.
- Note: mark the
- Complete the installation.
- Workload manager:
- After installation was completed:
- Choose to reboot the VM.
- In the VM settings, unmark the
Connectedcheckbox from the head node VM CD/DVD drive. - Restart the VM.
-
Launch and SSH to the head node with the
rootusername and the password chosen during installation. -
Confirm the node is visible to the internet with
ping www.google.com. -
Update the node with
apt -y update,apt -y upgradeandapt -y autoremove. -
Install Bright's license by running:
request-license.- Note: valid details are optional.
- Note: in case the cluster is in a dark-site and air-gapped environment:
- Run
request-licenseto generate a CSR (certificate request). - Move the certificate to the licensing server of Bright to get a signed license.
- Copy the license back to the cluster and install it using
install-license.
- Run
-
Optional: change the home directory to an external drive with either:
-
Editing the
fsmountsby running:cmsh category use <category-name> fsmounts use /home set device <hostname/IP of the NAS>:</path/to/export> commit
-
Running
cmha-setup.- Note: this option is only meant for HA and includes moving
/cm/sharedand/homepaths to an external shared storage (NAS, DAS or DRBD).
- Note: this option is only meant for HA and includes moving
-
-
Optional: if needed, fix compute nodes DNS by running:
cmsh
category use <category-name>
append nameservers <nameserver>
commit
quit
- Note: the nameservers is empty, therefore any existing nameservers should also be added.
- Note: order of nameservers is important.
-
The following changes should be made for each software image:
-
View all images:
cmsh
softwareimage
list
-
Clone the relevant image to a new image:
softwareimage
clone <from-image> <image-name>
commit
- Note: wait for
Initial ramdisk for image <image-name> was generated successfullymessage to appear.
- Note: wait for
-
Clone the default category to a new category and assign the relevant image:
category
clone default <category-name>
set softwareimage <image-name>
commit
-
Assign the relevant nodes to the relevant category:
device
set <node-name> category <category-name>
commit
quit
-
Update the software image by running:
cm-chroot-sw-img /cm/images/<image-name>
apt -y update
apt -y upgrade
apt -y autoremove
exit
-
Update the kernel if a newer version is available by running:
cmsh
softwareimage
use <image-name>
show | grep "Kernel version"
kernelversions
- Compare the versions, if a newer version is available and not set for the software image, set it by running:
set kernelversion <kernel-version>
commit
- Note: wait for
Initial ramdisk for image <image-name> was generated successfullymessage to appear, then runquit.
-
-
Install a workload manager by running:
cm-wlm-setupand note the following for Slurm:- TODO: convert the following into a one liner.
- Choose
Setup (Step By Step).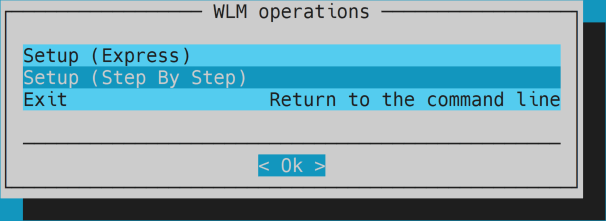
- Choose
Slurm.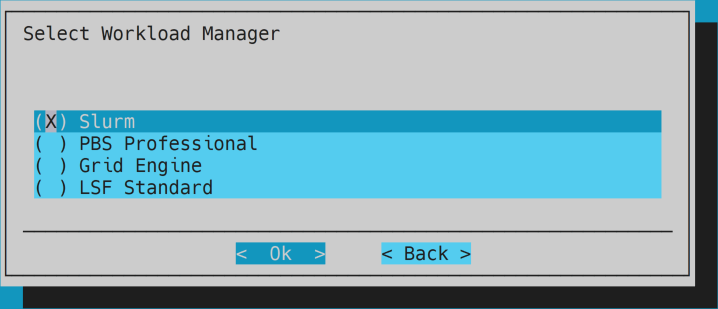
- Optional: keep cluster name
slurm.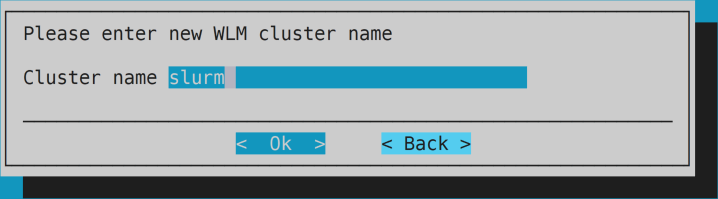
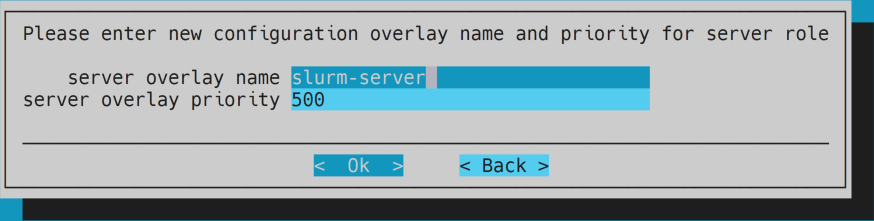
- Keep the head node only for server role.

- Optional: keep overlay configuration.
- Optional: unselect everything for client role.
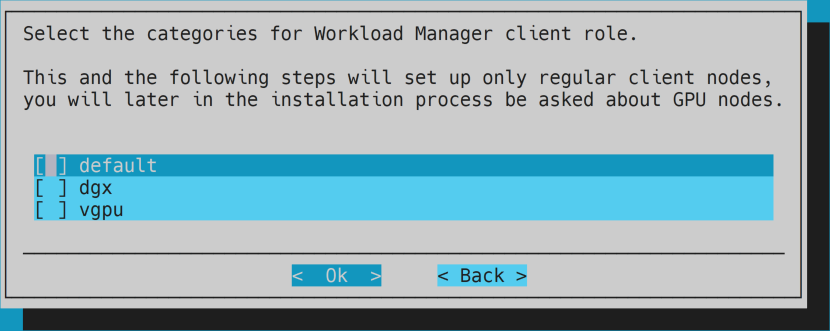
- Optional: unselect everything for client role.

- Optional: keep overlay configuration.

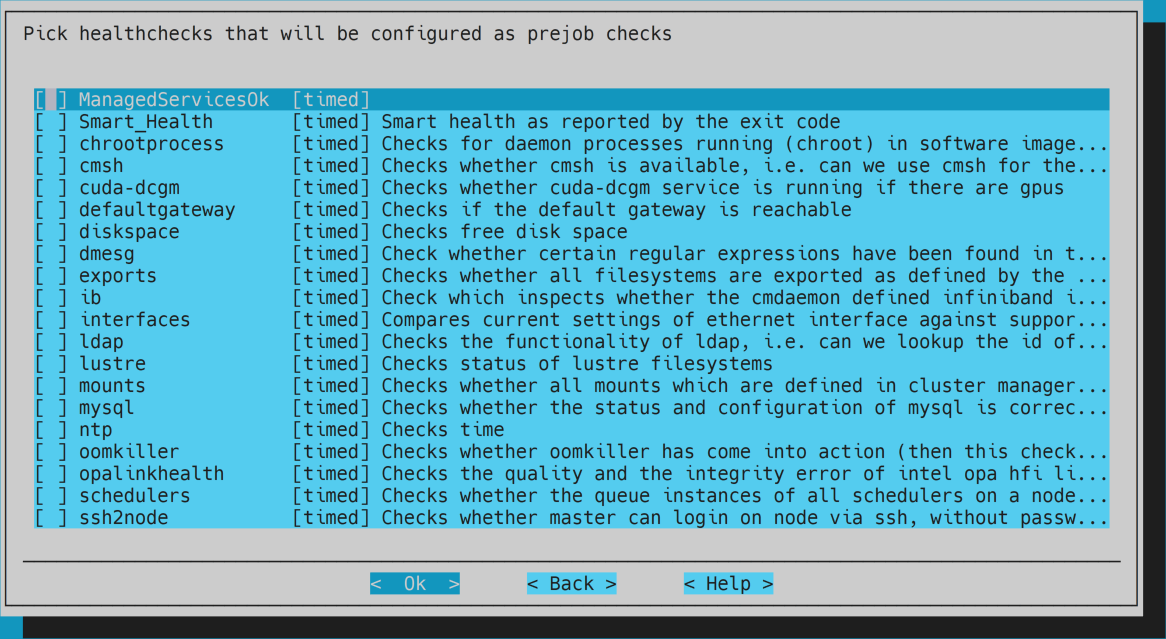
- Optional: keep prejob healthchecks empty.
- Select
yesfor GPU resources settings.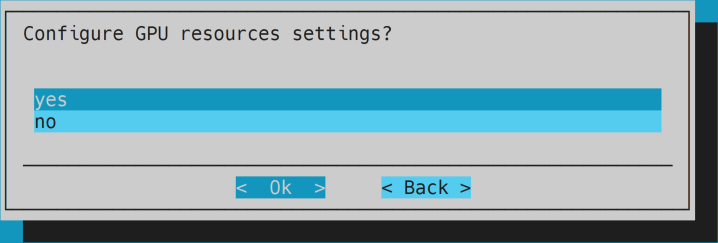
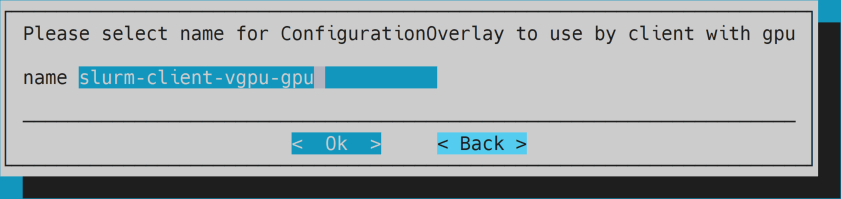
- Optional: keep settings for configuration overlay.
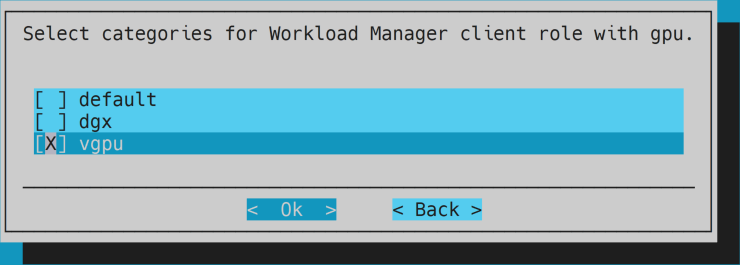
- Select all categories that include a GPU for GPU role.
- TODO: update the image.
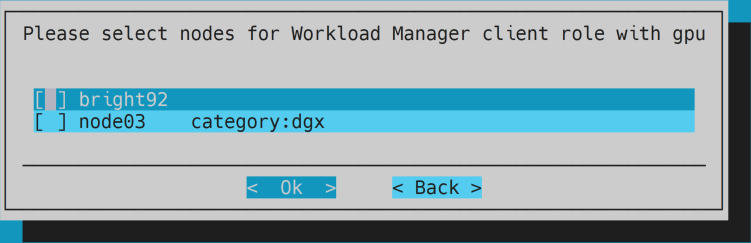
- Keep the head node unselected for GPU role.
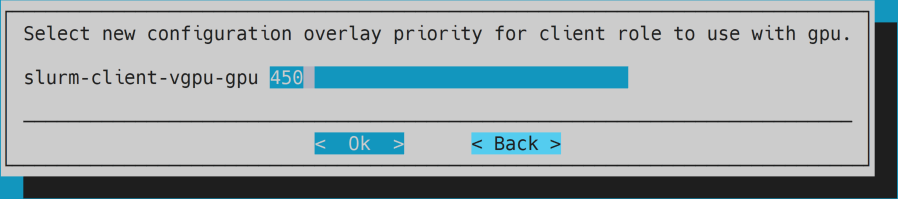
- Optional: keep settings for configuration overlay.
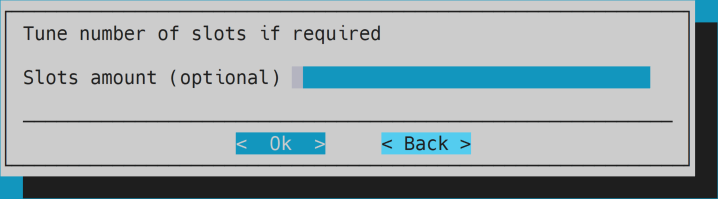
- Optional: keep slots amount empty.
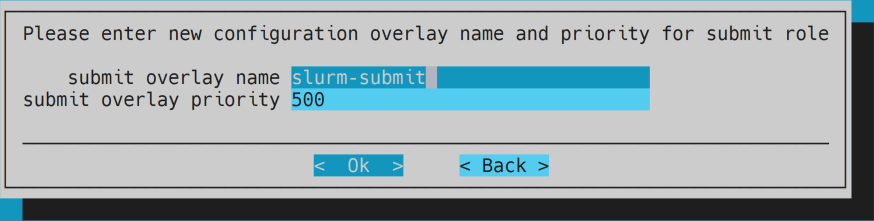
- Keep selected for submit role.

- Keep the head node for submit role.
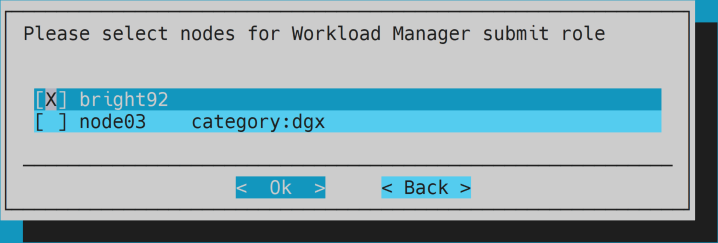
- Optional: keep default settings for overlay.
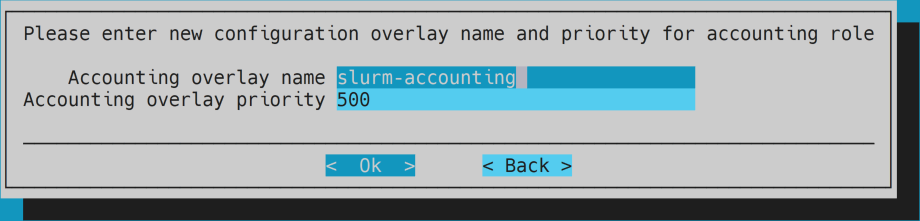
- Optional: keep accounting configuration.
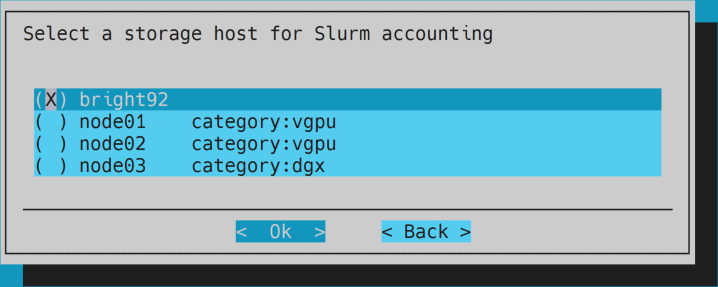
- Optional: keep the head node for storage host.
- Optional: select
nofor Slurm power saving.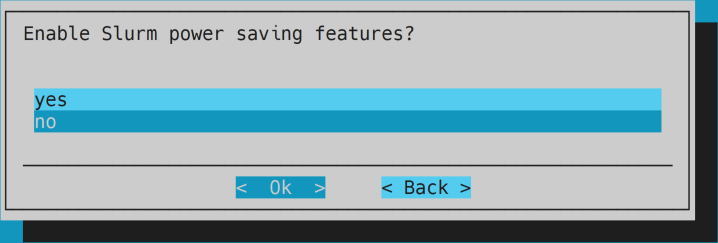
- Select
Automatic NVIDIA GPU configuration.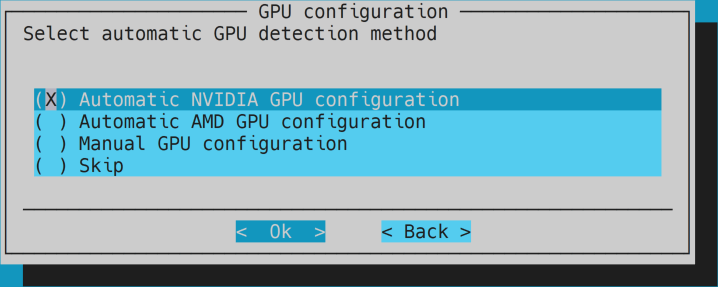
- Modify the
Countcolumn with the number of GPUs per compute node. No need to enter any other details.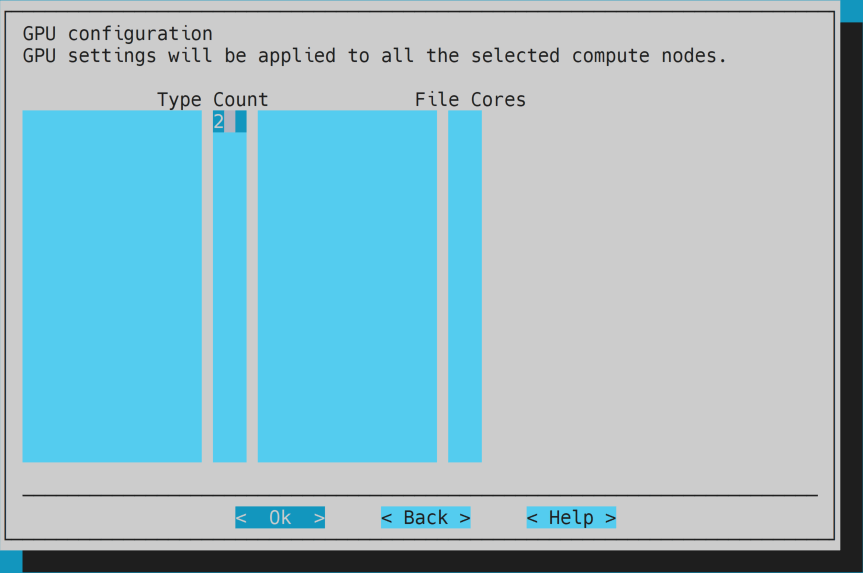
- Note: in case there are different number of GPUs in different compute nodes:
- Set the number of GPUs for one version of a compute node (e.g., a compute node with 2 GPUs).
- After the installation is complete duplicate the configuration and modify it for any other version (explained in the next bullet).
- Note: in case there are different number of GPUs in different compute nodes:
- Select
yesfor configuring Pyxis plugin.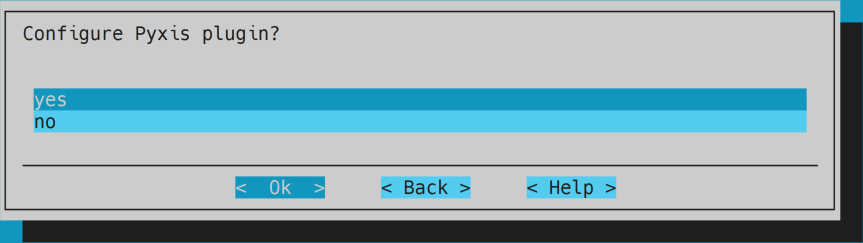
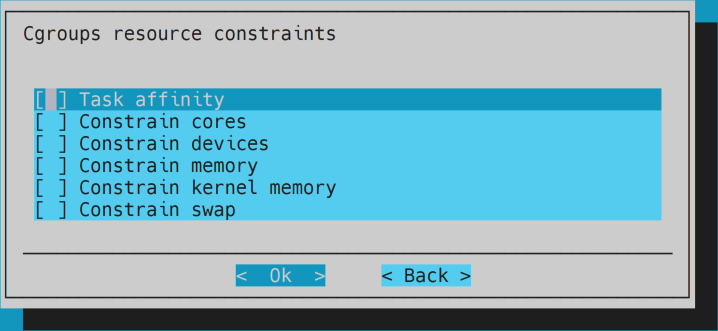
- Optional: keep Cgroups constraints empty.
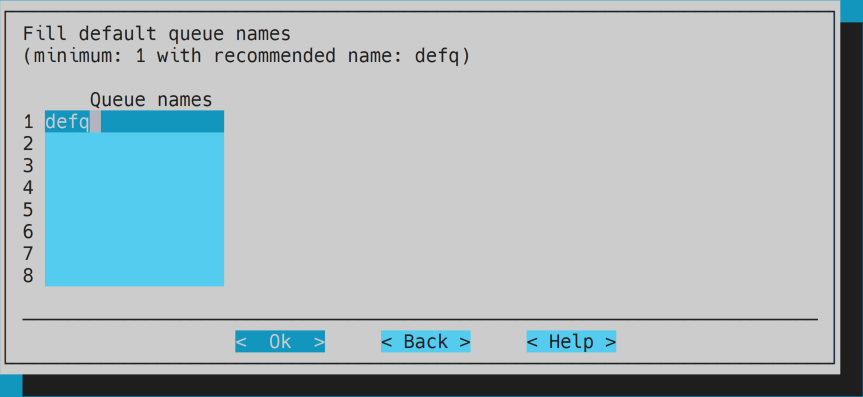
- Optional: keep default queue name.
- Select
Save config & deploy.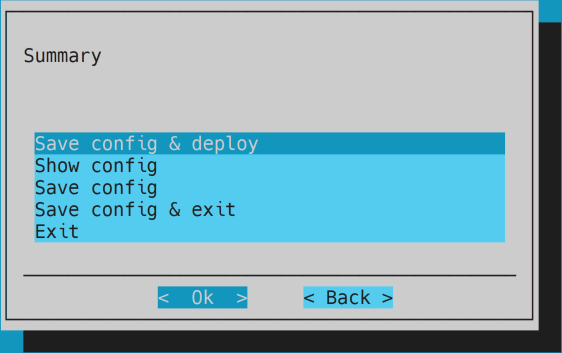
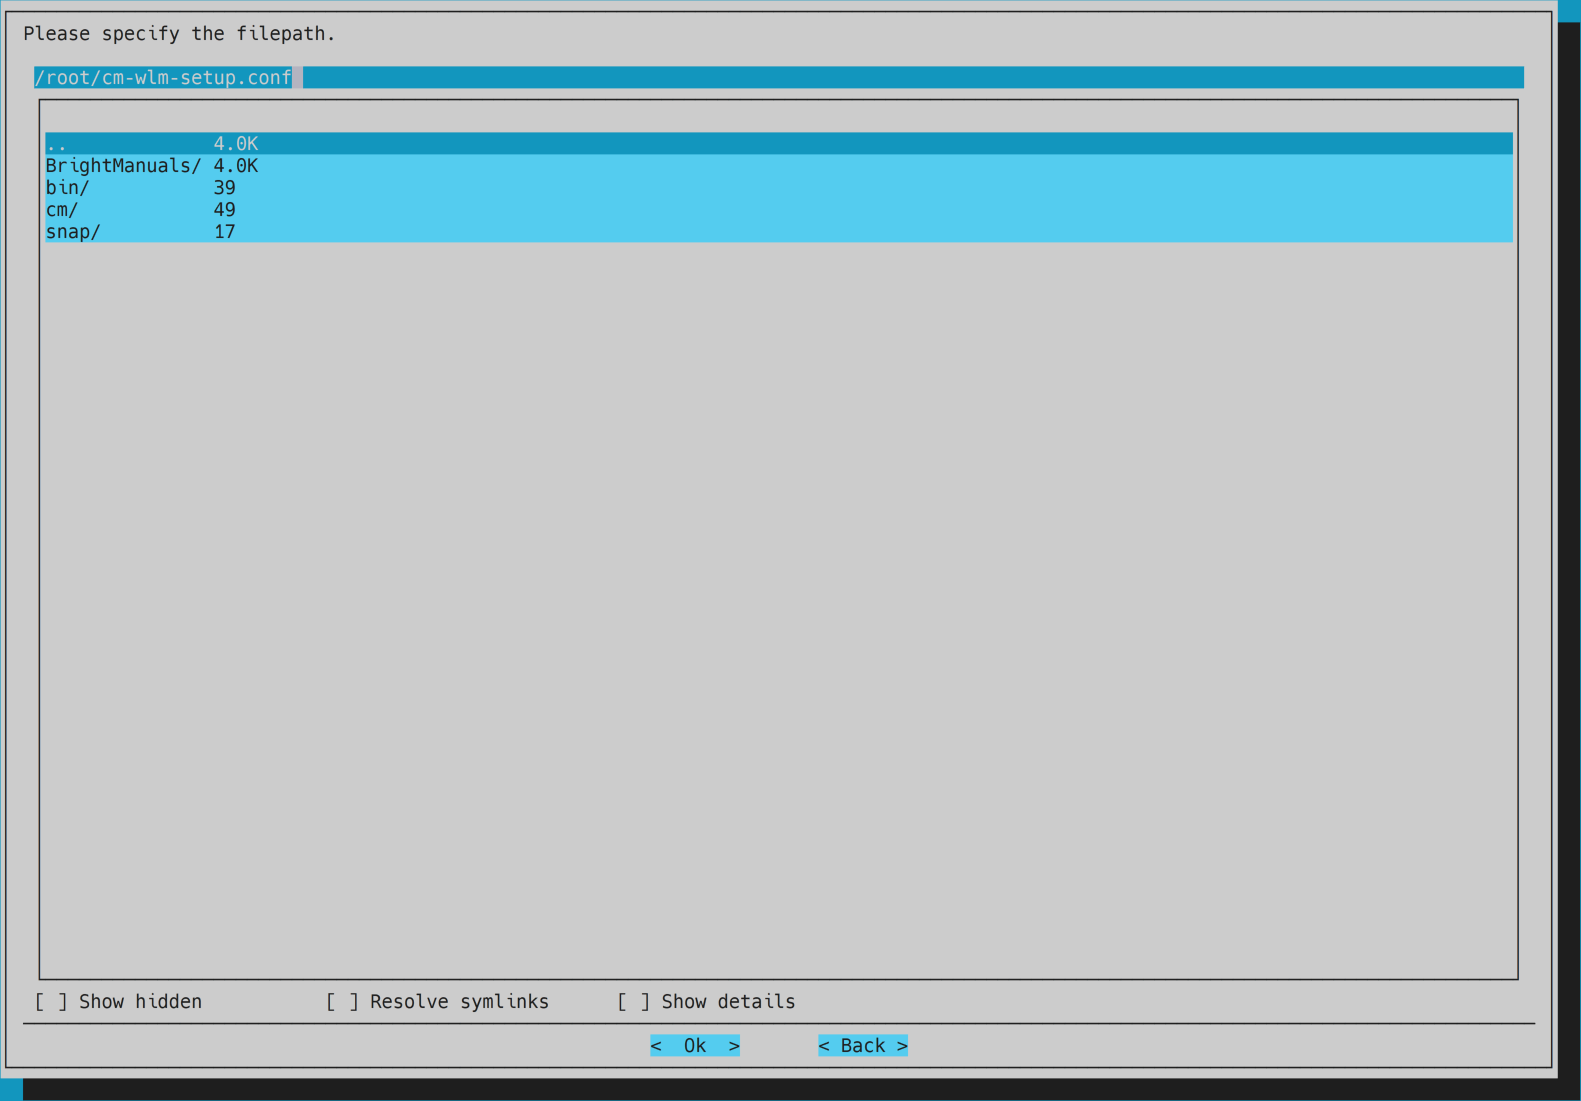
- Optional: save the configuration file in the default location.
- Complete the setup.
- Note: if an error of
Temporary failure resolving 'archive.ubuntu.com'appears undo the installation by pressingu, then try the following solutions for each software image and reinstall:-
Relink
resolv.conf:cm-chroot-sw-img /cm/images/<image-name> ln -s ../run/systemd/resolve/resolv.conf /etc/resolv.conf quit
-
Manually install Enroot:
cm-chroot-sw-img /cm/images/<image-name>
wget https://github.com/NVIDIA/enroot/releases/download/v3.4.0/enroot_3.4.0-1_amd64.deb
apt -y install ./enroot_3.4.0-1_amd64.deb
apt -y remove enroot\*
rm ./enroot_3.4.0-1_amd64.deb
exit
- Note: use the latest Enroot's release.
-
Note: if Slurm still exist, remove it before reinstalling by running the
cm-wlm-setupscript and choosingDisable. -
Note: if previous configuration overlays still exist, remove them before reinstalling:
cmsh
configurationoverlay
list
- Remove all listed by running
remove <configuration-overlay>for each one, then exit withquit.
- Remove all listed by running
-
-
In case there are different number of GPUs in different compute nodes, clone and set the configuration overlays:
- First, set the categories of the original configuration overlay so it won't include the different categories:
cmsh
configurationoverlay
use <configuration-overlay>
set categories <category-name>
commit
- Then, clone the configuration overlay and set the different categories:
clone <from-configuration-overlay> <configuration-overlay>
set categories <category-name>
roles
use slurmclient
genericresources
set gpu0 count <number-of-gpus>
commit
quit
-
Load Slurm by default on the head node by running
module initadd slurm. -
Optional:
tmpfs /runvolume is used as a cache for running the containers and configured automatically based on the compute nodes hard disks. To view its size rundf -hin a compute node. To override the configuration use:cmsh category use <category-name> fsmounts clone /dev/shm /run set mountoptions "defaults,size=<new size>" commit quit
-
There's an issue with
nvidia-uvmkernel and vGPUs that require some initialize. The issue involves this model being loaded but the path to/dev/nvidia-uvmis missing. This can be observed on a compute node by runningenv | grep _CUDA_COMPAT_STATUS. To overcome this issue do the following (provided by Adel Aly):-
Enter to the software image by running:
cm-chroot-sw-img /cm/images/<image-name>. -
Create a new file
/lib/systemd/system/nvidia-uvm-init.servicewith the following content:# nvidia-uvm-init.service # loads nvidia-uvm module and creates /dev/nvidia-uvm device nodes [Unit] Description=Initialize nvidia-uvm device on vGPU passthrough [Service] ExecStart=/usr/local/bin/nvidia-uvm-init.sh [Install] WantedBy=multi-user.target
-
Create a new file
/usr/local/bin/nvidia-uvm-init.shwith the following content:#!/bin/bash ## Script to initialize nvidia device nodes. ## https://docs.nvidia.com/cuda/cuda-installation-guide-linux/index.html#runfile-verifications /usr/sbin/modprobe nvidia if [ "$?" -eq 0 ]; then # Count the number of NVIDIA controllers found. NVDEVS=`lspci | grep -i NVIDIA` N3D=`echo "$NVDEVS" | grep "3D controller" | wc -l` NVGA=`echo "$NVDEVS" | grep "VGA compatible controller" | wc -l` N=`expr $N3D + $NVGA - 1` for i in `seq 0 $N`; do mknod -m 666 /dev/nvidia$i c 195 $i done mknod -m 666 /dev/nvidiactl c 195 255 else exit 1 fi /sbin/modprobe nvidia-uvm if [ "$?" -eq 0 ]; then # Find out the major device number used by the nvidia-uvm driver D=`grep nvidia-uvm /proc/devices | awk '{print $1}'` mknod -m 666 /dev/nvidia-uvm c $D 0 mknod -m 666 /dev/nvidia-uvm-tools c $D 0 else exit 1 fi
-
Change the permissions of the script file by running:
chmod 777 /usr/local/bin/nvidia-uvm-init.sh. -
Enable the service and exit:
systemctl enable nvidia-uvm-init.service
exit
-
-
Optional: add users.
-
Note: Slurm is not loaded by default for the users. To enable Slurm for all users by default, edit the
/etc/skel/.bashrcfile and add:# load Slurm module load shared module load slurm
-
-
Reboot the head node.


-
Create a new VM with the following settings:
- Name (optional):
node01. - Guest OS:
Linux - Ubuntu (64-bit). - Virtual Hardware:
- CPU: >=
8 CPUs. - Memory: >=
16 GB. - Hard disk:
64 GB* number of users. - Network adapter:
- An internal network.
- Create PCI devices per GPU.
- CPU: >=
- VM Options:
- Boot Options: Firmware -
EFI.
- Boot Options: Firmware -
- Name (optional):
-
Duplicate the VM for any other compute node and change the name accordingly.
-
Launch the first compute node VM and connect to it (recommended through the remote console).
-
The node should be PXE booted by the head node.
- Note: if an error is present try to reboot the node.
- Choose the relevant node and provision it with the
FULLoption.
-
SSH to the node from the head node for easier access.
-
Update the node with
apt -y update,apt -y upgradeandapt -y autoremove. -
For vGPU:
-
Uninstall the existing CUDA driver with
sudo apt -y remove --purge cuda-driver. -
Install the vGPU driver:
- TODO: add images.
- Download the vGPU driver from NVIDIA Application Hub -> NVIDIA Licensing Portal -> Software Downloads.
- Copy the vGPU driver file ending with
.runto the compute node. - Run
cmhod +x <file path>. - Run the installation file.
- Keep DKMS disabled for the kernel.
- Accept the warning.
- Select
Nofor installing NVIDIA's 32-bit compatibility libraries. - Accept the warning.
- Run
nvidia-smiand make sure the GPUs are visible. - Remove the installation file.
-
Install NVIDIA CUDA Container Toolkit (installation guide):
- Setup the package repository and the GPG key by running:
distribution=$(. /etc/os-release;echo $ID$VERSION_ID) \
&& curl -fsSL https://nvidia.github.io/libnvidia-container/gpgkey | sudo gpg --dearmor -o /usr/share/keyrings/nvidia-container-toolkit-keyring.gpg \
&& curl -s -L https://nvidia.github.io/libnvidia-container/$distribution/libnvidia-container.list | \
        sed 's#deb https://#deb [signed-by=/usr/share/keyrings/nvidia-container-toolkit-keyring.gpg] https://#g' | \
        sudo tee /etc/apt/sources.list.d/nvidia-container-toolkit.list
- Install the
nvidia-docker2package (and dependencies) after updating the package listing:
apt -y update
apt install -y nvidia-docker2
- Restart the Docker daemon to complete the installation after setting the default runtime by running:
systemctl restart docker.
-
-
Make sure
/homedirectory is mounted by runningcat /etc/fstab | grep "master:/home". -
Login to the head node.
-
Grab the node image to your relevant image by running:
cmsh
device
grabimage -i <image-name> -w <node-name>
- Note: the grabbing process might take a few minutes. Wait until a
grabimage [ COMPLETED ]message appears, then runquitto exit.
- Note: the grabbing process might take a few minutes. Wait until a
-
For vGPU, install the vGPU license:
- Generate a client configuration token.
- Note: it is important to copy the token file and not only its content. You can use a service such as Oshi for easy transfer. Make sure the name of the token didn't change.
- Configure a licensed client.
- Note: use the software image path:
/cm/images/<image-name>/etc/nvidia/.
- Note: use the software image path:
- Generate a client configuration token.
-
Reboot the head node.
-
Reboot all compute nodes one by one, link each new one to its name and allow the default provisioning.
- Note: make sure the vGPU license is installed by running
nvidia-smi -q | grep -A2 "vGPU Software Licensed Product"within a compute node.
- Note: make sure the vGPU license is installed by running
Note: if a DGX fails to show GPUs when running nvidia-smi it might be because the driver wasn't build with a newer kernel. To solve it, reinstall the driver by running apt reinstall nvidia-driver-<version> and grab the image via CMSH.
This example uses Horovod and TensorFlow.
-
Login to the head node.
-
Pull the latest NGC TensorFlow container by running:
enroot import 'docker://nvcr.io#nvidia/tensorflow:<TensorFlow version>'.- Note: This will create a local
.sqshfile.
- Note: This will create a local
-
Git clone Horovod's GitHub repository by running:
git clone https://github.com/horovod/horovod. -
Submit a Slurm job by running:
srun --mpi=pmix \
-G <number of GPUs> \
--container-image=<path to TensorFlow sqsh file> \
--container-mounts=<path to Horovod GitHub directory>:/code \
python /code/examples/tensorflow/tensorflow_synthetic_benchmark.py
- Note: if an error of
Invalid MPI plugin nameis received when running a Slurm job with--mpi=pmixit is probably because of a missing package. To solve it:- SSH to the relevant node.
- Run
/cm/shared/apps/cm-pmix3/3.1.4/bin/pmix_infoto view the issue: - Install the relevant package by running
apt install libevent-pthreads-2.1-7. - Grab the image.
- Note: if an error of
-
Examine the results and observe the GPU usage.