It allows to join @atomico/core to web-components in a simple and expressive way
Atomico is a personal Open Source project, whose mission is to simplify the creation of sustainable and scalable interfaces with minimal impact on browser resources.
Do not forget that these libraries are similar in api, but Atomico's orientation is to encourage the use of web-components with or without Atomico, since web-components are agnostic to framework or libraries.
you will need 2 imports, @atomico/element this allows you to work with web-components and @atomico/core that has support for hooks, context, HoCs, virtual-dom and more.
Atomico allows both syntax, so you can use components and web-components together, but now we focus on the creation of web-components
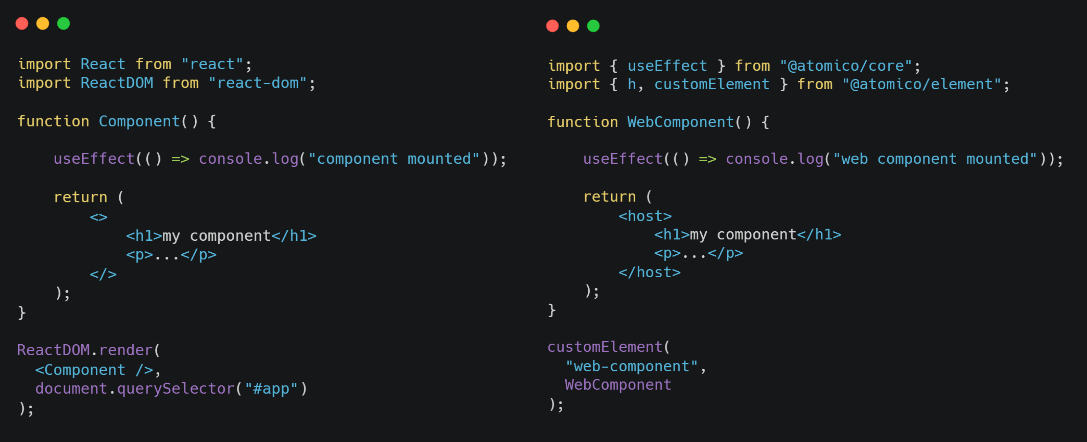
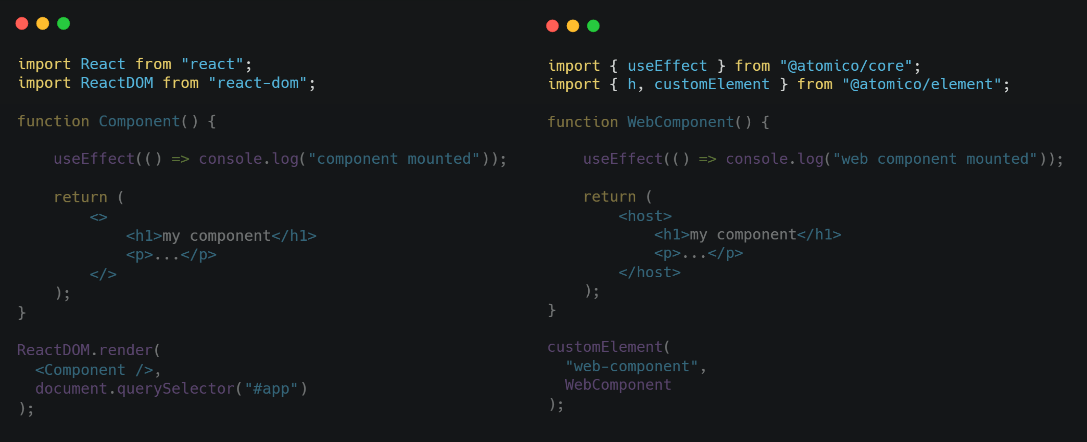
Atomico does not have support for fragments, but to improve the development experience Atomico creates the tag <host>, this has an effect similar to the css selector :host{}
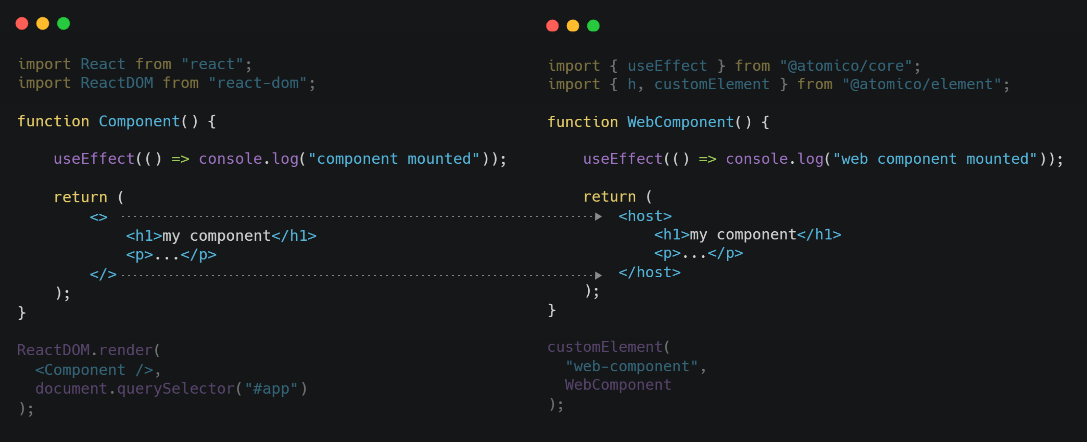
The <host> tag brings better benefits, since it allows to manipulate properties and attributes of the web-component from the same JSX, the following image shows the difference between a vanilla web-component and the atomic host tag, to understand its benefit and equivalence.

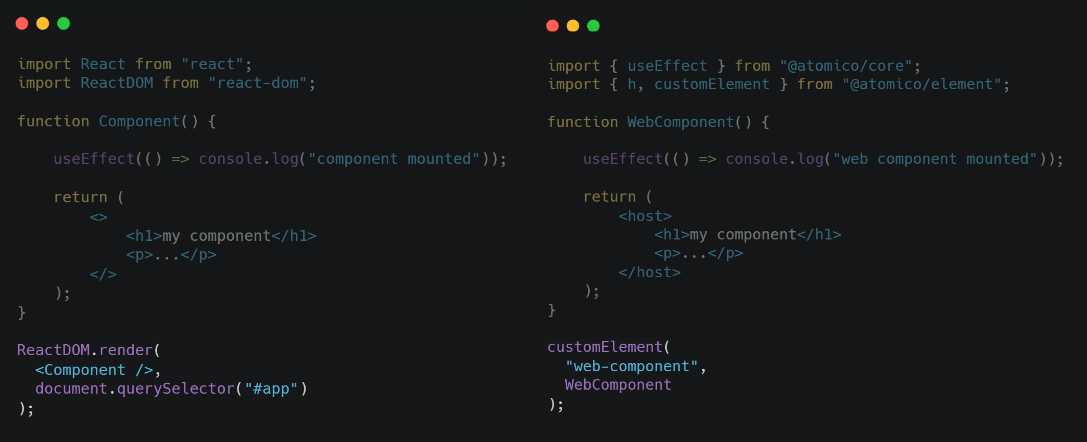
render allows to point the component to a specific node of the document, customElement allows associating its function to a web-component, so you should only invoke the web-component from the HTML, React or Vue, without worrying about specifying the node.
The above shows the similar, the observables are the Atomico layer to define properties and attributes of the web-component, to identify the types and force them if they come from a string Atomico makes use of the declarations like Number, String,Boolean, Object, Array, Function and Promise, to define the types of properties and attributes.
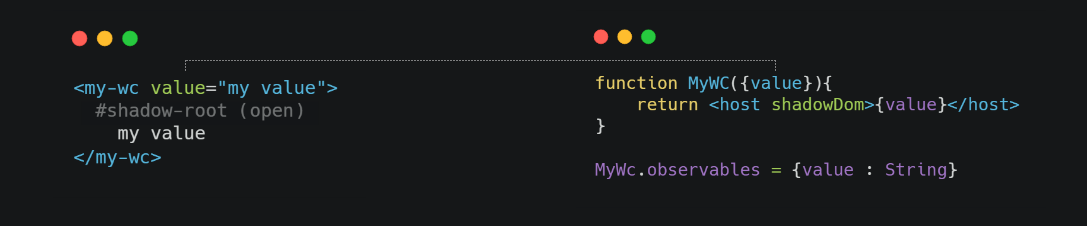
every attribute is defined as property so you can use document.querySelector("my-wc").value = "new value" for its definition.
Observables are not limited to just one property you can create more complex sets.
MyWc.observables = {
	isChecked: Boolean, //html: <my-wc is-checked/>
	value: String, //html: <my-wc value='....'/>
	id: Number, //html: <my-wc id='10'/>
	data: Object //html: <my-wc data='{"name":"atomico"}'/>
};The functional behavior is to simplify the expressiveness of a web-component, but the real api is a class, you can make use of this, the greatest benefit of using classes that the events maintain the context of this without the need to use bind
import { h, Element } from "@atomico/element";

class ShowEmoji extends Element {
	static observables = {
		checked: Boolean
	};
	toggle() {
		this.checked = !this.checked;
	}
	render({ checked = false }) {
		return (
			<host shadowDom>
				{checked && "😃"}
				<button onClick={this.toggle}>toggle emoji</button>
			</host>
		);
	}
}
The hooks can also be used within render.
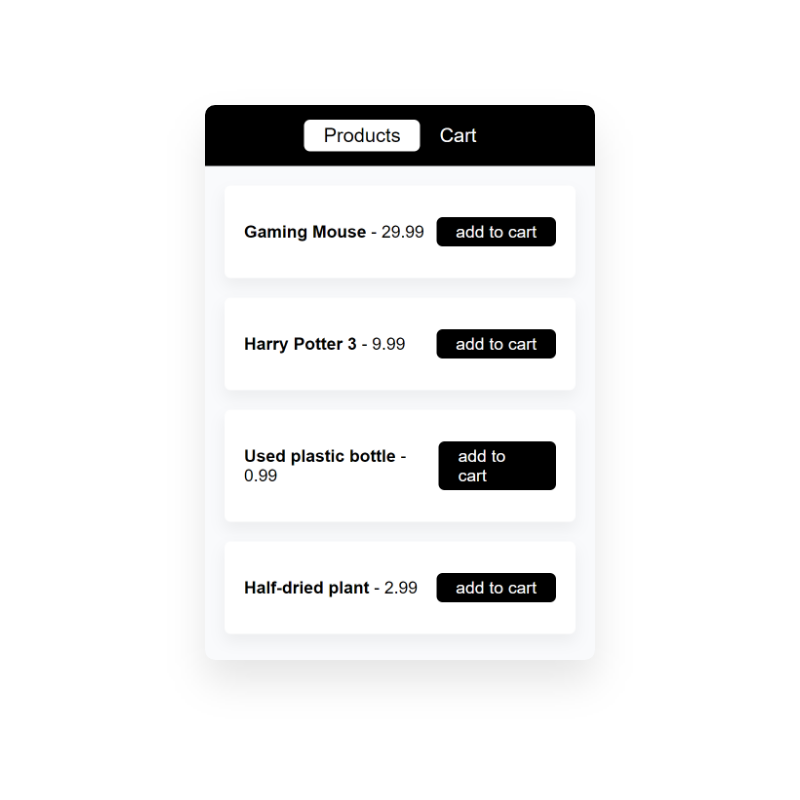
This small example was created by using npm init @atomico, it is a source for learning to develop PWA applications with Atomico.