PlatForm Management CLI (PFMCLI) Ansible BullSequana SH Playbooks allow Data Center and IT administrators to use RedHat Ansible to automate and orchestrate the operations (power, update) of MESCA5.
BullSequana SH
Ansible playbooks can be used as is with following prerequisites:
- Ansible 2.8.5+
- Python 3.6.8+
- MESCA5 Playbooks
- Prerequisites
- What to do first
- How to change technical states file path
- Warning for updates
- Support
- LICENSE
- Version
disable_ssh.yml: Disable the SSH modedisable_indicator_led.yml: Disable the Systems LEDenable_ssh.yml: Enable the SSH modeenable_indicator_led.yml: Enable the Systems LEDget_boot.yml: Get boot optionsget_chassis.yml: Get all chassis detailsget_chassis_fan.yml: Get chassis fanget_chassis_health.yml: Get chassis States and Statusget_chassis_inventory.yml: Get chassis inventoryget_chassis_thermals.yml: Get chassis thermalsget_cpu_inventory.yml: Get cpu inventoryget_indicator_led.yml: Get LED stateget_log_services.yml: Get log servicesget_manager_all_info.yml: Get manager all infoget_manager_nic_inventory.yml: Get manager nic inventoryget_memory_inventory.yml: Get memory inventoryget_networks.yml: Get network infoget_session_information.yml: Get session informationget_system.yml: Get systemget_system_power.yml: Get system power stateget_systems_health.yml: Get system states and statusget_systems_inventory.yml: Get systems inventoryget_systems_nic_inventory.yml: Get NIC inventorylist_users.yml: List usersmanager_power_force_restart.yml: Force managers to restartmanager_power_graceful_restart.yml: Gracefully restart the Managersreboot.yml: Rebootset_chassis_indicator_led to_<state>.yml: Set the LED to a desired state as aset_<onetime or continuous>_boot_to_<mode>.yml: Set boot option to a desired modeset_ntp_servers.yml: Set the 3 NTP Servers to specific values in external_vars.yml: ntp_server1 / ntp_server2 / ntp_server3set_power_cap.yml: Set the power cap to a specific value in external_vars.yml: power_capsystem_power_off.yml: Graceful System power offsystem_power_on.yml: System power onupdate_firmware.yml: Update ONE firmware specified in external_vars.yml: file_to_uploadupdate_firmwares_from_TS.yml: Update firmwares from TS mounted on : technical_state_path
Install your playbooks with rpm:
rpm -i PFMCLI_ANSIBLE_MESCA5_<version>.rpm
Update your playbooks with rpm:
rpm -Uvf PFMCLI_ANSIBLE_MESCA5_<version>.rpm
:info: Info: Default directory is /opt/PMF_CLI
- install python3
yum install python3 - install ansible
pip3 install ansible - optionnaly if you use Ansible vault:
pip3 install pycryptodome
pip3 install ansible-vault
:info: Info: Check your python version:
python --version
:info: Info: Check your ansible python version:
Here is the basic configuration for ansible:
config file = /etc/ansible/ansible.cfg file
inventory = /etc/ansible/hosts file
variables = path_to_ansible_mesca5/vars/external_vars.yml file
encrypted passwords = path_to_ansible_mesca5/vars/passwords.yml file
You should run the ansible playbooks on your local directory (/opt/PFM_CLI), let call it path_to_ansible_mesca5:
$path_to_ansible_mesca5> ansible-playbook <my_playbook.yml>

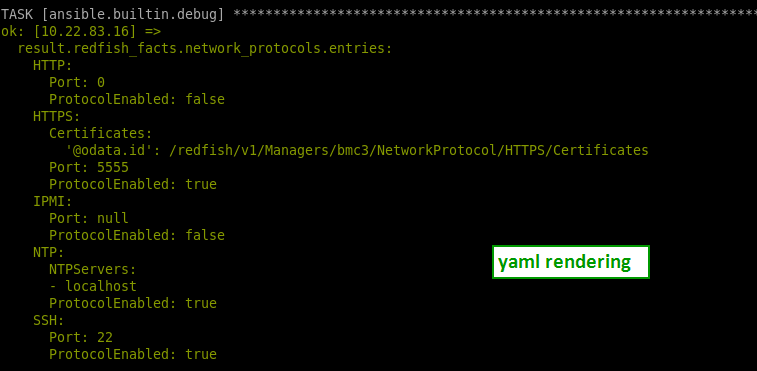
If you need to change the rendering of your output, feel free to change your stdout_callback in your ansible.cfg file
stdout_callback = community.general.yaml
or
stdout_callback = community.general.unixy
ansible-doc -t callback -l
💻 Choose your prefered rendering in:
- edit /etc/ansible/hosts file
- add your ip addresses or hostnames followed by baseuri and username variables
# add a group optionaly []
[MESCA5]
<here your IP address or hostname> baseuri="{{host}}" username=<here bmc username> password=<here bmc password>
- generate an encrypted password for your password variable
- replace your password in clear with the name of your encrypted password variable between double brackets
password='{{name_of_your_encrypted_variable}}'
# add a group optionaly []
[linux_mesca5]
<here your IP address or hostname> baseuri="{{host}}" username=<here bmc username> password='{{name_of_your_encrypted_variable}}'
For test purpose, you can always use a clear password in your hosts file
- edit path_to_ansible_mesca5/vars/external_vars.yml file
- comment/uncomment/modify your variables
General options can always be used with any ansible command as an optional and cumulative parameter
--limit=<your_group>
<your_group> should be declared in hosts file
-e "username=<mon user> password=<mon mot de passe>"
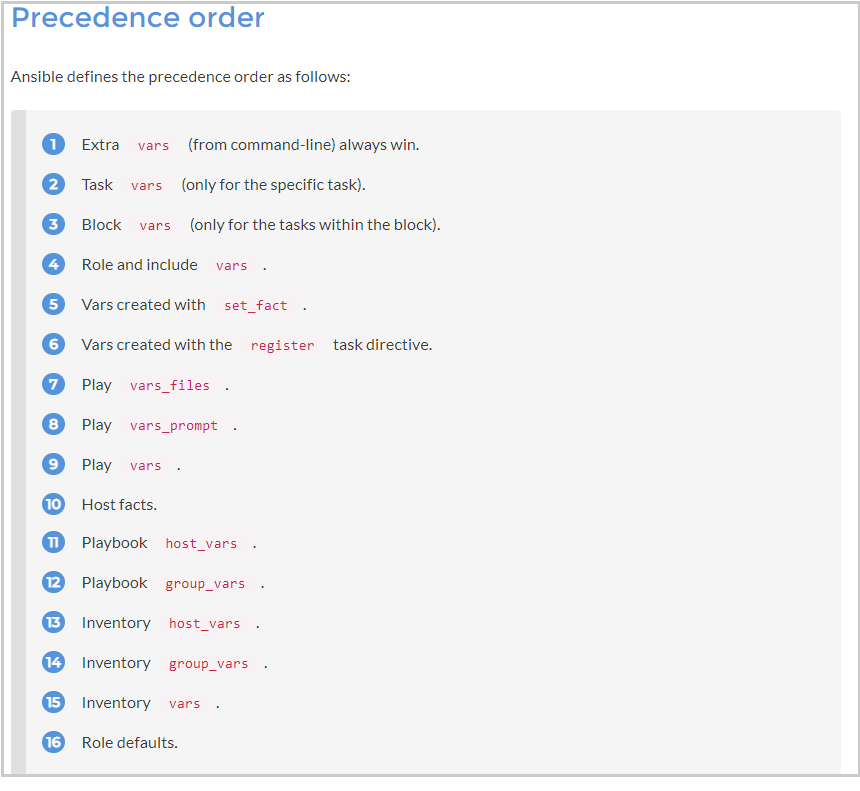
You can refer to Ansible documentation: Visit https://docs.ansible.com/ansible/2.5/user_guide/playbooks_variables.html
To summarize, two main possibilities:
- As a command parameter, indicate variable/value with --extra-vars as CLI argument :
ansible-playbook yourfile.yml --extra-vars "your_variable=your_value"
- In the appropriate external_vars file path_to_ansible_mesca5/vars/external_vars.yml, uncomment and set the desired variable :
your_variable: your_value

Best site that explain variable orders and conflicts: Visit https://subscription.packtpub.com/book/networking_and_servers/9781787125681/1/ch01lvl1sec13/variable-precedence
ansible-playbook update_firmware_with_applytime_immediate.ymlansible-playbook get_chassis_inventory.ymlex: [root@awx firmware]# ansible-playbook --limit=openbmc -vv get_chassis_inventory.yml
ansible-playbook power_off.ymlex: [root@awx power]# ansible-playbook --limit=openbmc -e "username=your_user password=your_pass" power_off.yml
ansible-playbook power_on.ymlex: [root@awx power] ansible-playbook --limit=openbmc -e "username=root password=mot_de_passe" power_on.yml
in your external_vars file, just adapt and uncomment the appropriate value: power_cap: 500
in your external_vars file, just change the appropriate value:
# Count down before checking a successfull reboot in MINUTES
reboot_countdown: 3
# Count down before checking a successfull for power on/off in SECONDS
poweron_countdown: 5
poweroff_countdown: 5
in your external_vars file, just change the appropriate value:
# Max retries for reboot in in repeated
reboot_maxretries: 10
# Max retries for power on/off in repeated times
poweron_maxretries: 10
poweroff_maxretries: 10
- generate your encrypted password: See How to manage encrypted passwords
- run your playbook
ansible-playbook --vault-id bull_password@prompt get_chassis_fan.yml
@prompt means that you should enter the Vault password during the process (hidden)
💻 Info: If your IP address is not declared in proxy: You may need to add your IP address in your NO_PROXY configuration to bypass the proxy. Either permanently in the /etc/profile.d/proxy.sh file or in command line for the current session only, like this:
export NO_PROXY="<your bullsequana mesca5 IP address>,$NO_PROXY"By default, the root directory is /mnt.
So, in your inventory, you can define the technical_state_path: variable to whatever you want
technical_state_path: /mnt
⛔ Warning: Be careful to adapt the file_to_upload variable of your inventory
file_to_upload: /mnt/OMF_CEB_<your version>.sign.tar.gz
⛔ Warning: Be careful to adapt the technical_state_path variable of your inventory
technical_state_path: /mnt
- execute the following native ansible command with the name of your password and the real password you want to encrypt
generate_encrypted_password_for_Ansible.sh --name your_password_name your_real_password_to_encrypt - you are prompted for a vault password you should remember
example
# ../generate_encrypted_password_for_Ansible.sh --name "bmc_root_password" "p@s$w0rd[$#34"
[DEPRECATION WARNING]: Ansible will require Python 3.8 or newer on the
controller starting with Ansible 2.12. Current version: 3.6.8 (default, Apr 16
2020, 01:36:27) [GCC 8.3.1 20191121 (Red Hat 8.3.1-5)]. This feature will be
removed from ansible-core in version 2.12. Deprecation warnings can be disabled
 by setting deprecation_warnings=False in ansible.cfg.
New vault password (bull_password):
Confirm new vault password (bull_password):
bmc_root_password: !vault |
          $ANSIBLE_VAULT;1.2;AES256;bull_password
          36323636636436333566303333313838653530316464333731326332633764316538303134653439
          6339393165353439353836623636643463663561306537370a366265353930306562313336373637
          63393737363433386465663833393033316632353937666364326361386233353066363233633165
          3865313836306432370a636330313336386634333333393333666262303736373133383938326164
          3932
you can now use your variable in your Ansible inventory
edit the your hosts and modify password="{{ bmc_root_password }}"You should replace " password= " in your hosts file
🔒 Info: you should run your playbooks with --ask-vault-pass or --vault-id in command line (alternatively you can indicate a vault_password_file in your ansible.cfg : See next section)
--ask-vault-pass
# ansible-playbook --ask-vault-pass  get_chassis_fan.yml
[DEPRECATION WARNING]: Ansible will require Python 3.8 or newer on the controller starting with Ansible 2.12. Current version: 3.6.8
(default, Apr 16 2020, 01:36:27) [GCC 8.3.1 20191121 (Red Hat 8.3.1-5)]. This feature will be removed from ansible-core in version 2.12.
 Deprecation warnings can be disabled by setting deprecation_warnings=False in ansible.cfg.
Vault password:
Executing playbook get_chassis_fan.yml

- Fan Inventory on hosts: all -
get Chassis Fan Inventory...
  10.22.84.156 ok
debug...
  10.22.84.156 ok: {
    "changed": false,
    "result": {
        "changed": false,
        "failed": false,
        "redfish_facts": {
            "fan": {
                "entries": [],
                "ret": true
            }
        }
    }
}

- Play recap -
  10.22.84.156               : ok=2    changed=0    unreachable=0    failed=0    rescued=0    ignored=0
or alternatively --vault-id
# ansible-playbook --vault-id bull_password@prompt  get_chassis_fan.yml
[DEPRECATION WARNING]: Ansible will require Python 3.8 or newer on the controller starting with Ansible 2.12. Current version: 3.6.8
(default, Apr 16 2020, 01:36:27) [GCC 8.3.1 20191121 (Red Hat 8.3.1-5)]. This feature will be removed from ansible-core in version 2.12.
 Deprecation warnings can be disabled by setting deprecation_warnings=False in ansible.cfg.
Vault password (bull_password):
Executing playbook get_chassis_fan.yml

- Fan Inventory on hosts: all -
get Chassis Fan Inventory...
  10.22.84.156 ok
debug...
  10.22.84.156 ok: {
    "changed": false,
    "result": {
        "changed": false,
        "failed": false,
        "redfish_facts": {
            "fan": {
                "entries": [],
                "ret": true
            }
        }
    }
}

- Play recap -
10.22.84.156 : ok=2 changed=0 unreachable=0 failed=0 rescued=0 ignored=0# ansible-playbook get_chassis_fan.yml
[DEPRECATION WARNING]: Ansible will require Python 3.8 or newer on the controller starting with Ansible 2.12. Current version: 3.6.8
(default, Apr 16 2020, 01:36:27) [GCC 8.3.1 20191121 (Red Hat 8.3.1-5)]. This feature will be removed from ansible-core in version 2.12.
Deprecation warnings can be disabled by setting deprecation_warnings=False in ansible.cfg.
Executing playbook get_chassis_fan.yml
- Fan Inventory on hosts: all -
get Chassis Fan Inventory...
10.22.84.156 failed | msg: An unhandled exception occurred while templating '{{ bmc_root_password }}'. Error was a <class 'ansible.parsing.vault.AnsibleVaultError'>, original message: Attempting to decrypt but no vault secrets found
- Play recap -
10.22.84.156 : ok=0 changed=0 unreachable=0 failed=1 rescued=0 ignored=0🔒 Info: you should install optional prerequisites => See install ansible locally
The previous chapter create only encrypted variables in a vault-id named bull_password.
You are prompted to provide the vault password
You can specify a vault-password-file in ansible.cfg file
The following steps is an example of how to create a file that contains the vault password, to decrypt all passwords in passwords.yml file, but you can use whatever ansible vault technology you want, especially a python script instead of a clear vault password file
- create a file - preferably named bull_password.yml :
# ll /etc/ansible/bull_password.yml
-rw-r--r-- 1 root root 5 Dec 15 17:55 /etc/ansible/bull_password.yml- edit your ansible.cfg file
- uncomment the vault_password_file section
- add the /path/filename to your vault password file
# If set, configures the path to the Vault password file as an alternative to
# specifying --vault-password-file on the command line.
vault_password_file = /etc/ansible/bull_password.yml
- edit the file generate_encrypted_password_for_Ansible.sh, uncomment first line and comment second line:
# if you specify vault_password_file in your ansible.cfg, just uncomment first line and comment second line:
ANSIBLECMD="ansible-vault encrypt_string" # in ansible.cfg vault_password_file = /path/to/bull_password
# ANSIBLECMD="ansible-vault encrypt_string --vault-id bull_password@prompt"
- run the folowing command
# ../generate_encrypted_password_for_Ansible.sh --name "bmc_root_password" "my_secre!p@ssw0rd"where bmc_root_password is the name of your password and my_secre!p@ssw0rd is your real secret password
you can now generate as many encrypted password variables as needed and play your playbooks without been prompted to the vault password
👍 Best Practice: Vault passwords could be retrieved from python script. For more information See https://docs.ansible.com/ansible/latest/user_guide/vault.html
You can use the directory ansible/playbooks to add your own playbooks.
- This branch corresponds to the release actively under development.
This project is licensed under GPL-3.0 License. Please see the LICENSE for more information
Version: PFMCLI_ANSIBLE_MESCA5 1.0.0

