Static sites are the future of Web: fast, secure, and scalable by design. We say that they are the future of e-commerce as well (enterprise included) and this tutorial aims to demonstrate our statement. Before getting started, you can get a high-level overview of how it works on the Contentful blog and play with the live demo here.
TIP: Use the 4111 1111 1111 1111 test card (with any CVV and future expiration date) if you want to place a test order.
- Create the content model
- Import test data into Contentful
- Enrich the product catalogue
- Create the Jekyll site and import catalogues
- Create a custom page generator
- Add ecommerce to the site
- Summary
The first step of our tutorial requires a Contentful account. If you don't have an account, you can create one for free here. Once logged in, create an empty space and take note of the following credentials:
- Organization ID
- Space ID
- Content management access token
- Content delivery access token
Then create the ~/.contentfulrc file and store all your credentials as follows:
# .contentfulrc

[global]
CONTENTFUL_ORGANIZATION_ID = <ORGANIZATION_ID>
CONTENTFUL_MANAGEMENT_ACCESS_TOKEN = <CONTENT_MANAGEMENT_ACCESS_TOKEN>

[Contentful Commerce]
CONTENTFUL_SPACE_ID = <SPACE_ID>
CONTENTFUL_DELIVERY_ACCESS_TOKEN = <CONTENT_DELIVERY_ACCESS_TOKEN>
Now download the content_model.json file from our repo and bootstrap you space as follows:
$ gem install contentful_bootstrap
$ contentful_bootstrap update_space <SPACE_ID> -j path/to/content_model.json
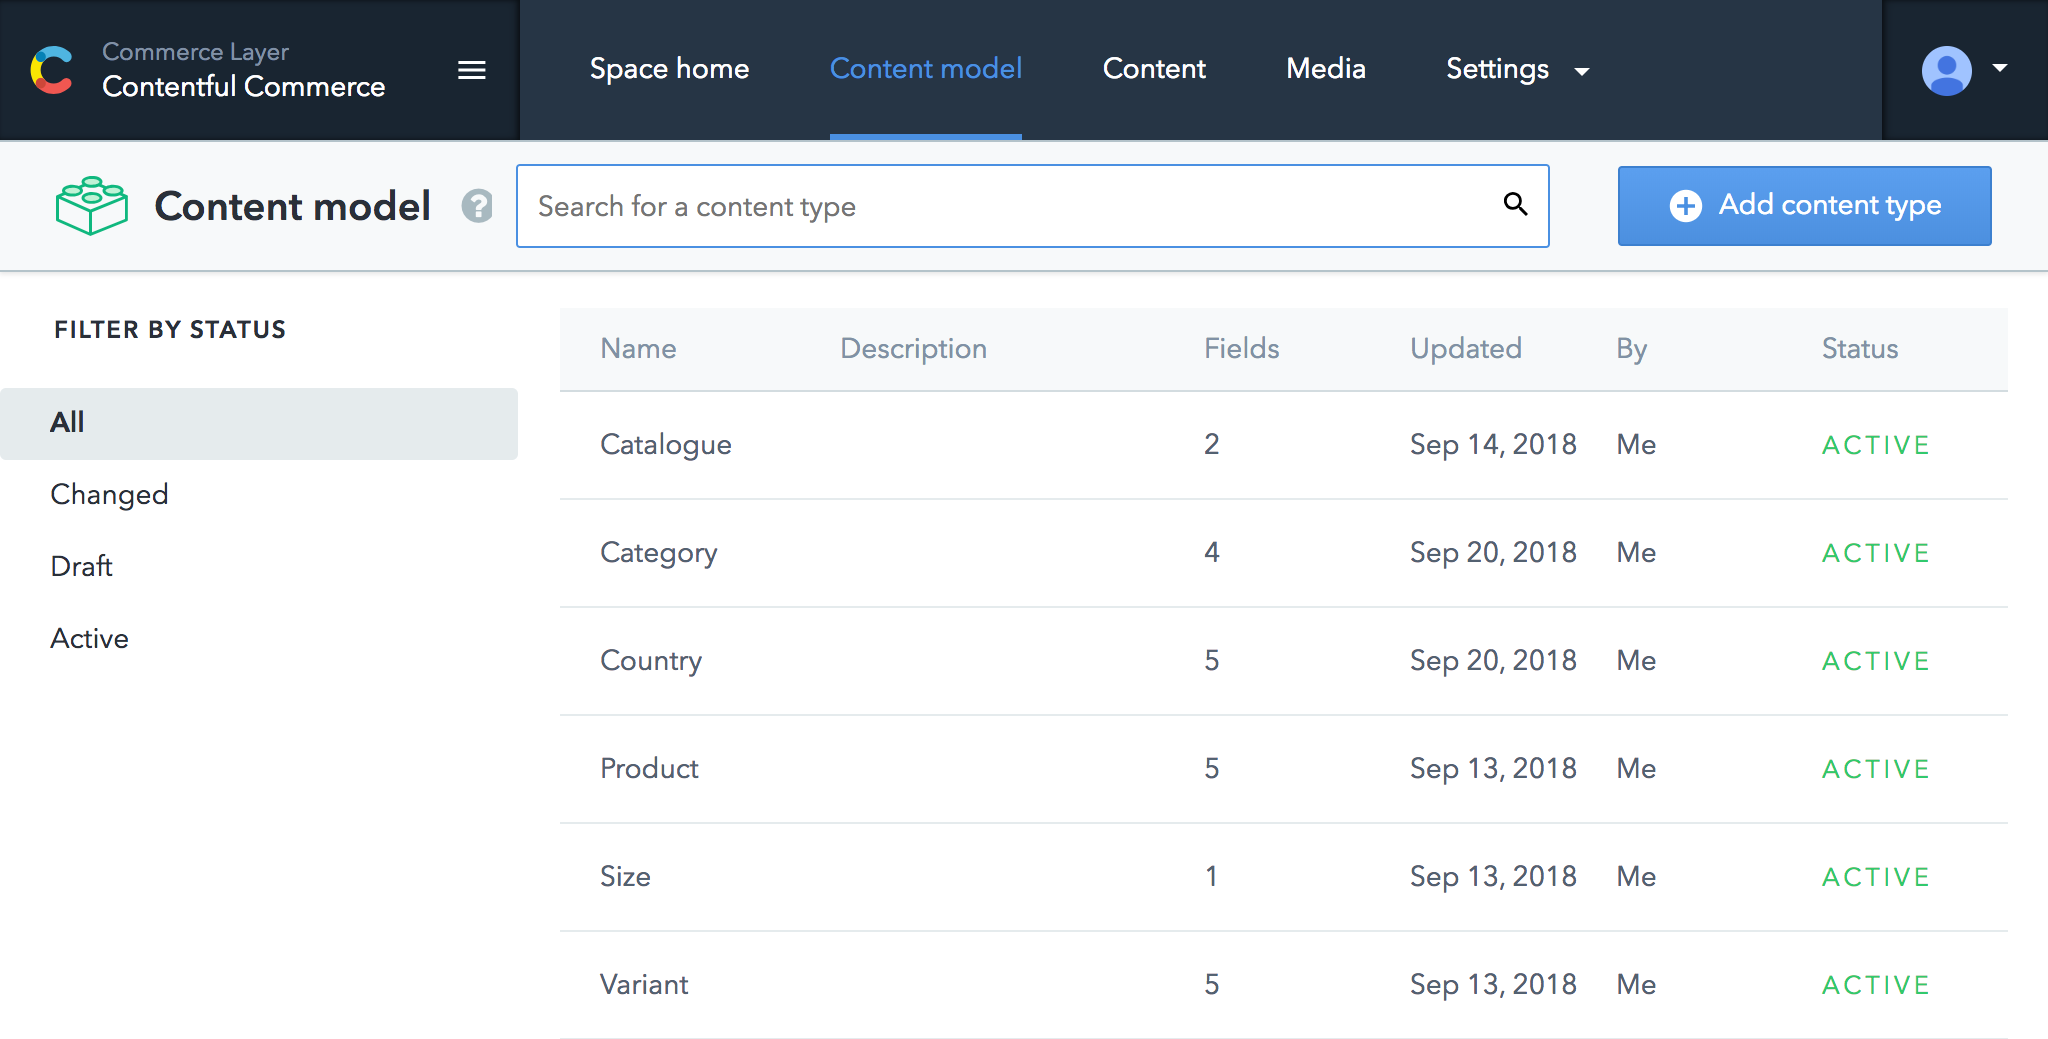
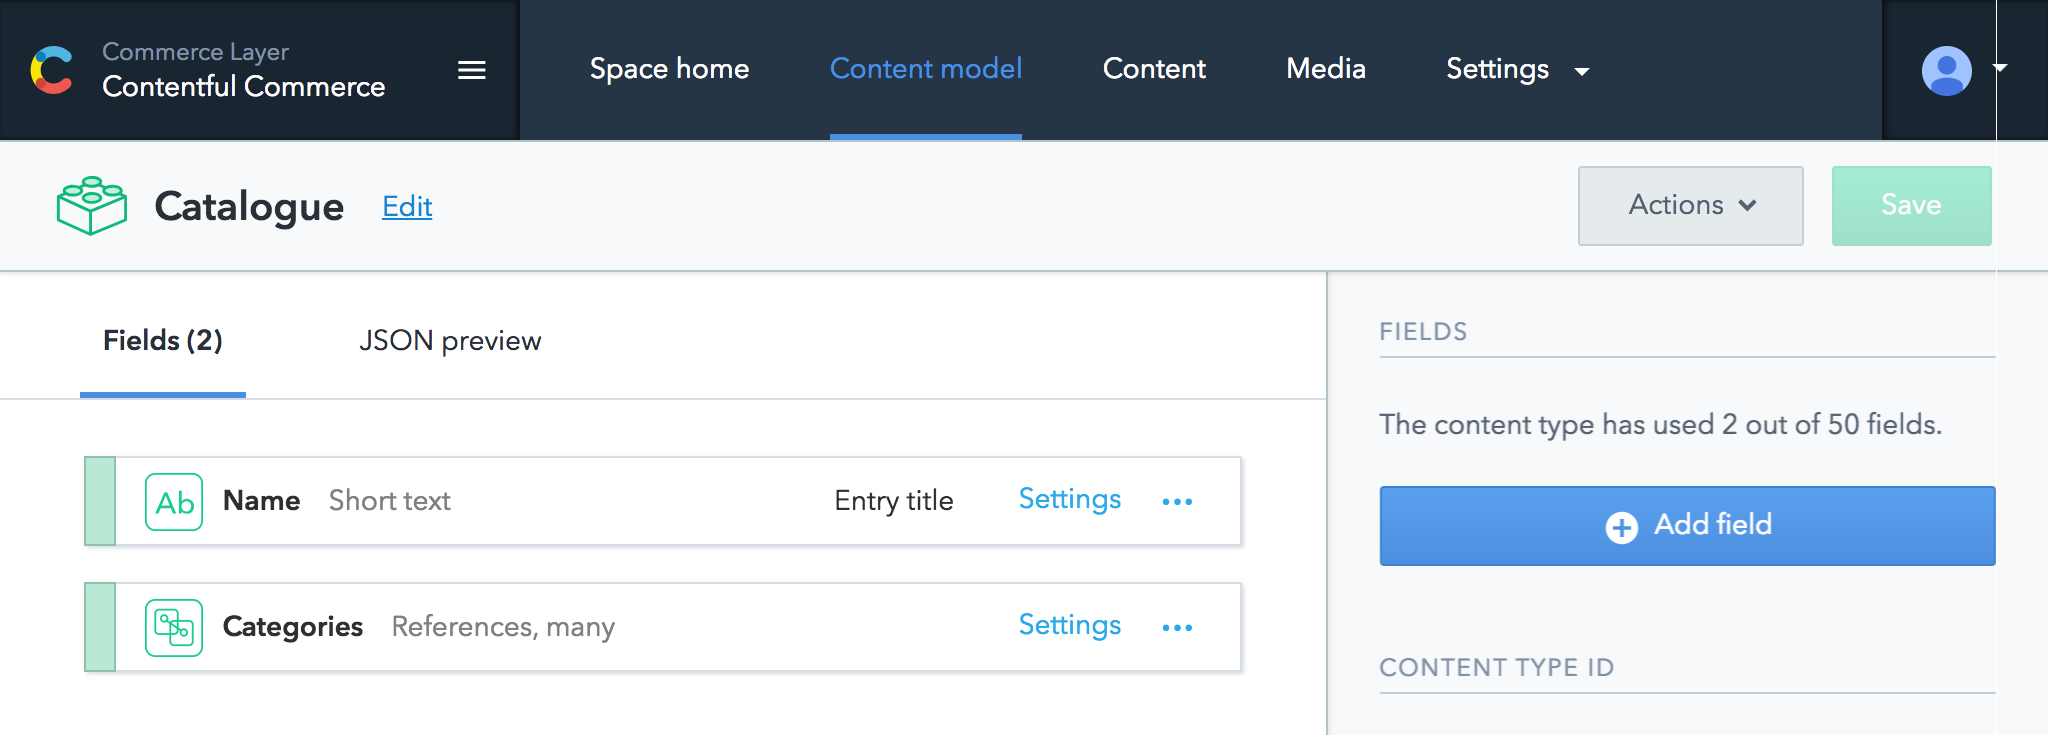
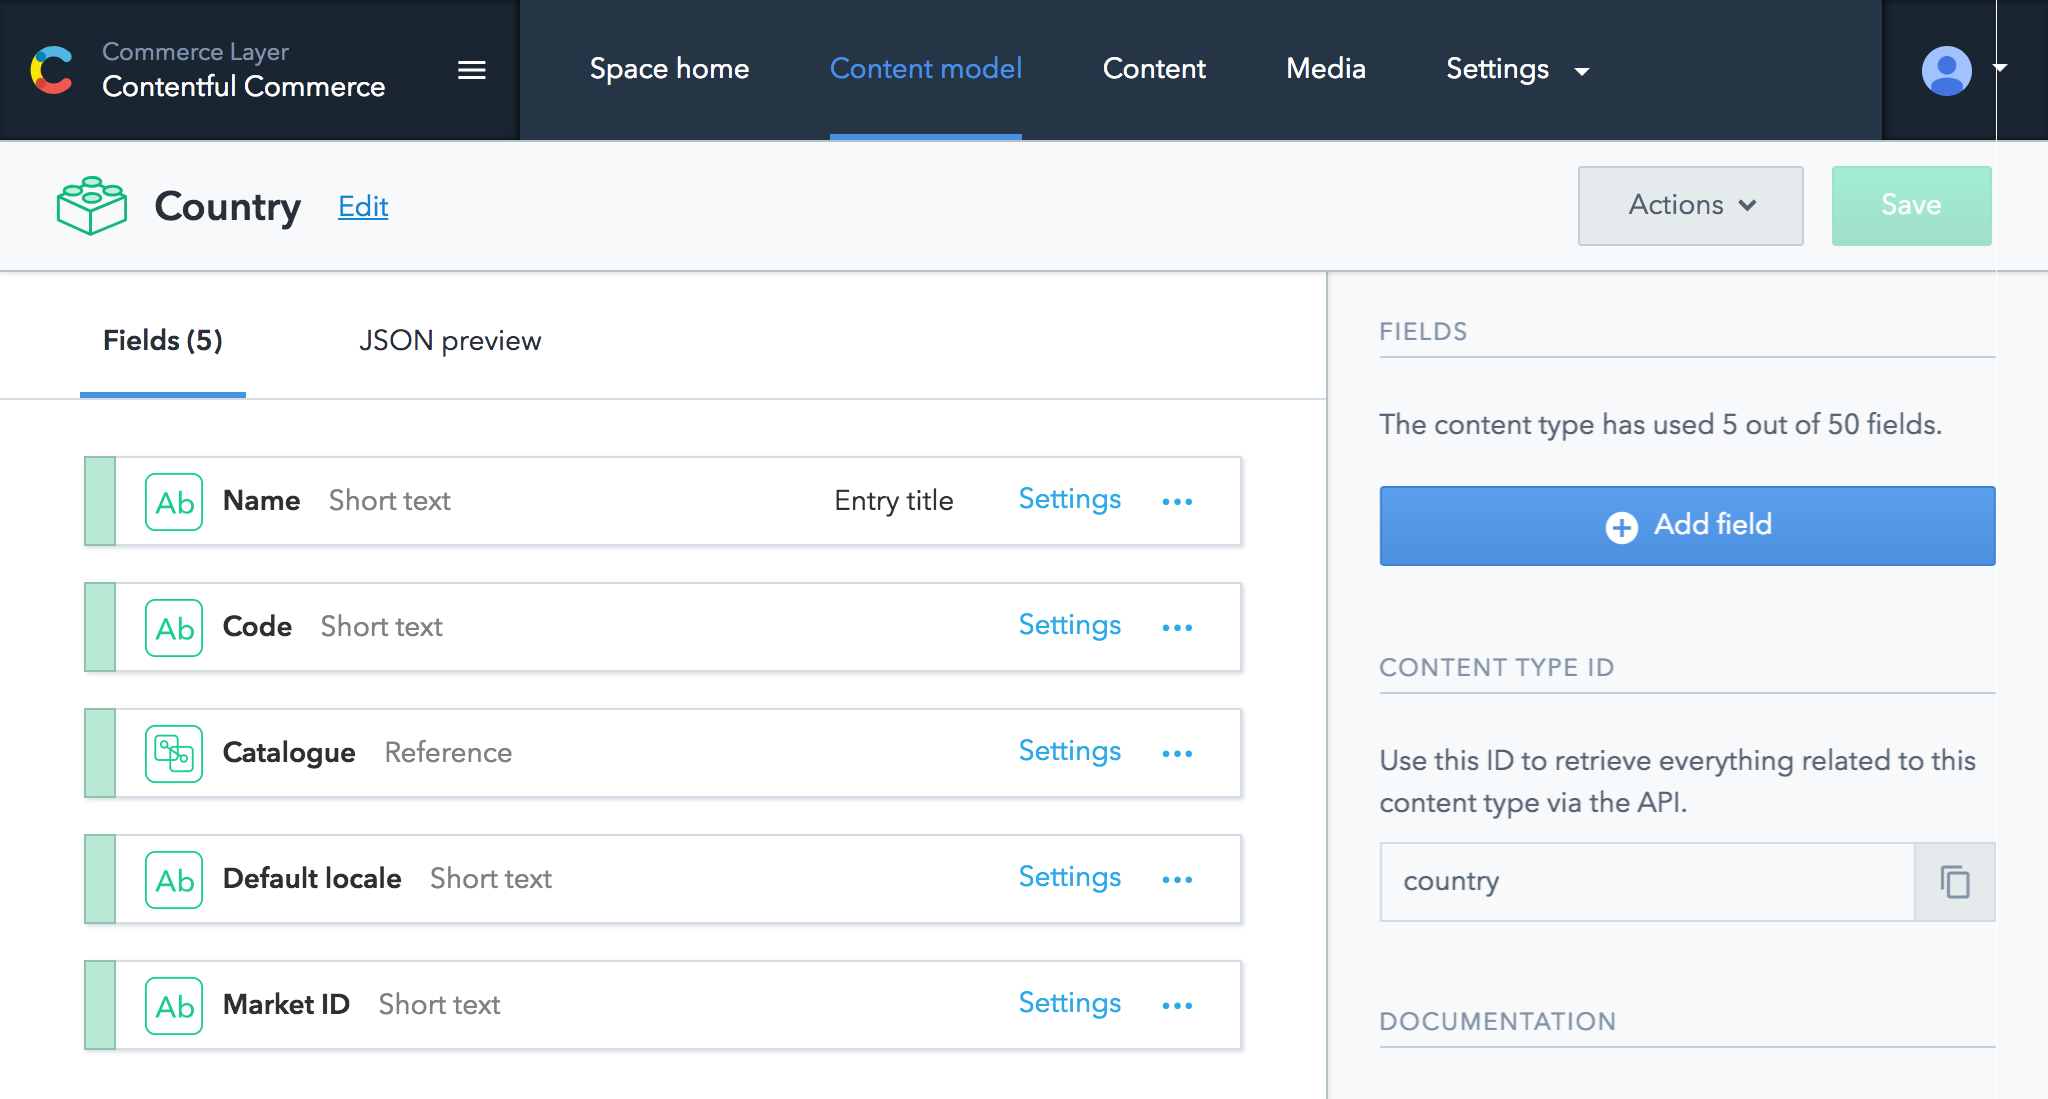
This will create your content model, that should look like this:
Let's take a look at each model.
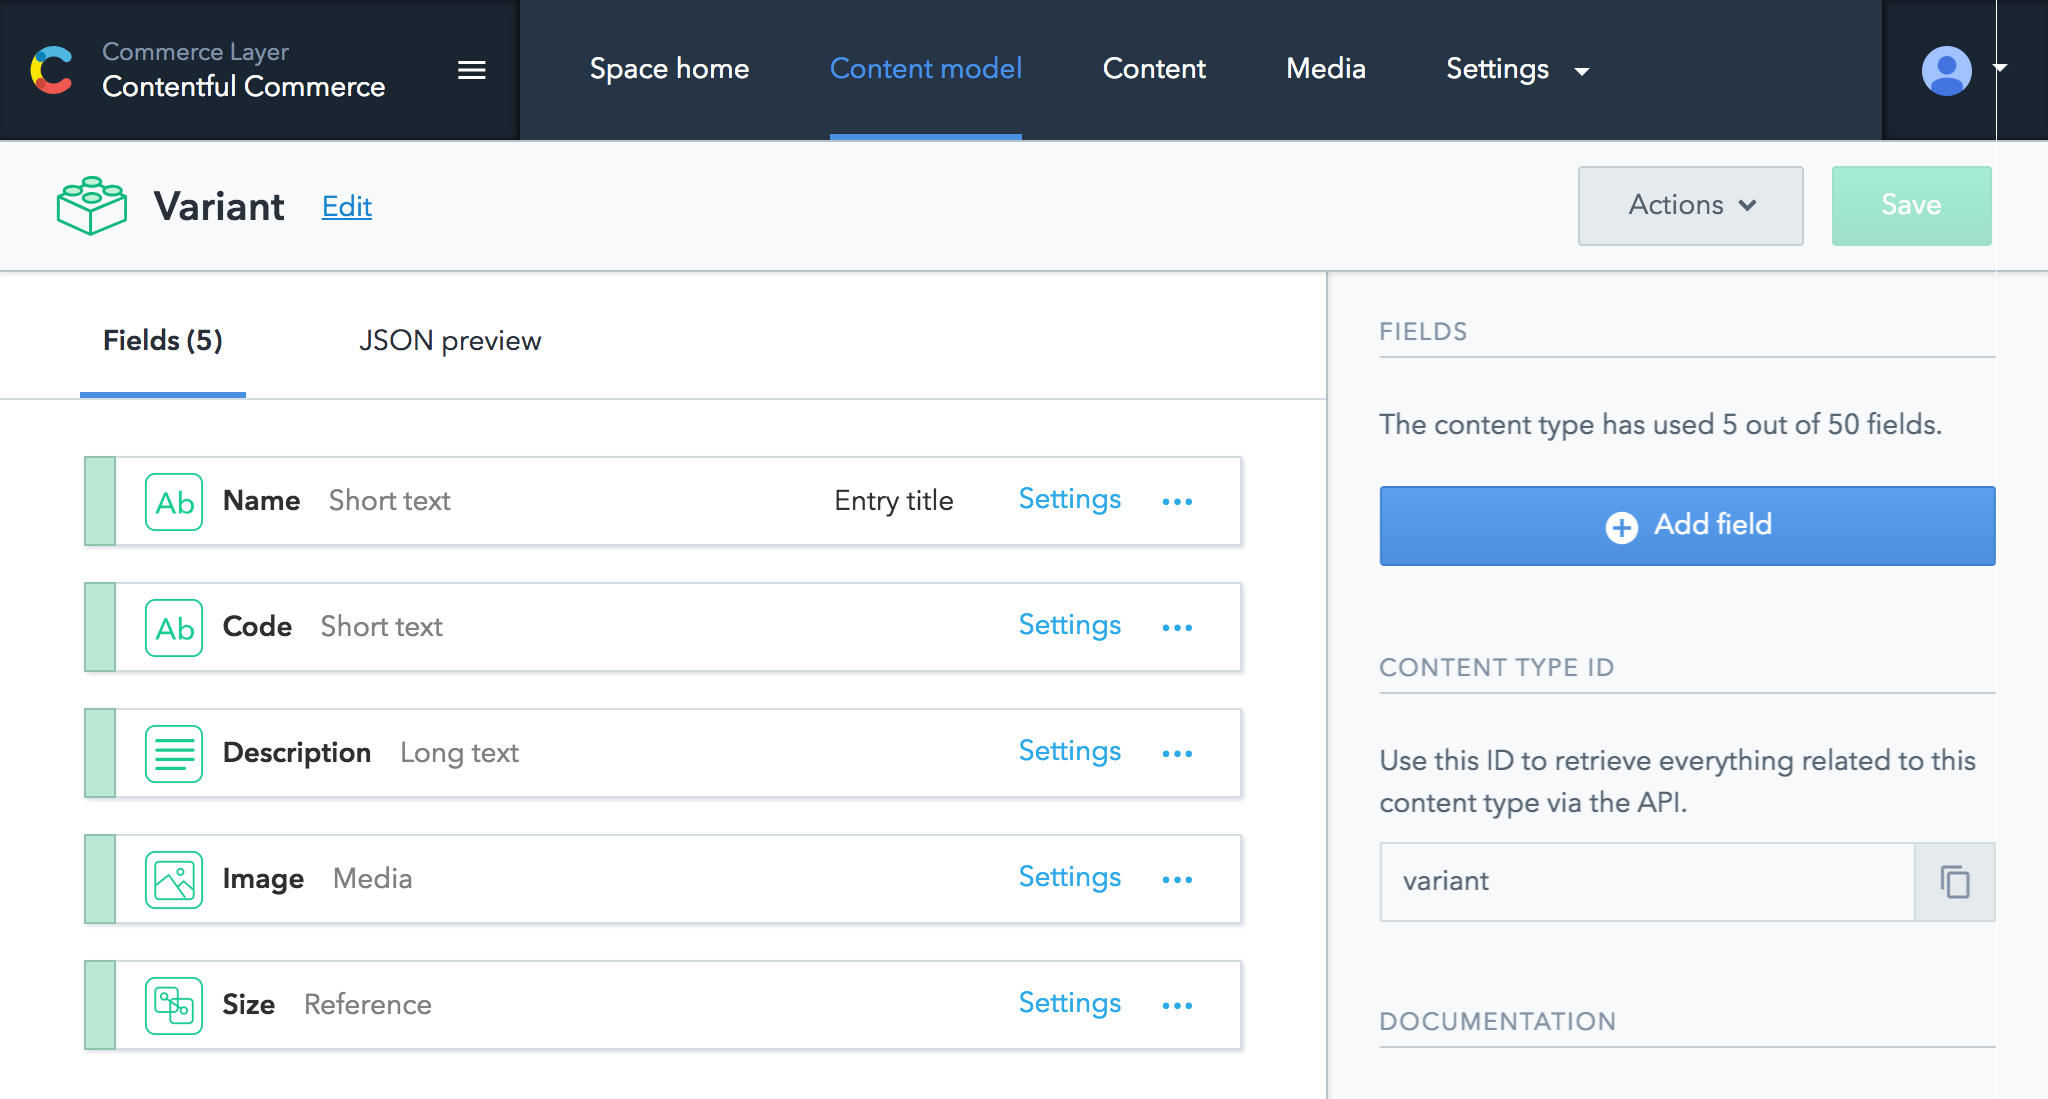
Variants represent the items that are being sold. The most relevant attribute is Code that will be used as the reference (SKU) to make them shoppable through Commerce Layer (more on this later). Also, note that each variant can be linked to a Size.
Sizes are very simple models with a name, that will be one of "Small", "Medium", "Large" for T-shirts or "18x24" for poster and canvas.
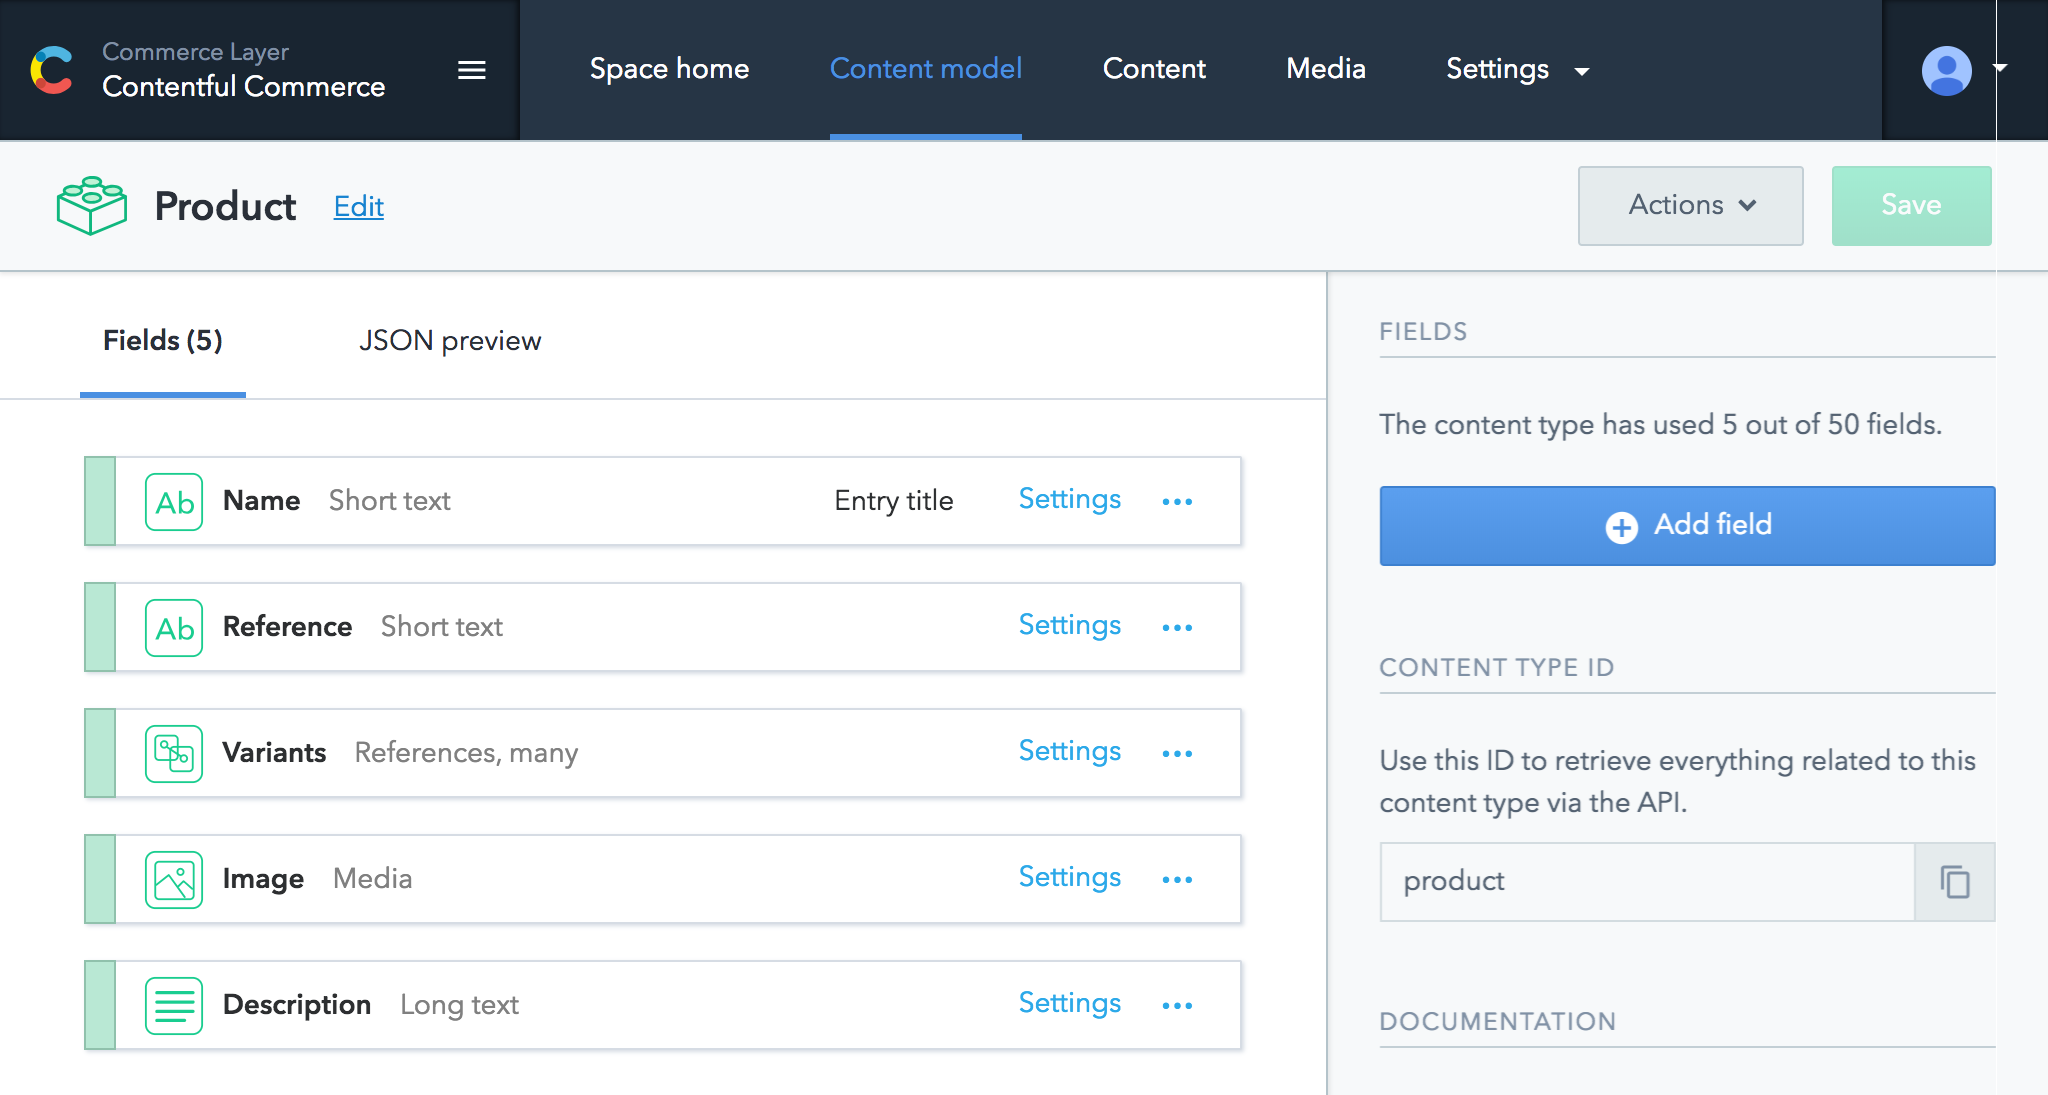
Products group variants of the same type (and different sizes). Products can have their own images and descriptions and can be merchandised by category.
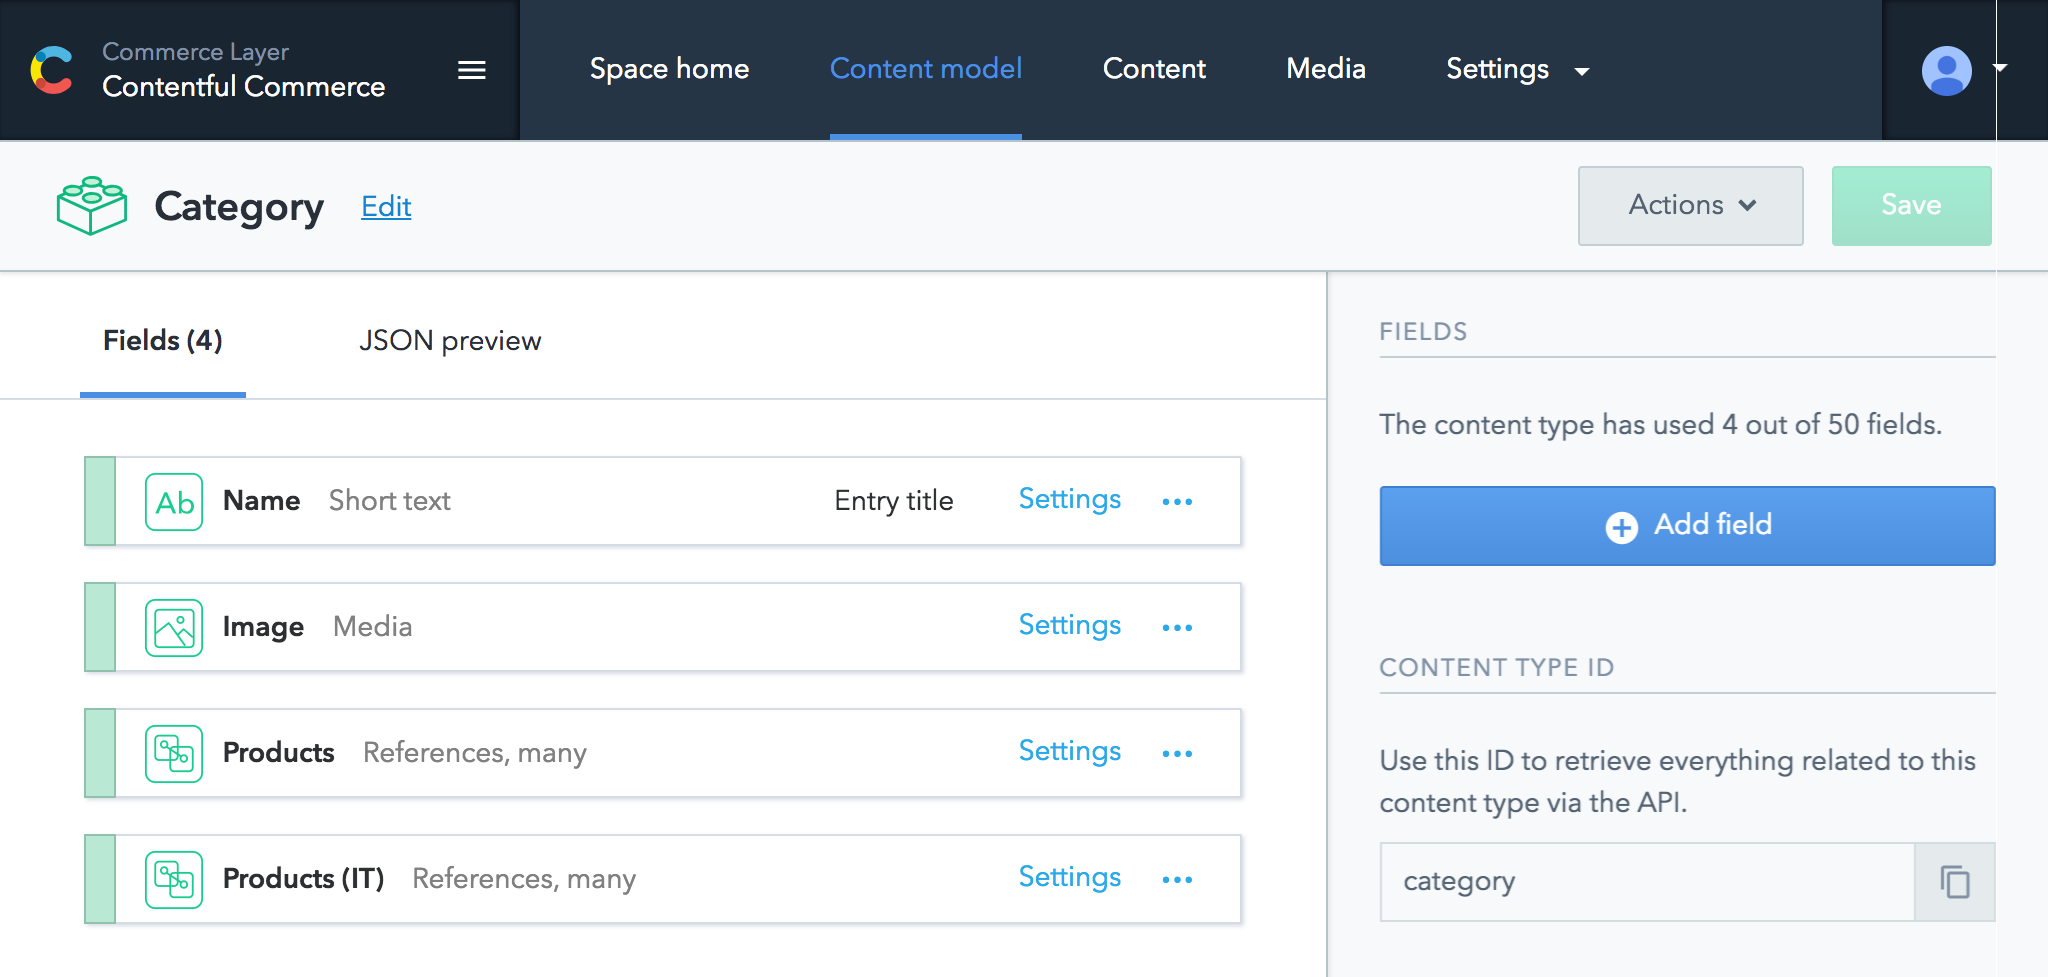
Categories are used to group products of the same type. Note that we defined two different associations, one named Products and another named Products (IT). This is a convention that will let merchandisers define a base product selection and sorting and eventually override it by country. When generating the catalogue pages for a given country, we will first check if that country (Italy in our case) has a dedicated association. If not, we will fall back to the default one.
Catalogues contain a list of categories, that can be selected and sorted independently. Each country will have its own catalogue and it will be possible to share the same catalogue between multiple countries.
Countries represent the top level of our content model. Take note of the Market ID attribute. Within Commerce Layer, the Market model lets you define a merchant, a price list, and an inventory model. Moreover, all shipping methods, payment methods, and promotions are defined by market. So the Market ID attribute will let us associate different business models to each country or share the same market configuration between multiple countries.
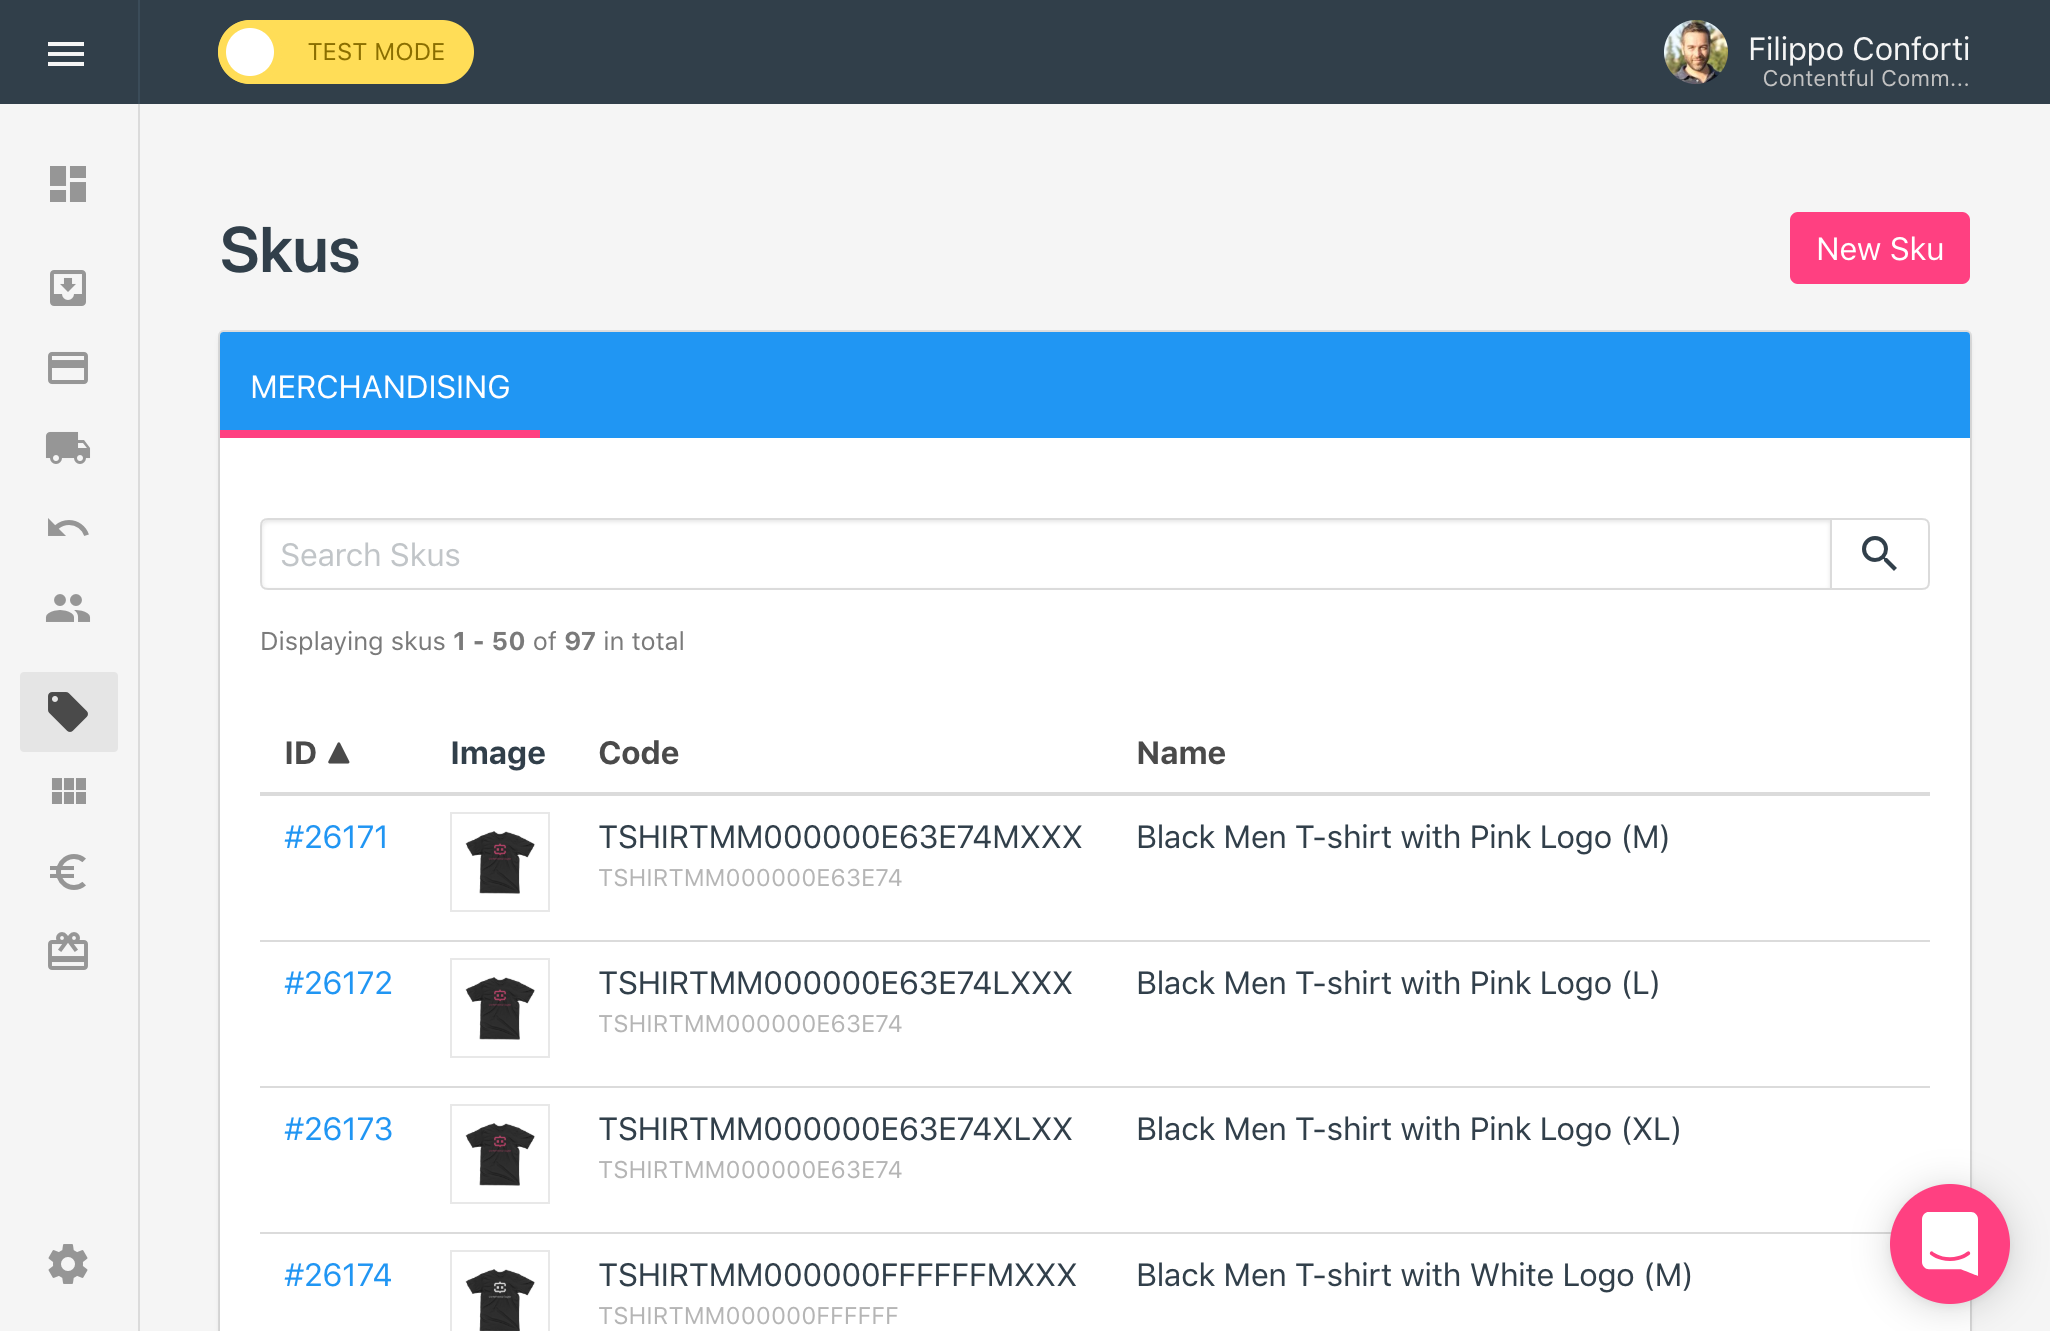
Once created the content model, we need to populate Contentful with some test data. To do that, create a free developer account on Commerce Layer. You will be prompted to create a sample organization and seed it with test data. In a few seconds, your sample organization will be populated with about 100 SKUs like the following:
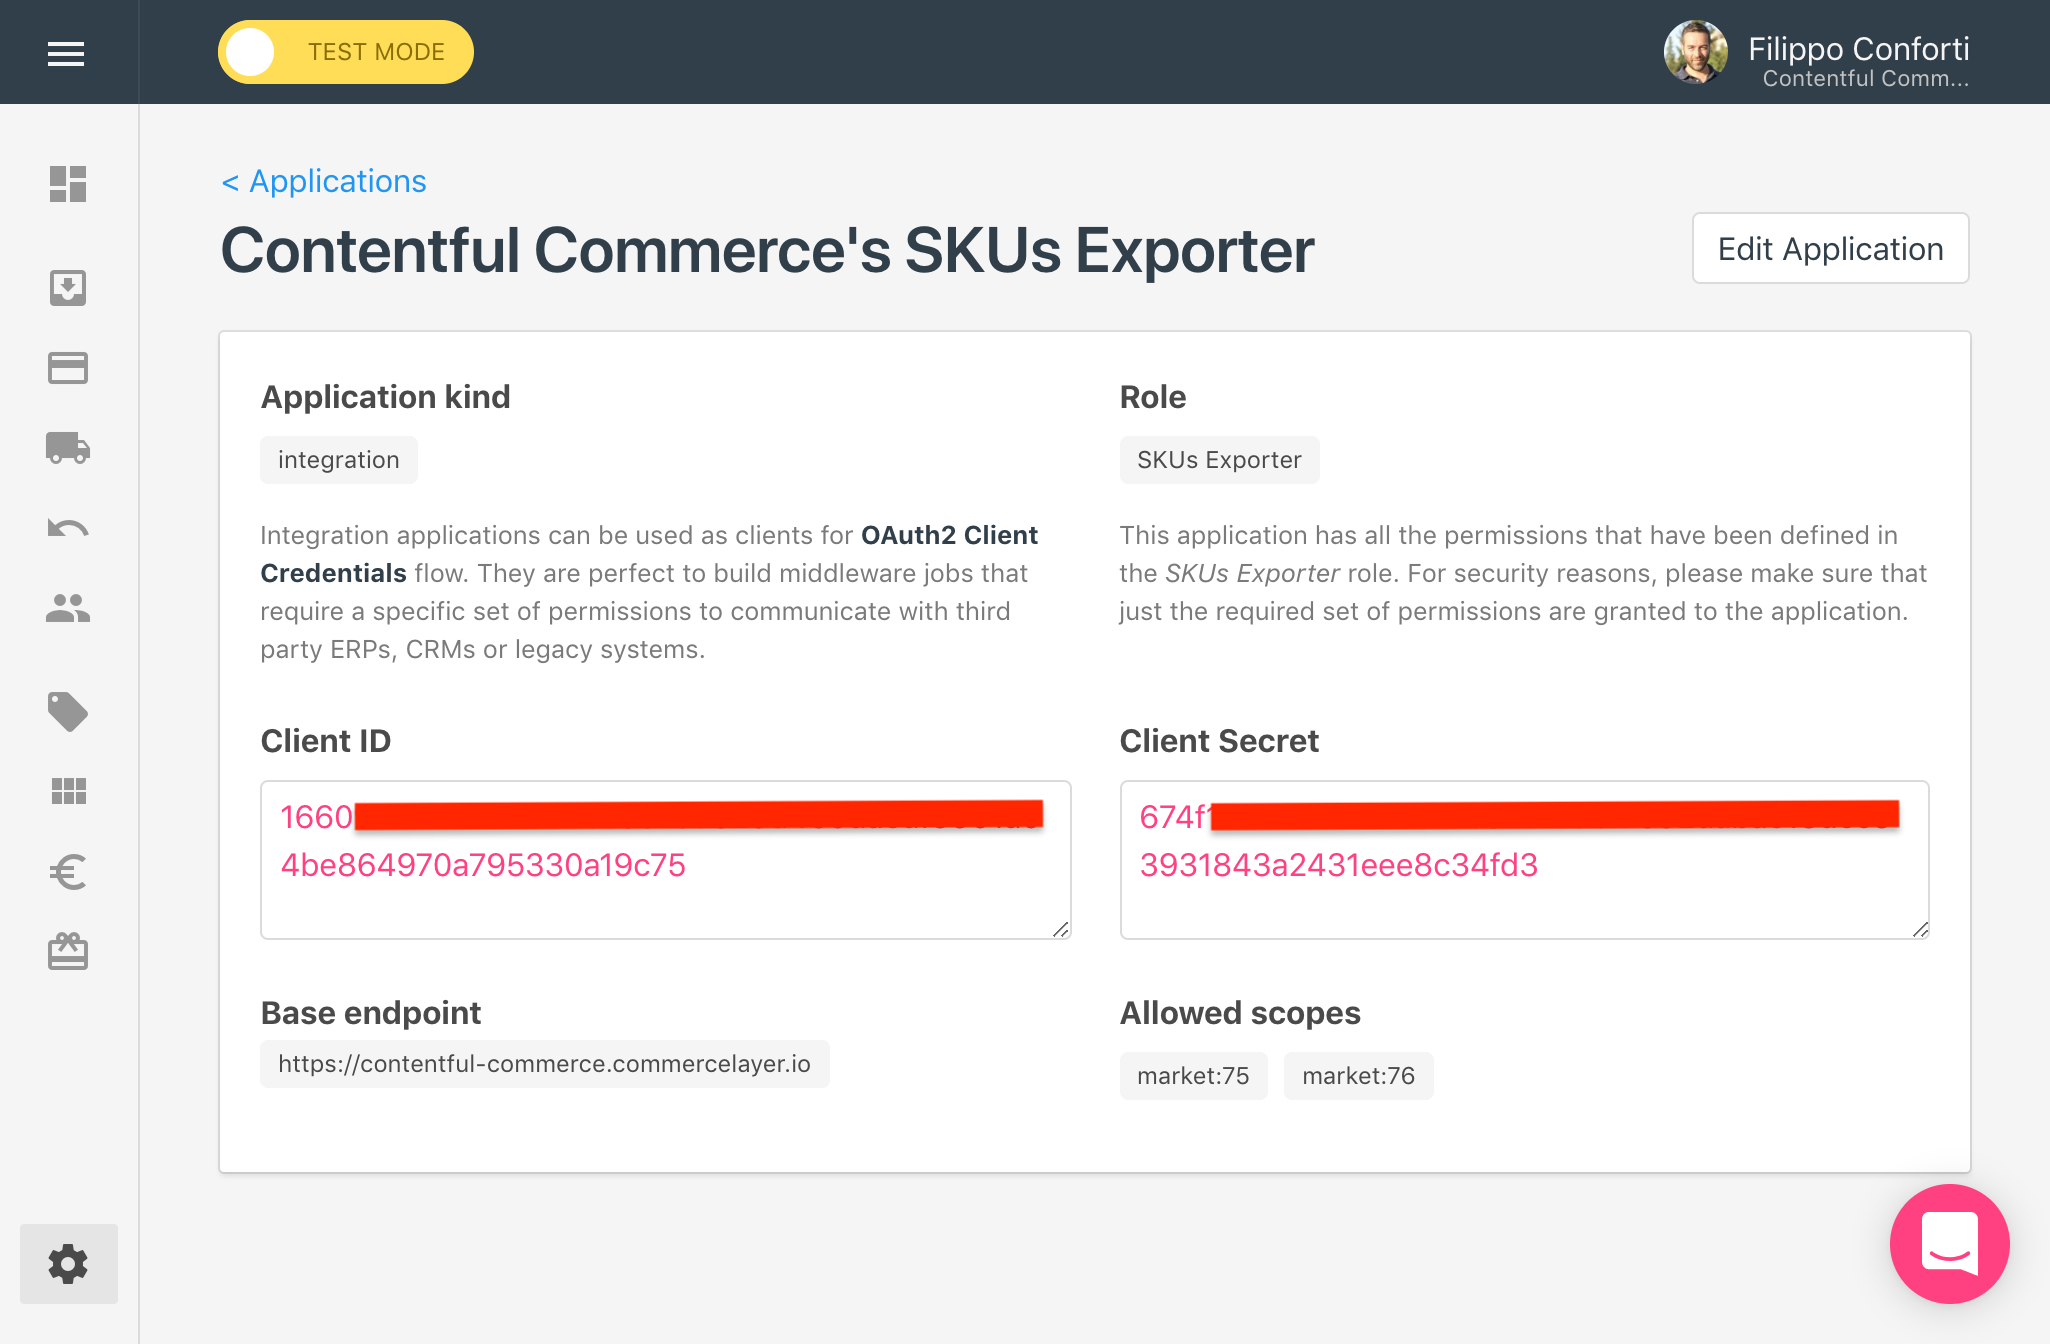
The seeder will also create two markets (EU and US) and an OAuth2 application. Take note of the application credentials, including the base endpoint.
Then create the ~/.commercelayer-cli.yml file on your local environment and store all your credentials as follows:
# .commercelayer-cli.yml

commercelayer:
  site: <your_base_endpoint>
  client_id: <your_client_id>
  client_secret: <your_client_secret>
contentful:
  space: <your_space_id>
  access_token: <your_access_token>
Finally, export your sample data into Contentful by running the following commands:
$ gem install commercelayer-cli
$ commercelayer-cli export contentful
The SKUs that we exported from Commerce Layer to Contentful created a list of variants and products, using the SKU references to automatically associate variants to products. Now we need to enrich the catalog on Contentful with product images, descriptions and categories. For the sake of simplicity, we skip this part of the tutorial. Anyway, it's important to notice how this process is independent of the ecommerce platform. Content editors are not locked into any templating system or front-end framework. They are free to create any content. The product prices and the stock will be managed by Commerce Layer transparently, as well as the shopping cart and checkout experience.
Now that we have all our content and commerce models set up, it's time to create the website. Run the following commands to install Jekyll and create a blank site:
$ gem install bundler jekyll
$ jekyll new contentful-commerce --blank
$ cd contentful-commerce
$ rm -r _drafts _posts
$ bundle init
Add the jekyll-contentful-data-import gem to the project Gemfile and update the bundle:
# Gemfile

gem "jekyll"

group :jekyll_plugins do
  gem "jekyll-contentful-data-import"
  gem "activesupport", require: "active_support/inflector"
end
$ bundle
Change the Jekyll configuration as follows:
# _config.yml

contentful:
  spaces:
    - en-US:
        space: ENV_CONTENTFUL_SPACE_ID
        access_token: ENV_CONTENTFUL_DELIVERY_ACCESS_TOKEN
        all_entries: true
        cda_query:
          locale: "en-US"
    - it:
        space: ENV_CONTENTFUL_SPACE_ID
        access_token: ENV_CONTENTFUL_DELIVERY_ACCESS_TOKEN
        all_entries: true
        cda_query:
          locale: "it"
Export you Contentful credentials as the following ENV variables
# .bash_profile
export CONTENTFUL_SPACE_ID=<SPACE_ID>
export CONTENT_DELIVERY_ACCESS_TOKEN=<CONTENT_DELIVERY_ACCESS_TOKEN>
Finally, run the following command:
$ bundle exec jekyll contentful
This will import your data into your Jekyll site, like this. What we need is to generate a page for each catalogue, category and product, all scoped by country and language. Since Jekyll doesn't generate data pages out of the box, we need to create a custom generator.
The custom generator should iterate over the imported data and create all the required pages. You can explore the generator and page modules in the plugins directory of our repo. We also need to create the catalogue, category, and product templates before starting the server and get our first version of the site:
$ bundle exec jekyll serve
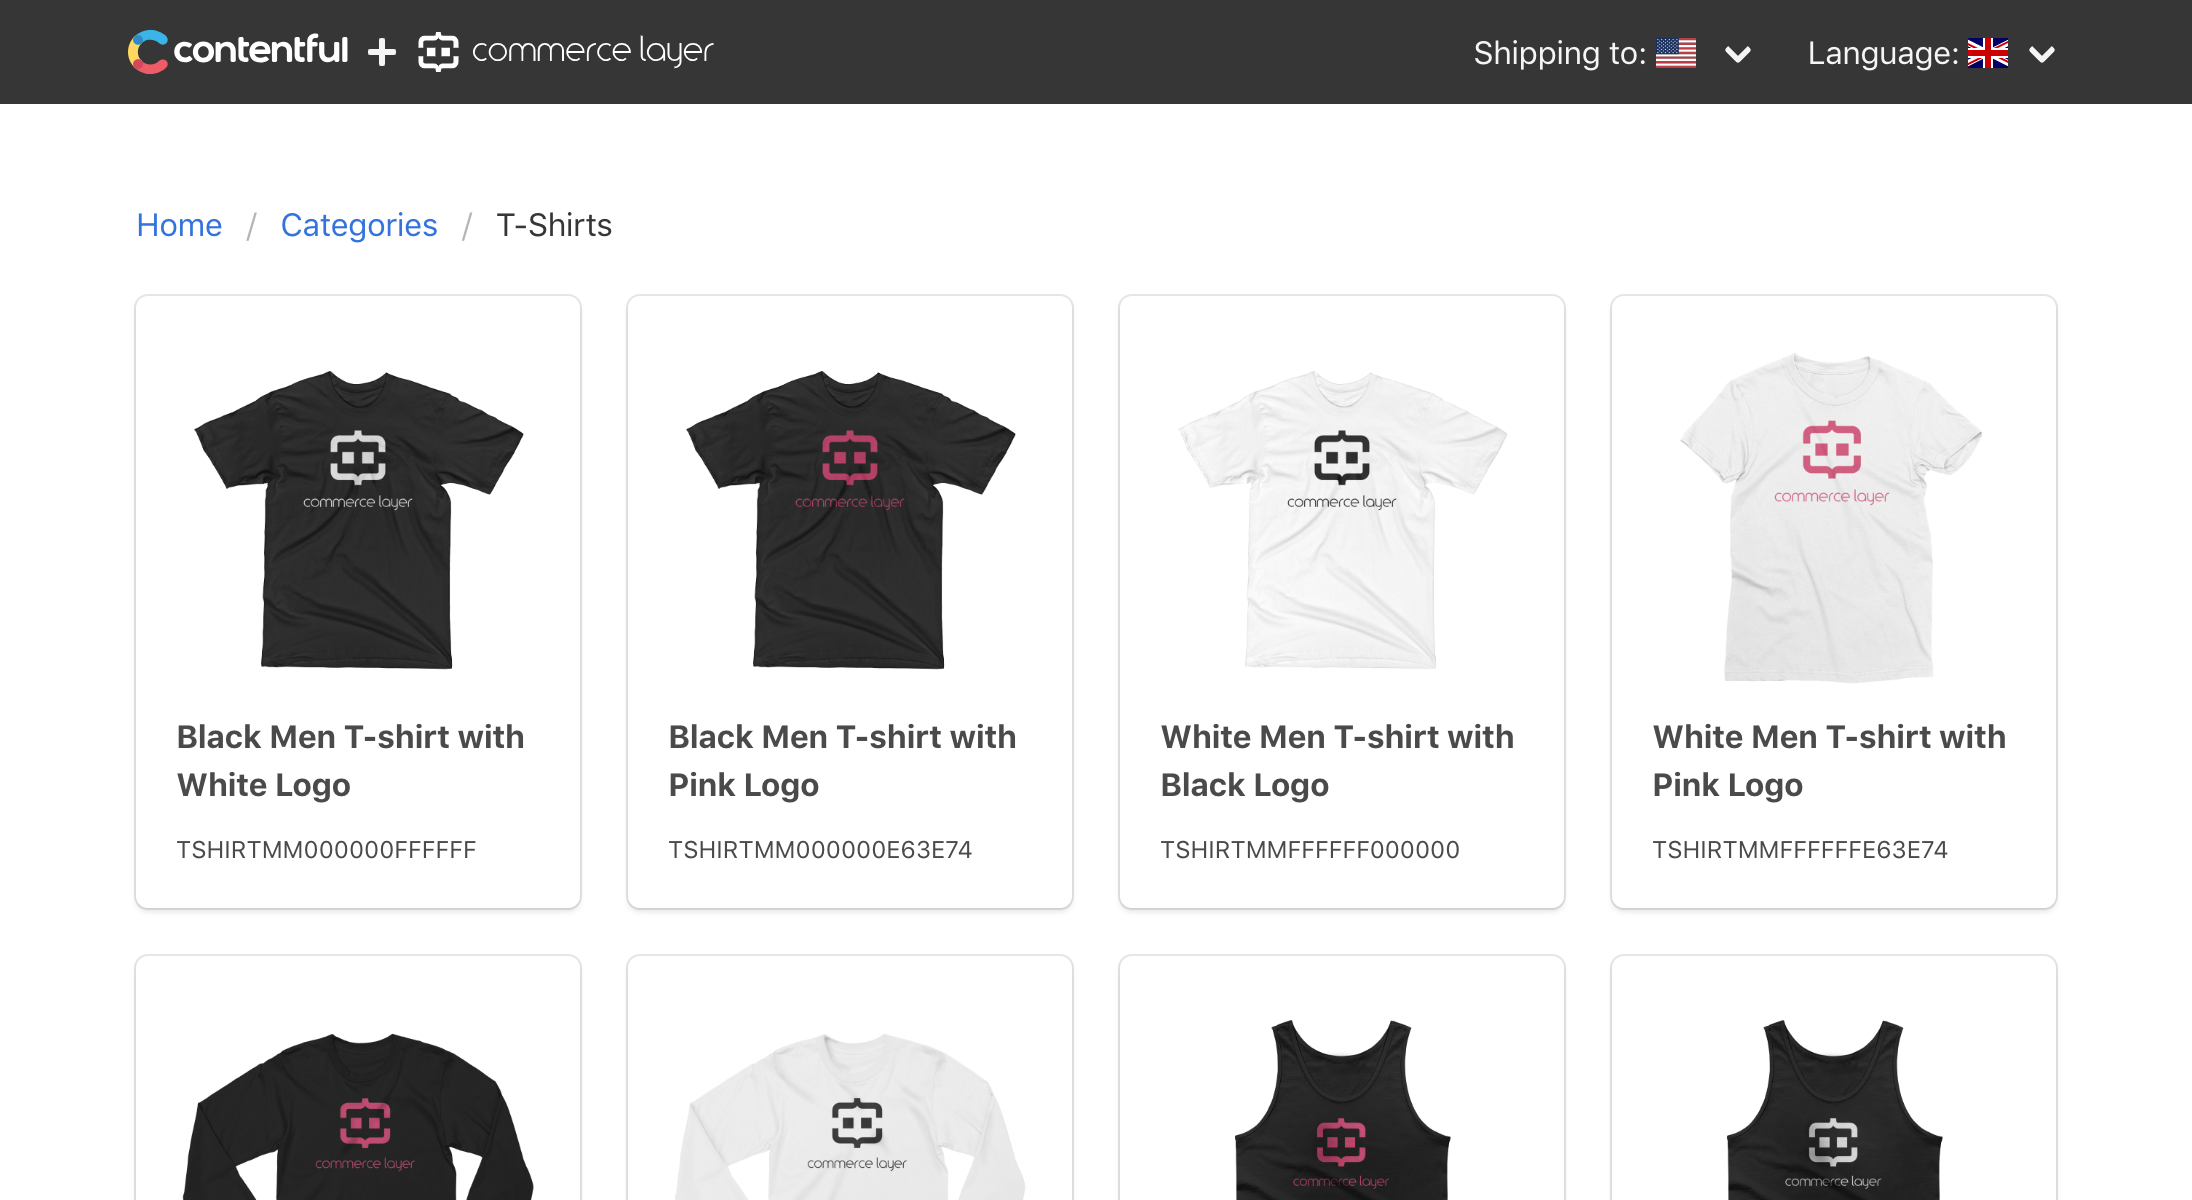
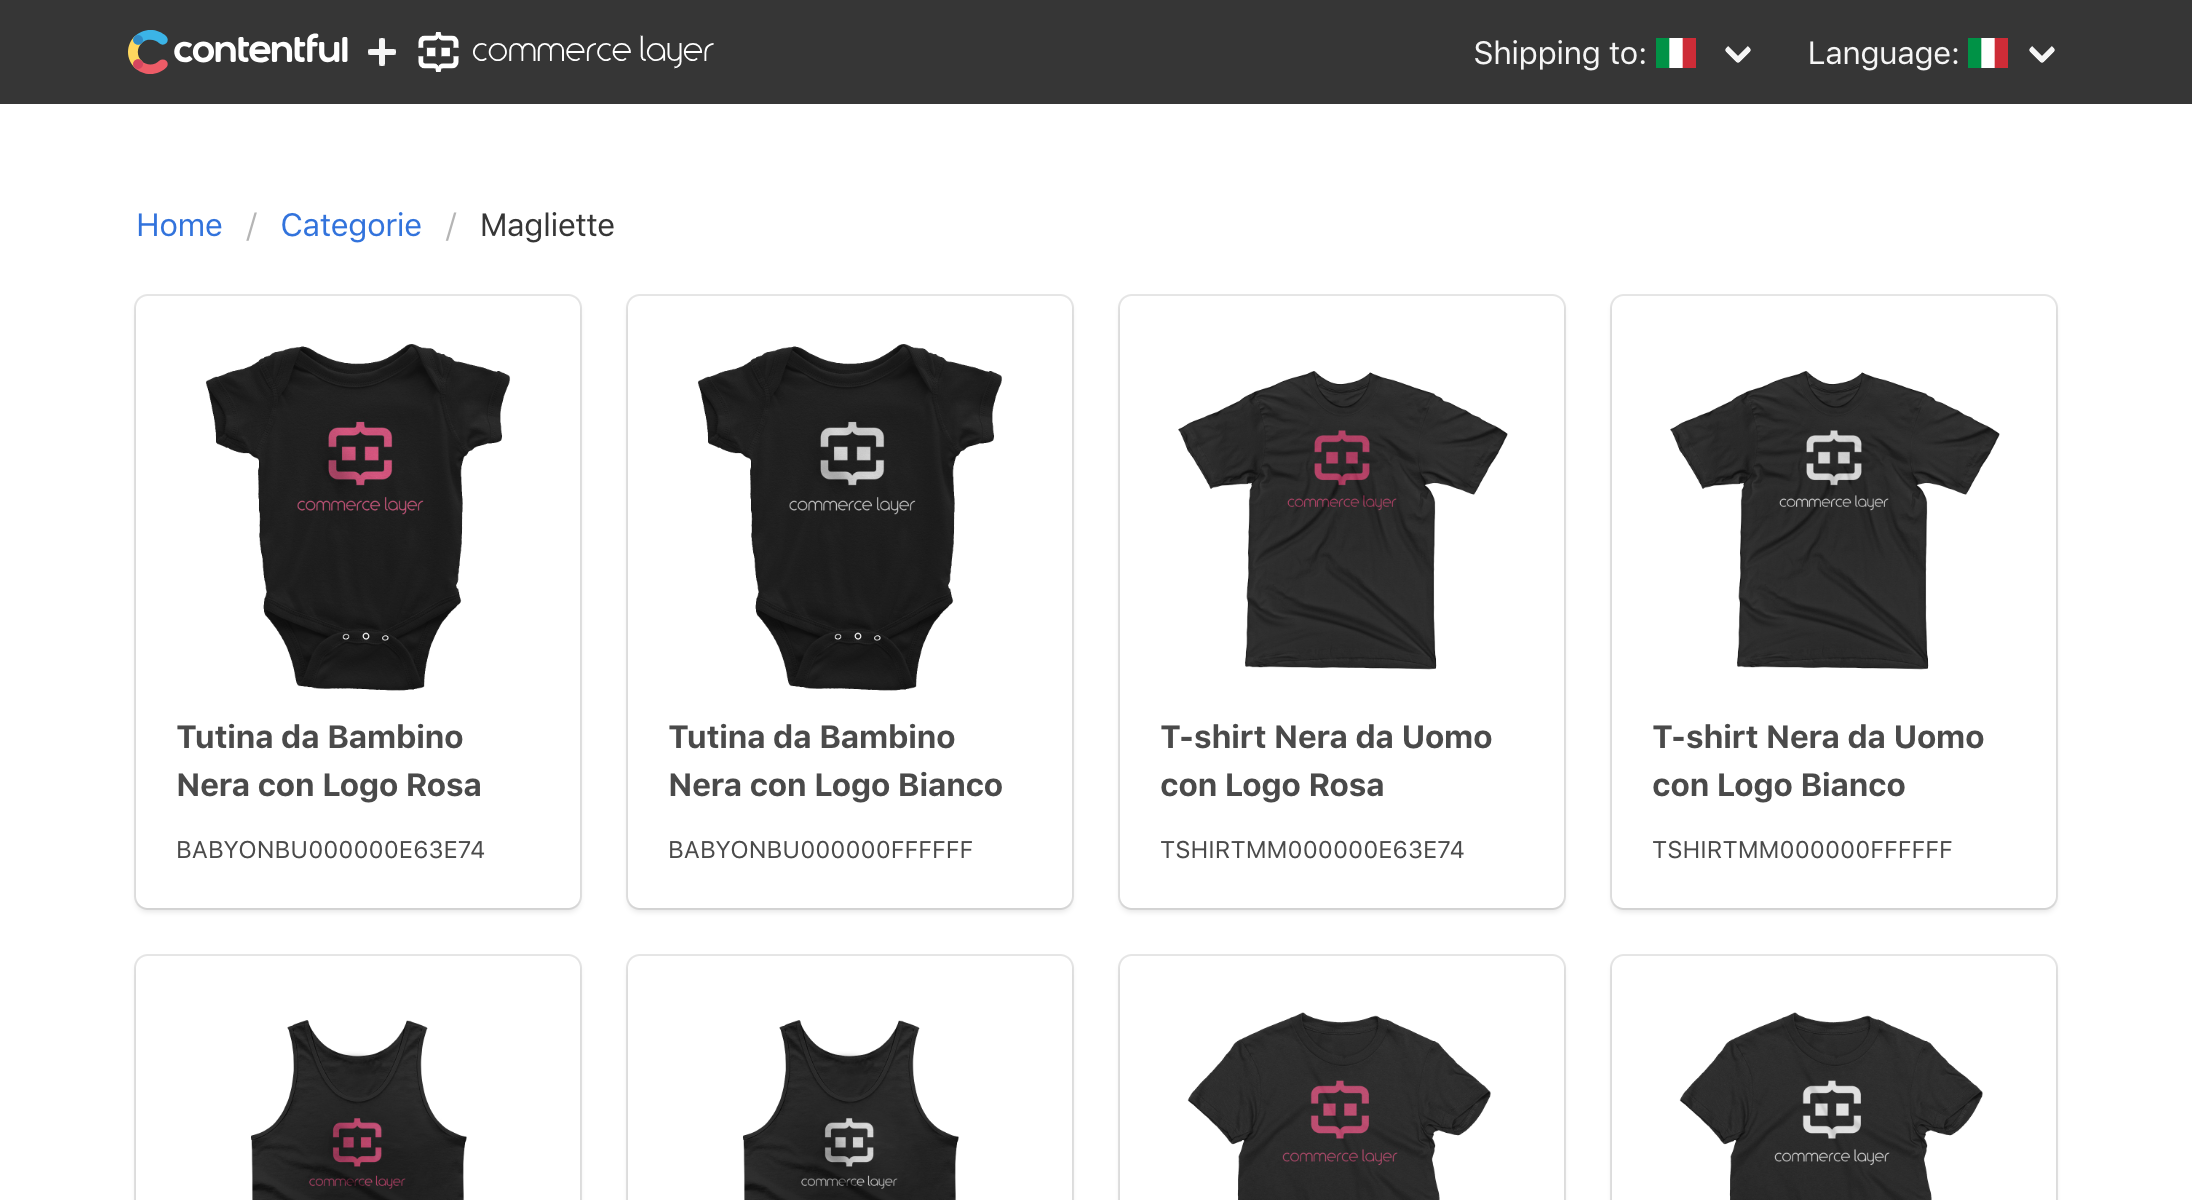
It's worth to notice that all the pages and URLs are localized, optimizing SEO. Moreover, the T-shirts category has a different merchandising for the two countries:
US 🇺🇸
IT 🇮🇹
The site has no prices yet. Time to add ecommerce to our beautiful products.
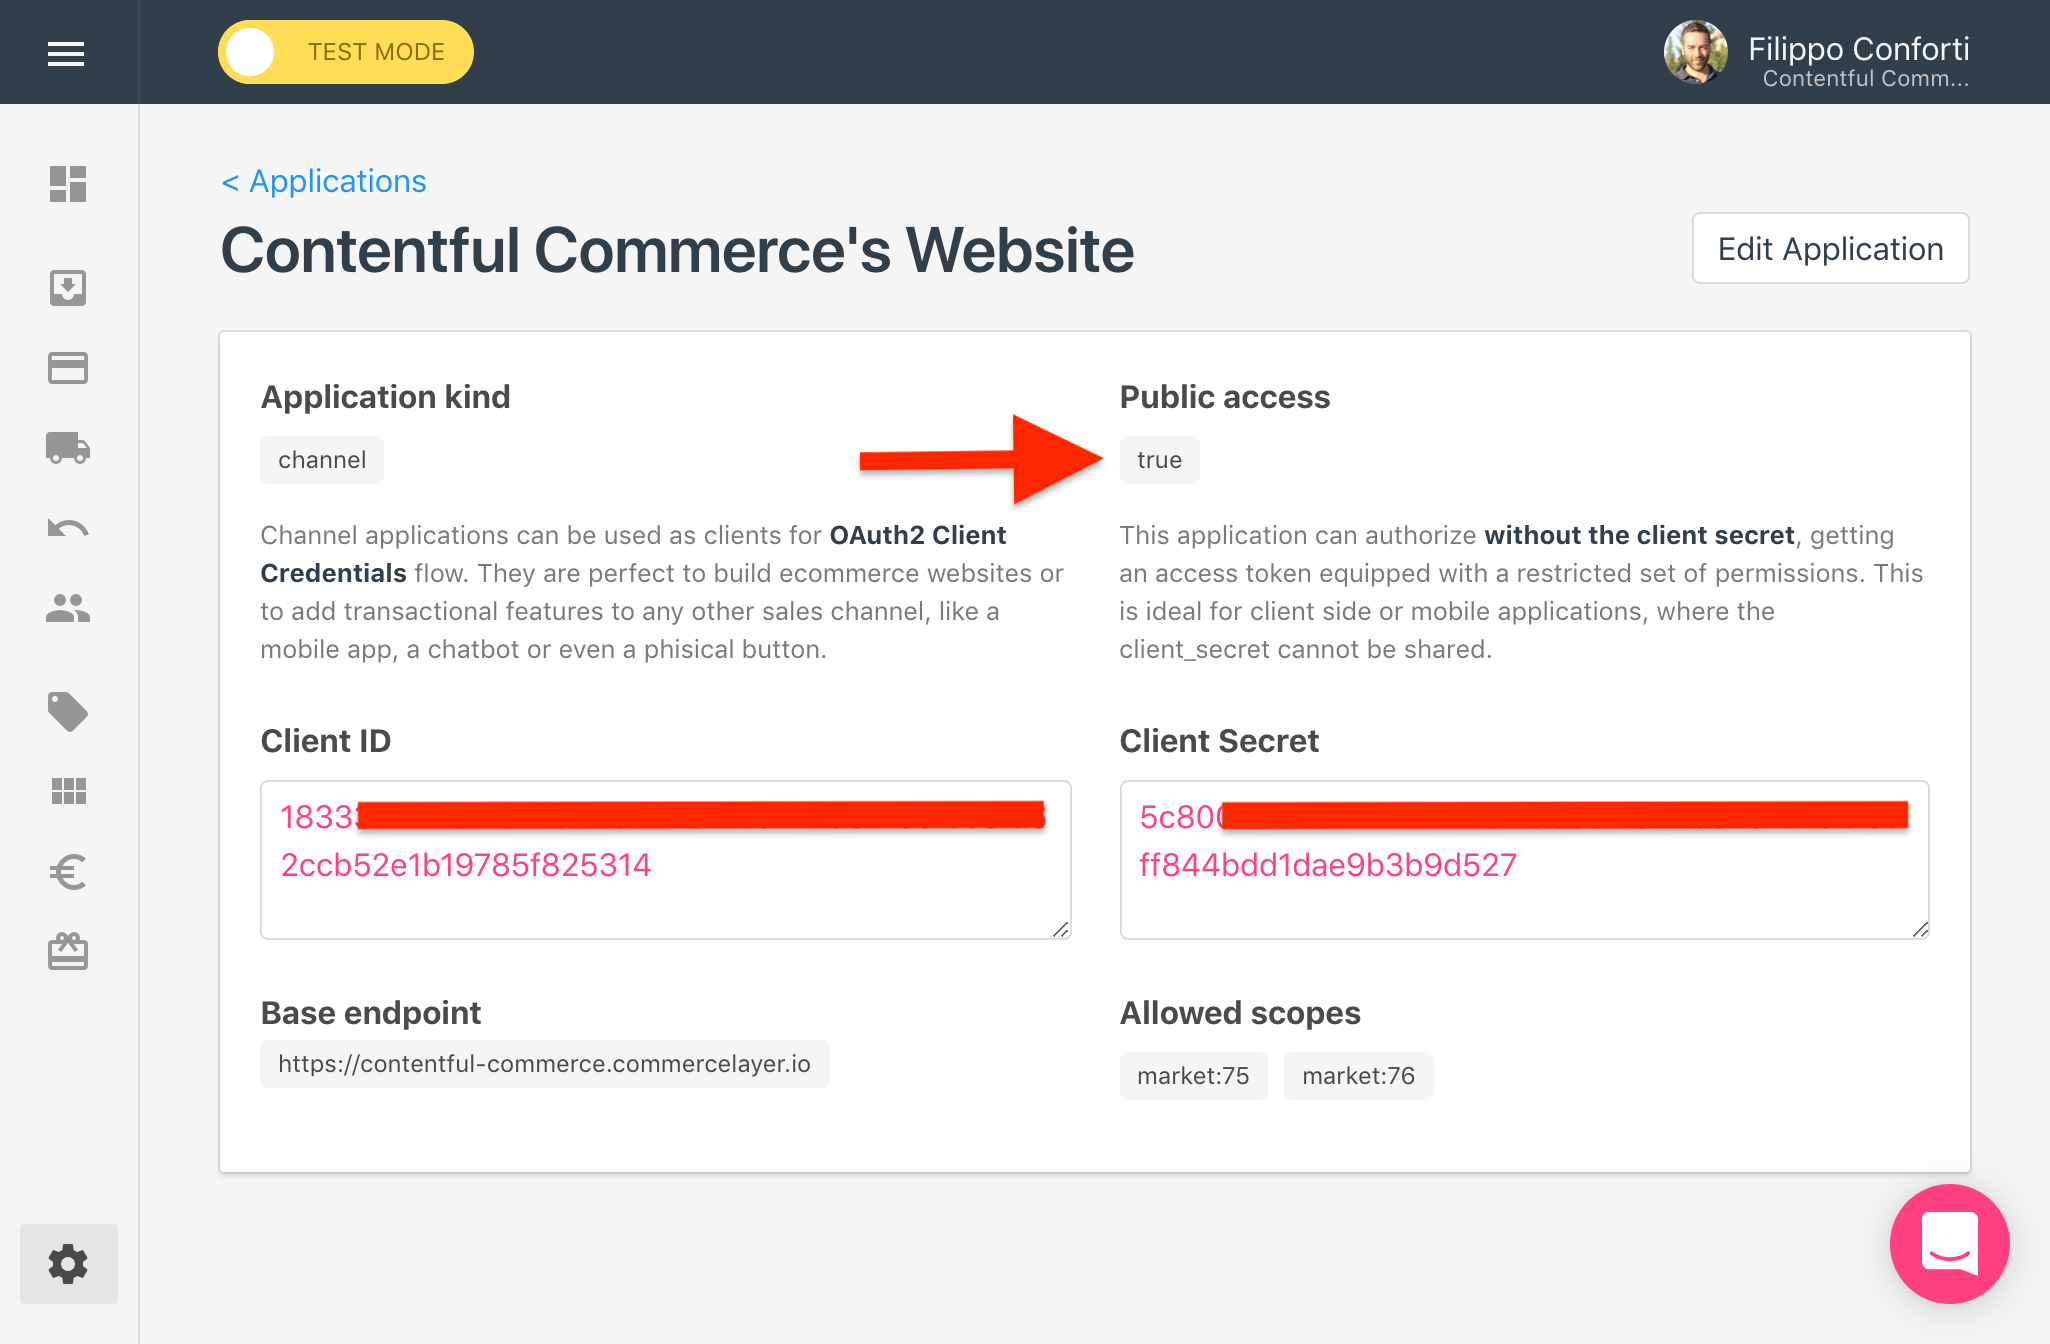
To start selling, we need a Commerce Layer channel application. Just get the one created by the initial seeder and take note of its credentials. Make sure that public access is enabled. Since we are building a client-side application, we cannot share the client secret but we can still authenticate with the client_id only, with some restrictions.
Save your credentials in your local environment before installing the Commerce Layer Javascript library:
# .bash_profile
export COMMERCELAYER_BASE_URL=<BASE_ENDPOINT>
export COMMERCELAYER_CLIENT_ID=<CLIENT_ID>
Commerce Layer ships with a Javascript library that can be dropped into any website to make its content shoppable. Despite being very simple, it can be used as-is or as a starting point for your own custom code (contributors are welcome!).
Let's add it to our project, using npm and webpack:
$ npm init
$ npm install commercelayer --save
$ npm install webpack webpack-cli --save-dev
$ touch webpack.config.js
// webpack.config.js
const path = require('path')

module.exports = {
  mode: 'production',
  entry: './index.js',
  output: {
    filename: 'main.js',
    path: path.resolve(__dirname, "assets/javascripts")
  }
}
Add the "build" and "watch" scripts to the project package.json:
{
  [...]
  "scripts": {
    "build": "webpack --progress --mode=production",
    "watch": "webpack --progress --watch"
  },
  [...]
}
Create an index.js file like this:
const commercelayer = require('commercelayer')

document.addEventListener('DOMContentLoaded', function () {
  commercelayer.init()
})
Create the following partial, that contains the required configuration parameters:
    <!-- _includes/commercelayer.html -->

    <div id="commercelayer"
      data-base-url="{{site.commercelayer_base_url}}"
      data-client-id="{{site.commercelayer_client_id}}"
      data-market-id="{{page.country.market_id }}"
      data-country-code="{{page.country.code }}"
      data-language-code="{{page.locale}}"
      data-cart-url="{{site.site_base_url}}"
      data-return-url="{{site.site_base_url}}"
      data-privacy-url="{{site.site_base_url}}"
      data-terms-url="{{site.site_base_url}}">
    </div>
Change the site layout as follows:
    <!-- _layouts/default.html -->

    {% include commercelayer.html %}
    <script src="/assets/javascripts/main.js"></script>
  </body>
</html>
Now run the Jekyll server and the npm watcher:
$ bundle exec jekyll serve
$ npm run watchTo make the prices appear, add the following snippets to the category and product templates. The library will look into the page and populate the price amounts for each element that contains a data-sku-code attribute:
  <!-- _templates/category.html -->

  <div class="price" data-sku-code="{{ product.variants.first.code }}">
    <span class="amount"></span>
    <span class="compare-at-amount"></span>
  </div>
  <!-- _templates/product.html -->

<div class="price" data-sku-code="{{ page.product.variants.first.code }}">
  <span class="compare-at-amount large has-text-grey-light"></span>
  <span class="amount large has-text-success"></span>
</div>
With a similar approach, the JS library searches pages for elements with class .variant and checks their availability on Commerce Layer by their data-sku-code. It also adds the required event listeners to the .variant-select dropdown and to the .add-to-bag button, activating the purchasing functions. When a variant option is selected, the .available-message gets populated with the selected variant's delivery lead time information and shows the .unavailable-message when it goes out of stock.
<!-- _templates/product.html -->

<div class="select is-fullwidth">
  <select class="variant-select">
    <option disabled selected value="">{{ site.t[page.locale]["select_size"] | capitalize }}</option>
    {% for variant in page.product.variants %}
      <option class="variant" data-sku-code="{{variant.code}}">
        {{ variant.size.name }}
      </option>
    {% endfor %}
  </select>
</div>

<a href="#" class="add-to-bag button is-success is-fullwidth" data-product-name="{{page.product.name}}" data-sku-image-Url="{{page.product.image.url}}">
  {{ site.t[page.locale]['add_to_bag'] | capitalize }}
</a>

<div class="available-message has-text-success">
  {{ site.t[page.locale]['available'] | capitalize}} in
  <span class="available-message-min-days"></span>-<span class="available-message-max-days"></span>
  {{ site.t[page.locale]['days'] }}
</div>

<div class="unavailable-message has-text-danger">
  {{ site.t[page.locale]['out_of_stock'] | capitalize }}
</div>
The final step is to add the required markup to the DOM to enable the shopping bag and the shopping bag preview components:
<!-- _includes/shopping_bag_preview.html -->

<a class="navbar-item" id="shopping-bag-toggle">
  <span class="icon">
    <i class="fas fa-shopping-bag"></i>
  </span>
  <span class="tag is-warning is-rounded" id="shopping-bag-preview-count">0</span>
</a>
<!-- _includes/shopping_bag.html -->

<div id="shopping-bag">
  <div class="shopping-bag-content">
    <div class="columns">
      <div class="column">
        <h4 class="has-text-weight-bold">
          {{ site.t[page.locale]['your_shopping_bag'] | capitalize }}
        </h4>
      </div>
      <div class="column">
        <h4 id="shopping-bag-preview-total"></h4>
      </div>
    </div>
    <div class="shopping-bag-unavailable-message has-text-danger">
      {{ site.t[page.locale]['out_of_stock'] | capitalize }}
    </div>
    <table class="table is-fullwidth" id="shopping-bag-table">
    </table>
    <div class="columns">
      <div class="column">
        <a href="#" class="button is-fullwidth" id="shopping-bag-close">
          {{ site.t[page.locale]['continue_shopping'] | capitalize }}
        </a>
      </div>
      <div class="column">
        <a href="#" class="button is-fullwidth is-success" id="shopping-bag-checkout">
          {{ site.t[page.locale]['proceed_to_checkout'] | capitalize }}
        </a>
      </div>
    </div>
  </div>
</div>
Regardless of the style, the relevant elements are the following:
- #shopping-bag: the shopping bag container
- #shopping-bag-toggle: toggles the ".open" class to the shopping bag container
- #shopping-bag-preview-count: gets populated with the numer shopping bag items
- #shopping-bag-preview-total: gets populated with the order total
- #shopping-bag-table: the shopping bag line items container (table)
- #shopping-bag-close: removes the ".open" class to the shopping bag container
- #shopping-bag-checkout: redirects the customer to the hosted checkout pages
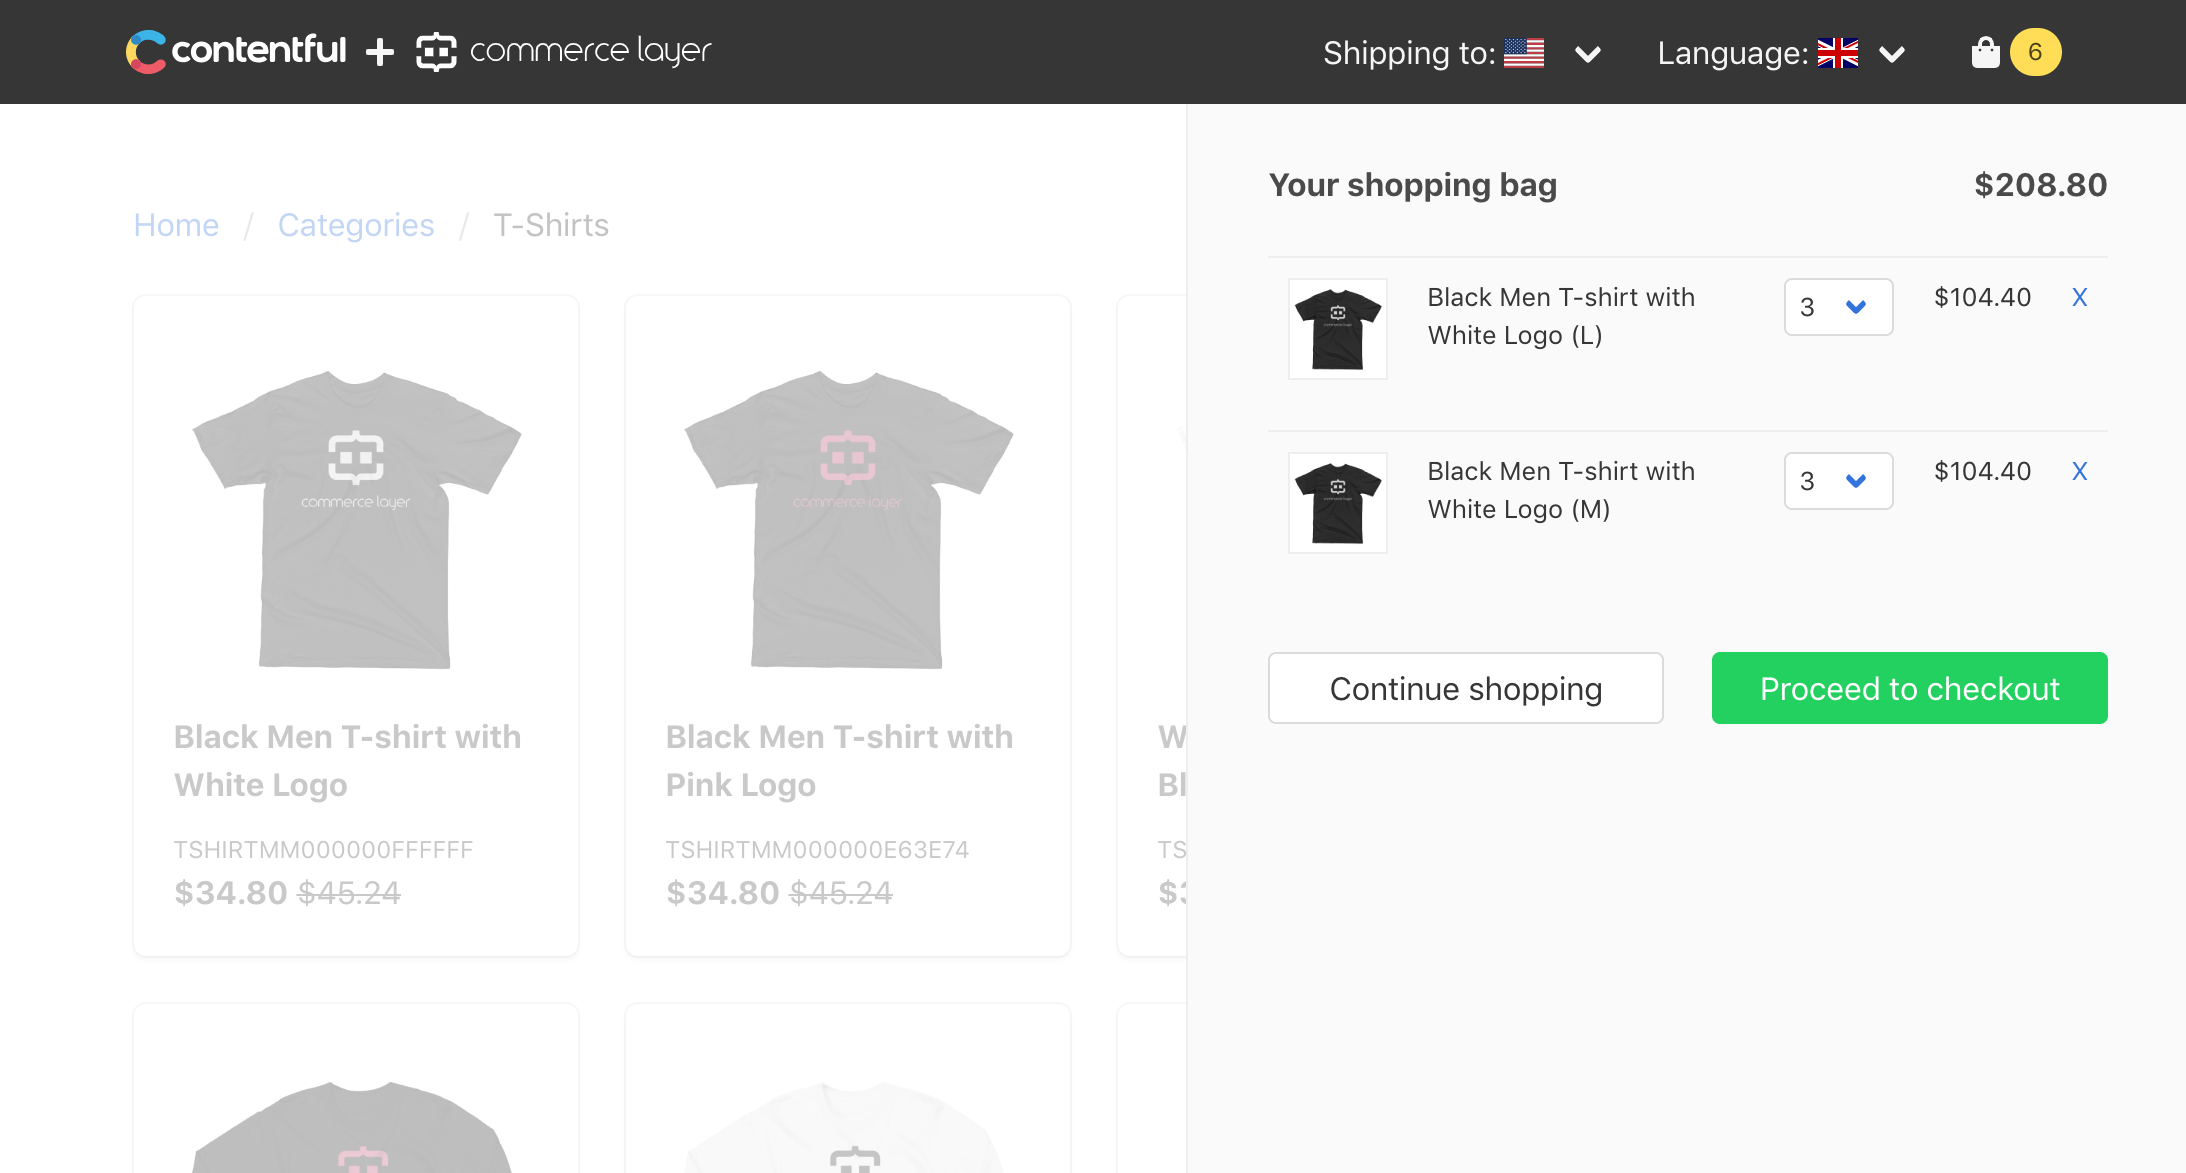
The result is a full-featured shopping bag that lets customers manage their line items and proceed to Commerce Layer hosted checkout 🎉
In this tutorial, we have built a static site ecommerce with the following enterprise-level features:
- Multi-country
- Multi-language
- Multi-catalogue
- Multi-currency
- Multi-warehouse
- Fast, scalable and secure by design
We used Jekyll as the SSG, Contentful to manage content and Commerce Layer to add ecommerce to the site. This stack lets creatives and developers build any customer experience; content editors publish outstanding content and merchants manage their business and fulfill orders through the ecommerce platform.
The next steps could be to add full-text search capabilities using a tool like Algolia or build a customer account section where they can see their order history, manage their address books, and wallets.
Instead of using the Commerce Layer hosted checkout, we could also develop a custom checkout experience through the API, to fully match our branding requirements. Just note that in this case, we would need to grant more permissions to our channel application, removing the public access. This means that we would need to add some server-side component to our application, at least to manage the channel authentication and safely store its client_secret.
