An admin-friendly, User Management Server (with Passkeys & JWTs) - for seamless and secure integration of user authentication.
Useful Links: Documentation | CHANGELOG | Demo Site | Follow on Mastodon
- Our documentation now includes 2 new .rest files that utilize the VS Code REST Client plugin to simplify API testing and provide clear examples of Authcompanion's admin and authentication APIs.
- New Support for Postgres when storing user accounts + New Login & Registration Web Form Styling - #22 [Done]
- A Refresh of the Admin Dashboard Design - #21 [Done]
AuthCompanion aims to satisfy the most common authentication and user management needs for your web application.
With AuthC you can:
- Securely handle the registration, login, logout, and account recovery of user accounts.
- Generate and verify JWTs, a token used for your user's session and authenticating them into your web application's backend APIs.
- Manage Users via a self-service Dashboard and confidently store and own your web application's user accounts, on your terms.
- Help users create accounts and login with a passkey on their mobile device (aka passwordless) or by using traditional username/passwords instead.
| Login Screen | Registration Screen |
|---|---|
 |
 |
The instructions below will launch the default server for exploring the features.
Pre-requirement:
- Node.js version >=18.13
Clone the repo if you haven't done so, and install dependencies using this command:
$ npm installWhen you're ready, start the server with the default settings!
$ npm startStart the server (with the default config):
$ docker run -it -p 3002:3002 --name AuthCompanion ghcr.io/authcompanion/authcompanion2:mainAlso available is the docker-compose.yml
If you're just trying AuthC out for the first time, the default configuration will work. See the Configuration Guide for a closer look at how to configure the server for other environments.
When ready, read the Launch Guide for more information on setting up AuthC in production.
-
Web Forms for User Authentication: Use pre-built and customizable web forms for your application users to: log in with their credentials, register an account, update their profile, and issue forgotten passwords.
-
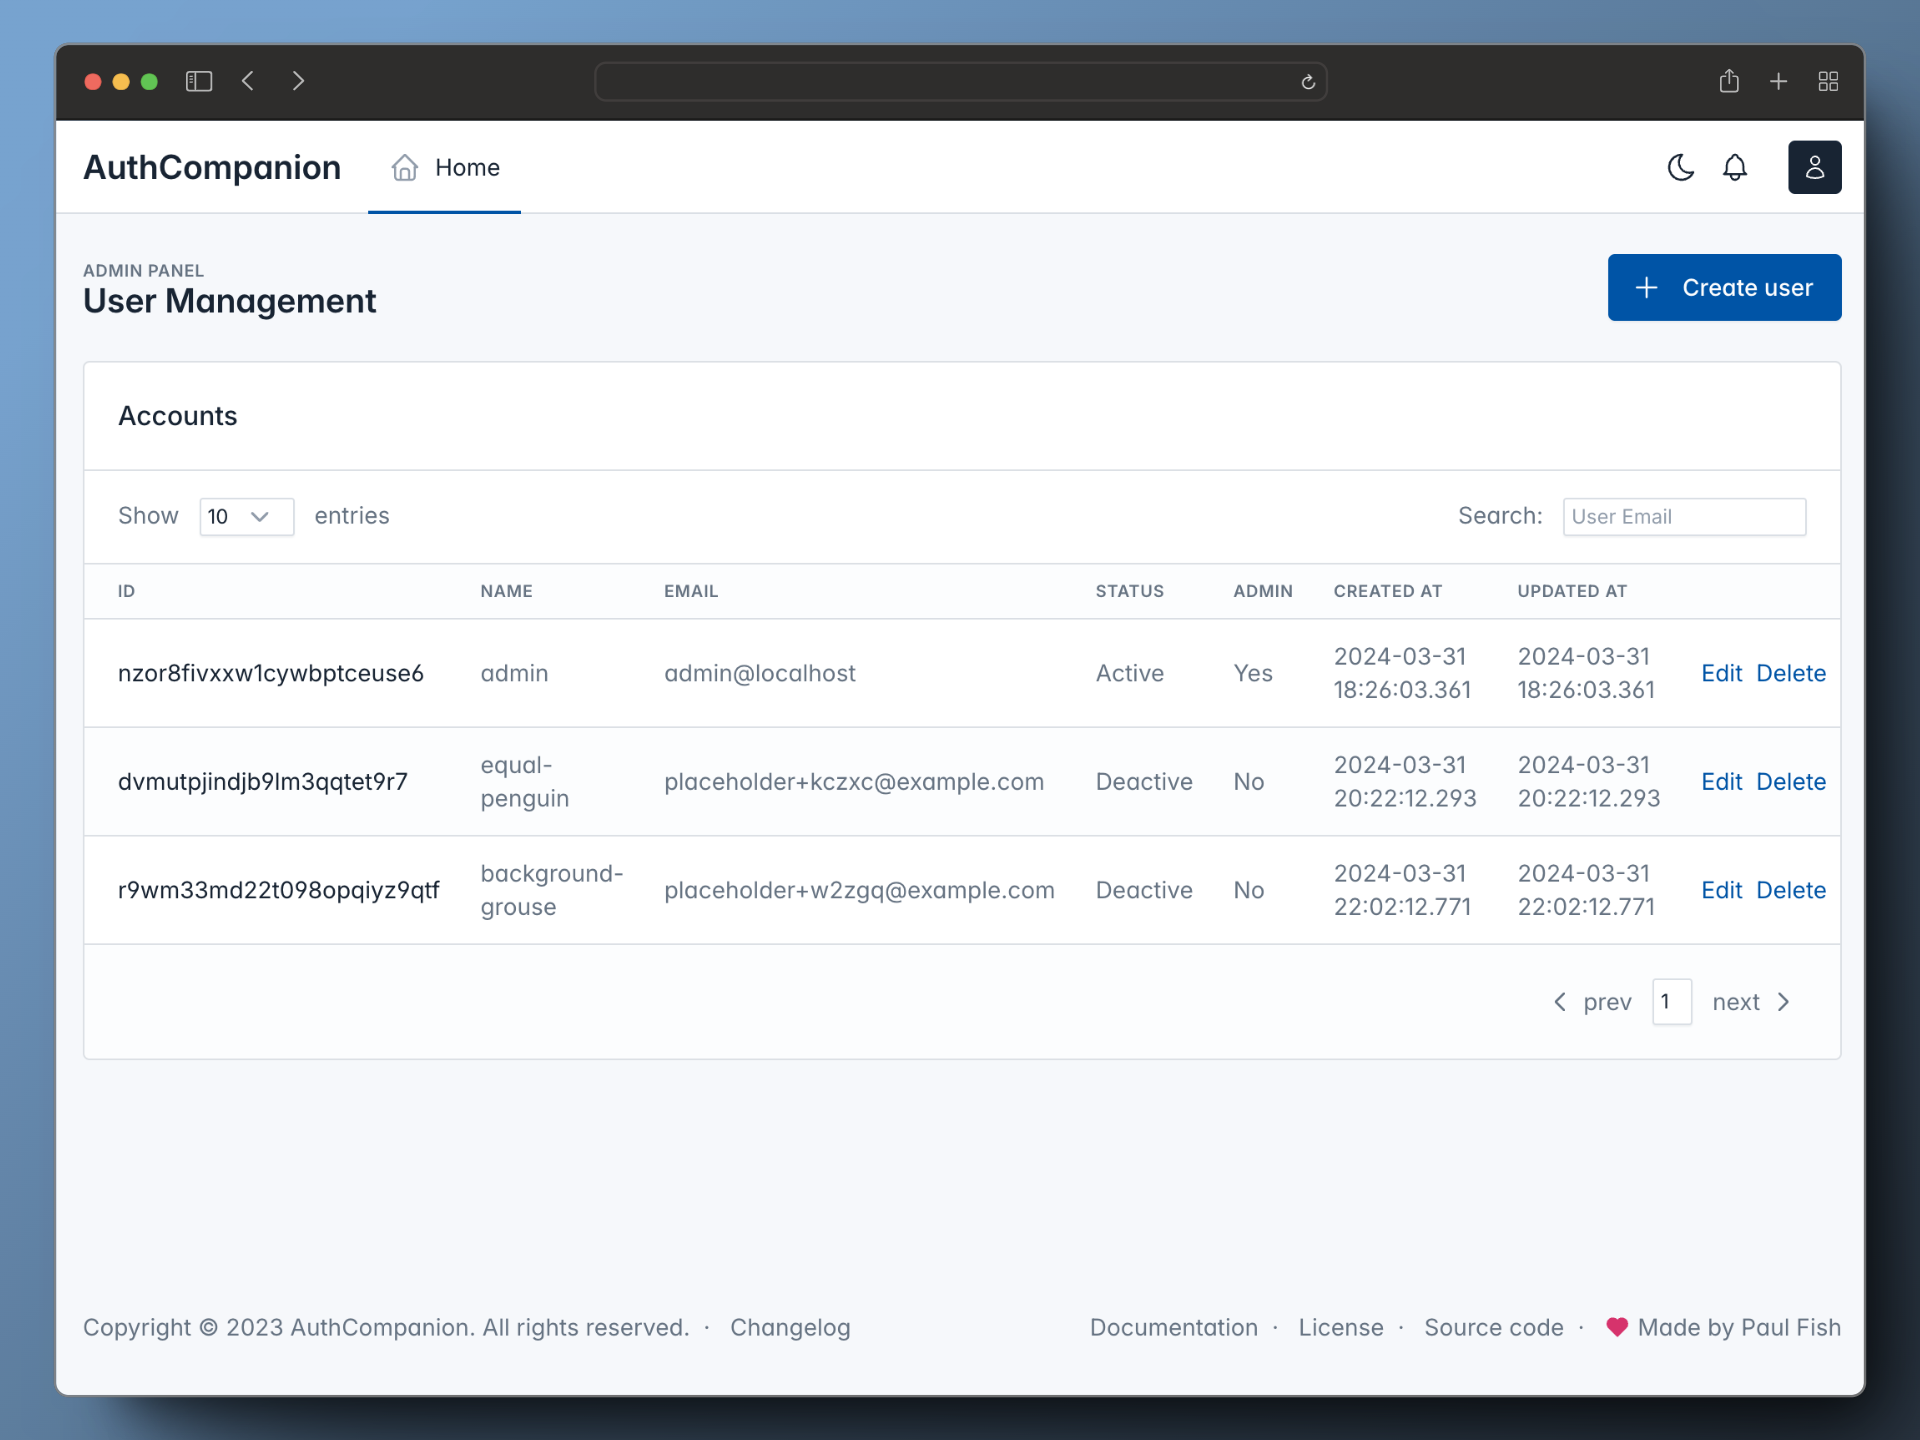
Admin Dashboard for Managing User Profiles: Modify the profile information of your users via a self-service dashboard - all account information is stored in a SQLite database.
-
User Account Recovery: Restore a user's access to their account using the Forgot Password flow which sends a special link via email for helping users quickly recover their account.
-
Passwordless Flow: Streamline your user's Login and Registration with Passkey, and authenticate users with a mobile device, USB security key or computer.
-
Extensible Platform: AuthC supports a plugin system for easily adding new functionality to cover more of your authentication needs.
Authcompanion provides built-in web forms for user authentiation including both login and registration pages.
After a user authenticates with AuthC's web forms, we pass them to your web application.
For a full list of AuthC's Web Forms, see the Web Form Guide.
The Admin Dashboard is a tool that allows administrators or application owners to manage the users of their web application. It provides a range of functions that administrators can use to create, edit, and delete user accounts; all via a friendly and intuitive interface.
Check out the Admin Dashboard in the documentation to learn how to access it: Administer.
The best way to learn is by doing; here's a couple ways to get started.
You can either use the publicly available demo at demo.authcompanion.com or start the server locally.
AuthC comes with pre-built Web Forms to help you quickly integrate user auth alongside your web application.
With the AuthC server running (in the prior steps), start first by registering an account using this web form: http://localhost:3002/v1/web/register
Next, log in with the account you just created using your email and password at this web form: http://localhost:3002/v1/web/login. The server response includes an access token for use when authenticating to backend APIs and redirects the user to your application's home page.
Log into the Admin Dashboard using the credentials found via the Administer Guide and update the user's profile you created in the previous step by changing their email (or similar field).
Have a look through the Integration Guide to understand how your frontend applications and backend web services interact with AuthC.
The RESTful Authentication API powers the Web Forms by which users authenticate into your web app. It's important to note that the web forms alone doesn't cover every authentication flow for your users. For example: refreshing an expired access token would require interacting with AuthC's APIs in addition to using the Web Froms.
For more information about the Authentication API check out the docs here: Auth API
The Admin API helps an administrator to manage the users of their web application. It provides a range of functions through which administrators can programatially create, edit, and delete user accounts. The Admin API is also natively used by the Admin Dashboard.
For more information about the Admin API check out the docs here: Admin API
AuthCompanion is licensed under the Big Time Public License. These terms let you use and share this software for noncommercial purposes and in small business for free, while also guaranteeing that paid licenses for big businesses will be available on fair, reasonable, and nondiscriminatory terms.
Cheers for the logo design - Timothy Reeder (Github)
Heavy lifting on the prototype and constant inspiration - Teddy Schmitz (Github)
Take AuthCompanion, the useful sidekick, into your next web project! 👏


