
This repository contains a sequence of simple notebooks demonstrating how to move from an ML idea to production by using Amazon SageMaker.
The notebooks make use of SageMaker processing and training jobs, and SageMaker MLOps features such as SageMaker Pipelines, SageMaker Feature Store, SageMaker Model Registry, SageMaker managed MLflow experiments, and SageMaker Model Monitor.
You start with a simple notebook with basic ML code for data preprocessing, feature engineering, and model training, all local to the notebook. Each subsequent notebook builds on top of the previous and introduces one or several SageMaker MLOps features:

Each notebook also provides links to useful hands-on resources and proposes real-world ideas for additional development.
You follow along the six notebooks and develop your ML idea from an experimental notebook to a production-ready solution following the recommended MLOps practices:

There are also additional hands-on examples of other SageMaker features and ML topics, like A/B testing, custom processing, training and inference containers, debugging and profiling, security, multi-model and multi-container endpoints, and serial inference pipelines. Explore the notebooks in the folder additional-topics to test out these features.
For the full version of the instructions and detailed setup of the account refer to the public AWS workshop Amazon SageMaker MLOps: from idea to production in six steps.
You need an AWS account. If you don't already have an account, follow the Setting Up Your AWS Environment getting started guide for a quick overview.
If you participating in an AWS Immersion Day or a similar instructor-led event and would like to use a provided AWS account, please follow this instructions how to claim your temporary AWS account and how to start SageMaker Studio.
❗ Skip the following steps Set up Amazon SageMaker domain and Deploy CloudFormation template if you use an AWS-provisioned account.
To run the notebooks you must use SageMaker Studio which requires a SageMaker domain.
If you already have a SageMaker domain and would like to use it to run the workshop, follow the SageMaker Studio setup guide to attach the required AWS IAM policies to the IAM execution role used by your Studio user profile. For this workshop you must attach the following managed IAM policies to the IAM execution role of the user profile you use to run the workshop:
AmazonSageMakerFullAccessAWSCloudFormationFullAccessAWSCodePipeline_FullAccessAmazonSageMakerPipelinesIntegrations
You can also create a new user profile with a dedicated IAM execution role to use for this workshop.
If you don't have a SageMaker domain or would like to use a dedicated domain for the workshop, you must create a new domain.
❗ If you have more than one domain in your account, consider the limit of the active domains in a Region in an account.
To create a new domain, you can follow the onboarding instructions in the Developer Guide or use the provided AWS CloudFormation template that creates a SageMaker domain, a user profile, and adds the IAM roles required for executing the provided notebooks.
❗ If you create a new domain via AWS Console, make sure you attach the following policies to the IAM execution role of the user profile:
AmazonSageMakerFullAccessAWSCloudFormationFullAccessAWSCodePipeline_FullAccessAmazonSageMakerPipelinesIntegrations
❗ If you use the provided CloudFormation template for domain creation, the template creates an IAM execution role with the following policies attached:
AmazonSageMakerFullAccessAmazonS3FullAccessAWSCloudFormationFullAccessAWSCodePipeline_FullAccessAmazonSageMakerPipelinesIntegrations
Download the sagemaker-domain.yaml CloudFormation template.
This template creates a new SageMaker domain and a user profile named studio-user-<UUID>. It also creates the required IAM execution role for the domain.
❗ This stack assumes that you already have a public VPC set up in your account. If you do not have a public VPC, see VPC with a single public subnet to learn how to create a public VPC.
❗ The template supports only us-east-1, us-west-2, and eu-central-1 Regions. Select one of those regions for deployment.
Open AWS CloudFormation console. The link opens the AWS CloudFormation console in your AWS account. Check the selected region and change it if needed.
- Select Upload a template file and upload the downloaded CloudFormation template, click Next
- Enter the stack name, for example
sagemaker-from-idea-to-prod, click Next - Leave all defaults on this pane, click Next
- Select I acknowledge that AWS CloudFormation might create IAM resources, click Submit

On the CloudFormation pane, choose Stacks. It takes about 15 minutes for the stack to be created. When the stack is created, the status of the stack changes from CREATE_IN_PROGRESS to CREATE_COMPLETE.

After signing into the AWS account, follow Launch Amazon SageMaker Studio instructions to open Studio.
Here are the instructions if you are in an AWS-led workshop event:
-
First navigate to Amazon SageMaker console, you can do this by simply starting to type
SageMakerin the search box at the top.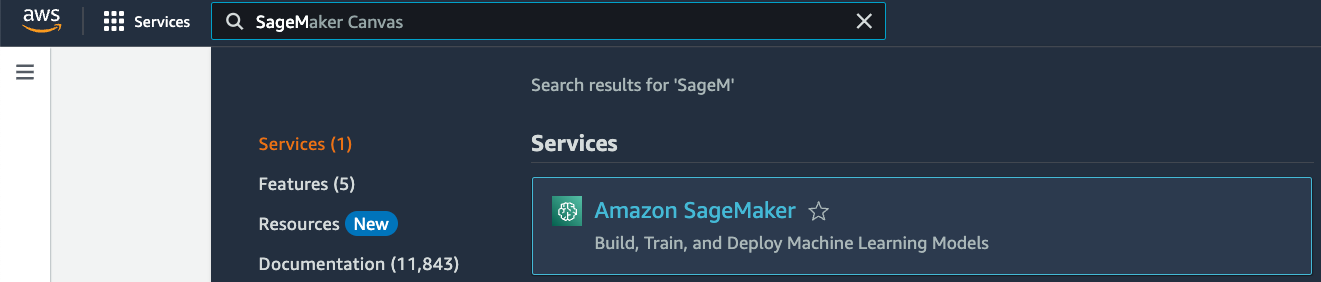
-
On the left in the
Applications and IDEssection select Studio -
In the
Get startedbox, make sure the studio-user-xxxxxxxx is selected and selectOpen studio. Now SageMaker Studio UI opens in a new browser tab and you're redirected to that window.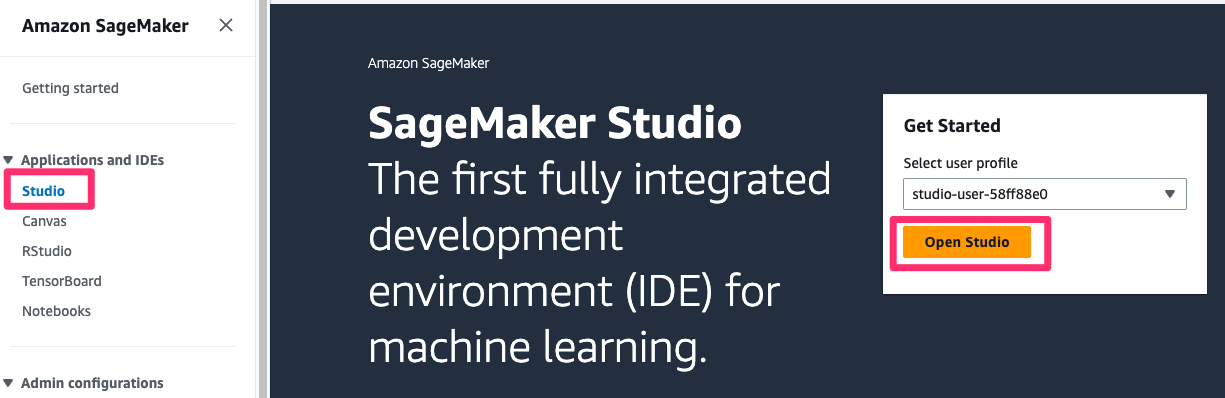
-
Optionally take the quick tour of the SageMAker Studio interface by selecting the
Take quick tour buttonor select `Skip Tour for now`` -
Accept or Decline the cookie preferences based on your preference


You use a JupyterLab space as our IDE for this workshop.
-
To launch a JupyterLab space, select the
JupyterLabapp in the top left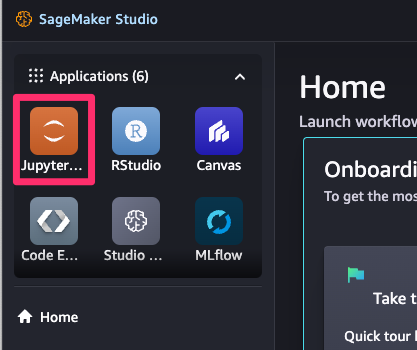
-
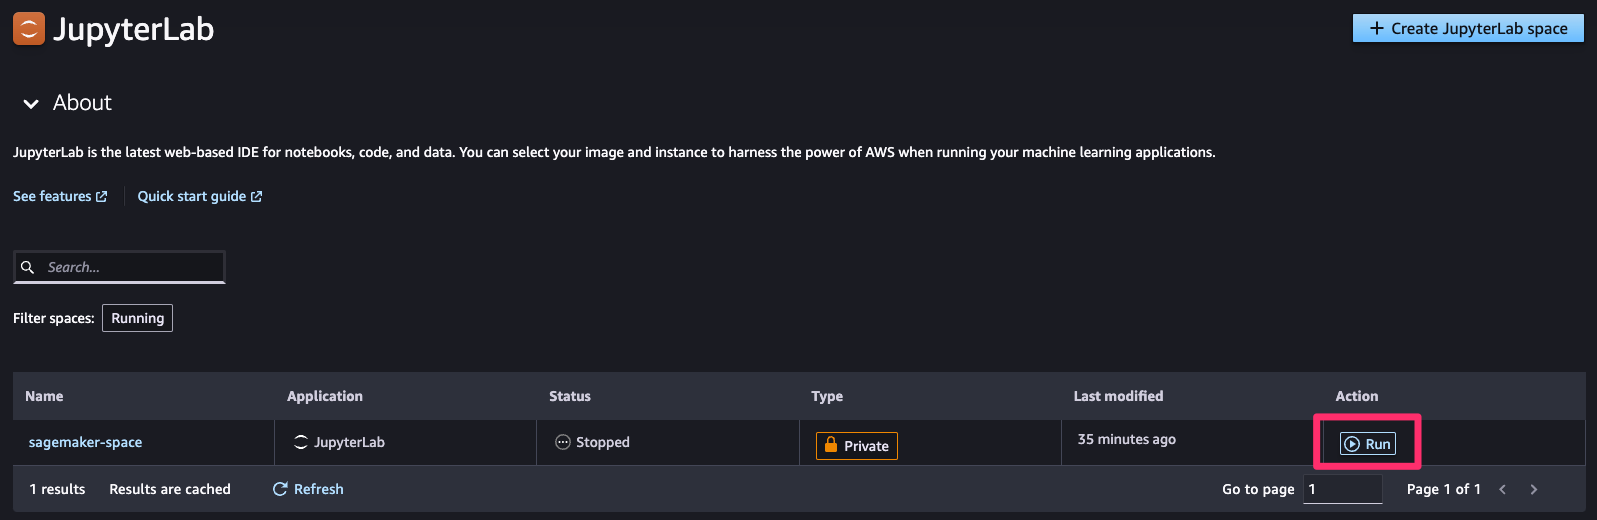
Each application in SageMaker studio gets its own space. Spaces are used to manage the storage and resource needs of each application. If you're participating in an AWS-led workshop or used the provided CloudFormation template, the required space is already created for you, otherwise you must create a new JupyterLab space as described in the the Developer Guide or re-use an existing one
-
Run the space by selecting the run button on the right. This process can take a few seconds.
-
Once the space is running select
Opento navigate to the JupyterLab application.


If you're participating in an AWS-led workshop or used the provided CloudFormation template, the workshop content is cloned on the space EBS volume automatically, no action required from you. If you use your own domain and user profile or created a domain via AWS Console UI, follow the instructions in the next section Download notebooks into your JupyterLab space to clone the content.
The public GitHub repository Amazon SageMaker MLOps: from idea to production in six steps contains all source code.
You only need to clone the notebooks into your space if you use your own domain and user profile. To do this select Terminal in the JupyterLab Launcher window or select File > New > Terminal to open up a terminal and run the git clone:
git clone https://github.com/aws-samples/amazon-sagemaker-from-idea-to-production.gitThis will clone the repository into the local JupyterLab file system.
As the final preparatory step, make sure to run and execute the 00-start-here.ipynb notebook. To do this
- In the file browser open the
amazon-sagemaker-from-idea-to-productionfolder by double clicking it - Open
00-start-here.ipynbnotebook and follow the instructions in the notebook

Note: we recommend you read and then execute each cell by using the Shift + Entercommand.
After executing the 00-start-here.ipynb notebook, you can move to the first notebook 01-idea-development.
You can do this workshop in two ways:
- Go through the provided notebooks, execute code cells sequentially, and follow the instructions and execution flow
- Write your own code with hands-on assignments and exercises
The following diagram shows the possible flows of the workshop:

Use this mode if you're not familiar with Python programming and new to Jupyter notebooks. You follow each notebook 00-..., 01-..., ..., 06-...and execute all code cells with Shift + Enter. The given instructions explain what code is doing and why. You need about two and half hours to run through all code cells in all notebooks.
All notebooks and all code cells are idempotent. Make sure you run all code cells sequentially, top to bottom.
Use this mode if you have experience working with Jupyter notebooks and would like to write own code to have a deeper hands-on understanding of SageMaker features and SageMaker Python SDK.
Each foundational instruction notebook 00-..., 01-..., ..., 06-... in the workshop root folder has a corresponding "assignment" notebook with exercises in the assignments folder. First, go through the instructions in the root folder notebook and then complete the exercises in the corresponding assignment notebook. The notebooks are mapped as follows:
00-start-here>./assignments/00-assignment-setup01-idea-development>./assignments/01-assignment-local-development02-sagemaker-containers>./assignments/02-assignment-sagemaker-containers03-sagemaker-pipeline>./assignments/03-assignment-sagemaker-pipeline04-sagemaker-projects>./assignments/04-assignment-sagemaker-project05-deploy>./assignments/05-assignment-deploy06-monitoring>./assignments/06-assignment-monitoring
❗ You don't need to perform a clean-up if you run an AWS-instructor led workshop.
To avoid charges, you must remove all project-provisioned and generated resources from your AWS account.
First, run all steps in the provided clean-up notebook. Second, if you used the AWS Console to provision a domain for this workshop, and don't need the domain, you can delete the domain by following this instructions.
If you provisioned a domain use a CloudFormation template, you can delete the CloudFormation stack in the AWS console.
If you provisioned a new VPC for the domain, go to the VPC console and delete the provisioned VPC.
This example uses the direct marketing dataset from UCI's ML Repository:
[Moro et al., 2014] S. Moro, P. Cortez and P. Rita. A Data-Driven Approach to Predict the Success of Bank Telemarketing. Decision Support Systems, Elsevier, 62:22-31, June 2014
The following list presents some useful hands-on resources to help you to get started with ML development on Amazon SageMaker.
- Get started with Amazon SageMaker
- Deep Learning MLOps workshop with Amazon SageMaker
- Scale complete ML development with Amazon SageMaker Studio
- Amazon SageMaker 101 workshop
- Amazon SageMaker 101 workshop code repository
- Amazon SageMaker Immersion Day
- Amazon SageMaker End to End Workshop
- Amazon SageMaker workshop with BYOM and BYOC examples
- End to end Machine Learning with Amazon SageMaker
- SageMaker MLOps Workshop
- Amazon SageMaker MLOps Workshop
- A curated list of awesome references for Amazon SageMaker
- AWS Multi-Account Data & ML Governance Workshop
Use the following QR code to link this repository.

Use the following QR code to link the public AWS workshop.

Copyright Amazon.com, Inc. or its affiliates. All Rights Reserved. SPDX-License-Identifier: MIT-0