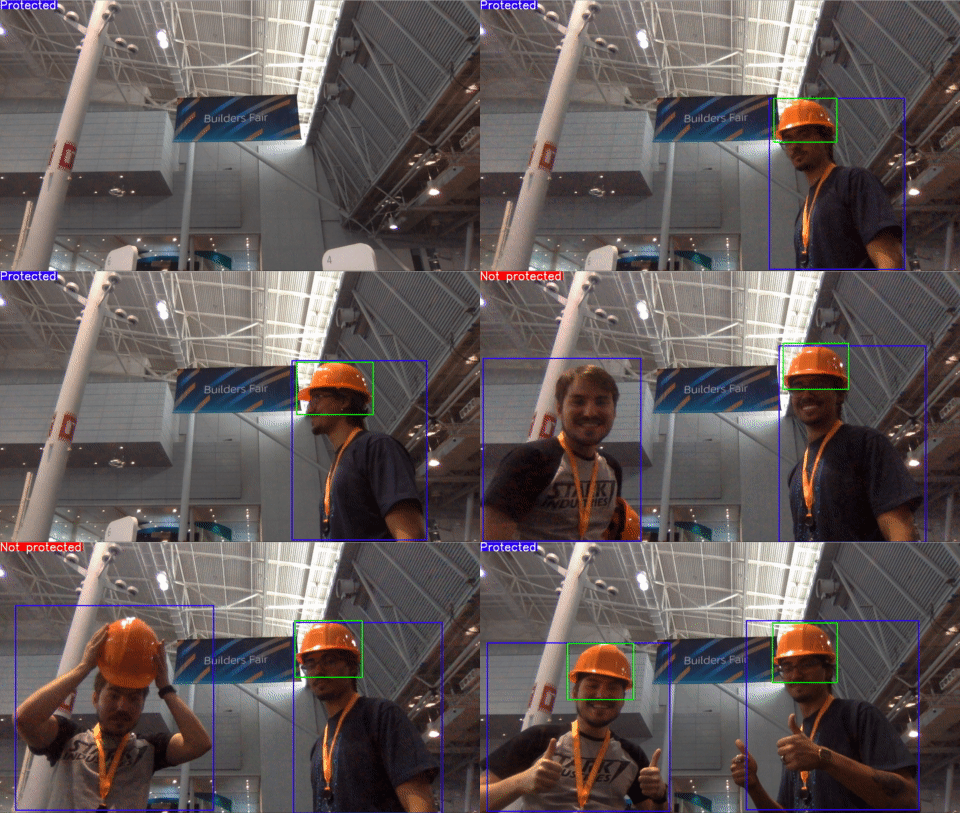
The purpose of Personal Protective Equipment (PPE) is to prevent injuries in the workplace, protect the wearer's body, and reduce exposure to different hazards, such as physical, electrical, chemical, and others. While the usage of such protective gear is essential and legally required in many industry sectors, it is common to see workers forgetting or neglecting the use of PPE.
This demo was presented in the re:Inforce 2019 Builders Fair and contains a prototype approach using several AWS services to help prevent accidents in the workplace.
To get started you will need:
- The AWS CLI tool installed on your local machine.
- Python 3.7 with boto3 and python-opencv libraries installed on your local machine:
pip install -r requirements.txt - A Raspberry Pi with the omxplayer package installed.
- Tested in the N. Virginia region (us-east-1).
-
Download the .zip or clone this repo on your machine.
-
Make sure you have a user with programmatic access and have configured the access key ID and secret access key.
-
Enter the
deploydirectory and execute./deploy.sh create. When asked, set the email address and alarm message (this process will take about 5 minutes to complete, please wait it to finish before proceeding):cd deploy ./deploy.sh create
Now that you have created the AWS resources in the previous step, you need to upload the certificates and source files to your Raspberry Pi.
-
On the AWS console, go to yours Things page on the AWS IoT Core service and click on the IoT Thing named
ppe-raspberry-<your_account_id>. -
In the left menu, click on Interact, then on Connect a device, and follow the steps to download the connection kit for Linux/OSX and Python SDK.
-
Upload the connection kit .zip and the files from the
src/iotdirectory. For example, using scp:scp connect_device_package.zip pi@<your_iot_device_ip>:~ scp src/iot/subscribe.py pi@<your_iot_device_ip>:~ scp src/iot/not_protected.ogg pi@<your_iot_device_ip>:~ -
Login to your Raspberry Pi, unzip the connection kit and modify the
start.shto run the demo:unzip connect_device_package.zip sed -i 's#python setup.py install#python setup.py install --user#g' start.sh sed -i 's#aws-iot-device-sdk-python/samples/basicPubSub/basicPubSub.py#subscribe.py#g' start.sh chmod +x start.sh ./start.sh
-
Make sure the
./start.shscript is still running in your Raspberry Pi. -
Execute the
src/webcam_client.pyin your machine.python src/webcam_client.py
The src/athena directory contains source files to make queries in Amazon Athena and create dashboards with Amazon QuickSight. Make sure you change the <your_data_bucket> present in src/athena/table.sql.
You can remove the AWS resources created for this demo by running ./deploy delete.
This sample code is made available under the MIT-0 license. See the LICENSE file.


