This API is actual for Aeviewer V2.1
- Introduction
- Features
- Installation
- Getting started with JSX and CEP
- API Documentation
- Create Settings Panel
This is a README file for Aeviewer API. Aeviewer is a digital assets manager (DAM) which works inside Adobe After Effects and Adobe Premiere Pro. The API provides a simple interface for accessing and manipulating Aeviewer functions and variables, and designed to be easy to use and integrate into other applications.
- Import any file to After Effects and Premiere Pro
- Customize pre- and post import actions
- Invoke build-in After Effects color and get color value
- Build customizable panels inside Aeviewer to add additional settings for your packages
- Get selected layers before import
- Get file path for imported file
To install the Aeviewer API, you need to open this page: https://aescripts.com/aeviewer And download and install Free or Pro version of Aeviewer.
var isAeviewerRunning = (typeof AEVIEWER !== 'undefined');

if (isAeviewerRunning) {
    alert("API version: " + AEVIEWER.version);
} else {
    alert("Aeviewer is not running");
} /**
* Show alert with trial version
* Useful when you would like customers to try a trial version first
* @param header - Alert's header
* @param content - Alert's content
* @param img - Path to local image or URL
* @param url - URL to package
* @returns boolean, always true
*/
AEVIEWER.alertTrial(header, content, img, url);/**
* Imports or opens file inside the current project
* @param {String} filepath Path to the file
* @param {String} importType Import type of the file
* @returns {boolean} true | false
*/
/*
* Available importType options:
- "add" Just add file to project
- "open" Open project or media in the viewer
- "onlyopen" Only open file. The same behavior as "Open" command
- "import-only" Only import file to the current project
- "import-and-replace" Import file and replace the selected layers with imported file\ or composition if it's aep file
- "import-and-comp" Import and create a pre-composition from file\comp
*/
AEVIEWER.importFile(filepath, importType);Supported formats
File extensions supported by FREE version:
"ffx", "aep", "aet", "aepx", "jsx", "jsxbin", "json", "mgjson", "csv", "tsv", "txt", "prst", "expr", "prproj"
"nef", "exr", "tif", "dpx", "pam", "pbm", "pcx", "ptx", "jpg", "jpeg"
"webm", "mkv", "3gp", "avi", "mov", "m4v", "apng", "mxf", "mogrt"
"aac", "ac3", "aif", "aiff", "m4a", "mp2", "mp3", "mpa", "wav", "wma", "flac", "ogv", "ogm", "ogg", "oga"
"gif", "mp4", "png"
"ttf", "otf", "c4d", "ai", "eps", "psd"
File extensions supported by PRO version:
"ffx", "aep", "aet", "aepx", "jsx", "jsxbin", "json", "mgjson", "csv", "tsv", "txt", "prst", "expr", "prproj", "mogrt"
"nef", "exr", "tif", "dpx", "pam", "pbm", "pcx", "ptx", "jpg", "jpeg"
"webm", "mkv", "3gp", "avi", "mov", "m4v", "apng", "mxf", "mogrt"
"aac", "ac3", "aif", "aiff", "m4a", "mp2", "mp3", "mpa", "wav", "wma"
"gif", "mp4", "png", "webp"
"ttf", "otf", "c4d", "ai", "eps", "psd"
/**
 * Get available system fonts
 * @returns {object} { fonts: [...], errors: [...] } with fonts and errors occured during parsing the fonts
 */

AEVIEWER.getSystemFonts();

// returned data example below

// {
//     "fonts": [{
//             "path": "/Library/Fonts/Arial Unicode.ttf",
//             "familyName": "Arial Unicode MS",
//             "style": "Regular",
//             "postScriptName": "ArialUnicodeMS"
//         },
//         {
//             "path": "/Library/Fonts/SF-Compact-Display-Bold.otf",
//             "familyName": "SF Compact Display",
//             "style": "Bold",
//             "postScriptName": "SFCompactDisplay-Bold"
//         },
//         ...
//     ],
//     "errors": [{
//             "message": "Only format 4 and 12 cmap tables are supported (found format 13).",
//             "fontPath": "/System/Library/Fonts/LastResort.otf"
//         },
//         {
//             "message": "Maximum call stack size exceeded",
//             "fontPath": "/System/Library/Fonts/SFNS.ttf"
//         },
//         {
//             "message": "Font doesn't contain TrueType or CFF outlines.",
//             "fontPath": "/System/Library/Fonts/Supplemental/NISC18030.ttf"
//         }
//     ]
// }
/**
 * Create a dialog window with color picker
 * @returns {array} RGB or -1 if user clicked "Cancel"
 */

AEVIEWER.colorPicker();/**
* Execute command in the system terminal
* @param cmd - String with the command
* @returns {string} String with the answer from command line
*/
AEVIEWER.systemCall(cmd);// array of selecter [LayerObject] files, or null
AEVIEWER.selectedLayers// String, full path to imported file
AEVIEWER.filePathCreate aev_before.jsx and aev_after.jsx inside the folder with importing files to controll before and after import actions.
aev_after.jsx example:
(function () {

    try {

        if (!app.project.selection.length || (!app.project.activeItem)) return !!alert("Please, open the composition and select layers");

        app.beginUndoGroup("aev_after");

        var importedProject = app.project.selection[app.project.selection.length - 1];

        var myComp = app.project.activeItem;
        var layer = myComp.selectedLayers[0];

        // Do anything with myComp for example add 'Levels' effect

        layer("ADBE Effect Parade").addProperty("ADBE Easy Levels2");


    } catch (e) {

        alert(e.toString() + "\nScript File: " + File.decode(e.fileName).replace(/^.*[\|\/]/, '') +
            "\nFunction: " + arguments.callee.name +
            "\nError on Line: " + e.line.toString());

    } finally {
        app.endUndoGroup();
    }

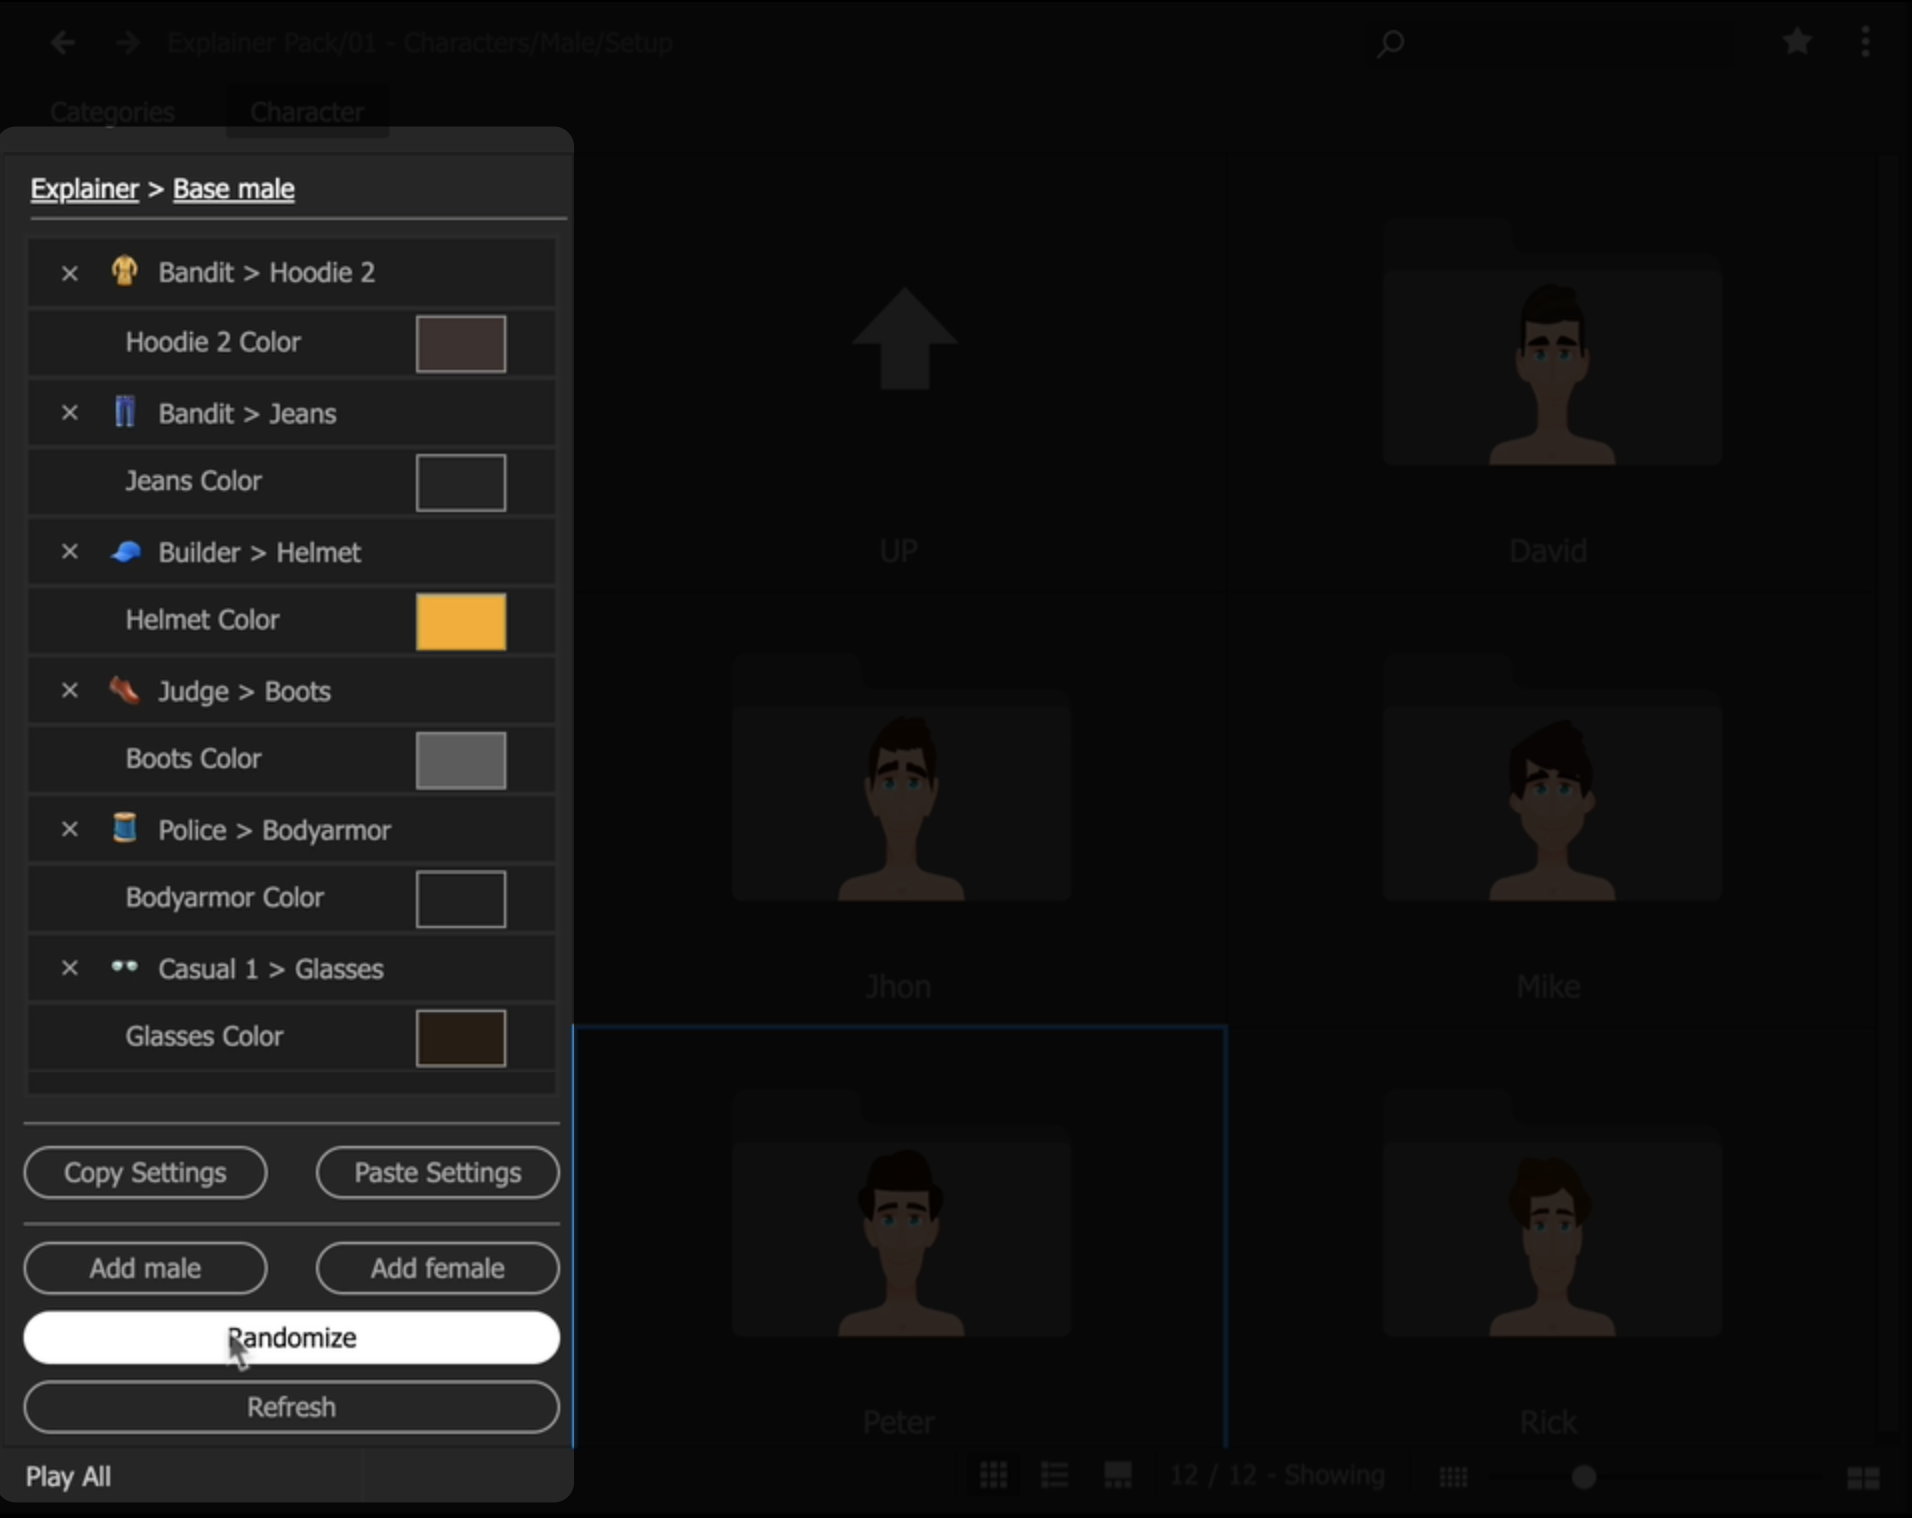
})()Here is an example of the settings panel you can create:
This panel would be available in tabs bar under Project Settings name.
You can use HTML, CSS, JS and JSX to create such panels.
Create a folder (Settings) inside the root folder of your package.
Add the following files inside a (Settings) folder:
* index.html
* script.js
* style.css
* hostscript.jsx
The first three files are responsible for the UI of the panel and its logic.
hostscript.jsx is the part that will communicate with Aeviewer, use import functions, and do some processing of projects/comps.
IMPORTANT NOTE: Please use the same names as above, otherwise Aeviewer wouldn't be able to eval your panel.
Files structure example:
My package folder
│
├── (Settings)
│   ├── index.html
│   ├── style.css
│   ├── script.js
│   └── hostscript.jsx
└─ Titles
    ├── titles 01.aep
    ├── titles 02.aep
    ├── titles 01.png
    ├── titles 02.png
    ├── titles 01.mp4
    ├── titles 02.mp4
└── ...To invoke your own ExtendScript function, first of all write this code in your JS file:
var csInterface = new CSInterface();Then you can call evalScript method and pass your parametrs to JSX function:
csInterface.evalScript('testFunction("' + firstParametr + '", "' + secondParametr + '")', function(res) {
    //callback after JSX
});Write your HTML code without
<!DOCTYPE html>
<html>
</html>
For scrollable elements set class to "scrollable":
<div class="scrollable">
</div>
