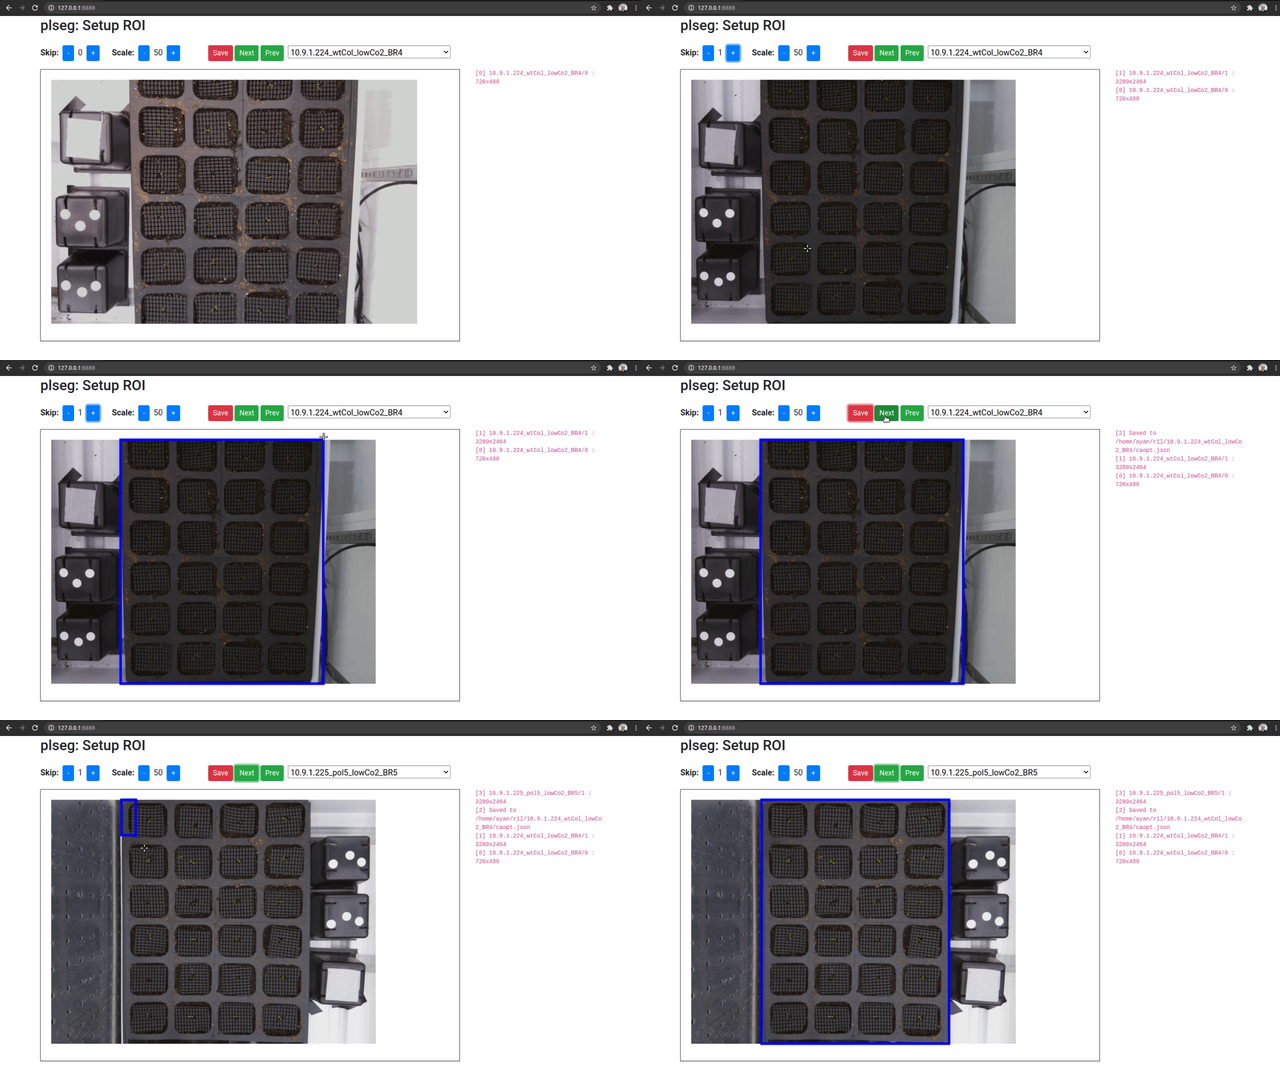
This package implements a graph-cuts based algorithm to segment overhead image sequences of plants, producing a distinct label for each plant that is consistent across the various frames. The package asks users to select a region of interest within which to segment plants—this region is annotated in the first image of the sequence and subsequent images are automatically aligned. Then, the algorithm uses local and pairwise edge-based evidence to perform a segmentation, matching connected components across frames, separating merged components from overlapping plants, and enforcing connectivity within each segmented plant in each frame.
We recommend using Conda to setup the environment for this package, using the provided environment setup files to install all required dependencies. Create the plseg environment by running:
conda env create -f plseg/environment.yml
Once the environment is created, remember to "activate" it with:
conda activate plseg
Note: If you installed the environment for a previous release of this package, you may need to repeat this step. Either remove the old plseg environment and recreate it, or use conda env update.
We assume every sequence is stored in its own sub-directory as a set of PNG or JPEG files, which we sort by filename to construct the sequence. All images are assumed to be taken by the same camera at the same resolution with possibly some camera translation between frames.
Our UI for specifying ROIs, scale, skip, etc. runs as a Flask web-app. Run this as:
conda activate plseg
./plroi.py --port 8888 /path/to/source/base /path/to/target/base
The command line arguments above specify the base source and target directories---i.e., segmentation outputs of a source sequence stored in /path/to/source/base/seqname will be stored in the target /path/to/target/base/seqname sub-directory. If your data is stored on a remote machine, you can run it remotely with SSH port-forwarding, e.g.,
ssh -L 8888:localhost:8888 username@server.edu
cd /path/to/code
conda activate plseg
./plroi.py --port 8888 /path/to/source/base /path/to/target/base
Access the UI by going to http://127.0.0.1:8888/ in your browser. Note that anyone with localhost network access to either of these two machines will be able to also access the UI, so be sure to secure these machines as necessary.
When you access the UI, you will be able to pick a source sequence sub-directory, or cycle through them with the previous and next buttons. For each sequence, specify the number of frames to skip at the beginning of each sequence, and a scale factor as percentage of the original size. Then, click and drag on the image to select a bounding box for the ROI on the shown first image of the sequence (after any skips). The ROI for subsequent frames will be automatically detected during segmentation. Once you're done, click on Save to store these parameters as a JSON file in the corresponding target sub-directory (which will be created if necessary). Repeat this process for different sequence sub-directories.
Important: If you plan on running the UI on a different machine than the one in which you will run the segmentation script in the next step below, it is important that the full path to the source base directory be the same on both machines (if you are running the UI through SSH forwarding, paths on the server you are SSH-ing into should be the same as those on which the segmentation script will be run).
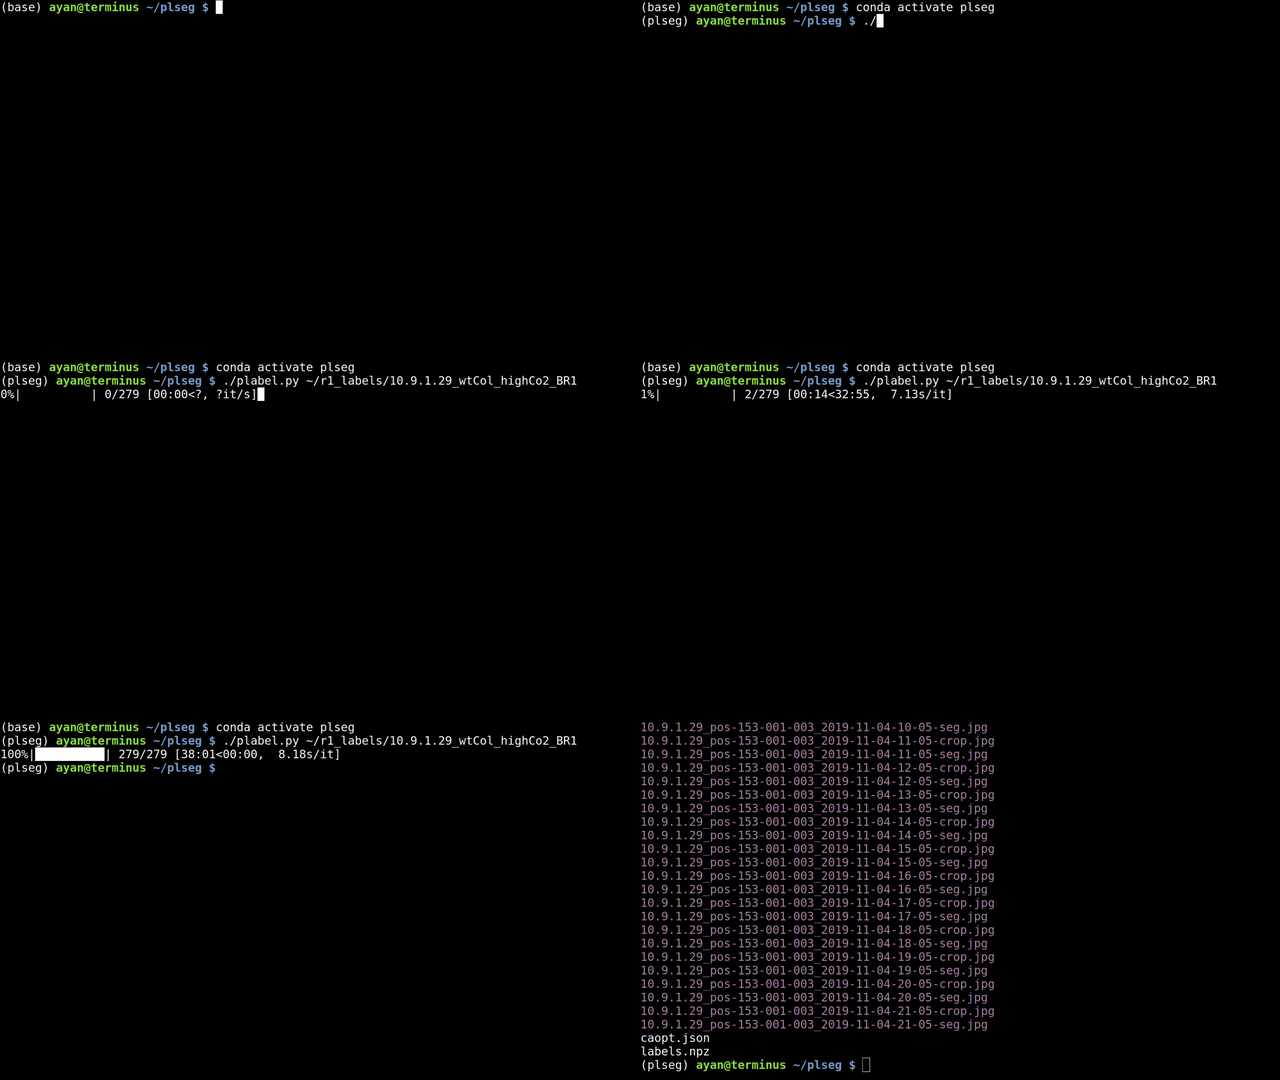
Next, use the plabel.py script to perform the actual segmentation. Activate the plseg conda environment, and then call the plabel.py script with the target directory path of a sequence. You can also execute plabel.py from a job script (remember to activate the right conda environment inside the job script).
For every image in the source sequence (after the skipped initial frames), the script will generate two corresponding image files: one named -crop showing the cropped ROI (as tracked across frames), and the other -seg visualizating the segmentation. The script alsos create a file called labels.npz, that can be loaded in python using labels = numpy.load('labels.npz')['labels']. This will be an H x W x N integer matrix, where H and W are the height and width of each cropped image, and N the number of frames. Each segmented plant in the sequence will have a positive integer ID, with values in labels set to that ID for identified pixels across all frames. Background pixels will be set to zero.
The segmentation will run with default parameters for the graph-cuts formulation. You may optionally modify these parameters by creating a JSON file in the target sub-directories. See our documentation on Specifying Segmentation Parameters.
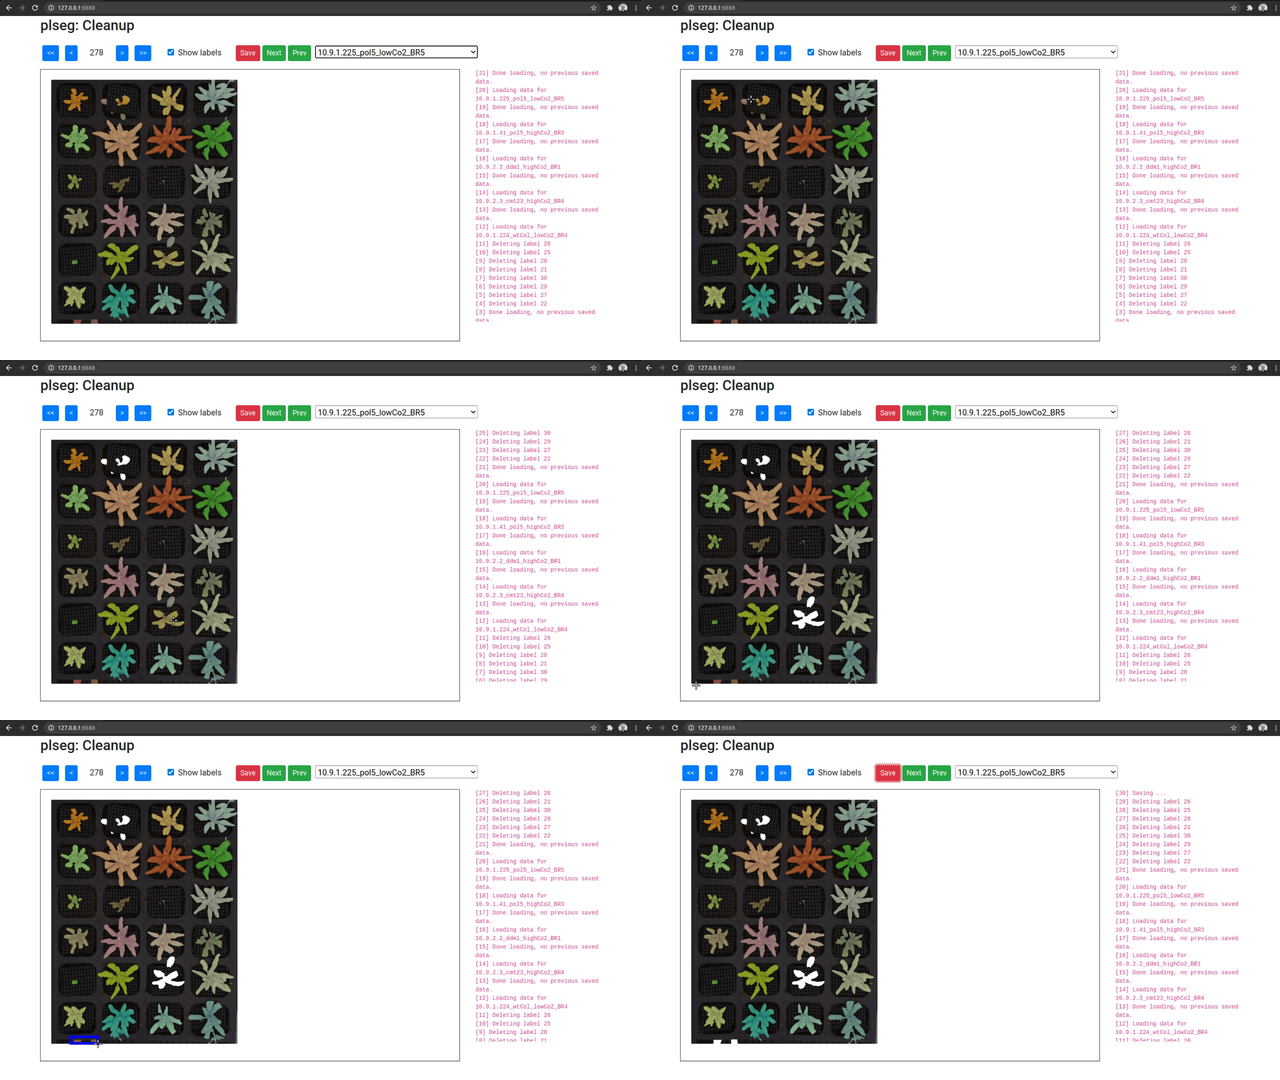
As an optional final stage, you can mark plants that were incorrectly segmented in a sequence using another Flask based UI. Run the plclean.py with the name of the base target directory, either locally or with SSH forwarding. You will then be able to step through the different segmentation results, and mark labels to leave out of the segmentation. Note that marking a plant in any one frame marks it in all frames in the sequence. Select plans to remove by drawing bounding boxes, which will toggle the deletion status of any label included in the box in that image.
Clicking Save will create a new file clean.npz in each sub-directory, which will contain a variable removed listing the IDs that were removed from the segmentation in labels.npz, and a new labels variable with only the labels that were not marked for removal (with new plant IDs from from 1 to the number of remaining plants). Once you are done marking all volumes, you can optionally run the script vizcseg.py with the base target directory as argument, that visualizes the cleaned up segmentations by creating corresponding image files tagged with -cseg in their names.
The deletion tool can be used to discard sections of the segmentation that you may not want to focus on. For example, if you want to obtain the subsection of the plants before they bloom. Call pldeletion.py with the name of the base target directory. The usage is similar to the Interactive Cleanup tool, except the selected labels will only be eliminated from the selected frame onwards. Clicking Save will create the file bloom-time.npz. The new labels variable will omit the discarded section of each label. Furthermore, the bloom-time variable is an array in which array[<label name>]=<selected frame number> for the deleted labels, and array[<label name>]=-1 if the label was not modified.
Additional command-line options extend the functionality of this tool.
--input(defaultcleanup) the name of the.npzfile to use as input (uselabelsif the cleanup tool was not used)--name(defaultbloom-time) the name of the.npzfile to produce--type(default1) defines the type of deletion to make when the user clicks a plant label it may be any of the following:1deletes the plant label from the current image onwards2deletes the plant label from the first image to the current image3deletes the plant label only at the current frame
This work was supported by the National Science Foundation under award no. EF-1921728. Any opinions, findings, and conclusions or recommendations expressed in this material are those of the authors, and do not necessarily reflect the views of the National Science Foundation.


