This demo showcases how the OpenFeature Operator allows to integrate with ArgoCD to control feature flags
in a GitOps environment. Using the FeatureFlagConfiguration and FlagSourceConfiguration CRDs which live in the application's GitOps
reppository, features can be enabled/disabled by creating a pull request for the GitOps repository. Once a PR has been merged,
ArgoCD will pick up that change and automatically apply the updated configuration.
Changes for a feature flag will be immediately reflected in the demo application, without the need to restart the pod running the application.
This is enabled by a Grpc event stream between the application and the flagd instance injected by the OpenFeature Operator. This event stream will
notify the application about any changes that have been made to a feature flag.
Note: Until open-feature/open-feature-operator#371 has been implemented in the OpenFeature Operator, the event stream based
client-side feature flagging is enabled by an nginx container within the pod running the application. This container can be accessed via a flagd-service Kubernetes service
and will proxy all flagd requests to the flagd container injected by the OpenFeature Operator.
To setup the demo, you must be connected to a K8s cluster (this demo has been tested on Kubernetes version v1.25.6).
To install everything, use the following command:
make install-environment GITOPS_REPO="<gitops repo url>"This will install everything you need to deploy the demo application. The installed components are:
- Cert-manager: Required by the OpenFeature Operator
- OpenFeature Operator: Will inject the flagd sidecar into the application's pod
- ArgoCD: Will watch the GitOps repository and apply any changes once they have been merged into the main branch
In addition to deploying these three components, an ArgoCD Application will be created. This will ensure that ArgoCD is
watching the GitOps repo you specify using the GITOPS_REPO parameter for the make install-environment command.
You can afterwards also login to ArgoCD to check if the Application has been created and view its sync status:
- Create a port-forward to the
argocd-server. This can be done using:
make port-forward-argoRunning this command will make ArgoCD accessibla via http://localhost:8081. When accessing ArgoCD, you will be prompted to enter your credentials.
Those are auto generated when ArgoCD is installed, and can be retrieved using the argocd CLI, using the following command:
argocd admin initial-password -n argocd
This will give you the login password for ArgoCD. The user name is admin.
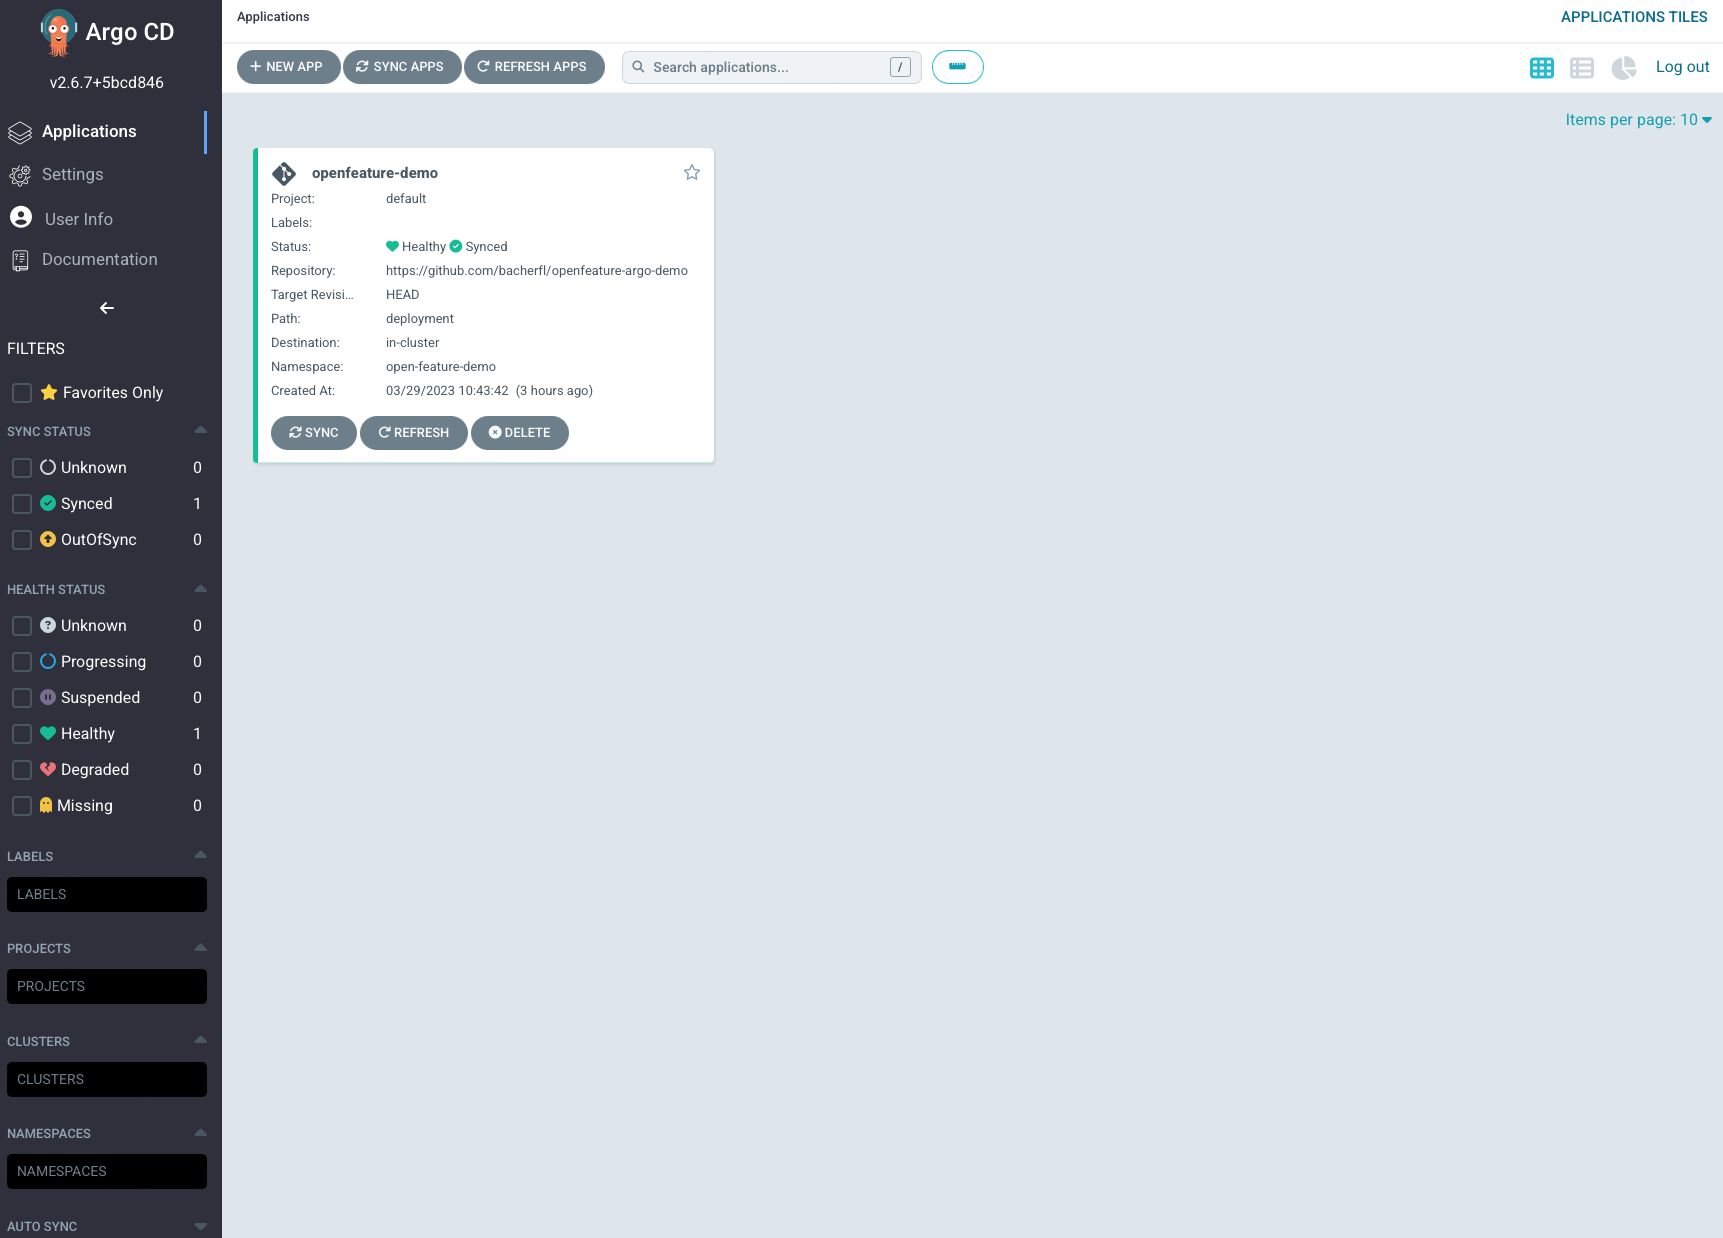
Once logged in to the ArgoCD UI, you should see the openfeature-demo application:
This application will be automatically synced every 15 seconds, so you should also see the deployment of the sample application, as well as a Jaeger instance in the open-feature-demo namespace.
$ kubectl get all -n open-feature-demo

NAME                                                           READY   STATUS    RESTARTS   AGE
pod/open-feature-demo-go-feature-flag-proxy-5f969dbd4c-9k6rk   1/1     Running   0          3h22m
pod/open-feature-demo-jaeger-agent-75b58df947-n4n85            1/1     Running   0          3h22m
pod/open-feature-demo-playground-app-65449d5444-q8vph          3/3     Running   0          153m
pod/open-feature-fib-service-6c7b76d997-zk2z5                  2/2     Running   0          3h22m

NAME                                       TYPE        CLUSTER-IP       EXTERNAL-IP   PORT(S)     AGE
service/flagd-service                      ClusterIP   192.168.62.139   <none>        8013/TCP    172m
service/open-feature-demo-goff-service     ClusterIP   192.168.49.26    <none>        1031/TCP    3h22m
service/open-feature-demo-jaeger-service   ClusterIP   192.168.58.66    <none>        6832/UDP    3h22m
service/open-feature-demo-jaeger-ui        ClusterIP   192.168.53.254   <none>        80/TCP      3h22m
service/open-feature-demo-service          ClusterIP   192.168.57.102   <none>        80/TCP      3h22m
service/open-feature-fibonacci-service     ClusterIP   192.168.61.80    <none>        30002/TCP   3h22m

NAME                                                      READY   UP-TO-DATE   AVAILABLE   AGE
deployment.apps/open-feature-demo-go-feature-flag-proxy   1/1     1            1           3h22m
deployment.apps/open-feature-demo-jaeger-agent            1/1     1            1           3h22m
deployment.apps/open-feature-demo-playground-app          1/1     1            1           3h22m
deployment.apps/open-feature-fib-service                  1/1     1            1           3h22m

NAME                                                                 DESIRED   CURRENT   READY   AGE
replicaset.apps/open-feature-demo-go-feature-flag-proxy-5f969dbd4c   1         1         1       3h22m
replicaset.apps/open-feature-demo-jaeger-agent-75b58df947            1         1         1       3h22m
replicaset.apps/open-feature-demo-playground-app-65449d5444          1         1         1       172m
replicaset.apps/open-feature-fib-service-6c7b76d997                  1         1         1       3h22m
The playground application will be accessible via an Ingress. You can get its IP with the following command:
$ make get-ingress-address

Playground application: http://<ingress-address>
Jaeger UI:              http://<ingress-address>/tracing
This command will also print out the address of the Jaeger UI, which will be used later in this guide.
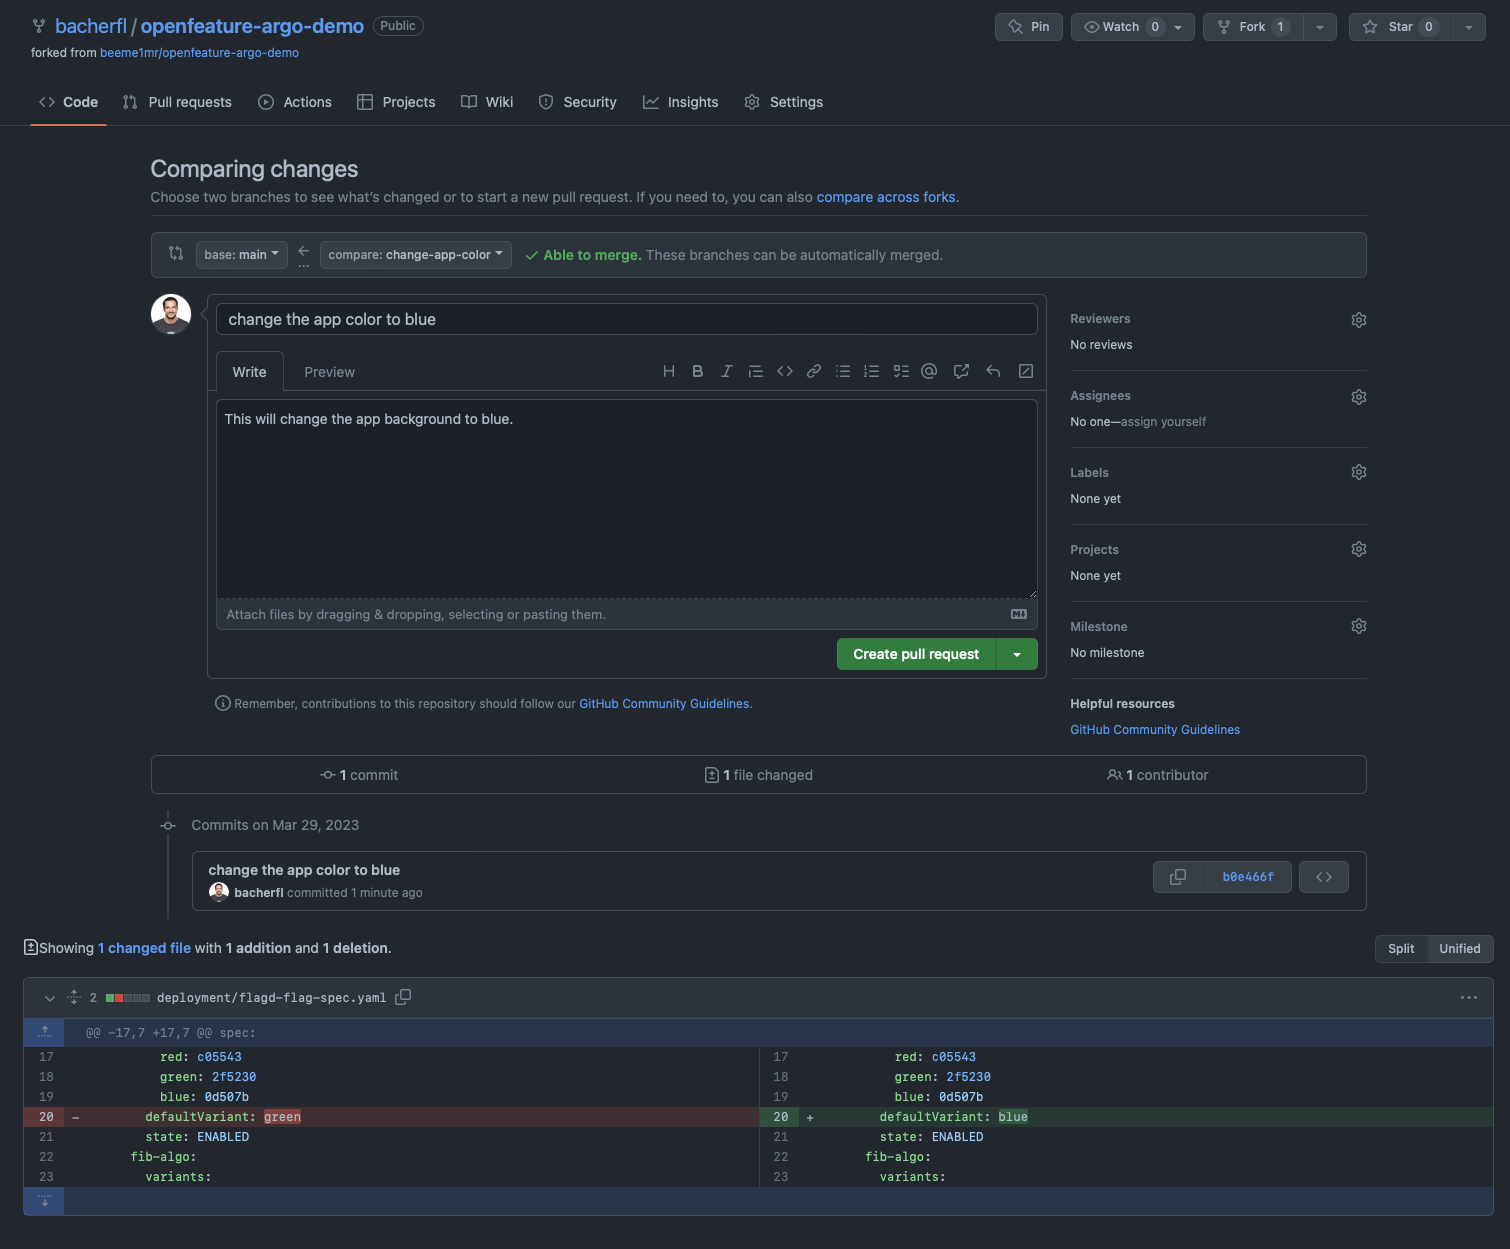
To demonstrate the change of a flag using a PR, adapt one of the flags in the file deployment/flagd-flag-spec.yaml and commit/push those changes to a
branch of the GitOps repository, e.g.:
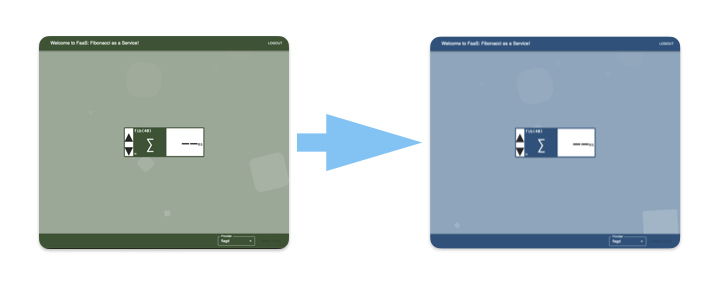
Once the PR has been merged, the new background color should automatically be visible within ~30 seconds.
In addition to the playground application, the open-feature-demo namespace also contains a Jaeger instance, where the application sends traces to.
To demonstrate this, click on the element in the middle of the screen to start the calculation of the fibonacci number. Being logged out, the backend will
use the naive recursive algorithm to calculate the number, due to the configuration of the fib-algo feature flag. Due to this, the calculation will take a couple of seconds.
To inspect the traces an Jaeger, use the following command to get a link to the Jaeger UI:
$ make get-ingress-address

Playground application: http://<ingress-address>
Jaeger UI:              http://<ingress-address>/tracing
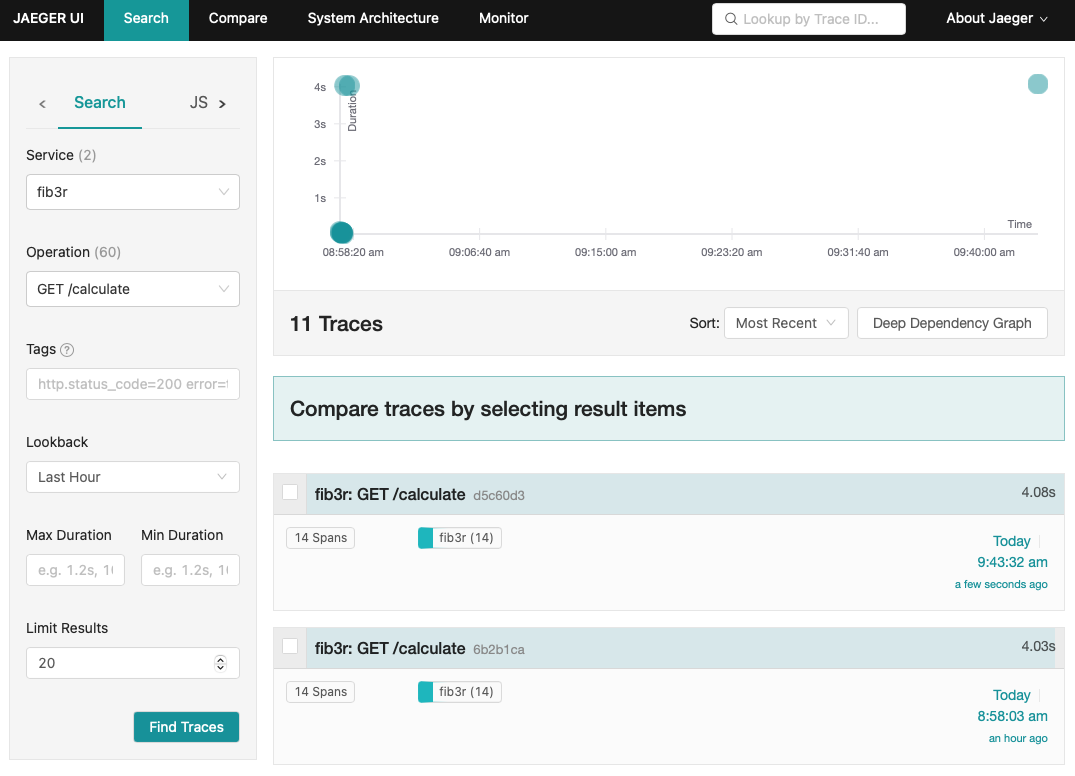
To inspect the traces of the calculate function in Jaeger, select the
fib3r service, and filter for the GET /calculate operation (see the screenshot below). This will give you a list of all traces related to this operation:
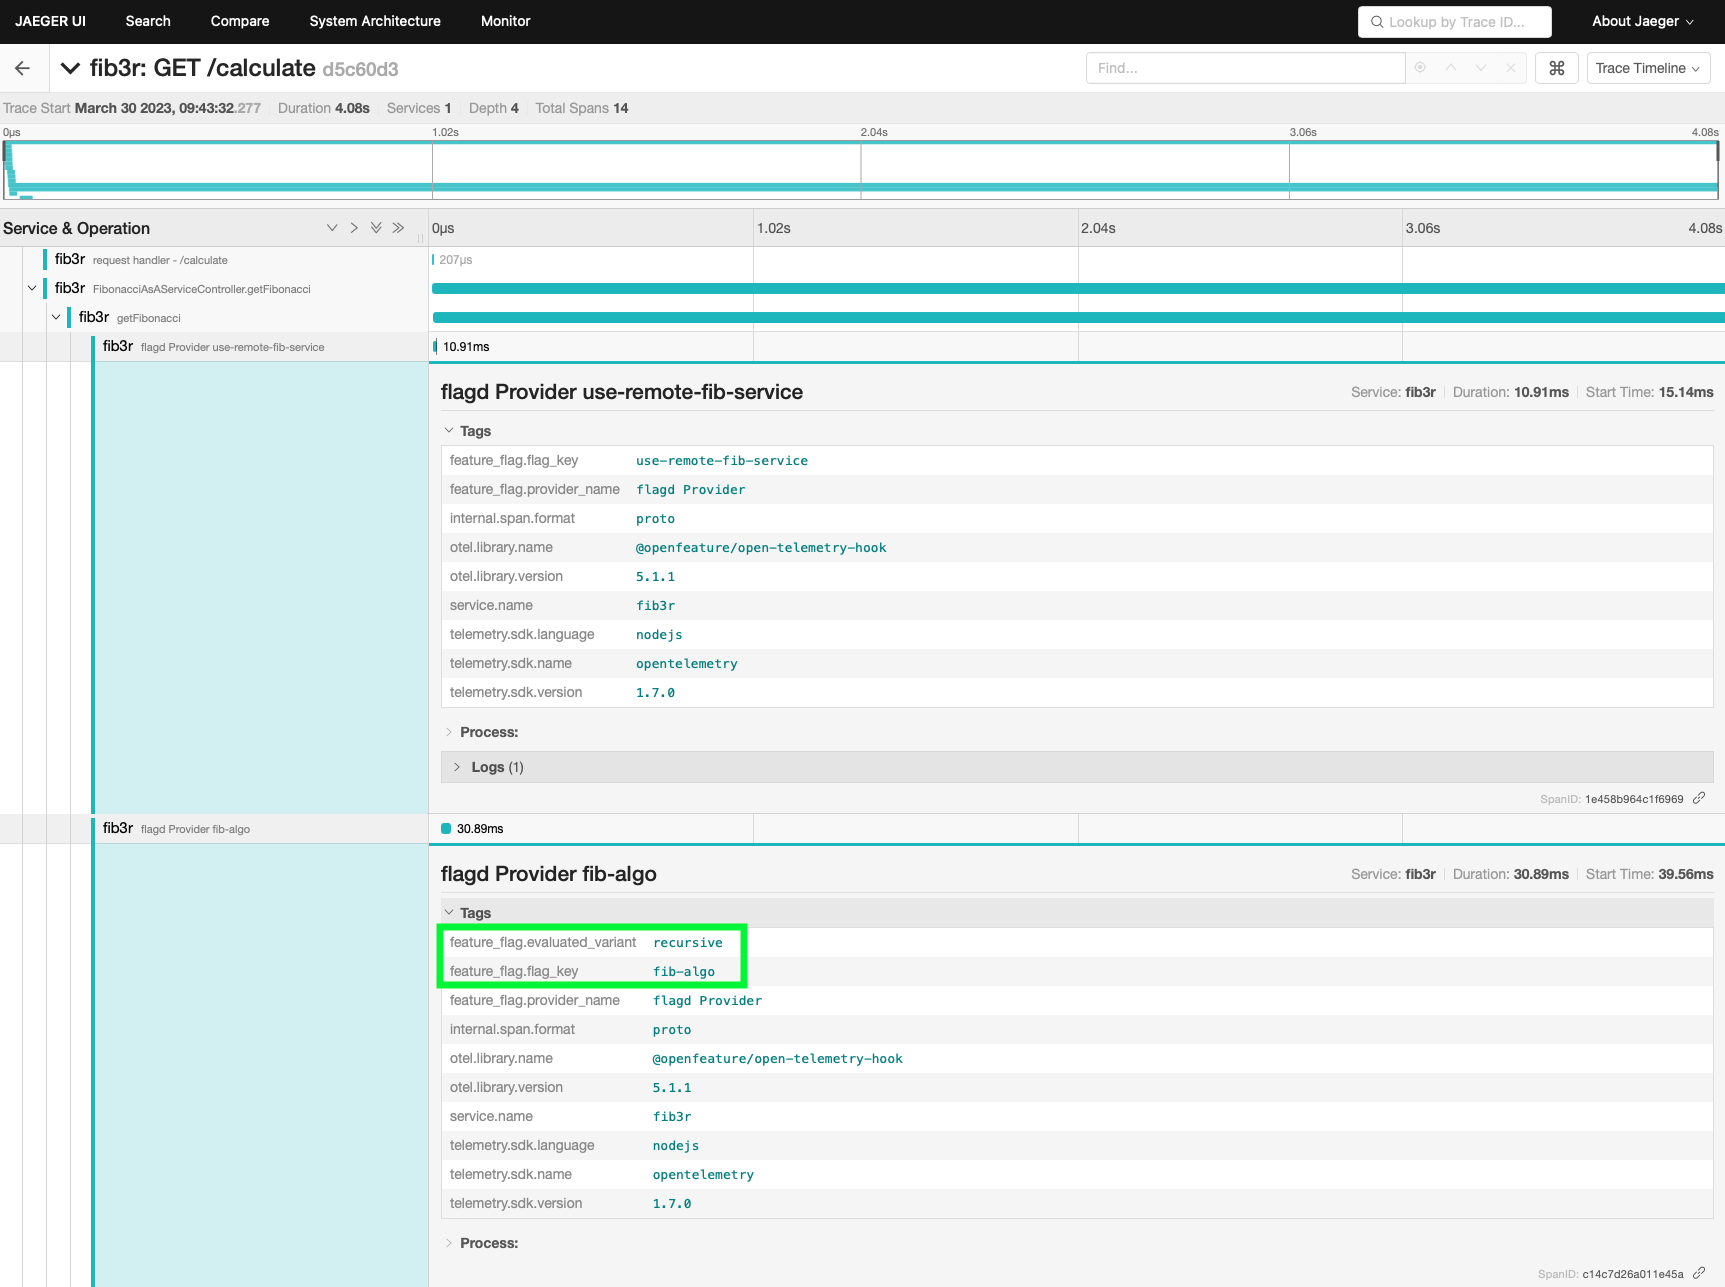
When selecting one, you will get to the detailed breakdown of the spans that are part of that trace. Here you will find the information that the flagd-provider evaluated
the fib-algo feature flag, which resolved to the recursive variant:
Now, to make things faster, we will go back to the app's UI and login with a user name that ends with @faas.com:
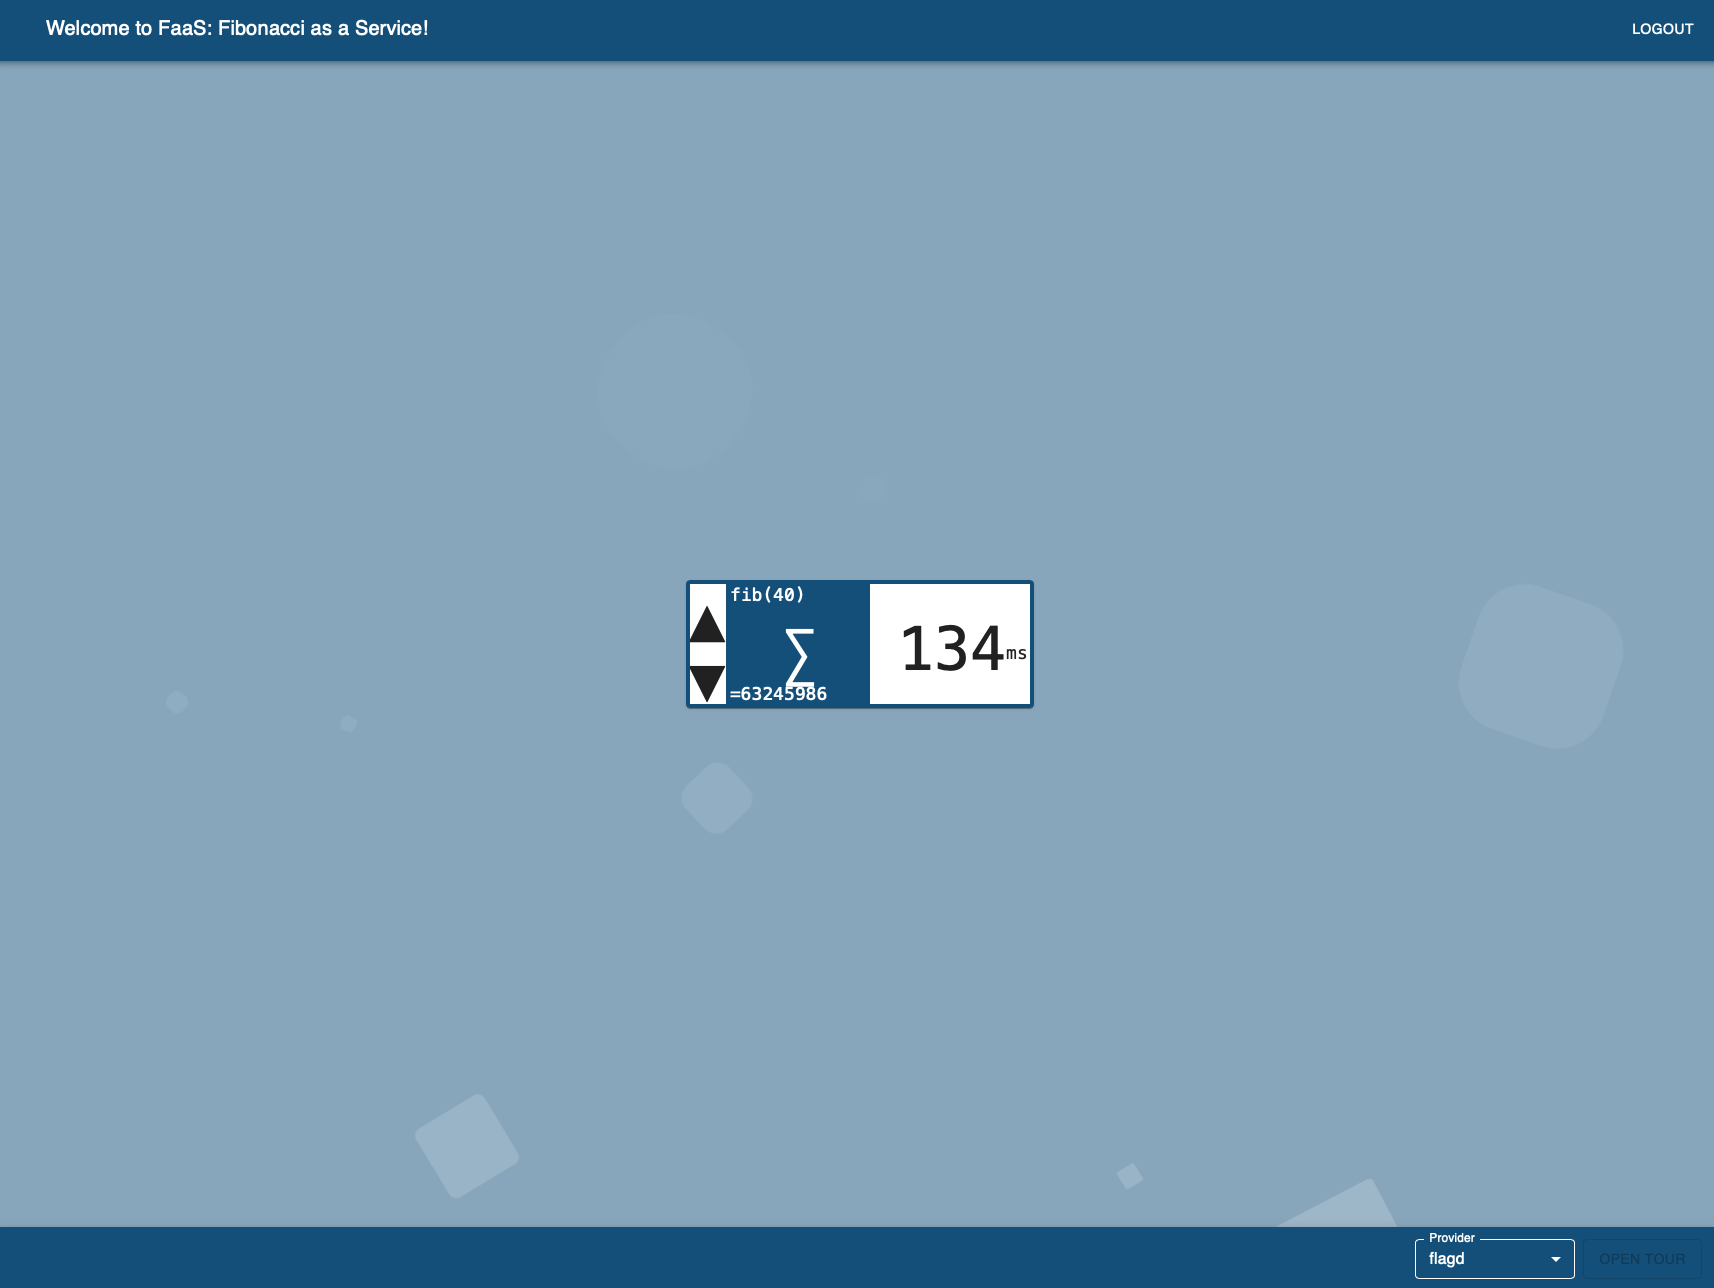
After you are logged in, trigger the calculation again - this time it will be much faster, due to the binet algorithm being used for logged in users:
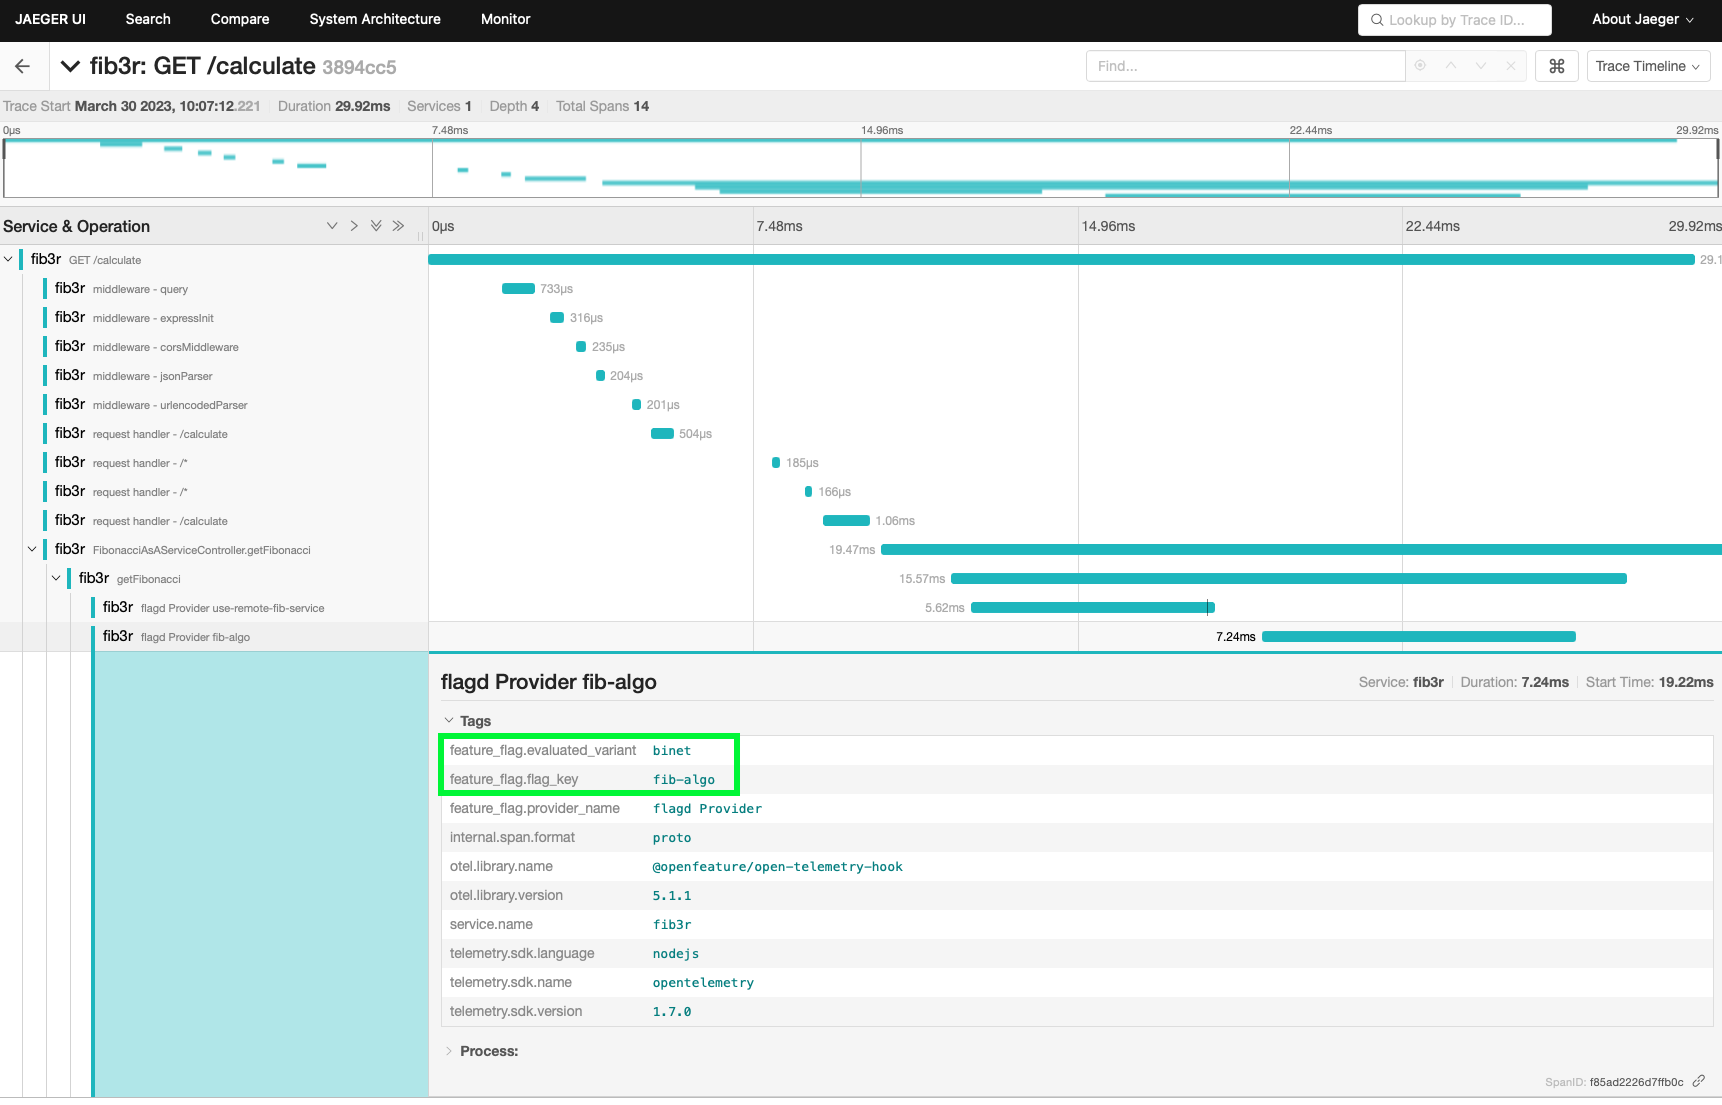
Just like before, the trace for this operation can then again be inspected, only that this time the overall timespan will be much smaller, due to the different algorithm being chosen:
In addition to FlagD, the demo app supports the following feature provider tools:
- Environment Variable
- Go Feature Flag
- CloudBees Feature Management
- Split
- Harness
- LaunchDarkly
- Flagsmith
To set up these providers, you need to populate the secret containing the API keys for these platforms. The file containing all the
required keys is located at environment/feature-flag-providers/api-keys.yaml. To find instructions on how to set up those keys, please refer to the
README of the OF playground app.
