

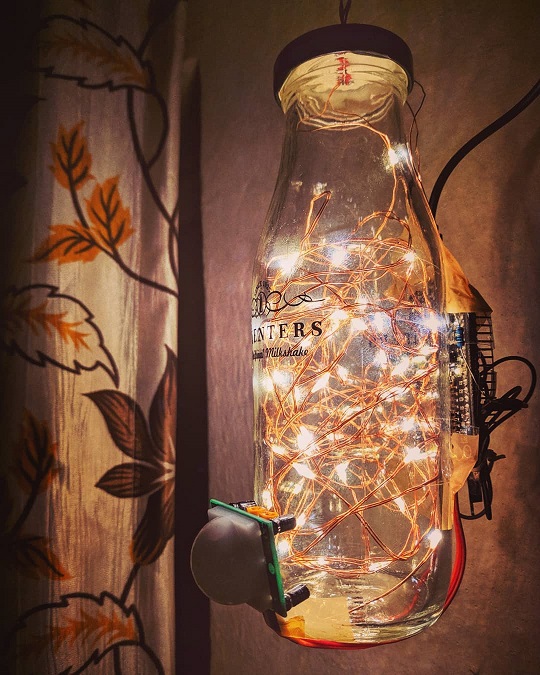
Radiance is an IoT based smart ambient lamp. It consist of an ESP8266 (NodeMCU) microcontroller and a PIR sensor tied to it to detect the motion in the room. This controller drives a 5V DC LED rice-light strip. To create an aureate ambience, these rice-lights can be kept inside a bottle and then it can hanged to the ceiling or a window!
You know that sky is the limit when it comes your creativity! 😄
- ESP8266 (NodeMCU) connects to your WiFi.
- It connects to a Blynk-IoT server.
- Smartphone App, Website or even through voice commands (Google assistance) can be used to control the lamp.
- With PIR sensor, the lamp is smart enough to sense the motion and switch itself ON and OFF! 😎
This project is developed using following frameworks/technologies/plugins/add-ons.
Are you new to Arduino/NodeMCU or you don't know how to add NodeMCU board to arduino IDE? 😕
Don't worry, Its really simple if you checkout this link and follow the steps given there! 👍
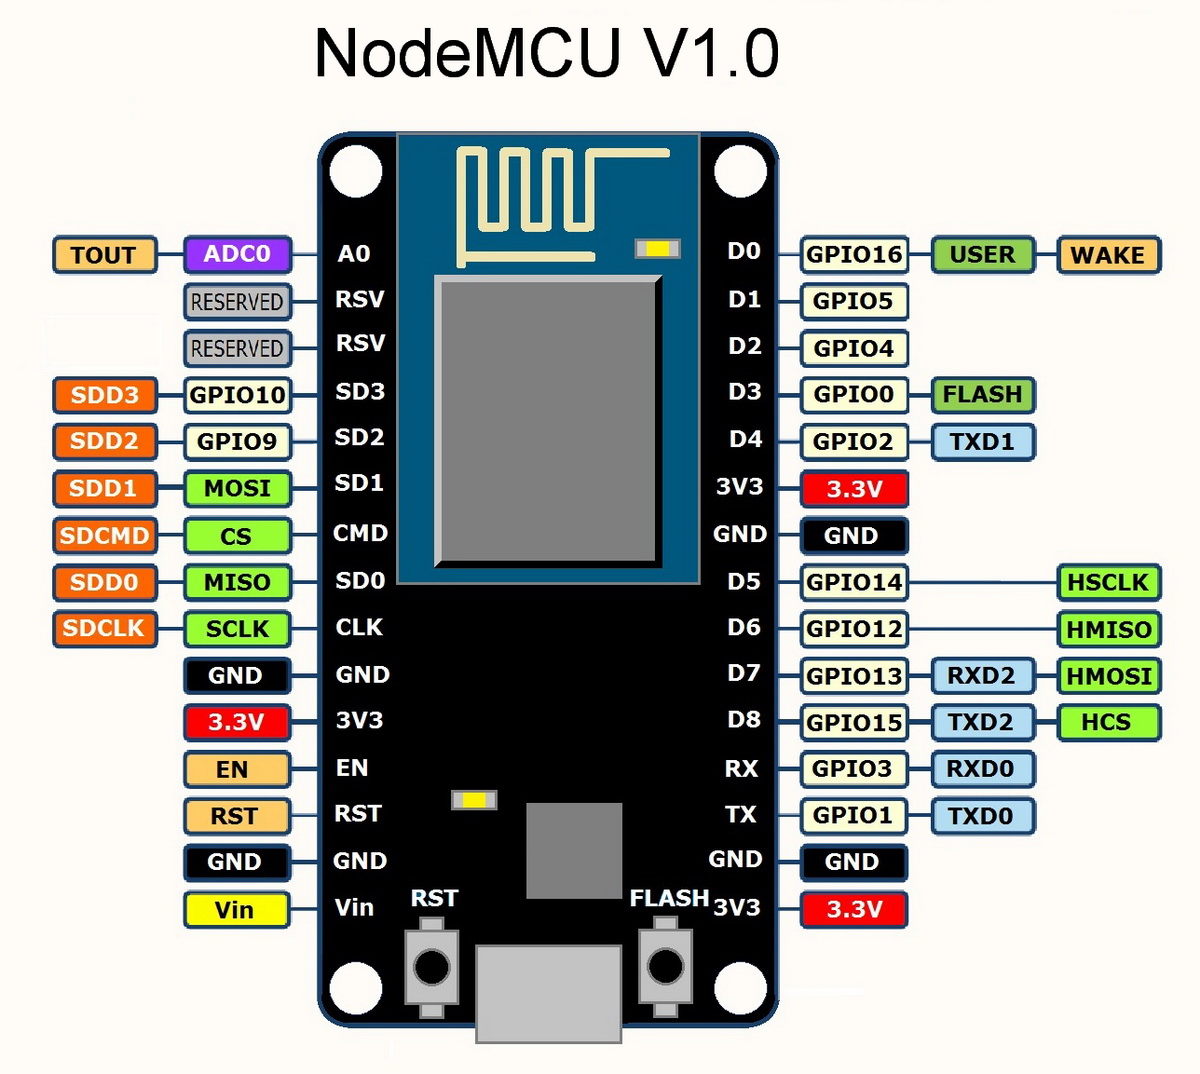
The pin configuration that I have used for this project is given in this file. The hardware configuration can be changed by changing the following values.
#define D_OUT        5
#define PIR          4
#define LED_MOTION   16
#define LED_BUILTIN  2
Note:
- The pin numbers used above are GPIO pins as per the given pinout diagram and not the digital pins printed on the board.
- Download Blynk App from Google Play (Android) or App Store (iOS).
- Create a new project - Choose NodeMCU as a hardware model and WiFi as a connection type.
- As soon as you setup the project, you will receive an email containing an Authorization Token from Blynk.
- Copy this Auth Token and paste it into creds.h file. Also, add your Wi-Fi SSID and password so that NodeMCU will be able to connect to your network.
// Filename: creds.h
char auth[] = "YOUR_BLYNK_TOKEN";
char ssid[] = "WIFI_SSID_NAME";
char pass[] = "WIFI_PASSWORD";
(This token is your private key to access your hardware. Anyone who's having this token have a full access of your IoT device so make sure not to release this file into a public source control like GitHub!)
- Feel free to tinker and play with your Blynk app. Try to make a few UIs, explore various widgets. Remember, for development and testing, we will use Blynk app but once you finalized your project architecture, you can create your own standalone & custom app (we'll cover that here as well!)
This is the UI that I have made in my blynk app while developing the project.
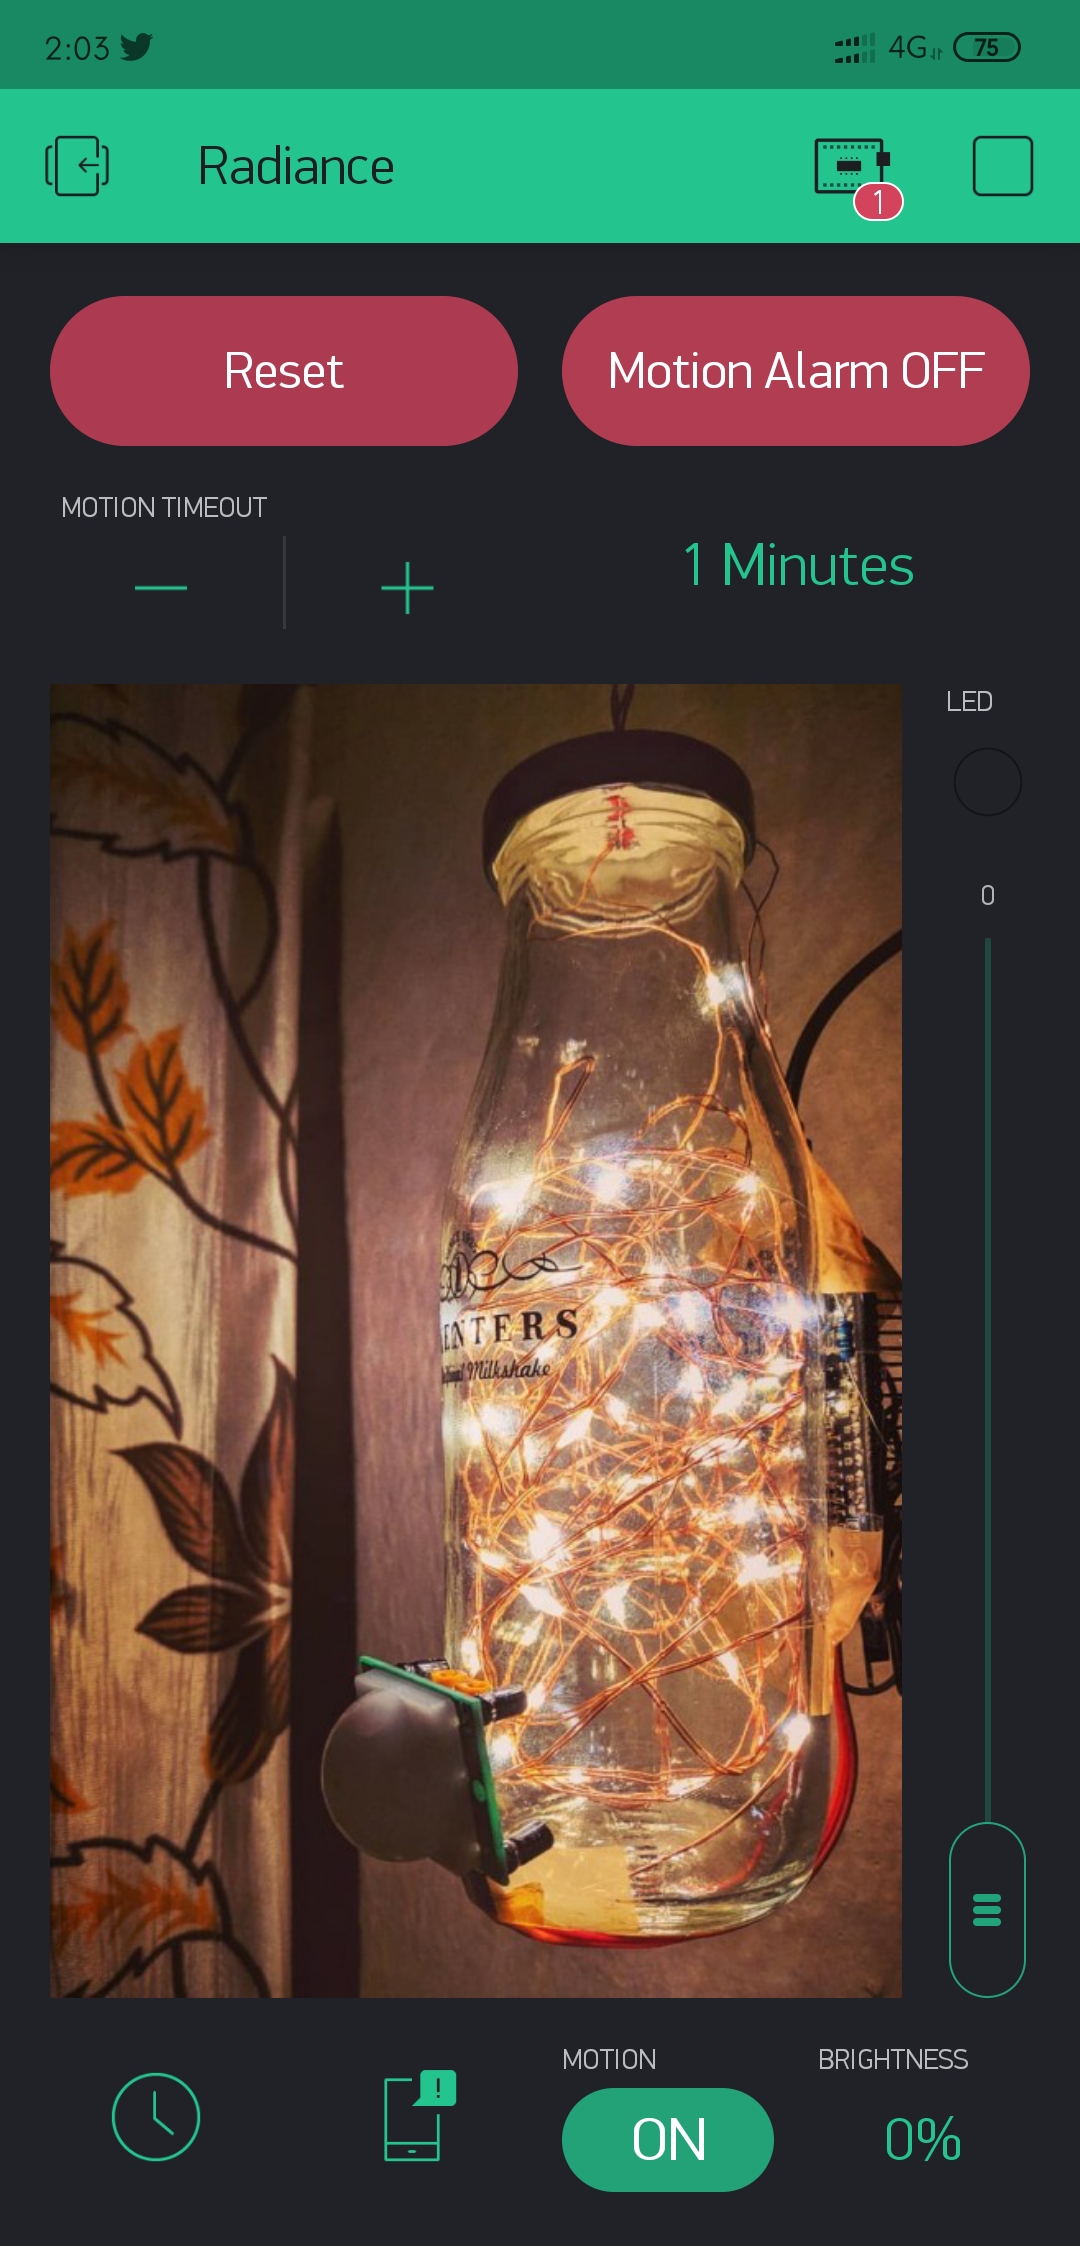
You can Scan this QR code from the Blynk app to get a copy of this layout.

Note: If you made any changes into Virtual Pin configuration while flashing the code into the NodeMCU, make sure that same changes should be made into Blynk app to connect the respective widget to the appropriate V-pin.
// Default V-Pin configuration
// filname: Radiance.ino
#define V_LED       V0
#define V_MOTION    V1
#define V_CONTROL   V2
#define V_TIMEOUT   V3
#define V_STATUS    V4
#define V_RESET     V5
#define V_ALARM     V6
#define V_OTA       V7
Well, Rather than explaining everything here from the scratch, you can follow this tutorial (Step-5) to integrate your Blynk project with Google Assistance using webhooks.
Thanks to codeometry.in for their awesome tutorial! 👏
In 2019 ,As compared to Android-Java and Swift, Flutter is a new framework.
Here are some helpful links to setup & release your own app using flutter.
Flutter uses the dart language for application development. You can find the source code in the following directory path
Radiance-App/radiance_flutter/

Any contributions you make are highly appreciated
- Fork the Project.
- Create your own Branch.
- Commit your changes.
- Push to your Branch.
- Open a Pull Request.
- Pranjal Joshi - joshi.pranjal5@gmail.com
This project is licensed under the MIT License - see the LICENSE.md file for details.
The images used in this project may subjected to the copyright.