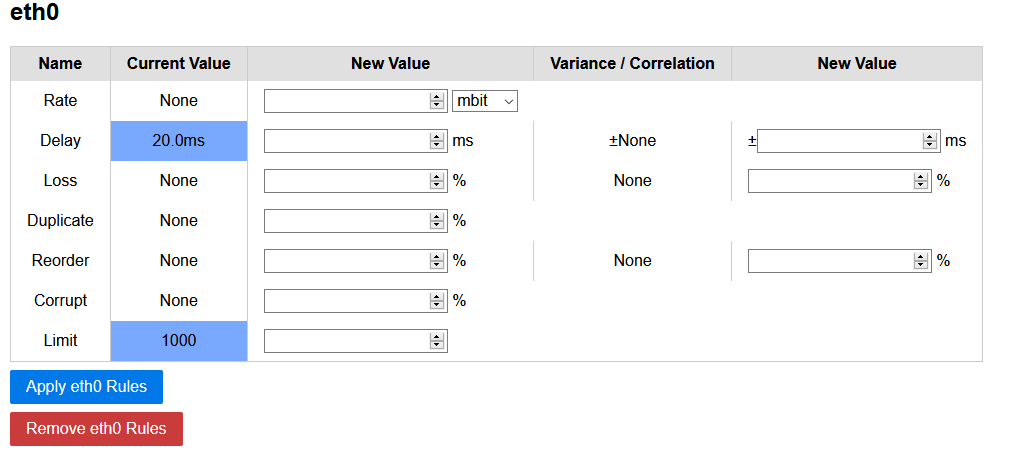
A lightweight Python-based Web-GUI for Linux traffic control (tc) to set, view and delete traffic shaping rules. The Web-GUI is intended for short-term isolated testbeds or classroom scenarios and does not contain any security mechanisms.
No further changes are planned right now, but pull requests are welcome.
- Tested with Ubuntu 16.04 LTS & Ubuntu 18.04 LTS & Raspbian 4.14.98-v7+ (stretch, Debian 9.8)
netemtools &python3-flaskare required- Ubuntu 16.04 : Install with
sudo apt install iproute python3-flask - Ubuntu 18.04 : Install with
sudo apt install iproute2 python3-flask
- Ubuntu 16.04 : Install with
- More information:
-
Execute the main.py file and go to http://localhost:5000:
sudo python3 main.py --ip IP The IP where the server is listening --port PORT The port where the server is listening --dev [DEV [DEV ...]] The interfaces to restrict to --regex REGEX A regex to match interfaces --debug Run Flask in debug mode -
The tool will read your interfaces and the current setup every time the site is reloaded
You can use docker to run this application. Run with host network (--network host) and network admin capabilities (--cap-add=NET_ADMIN). Site will be available on default port Ex: http://dockerhost:5000
docker run -dit --restart unless-stopped --network host --cap-add=NET_ADMIN ncareau/tcgui:latest
You can change the configuration using these Environment Variables:
- TCGUI_IP - Default
0.0.0.0- Use to change listening address - TCGUI_PORT - Default
5000- Use to change the listening port - TCGUI_DEV - The interfaces to restrict to
- TCGUI_REGEX - A regex to match interfaces
If using an interface bridge, docker might cause issue with the bridge. (https://askubuntu.com/questions/1073501/docker-breaks-network-bridging-to-virtual-machines)
To fix this, create a file /etc/docker/daemon.json with the following contents:
{
    "iptables" : false
}
You can use the supplied Vagrantfile to test tcgui quickly. Vagrant will setup two machines, sender (192.168.210.2) and a receiver (192.168.210.3):
vagrant up
Afterwards connect to the sender and start the GUI:
vagrant ssh sender
cd /vagrant
sudo python3 main.py --ip 0.0.0.0 --debug
Start a receiver in the receiving VM:
vagrant ssh receiver
iperf3 -s
Send a packet stream from the sender to the receiver:
vagrant ssh sender
iperf3 -c 192.168.210.3 -t 300
Now access the GUI at http://192.168.210.2:5000/ and change the rate of interface eth1. You should see the sending/receiving rate to decrease to the set amount.

