This repository contains code that was developed as a part of Master Thesis at Imperial College London Movement Classification on Energy-efficient Sensor Using Neural Networks written under the supervision of Dr Thomas Heinis.
The project tackles the area of Human Activity Recognition (HAR) by utilizing Bidirectional LSTM (Recurrent Neural Networks) to build a robust classifier that recognizes fitness activities and classifies them as correct or incorrect. It achieved a performance of 96% and was built on a custom dataset consisting of over 11 thousand samples. The system recognizes seven different fitness activities: Push-up, Push-up (incorrect), Squat, Sit-up, Sit-up (incorrect), Jumping, Lunge. The data might be found in the data_collected/directory
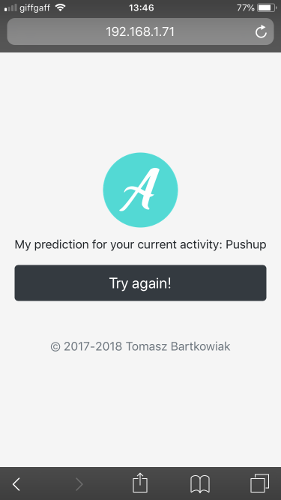
The system is built in such a way that it can be easily adapted to custom datasets with arbitrary activities. It provides a web app Data collection that facilitates the data collection process. The Analyzemyworkout is a web application used for HAR classification.
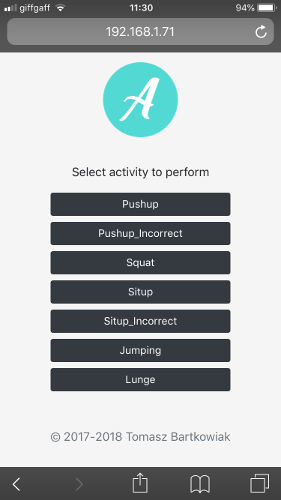
Data collection application:
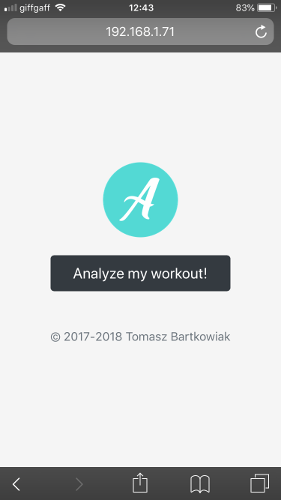
Analyzemyworkout application:
Hardware: Inertial Measurement Unit equipped with BLE module (Here: Arduino LilyPad SimbleeBLE with MPU9250 IMU was used)
pip install -r requirements.txt
The classifier achieved an overall accuracy of 96% (the model can be found in models/ directory. The confusion matrix resulting from testing the classifier on the test set can be seen below:
 Yet the architecture is quite simple and consists of two stacked Bidirectional LSTM layers:
The hyperparameters of the network were optimized using Bayesian optimization.
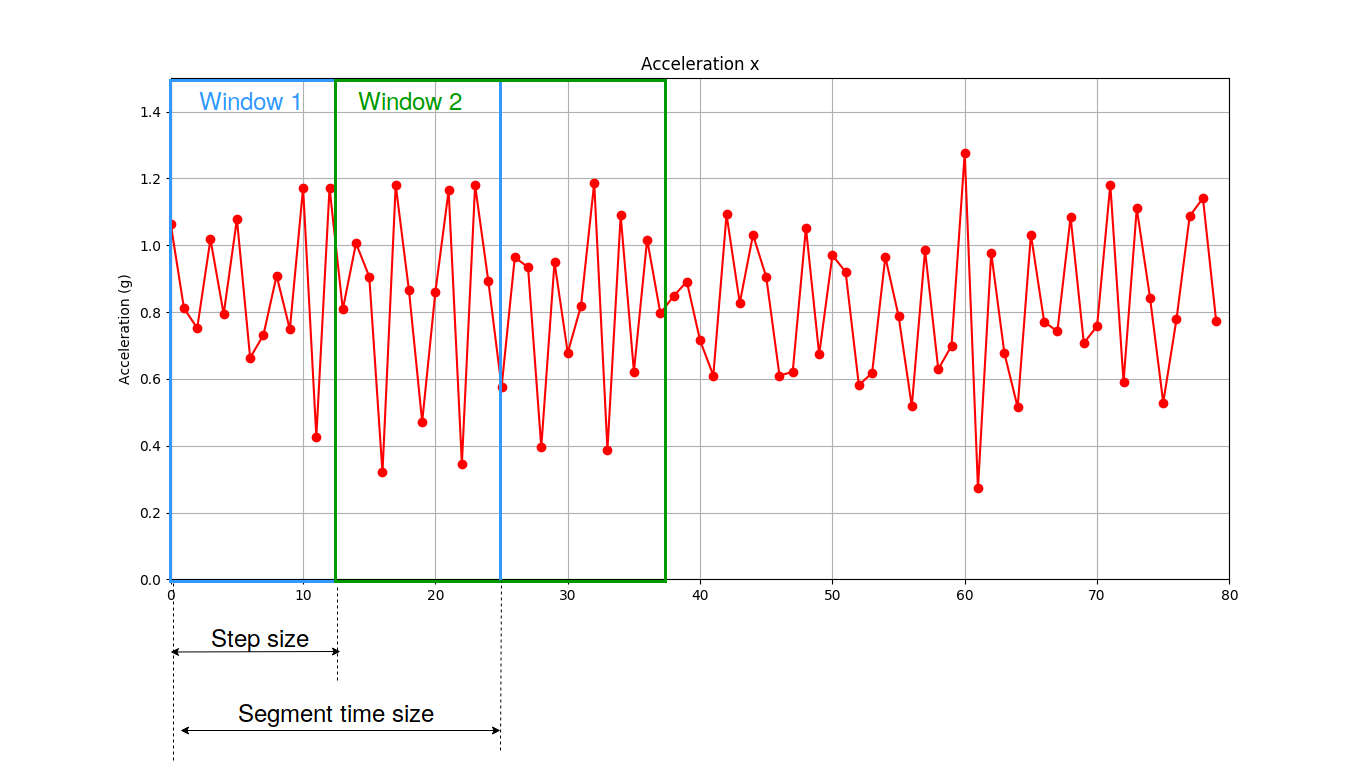
The data fed into the classifier is preprocessed using Sliding window approach where each sample after preprocessing is a single window composed of many raw samples (tuples of IMU readings, in case of 9DOF IMU - 9 numbers), as presented on a figure below:
The repository consists of two systems: Data collection system and Human Activity Recognition system (aka Analyzemyworkout).
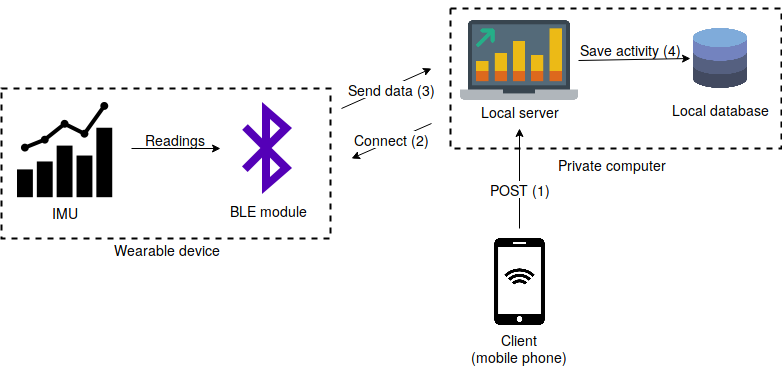
Data collection system is a web app written in Flask that establishes BLE connection with a wearable device (motion sensor/IMU) and saves the data as a .pckl file. Its high-level architecture is presented below:
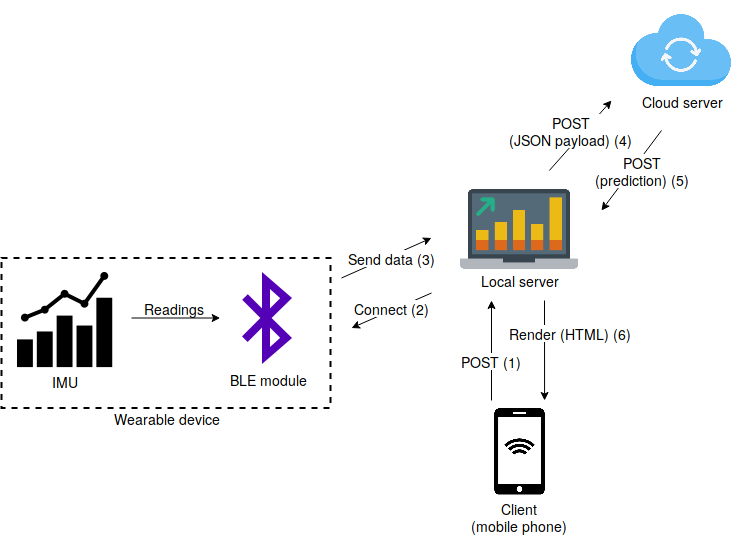
Analyzemyworkout is a web app written in Flask that establishes BLE connection with a wearable device (motion sensor/IMU), preprocesses data and sends to an external server for classification. After receiving the response (JSON), it renders that response on the client's browser.
Its high-level architecture is presented below:
Motion sensor/IMU should be configured so that it sends one packet of data with IMU readings. In case of 9DOF IMU (accelerometer, gyroscope and magnetometer) the C/C++ code would look like this:
  int16_t ax, ay, az;
  int16_t gx, gy, gz;
  int16_t mx, my, mz;

  int DATA_SIZE = 2;
  memcpy(data, &ax, sizeof(ax));
  memcpy(data + 1 * DATA_SIZE, &ay, sizeof(ay));
  memcpy(data + 2 * DATA_SIZE, &az, sizeof(az));
  memcpy(data + 3 * DATA_SIZE, &gx, sizeof(gx));
  memcpy(data + 4 * DATA_SIZE, &gy, sizeof(gy));
  memcpy(data + 5 * DATA_SIZE, &gz, sizeof(gz));
  memcpy(data + 6 * DATA_SIZE, &mx, sizeof(mx));
  memcpy(data + 7 * DATA_SIZE, &my, sizeof(my));
  memcpy(data + 8 * DATA_SIZE, &mz, sizeof(mz));

  SimbleeBLE.send(data, sizeof(data));
Where ax, ay, az, gx, gy, gz, mx, my, mz are the IMU readings in x,y,z axis from accelerometer, gyroscope and magnetometer respectively. The variables are declared as 2-byte integers (instead of 4-byte), due to BLE packet size restrictions.
In order to establish BLE connection MAC address, uuid of characteristic and its handle should be known (see GATT overview). gatttool and hcitool can be used to discover them using Command Line Interface (CLI):
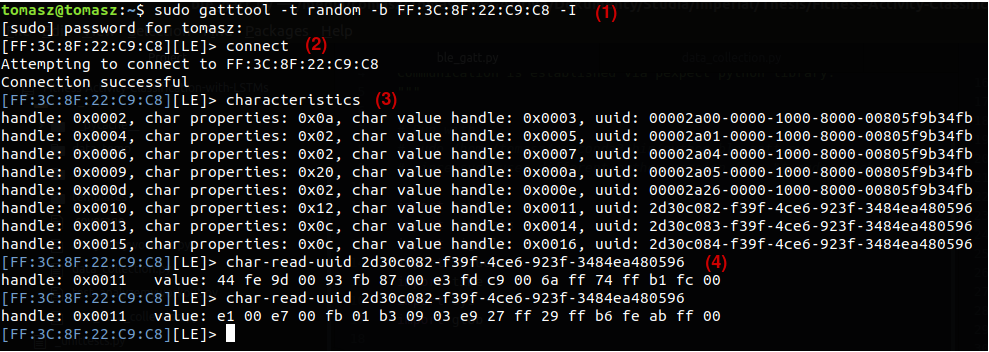 (1), (2) Connect to the device with known MAC address. (3) Discover characteristics. (4) Read particular characteristic.
 pexpect (see documentation) can be used to automate the use of gatt.
Once sensor/IMU/wearable device is configured we can start setting up the system:
- Clone this repository
- Install required packages (see
requirements.txt) - Perform necessary config changes (see comment below)
- Run
data_collection.pyapp inweb_app/directory - Access the web app at
http:<local_ip>:5000 - Wear the sensor
- Select activity you want to record
- Perform the activity till
----- ACTIVITY SAVED ---gets printed in the console - Repeat steps 7,8 as many times as needed
- Merge collected samples with
merge_data.pyscript - Delete all samples apart from the
data_merged.pcklfile - Rename the
data_merged.pcklfile todata.pckland move it todata/directory - Run
model_train_keras.pyto train the network
Line 3 mentions the necessity of editing config.py file. It consists of five "sections": GLOBAL VARIABLES, MODEL, DATA COLLECTION/PREPROCESSING, VISUALIZE and BACKEND REQUEST. GLOBAL VARIABLES contain global variables such as COLUMN_NAMES that describes all the features of the data, LABELS_NAMES that contains all the activities to be recognized, and data/model directories indicating where data and classification models are stored. MODEL section contains the hyperparameters of the LSTM model. DATA COLLECTION/PREPROCESSING section contains variables that need to be edited in order to establish a BLE connection: IMU_MAC_ADDRESS (MAC address of the wearable device), UUID_DATA (uuid of characteristic that contains the IMU data) and BLE_HANDLE (handle is a unique number associated with each characteristic). VISUALIZE section contains global variables specifying the dimensions of the graph if data is to be visualized in real-time. Finally, BACKEND REQUEST section contains the variables needed for proper functioning of web applications; user should change the values of IP_EXTERNAL and IP_LOCAL.
Once the model is trained it can be deployed and used for activity recognition. Analyzemyworkout back-end application contains a code for web application that can be deployed on a VM and used for classification.
The following steps need to be undertaken in order to deploy the app:
- Set up a virtual machine (VM)
- Allow for HTPP traffic on port 5000 on the VM
- Clone this GitHub repository on the VM and this repository on the local machine (LM)
- Install required packages (see
requirements.txt) - Place the pretrained model
model.h5inside amodels/directory in the VM - Change the
IP_EXTERNALinconfig.pyon the LM for the ip of the VM - Run the
analyzemyworkout.pyapp found in theweb_app/directory on the LM - Access the (local) application from a smartphone at
http:<local_ip>:5000 - Click
Analyzemyworkout!and perform the activity
