I'd like to share my approach to control a Fairland made heatpump directly via modbus not depending on Tuya with homeassistant. My heatpump is an IPS Pro model sold by Pool Systems which seems to be quite similar to the InverX series by Fairland directly.
Everything I describe here is at quality level "works for me". Follow these instructions at your own risk. You need to open your heatpump and connect cables to the mains powered main crontrol board. It might void your warranty and you will get close to mains powered components including some large capacitors. Don't follow allong if you are not sure what you are doing.
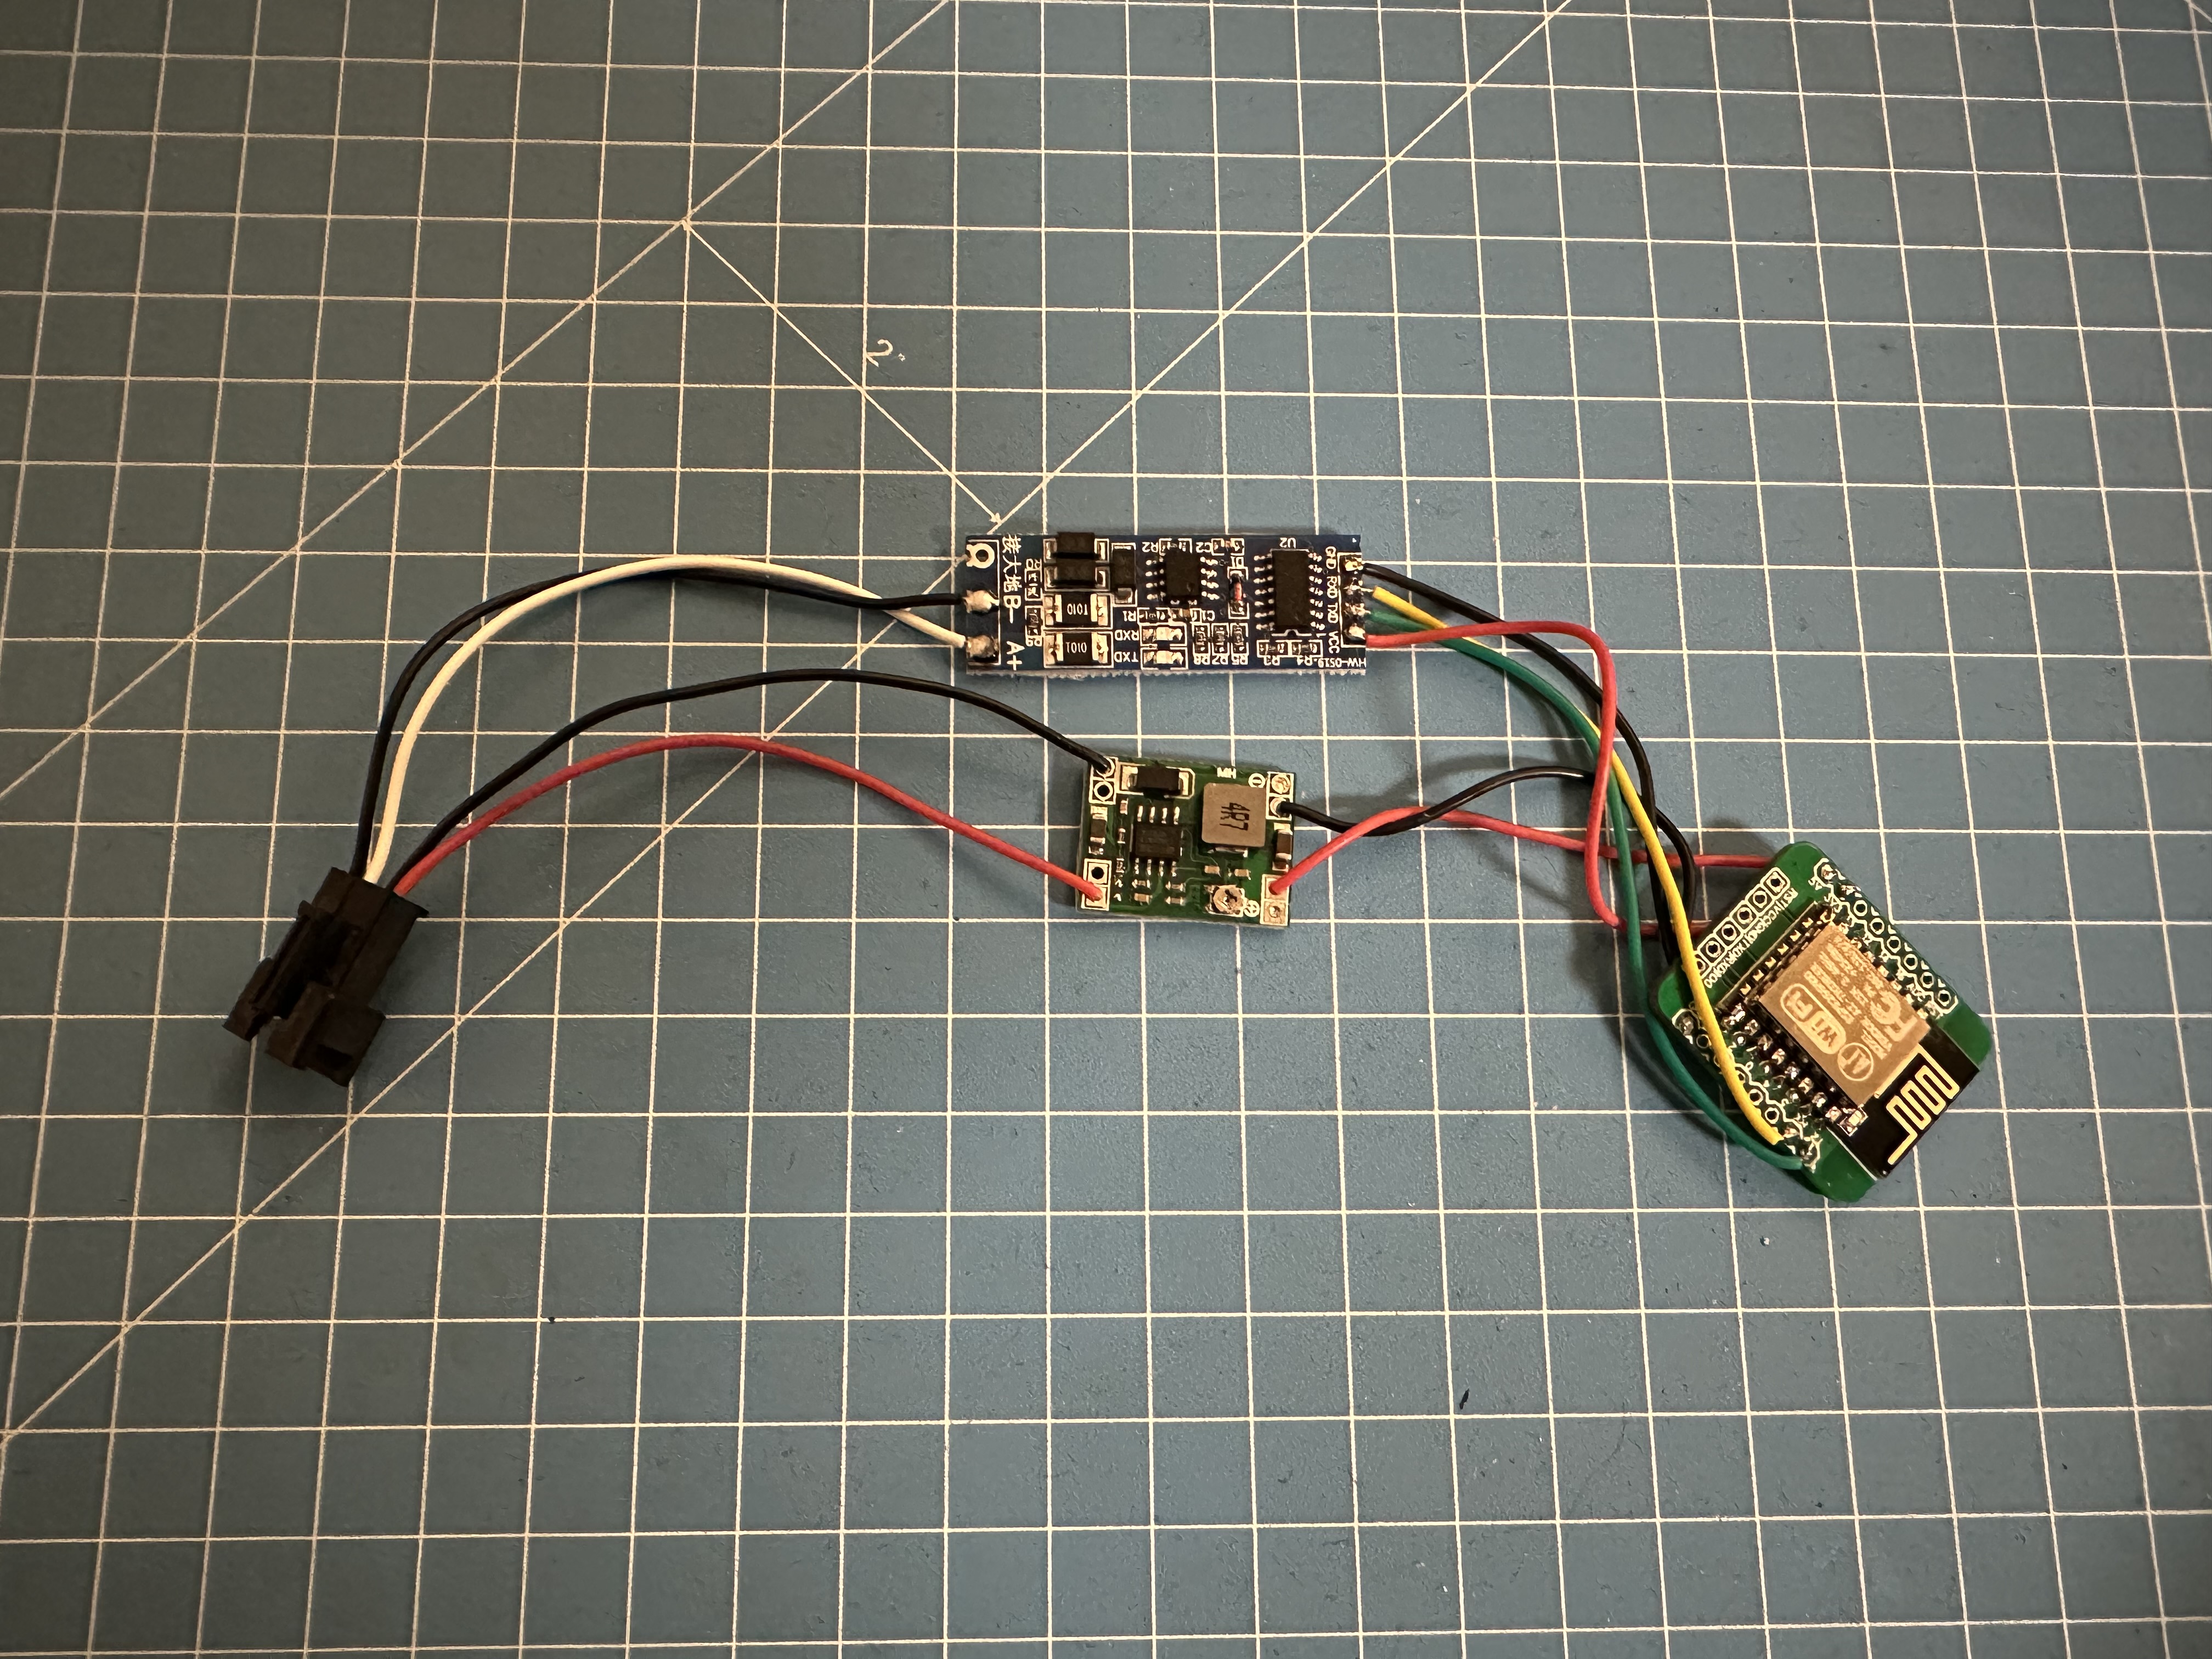
- ESP Baord. Most will work
- MAX485 module, preferably one with automatic flow control
- Buck converter if the 12V from the heatpump control board will be used to power the ESP
- JST-XH 4 pin connector to attach everything to the control board
- other connectors (optional) to alow for easier disassembly
- 12V+ from control board to + on the buck converter input side
- Ground from control board to - on the buck converter input side
- out + from buck converter to 5V or VIN of the ESP board
- out - from buck converter to GND on the ESP board
- RX on ESP to RXD on max485 board
- TX on ESP to TXD on max485 board
- 3,3v on ESP to VCC on max485 board
- G on ESP to GND on max485 board
- A on max485 board to A on control board
- B on max485 board to B on control board
If you use a variable voltage buck converter, make sure to set it properly to deliver 5v from 12v input before connecting it to the ESP. Otherwise you might fry the board.
In case you are using a max485 board without automatic flow control, one additional pin needs to be connected to the two center pins on the max board. This needs to be configured in esphome as well.
- Create a new ESPHome device in homeassistant
- Copy the esphome config snippet below the header. I left the captive_portal directive in the snippet for reference. Make sure it's only there once.
- Flash the board
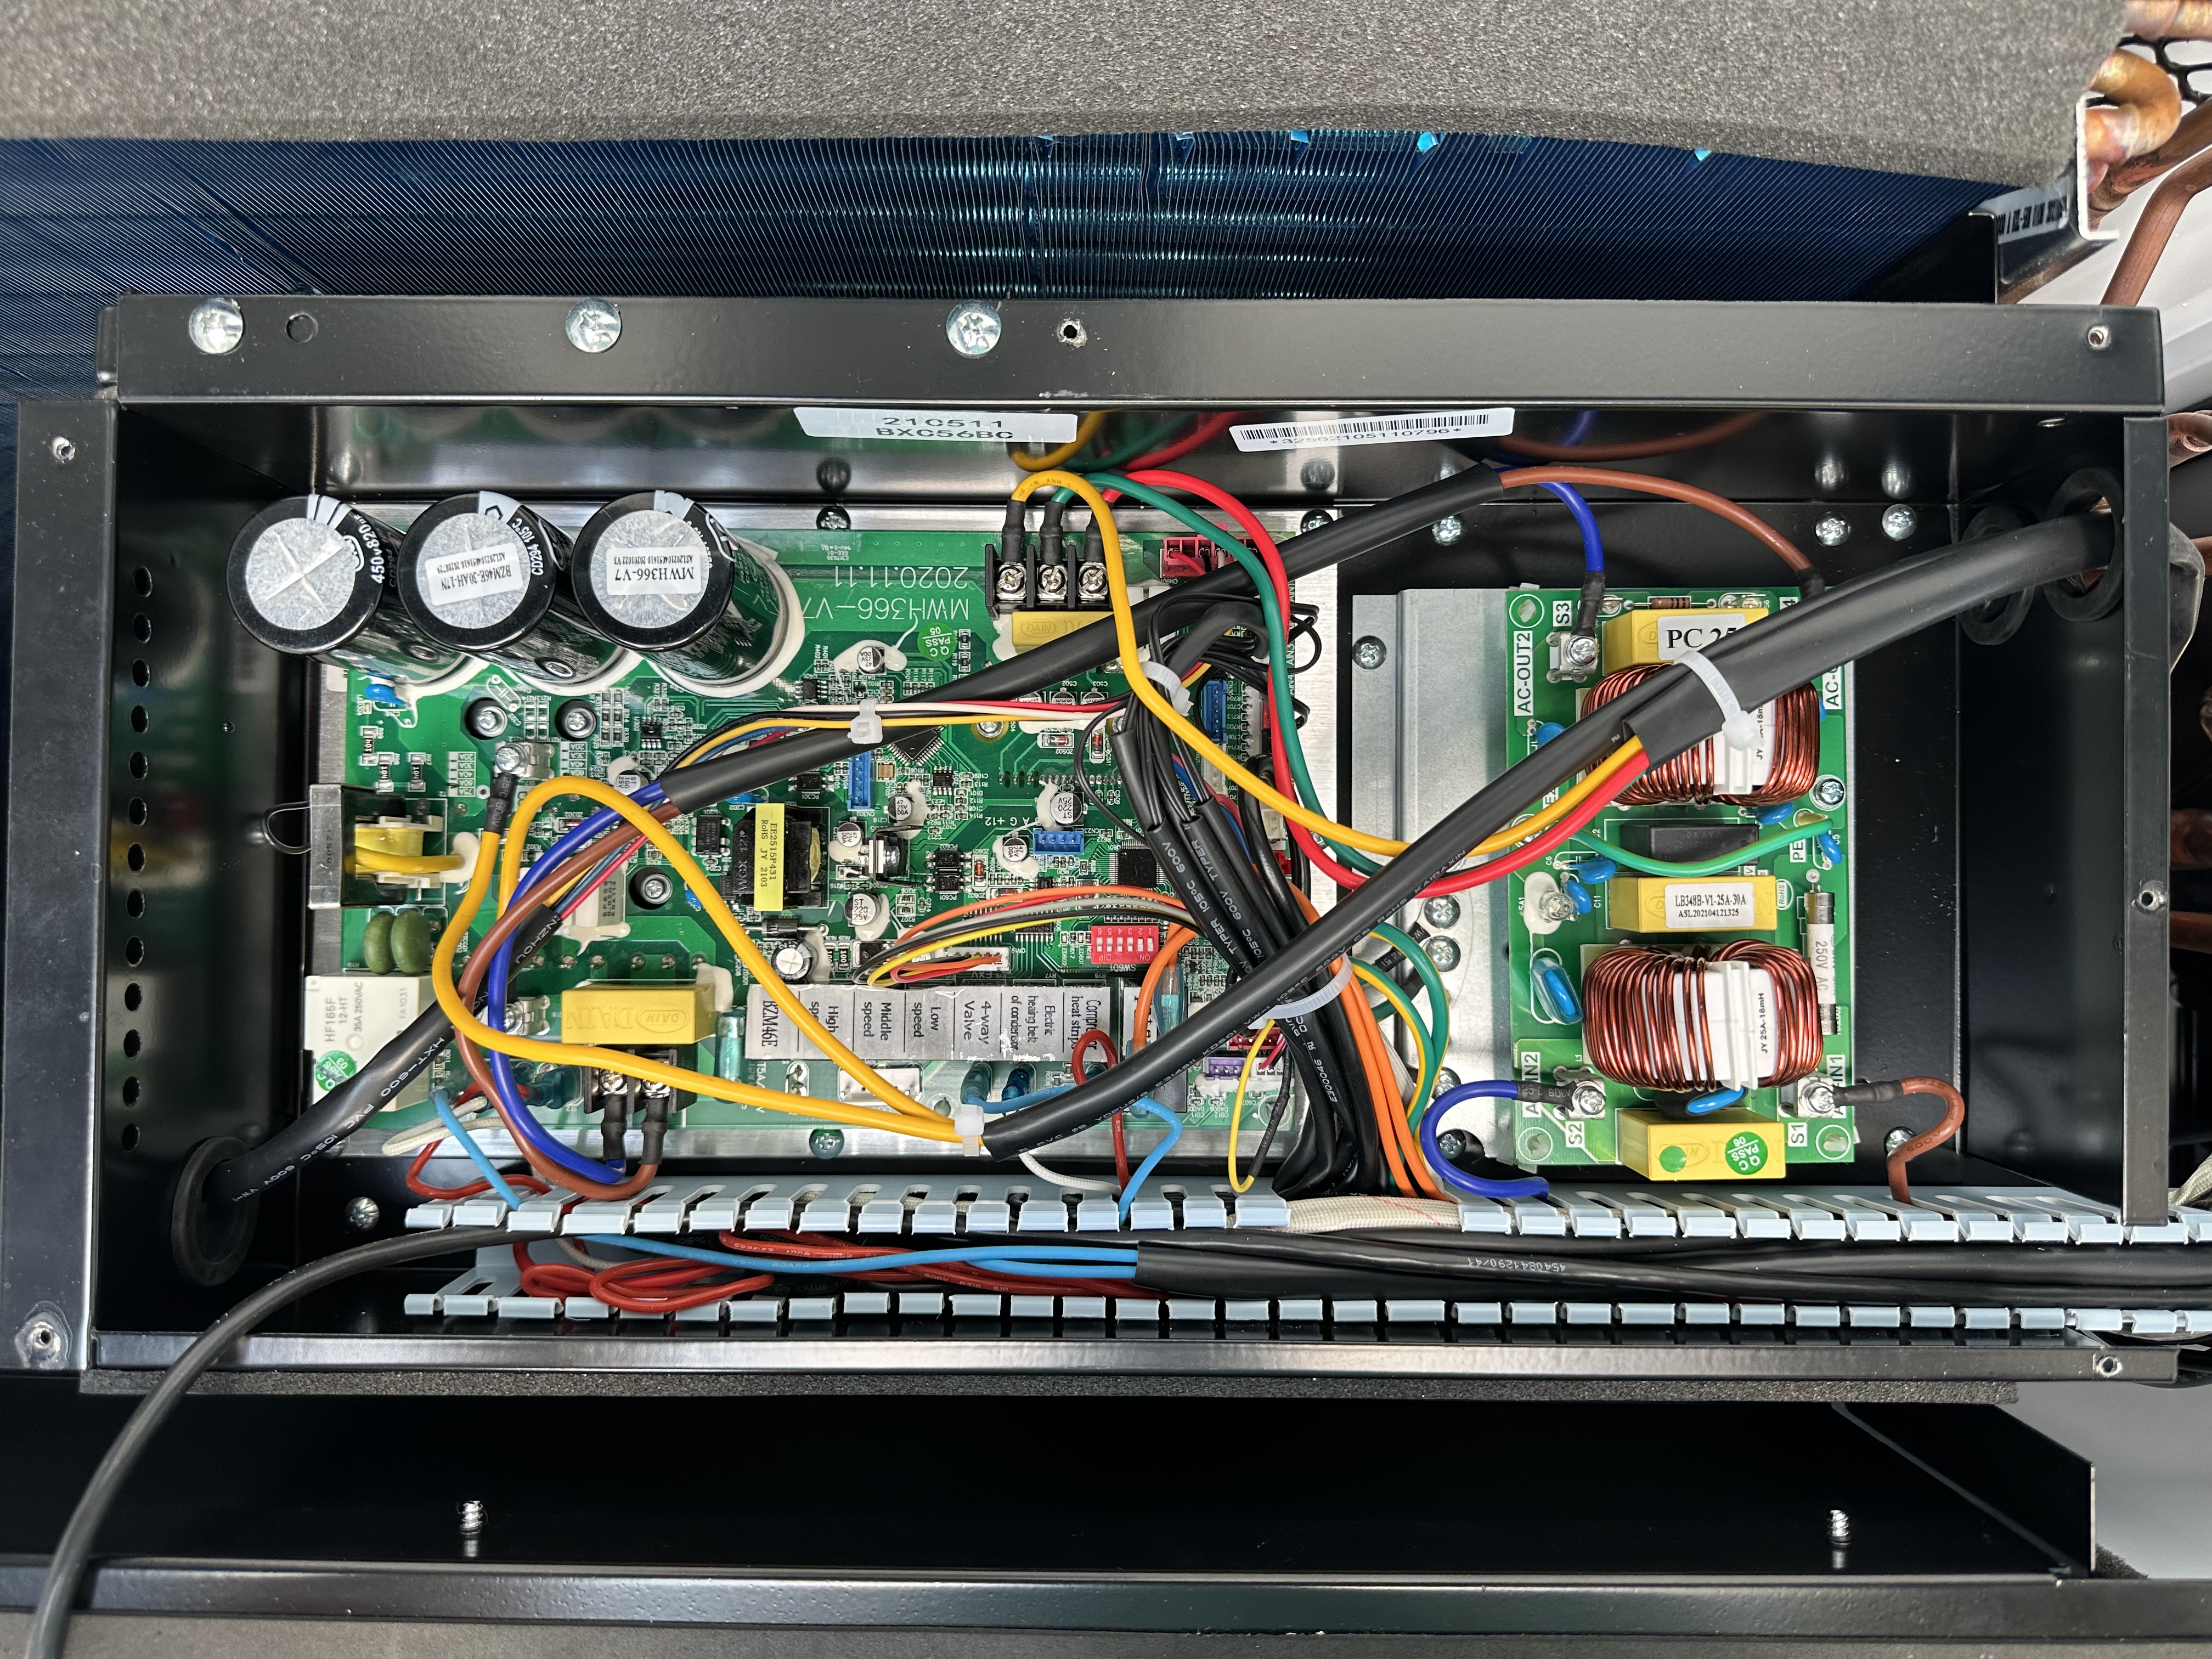
Connect everything to the header in the center of the image marked B A G +12V. The existing cable channels are quite handy to feed the cable out at the back of the unit. I have included a very simple (temporary) housing for the electronics which I clip on to one of the 50mm water pipes.
- Open the side panel providing access to the power connection terminal with two screws at the bottom
- two additional screws free the panel above which houses the control unit. remove this panel and disconnect the control unit
- Remove the two screws holding the top plate. There's an additional screw at the back to remove. After that, the top can be lifted.
- There's a large padded box in the center of the unit. Open it and inside you'll find the control board
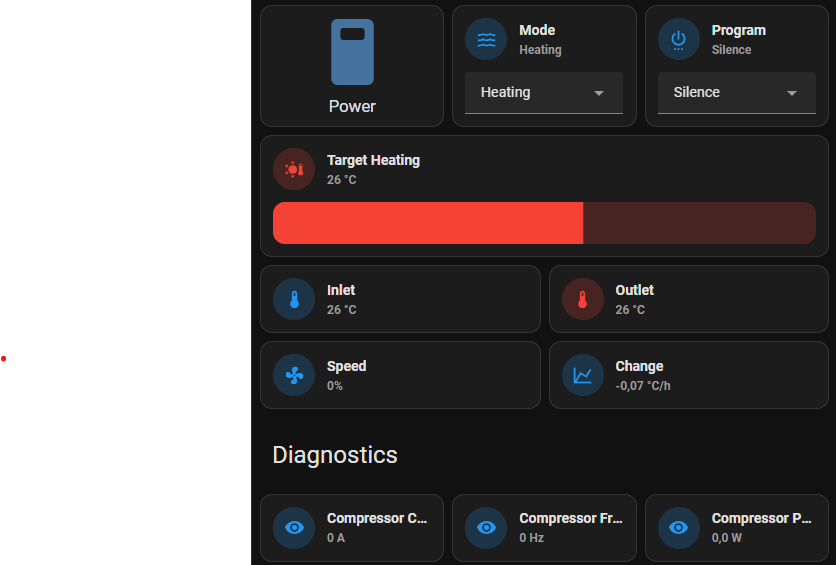
I have added a code snippet you can incorporate in your dashboard.

- The modbus configuration still throws a few warnings related to duplicate entries. It seems to work well despite these warnings though.
- The selected heating/cooling mode (slient, normal, ...) is not remembered properly. The heatpumpt often switches to silent when it's powered on even though normal was selected before.
- The case is to be considered rather preliminary. I just wanted something to get it to work.

