Project acronym: Nephio
Authors:
- Bartłomiej Chwast
- Karol Wrona
- Konrad Krzemiński
- Sławomir Tenerowicz
Year, Group: 2023/2024 Group 3
- 1. Introduction
- 2. Theoretical background/technology stack
- 3. Case study concept description
- 4. Solution architecture
- 5. Environment configuration description
- 6. Installation method
- 7. Demo deployment steps:
- 8. Summary – conclusions
- 9. References
Nephio is a cloud-native intent automation platform built on Kubernetes, designed to simplify the deployment and management of multi-vendor cloud infrastructure and network functions across large-scale edge deployments. By focusing on automation, Nephio streamlines the full lifecycle management of entities, from provisioning to updates and decommissioning. It encompasses both network functions and the underlying infrastructure required to support them, enabling automation that adapts to changing requirements. Nephio is vendor-agnostic, fostering an ecosystem for innovation while ensuring interoperability. Its Kubernetes-based approach leverages declarative intent with continuous reconciliation, enabling efficient and scalable automation. Nephio aims to accelerate the onboarding of network functions to production and reduce the costs associated with cloud adoption, ultimately enhancing agility in delivering services to customers [^1]. This project aims at creating demo presenting Nephio capabilities.
Nephio is a project that uses Kubernetes to automatically handle network tasks in cloud settings. It makes it easier to manage cloud infrastructure from different providers by using cloud-native ideas. This ensures that network services can grow, bounce back from issues, and be nimble when being set up and used on a large scale. The main aim of Nephio is to make using cloud and network infrastructure simpler and cheaper.
Technologies like distributed cloud help us use computing resources across different locations easily, through the internet. But, the traditional ways of setting up and managing these resources don't work well with these new, flexible cloud systems. They can't easily adjust to changes or handle the complex setups involving different providers and locations.
Nephio is a solution that makes this easier. It uses newer methods that are better at dealing with the complexities of setting up and managing network services and the cloud infrastructure they run on, even when these involve many different providers and locations. It focuses on initially setting everything up and then, using Kubernetes (a system for automating application deployment, scaling, and management), it makes sure that the network keeps running smoothly even if there are problems, needs to grow, or changes in the cloud services.
Nephio tackles the big challenge by focusing on two main solutions:
- It uses Kubernetes at each site as a consistent tool to set up and manage both the distributed cloud and the network services running on it. This means no matter where your resources are, you're using the same system to control them.
- It offers an automation system that uses Kubernetes' smart, self-correcting approach. This system also allows configurations to be easily handled by computers. This helps manage the complex setups without getting overwhelmed.
The diagram below shows a system where Kubernetes helps automate and manage a telecom stack in three parts:
-
- the cloud setup
-
- network function resources
-
- network function setup. Nephio aims to create flexible and open Kubernetes templates, called CRDs, for each part, following telecom standards.
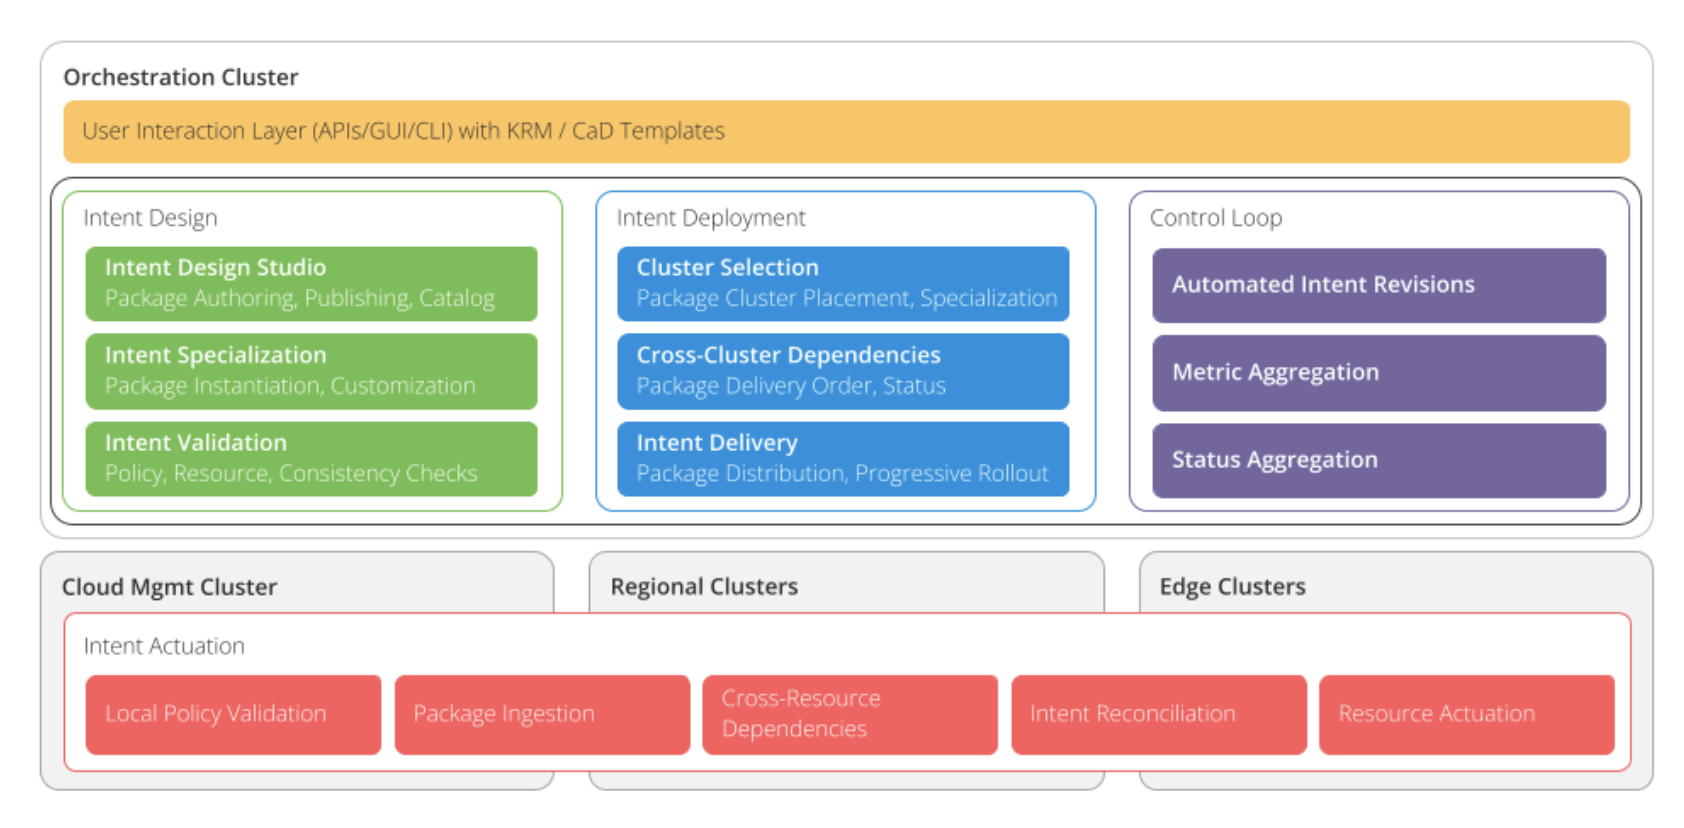
The belows diagram shows a system designed to manage automation smoothly across different locations, it consists of two parts:
- At the bottom part of the diagram, there's a layer called “Intent Actuation” that works on each site's own computer clusters to make sure the system does what it's supposed to do.
- The top part of the diagram shows a setup that uses Kubernetes (a tool to manage applications) to handle automation tasks more efficiently. This part is called the "Orchestration Cluster," and it's a special Kubernetes cluster set up just for managing the automation processes.
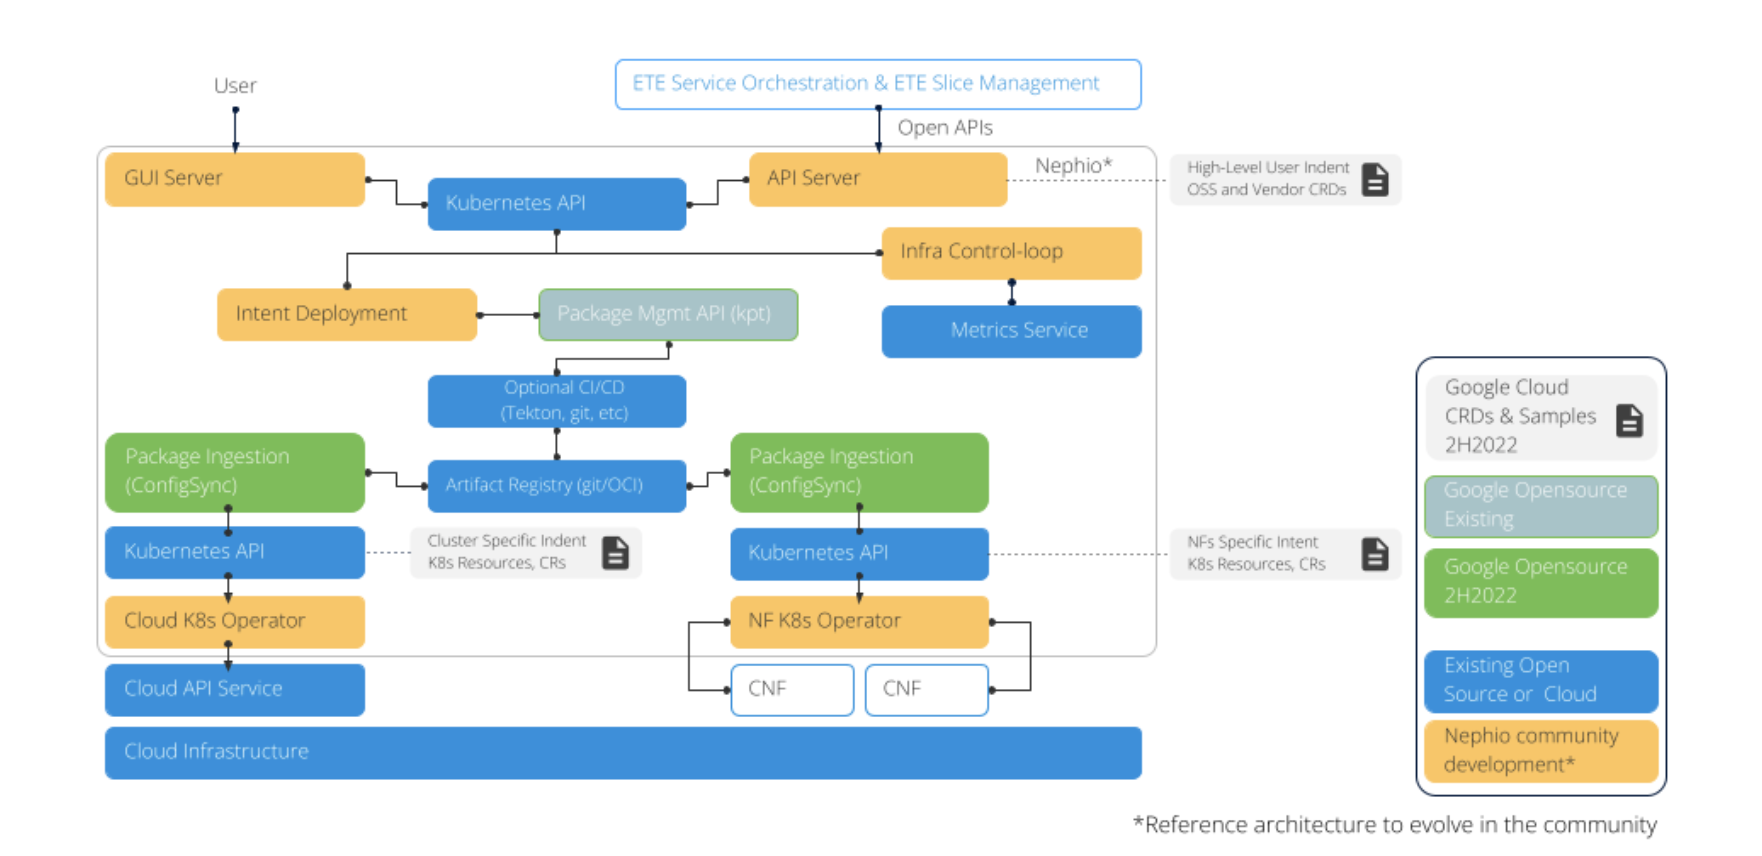
The diagram below shows the recommended system architecture benefiting from Nephio, which is used to simplify the deployment and management of cloud infrastructure and network functions in large-scale deployments at the edge of the network.
Nephio is usually known for its role in advanced networking, especially in 5G networks and network functions. But in our project, we want to keep things simple. Let's imagine we just want to show how Nephio can be useful in different situations. So we're setting up a basic web application. But instead of anything fancy, we're just serving a simple webpage using Nginx. That simple case is enough for use case study as it's all about demonstrating how Nephio can be handy even in basic setups, not just in big, complicated networks.
In our demo application we will showcase the usage of Nephio in configuring kubernetes workloads across multiple kubernetes clusters operating with different cloud providers. We are going to use AWS Cloud, Azure Cloud, local Kubernetes cluster and possibly GCP.
The demo will consist of the following steps:
- Developer creates new workload configuration in main repository
- Nephio’s porch component will create new branches in each “edge” cluster repository
- Those changes will be approved using Nephio’s gui
- configsync component will update the workload configuration in each kubernetes cluster
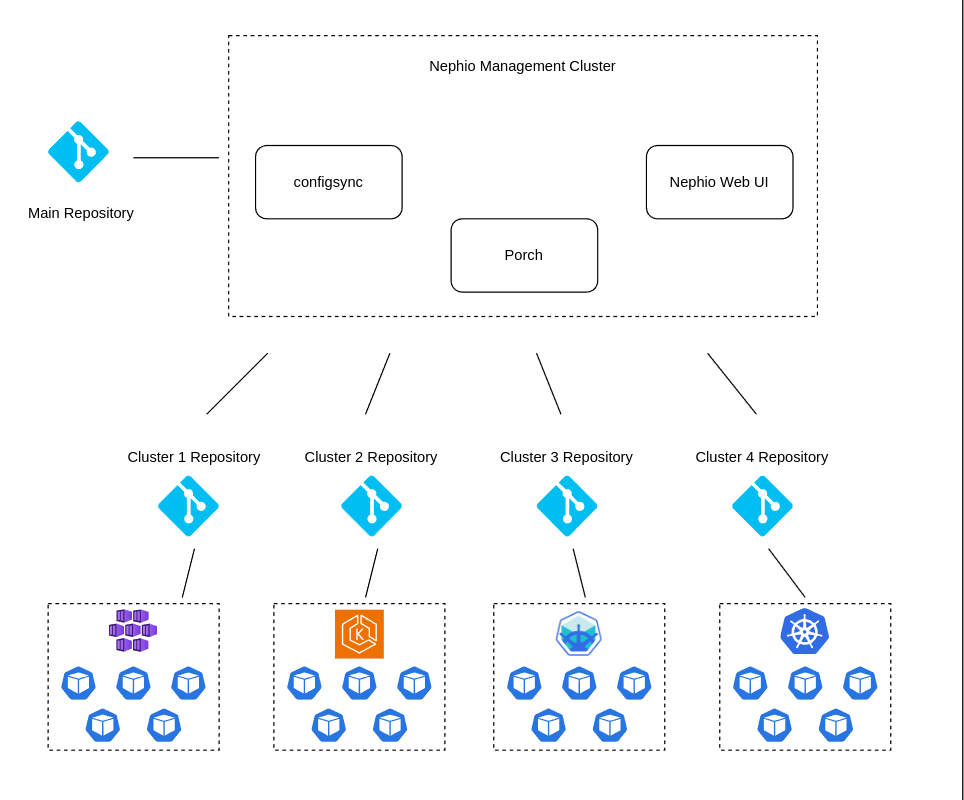
Our demo will be based on the following architecture:
- Main repository - the main repository on GitHub where the developer will create workload configuration
- Edge repositories - four repositories on GitHub for each edge cluster
- Nephio management cluster - a microk8s cluster based on AWS EC2 where Nephio components will be deployed
- Edge clusters:
- microk8s cluster based on Azure VM in Azure Cloud
- microk8s cluster based on AWS EC2 in AWS Cloud
- Local Kubernetes cluster based on minikube
- GCP GKE cluster based on GCP VM in GCP
Our goal is to present how Nephio can be used to manage workload configuration across various cloud providers and local Kubernetes clusters. However, we are aware of possible limitations in terms of resources and costs, so we will focus on having at least two edge clusters. One of them will be a local Kubernetes cluster, and the second one will be an AWS cluster.
terraform {
  required_providers {
    aws = {
      source  = "hashicorp/aws"
      version = "~> 4.16"
    }
  }

  required_version = ">= 1.2.0"
}

provider "aws" {
  region = "us-east-1"
}

resource "aws_security_group" "nephio-sg" {
  name        = "nephio-sg"
  description = "Allow inbound traffic"

  ingress {
    protocol = "tcp"
    from_port = 0
    to_port = 65535
    cidr_blocks   = ["0.0.0.0/0"]
  }

  egress {
    from_port        = 0
    to_port          = 0
    protocol         = "-1"
    cidr_blocks      = ["0.0.0.0/0"]
    ipv6_cidr_blocks = ["::/0"]
  }
}

resource "aws_instance" "nephio-master" {
  ami             = "ami-04b70fa74e45c3917"
  instance_type   = "t2.medium"
  key_name        = "vockey"
  security_groups = ["nephio-sg"]
  tags = {
    Name = "nephio-master"
  }
  root_block_device {
    volume_size = 20
  }
}

resource "aws_instance" "nephio-edge" {
  ami             = "ami-04b70fa74e45c3917"
  instance_type   = "t2.small"
  key_name        = "vockey"
  security_groups = ["nephio-sg"]
  tags = {
    Name = "nephio-edge-1"
  }
}
We will use the above terraform script to create two EC2 instances on AWS. One will be used as a Master Cluster and the second one as an Edge Cluster. Additionally, we will create a security group allowing all inbound TCP traffic and all outbound traffic.
You can find a sample Kubernetes workloads which will be used in the demo in th demo-workload directory.
We will use a simple Kuard application used during Kubernetes labs and static html page served on Nginx.
1. Ubuntu local machine (this guide is based on Ubuntu 22.04 LTS, if you are using different OS, please adjust the commands accordingly)
You can use prepared terraform scripts in the 'infrastructure/aws' directory.
Create at least two EC2 on AWS. One for Master Cluster and at least one for Edge Cluster. For our case Master Clauses is using t2.medium instance, and edge cluster is using t2.small instance. For simplicity the inboud rules accept all tcp traffic.
Installation guide for Master Cluster:
- SSH to nephio-master EC2 instance
- Copy
infrastructure/aws/nephio-common.shandinfrastructure/aws/nephio-master.shscripts to nephio-master EC2 instance - Make scripts executable
chmod +x nephio-common.sh nephio-master.sh - Run initial installation script
./nephio-common.sh - Run initial installation script
./nephio-master.sh
Instalation guide for Edge Cluster
- SSH to nephio-edge-1 EC2 instance
- Copy
infrastructure/aws/nephio-common.shandinfrastructure/aws/nephio-edge-1.shscripts to nephio-edge-1 EC2 instance - Make scripts executable
chmod +x nephio-common.sh nephio-edge-1.sh - Run initial installation script
./nephio-common.sh - Run initial installation script
./nephio-edge-1.sh - Copy contents of
infrastructure/local/rootsync.yamlto configsync/rootsync.yaml file with replacing url in spec.git.repo to point to your edge repository - Apply config-sync package
kpt live init configsync
kpt live apply configsync --reconcile-timeout=5m
- Copy
infrastructure/local/nephio-common.shandinfrastructure/local/nephio-edge-2.shscripts to your home directory - Make scripts executable
chmod +x nephio-common.sh nephio-edge-2.sh - Run initial installation script
./nephio-common.sh - Run initial installation script
./nephio-edge-2.sh - Copy contents of
infrastructure/local/rootsync.yamlto configsync/rootsync.yaml file with replacing url in spec.git.repo to point to your edge repository - Apply config-sync package
kpt live init configsync
kpt live apply configsync --reconcile-timeout=5m
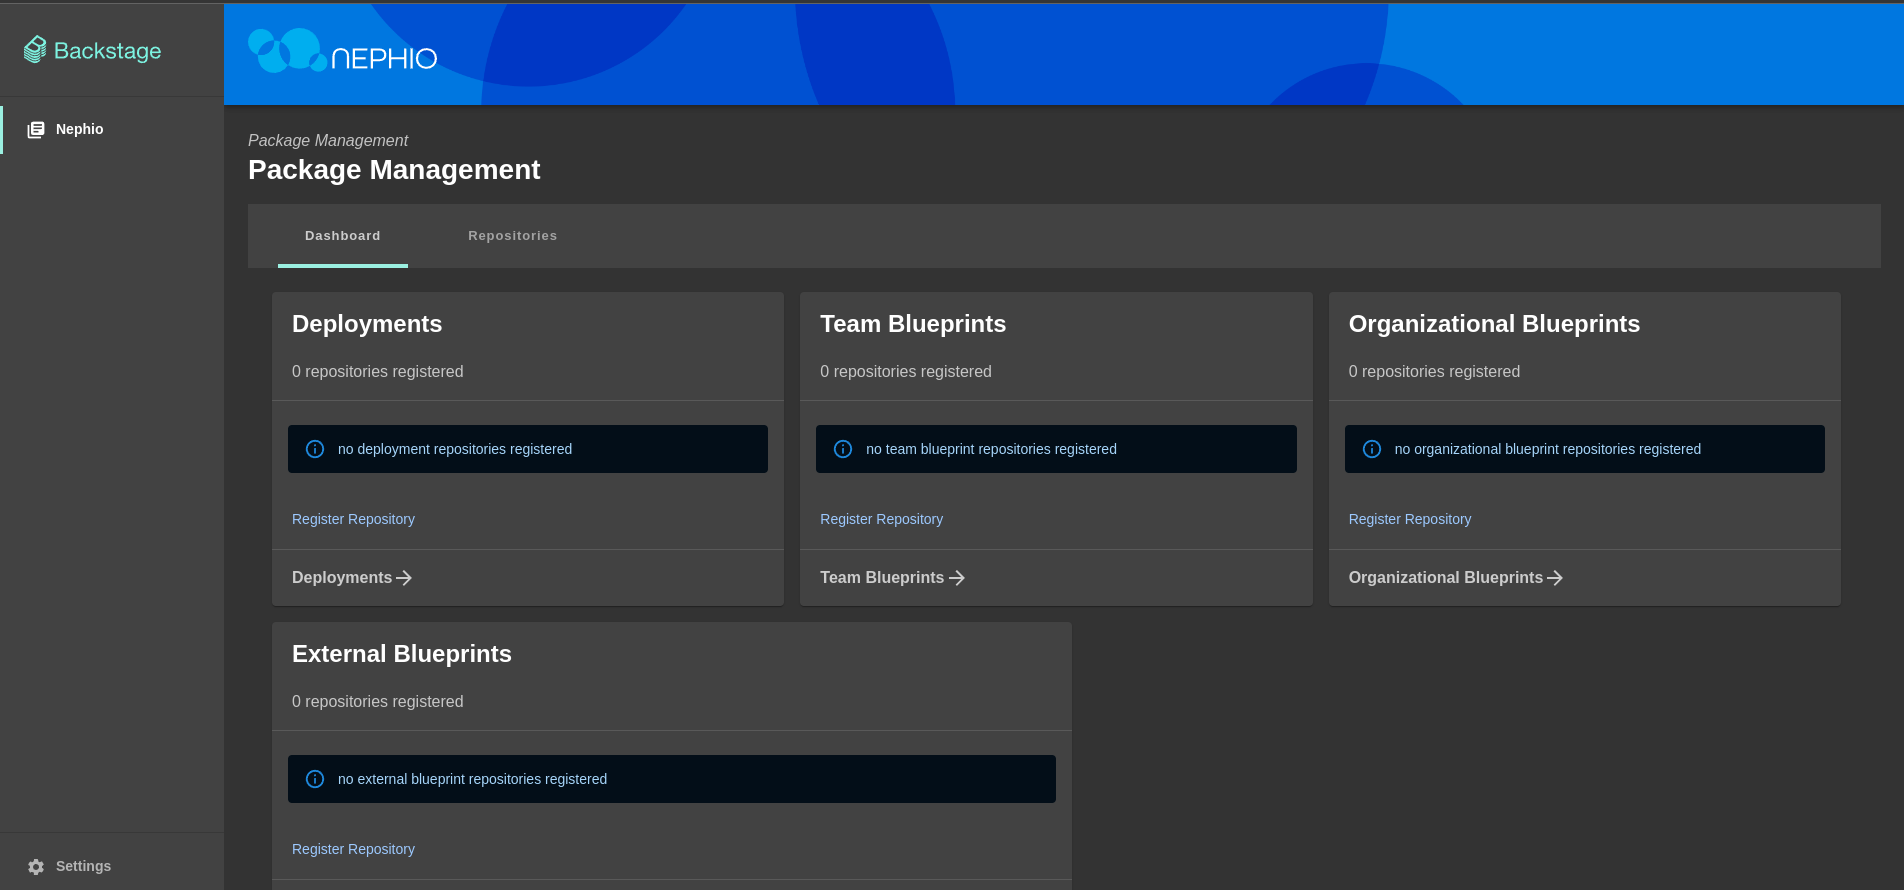
It is available at http://<nephio-master-public-ip>:7007
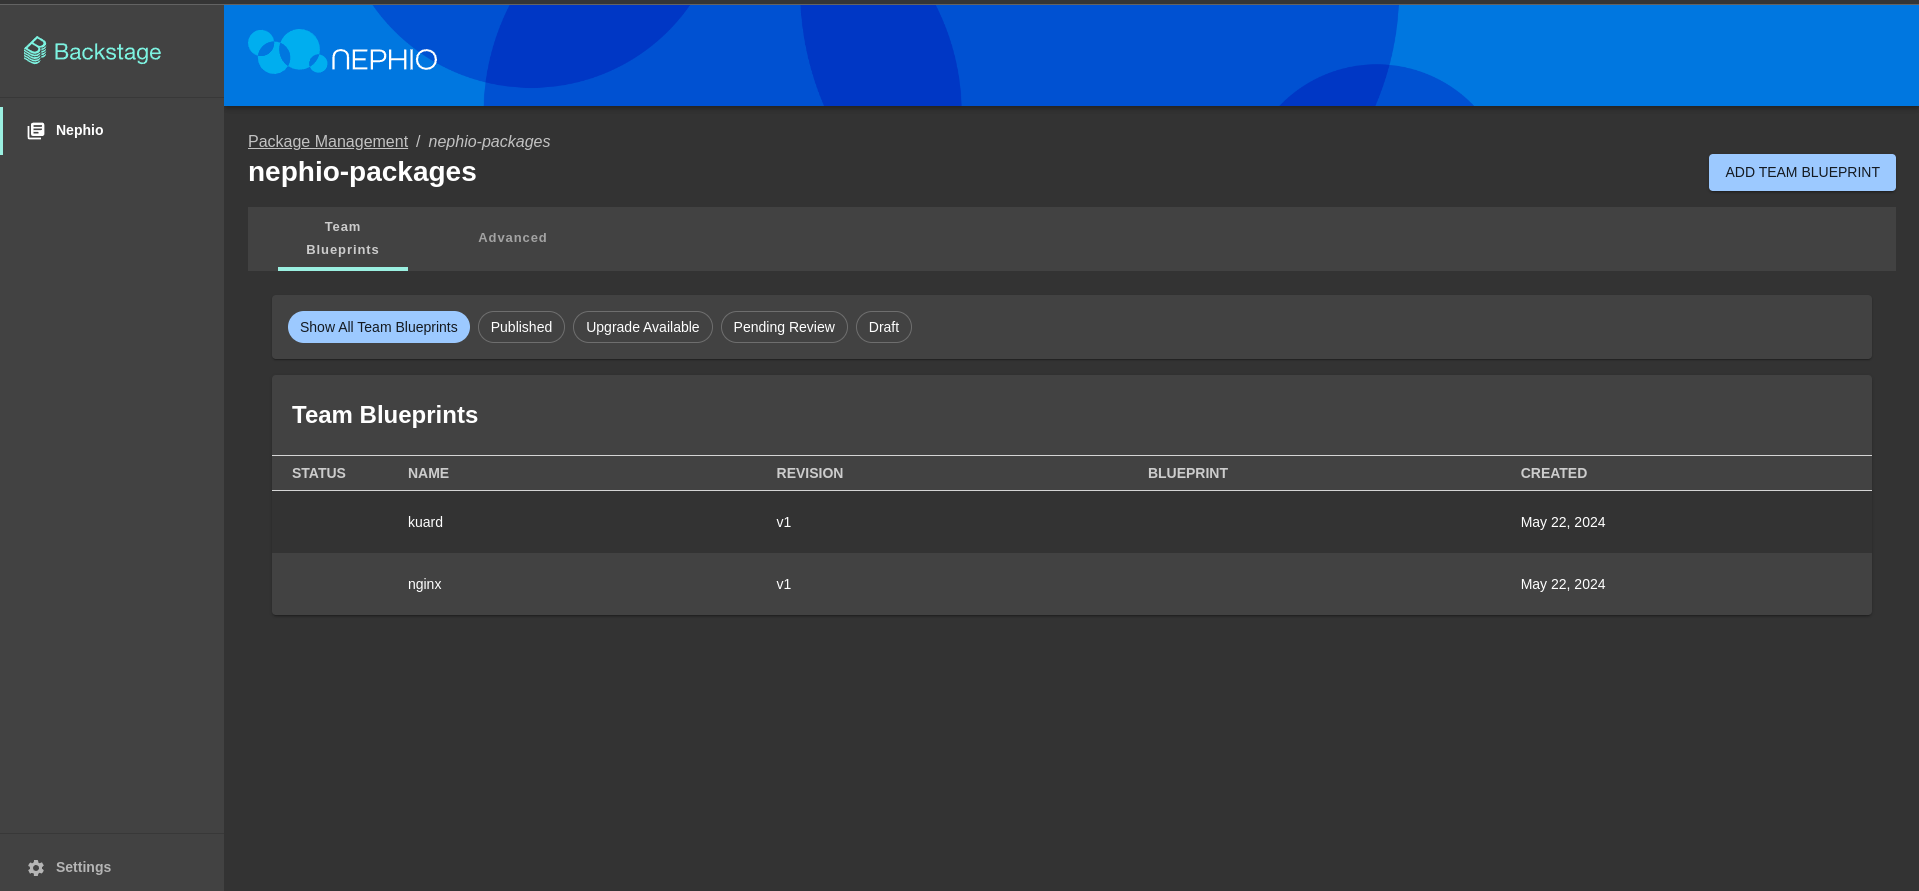
Register blueprints repository and deployment repositories https://github.com/bchwast/nephio-edge-1.git, https://github.com/bchwast/nephio-edge-2.git
- Click on
Register Repositorylink in the Team Blueprints section - Enter repository URL with packages (
https://github.com/bchwast/nephio-packagesin this demo) and clickNextbutton - Add authentication token for the repository (if needed) and click
Nextbutton - Add repository description (if needed) and click
Nextbutton - Choose
Team Blueprintsoption and clickNextbutton - Click
Register Repositorybutton
After that you should see blueprints available in added repository.
- Go back to the main page
- Click on
Register Repositorylink in the Deployments section - Enter repository URL with deployment repository (
https://github.com/bchwast/nephio-edge-1in this demo) and clickNextbutton - Add authentication token for the repository (if needed) and click
Nextbutton - Add repository description (if needed) and click
Nextbutton - Choose
Deploymentsoption and clickNextbutton - Click
Register Repositorybutton
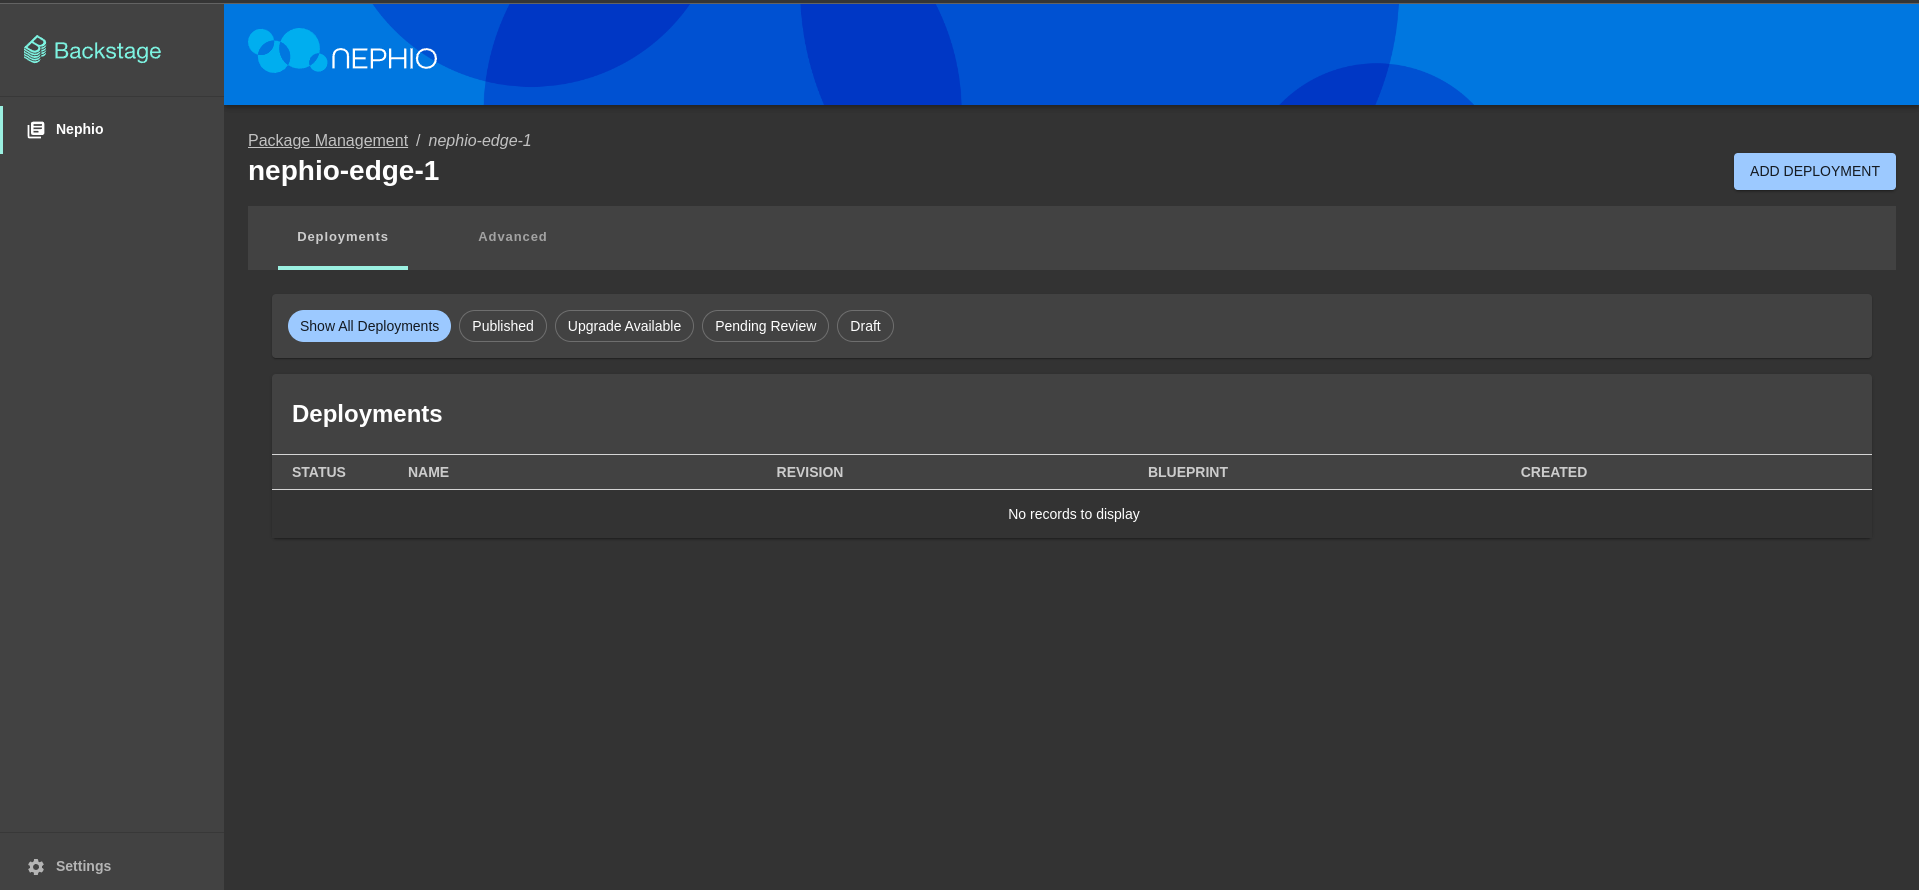
After that you should see empty deployments' repository.
Repeat above steps for the second edge repository (https://github.com/bchwast/nephio-edge-2 in this demo)
- Go to the
nephio-edge-1deployment page - Click on
Add Deploymentbutton - Select
Create a new deployment by cloning a team blueprint, leavenephio-packagesas a source repository, selectkuardblueprint and clickNextbutton - Add metadata for the deployment (if needed) and click
Nextbutton - Change namespace (if needed) and click
Nextbutton - Select whether to validate resources and click
Nextbutton - Click
Create Deploymentbutton
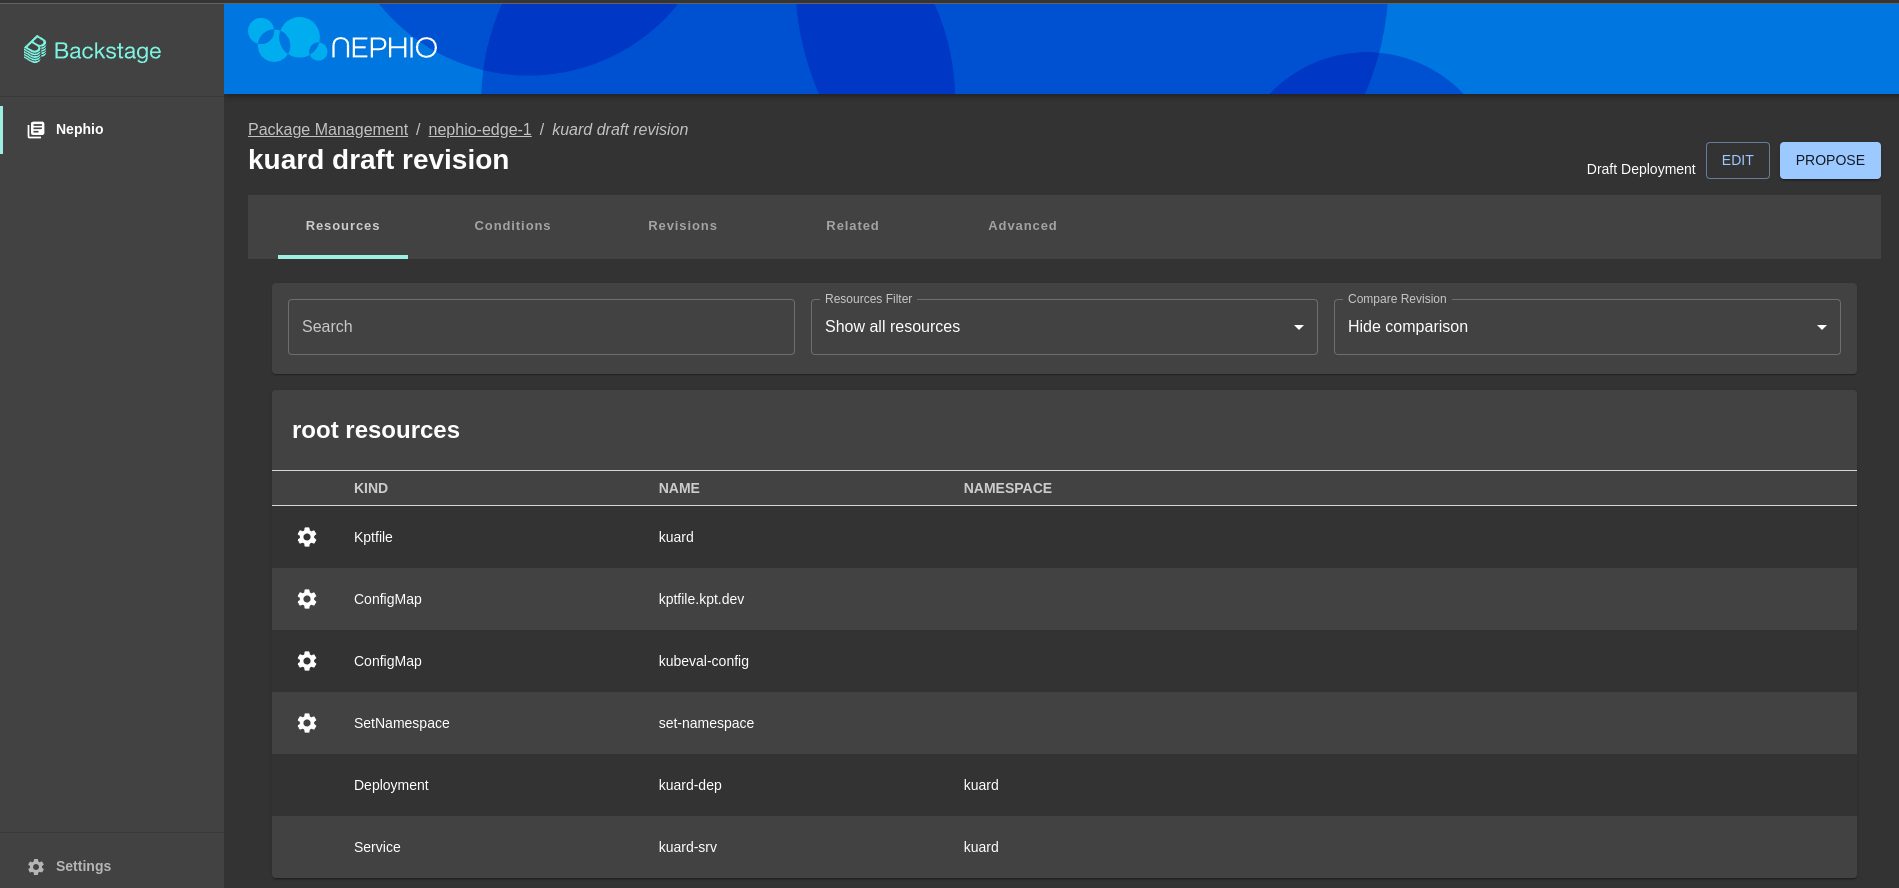
In the background Nephio will create a new branch in the nephio-edge-1 repository with the deployment configuration.
You can inspect proposed deployment and add changes if needed by clicking Edit button.
- Click
Proposebutton to propose changes
In the background Nephio will create a pull request in the nephio-edge-1 repository.
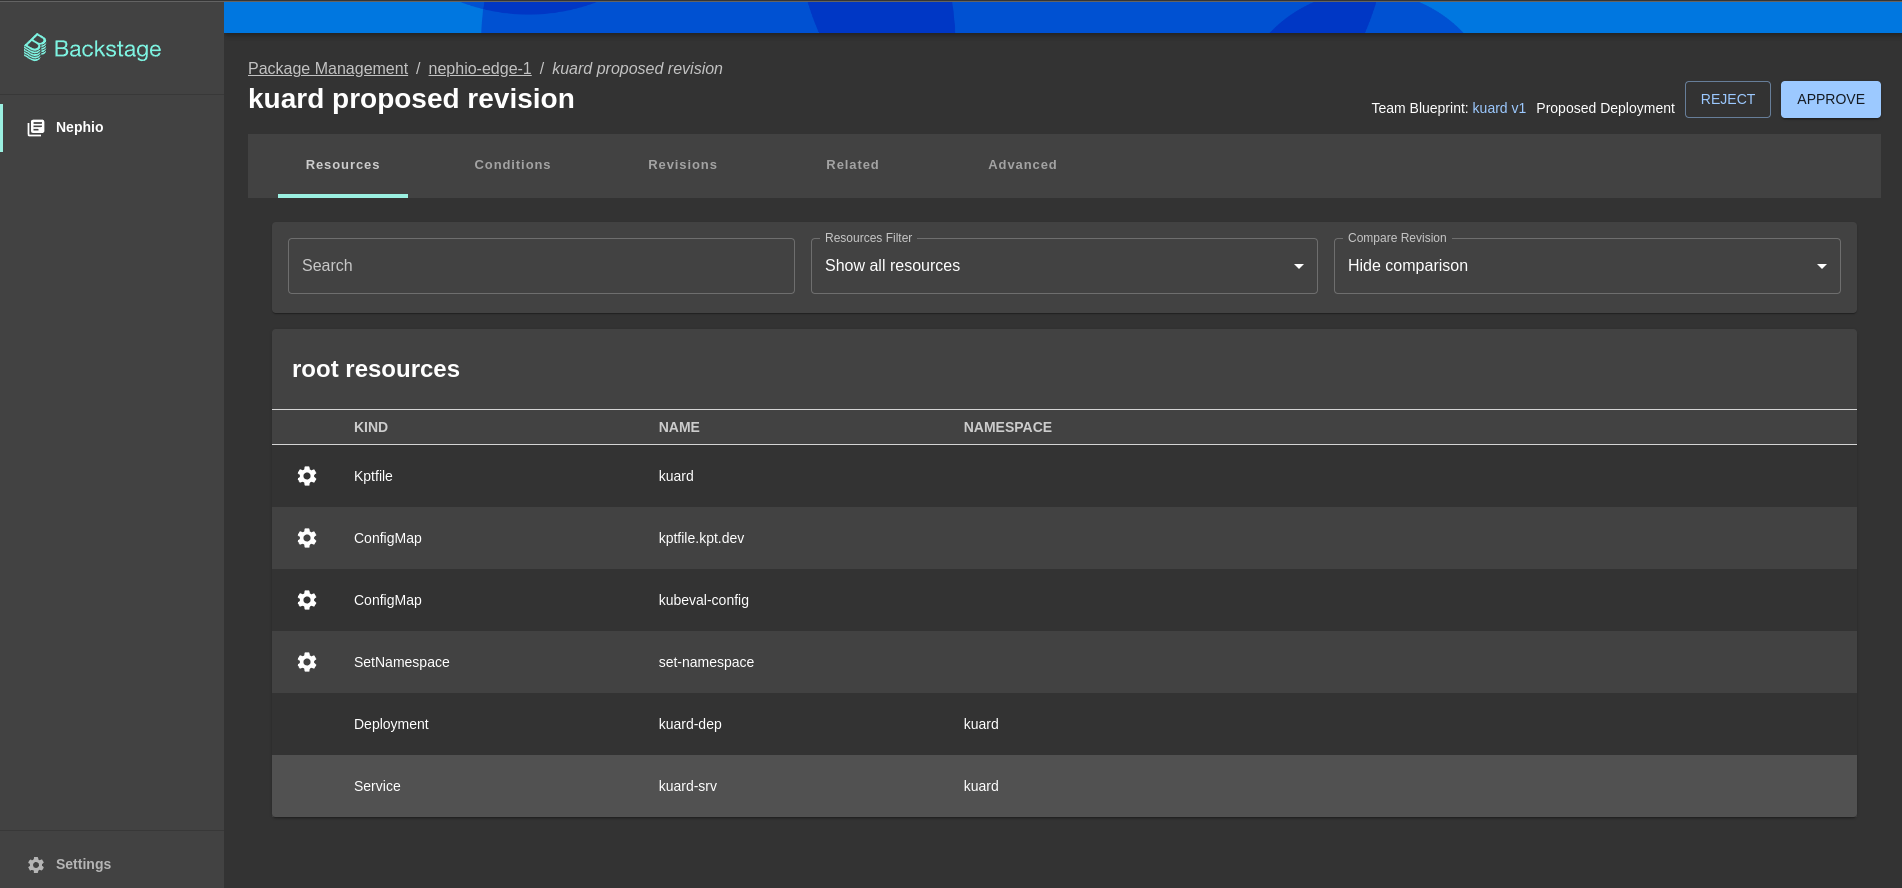
Second developer should now review proposed deployment and approve it or reject it by clicking appropriate button.
- Click
Approvebutton to approve changes
In the background Nephio will merge pull request and apply deployment configuration to the edge cluster.
Repeat above steps for the second edge repository (https://github.com/bchwast/nephio-edge-2 in this demo)
- SSH to the
nephio-edge-1EC2 instance - Check if deployment is running by executing
microk8s kubectl get pods -n kuardcommand
- Port forward service to access application
microk8s kubectl port-forward --namespace=kuard --address 0.0.0.0 service/kuard-srv 8080:80 &
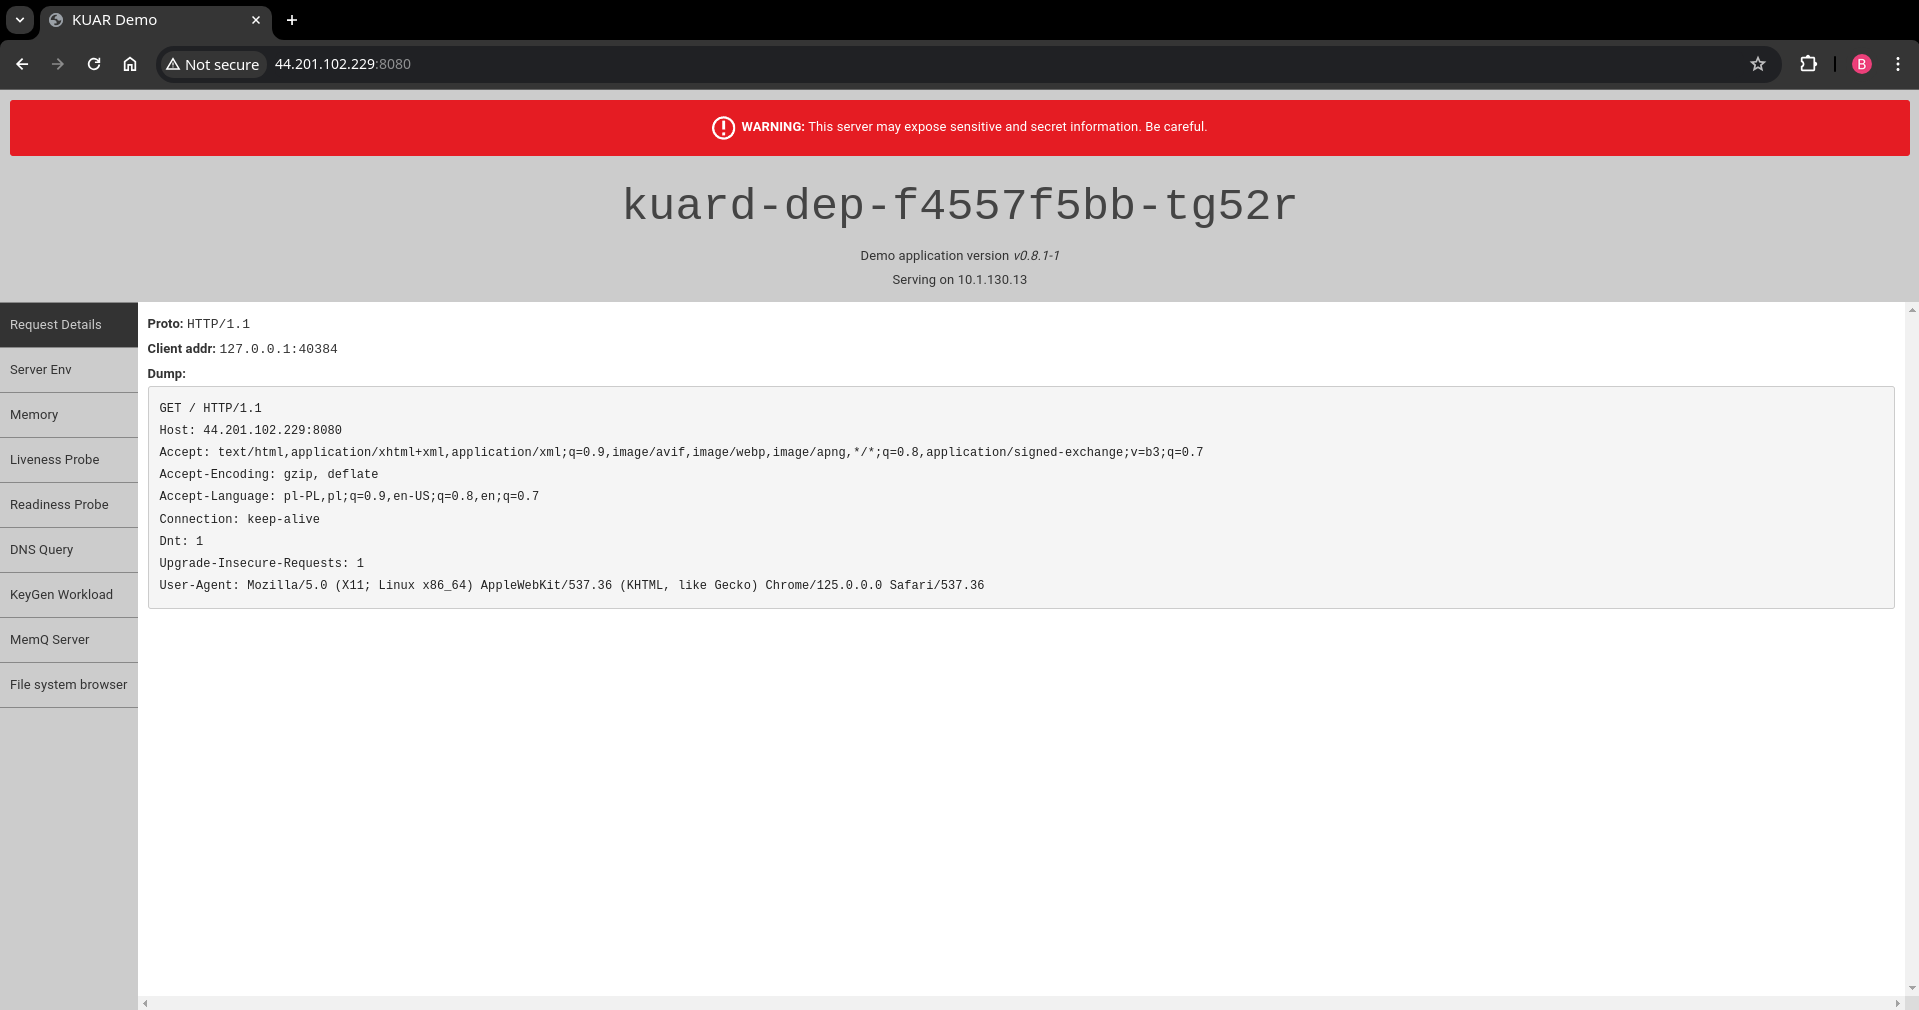
- Open browser and go to
http://<nephio-edge-1-public-ip>:8080to see the application
- Open terminal session on your local machine
- Check if deployment is running by executing
microk8s kubectl get pods -n kuardcommand
- Port forward service to access application
microk8s kubectl port-forward --namespace=kuard --address localhost service/kuard-srv 8080:80 &
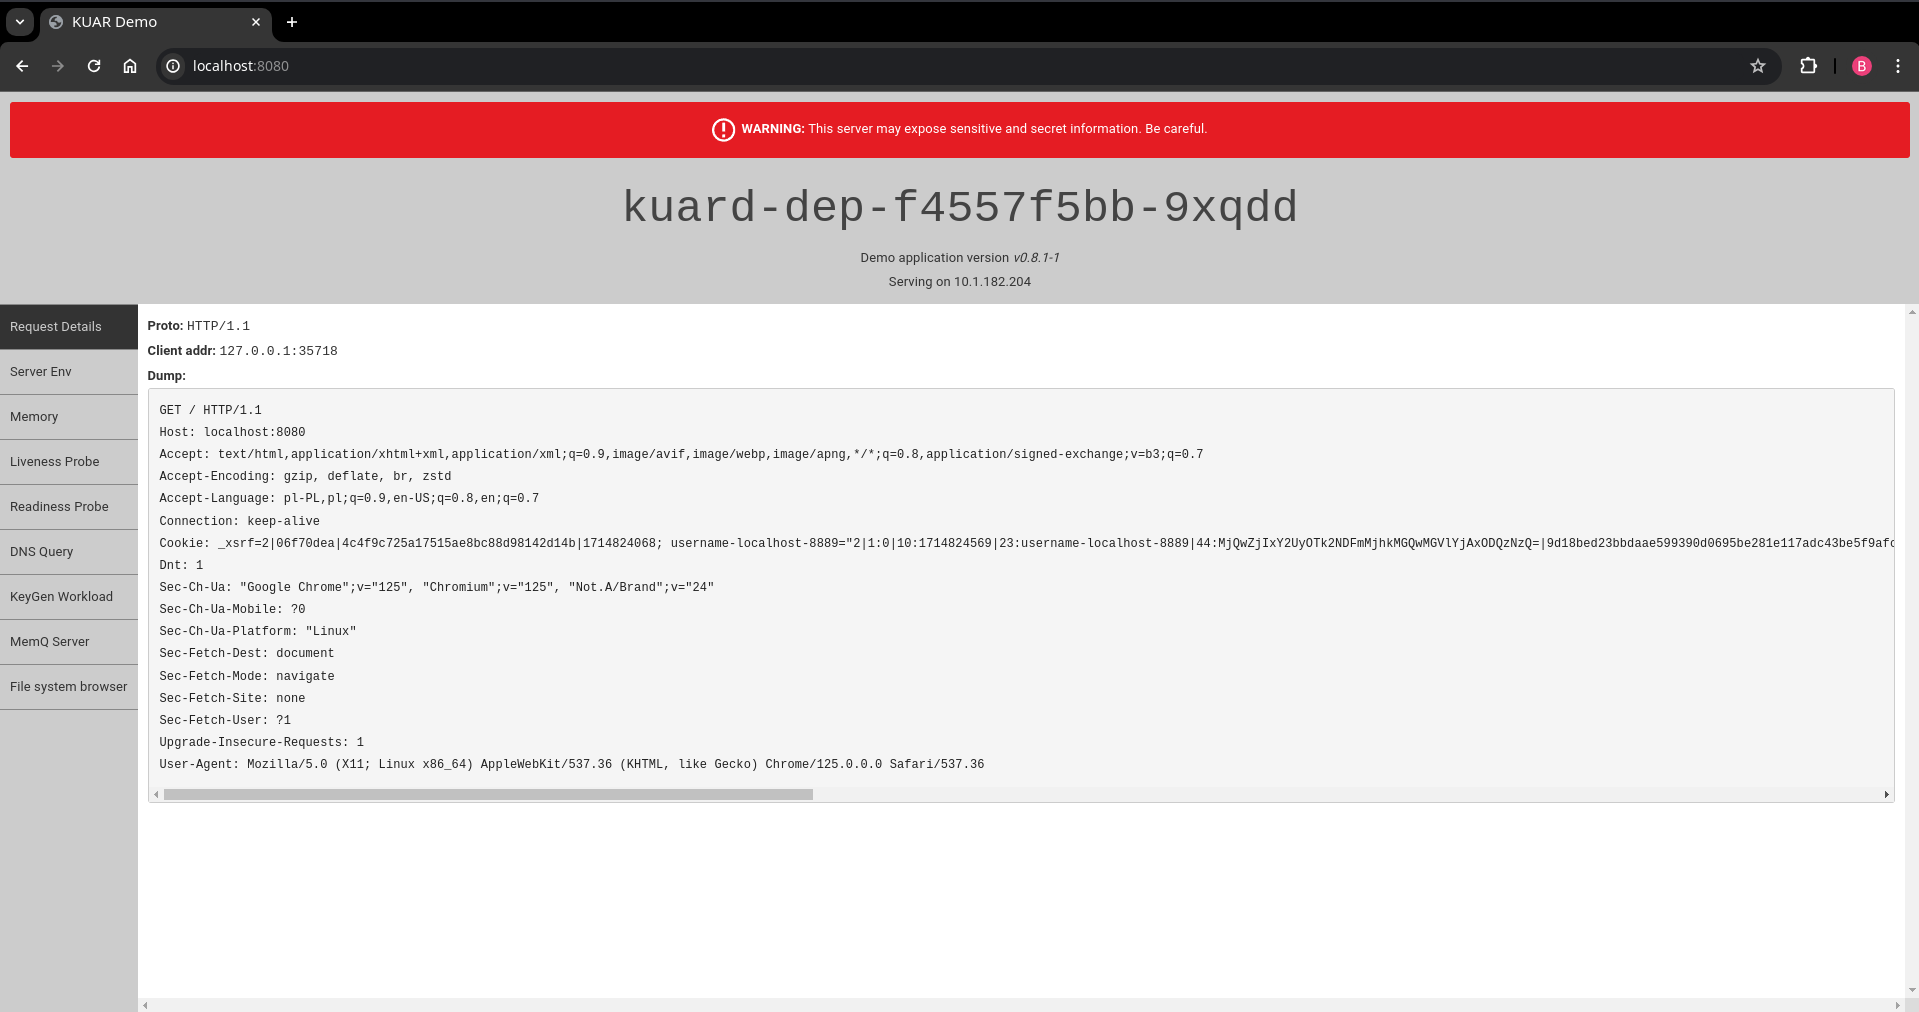
- Open browser and go to
http://localhost:8080to see the application
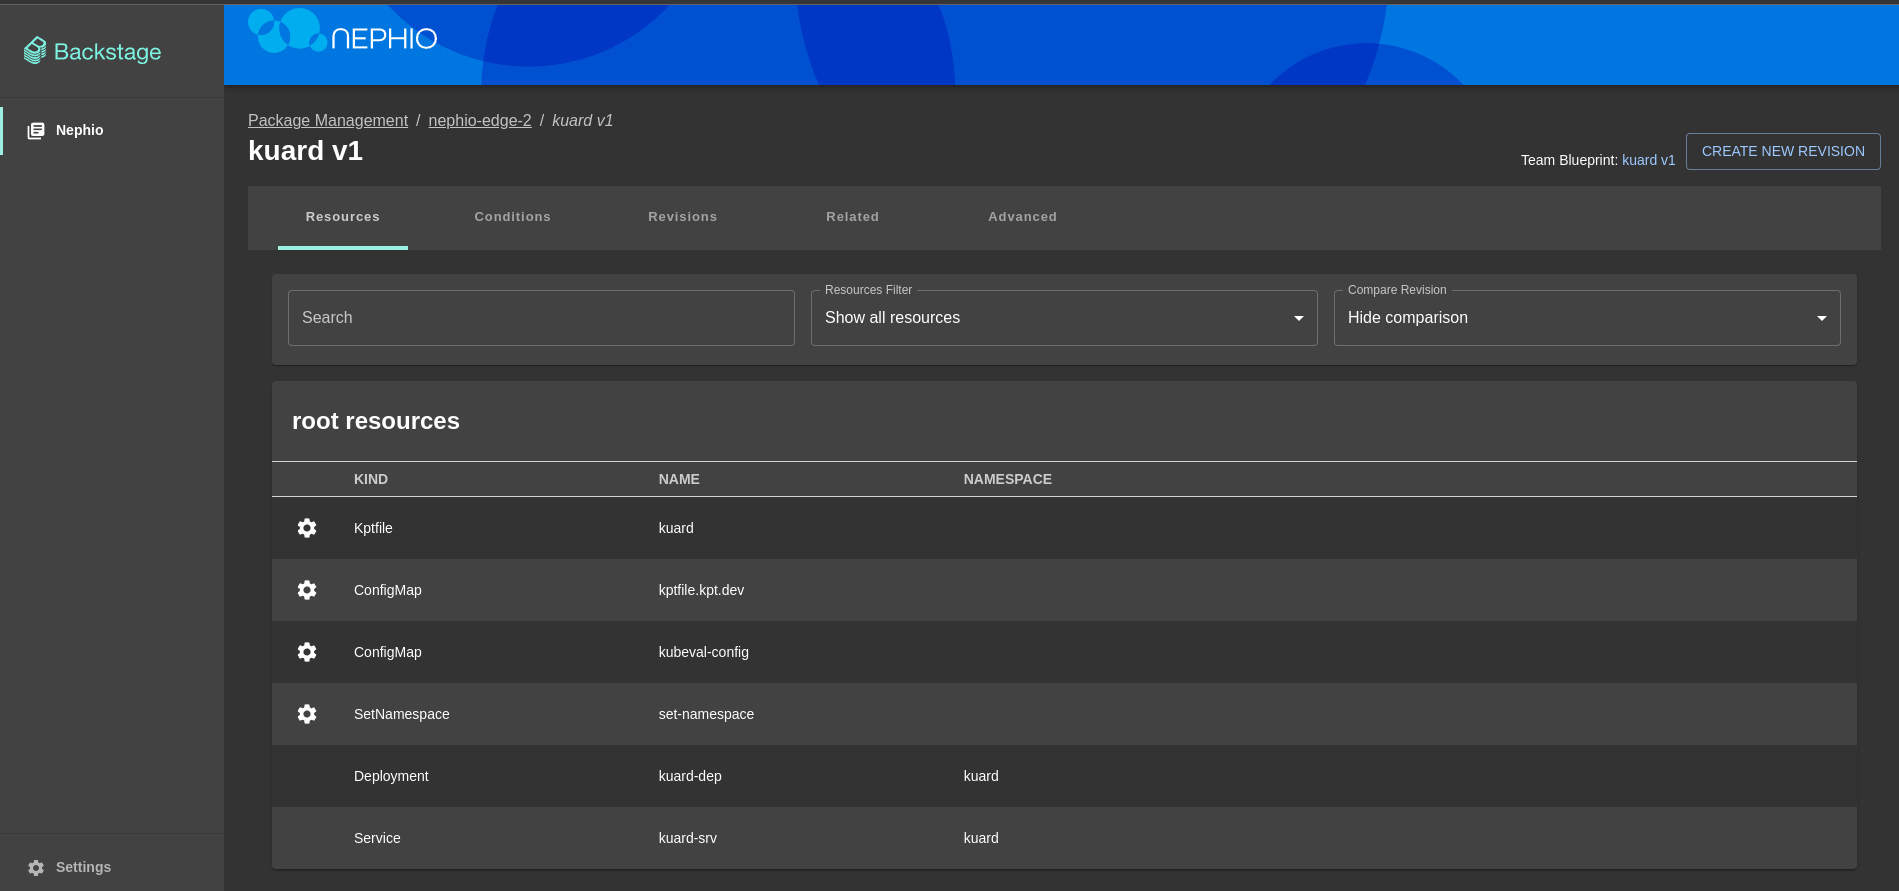
- Go to the
nephio-edge-1deployment page - Go to
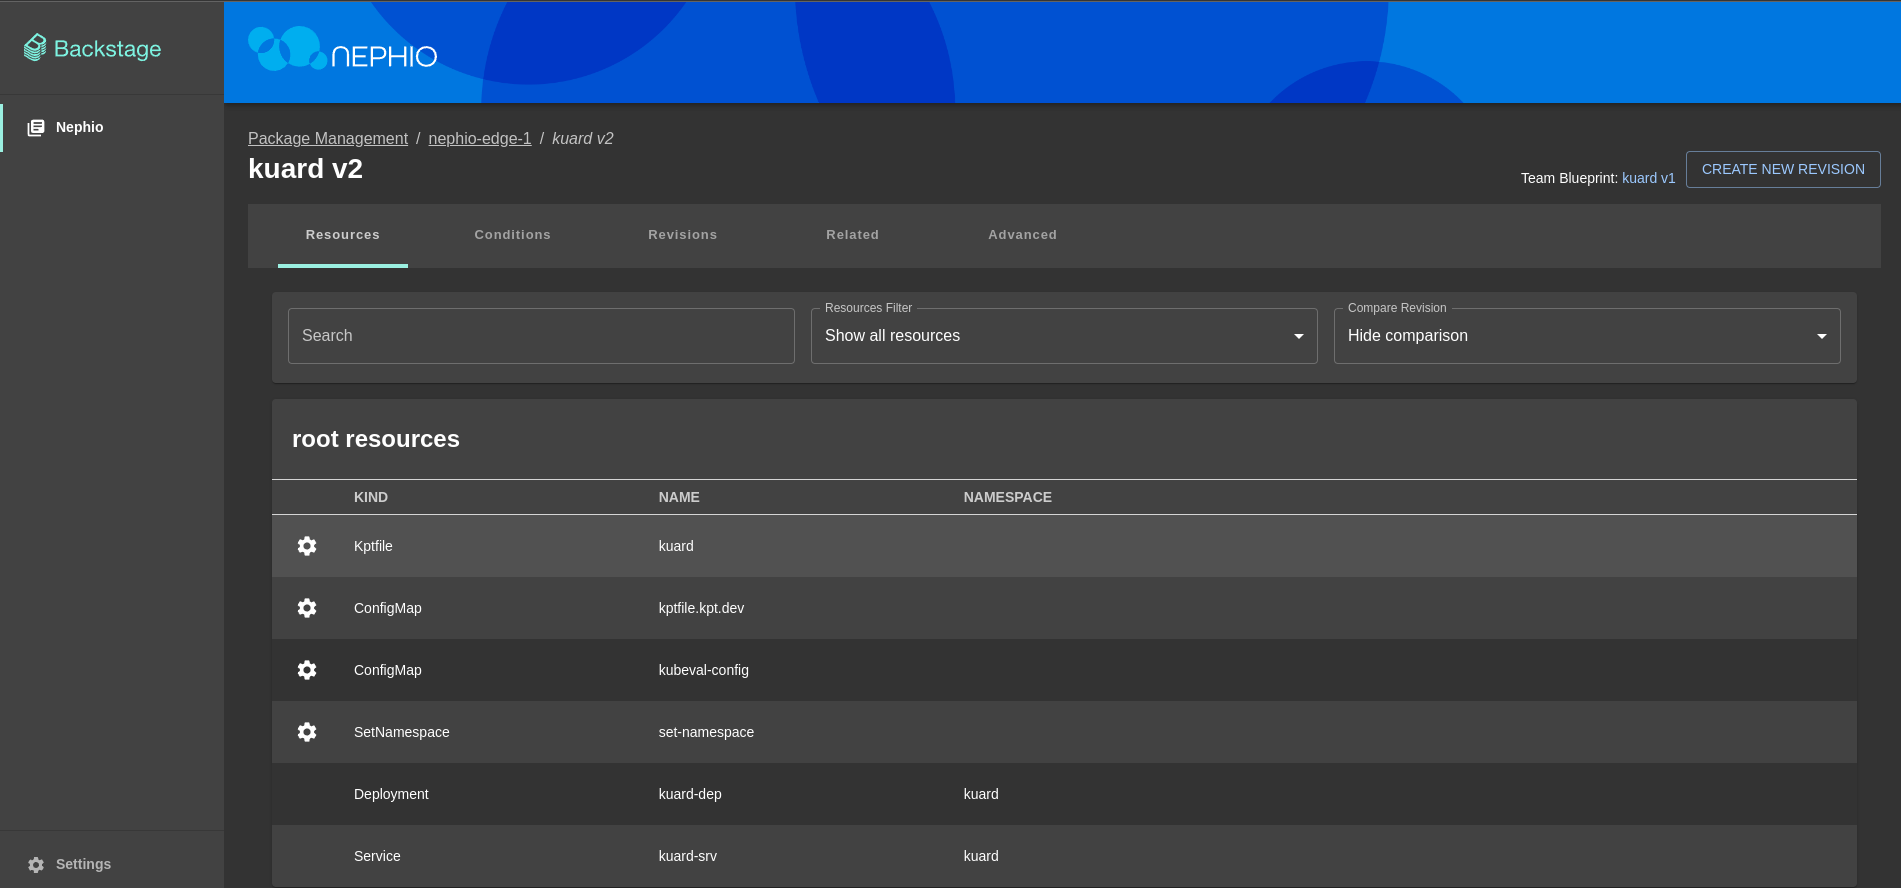
kuarddeployment page - Click
Create New Revisionbutton - Click
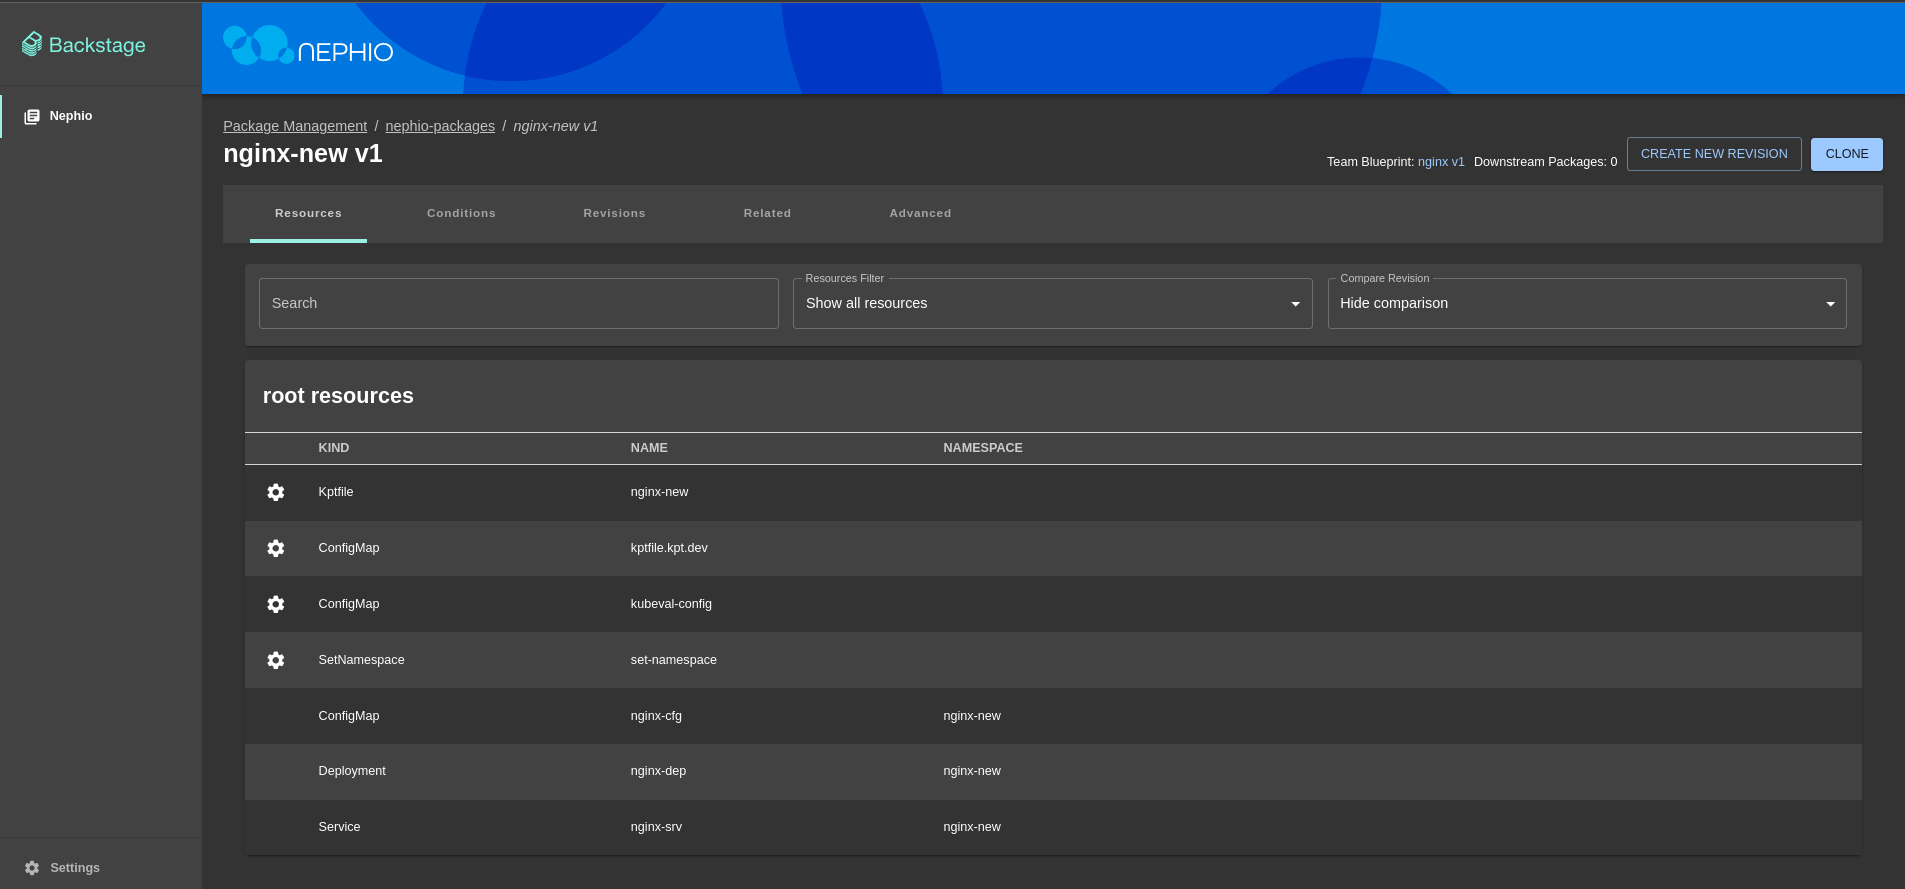
Editbutton to modify deployment, enter changes and clickSavebutton (In this demo we will change the number of replicas from 3 to 5) - Click
Proposebutton and thenApprovebutton
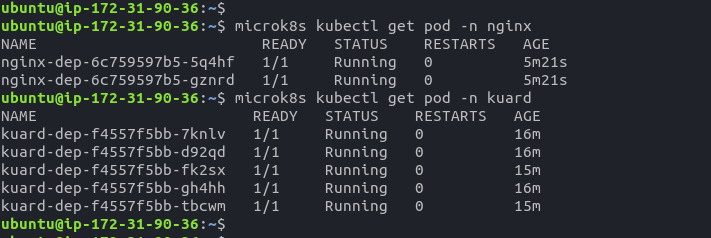
- SSH to the
nephio-edge-1EC2 instance - Check if deployment has been updated by executing
microk8s kubectl get pods -n kuardcommand
- Go to the
nephio-edge-1deployment page - Click on
Add Deploymentbutton - Select
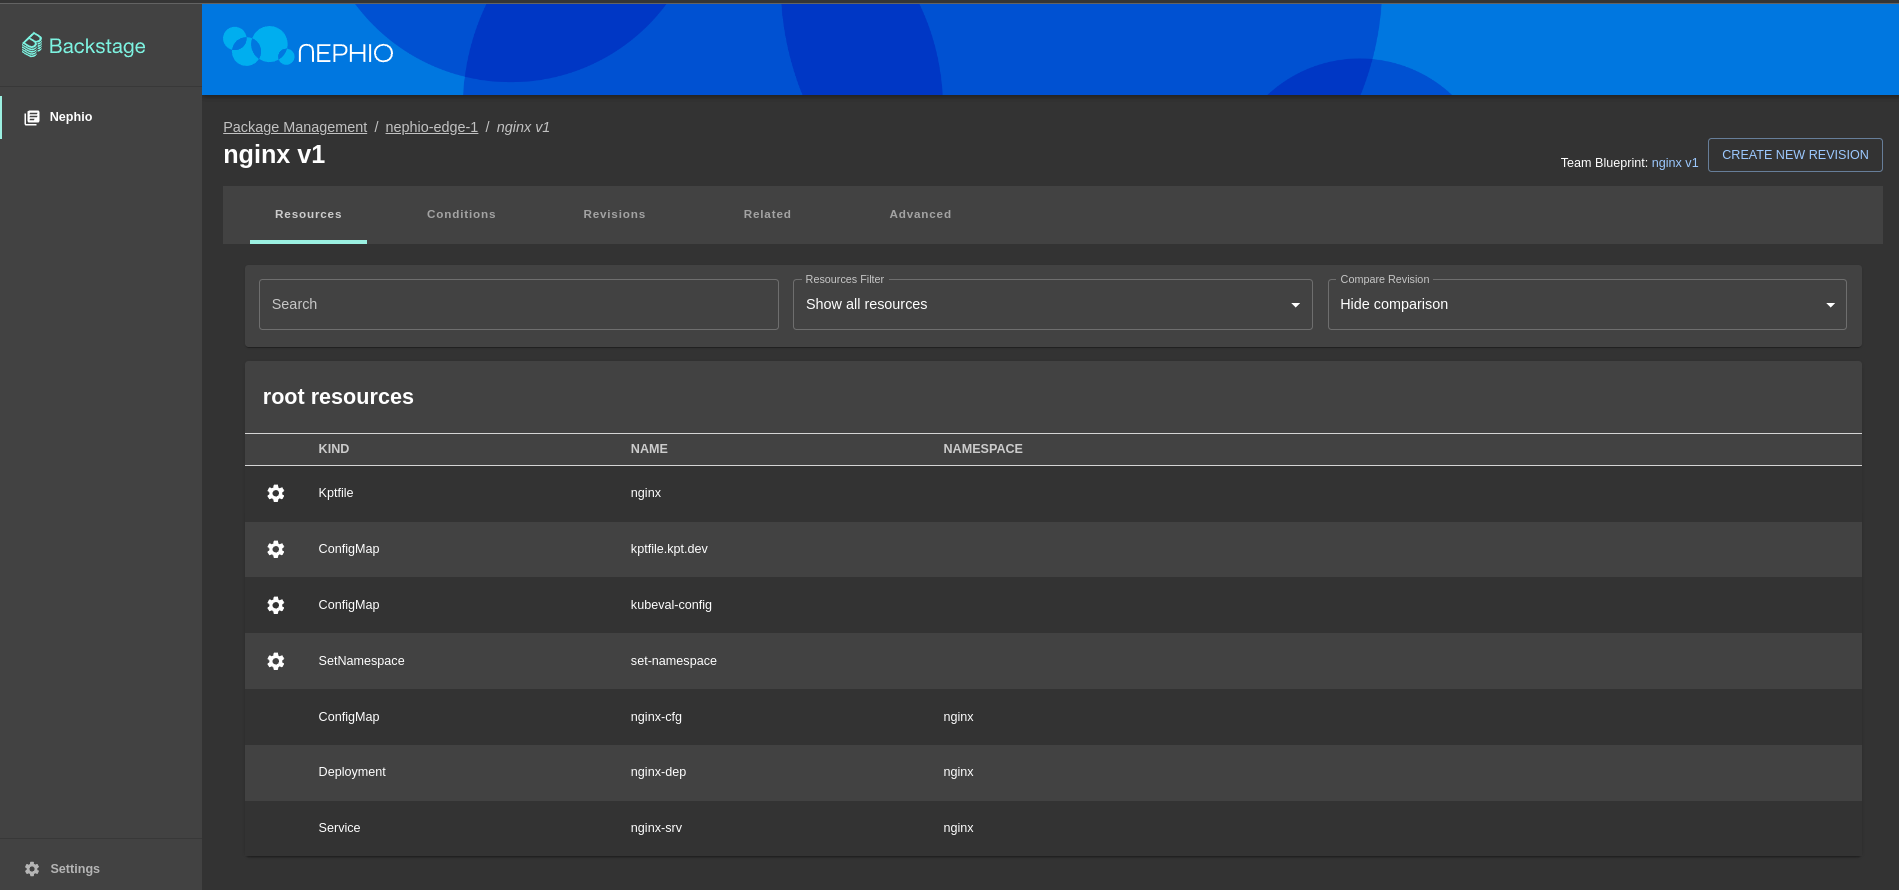
Create a new deployment by cloning a team blueprint, leavenephio-packagesas a source repository, selectnginxblueprint and clickNextbutton - Add metadata for the deployment (if needed) and click
Nextbutton - Change namespace (if needed) and click
Nextbutton - Select whether to validate resources and click
Nextbutton - Click
Create Deploymentbutton - Click
Proposebutton to propose changes - Click
Approvebutton to approve changes
- SSH to the
nephio-edge-1EC2 instance - Check if deployment is running by executing
microk8s kubectl get pods -n nginxcommand - Check if previous deployment is running by executing
microk8s kubectl get pods -n kuardcommand
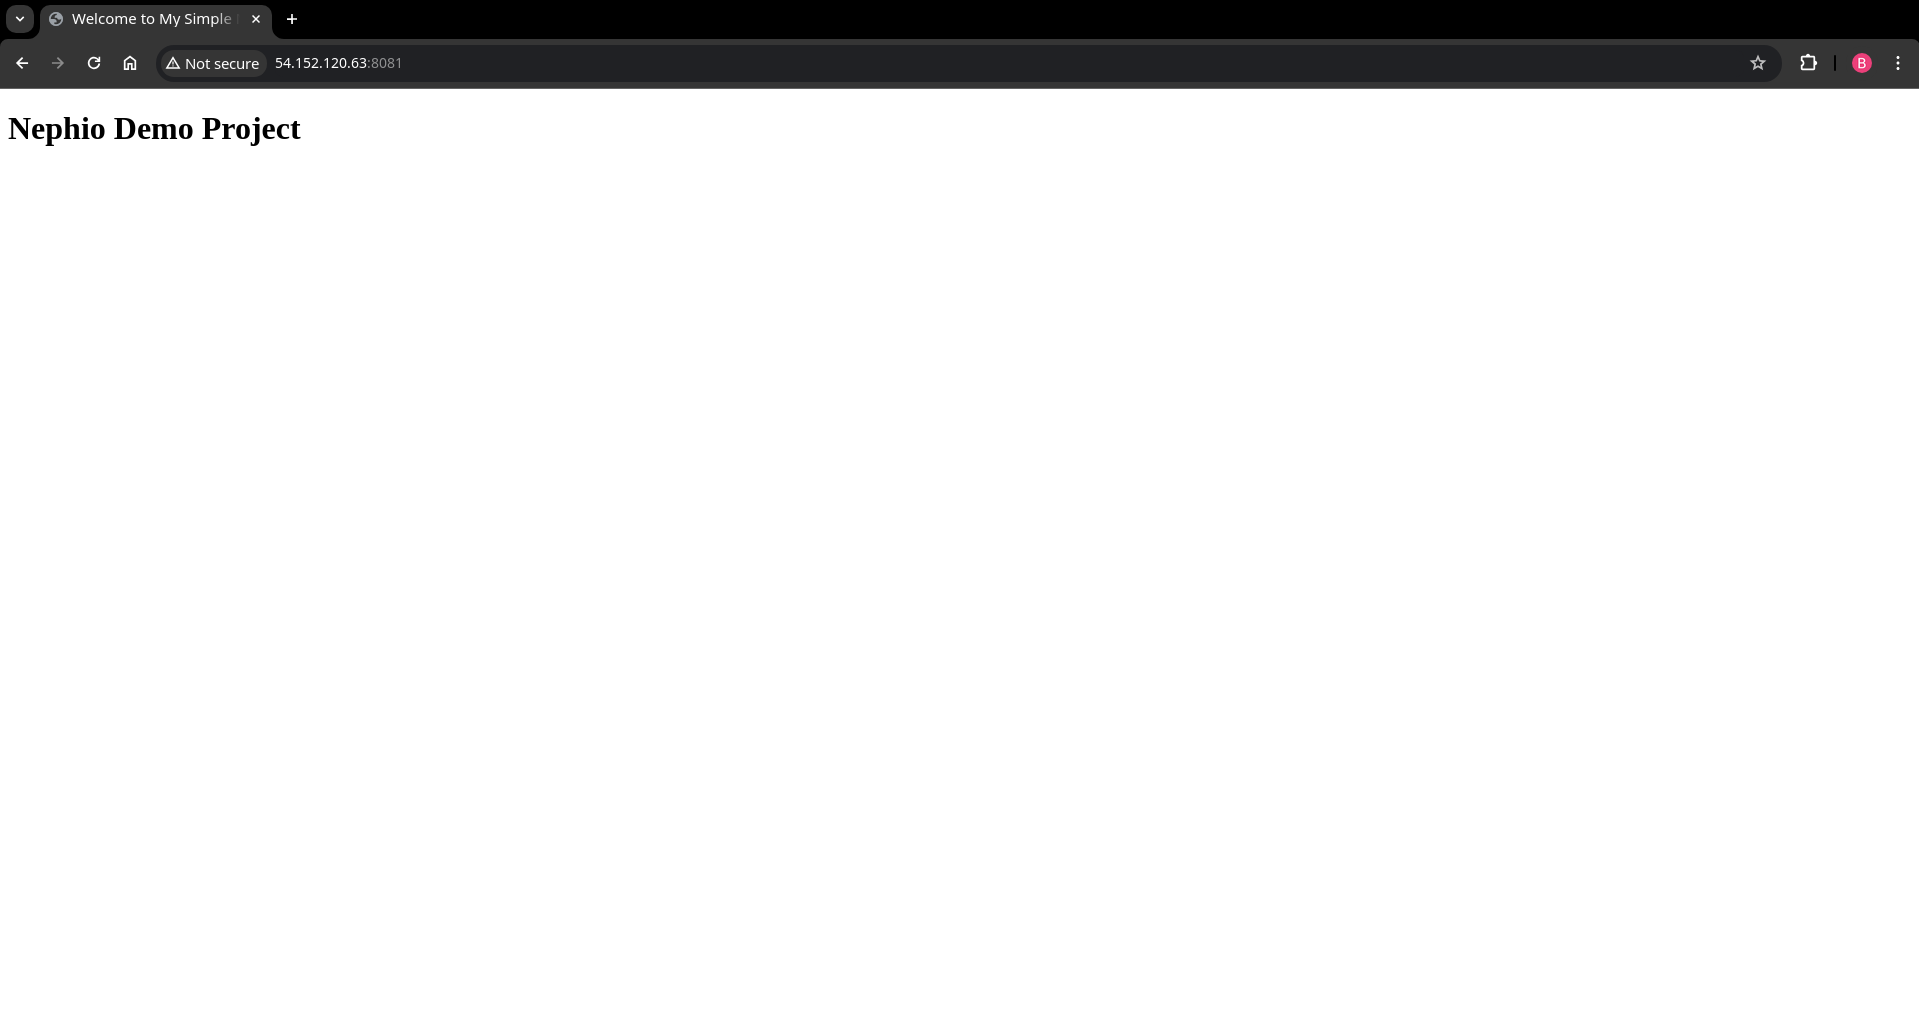
- Port forward service to access application
microk8s kubectl port-forward --namespace=nginx --address 0.0.0.0 service/nginx-srv 8081:80 &
- Open browser and go to
http://<nephio-edge-1-public-ip>:8081to see the application
- Go to the
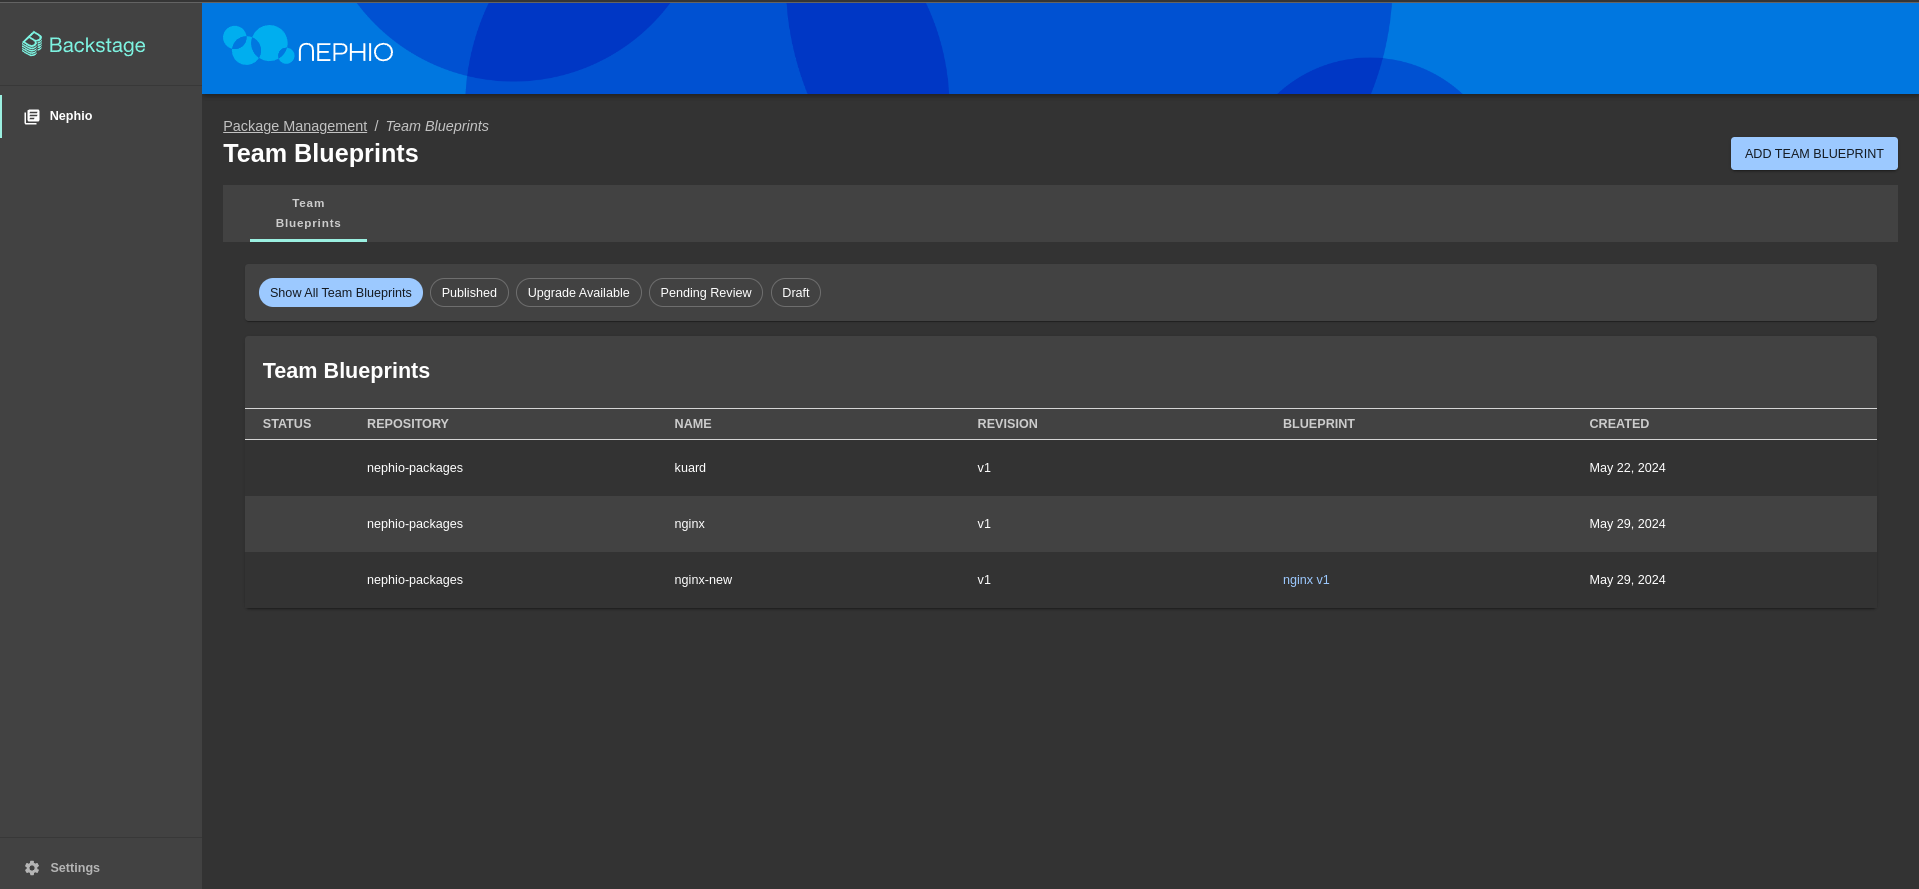
Team Blueprintspage - Click on
Add Team Blueprintbutton - Select
Create a new team blueprint by cloning a team blueprint, leavenephio-packagesas a source and destination repository, selectnginxblueprint and clickNextbutton - Add metadata for the deployment (if needed) and click
Nextbutton - Change namespace (if needed) and click
Nextbutton - Select whether to validate resources and click
Nextbutton - Click
Editbutton to modify deployment, enter changes and clickSavebutton (In this demo we will change the number of replicas from 2 to 10) - Click
Proposebutton to propose changes - Click
Approvebutton to approve changes
- Go back to the
Team Blueprintspage
The project aimed to showcase Nephio, a cloud-native intent automation platform built on Kubernetes, and its ability to manage and simplify multi-vendor cloud infrastructure and network functions. The demonstration involved setting up cloud environments. Terraform scripts were used to configure EC2 instances and necessary security settings.
In this project we conducted a study to explore Nephio technology and its capabilities.
- We have presented the theoretical background of Nephio and its technology stack.
- We have created a demo showcasing how Nephio can be used to manage workload configuration across various cloud providers and local Kubernetes clusters.
- We have successfully deployed a simple web application using Nginx and Kuard on AWS and local Kubernetes cluster.
- We have also shown how to modify deployments and create new blueprints using Nephio Web UI.
Nephio components were successfully deployed on these clusters, establishing a functional management framework. Nephio effectively automated the deployment process, managed configurations, scaled applications, and maintained operations across different environments.
The project validated Nephio’s ability to simplify lifecycle management, enhance operational efficiency, and reduce costs associated with cloud infrastructure management. This demonstration highlighted Nephio's flexibility, interoperability, and efficiency in handling complex, multi-cloud setups.
We learned that Nephio is a powerful tool that can be used to automate the deployment and management of cloud infrastructure and network functions across large-scale edge deployments. It is a vendor-agnostic solution that fosters an ecosystem for innovation while ensuring interoperability. Its Kubernetes-based approach leverages declarative intent with continuous reconciliation, enabling efficient and scalable automation. Nephio aims to accelerate the onboarding of network functions to production and reduce the costs associated with cloud adoption, ultimately enhancing agility in delivering services to customers.
[1]: Learning with Nephio R1 - Episode 1 - Series Introduction
[2]: Nephio - GitHub Repository
[3]: AWS - Amazon Web Services
[4]: Kubernetes
[5]: Terraform
[6]: Nginx
[7]: Kuard
[8]: Kpt
[9]: Microk8s

