ThunderScope
Low-Cost Four Channel 1GSPS Oscilliscope using Thunderbolt/USB4 to stream data to PC for processing and display. Check out the Hackaday.io project here: https://hackaday.io/project/180090-thunderscope
Hardware (TODO: Update this)
Front End
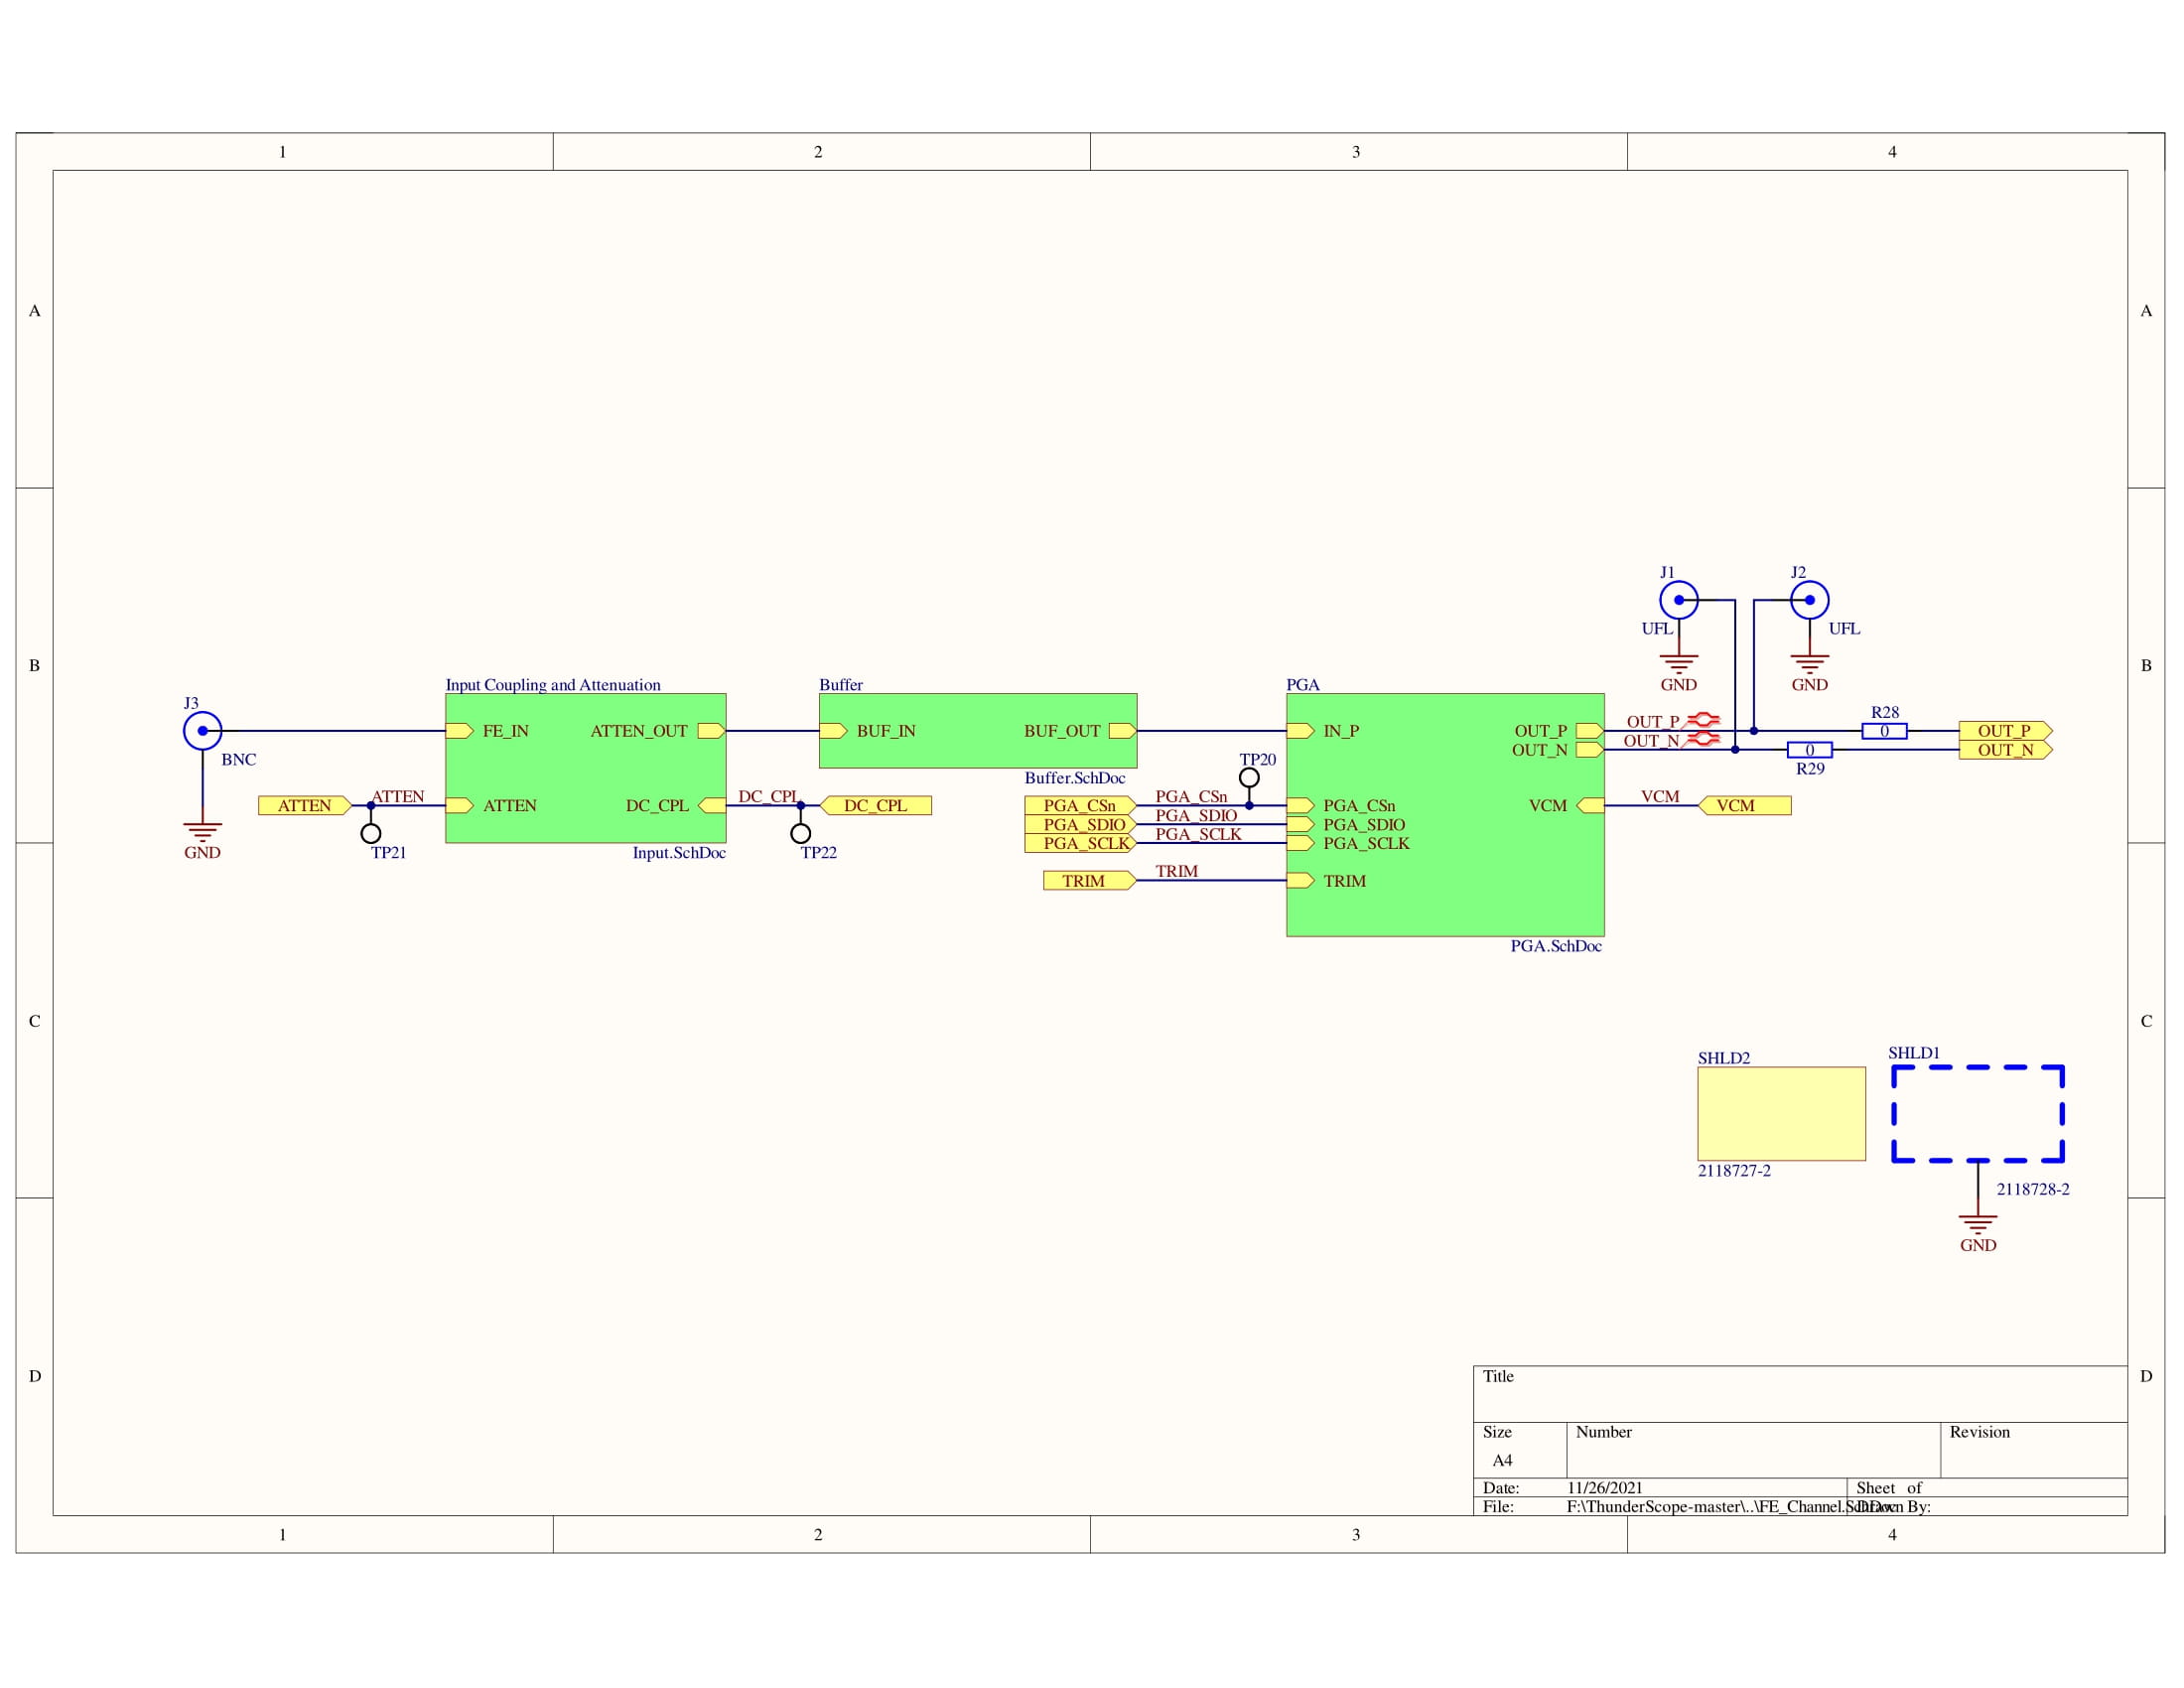
The analog front end of an oscilloscope should have an input impedance of 1MΩ in parallel with ~15pF. The front end must also take in any signal between 8 mV and 80 V peak to peak and attuenuate or amplify it to fit the ADC's full-scale voltage (the max voltage it can read at its inputs), which for the HMCAD1511 ADC that we are using is software adjustable between 1.8 V to 2.2 V.
Current Implementation
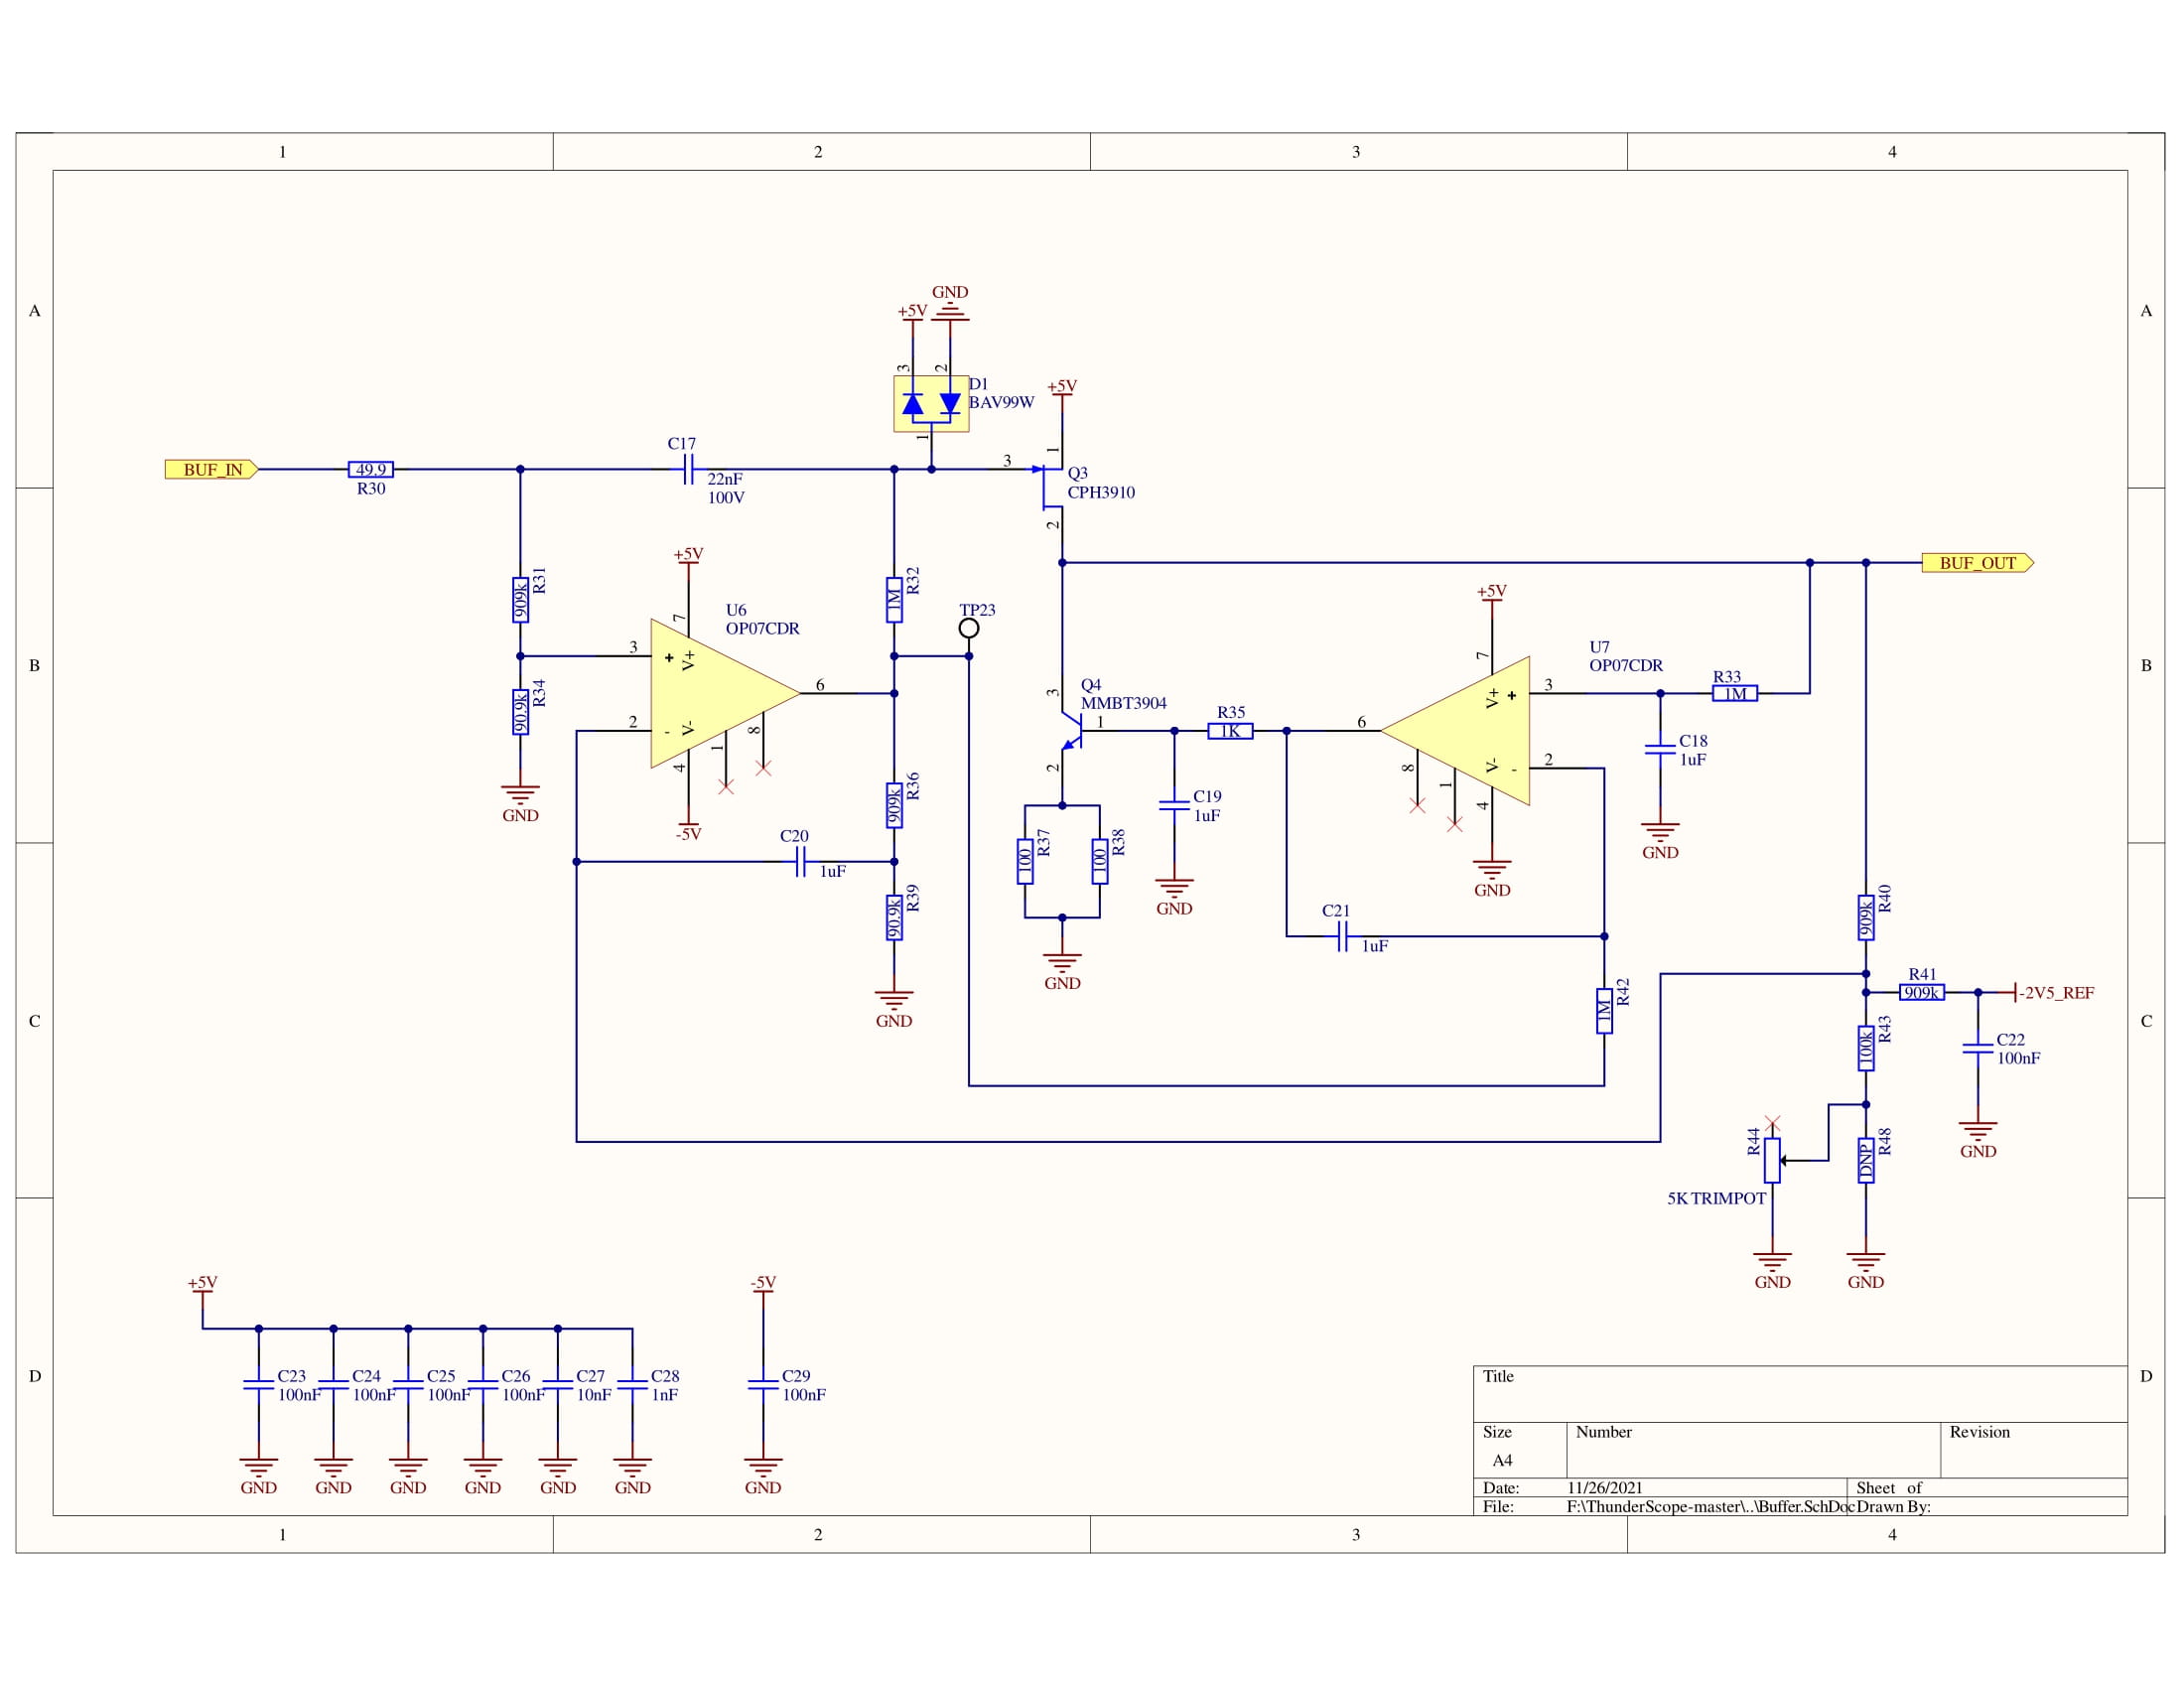
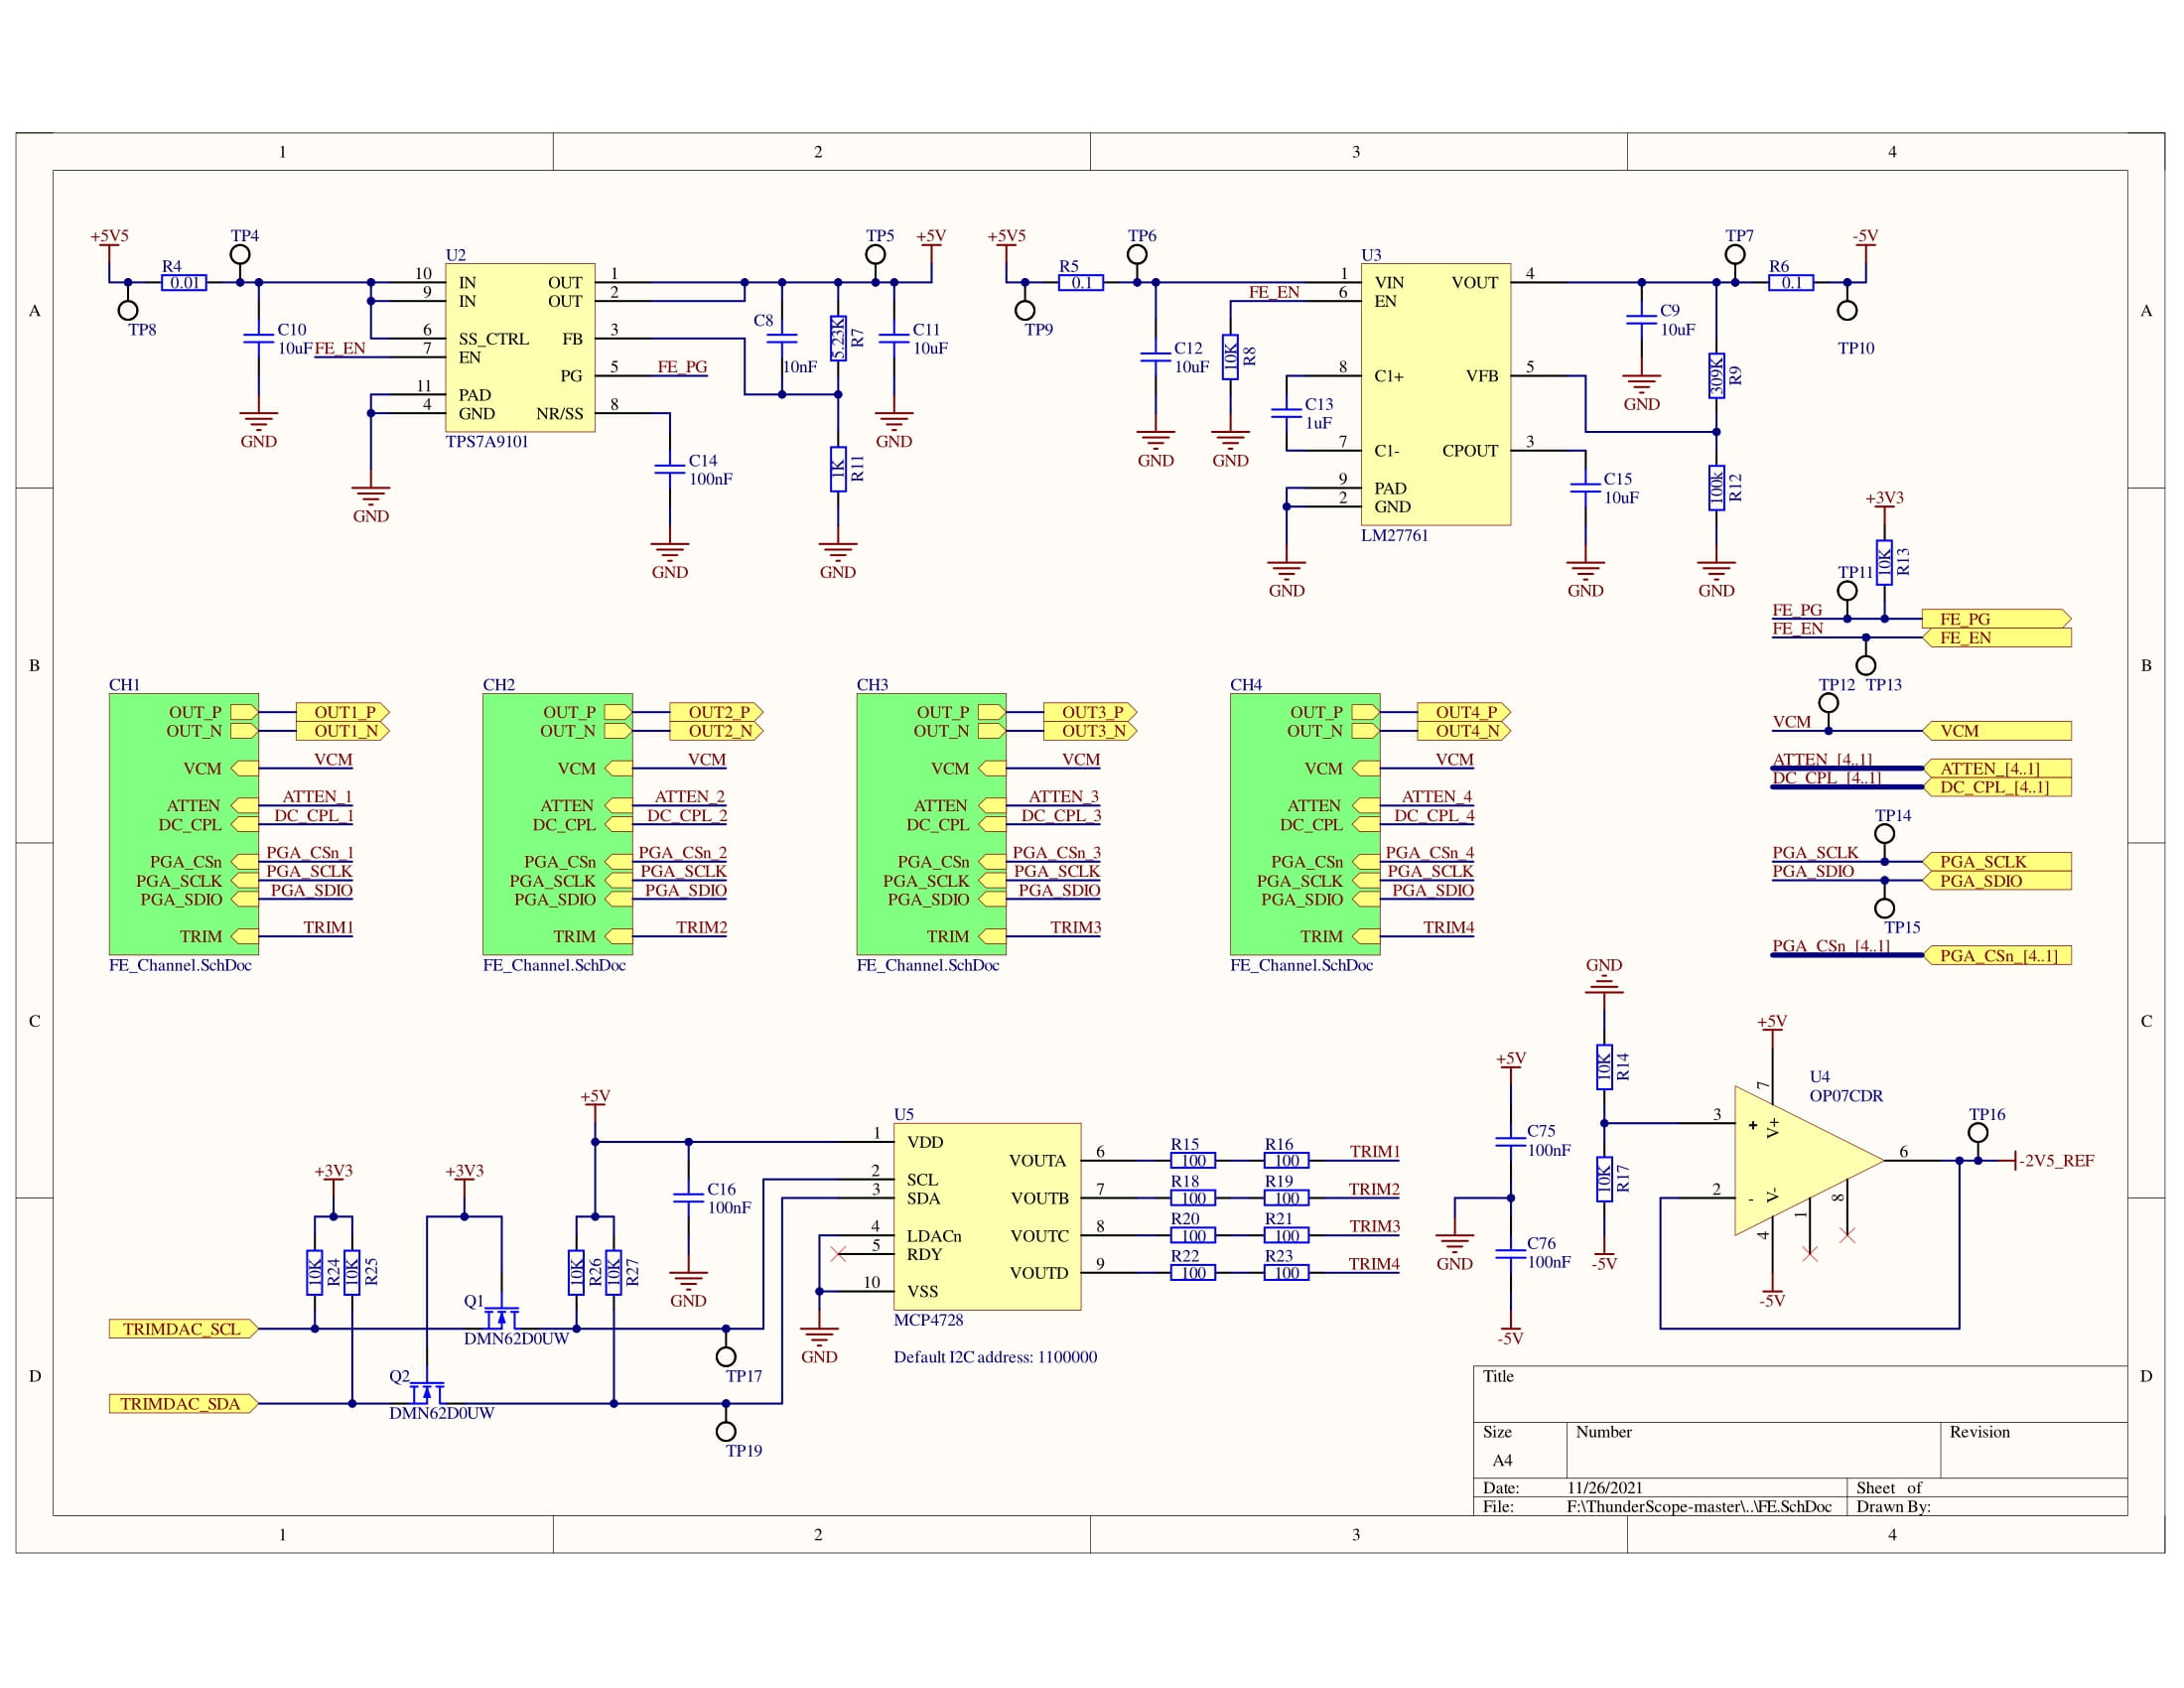
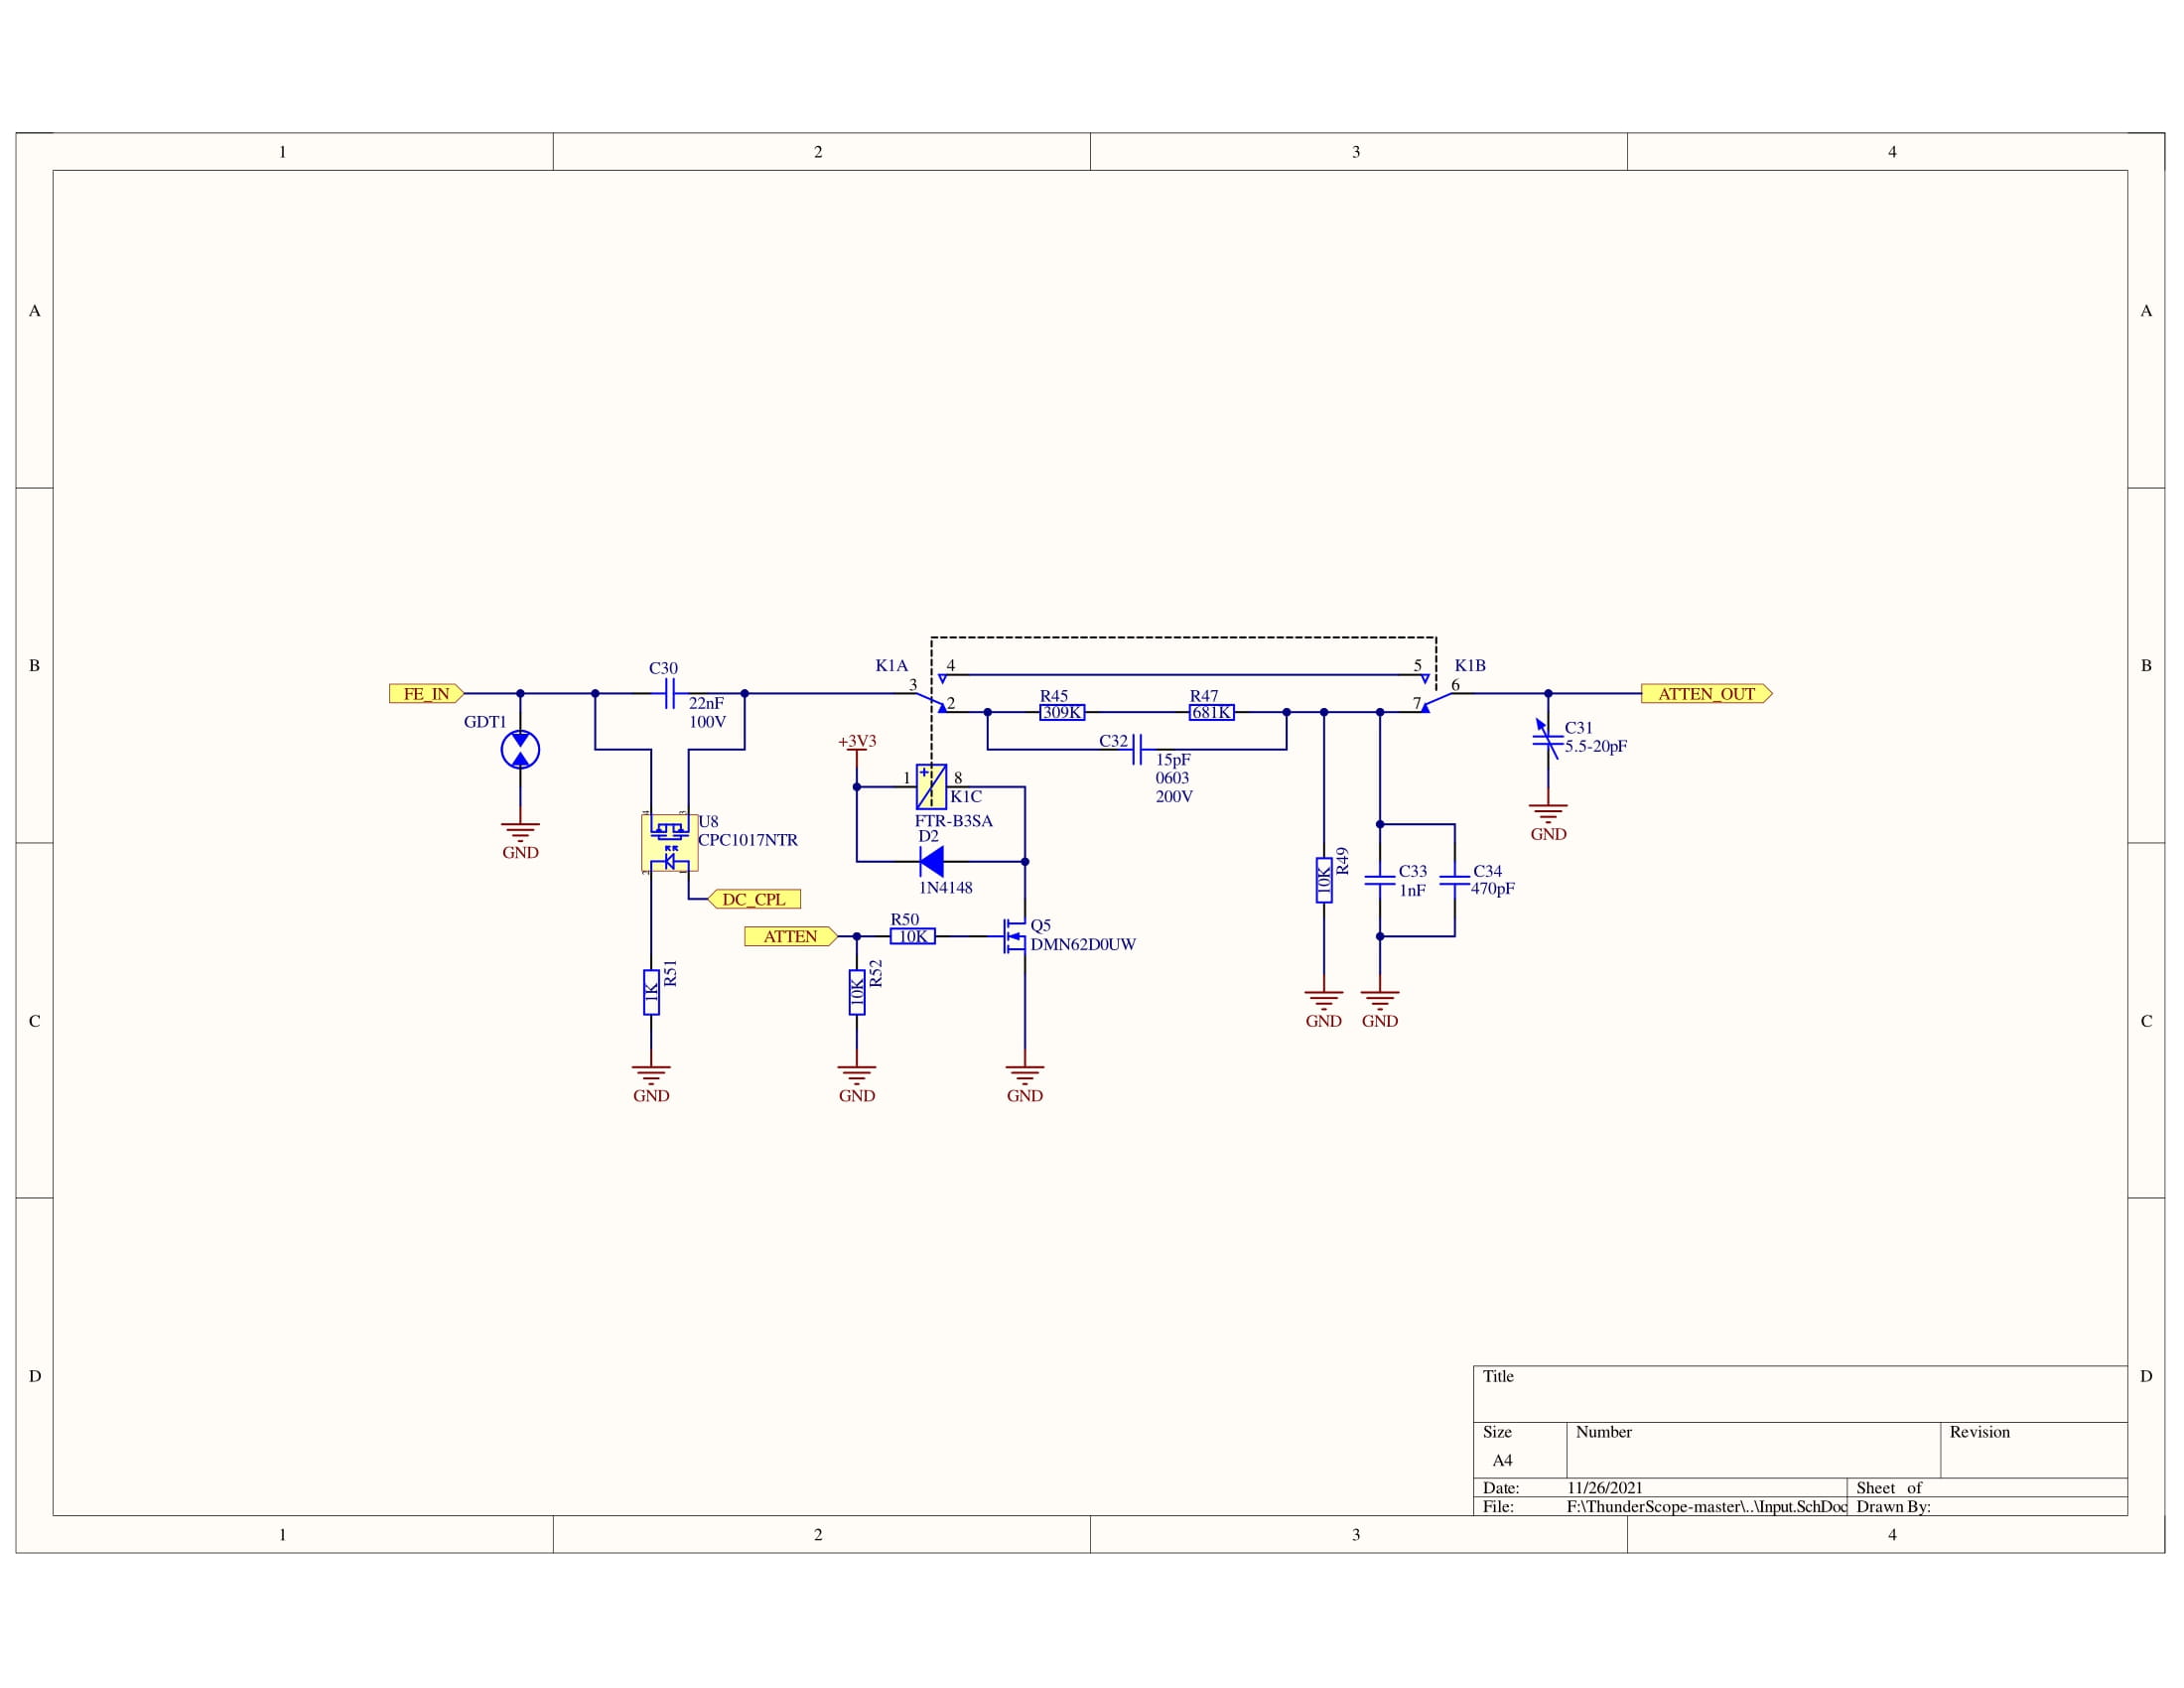
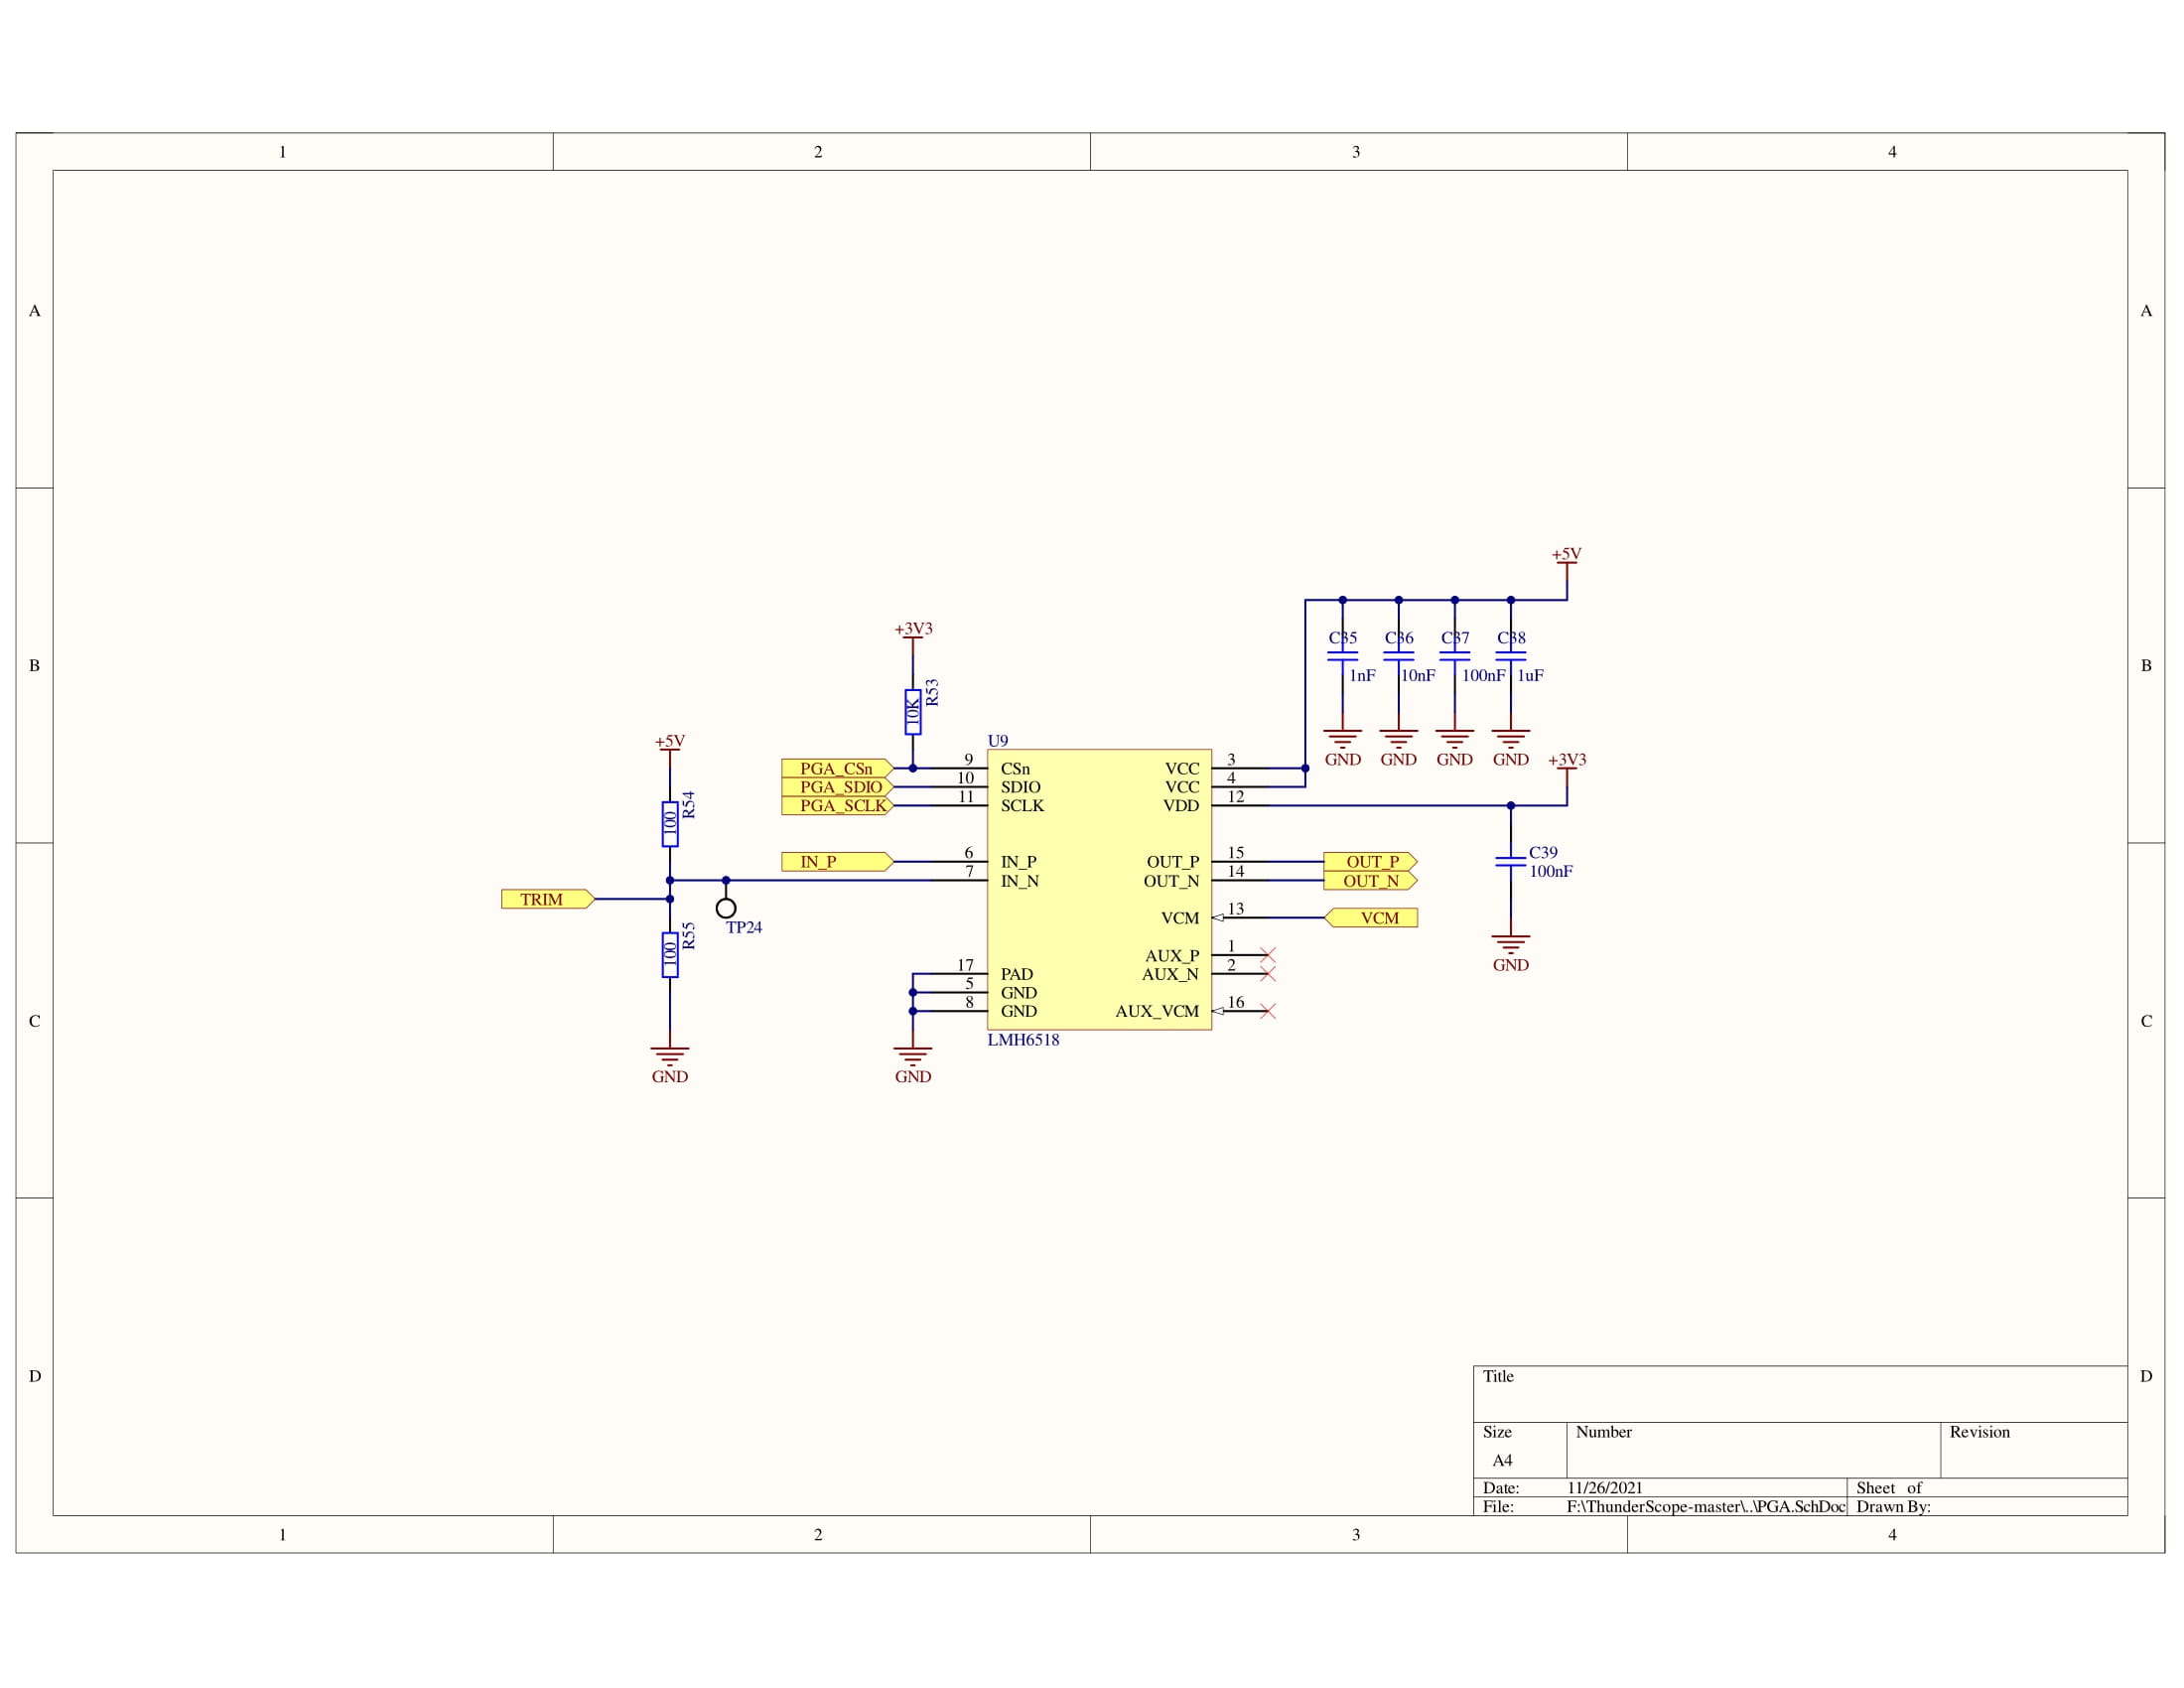
The front of the front end (FFE) has a relay controlled attenuator for course attenuation control and a high impedence buffer with level-shifting for the PGA input. The LMH6518 programmable gain amplifer (PGA) gives us finer gain control and adjustable anti-aliasing filters. Since the ADC samples at 13 bits internally and provides a software configurable "digital gain", where instead of using the full resolution when downsampling, only a subset of the actual resolution is used to downsample to 8 bits. This degrades the performance of the ADC in exchange for gain that would otherwise have to be provided by the front end. By using 2.5x digital gain, the PGA is used to drive the ADC without reaching saturation or needing additional amplification. To shift the signal and to cancel any DC offset, a DAC feeds a copy of the measured DC offset into the non-inverting terminal of the PGA. Four front ends are connected to a 4:1 adapter (FE Adaptor), bringing their differential outputs to the ADC and providing more outputs for the input relay control signals.
Issues
- Bandwidth is 220MHz instead of simulated >350MHz
- 1dB Peaking at about 30MHz, all peaking should be limited to 0.5dB
- Front end may not handle rated voltage under all conditions (when the relay is off)
ADC and PLL
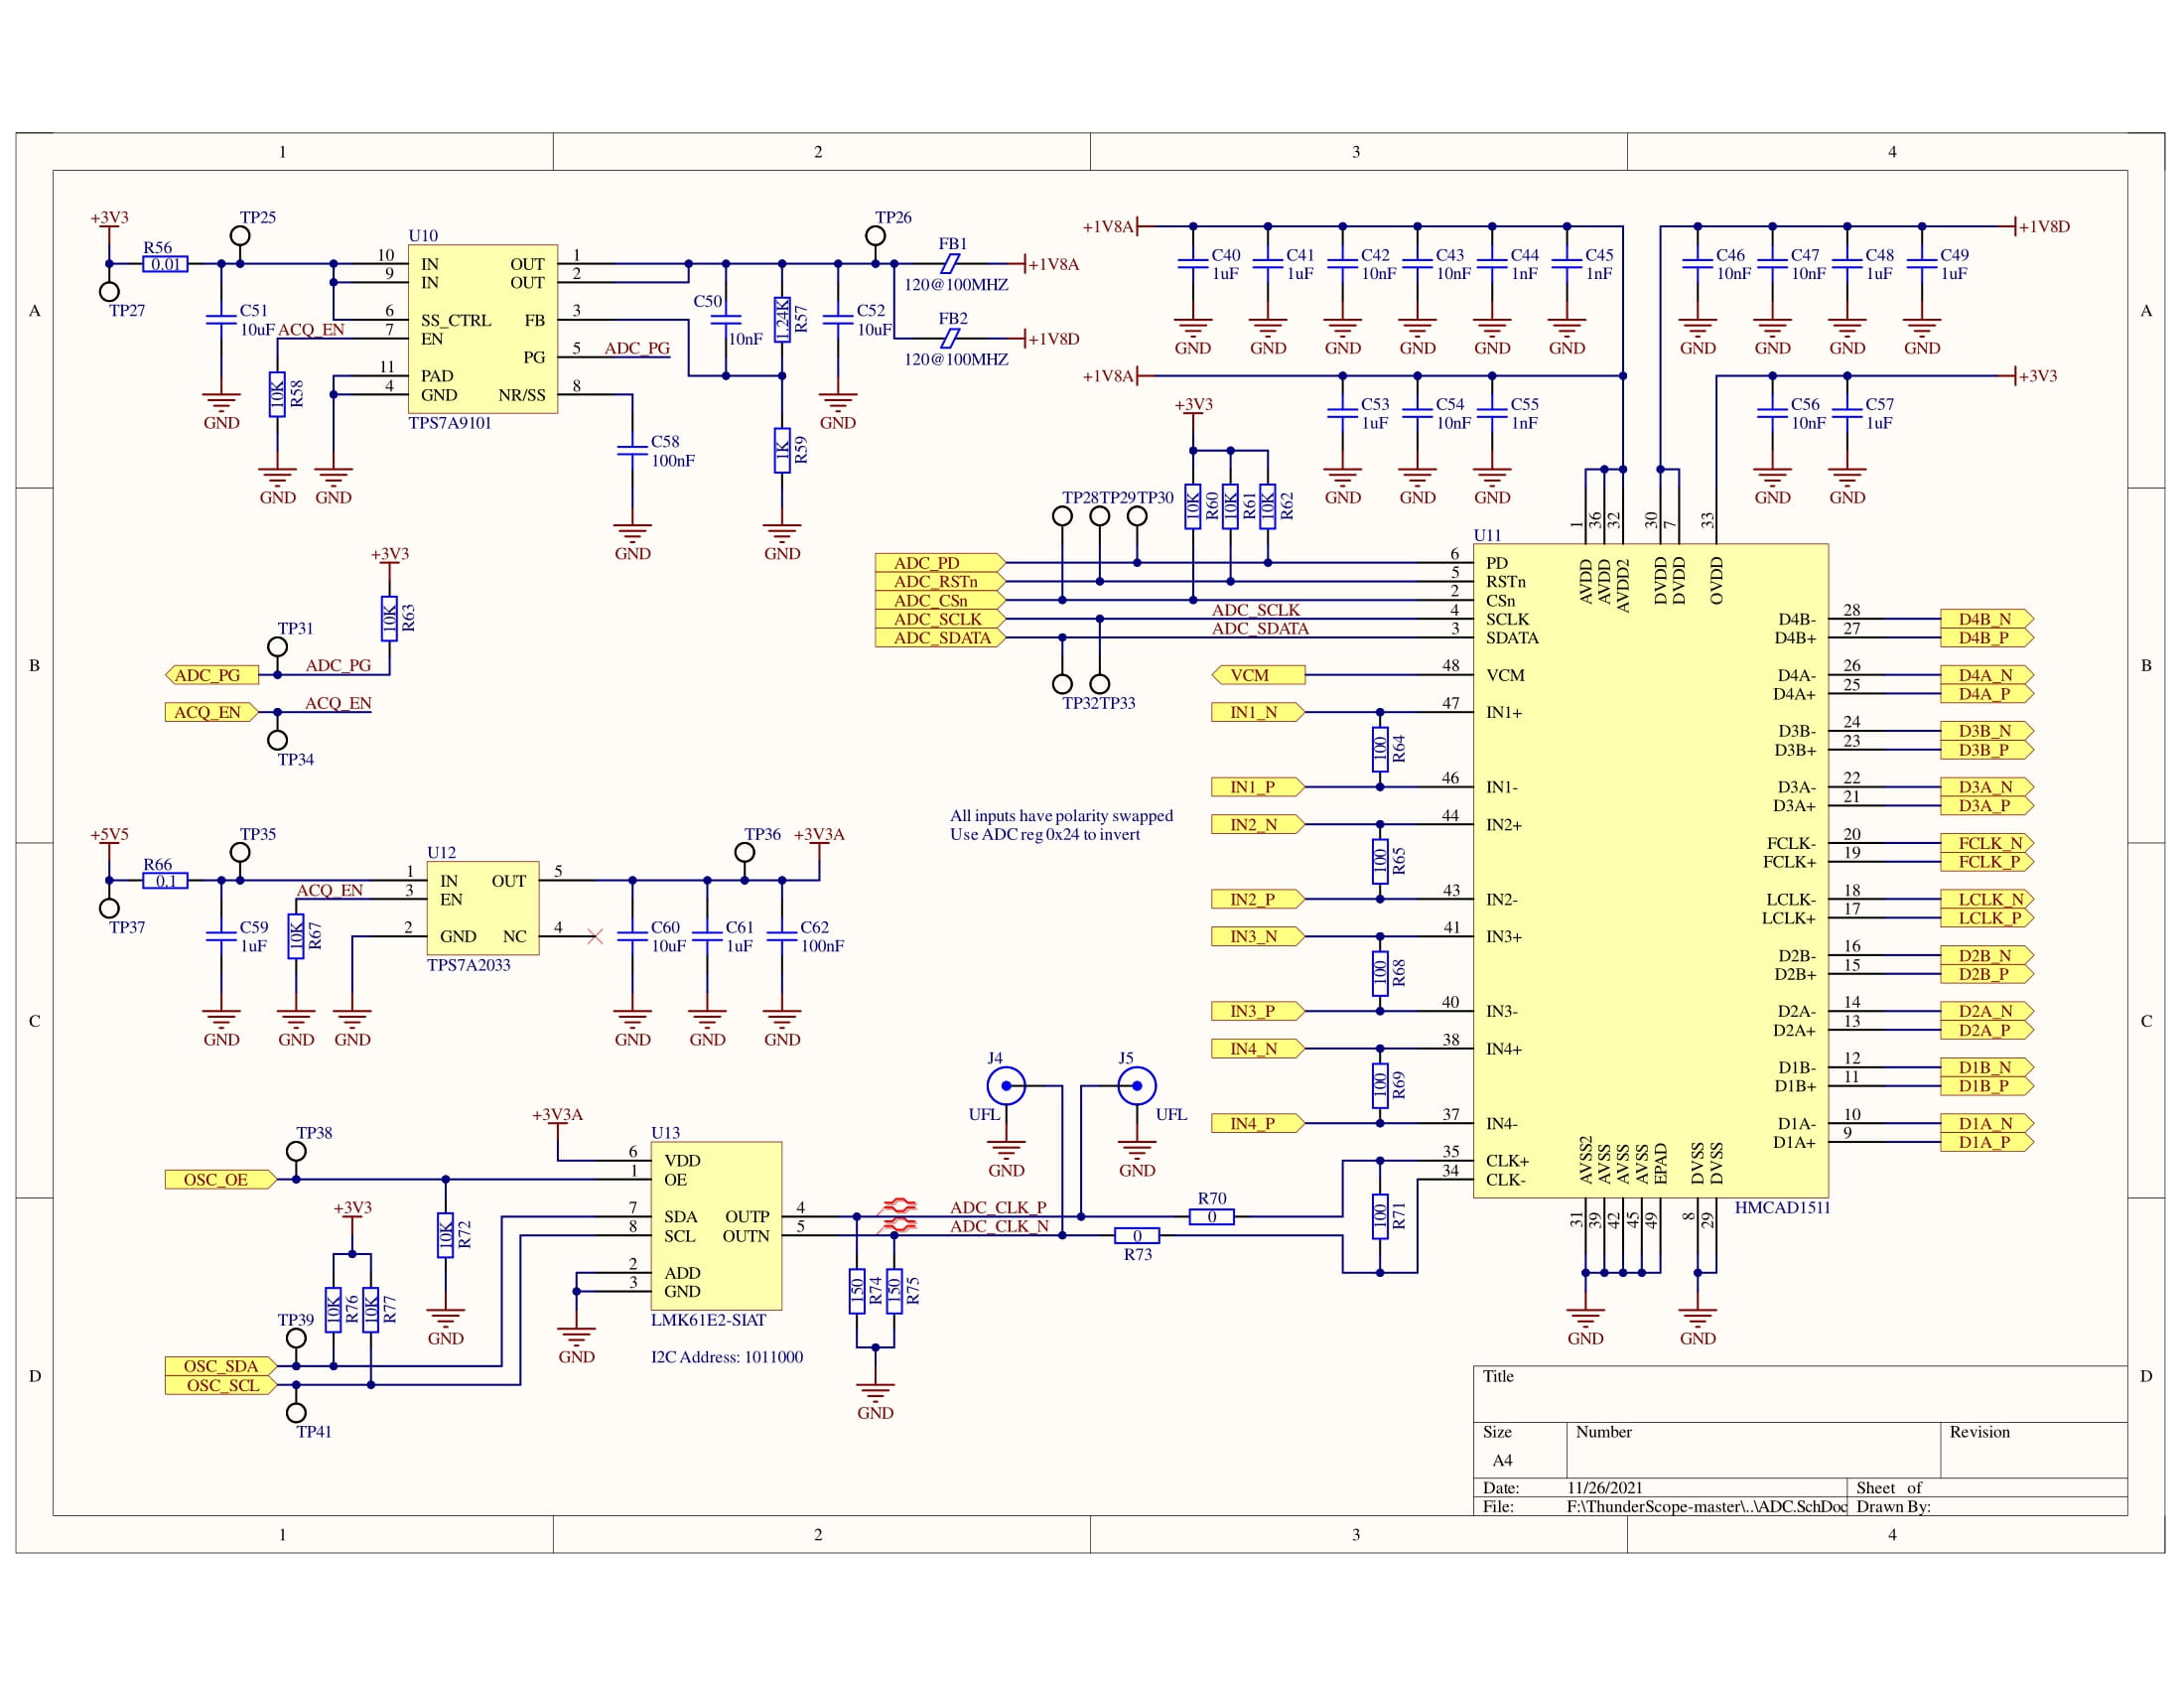
The HMCAD1511 ADC converts the input signal to digital at a rate determined by the input clock. Currently, the clock will be provided externally until the PLL is designed and fitted on the ADC board.
Issues
- Pulldown on CS pin should be a pullup
- Pullup on PD pin should be a pulldown
- ADC needs 100 ohm input termination for PGA
Digital Interface
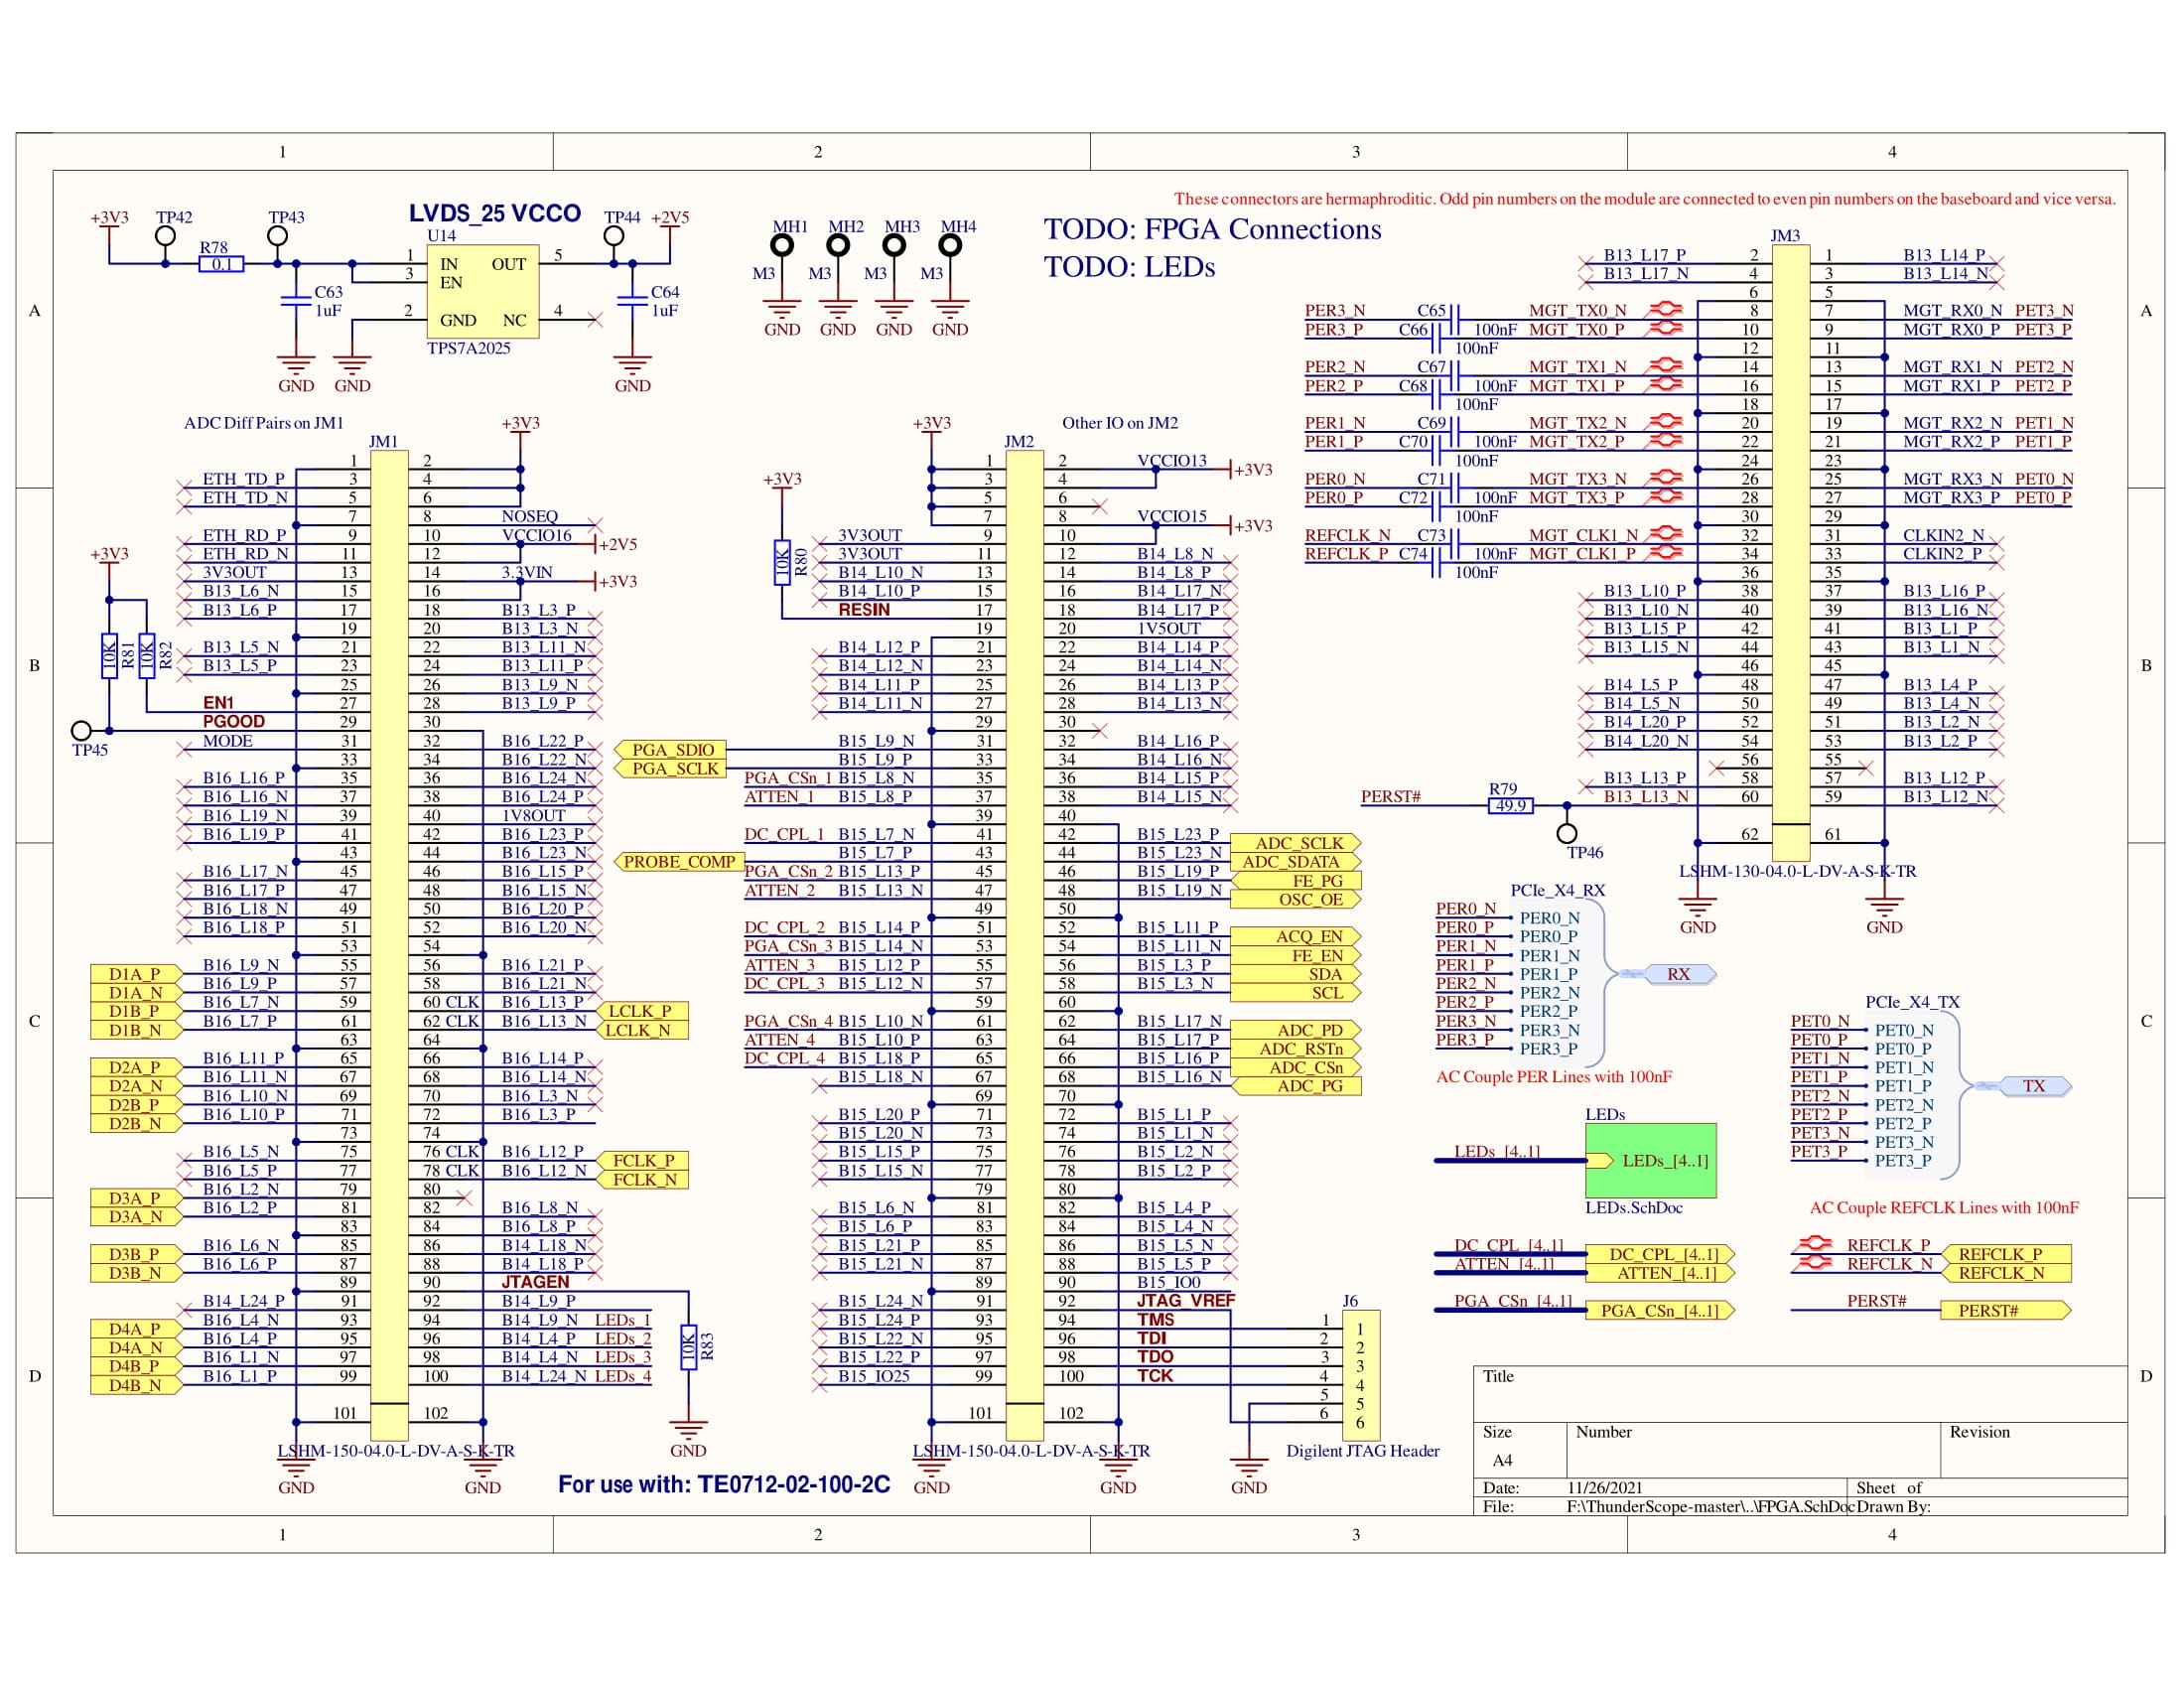
The 8 serial data pairs and 2 clocking pairs from the ADC are routed to the Spartan-6 FPGA to be deserialized to a 32-bit parallel interface used by the FT601 USB 3 controller IC. This IC then transfers the ADC data over to the PC for processing and display. The FT2232H, which uses USB 2, is connected through a USB hub and provides JTAG programming for the FPGA on channel A and an 8-bit parallel bus to communicate to the FPGA on channel B. Through logic on the FPGA, this 8-bit parallel bus can be used to send SPI and I2C data to the rest of the oscilliscope.
Issues
- TMS & TDO are swapped (fixed on all dev units)
- M1 configuration pin not connected to ground due to duplicate pin in symbol (1k pulldown installed on all dev units)
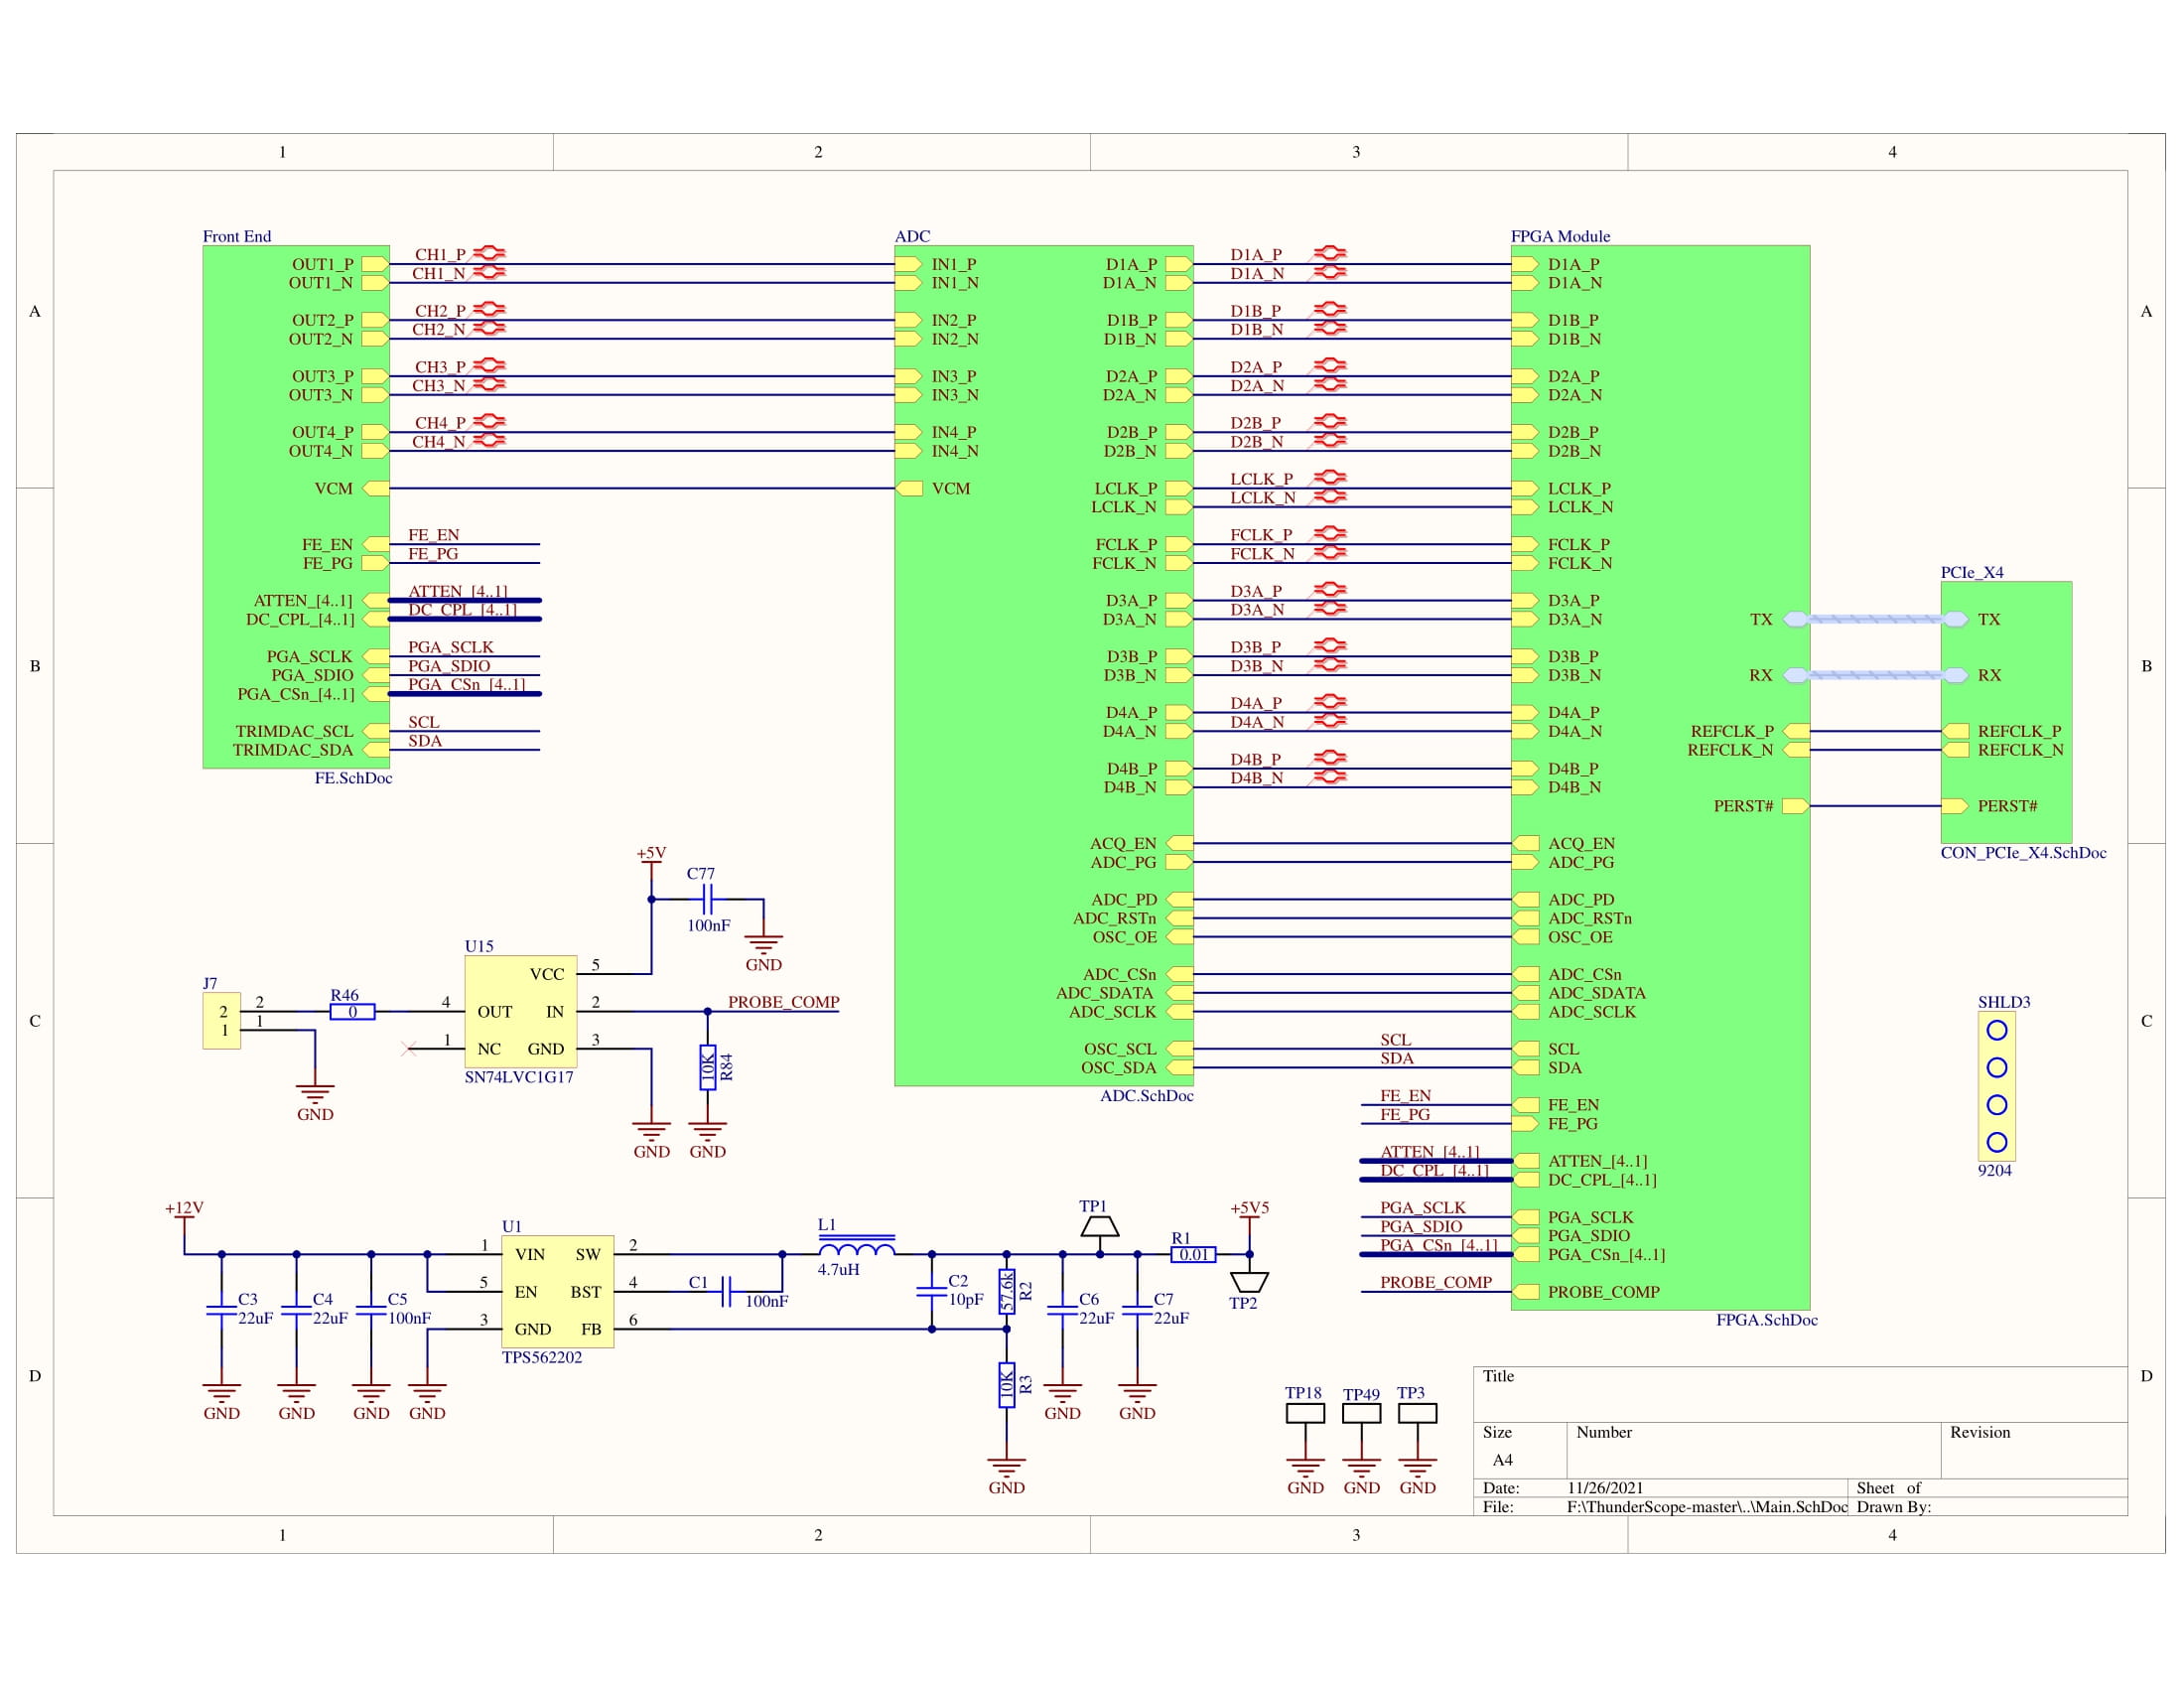
Schematics
Firmware
Setup
To program the FPGA, use papillio loader or OpenOCD. For Windows, papillio loader should be a smooth install, then use the GUI to upload to the FPGA. On Linux or Mac, build either one from source.
For OpenOCD:
Run openocd -f xc6_openocd.cfg in a folder with the cfg file, the bin file you wish to upload and the bscan bit file.
Then open a new terminal tab and run telnet 127.0.0.1 4444
In the new terminal tab, run:
init
jtagspi_init 0 bscan_spi_xc6slx4.bit    (or bscan_spi_xc6slx4_OLD.bit)
jtagspi_program blink_top.bin 0x0
fpga_program
shutdown
Software
We are using React with TypeScript and Electron for our desktop app, with a C++ library to mediate between the desktop app and the hardware.
The main dependencies to build and test are:
- Node.js
- Your platform's C++ compiler (MSVC on Windows)
- Boost (built from source on Windows)
- CMake
Node.js
Node.js includes npm. npm is a package manager for Node.js, which itself is a JavaScript runtime used by React. Installing Node.js is different for reach platform, go to:
nodejs.org
for platform specific instructions. These will always include installing npm as well.
Once you have Node.js and npm installed, you can:
cd DSO/Software/waveview
Then you will want to grab all the JavaScript/TypeScript dependencies before you can actually do anything. Dependencies are not uploaded to git and must be grabbed individually by each person. Do to this simply use:
npm install
This will get all the JavaScript/TypeScript dependencies and place it inside the node_modules folder.
C++ Compiler
This should be g++ on Linux, and MSVC on Windows. Installing MSVC will probably require installing Visual Studio: Community Edition is fine.
Boost
Boost is a huge C++ library used extensively for the C++ portion of our application. It may be available in your operating system's package manager.
Boost on Windows
We ran into a lot of issues using Boost prebuilt binaries on Windows. For now, on Windows you should build Boost from source and make sure it is installed at C:\Boost. This is time consuming but pretty easy.
- Navigate to the
Software\Waveviewsubdirectory of the source code using the Command Prompt or Powershell - Run
deps
More detailed info is available here. You don't actually need to add the Boost directory to your system PATH: we explicitly set the Boost root dir to be C:\Boost in our build script.
CMake
Get it from here.
Scripts
We have three main scripts that you should use:
npm run make-cpp(On Windows usenpm run make-cpp-wininstead)npm run electron-dev(on Windows usenpm run electron-dev-wininstead)npm run electron-build(on Windows usenpm run electron-build-wininstead)
Make-Cpp
This script will build the C++ portion of our application using CMake and your platform's C++ compiler
Electron-Dev
This will open up the app in a dev environment, with hot reloading supported. The built in chrome dev tools have the react dev tools installed and your terminal will be watching the process, so all of the dev tools are at your disposal.
Electron-Build
This will make a distribution ready bundle suitable for your current platform. If you ever need to build another platform's bundle, contact Andrew.
Curious souls can go into the package.json file to see exactly what these scripts do, but careful. Once you stare into the void, so too does the void stare into you.
The scopeview directory will now have a build and a dist folder. The build folder is environment specific and contains build information. The dist folder is where finished builds for the desired platforms will go.
These folders will naturally be environment specific and are quite large. In fact, if you commit them to your branch, you will no longer be able to push your changes to GitHub.com. Feel free to .gitignore them.
Useful Links: (list of bookmarks for Andrew's reference, can be ignored by everyone else but anyone curious enough can peruse)
Getting Started with React and Electron

