Protecting an Azure Function using AAD B2C
Protecting an Azure Function App using the Azure AD B2C authentication provider is very similar to protecting it using Azure AD (as documented here) with just a couple of minor differences. In this article, we'll walk through the steps to protect an Azure Function using Azure AD B2C and highlight those differences.
Create a Function App
Let's start by creating an Azure Function to protect using the Azure portal. In your portal, create a new Resource of type Function App. Then click Go to resource and create a http triggered aka Webhook + API function. Far better documentation can be found here.
To test our system generated http triggered function, we turn to the trusty Postman tool.
Copy the function url found by clicking the </>Get function URL link.
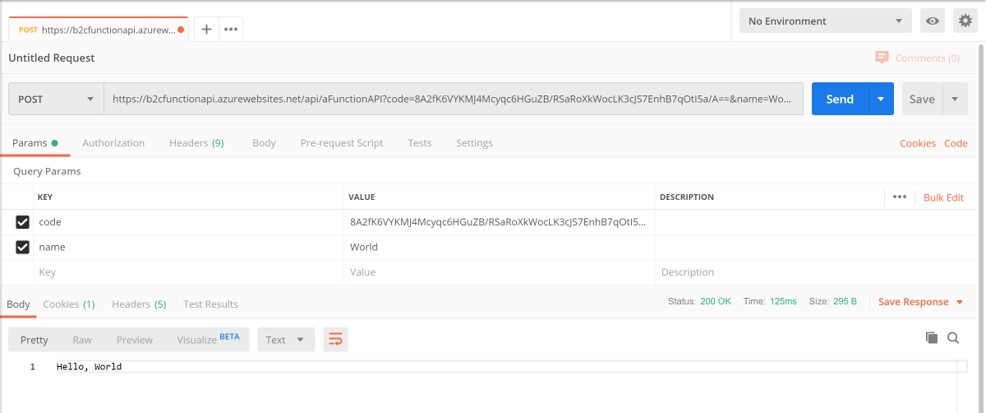
In Postman paste the function url, then click the Params tab and enter a new key called name with a value, e.g. "World". Click Send and see that the function successfully returns Hello, World with a status of 200 OK.
As expected, the function runs without any authentication. Now, let's lock this function down so only our AAD B2C tenant can access it.
Configure the AAD B2C App
We've assumed an AAD B2C tenant has already been set up, but if not, documentation can be found here. Also a Sign-up/Sign-in B2C policy has been created, documentation here.
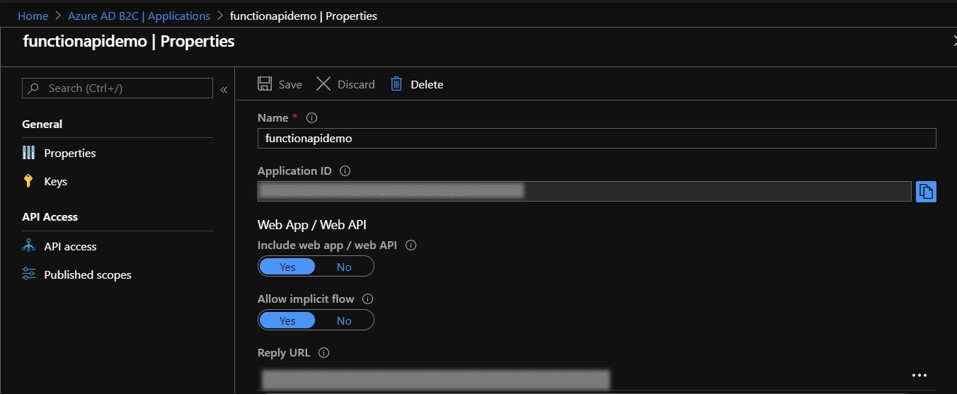
In your B2C tenant, create a new B2C App and set Include web app / web API and Allow implicit flow to Yes.
In the Reply URL field, enter a value with the following format:
[Your Function App URL]/.auth/login/add/callback.
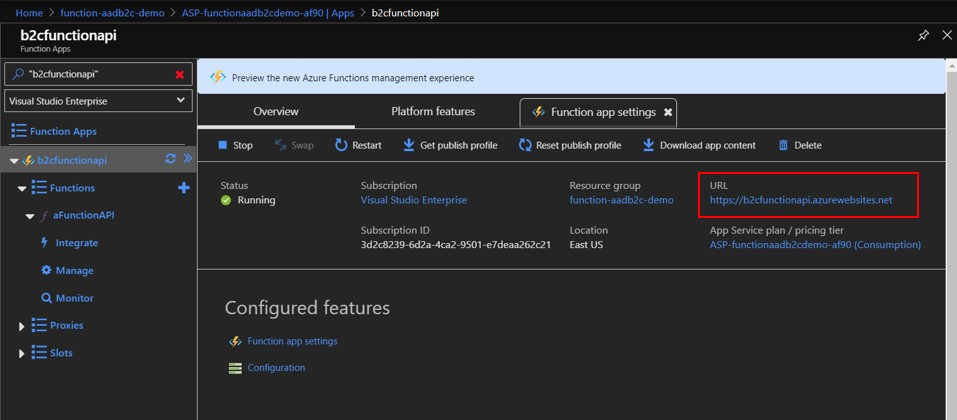
The Url of your Function App can be found in its Overview tab. Important!, make sure to enter the Url with https!
This tells the AAD B2C App to send the authorization tokens to our Function App upon successful authentication.
Now that we've wired our B2C App to talk to our Function App, next is to make sure our Function App is connected to our B2C App.
Configure the Function App
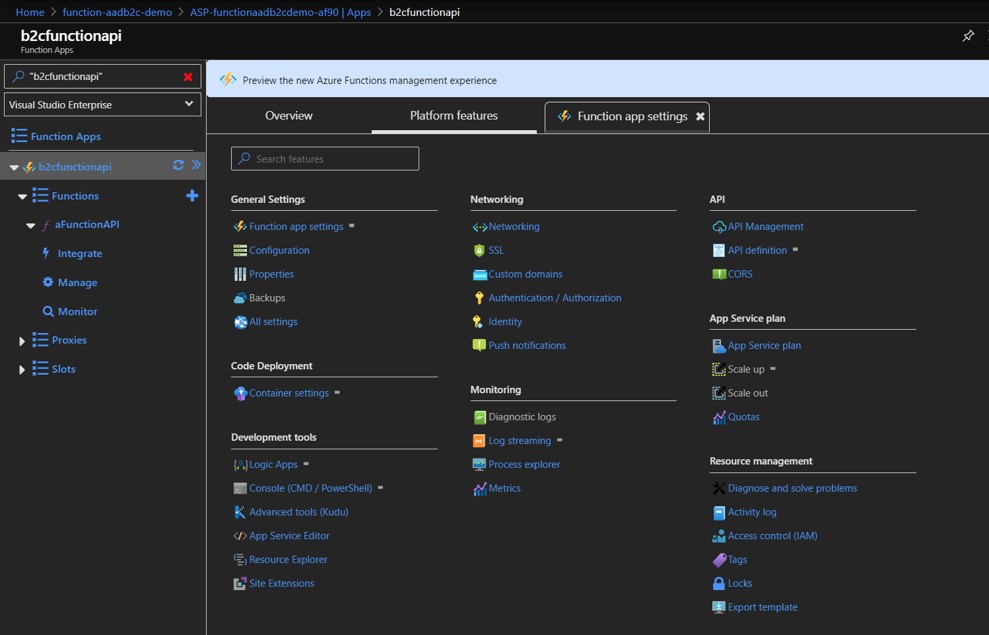
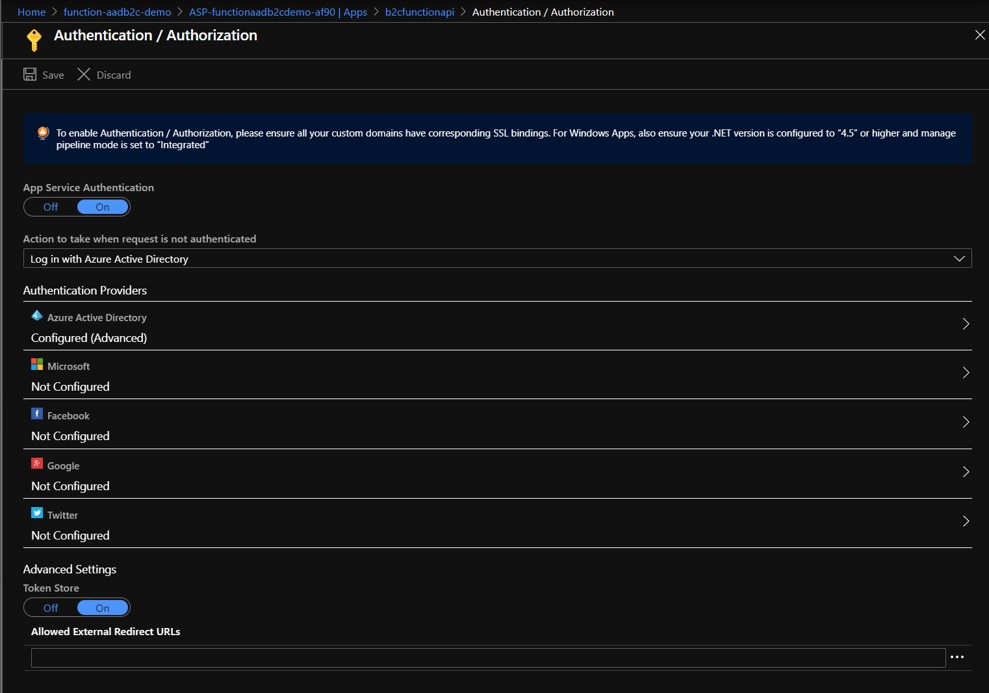
In your Function App, go to function's Platform Features tab and select Authentication / Authorization under Networking.
Switch the App Service Authentication to On and notice a whole slew of new options are presented. Next change the Action to take when request is not authenticated to Login with Active Directory.
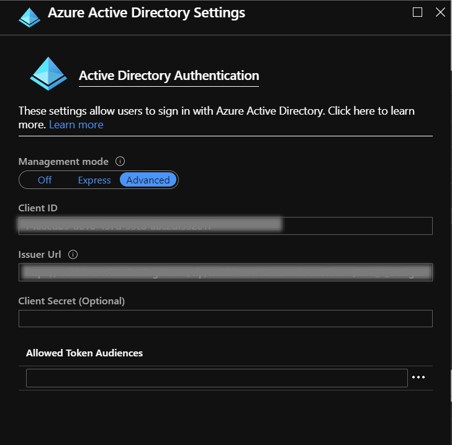
Next click on the Azure Active Directory (Not Configured) which launches the Azure Active Directory Settings blade.
But I thought we were supposed to use AAD B2C you say, well by specifying the B2C's Sign-up/Sign-up policy as part of this configuration, we're making sure unauthenticated requests are directed to our AAD B2C tenant.
Click on Advanced under the Management Mode and proceed to enter the Client ID and Issuer URL.
This is where the differences I mentioned at the beginning of this article take place. Instead of entering a Client ID and Issuer URL associated to Azure AD, we'll enter those associated to our AAD B2C tenant.
The Client ID field is the AAD B2C Application ID of your B2C App. Go to your B2C App's Properties blade.
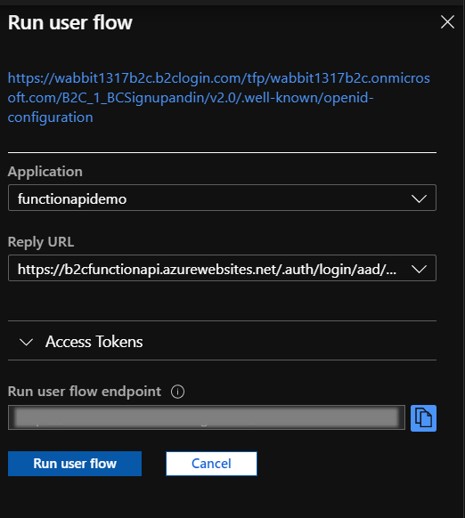
The Issuer URL field is your Sign-up/Sign-in B2C policy. Go to User Flows, select your Sign-up/Sign-in policy, click Run user flow and copy the url located at the top of the Run user flow blade.
Complete the Client ID and Issuer URL fields, click OK and Save.
Congratulations your Function App is now protected with AAD B2C!
Run the same Postman test again and notice this time a status of 401 Unauthorized is returned.
That's pretty awesome right?, but how do we call the protected function successfully?, well we'll need an auth token Of course! To do this, let's go back to B2C App in its Properties blade and enter a new Reply URL with a value of https://jwt.ms.
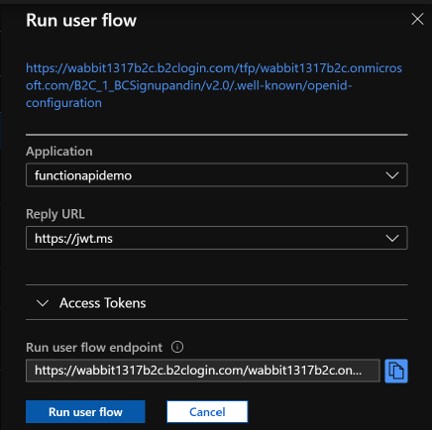
Now go to the User flows, select your Sign-up/Sign-in flow, click Run user flow, select your B2C App and https://jwt.ms as the Reply URL and click the Run user flow button.
A browser window opens with the jwt.ms site capturing the generated token.
Next copy the token from jwt.ms and go to Postman, click on its Authorization tab, and choose Bearer Token in the Type field.
Paste the token in the Token field and click Send and notice the function returns once again with Hello, World. You've successfully tested your protected Azure Function!
