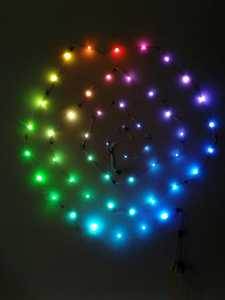
colour spiral clock/patterns
Ben Clifford benc@hawaga.org.uk
This is driver code for a wall-mounted colour spiral made from an Adafruit Soft Flexible Wire NeoPixel Strand - 50 NeoPixels arranged into a spiral on the wall, driven by a Raspberry Pi.
The driver runs a web server on port 80, giving a menu of available modes on the main index page. Modes can be switched from a browser by clicking on the appropriate links, or by making a HTTP GET to the appropriate mode URL using your favourite URL getter (such as curl).
Hardware assembly
The data-in of the LED strip should be attached to pin 18 of the Raspberry Pi.
The power pins should be connected to something that can drive enough current. My experience is that the strip can be connected to the 5v output pin of the Raspberry Pi GPIO header, if the Pi is powered by a strong enough power supply.
The spiral should be laid out on the wall with LED 0 (the one closest to the Pi) at the bottom on the outside of the spiral with LED 49 (at the far end of the strip) being right in the centre of the spiral.
The driver code needs to know how many LEDs are in each loop of the spiral, and that is configured in the 'bottoms' variable defined in main.py
Installing the code
On a clean Raspberry Pi OS install:
sudo apt-get update
sudo apt-get install python3-pip
sudo pip3 install -r requirements.txt
Running the code
Run:
sudo FLASK_APP=main.py flask run -h 0 -p 80
You should see the default pattern on the spiral. Point your browser at your Pi's IP address, and you should get a page to change modes.
Feedback
Feedback is welcome, whether this inspired you to build your own LED stuff or whether you tried this and ran into problems.
