A guide for getting started with Django by creating a Django project, a Django app, making the initial migration, and running the Django development server.
For a more comprehensive guide to working with Django, check out the official Django documentation.
For the purposes of this guide, you will need:
- A Linux operating system.
- Python version 3 or higher installed in your system.
- A code editor e.g. VSCode.
Before you can install Django and create a Django project or app, you will need to set up a virtual environment.
Think of a virtual environment as a container to store all the packages/libraries that you will use in your Django project.
- This sets aside your project's packages from those already installed globally in your system.
- It also helps you avoid overloading your project with the other installed packages, which you may not need/want to use in the project.
Learn more about a Python virtual environment in the official Python documentation.
In your code editor's workspace, take the following steps to create a virtual environment:
-
Open your terminal and run the following command:
virtualenv venv
-
Let's break down the command:
virtualenvis the section of the command that triggers the creation of the virtual environment.venvis the (conventional) name of your virtual environment. You may name it anything relevant likeenvor whatever you'll prefer.
-
If you're following this guide step-by-step, you will notice a new folder titled
venvcreated in the root directory of your workspace.
After creating a virtual environment, you need to activate it before you can use it to store libraries/packages that you will install.
- Run the following command to activate your virtual environment:
source venv/bin/activate - You may replace
venvwith the name you used when creating your virtual environment.
Before you can proceed with installing Django, you need to do one more thing: put the .gitignore file to use.
A gitignore file stores all folders and files that you do not want to be pushed to your remote GitHub repository.
You should keep the size of your remote repository as light as possible, and push only what is necessary to it.
You should also keep sensitive information/data in your local system and not expose them to the public by pushing them to GitHub. A .gitignore file comes handy in this case as well.
You will add your virtual environment to .gitignore. Later on, you will learn how to retrieve the packages/libraries stored in your virtual environment so that you can still access these dependencies even when you don't have access to the virtual environment that you created earlier on.
If you don't have a .gitignore file already, you will need to create one in the root directory of your workspace. Follow these steps:
-
Open your workspace's file explorer.
-
Manually create the
.gitignorefile in the root directory of your workspace.
-
An alternative approach is to add a
.gitignorefile when creating your new GitHub repository:
Now, add your virtual environment folder to .gitignore. Follow these steps:
-
Open your
.gitignorefile. -
In a new line, type or paste the following:
venv/ -
You may replace
venvwith the name you used when creating your virtual environment. -
This will inform your source control that you do not want to push your virtual environment folder,
venv, including all its contents/ -
The following
.gitignorefile was generated by GitHub when I was creating this project's repository.
You are now ready to start installing packages/libraries for your project. The very first package will be django.
Learn more about Django in the official Django documentation.
Take the steps below to install django in your virtual environmet.
-
Run the following command:
pip install django -
What does this command do?
-
It installs the latest, stable version of the
djangopackage, along with other libraries thatdjangodepends on to run.
-
An environment file, .env, is the home for all sensitive information/data within your workspace.
I recommend that you do not expose or make publicly available, any sensitive information, including but not limited to:
- Credentials (e.g. username and/or password).
- Tokens (e.g. access token).
- Security/Secret keys
- Hosts of your project
The contents of a .env file are referred to as environment variables.
In the root directory of your workspace, follow the step below:
- Manually create a
.envfile - Add the following environment variable:
MODE='dev' - The variable above determines whether your project is in
developmentorproductionmode. - Whenever you're working locally, remember to set this variable's value to
dev. You will learn later on more ways that you can use this variable.
You will also use the .env file more extensively later on.
A Django Project contains the core settings and configurations that all Django Apps you will build will rely and run on. Think of it as a container for any/all Django application(s) you will create. But it is more than a "container".
Learn more in the official Django Documentation.
Important: If you've been committing and pushing your changes to GitHub, please do not commit and push any changes after creating your Django project yet.
Take the step below to create a Django project.
-
Run the following command:
django-admin startproject django_proj . -
You may replace
django_projwith your preferred name for your project. -
Let's break down this command:
-
django-adminis the section of the command that triggers the creation of either a Django project or a Django app. -
startprojectis the section of the command that tells Django specifically what we want to create between the project and the application. -
django_projis the name I chose for the project. You may call it anything relevant to what you're building. -
The period
.I added at the end tells Django to create the project within the current folder (which in this case is the root folder of my workspace)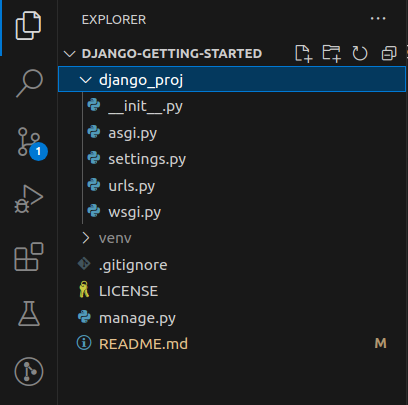
-
Without the period
., Django will create the project within a containing folder of the same name.
-
Either approach is okay, depending on how you want to manage your workspace.
-
-
What happens after the command?
-
Django creates a folder containing files which all our applications will rely and run on.
-
The files you will mostly interract with are:
settings.py: contains the project's configurations, which will be applied to any/all application(s) installed/created.urls.py: contains the url configurations that connect an application to the project. This is one of the ways that the project communicates with each application connected to it. In the context of APIs, this file defines base URLs which all other URL endpoints will connect to.
-


Remember: Do not commit and push any changes to GitHub yet. Check out (ii), (iii), and (iv) below for more information.
After storing any sensitive information in the environment file .env, you will need a way to retrieve this information. The python-decouple package/library enables you to do this seamlessly.
-
Run the following command to install python-decouple:
pip install python-decouple
The package/library python-decouple that you installed in (ii) above exposes a variable called config, which you can use to retrieve environment variables.
Follow these steps to import config in your Django project:
- Open your project's
settings.pyfile, which you will find here:django_proj/settings.py- If you have a different name for your Django project, open its folder, and you will find the
settings.pyfile there.
- At the top of the
settings.pyfile, you will see the following default import:from pathlib import Path - Just below this import, add a new line and type or paste the following:
from decouple import config - Your project's
settings.pyfile should now have the following imports at the top of the file:from pathlib import Path from decouple import config - Now, whenever you want to retrieve an environment variable, you can always type:
config('NAME_OF_THE_ENVIRONMENT_VARIABLE')
You still need to do something in your project's settings.py file.
A secret key in Django is used to secure signed data. This is one of the sensitive information that you shouldn't make publicly available.
Follow the steps below to secure your secret key:
- If you already exited your project's
settings.pyfile, open it. - In the
settings.pyfile, locate the configuration titledSECRET_KEY.SECRET_KEY = 'theValueOfYourSecretKeyWillBeHere' - Cut/copy the value of the
SECRET_KEYconfiguration and replace it with the following:config('SECRET_KEY') - Therefore, before you had:
SECRET_KEY = 'theValueOfYourSecretKeyWillBeHere' - And now you should have:
SECRET_KEY = config('SECRET_KEY') - This tells Django to retrieve the value of the secret key from your environment file, and that the variable which contains the value of this secret key is titled
SECRET_KEY.
Now that you have the value of the SECRET_KEY configuration in your clipboard, follow the steps below to store this value in your .env file:
- Open your
.envfile at the root folder of your workspace. - In a new line, type or paste the following (without leaving any trailing spaces):
SECRET_KEY='pasteOrEnterTheValueOfTheSecretKey' - Replace
pasteOrEnterTheValueOfTheSecretKeywith the value of theSECRET_KEYthat you cut/copied from your project'ssettings.pyfile. - Therefore, if before, in your project's
settings.pyfile you had the value of theSECRET_KEYas:SECRET_KEY = '12345' - It should now be:
SECRET_KEY = config('SECRET_KEY') - And in your
.envfile, you should now have:SECRET_KEY='12345'
Once you've followed the steps above, you may commit and push your changes. Your project's SECRET_KEY is stored securely in your local .env file, which will not be pushed to or accessible on GitHub.
A Django App contains logic and configurations that the application requires to render a HTML template, send email messages, or build APIs. But there is so much more you can do with a Django app. On its own, this application cannot run successfully. It has to be hooked or linked to a Django project.
- And while a project can contain more than one app, I do not recommend having more than one project within your Django workspace.
Learn more about Django applications in the official Django documentation.
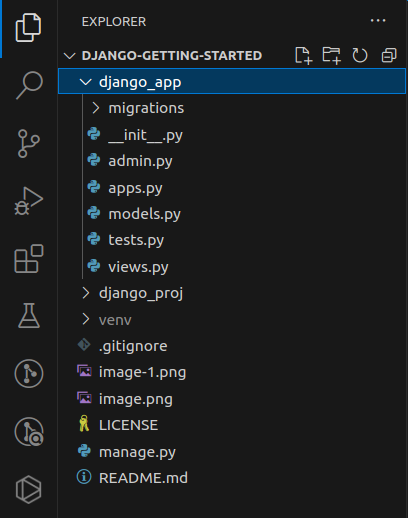
Take the step below to create a Django app.
-
Run the following command:
django-admin startapp django_app -
You may replace
django_appwith your preferred name for your application. -
Let's break down this command:
django-adminis the section of the command that triggers the creation of either a Django project or a Django application.startappis the section of the command that tells Django specifically what we want to create between the project and the application.django_appis the name I chose for the app. You can call it anything relevant to what you're building.
-
What happens after the command?
-
Django creates a folder containing files which will further contain configurations and logic necessary for that application to serve its purpose.
-
For example, if you want to render a
HTML template, you will need aviews.pyfile (auto-generated), and aurls.pyfile; both files will contain logic and configurations for rendering the HTML template. -
Depending on what you're building, you may need to manually create more files, for example a
models.pyfile (in older versions of Django; now autogenerated in later versions), where your database logic will lie, or aserializers.pyfile, where your data serializers will lie (helpful for handling API data).
-

Now that you have a Django project and a Django application, what next?
There is so much that you can do with Django, but this section and guide will only cover running your project successfully. Explore the official Django documentation for more information about what you can do with your application and project.
The two important things you must do are:
- Hook your application to your project
- Make the initial migration
An optional step is to create your custom database before running migrations, and I would recommend PostgreSQL as a Relational Database Management System that you can use. Check out this guide: Setting Up and Using PostgreSQL in Django for more information about how you can create and configure your custom database for Django.
Since Django uses SQLite by default and has configurations set up for it, we will use it in this guide as our RDBMS (Relational Database Management System).