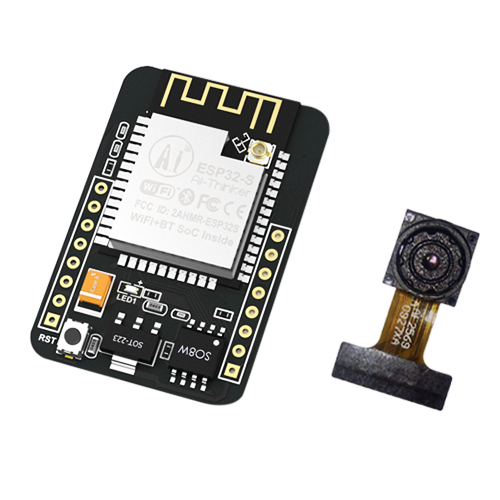
ESP32-CAM remote image access via HTTP. Take pictures with ESP32 and upload it via MQTT making it accessible for the outisde network on Node_RED
- The MQTT buffer size is limited by the library, thus the max picture size
_client.space() == 5744-> Play around with the resolution and find the suitable oneFRAMESIZE_QVGA
-
More information can be found on their comprehensive Docs. But Basically:
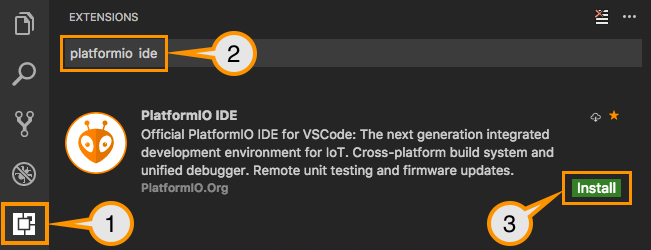
- Download and install official Microsoft Visual Studio Code. PlatformIO IDE is built on top of it
- Open VSCode Package Manager
- Search for official
platformio-ideextension - Install PlatformIO IDE.
-
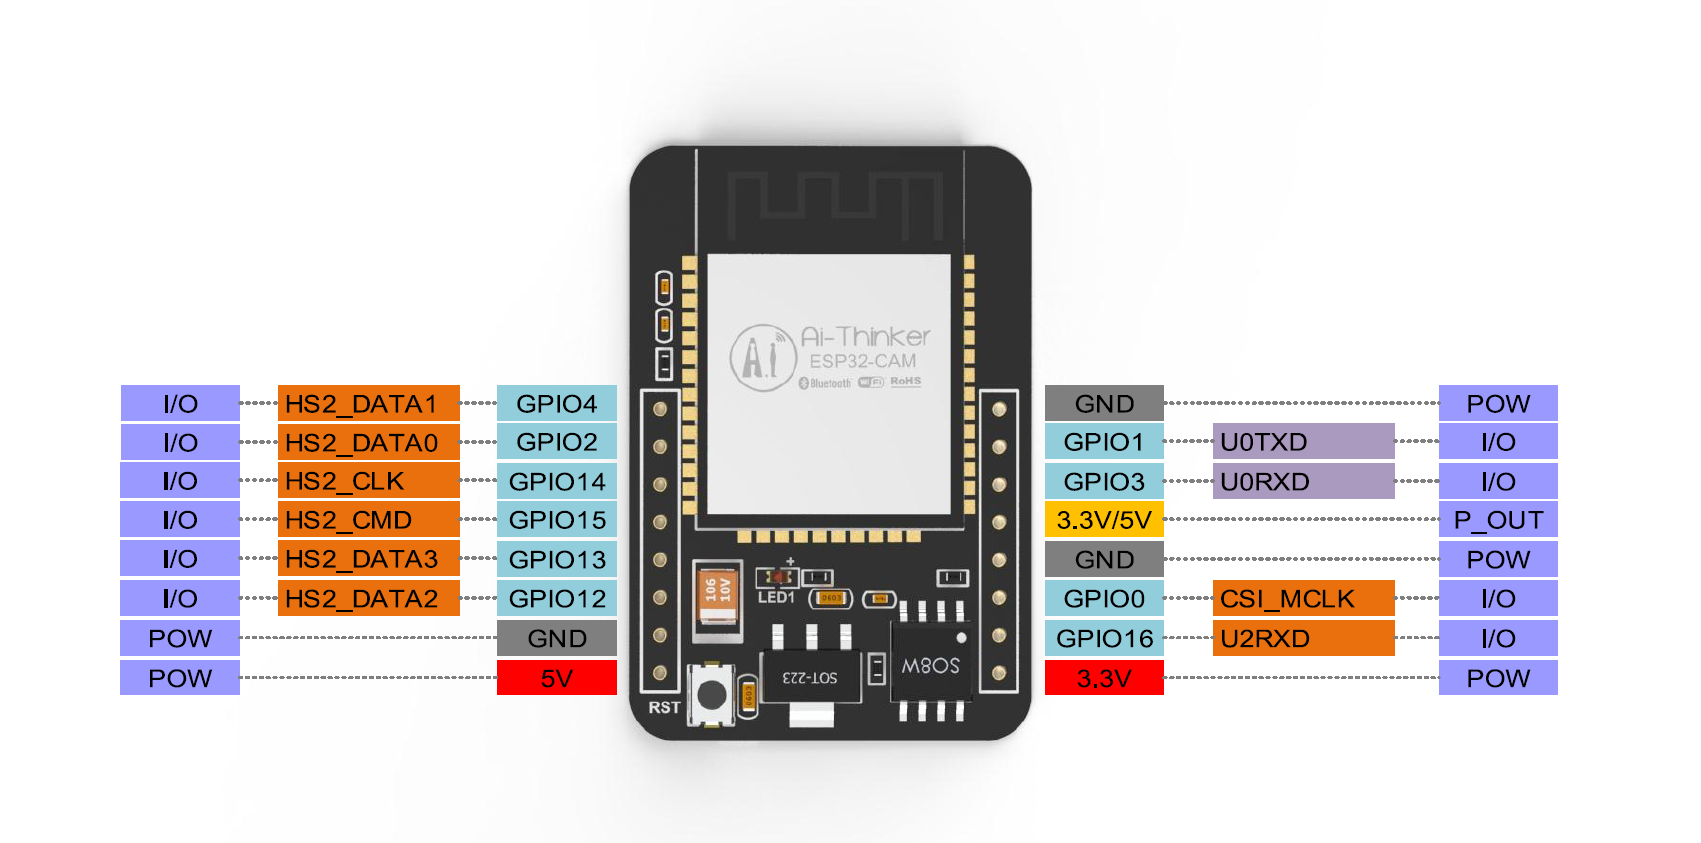
ESP32-CAM does not have a built-in UART/USB converter, therefore you will need one.
- TX goes to RX;
- RX goes to TX;
- Power the board while keeping
GIPO0low; - You can now release it and upload your code;
- This board has an AMS1117 voltage regulator which "sleep" current is around
6mA, this is quite a lot if you plan to have your board running on batteries. - TODO! find an alternative with the same package.
The MQTT Broker used is CloudMQTT they offer Free accounts 😉 that works just fine.
The process was a bit tedious and took a while to get it properly running as of today (2019/07/23) the information provided on the tutorial had few broken links.
https://nodered.org/docs/platforms/bluemix
- Sign-up/Log in to https://cloud.ibm.com/;
- Using the top search bar, search for
Node-RED Starter; - Fill the required fields,
App name,Host name, etc... - Select
LiteforSDK for Node.jsandCloudant, those are free, you can upgrade later if required; - Click
Createat the bottom right, the circle will spin, take few seconds; - You will be redirected to the next page and should see
runningwhen everything is ready for use:
- Go to your App URL, something like http://AppName.eu-gb.mybluemix.net and complete the initial set-up;
- The Node-Red GUI Flow Editor is available at http://AppName.eu-gb.mybluemix.net/red
- After installing the Node desbribed below, Your Node-red Dashboard is available at http://AppName.eu-gb.mybluemix.net/ui
- Menu -> Manage Palette -> Install tab. You will need
node-red-dashboard
- Copy the flow below and import to your Nore-RED available at
yournode.eu-gb.mybluemix.net/redImport -> Clipboard, paste it.
You will find the flow.json here.
- Generally Cloudant autheticate via IBM cloud therefore we need to create new Credentials and use the username and password for authentication on the
delete inputs on databasenode.
- Via the
catchnode, you can enable notification, for your phone for example. Below I have quickly show few options:
- Use the
emailoutput, configured with your email provider info;
- PushSafer
- Offers several customizations, sound, vibration, icons, etc:
- GET request url:
https://www.pushsafer.com/api?k=YOURKEY&c=%23ff0000&v=1&a=1&m={{payload}}
- Twilio SMS
- SMS API, built-in to the Node-RED and IBM example;
- IFTT
- If this than that, with android and iOS apps can be accesible via webhooks;
- GET
https://maker.ifttt.com/trigger/YOUR_EVENT/with/key/YOUR_KEY?value1=MESSAGE
GitHub Shields and Badges created with Shields.io
GitHub ESP32 camera example


