This will give you an overview of how an HTML page and its resources are structured. You will learn the basics of how these resources interact, and how your JavaScript can manipulate them. You'll also learn a little bit about testing your code. Basic testing will use Jasmine as that will run in your browser and requires no other downloads like node.js or selenium.
I will try to explain as much as I can along the way. There may be some concepts that you'll just have to take as further research points from this experience. This is really just a primer.
We will, eventually, divide up the code by directories, so we have HTML in this
directory, Javascript in its own js directory, Cascading Style Sheets in a
css directory, images in an images directory, and we'll push tests into a
test directory.
-README.md
-hello.html
-hellos.html
-css/
  |-hello.css
-doc/ # images for this README to reference
-images/
  |-hello_my_name_is.png
-js/
  |-names.js
-test/
  |-jasmine/
     |-SpecRunner.html
     |-lib/ # contains jasmine code
     |-spec/
In a perfect world, you would install git on your computer and clone this repository.
If you would like, you can clone this repository. It will come down in its completed form.
not implemented yet
You can wind back the source for each step by checking out the tags related to each step. Checking out step0 will have you ready to start step 1 and checking out step1 will have you ready to start step 2.
end not implemented yet
As of right now, when you check this out, there is only one branch, master, and it has no tags. Rolling back commits will not necessarily walk you through the tutorial and the README.md changes with each commit.
Each general step will have its own heading.
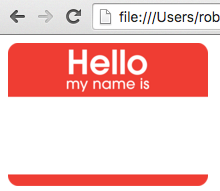
Images are normally specified using an img tag, e.g.,
<img src="images/hello_my_name_is.png" />
Note: the image used here came from wikimedia commons
First, let's display the image.
-
If you cloned this repo, rename hello.html
mv hello.html hello_orig.html -
Open a new hello.html in a text editor and add the following html:
<html> <head> <title>hello my name is</title> </head> <body> <img src="images/hello_my_name_is.png" height="143px" width="200px" /> </body> </html> -
Check it out in a browser
However, we eventually want to write on the image. Since the JavaScript we
will be writing manipulates the HTML and not the actual image, we are going to
use a trick of layering HTML on top of the image so it looks as one. The best
way to do that is to make the image the background of a block section of the
HTML page. A div tag is the best way to do this. We will style that div tag
with CSS.
-
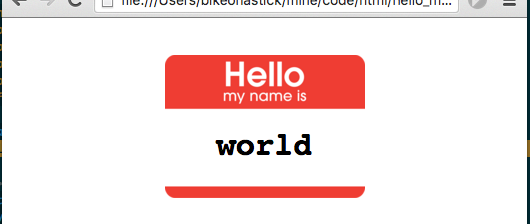
Let's make the image a background image, so we can layer HTML on top of it. We're going to do that with CSS. Add a style attribute to the head. As well, create a div in the body and give it the class of
tag<html> <head> <title>hello my name is</title> <style> .tag { height: 200px; background-image: url("images/hello_my_name_is.png"); background-size: 200px 143px; background-repeat: no-repeat; background-position: center; font-family: "courier",monospace; } .tag h1 { padding-top: 100px; text-align: center; } </style> </head> <body> <div class="tag"> <h1 id="nametag_text">world</h1> </div> </body>
Look at that! Now, we have text superimposed on the image.
-
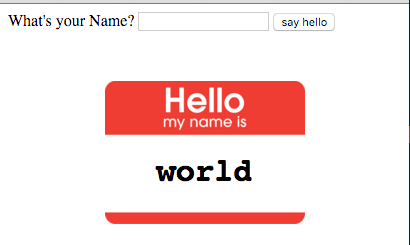
We want the page to be interactive, and want the user to be able to input some data with which our page can interact. The best way to do that is with a form. Let's add a form to the page just beneath the body tag:
<body>
  <form>
    <label for="helloname">What's your Name?</label>
    <input type="text" name="helloname" id="name" />
    <input type="button" onclick="alert(this.form.helloname.value)" value="say hello"/>
  </form>
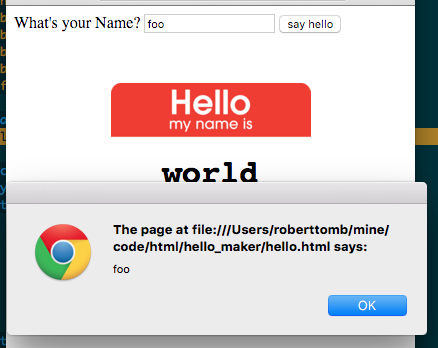
Pass the form's
hellonamefield to the alert method. (alert is a built in javascript method on all browsers and can be a good tool during development. It sucks in production, though, so don't leave alerts in real code.)Save hello.html, refresh your browser, type a name in the form and click the "say hello" button:
Yeah! Getting somewhere.
-
This doesn't do much more than flash what you type in a browser alert box, so let's get set up to do something more meaningful, let's create our own javascript function and call it instead.
Add this to the
headregion of your page:<script> function nameIt(nameVal) { alert(nameVal); } </script>We have written a JavaScript function that takes one argument (arguments are passed in the parentheses). Arguments are how you pass information (or context) from where the user action occurs to where you are going to use it. Inside the function, you use the argument by name to reference it. Notice, now we alert
nameValinstead of the form -
To enable this, change your form to call the new
nameItfunction you created<form> <label for="helloname">What's your Name?</label> <input type="text" name="helloname" id="name" /> <input type="button" onclick="nameIt(this.form.helloname.value)" value="say hello"/> </form>It still does the same thing, but now it does it through your function! Save hello.html, refresh your browser, type a name in the form, and click the "say hello" button, again.
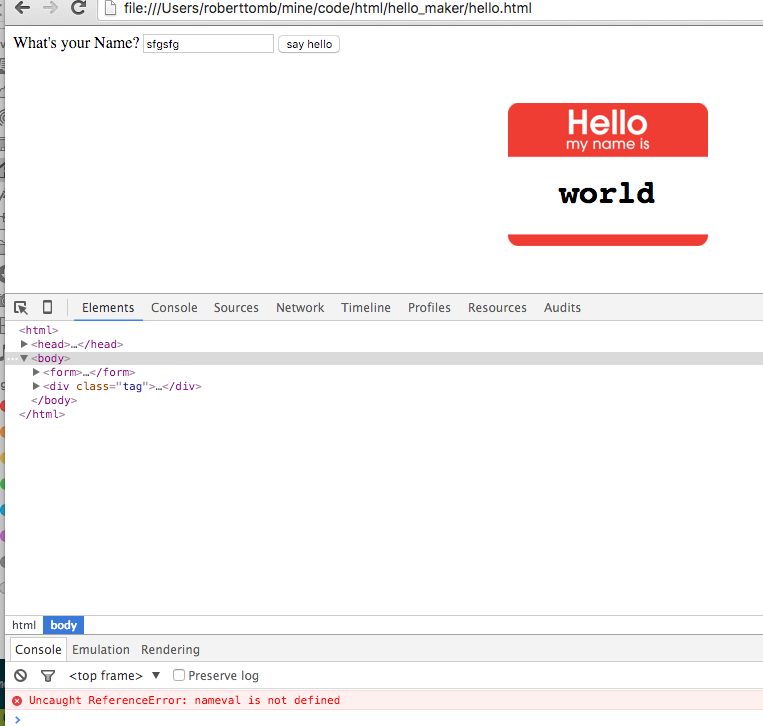
You should see the alert, again. If you do not, check your capitalization. If you try to
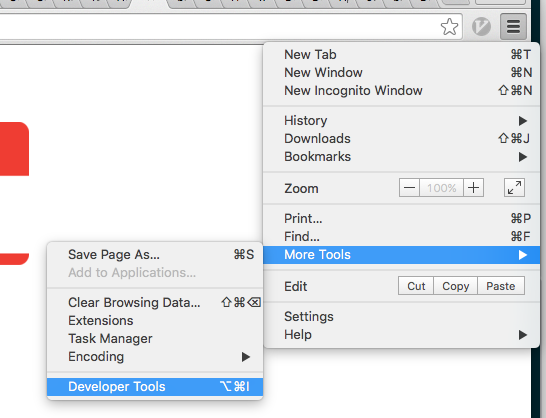
alert(nameval)when you usednameValfor an argument name in your function declaration, you will not see anything happen in your browser window, but you can probably figure out the problem if you look in the javascript console.If you are using a modern version of Internet Explorer, Firefox, or Chrome, you have access to developer tools, which are extremely handy. Here's how to open Chrome's tools:
open the
developer toolslook in the
consoleWere you able to fix the problem? phew!
-
Now that we have the form calling your function, we can make it do something interesting! From JavaScript, we can manipulate the Document Object Model that represents the page we are running in. You can get a reference to an element by its
id, so this is why we had you add the id of nametag_text to our h1 tag<h1 id="nametag_text">world</h1>. We can now use the id ofnametag_textto get the section we want to manipulate. Once we have that reference, we can set its textContent value<script> function nameIt(nameVal) { var theNode = document.getElementById("nametag_text"); theNode.textContent = nameVal; return true; } </script>Note: in case your JavaScript code ran smoothly earlier and you didn't have to debug things, this is a reminder that in JavaScript, case matters!
nameValandnamevaldo not refer to the same things.Reload your page in your browser and you should now be able to manipulate the text that appears to be written in the hello-my-name-is sticker.
-
Projects get bigger and you will need to share JavaScript and CSS across many pages. To do this, you want to put them into their own files. Let's start with the style information. Create a new directory called
cssand create a file calledhello.cssin there. -
Open hello.css in an editor and copy everything in your style tags into hello.css
 .tag {
   height: 200px;
   background-image: url("images/hello_my_name_is.png");
   background-size: 200px 143px;
   background-repeat: no-repeat;
   background-position: center;
   font-family: "courier",monospace;
 }
 .tag h1 {
   padding-top: 100px;
   text-align: center;
 }
Note: do not include the style tag in your CSS file, it is HTML and not valid CSS.
-
Now edit
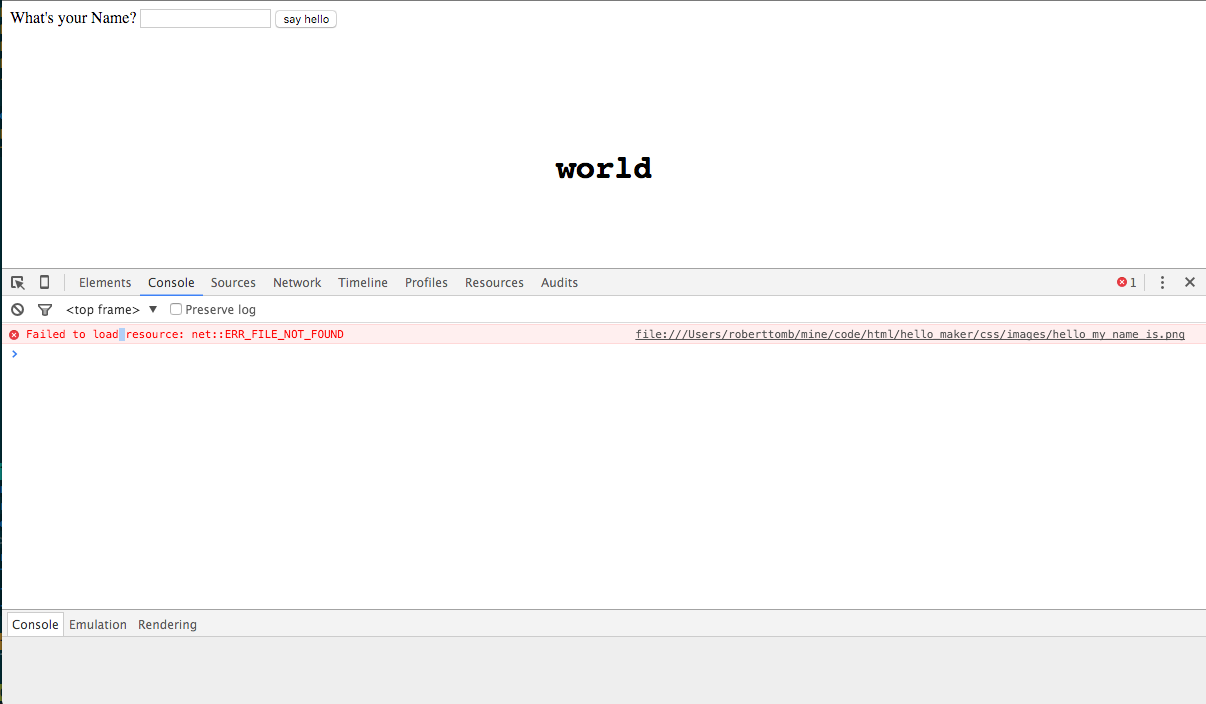
hello.htmlagain and delete your existing<style>...</style>tag and its content. Replace it with a reference to your new stylesheet:<link rel="stylesheet" type="text/css" href="css/hello.css"/>Reload hello.html in your browser and.... hey what's going on? I suspect you can't see your image anymore. That's because I oversimplified my earlier instructions.
-
Instead of just giving you the answer, let's head back to the console in the Developer tools:
Notice that it is looking for
hello_my_name_is.pngin an images directory within the css directory. That's not where it is! To fix this you could move your images to be below your css folder, but that's an atypical directory structure. You should have your images directory as a sibling to your css directory. -
The image reference in the style info for the
tagclass is different based on where it is used. Since it was originally written in hello.html, the path to hello_my_name_is.png is relative to the html pagebackground-image: url("images/hello_my_name_is.png");however, now that this is in the CSS file (in a different directory) you need to change the image reference:background-image: url("../images/hello_my_name_is.png");We've now moved your CSS into its own file and when we create a new page later, we wil be able to share the CSS code in that page. This is the DRY principle, Do not Repeat Yourself. The thing to watch for is when you see yourself starting to copy code for reuse, you should look to find a way to write it once and share it.
-
Speaking of sharing, let's get that Javascript moved into its own file. Make a directory in our project folder called
jsand write a blank file in there namednames.jsI create blank files from my terminal window like this
touch js/names.js. If you're on mac or linux you can do this too.Now, open both js/names.js and hello.html up in your text editor and cut the text out of the
<script></script>tags (not including the script tags, themselves as they are HTML and not valid JavaScript). Now, switch to yournames.jsfile and paste the contents of your clipboard into it:function nameIt(nameVal) { var theNode = document.getElementById("nametag_text"); theNode.textContent = nameVal; return true; }Save
names.js -
Now you should have a proper javascript file, but your page won't run the code as we need to change the page so it knows about the new script file.
Switch over to editing hello.html and find the existing empty script tags:
<script></script>To look like this:
<script src="js/names.js"> </script>Now, the extremely observent people in the group will have noticed that this looks different than our css link tag, which we were able to create as an "empty" html tag, which means a tag that won't have anything nested within it, (hence empty) and there is a shortened syntax for that
<foo />, which is, functionally the same as<foo></foo>but a little shorter to type. The script tag, however, does not get this advantage. If you try to create your script tag as an empty tag, your page doesn't render properly (at least in the chrome browser).Save hello.html and refresh your browser, it should work the same as it did before. You, now, have a well separated project and things are starting to look kind of professional!
You understand a lot about the structure of an HTML project, but there are a few more things to understand that will be helpful:
- Testing
- Evolving the example
- Deployment
I will introduce you to testing and we will add a slightly more sophisticated version of our lession.
However, I am not going to walk you through deployment as an example. Deployment will depend upon your hosting situation. You will want to understand tools like scp, rcp, sftp, oh my! You'll need to pre-process your javascript files (uglify, minify) for production. Then, you only want to put the files needed for the website into production, so you want to avoid deploying your tests and any documentation to the production site.
As well, once you've decided how you'll deploy, there are a number of tools and scripting languages to automate deployment. One of the best tools for automating the processing and deployment of static websites is gulp.
Anyway... on to testing and the next steps of the example!
Ahh, testing. This is super important when a project lives over a long period of time. It's extremely easy to forget what behavior you meant to implement, the last time you were in the code, when you're working on a project by yourself. It's even more difficult if you are working on a project with someone else. Sharing code can be difficult, so it's a good idea to have executable definitions of what you belive properly functioning code is.
To do this, you should add tests. There are a ton of different ways you can add tests. I'm going to walk you through one way of doing it: Jasmine. Jasmine was simple to add here, because we'll include the jasmine code right in this project, make a small test file, and run that file by opening it in the browser. It will just test the javascript we execute in the test. This is a unit test. If, instead, we want to test our HTML page (a functional test) you can use Selenium. There are multiple ways to execute selenium tests, but you need a lot of external dependencies to execute that I chose not to show you that, here.
What I want you to understand is that tests are important and not very difficult to add to your project, so keep following this!
-
If you've brought this down locally using git, you've had a directory named
testin your source tree the whole time. Now we're going to use it. I have included a copy of Jasmine's source. If you are starting a new project, download a new copy. To add a jasmine test, create thespecdirectory under thetest/jasminedirectory, e.g., from the top of the project directory,mkdir test/jasmine/specthe
test/jasminedirectory should contain the jasmine source code -
Create a test Runner HTML file to execute your Jasmine tests. This file brings together the jasmine libraries for running your tests, all of your source files and all of your tests (specs). Create
test/jasmine/SpecRunner.htmland add the following content:<!DOCTYPE html> <html> <head> <meta charset="utf-8"> <title>Jasmine Spec Runner v2.4.0</title> <link rel="shortcut icon" type="image/png" href="lib/jasmine-2.4.0/jasmine_favicon.png"> <link rel="stylesheet" href="lib/jasmine-2.4.0/jasmine.css"> <script src="lib/jasmine-2.4.0/jasmine.js"></script> <script src="lib/jasmine-2.4.0/jasmine-html.js"></script> <script src="lib/jasmine-2.4.0/boot.js"></script> <!-- include source files here... --> <script src="../../js/names.js"></script> <!-- include spec files here... --> <script src="spec/names_spec.js"></script> </head> <body> </body> </html>We are going to test our js/names.js javascript file you need to add a reference to it that is relative to SpecRunner.html. As well, you need a reference to your test file. I'm going to have you create names_spec.js in a subdirectory called spec, so add that now.
-
Now, let's create the test file. Create
test/jasmine/spec/names_spec.jsand open it in a text editor. Then, paste in the following code:describe("names", function() { beforeEach(function() { var testNode; testNode = document.createElement("div"); testNode.setAttribute("id","nametag_text"); document.body.appendChild(testNode); }); afterEach(function() { var toDel = document.getElementById("nametag_text"); toDel.parentElement.removeChild(toDel); }); it("should set the 'nametag_text' node's content", function() { var testVal = "foo"; nameIt(testVal); expect(document.getElementById("nametag_text").textContent).toEqual(testVal); }); });wait what?
I know that's a lot of code, and I will explain some of it in a moment. First, let's see your test run!
-
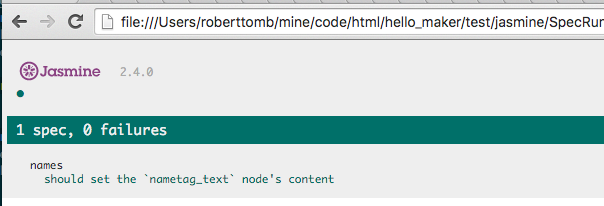
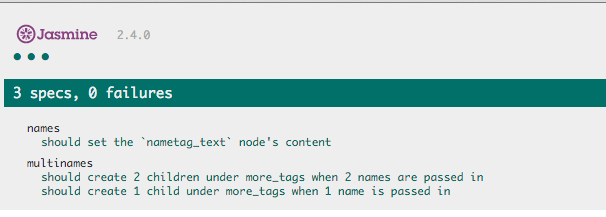
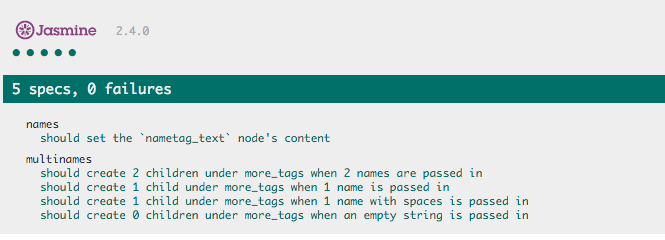
Open SpecRunner.html in your browser. If everything is set up right, the test should pass and you should see something like this:
-
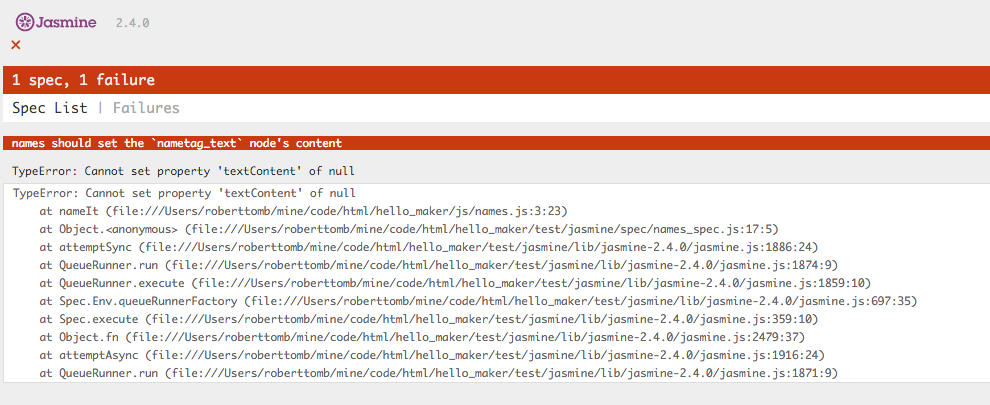
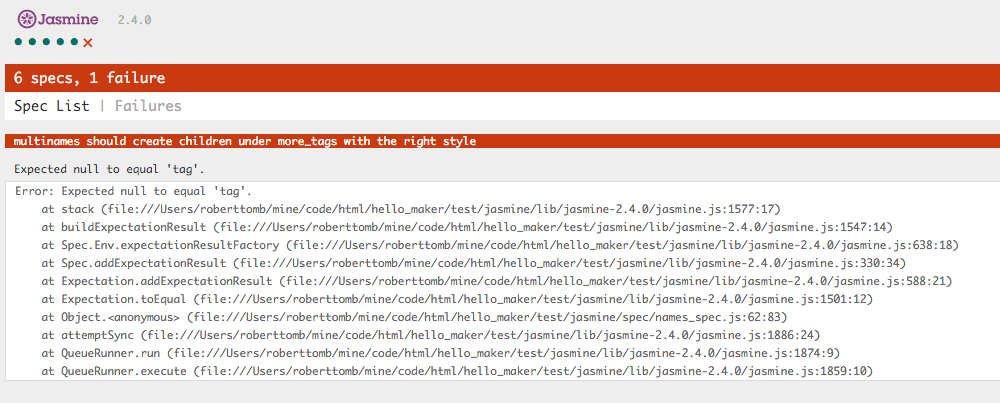
Now, just to make sure our test is doing something, let's make it fail. One way would be to change what the test is looking for, but, instead, I'm going to recommend you break the JavaScript.
Open names.js in a text editor and change the DOM id that the nameIt function is looking for:
Passing
function nameIt(nameVal) { var theNode = document.getElementById("nametag_text"); theNode.textContent = nameVal; return true; }Failing
function nameIt(nameVal) {
  var theNode = document.getElementById("xnametag_text");
  theNode.textContent = nameVal;

  return true;
}
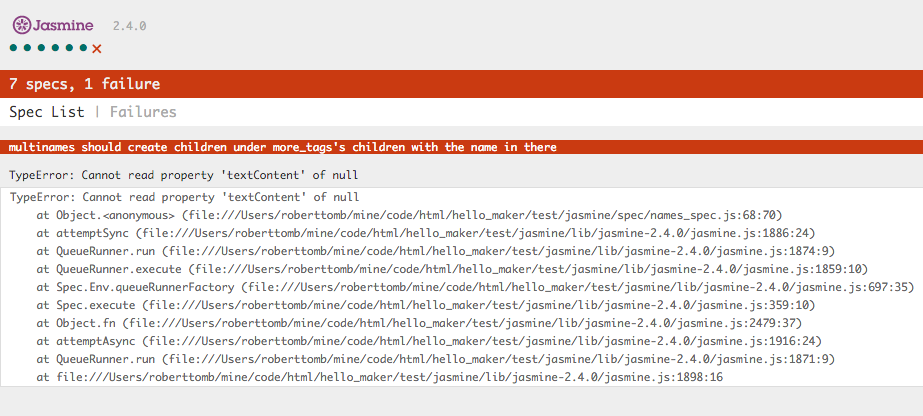
Subtle change, I'm sure, but I changed nametag_text to xnametag_text so now the test fails
This syntax is Jasmine, which is a JavaScript DSL (Domain Specific Language) for writing unit tests. (I know, they claim to be BDD, but most people really write unit tests despite claiming to be testing behavior with this tool. Any time you test in isolation, you are testing a unit, even if you can describe the intended behavior with rich, human-readable language, like we do in Jasmine. If you want to do true BDD on browser-based projects, look into driving Selenium with Jasmine, or use Mocha with the excellent chai JavaScript assertions to drive your browser through Selenium. The deal is, if you're not testing it the way your user experiences it, you're not testing behavior.) I'm not just picking on BDD here, it's really just funny how people will latch on to a name for something even if they aren't doing it. Some people use well-known unit testing frameworks to drive behavioral or integration tests, and they call them unit tests, despite needing a huge dependency chain configured and running just to support the tests.
The point is, you are testing what you are testing, and testing is a good thing, so don't get caught up in the name of your tooling. You chose the tooling, hopefully, because it makes you productive and not because of an industry buzzword.
Anyway, enough controversial topics for the day. Let's deconstruct the Jasmine code so you can benefit from what we've done here.
While this is the Jasmine DSL, the general concepts will apply to most unit testing frameworks.
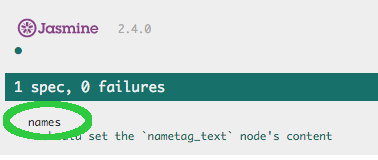
On the first line we call a jasmine function named describe and we pass a
string and a function to it. The string shows up in our test output
describe("names", function() {
The function encapsulates all of the rest of the code for the test.
Before we get to the actual test, let's get the housekeeping steps covered.
Notice there are two methods being called: beforeEach and afterEach. Most
unit testing frameworks have methods the will run to set up and tear down for
each of the tests in their scope. That's what these do.
In my implementation, I am creating the DOM elements that my nameIt function
interacts with when it is added to an html page in the beforeEach method.
This way, when it tests my method, all the right pieces will be in place:
  beforeEach(function() {
    testNode = document.createElement("div");
    testNode.setAttribute("id","nametag_text");
    document.body.appendChild(testNode);
  });
If you are running multiple tests, you also want to clean up after yourself before running a new test or else you cannot really trust the results. Some engineers will try to write progressive tests that build upon the results of previous tests. These can be very brittle and hard to maintain. Some purists will tell you that you're doing it wrong if you do it that way. I will say that I try to avoid doing that, but people have their reasons, sometimes it's for performance (setup and teardown can take a lot of time), and sometimes it's because they're black-box testing and cannot change the code, but, in reality, sometimes it's for misguided reasons. However, I won't judge, heck... there are worse sins than testing, such as, NOT TESTING!
Oh yeah, I digress... I'm using afterEach to wipe out the div I create in
beforeEach, so the DOM will be clean for the next test I write:
  afterEach(function() {
    var toDel = document.getElementById("nametag_text");
    toDel.parentElement.removeChild(toDel);
  });
Now on to the actual test.
  it("should set the 'nametag_text' node's content", function() {
    var testVal = "foo";
    nameIt(testVal);
    expect(document.getElementById("nametag_text").textContent).toEqual(testVal);
  });
We call the it method. Yeah... it. Seems weird, but stick with me. Remember,
we are in a describe method for something we called "names" and we are going
to call it and supply that with a descriptive phrase. Try to read this as a
sentence. Describe "names" it "should set the nametag_text node's content".
See? Then in that test (encapsulated in a JavaScript function) we set the
variable testVal, pass it to our nameIt function as an argument, and we
describe our expectation:
expect(document.getElementById("nametag_text").textContent).toEqual(testVal);
We, expect the "nametag_text" node's text to equal the value we passed into our
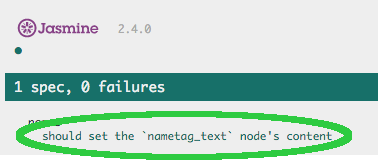
nameIt function. That string we pass into the it method as our first argument
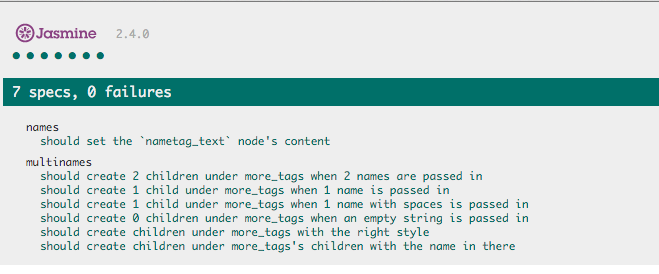
is displayed in the test results page in your browser:
So, you should be able to find your results, easily. As well, if you do a nice job of writing accurate and descriptive messages, you can share these results with non-technical (or slightly-less-technical) people who are involved with your project. They can look at your tests and understand the behavior you have described. Some people would say "the behavior" of your code, but, in reality, if you write poor or inaccurate descriptions, they won't know what it's really doing.
Let's look at how we could write multiple nametags. We'll use the same form, and if you enter multiple names separated by commas, we'll create a nametag for each one.
Notice, we'll use the same names.js file and the same hello.css. This time,
though, we will start with a blank-ish looking page. The other behavioral thing
to note is that our form will append nametags to the more_tags div each time
it's run until the page is refreshed. We'll write tests that express that
intent, as well.
-
Add the following to a page called
hellos.htmland we'll get started:<html> <head> <title>hello all</title> <link rel="stylesheet" type="text/css" href="css/hello.css"/> <script src="js/names.js"> </script> </head> <body> <form> <label for="helloname">What Names?</label> <input type="text" name="helloname" id="name" /> <input type="button" onclick="nameThem(this.form.helloname.value)" value="say hellos"/> </form> <div id="more_tags"></div> </body> </html> -
Now, open names.js and add the following shell of a function definition:
function nameThem(nameVals) {
}
Huh? Stick with me, we're going to do tests and code along with each other this time. The reality is, the longer you take to write tests after you have written code, the crappier your tests will be. The crappiest test is the one that's never written.
In this case, we can do Test Driven Development because we're expanding on something we already know. When you're learning something, you have to poke at it a bit before you even understand how to code it, let alone, how to accurately assert if it's working.
-
Open names_spec.js. Before we dive into the test code, what do we know? Well, we know we want to:
- create a nametag for each name added in the text box
- names will be separated with commas ","
- we want to append to our
more_tagsdiv each time we're called
Let's add a new
describesince we're describing a slightly different context:describe("multinames", function() { });We can write those tests, but, first, let's get the DOM set right in our
beforeEachandafterEachmethods. For nameThem to work on our page, we are going to need amore_tagsdiv.beforeEach(function() { var testNode = document.createElement("div"); testNode.setAttribute("id","more_tags"); document.body.appendChild(testNode); });There. We'll just create a
more_tagsnode for this context. These methods will be run before and after each test WITHIN this describe context. -
Let's clean up after ourselves too.
afterEach(function() { var toDel = document.getElementById("more_tags"); toDel.parentElement.removeChild(toDel); }); -
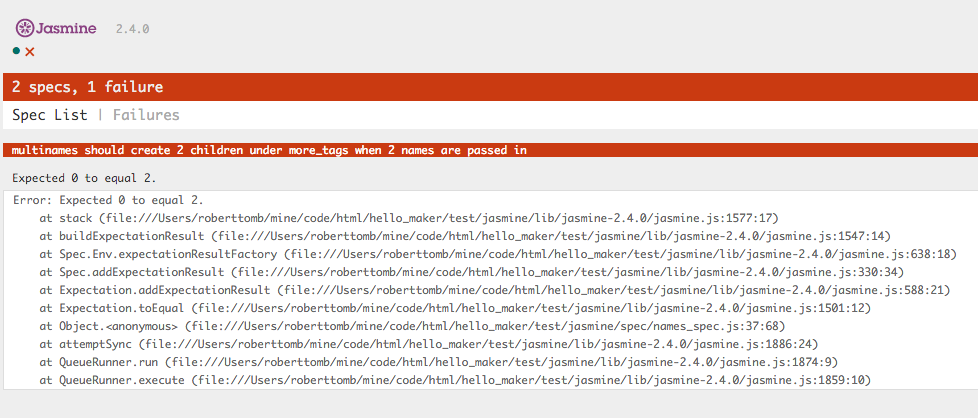
Let's add our first test. The easiest thing we know is that we want to be able to handle multiple names and we will separate those names with commas. We plan to write those new children to our
more_tagsdiv, so the easiest test will be to see how many children that div has:it("should create 2 children under more_tags when 2 names are passed in", function() { var testVal = "foo,bar"; nameThem(testVal); expect(document.getElementById("more_tags").childNodes.length).toEqual(2); });Calling
childNodeson themore_tagsnode will give us a list of all children and we can test its length. Since we haven't written our implementation, yet, our test fails: -
Let's create enough implementation to pass:
function nameThem(nameVals) {
  var names = nameVals.split(',');
  var theNode = document.getElementById("more_tags");
  for ( var count = 0; count < names.length; count++ ) {
    var helloDiv = document.createElement("div");
    theNode.appendChild(helloDiv);
  }
  return true;
}
Not fully functional, yet, but it will create child nodes. To point out what we're doing here, look at the first line of the function, I am calling a function called
spliton the nameVals argument. What that does, when fed with an argument, is to break a string on whatever the character is in the argument. In this case, it will split any string on commas. The returning value from that is an array of values.You should do some research on JavaScript arrays. I will use a for loop to walk through each element of the array until we reach the end of the array.
While you're at it, you should look at JavaScript for loops
-
Let's test that it will not create multiple nodes when we pass in one name and will not mistake names with spaces as two names.
it("should create 1 child under more_tags when 1 name is passed in", function() { var testVal = "foo"; nameThem(testVal); expect(document.getElementById("more_tags").childNodes.length).toEqual(1); }); -
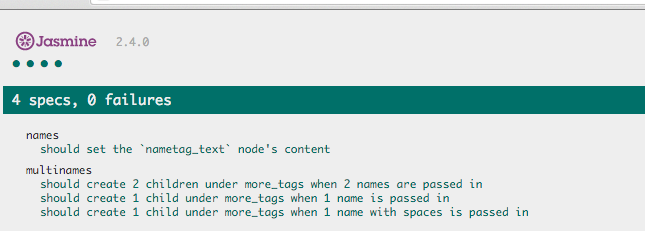
Let's test that it will not create multiple nodes when we pass in one name that has a space in it.
it("should create 1 child under more_tags when 1 name with spaces is passed in", function() { var testVal = "Billy Jo"; nameThem(testVal); expect(document.getElementById("more_tags").childNodes.length).toEqual(1); }); -
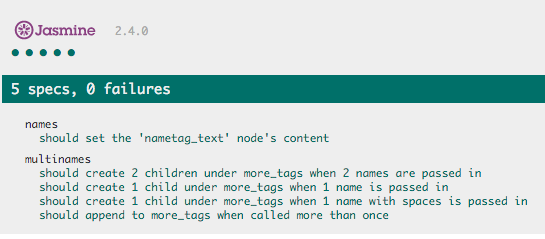
Do you remember that we said we want the code to append if you keep using the page? Let's make sure it does that and describe it in a test. Without this, the next developer could easily come in and see this behavior as a bug, writing code to wipe out the
more_tagsdiv before it manipulates the DOM each time.it("should append to more_tags when called more than once", function() { var testVal0 = "foo"; var testVal1 = "bar"; nameThem(testVal0); nameThem(testVal1); expect(document.getElementById("more_tags").childNodes.length).toEqual(2); });Ooh, yeah, it works!
This is one of those cases where either type of functionality could be valid, and, therefore, the other behavior could be deemed a bug based on the context a developer brings to the table.
It's best to call out this behavior, clearly, as intended, so people don't waste their time "fixing" it in the future. (Unless customers and Product Managers want the behavior, changed.)
-
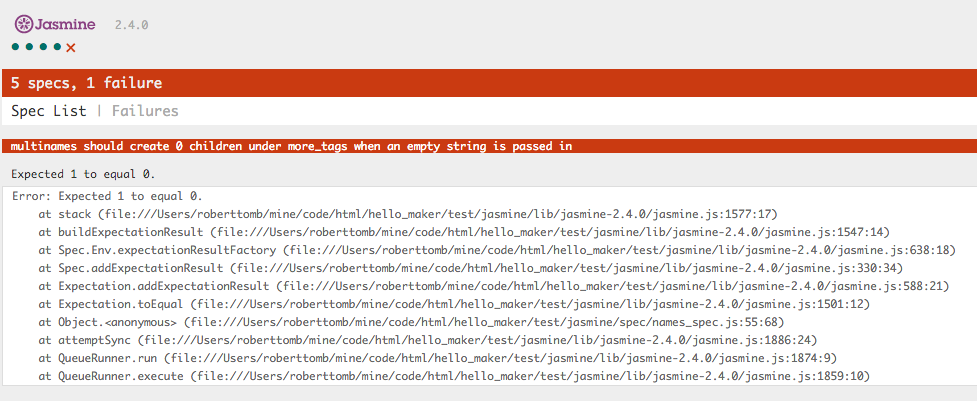
Hmm... what happens if we pass in an empty string? This will happen if someone hits the "say hello" button before they enter anything. Let's make sure we don't create empty nametags
it("should create 0 children under more_tags when an empty string is passed in", function() { var testVal = ""; nameThem(testVal); expect(document.getElementById("more_tags").childNodes.length).toEqual(0); }); -
Failed! Let's fix that by testing for empty string before doing anything:
function nameThem(nameVals) { if ( nameVals != "" ) { var names = nameVals.split(','); var theNode = document.getElementById("more_tags"); for ( var count = 0; count < names.length; count++ ) { var helloDiv = document.createElement("div"); theNode.appendChild(helloDiv); } } return true; } -
Now that we're handling many of the name-to-div cases, we should make sure we create divs that look like we want them to look. Since we know what this code would look like in the DOM, we can test for it.
 it("should create children under more_tags with the right style", function() {
   var testName = "foo";
   var expectedClass = "tag";
   nameThem(testName);
   expect(document.getElementById("more_tags").firstChild.getAttribute("class")).toEqual(expectedClass);
 });
Since we create these child nodes in a loop and they should be basically templates of each other, it should be fairly safe to just test the first one. If you wanted to be overly cautious, you could copy all of the above tests and make sure that nodes are created with the right CSS class in every case.
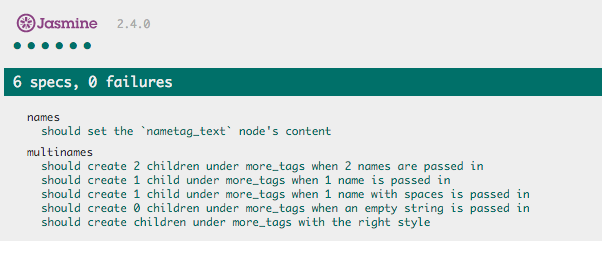
Now... something can happen to prove me wrong, but this should do for now:
-
Let's add style to our nodes and see if the test will pass:
function nameThem(nameVals) { if ( nameVals != "" ) { var names = nameVals.split(','); var theNode = document.getElementById("more_tags"); for ( var count = 0; count < names.length; count++ ) { var helloDiv = document.createElement("div"); helloDiv.setAttribute("class", "tag"); theNode.appendChild(helloDiv); } } return true; } -
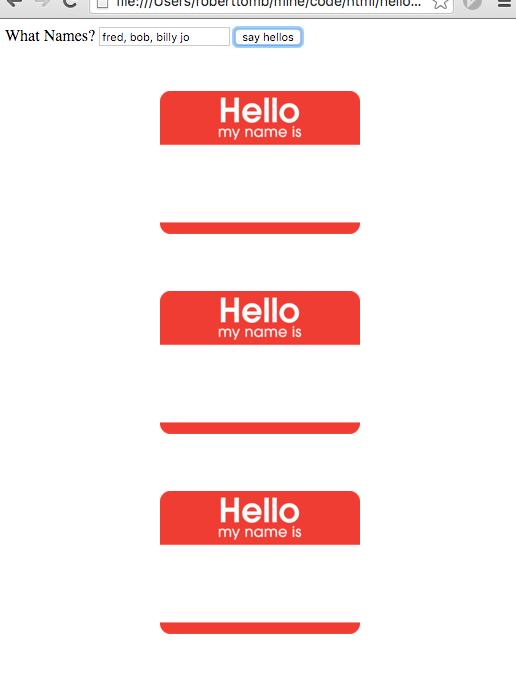
Awesome! Let's try out
hellos.htmlin the browser and see how friggin fabulous this is:WAT??? Oops, we forgot to add our names!
-
Let's add a test that makes sure we add a name in a tag with the name as its content. This can be like our style test as we will either get them all wrong or all right:
it("should create children under more_tags's children with the name in there", function() { var testName = "foo"; nameThem(testName); expect(document.getElementById("more_tags").firstChild.firstChild.textContent).toEqual(testName); }); -
We could write a better test than that, but it'll do for now, I don't want to crush you under any more details. Let's make that test pass:
function nameThem(nameVals) {
  if ( nameVals != "" ) {
    var names = nameVals.split(',');
    var theNode = document.getElementById("more_tags");
    for ( var count = 0; count < names.length; count++ ) {
      var nameVal = names[count].trim();
      var h1 = document.createElement("h1");
      var namedH1 = document.createTextNode(nameVal);
      h1.appendChild(namedH1);

      var helloDiv = document.createElement("div");
      helloDiv.setAttribute("class", "tag");
      helloDiv.appendChild(h1);

      theNode.appendChild(helloDiv);
    }
  }
  return true;
}
Back to our array. Look at the first line within the for loop. I have used the
countvariable created in theforloop to reference a specific element in thenamesarray. We will execute this loop for each element in the names array and pick that value out of the array using thecountvariable, which is being incremented by the for loop. -
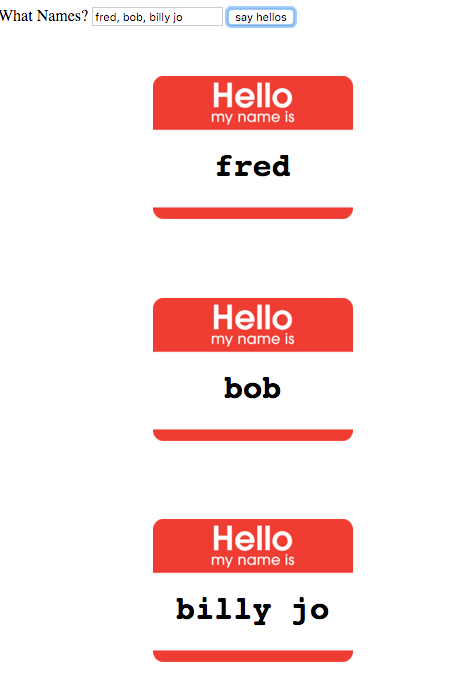
Back to our html page, let's try hellos.html in the browser:
