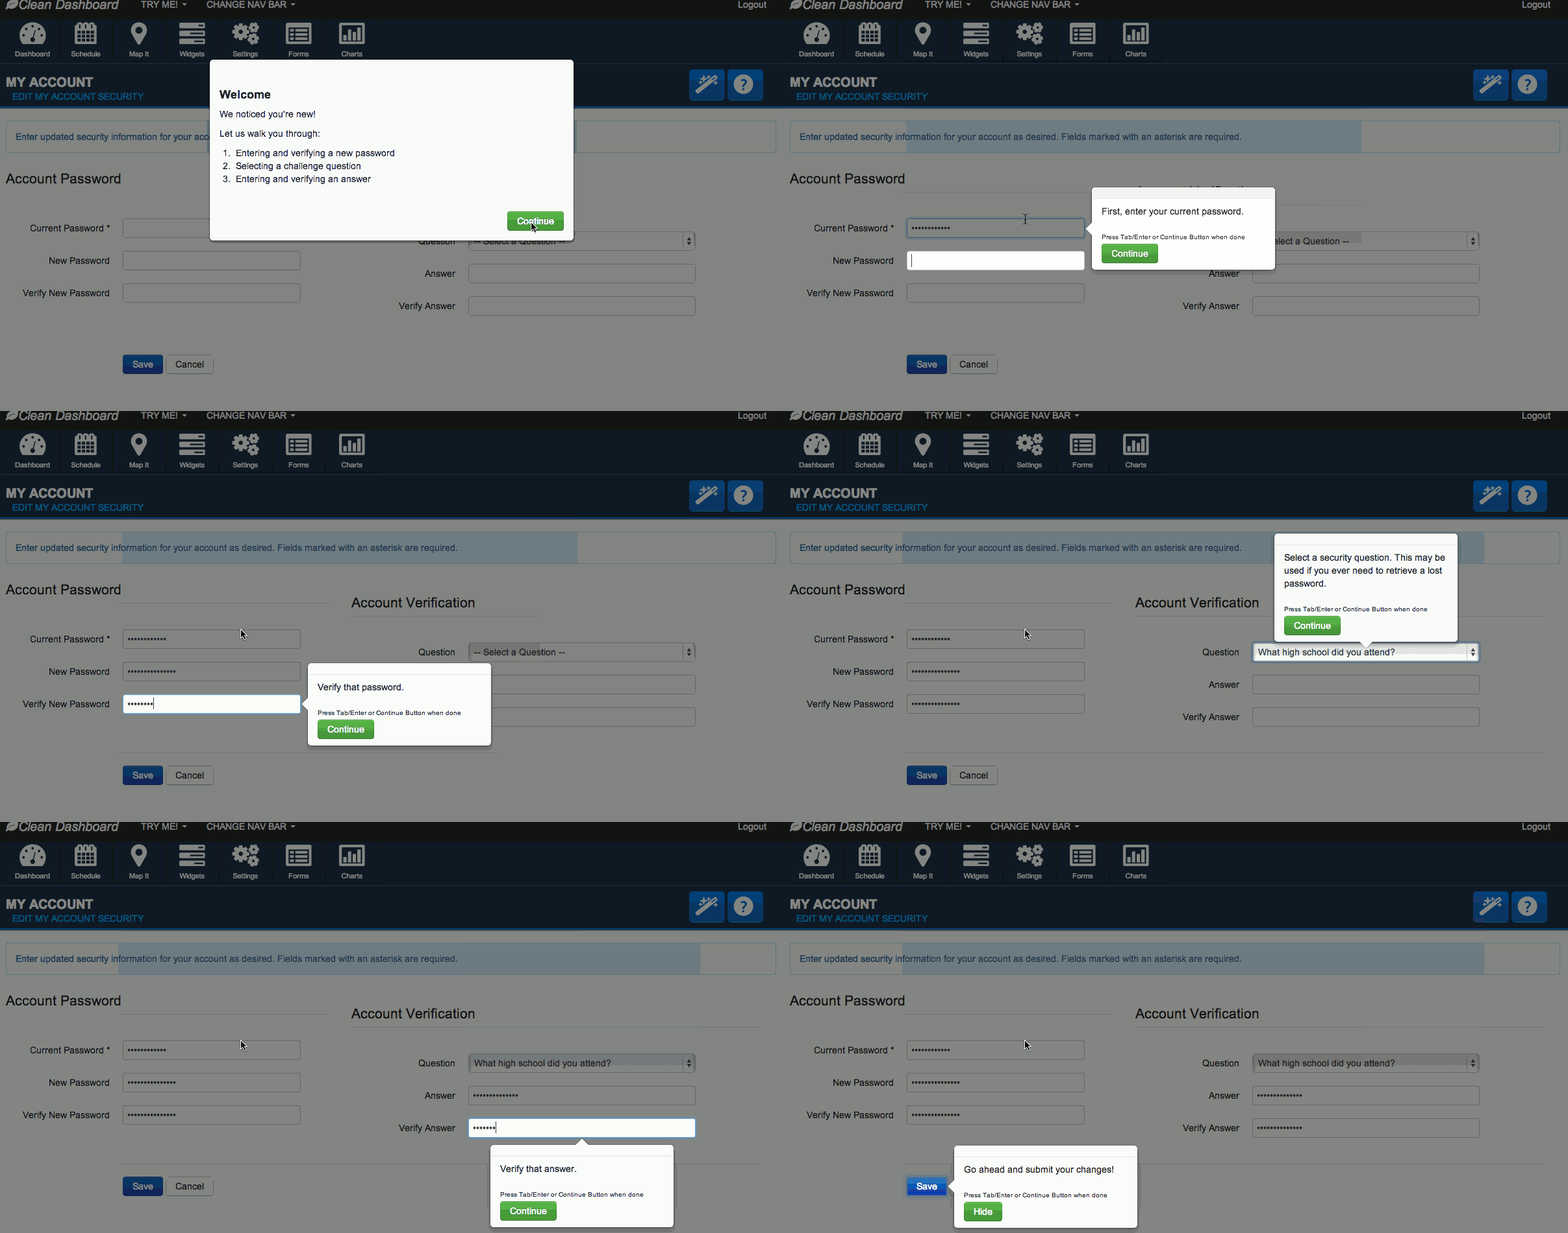
A jQuery library used for designing help pages for your website. Gives the user a guided walk through of your webpage and it's functions.
With This Library You Can:
- Apply an overlay to a web page, navigating a user through the pages functions.
- Start the virtual tour via javascript invocation or with a hash-tag #vtour in the URL.
- Help a user understand your page in a simple and affective way.
Dependencies (Must be downloaded separately)
- Twitter Bootstraps Modal and Popover Javascript and styling.
- jQuery 1.7
Another open source project, Bootstrap Admin Theme uses the tour library. Live demos are provided for each help guide type:
The demos consist of an html file that provides instructions to the tour library. The demos tour files can be found in the clean dashboard demo directory.
Create an html file with the virtual tour's directions.
An Example Tour File
<html>
    <body>
        <div display="modal">
            <h4>Virtual Tour</h4>
            <p>
                This is an example virtual tour on a page requiring you to change your password.
                <br/>You will be:
            </p>
            <ul>
                <li>
                    Entering and Verifying a New Password
                </li>
            </ul>
        </div>
        <div display="popover" field="current-pass-control">
            <p>
                First, lets enter your current password.
            </p>
        </div>
        <div display="popover" field="new-pass-control">
            <p>
                Now create a new password.
            </p>
        </div>
        <div display="popover" field="new-pass-verify-control"  placement="top">
            <p>
                Verify your password.
            </p>
        </div>
        <div display="modal">
            <h4>Thank You!</h4>
            <p>You have succesfully changed your password</p>
        </div>
        <div display="popover" field="submit-button">
            <p>
                Go ahead and submit your changes!
            </p>
        </div>
    </body>
</html>
Three ways to start the virtual tour
- Start the Virtual Tour from javascript
	//Instantiate a Virtual Tour with the url to the tours instructions
	var vTour = new VTour("/domain/vtour/page-tour-guide.html");
	//start the tour
vTour.tour();- Start the tour, but only on html tags with id's
'user-name-input', 'user-password-input', 'submit-button'
	//Instantiate a Virtual Tour with the url to the tours instructions
	var vTour = new VTour("/domain/vtour/page-tour-guide.html");
	//start the tour
vTour.tour({'user-name-input', 'user-password-input', 'submit-button'});- Start the tour by communication from the server.
Server adds hashtag #vtour to url when redirecting to page
example:
http://mysite.com/domain/page#vtour
First:
Any page that wants to define a virtual tour for its page must have the variable pageVTourUrl defined in the body tag, or a childs tag.
(This allows the VTour to pick up the url when the hashtag #vtour is appended to the page url)
EXAMPLE:
	<body>
		<div id="container" pageVTourUrl="/domain/vtour/page-tour-guide.html">{...}</div>
	</body>
The VTour Guide Page:
Say you want to create a VTour guide for a webpage that contains a form. In this case your tour page would contain, in order, a div for each field on that page and a description of the purpose or use of that field, or directions on how to fill in/edit/update that field or area on the page.
Each div tag has four attributes:
displaydetermines the popover display type (popover or modal).fieldspecifies the html attributes id in which the popover or modal should hover on. This means that any field that has a purpose in the virtual tour, needs to have an "id" attribute set.placementis an optional attribute for popovers. This gives you control on where the popover should be placed (left, right, top, bottom) in association to the field it is designed for.mobile-placementcan be used to change the placement of popovers when using on a mobile device.
EXAMPLE:
<div display="popover" field="userName-input"><p>Enter your user name</p></div> The Process:
The vtour.js should go paragraph by paragraph reading in the vtour document. When it hits a paragraph, it will locate the given field id on the page. It will highlight the field and display a popover on the field with the paragraphs text. In the popover, at the bottom displays the text: "Press Enter or Tab to continue". Once the tour is complete, the tour will fall off the page, and the user may continue traditional operations.

