This document is a cheat sheet I created for myself but perhaps it will be useful to others. I will continue to work on it as I learn more about CMake. If you see mistakes or have suggestions, please feel free to contact me at masood@masoodkamandy.com.
CMake generates a makefile which specifies how your project will be linked and compiled.
A good practice is to create a build folder or an out and a build folder.
Create a C++ project with the following folder structure:
The CMakeLists.txt file is empty. This is a case sensitive file name, so make sure you don't change the case at all.
The main.cpp file is just a minimal C++ main file:
#include <iostream>

int main()
{
    std::cout << "Hello World!\n";
    return 0;
}
CMake is basically a makefile compiler. In order to do your first build, you'll need to navigate to your project/out/build folder.
From your project folder type:
cd out/build/Here we'll start our first barebones CMake build.
cmake -S ../../ -B .-S is the location of your CMakeLists.txt file. -B is the build directory. . means just do it in the current directory.
At this point Cmake will 'compile' your Makefile and all of the files it needs to function.
You'll see the following in your build directory:
CMakeCache.txtCMakeFiles/Makefilecmake_install.cmake
First, it's important to know that CMakeLists.txt files are written in CMake Language, which has its own syntax. Here's a link to the reference.
First go to the terminal and check what version of CMake you have installed. Type:
cmake --versionMake note of whatever version you have and head over to your CMakeLists.txt file. At the top of this file type this with your version number. As long as you aren't going for backward compatibility, you can use whatever version you currently have.
cmake_minimum_required(VERSION 3.20)Next configure your **project title **(sub in whatever you'd like for Title):
project(Title)Next we're going to specify what the executable will be called using the project title we created above and what .cpp file to use. Type:
add_executable(${PROJECT_NAME} main.cpp)The $ operator specifies veriable names. ${PROJECT_NAME} is a variable which refers to the project name we set using the project() command above. main.cpp is the name of your main C++ file that you'd like to compile.
If you want to include more files when compiling, you can specify the files after main.cpp. For example, imagine we have a common.cpp file and its header common.h with a bunch of our most commonly used functions in it, we might type the following:
add_executable(${PROJECT_NAME} main.cpp common.h common.cpp)Here we're going to create our own library with its own CMakeLists.txt file.
CMakeLists.txt can have different levels. If you are creating a library, your library should be in a subdirectory with its own CMakeLists.txt file.
Here's how the directory might look:
The most simple version of this file will only have the following in it:
add_library(library library.cpp)Back in your main CMakeLists.txt file, let's create a reference to this new library.
Instead of adding our source files to the add_executable() command above, we've turned our common.h and common.cpp into a library. So we can remove the references to them and go back to:
add_executable(${PROJECT_NAME} main.cpp)Below this, we'll need to do 3 things:
- Add a subdirectory.
- Declare our include directories.
- And link our library.
We do this with the following code:
add_subdirectory(library)

## This enables you to include your library without the path to the library.*
target_include_directories(${PROJECT_NAME} PUBLIC library)

## Link library to project.*
target_link_libraries(${PROJECT_NAME} library)
The PUBLIC keyword is about scope, but is beyond my knowledge at this moment, but here is a good resource explaining this. Another resource with a slightly more clear explanation.
CMake allows you to include any GitHub repo into your project fairly seamlessly by submoduling it in. It's easy as long as the repository has a CMakeLists.txt. [Note: I'll update this in the future for non-CMake libraries.]
This is used with a git command which has the following syntax:
git submodule add <remote-repo> <destination-directory>
In this example let's add GLFW (a windowing library for computer graphics) to our project. In order to use git submodules in our project, the project has to be a git repository, so first initialize your project as a git repository.
For more information on git commands, you can use my cheat sheet.
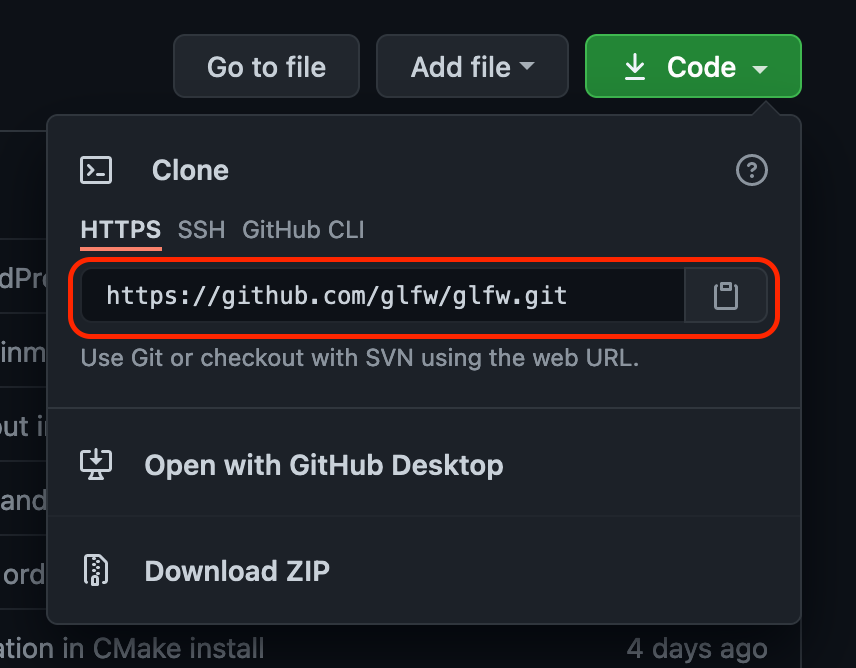
Once you've initialized your git repo, you can add submodules by copying the URL to the repo here:
We're going to put our dependencies into a folder called external. With this repo, the command would look like this:
git submodule add https://github.com/glfw/glfw.git external/glfwAfter you've added the submodule, stage your changes and commit. If you don't stage them, it will not work.
Then you can add the subdirectory to your CMakeLists.txt file in the same area that you've added other subdirectories:
add_subdirectory(external/glfw)You'll also need to specify your include directory. Many libraries have an include directory and GLFW is one of those. This directory includes GLFW's header files.
You'll also need to specify the directory of the library source files, since they are in a different location. [Note: We didn't do this for our library because the header and source are in the same place, so it isn't necessary.]
Modifying our previous code we get:
# This enables you to include your library without the path to the library. This is for header files.*
target_include_directories(${PROJECT_NAME}
	PUBLIC library
	PUBLIC external/glfw/include
)

# This is for the actual source of your libraries, as opposed to header files.*
target_link_directories(${PROJECT_NAME}
	PRIVATE external/glfw/src
)
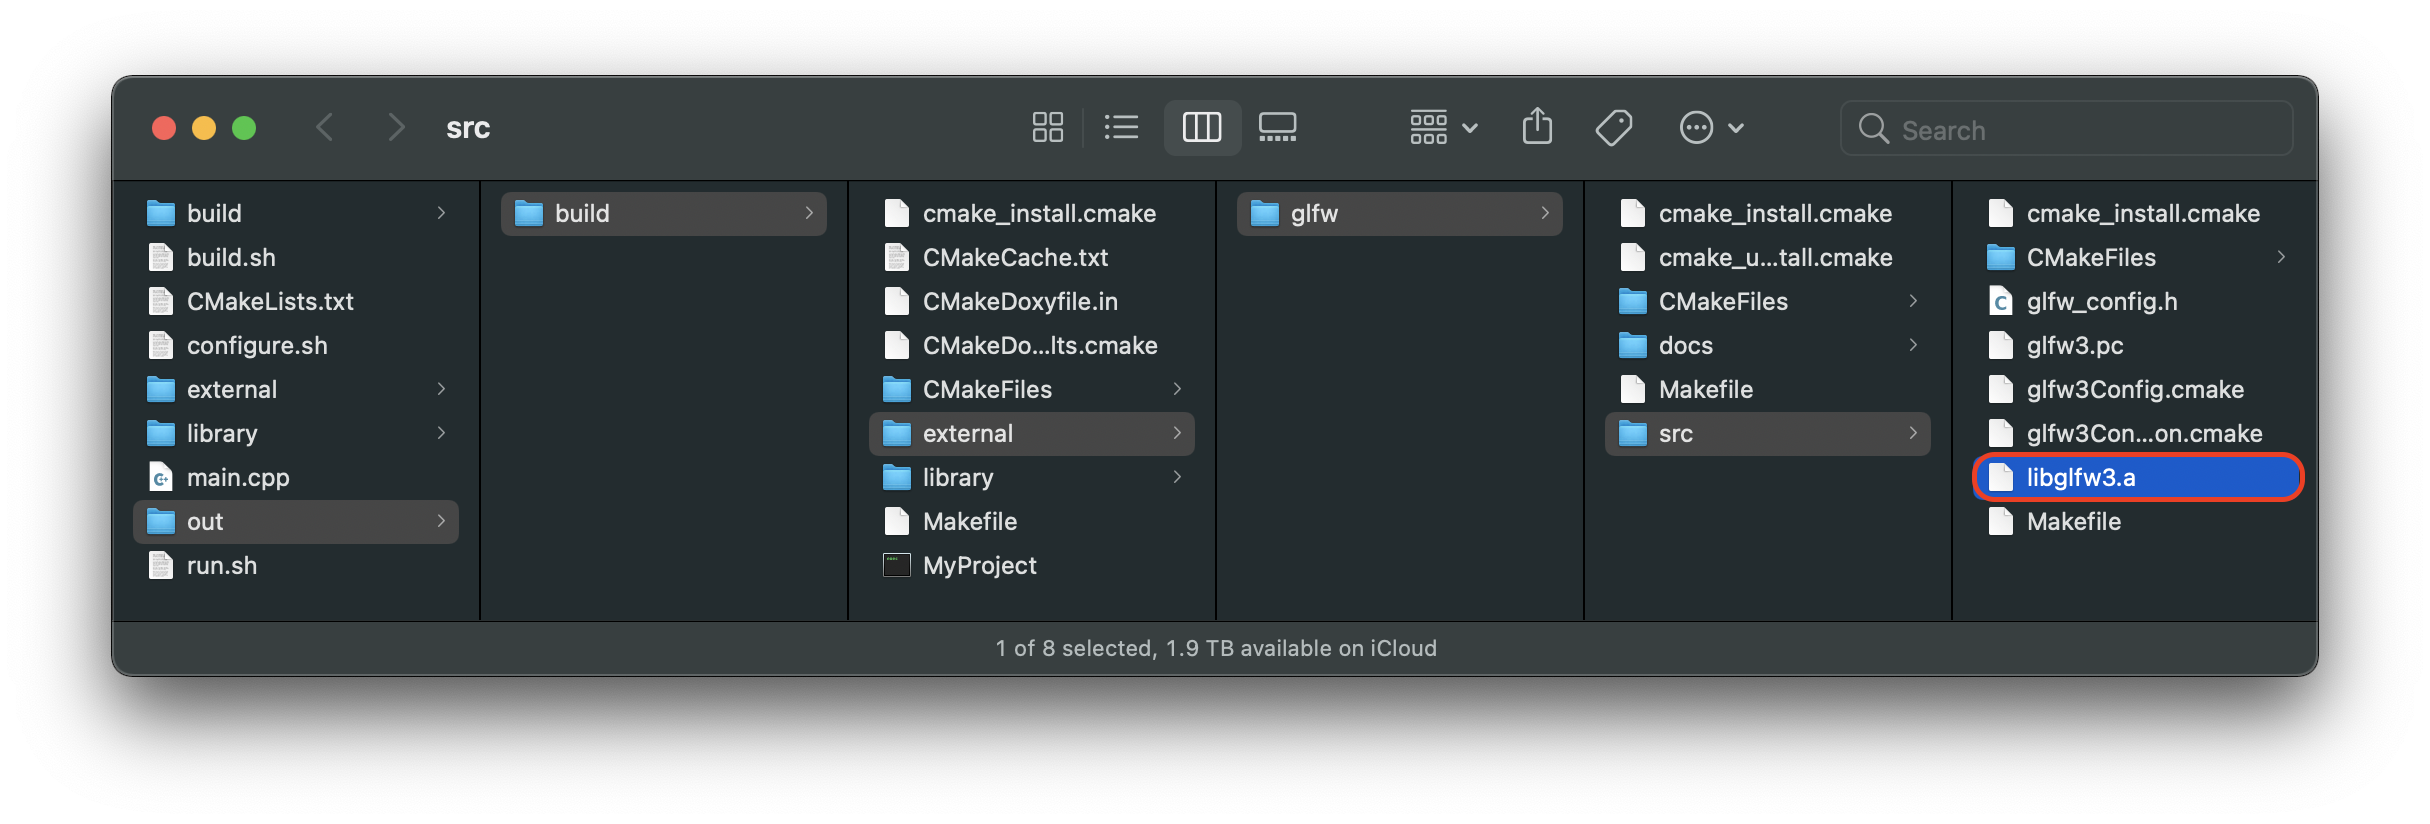
Next we need to add a reference to the compiled library that CMake created when it ran. You can see the file here:
When a library includes its own CMakeLists.txt file, we refer to the library (and the compiled library file above) by using the name it gives itself in its CMakeLists.txt file with the ``add_library()command. If we look atexternal/glfw/src/CMakeLists.txt` we'll see the following at line 2:
add_library(glfw
	"${GLFW_SOURCE_DIR}/include/GLFW/glfw3.h"
	"${GLFW_SOURCE_DIR}/include/GLFW/glfw3native.h"
	internal.h mappings.h context.c init.c input.c monitor.c vulkan.c window.c
)
You can see the library calls itself glfw so in our main CMakeLists.txt file we'll modify things to include it:
# Link library to project.
target_link_libraries(${PROJECT_NAME}
	library
	glfw
)
Go ahead and build and it should work.
Since we used GLFW as our window, it might be fun to actually use the library and see what happens.
In this code, we'll create the most barebones example of a GLFW window and put it up on the screen.
#include <iostream>
#include "library.h"
#include <GLFW/glfw3.h>

int main()
{
    GLFWwindow *window;

    if (!glfwInit())
    {
        fprintf(stderr, "Failed to initialize GLFW\n");
        exit(EXIT_FAILURE);
    }

    window = glfwCreateWindow(300, 300, "MyProject", NULL, NULL);

    if (!window)
    {
        fprintf(stderr, "Failed to open GLFW window\n");
        glfwTerminate();
        exit(EXIT_FAILURE);
    }

    // Main Loop
    while (!glfwWindowShouldClose(window))
    {
        glfwPollEvents();
    }

    glfwTerminate();

    return 0;
}Because we are using a git submodule, when people clone your project it will not download the submodules for you because they are not really considered to be a part of your repository. This needs to be done manually and can be done easily with the following command:
git submodule update --init --recursiveThere is a method for doing this automatically in your CMakeLists.txt file, but it's beyond the scope of this article. You can find a great description of how to do this at this link.
One great workflow to minimize the amount of space you end up using for libraries and only need to compile the binaries once is to store them in the same place and use environment variables to refer to them.
Environment variables are system-wide variables you can set in your shell. This tutorial is for .zsh, but you can also find information on bash as well.
-
Make sure to check which shell you're using. I'm going to give instructions for zsh. To check your shell type:
echo $0
-
If the response is -
zsh, these instructions will work for you. If not here's a site with the bash instructions as well. It's not all that different. -
Download your library. This example uses GLM and GLFW. Create a folder and call it
MIDDLEWAREorLIBRARIESor whatever name you would like. -
Wherever you put them you'll need to add environment variables that refer to them. To open your shell configuration file in TextEdit, type:
open .zshrc
If you prefer a command-line text editor like vim or nano you can use that too. TextEdit is quite easy, so I use
open. -
Add the external variables by adding these to the end of your
.zshrcfile (we'll focus on the OpenCV one):export GLM_DIR="/(INSERT YOUR PATH)/glm" export GLFW_DIR="/(INSERT YOUR PATH)/glfw" export OPENCV_DIR="/(INSERT YOUR PATH)/build_opencv"
-
You'll need to now set a CMake variable to that directory, double check that the variabe was found, and use the
find_package()function to find and load the settings from your library (assuming it is compatible with CMake):set(OpenCV_DIR "$ENV{OPENCV_DIR}") if(OpenCV_DIR) message(STATUS "OpenCV environment variable found") find_package(OpenCV REQUIRED) else() message(STATUS "OpenCV environment variable not found") endif()
-
Next you'll need to go through two steps.
First you'll have to add the target include directories. The include directories are specific to any package that uses CMake. In the case of OpenCV, it's called
OpenCV_INCLUDE_DIRSand this is declared in theOpenCVConfig.cmakefile in OpenCV's build folder.target_include_directories(${PROJECT_NAME} PRIVATE ${PROJECT_BINARY_DIR} ${OpenCV_INCLUDE_DIRS} )
-
Next you'll need to lik the libraries:
target_link_libraries(${PROJECT_NAME}
		PRIVATE
		${OpenCV_LIBS}
)
That's it! You should now be able to use OpenCV (or any other library) from a middleware folder on your computer.
If you want to keep track of your versions, you can add a version argument to your project() command in your CMakeLists.txt file. This section will teach you how to print a version number whenever your program starts up.
To do this, we first have to modify our project() command to the following (MyProject and version number can, of course, be anything you'd like):
project(MyProject VERSION 1.0)We can also specify the C++ standard we'd like to use with the following:
# specify the C++ standard
set(CMAKE_CXX_STANDARD 11)
set(CMAKE_CXX_STANDARD_REQUIRED True)
We're going to have CMake generate a header file that defines the version number at compile time.
To do that, you can add this line:
configure_file(Config.h.in Config.h)Config.h.in is where we create a macro definition that CMake can read and use to generate the Config.h file, which is created by CMake at compile time. It's how we can extract and print our version number.
We also need to create a new target_include_directories command so that we can #include our generated Config.h file. Below the add_executable() command, go ahead and add the following:
target_include_directories(${PROJECT_NAME} PUBLIC ${ROJECT_BINARY_DIR})Now create a new file called Config.h.in (or any name you please as long as it is consistent with the above instructions) and include the following:
#define MYPROJECT_VERSION_MAJOR "@MyProject_VERSION_MAJOR@"
#define MYPROJECT_VERSION_MINOR "@MyProject_VERSION_MINOR@"
Now in main.cpp, you can add the include:
#include <Config.h>Now change the main() to include arguments and add a cout to tell us the version number (I added the carriage returns for clarity here, but they're not necesary):
*int* main(*int* *argc*, *char* ****argv*[])
{
  std::cout << argv[0]
    				<< " Version "
    				<< MYPROJECT_VERSION_MAJOR
    				<< "."
    				<< MYPROJECT_VERSION_MINOR
    				<< '\n';
argv[0] just prints out your program's name and the macro definitions were generated for you at compile time by CMake. Your output should look like this:
./MyProject Version 1.0This document is basically me working through the CMake tutorials by Code, Tech, and Tutorials on YouTube. Here's a link to the CMake playlist. Videos 1–4 were the most relevant to me at the moment, so those were what I focussed on.
I also used this Udemy course on CMake.
I've aslo drawn from the CMake tutorial on cmake.org.


