| author |
|---|
Bruno Vitali/Paul Shiner |
This library uses AWS C-SDK to implement an Arduino class AWSGreenGrassIoT to make it easy to securely connect sensors/actuator to AWS IoT Core, directly or by means of an AWS Greengrass device (i.e. Raspberry PI) using X509 certificates and discovery.
The class AWSGreenGrassIoT exposes the following methods:
Constructor: AWSGreenGrassIoT(const char * AwsIoTCoreurl, // AWS IoT core URL
                              const char * thingName,     // AWS thing name
                              const char * iotCoreCA,     // AWS IoT core certificate (defined in certificate.c)
                              const char * thingCA,       // thing certificate (defined in certificates.c)
                              const char * thingKey);     // thing private key (defined in certificate.c)

 bool connectToGG(void);       // connect the device to greengrass
 bool connectToIoTCore(void);  // connect the device directly to AWS IoT Core

 bool publish(char * pubtopic, char * pubPayLoad);  // publish a JSON record to "pubTopic"
 bool subscribe(char * subTopic, pSubCallBackHandler_t pSubCallBackHandler); // subscribe to "subTopic" and define the callback function to handle the messages coming from the IoT broker
The library is based on the latest (as of January 2020) Amazon IoT C-SDK version 3.0.1 https://github.com/aws/aws-iot-device-sdk-embedded-C/releases/tag/v3.0.1. Future version of the SDK can be found on https://github.com/aws/aws-iot-device-sdk-embedded-C and might require a recompilation of the AWSGreengrassIoT code. The library makes use of some standard Arduino libraries: WiFi, WifiClientSecure, HTTPClient.
The examples requires the installation of the following libraries from public repositories:
- NTPClient, to synchronize the real time clock with the ntpd server and generate timestamps for sensor measurements (in publishing examples, gg_SGP30_publisher and was_SGP30_publisher);
- ADAFruit_SGP30, to use the air impurity sensor in gg_SGP30_publisher and was_SGP30_publisher examples;
- ESP32Servo, to control the rotation of the servo motor in gg_subscriber and aws_subscriber examples;
- DHT sensor library, to read the values from the DHT22 sensor in the gg_temp_humid_pub_sub example.
-
Install the latest Arduino IDE for your platform (the following screenshots will refer to the MAC OS version): https://www.arduino.cc/en/main/software;
-
Install ESP32 board manager:
- From Arduino IDE main menu -> Preferences

-
Enter https://dl.espressif.com/dl/package_esp32_index.json into the “Additional Board Manager URLs” field as shown in the figure above and press “OK”.
- From Arduino IDE main Menu -> Tools -> Board Manager

- Enter ESP32 in the search field as indicated below and install the new eps32 board manager:

- In Tools-> Board select your ESP32 module type, in my case ESP32 Dev Module

- Install Arduino Libraries (Tools>Manage Libraries...) “NTPClient”, “Adafruit_SGP30”, “ESP32Servo”, "DHT sensor library" to be able to use the publishing and subscribing examples from the File menu-> Examples -> AWSGreengrassIoT). The picture below shows how to add the support library for simple servo motors:

-
Open a browser in the GitHub repository under https://github.com/aws-samples/arduino-aws-greengrass-iot
-
Download the library in zip format as indicated in the image:

- Add the Zip file as new Arduino library in Sketch->Include Library-> Add .ZIP library:

- Check that the library is visible in Sketch -> Include Library, as indicated in the screenshot below:

-
First create a Greengrass group in your AWS account.
-
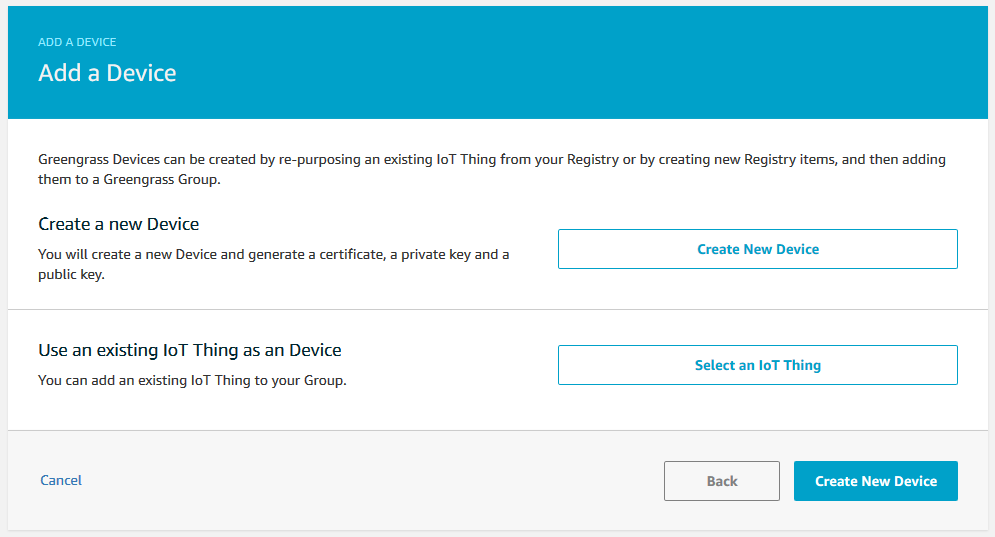
Within that group go to the devices sub menu and Add a Device.
-
On the next page select Create new device;
-
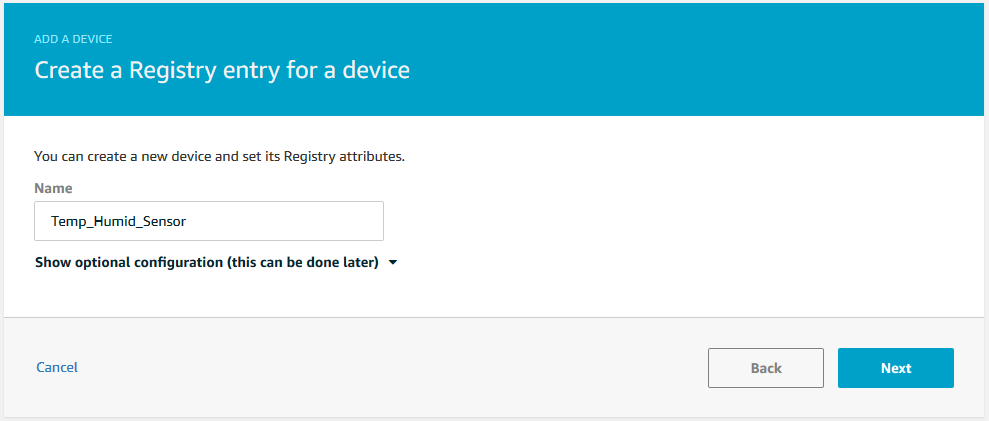
Give your device a name (in this example "Temp_Humid_Sensor") and click next;
-
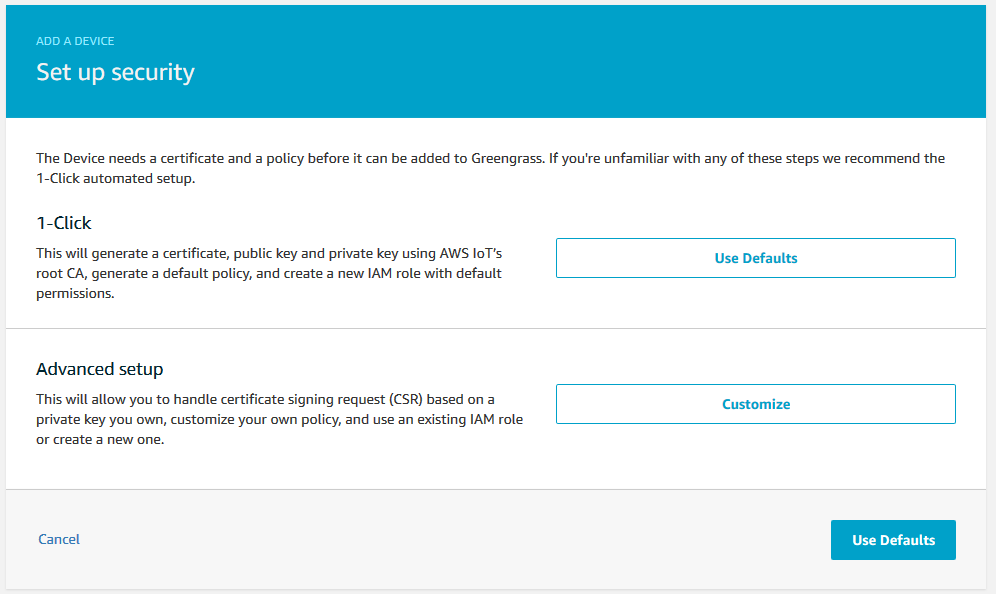
Click "Use Defaults" on the next page.
-
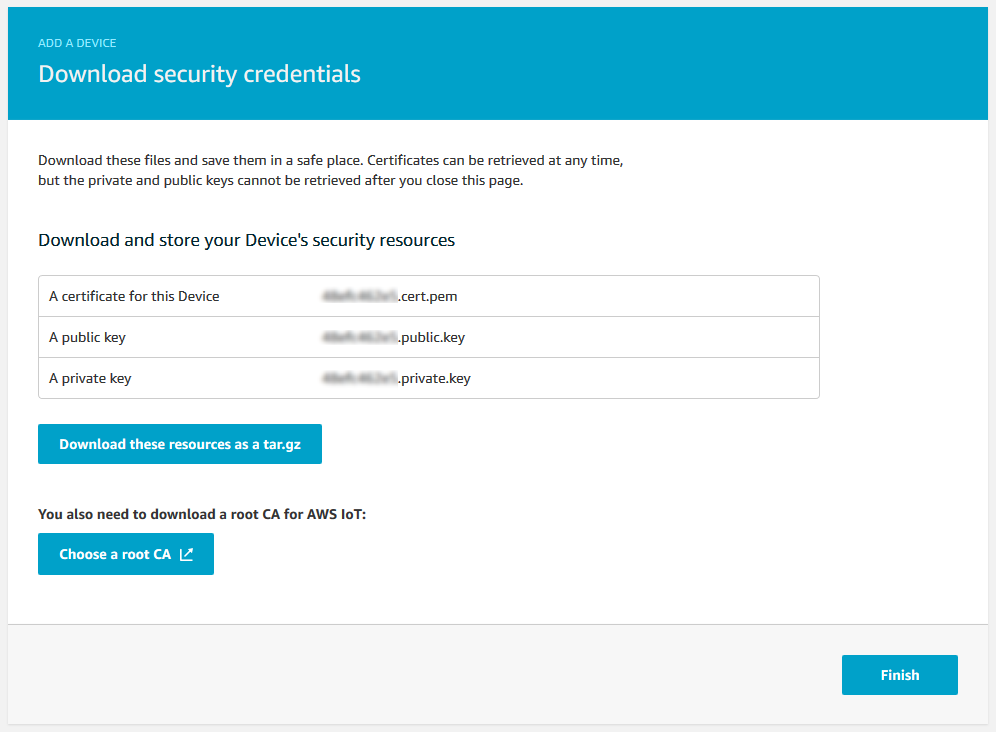
On the next page download your credentials as well as a root CA (For this example I will use Amazon Root CA 1);
-
Amazon Root CA can be found at https://www.amazontrust.com/repository/AmazonRootCA1.pem

-
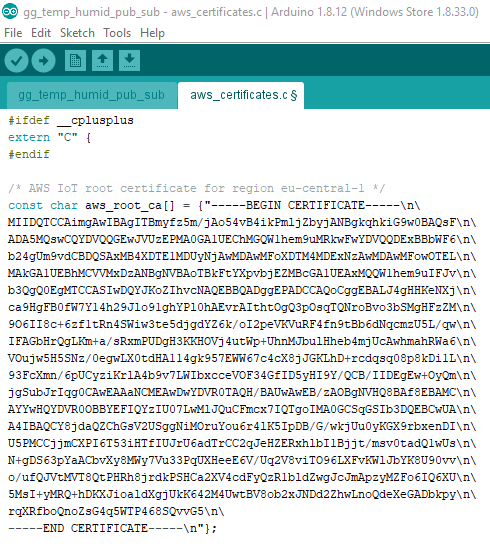
Next Populate your "aws_certificates.c" file with your credentials *Note the use of the Newline line termination below \n\ *
-
For the "aws_root_ca[]" copy the "AmazonRootCA1.pem" from above adding the \n\ where appropriate.
-
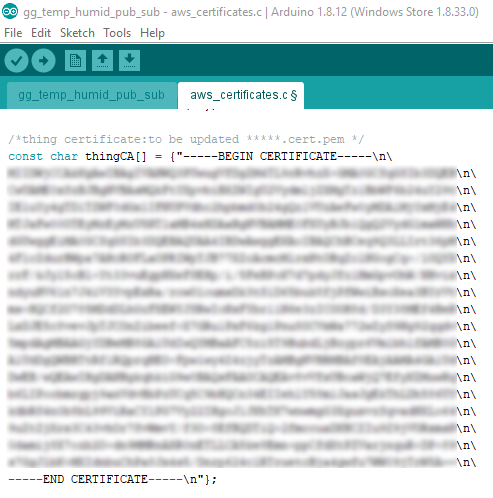
The next Certificate to add is the "thingCA[]" you will find this in the downloaded xxxxx-setup.tar.gz file with the extension .cert.pem. Copy the file into the "aws_certificates.c" file adding the \n\ as appropriate.
-
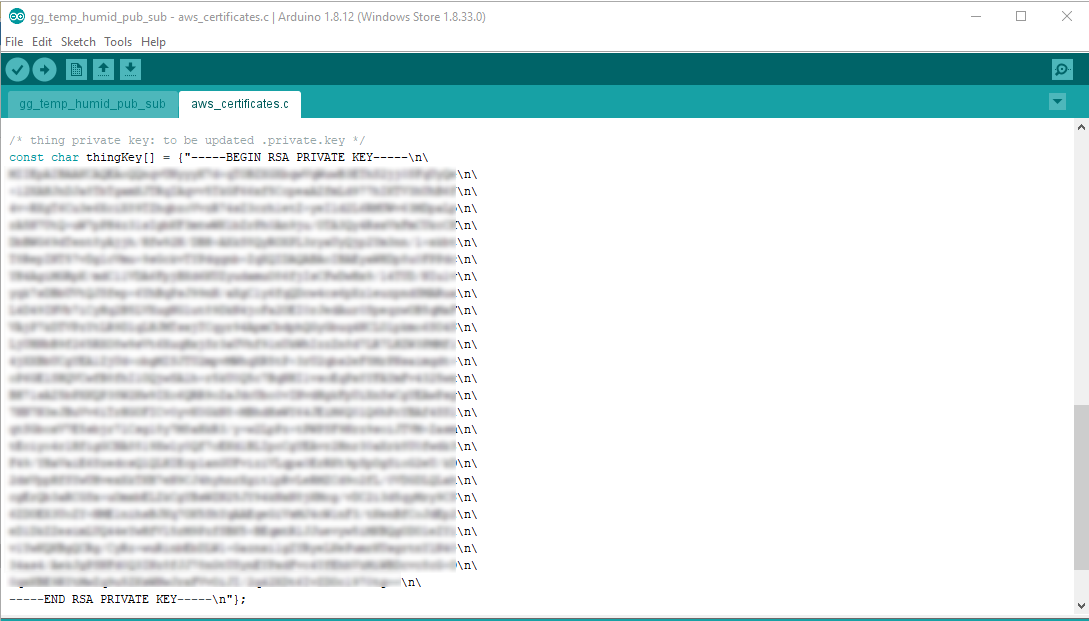
Lastly add the "thingKey[]" for your device from the file ending with .private.key from the xxxx-setup.tar.gz file.
-
You now need to deploy your GreenGrass setup so that the new device will be added and the Greengrass core will accept the local connection.


-
Customize the Arduino sample code by editing the parameters for your AWS IoT Core URL, your "thing" and your WiFi network settings. You can also edit the topics you wish to publish and subscribe too:

-
Deploy to your device and open the Arduino monitor (Tools>Serial Monitor). Make sure the comm port is set correctly and you have the baud rate set to 115200. You should see something similar to below.


- You may see connection errors these could be due to latency. Delays have been implemented to mitigate this in the examples that you can adjust to your requirements.
Before using the examples from the Sketch->Examples menu, please remember to:
- Create "things" in AWS IoT Core: (https://docs.aws.amazon.com/iot/latest/developerguide/register-device.html);
- Generate and download thing's certificate, thing's private key and AWS service certificate (if your endpoint is different from eu-central-1);
- Create aws_certificates.c file with the certificates/key generate in the previous step;
- Customize the Arduino sample code by definiting the parameters for your AWS IoT Core URL, your "thing" and your WiFi network:
char WIFI_SSID[]="SSID";
char WIFI_PASSWORD[]="PASSWORD";
char AWSIOTURL[]="xxxxxxxxxxxxxxx-ats.iot.region.amazonaws.com";
char THING[]= "your device name here";
AWSGreenGrassIoT library comes with 5 examples:

In these examples a servo motor is connected to Analog GPIO port0 on ESP32, and simulate the remote opening and closing of a window by turning ±90 degree the motor depending on the subscribing topic "Window". An "open" will rotate the motor +90 degrees, a "close" will rotate the motor in the opposite sense, -90 degrees.
Circuit diagram:

The only difference between the two examples is that:
- aws_servo_subscriber connects to AWS IoT Core directly using the member function "connectToIoTCore";
if(greengrass->connectToIoTCore() == true)
  {
      Serial.println("Connected to AWS IoT core");
      delay(2000);

     if( true == greengrass->subscribe(TOPIC_NAME,subscribeCallback)) {
          Serial.println("Subscribe to Window/# topic successful ");
     }
     else {
          Serial.println("Subscribe to Window/# Failed, Check the Thing Name and Certificates");
          while(1);
     }

   }
  else
  {
      Serial.println("Connection to AWS IoT core failed");
      while(1);
}- gg_servo_subscriber connects via a greengrass device (it could be a Raspberry Pi connected to the same WiFi network or a remote EC2 instance inside AWS cloud) using the member function "connectToGG";
if(greengrass->connectToGG() == true)
 {
     Serial.println("Connected to AWS GreenGrass");
     delay(2000);

    if( true == greengrass->subscribe(TOPIC_NAME,subscribeCallback)) {
         Serial.println("Subscribe to Window/# topic successful ");
    }
    else {
         Serial.println("Subscribe to Window/# Failed, Check the Thing Name and Certificates");
         while(1);
    }

  }
 else
 {
     Serial.println("Connection to Greengrass failed, check if Greengrass is on and connected to the WiFi");
     while(1);
 }
The callback function handling the topic subscription is the same for both use cases:
static void subscribeCallback (char *topicName, int payloadLen, char *payLoad)
{

    //check if the topic is Window/close or Window/open
    rcvdPayload = String(payLoad);
    cmdReceived = CMD_UNKNOWN;
    String topic = String(topicName);
    if ( topic.startsWith(topicClose+ "{")) {
      cmdReceived = CMD_CLOSE;
      rcvdTopic = topicClose;
    }
    else if (topic.startsWith(topicOpen + "{")) {
      cmdReceived = CMD_OPEN;
      rcvdTopic = topicOpen;
    }
    else
      rcvdTopic = topicName;
    msgReceived = 1;
}These two examples use an air impurity sensor SGP30 from Adafruit connected to one of the I2C port on ESP32 as indicated in the diagram below. The examples require the installation of the ADAFruit_SGP30 library as indicated in point 3 in the previous section.
Circuit diagram:

The two examples share the same code except for the parts that connects the ESP32 Arduino to the cloud. In aws_sgp30_publisher we use "connectToIoTCore" function to publish the measurements directly to the AWS IoT core. In gg_sgp30_publisher we use "connectToGG" member function to send measurements to the greengrass edge device.
In this examples we show how to use two sensors to the same I2C bus, BME280 (temperature, humidity, pressure, altitude) and SGP30. The example sketch is similiar to aws_sgp30_publisher with the addition of the initialization and the reading of the measurements of the Adafruit BME280 sensor.
This is the circuit diagram:

In this example we show how to publish temperature and humidity readings from an ESP32 to a local Greengrass device and then how to forward those messages onto AWS IoT core. This example will also show you how to subscribe to a topic and control the Red/Green Leds from the test console in AWS IoT core.
The parts used in this example are; 1 x ESP32 WROOM DevkitC 1 x DHT22/AM2302 Temp Humidity sensor 1 x 10k resistor 1 x LED traffic light cluster (Red/Amber/Green)
Assembled;


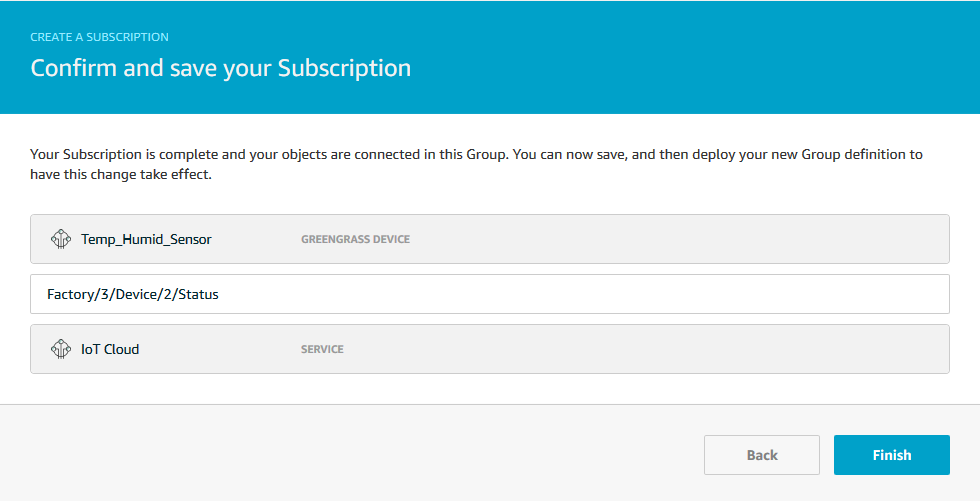
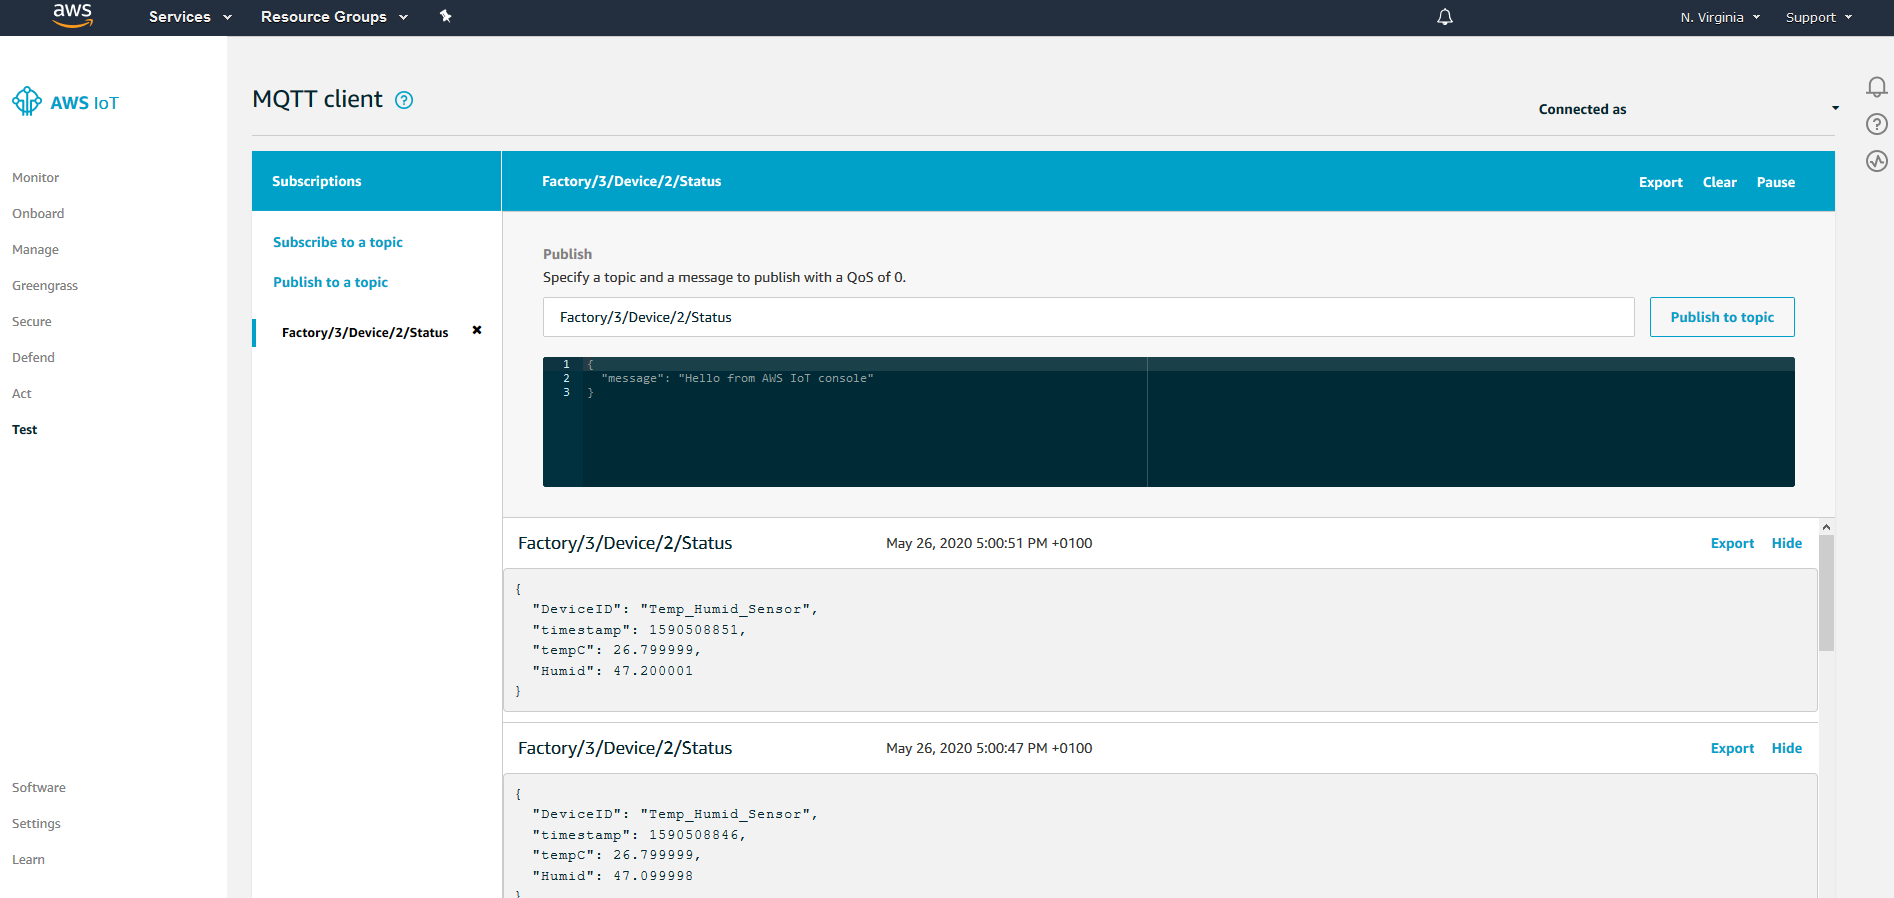
Now that your device is subscribing and publishing on the local GreenGrass MQTT broker you can pass the messages to other services or control the device LEDs. In the following example I will show you how to monitor the status messages from IoT Core.
-
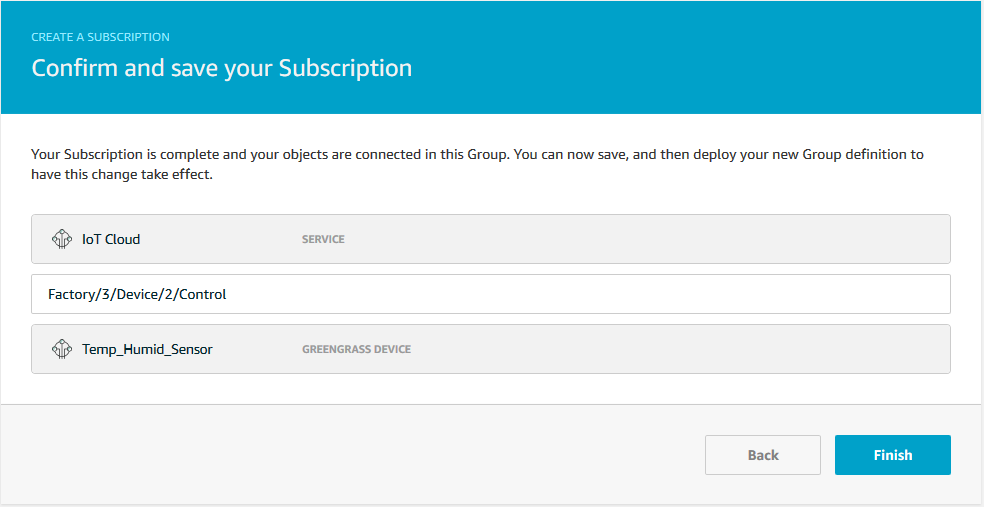
Go into the GreenGrass group and add a subscription for your publish topic (in my case "Factory/3/Device/2/Status")
-
You will need to deploy the updated settings to the GreenGrass group and check the ESP32 has reconnected after the update.
-
Log onto the AWS IoT console and go to the Test tab on the left, then subscribe to the topic that should be forwarded by the GreenGrass group. (in my case "Factory/3/Device/2/Status")


Now that your device is subscribing and publishing on the local GreenGrass MQTT broker you can pass the messages to other services or control the device LEDs. In the following example I will show you how to control the Device LEDs from IoT Core.
-
Go into the GreenGrass group and add a subscription for your subscribe topic (in my case "Factory/3/Device/2/Control")
-
You will need to deploy the updated settings to the GreenGrass group and check the ESP32 has reconnected after the update.
-
Log onto the AWS IoT console and go to the Test tab on the left, then "Publish to a topic" and enter the Topic that you wish to publish too, in my case "Factory/3/Device/2/Control" along with the Json to send.
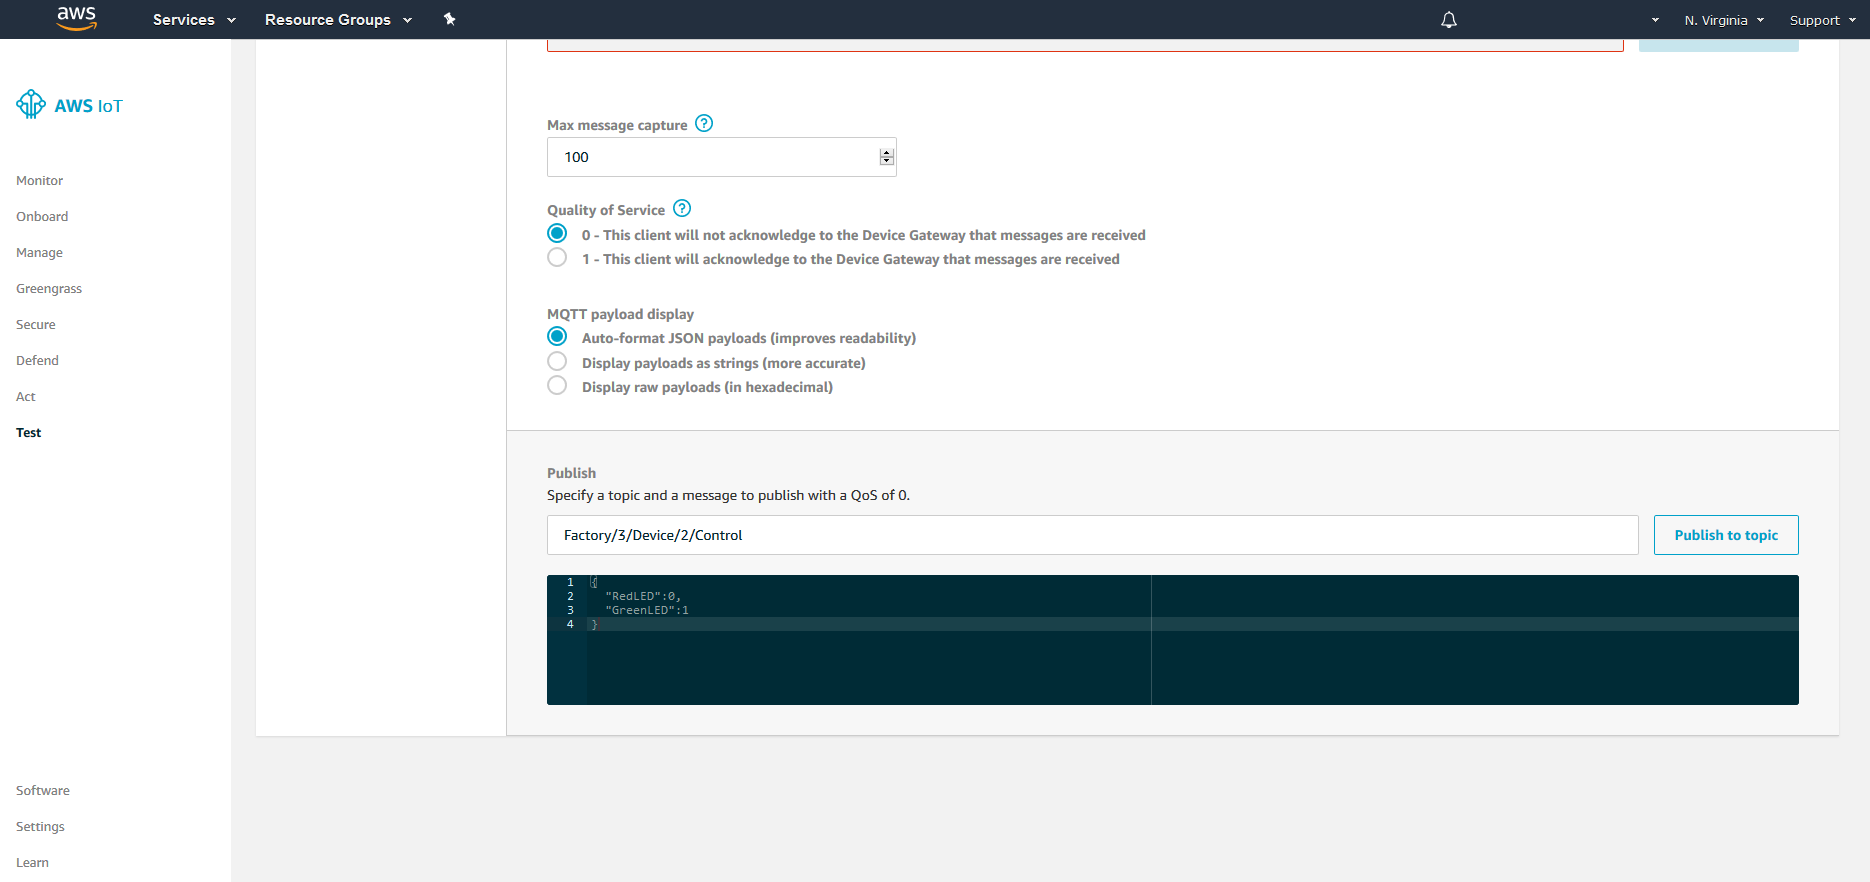
-
You can adjust the payload to control the LEDs as desired, note there must not be spaces between the key and the value.
{
  "RedLED":0,
  "GreenLED":1
}

