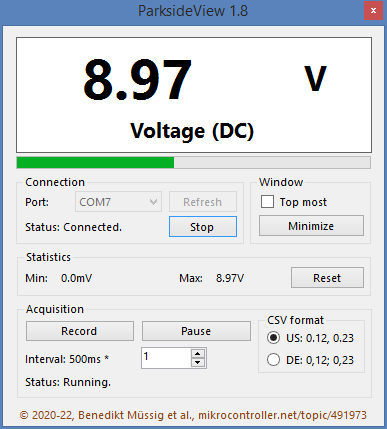
Program for connecting to and retrieving data from a Parkside PDM-300-C2 or PDM-300-C3 digital multimeter.
ParksideView is a utility program that allows retrieving real-time measurement data from budget Parkside PDM-300-C2 and PDM-300-C3 digital multimeters. The PDM-300-C2 multimeters were last sold internationally by the discounter LIDL in March, 2020. The PDM-300-C3 revision is sold by LIDL multiple times a year for around 13€.
- Big, realtime readout for the value displayed on the multimeter
- Bargraph display for all supported modes
- Recording of values to a CSV formatted file
- Resettable Min/Max statistics
- Custom acquisition speeds
- Runs on Windows 7, 8, 10, 11 and Linux (via Mono: https://www.mono-project.com/)
- Localized to German and Portuguese besides English
- German and US/international CSV formats selectable
- Automatic configuration of the serial interface
- Synchronization to the data stream, graceful error handling and display blanking on error or timeout
- Acquisition can be paused in real-time and CSV mode
- The mode is also recorded in CSV mode and may be changed during recording
- Clicking on the readout display copies the currently displayed value to the clipboard
- Window can be set to be always ontop of all other windows
- Multiple instances can be run at the same time to display and record different multimeters
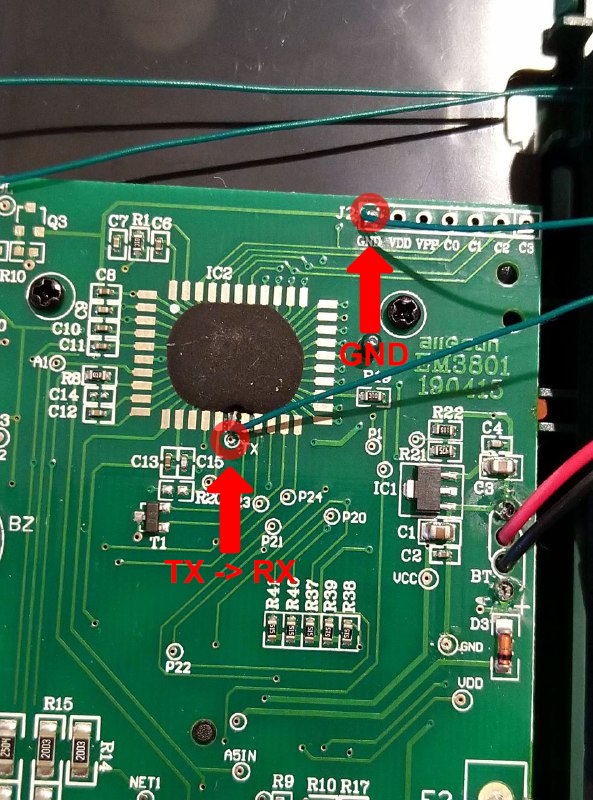
To use the software, a small and simple hardware modification has to be done to the multimeter. Two wires have to be soldered to two testpoints on the PCB and brought outside the device. This can for instance be accomplished by drilling a tiny hole into the backside of the case.
- Soldering iron and solder
- Snips
- 28+ AWG wire (~ 1m)
- USB serial converter (can be 5V with the recommended opto-isolator / 3.3V directly - don't do this!)
- Opto-isolator (https://www.sparkfun.com/products/9118 - DO NOT use this for high voltages > 60V!)
The image below shows the two test points to connect the opto-isolator to:
To connect the multimeter to your PC, solder a wire from the TX test point to the IN1 pad of the opto-isolator. Then, connect another wire between the GND test point of the multimeter to the GND pad of the opto-isolator. Now, you can make a connection between the HV pad of the opto-isolator to the 5V output of the USB serial converter. Next, connect HVG on the opto-isolator to GND of the USB serial converter. Finally, connect OUT1 of the opto-isolator to the RX (yes, not TX!) connection of the serial converter.
After making the hardware modifications, you can still use the multimeter in standalone mode (as usual). You may not use the multimeter to measure voltages above 60V over PE anymore! If you want to connect it to your PC, just plug in the USB serial converter and you are ready to use the software. You can use the device manager on Windows or dmesg on Linux to find the correct port. On Linux it is usually /dev/ttyUSB0.
When sharing the program, please always include a link to either https://github.com/bmuessig/ParksideView or https://www.mikrocontroller.net/topic/491973
Have fun!

