- Overview
- Supported Tests
- Installing the Package
- Installation for Zustand Apps
- Installation for Recoil Apps
- Usage for All Apps
- Test Setup
- Demo Apps
- Contributing
- Core Team
- License
You're an independent developer or part of a lean team. You want reliable unit tests for your new Zustand or React-Recoil app, but you need to move fast and time is a major constraint. More importantly, you want your tests to reflect how your users interact with the application, rather than testing implementation details.
Enter Chromogen - Now on version 4.0. Chromogen is a Jest unit-test generation tool for Zustand Stores and Recoil selectors. It captures state changes during user interaction and auto-generates corresponding test suites. Simply launch your application after following the installation instructions below, interact as a user normally would, and with one click you can download a ready-to-run Jest test file. Alternatively, you can copy the generated tests straight to your clipboard. Chromogen is now compatible with React V18!
Zustand Tests
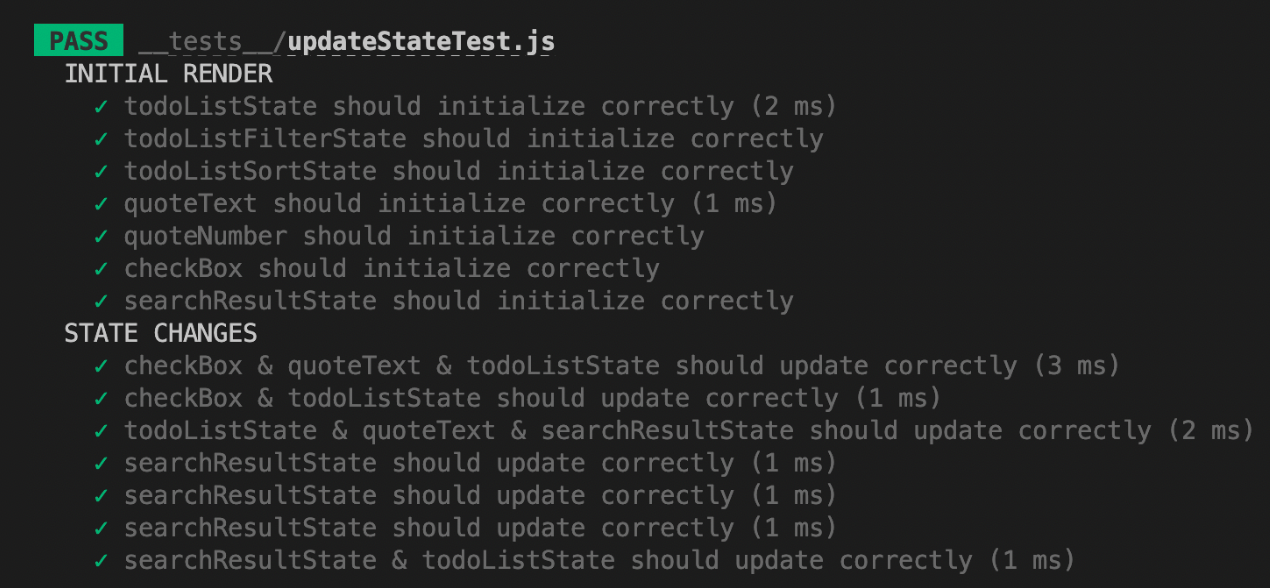
Chromogen currently supports two types of testing for Zustand applications:
- Initial Store State on page load.
- Store State Changes whenever an action is invoked on the store.
On initial render, Chromogen captures store state as a whole and keeps track of any subsequent state changes. In order to generate tests, you'll need to make some changes to how your store is created.
To use Chromogen with your Zustand application, please see the Installation for Zustand Apps section below.
Recoil Tests
Chromogen currently supports three main types of tests for Recoil apps:
- Initial selector values on page load
- Selector return values for a given state, using snapshots captured after each state transaction.
- Selector set logic asserting on resulting atom values for a given
newValueargument and starting state.
These test suites will be captured for synchronous selectors and selectorFamilies only. However, the presence of asyncronous selectors in your app should not cause any issues with the generated tests. Chromogen can identify such selectors at run-time and exclude them from capture.
At this time, we have no plans to introduce testing for async selectors; the mocking requirements are too opaque and fragile to accurately capture at runtime.
By default, Chromogen uses atom and selector keys to populate the import & hook statements in the test file. If your source code does not use matching variable and key names, you will need to pass the imported atoms and selectors to the ChromogenObserver component as a store prop. The installation instructions below contain further details.
npm install chromogen
Before using Chromogen, you'll need to make two changes to your application:
- Import the
<ChromogenZustandObserver />component and render it alongside any other components in<App /> - Import
chromogenZustandMiddlewarefunction from Chromogen. This will be used as middleware when setting up your store.
Import ChromogenZustandObserver. ChromogenZustandObserver can be rendered alongside any other components in <App />.
import React from 'react';
import { ChromogenZustandObserver } from 'chromogen';
import TodoList from './TodoList';

const App = () => (
  <>
    <ChromogenZustandObserver />
    <TodoList />
  </>
);

export default App;
Import chromogenZustandMiddleware. When you call create, wrap your store function with chromogenZustandMiddleware. Note, when using chromogenZustandMiddleware, you'll need to provide some additional arguments into the set function.
- Overwrite State (boolean) - Without middleware, this defaults to
false, but you'll need to explicitly provide a value when using Chromogen. - Action Name - Used for test generation
- Action Parameters - If the action requires input parameters, pass these in after the Action Name.
import { chromogenZustandMiddleware } from 'chromogen';
import create from 'zustand';

const useStore = create(
  chromogenZustandMiddleware((set) => ({
    counter: 0,
    color: 'black',
    prioritizeTask: ['walking', 5],
    addCounter: () => set(() => ({ counter: (counter += 1) }), false, 'addCounter'),
    changeColor: (newColor) => set(() => ({ color: newColor }), false, 'changeColor', newColor),
    setTaskPriority: (task, priority) =>
      set(() => ({ prioritizeTask: [task, priority] }), false, 'setTaskPriority', task, priority),
  })),
);

export default useStore;Before running Chromogen, you'll need to make two changes to your application:
- Import the
<ChromogenObserver />component as a child of<RecoilRoot /> - Import the
atomandselectorfunctions from Chromogen instead of Recoil
Note: These changes do have a small performance cost, so they should be reverted before deploying to production.
ChromogenObserver should be included as a direct child of RecoilRoot. It does not need to wrap any other components, and it takes no mandatory props. It utilizes Recoil's TransactionObserver Hook to record snapshots on state change.
import React from 'react';
import { RecoilRoot } from 'recoil';
import { ChromogenObserver } from 'chromogen';
import MyComponent from './components/MyComponent.jsx';

const App = (props) => (
  <RecoilRoot>
    <ChromogenObserver />
    <MyComponent {...props} />
  </RecoilRoot>
);

export default App;
If you are using pseudo-random key names, such as with UUID, you'll need to pass all of your store exports to the ChromogenObserver component as a store prop. This will allow Chromogen to use source code variable names in the output file, instead of relying on keys. When all atoms and selectors are exported from a single file, you can pass the imported module directly:
import * as store from './store';
// ...
<ChromogenObserver store={store} />;
If your store utilizes seprate files for various pieces of state, you can pass all of the imports in an array:
import * as atoms from './store/atoms';
import * as selectors from './store/selectors';
import * as misc from './store/arbitraryRecoilState';
// ...
<ChromogenObserver store={[atoms, selectors, misc]} />;Wherever you import atom and/or selector functions from Recoil (typically in your store file), import them from Chromogen instead. The arguments passed in do not need to change in any away, and the return value will still be a normal RecoilAtom or RecoilSelector. Chromogen wraps the native Recoil functions to track which pieces of state have been created, as well as when various selectors are called and what values they return.
import { atom, selector } from 'chromogen';

export const fooState = atom({
  key: 'fooState',
  default: {},
});

export const barState = selector({
  key: 'barState',
  get: ({ get }) => {
    const derivedState = get(fooState);
    return derivedState.baz || 'value does not exist';
  },
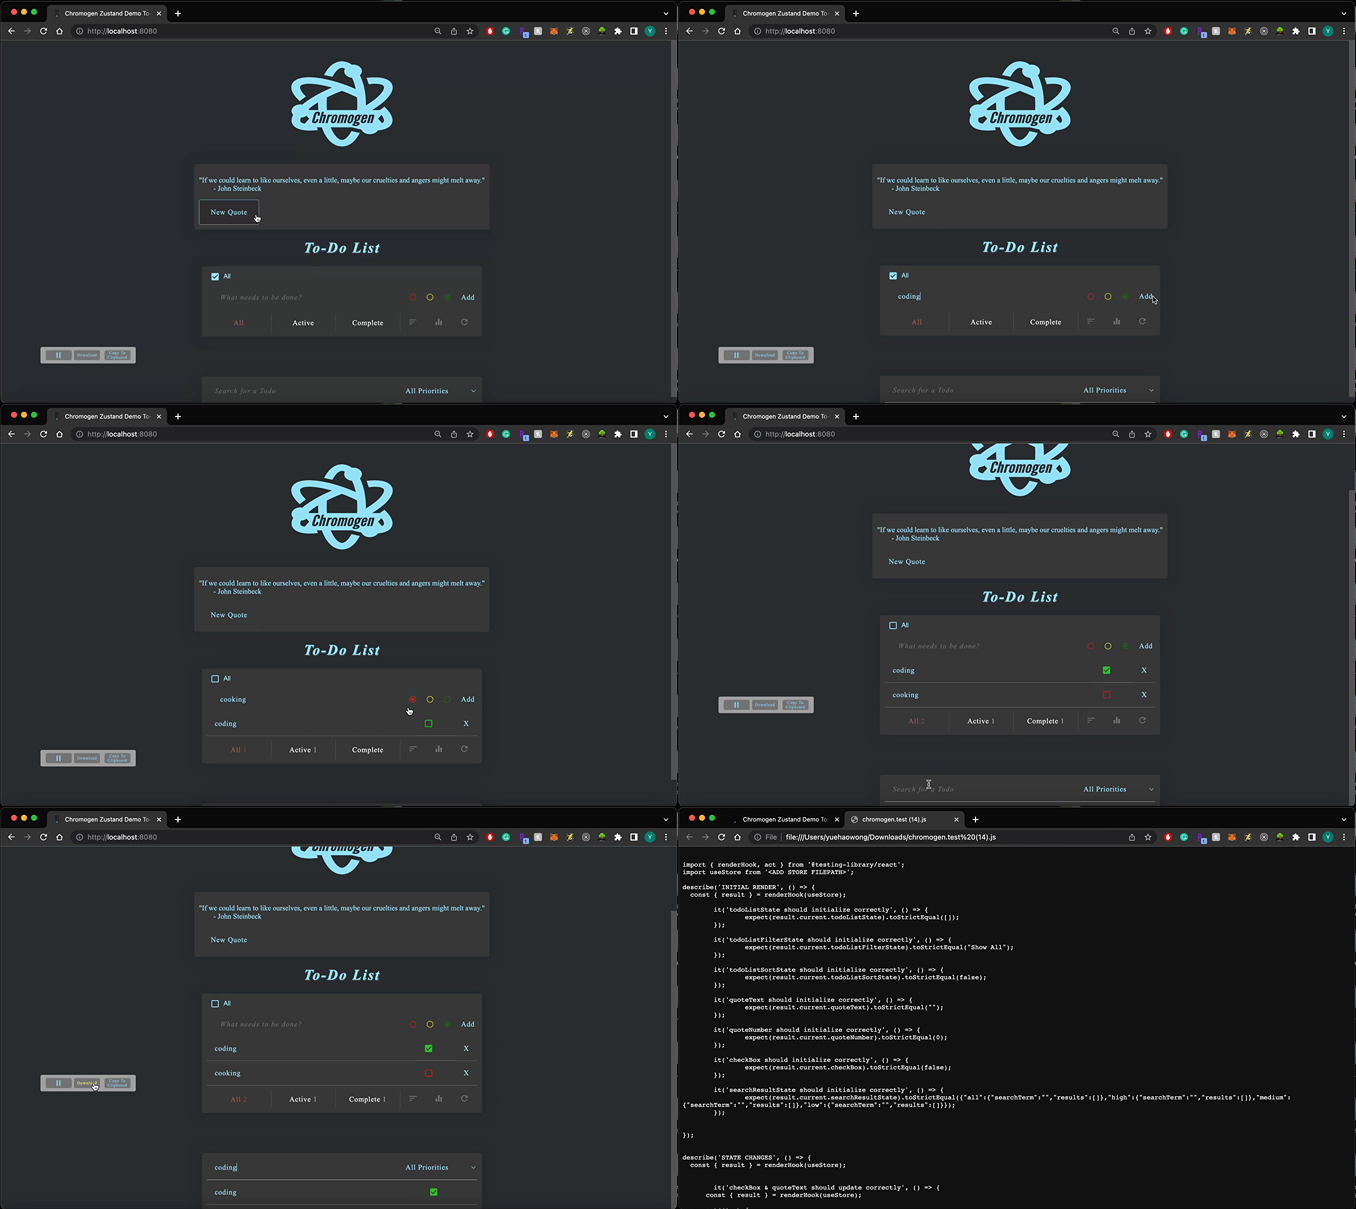
});After following the installation steps above, launch your application as normal. You should see two buttons in the bottom left corner.
The pause button on the left is the pause recording button. Clicking it will pause recording, so that no tests are generated during subsequent state changes. Pausing is useful for setting up a complex initial state with repetitive actions, where you don't want to test every step of the process.
The button in the middle is the download button. Clicking it will download a new test file that includes all tests generated since the app was last launched or refreshed.
The button on the right is the copy-to-clipboard button. Clicking it will copy your tests, including all tests generated since the app was last launched or refreshed.
Once you've recorded all the interactions you want to test, click the pause button and then the download button to generate the test file or press copy to copy to your clipboard. You can now drag-and-drop the downloaded file into your app's test directory or paste the code in your new file. Don't forget to add the source path in your test file
You're now ready to run your tests! After running your normal Jest test command, you should see a test suite for chromogen.test.js.
The current tests check whether state has changed after an interaction and checks whether the resulting state change variables have been updated as expected.
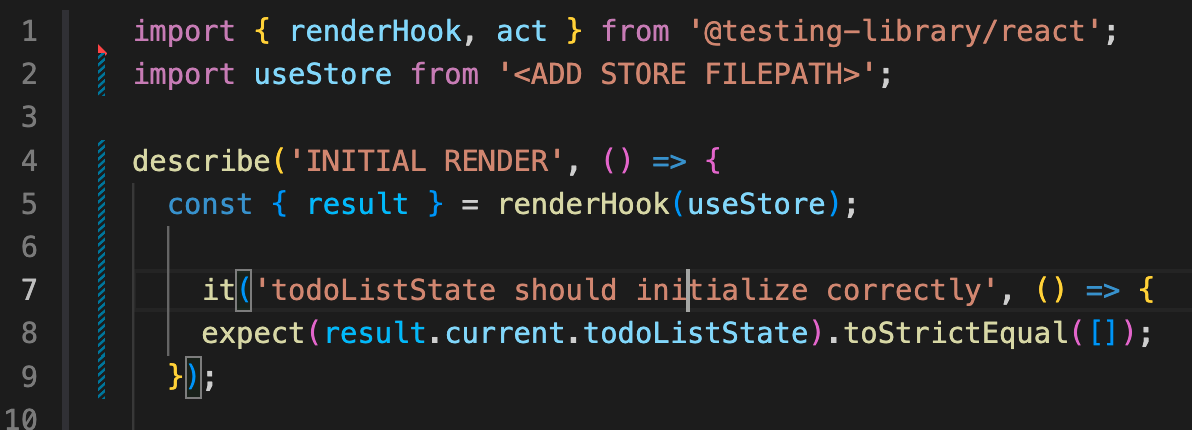
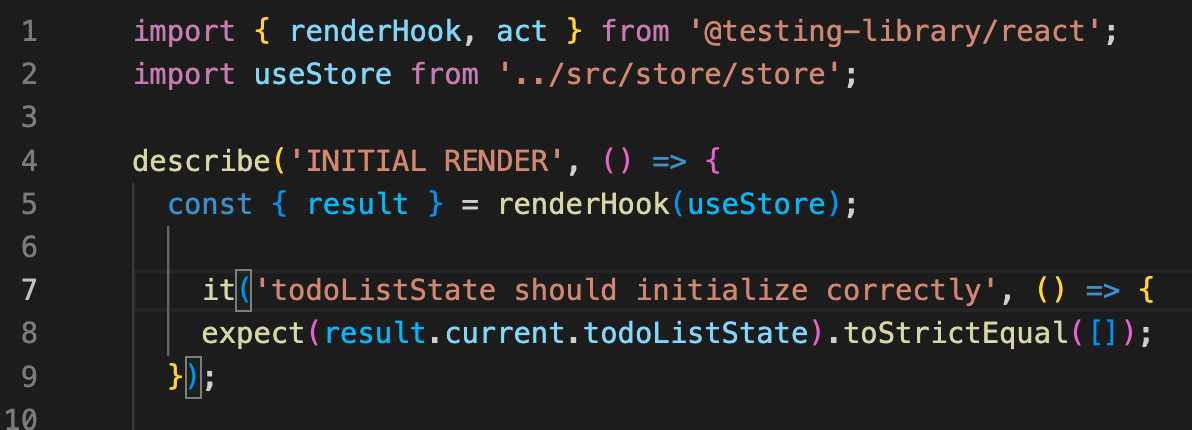
Before running the test file, you'll need to specify the import path for your store by replacing <ADD STORE FILEPATH>. The default output assumes that all stores are imported from a single path; if that's not possible, you'll need to separately import each set of stores from their appropriate path.
| BEFORE | AFTER |
|---|---|
 |
 |
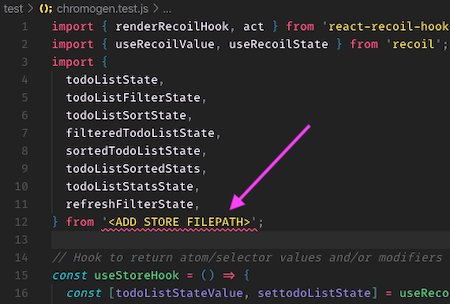
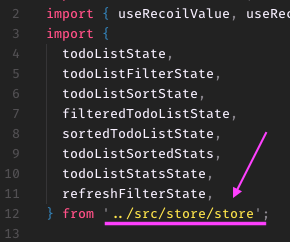
Before running the test file, you'll need to specify the import path for your store by replacing <ADD STORE FILEPATH>. The default output assumes that all atoms and selectors are imported from a single path; if that's not possible, you'll need to separately import each set of atoms and/or selectors from their appropriate path.
| BEFORE | AFTER |
|---|---|
 |
 |
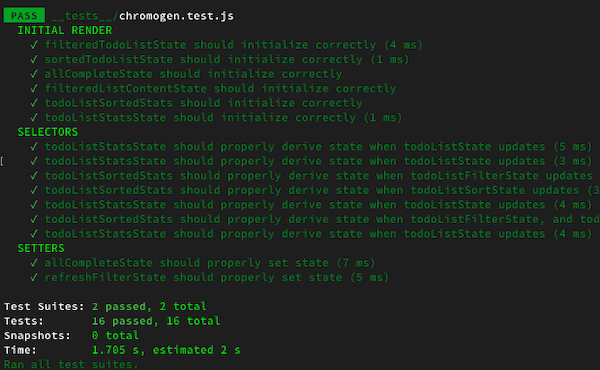
You're now ready to run your tests! Upon running your normal Jest test command, you should see three suites for chromogen.test.js:
Initial Render tests whether each selector returns the correct value at launch. There is one test per selector.
Selectors tests the return value of various selectors for a given state. Each test represents the app state after a transaction has occured, generally triggered by some user interaction. For each selector that ran after that transaction, the test asserts on the selector's return value for the given state.
Setters tests the state that results from setting a writeable selector with a given value and starting state. There is one test per set call, asserting on each atom's value in the resulting state.
Chromogen's open-source Zustand demo app provides a Zustand-based frontend with multiple store properties and actions to test. You can access this demo application here, and view the source code in the demo-zustand-todo folder of this repository.
Chromogen's official Recoil demo app provides a ready-to-run Recoil frontend with a number of different selector implementations to test against. It's available in the demo-todo folder of this repository and comes with Chromogen pre-installed; just run npm install && npm start to launch.
We expect all contributors to abide by the standards of behavior outlined in the Code of Conduct.
We welcome community contributions, including new developers who've never made an open source Pull Request before. If you'd like to start a new PR, we recommend creating an issue for discussion first. This lets us open a conversation, ensuring work is not duplicated unnecessarily and that the proposed PR is a fix or feature we're actively looking to add.
Please file an issue for bugs, missing documentation, or unexpected behavior.
Please file an issue to suggest new features. Vote on feature requests by adding a 👍. This helps us prioritize what to work on.
For any questions and concerns related to using the package, feel free to email us via chromogen.app@gmail.com.
Logo crafted with AdobeExpress
README format adapted from react-testing-library under MIT license.
All Chromogen source code is MIT licensed.
Lastly, shoutout to this repo for the original inspiration.
