WARNING - This plugin is currently in a beta state. Use with caution.
This Obsidian plugin allows for the creation and population of json data files.
- Clone this repo.
npm ioryarnto install dependenciesnpm run devto start compilation in watch mode.
- Copy over
main.js,styles.css,manifest.jsonto your vaultVaultFolder/.obsidian/plugins/obsidian-data-collection/.
The plugin registers an extension and viewer for .json files.
The following example is designed to collect a daily weight measurement and add it to the my_weight_data.json file in the data folder. YAML format is used to specify the form.
```datacollection-form
title: Daily Weight
source: Data/my_weight_data.json
buttonText: Save Weight
fields:
- type: date
  name: EntryDate
  displayName: Entry Date
  defaultValue: today
- type: double
  name: Weight
  displayName: Weight (lbs)
  defaultValue: 0
```
Here is a view of the form that is created.
- title - (optional) - The form's title
- source - The json file to save data into
- buttonText - (optional) Text on the save button.
- requiredFieldMessage - (optional) Message to display when a field is not populated.
- recordSavedMessage - (optional) Message to display on save.
- sortOnSave - (optional) Indicates if the array should be sorted on save.
- sortFieldName - Field to sort the array on
- sortDirection - asc or desc
- fields - List of fields to collect data on.
Note - Sorting on every save will may cause performance issues
- type - Type of field
- name - Field name to store in the JSON file
- displayName - Field name to display
- defaultValue - Value to set when the form loads
- required - (Optional) Indicates if the field is required. Defaults to false. If required is set then an asterisk is added to the display name.
I am using using these forms with the Force note view mode plugin.
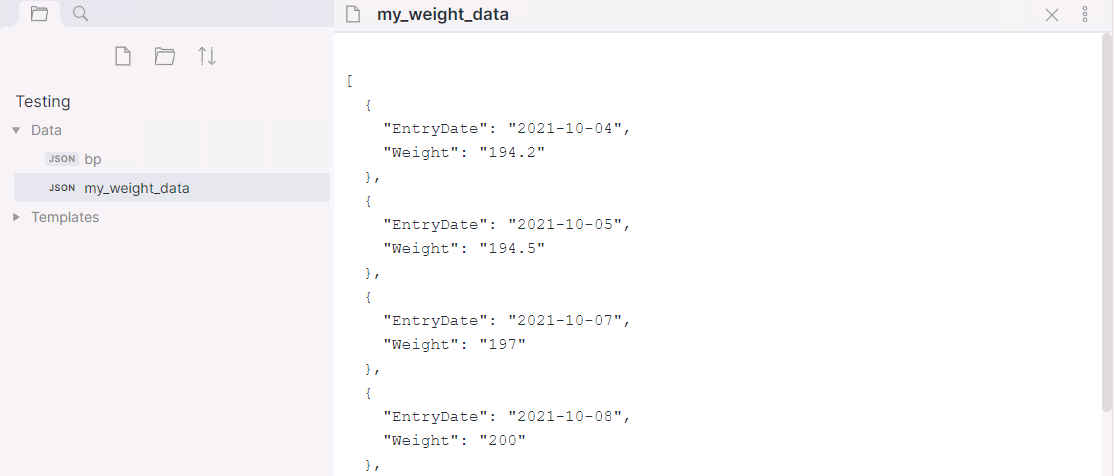
The following is an example of the JSON data file that is created by the form.
[
  {
	"EntryDate": "2021-10-04",
	"Weight": "194.2"
  },
  {
	"EntryDate": "2021-10-05",
	"Weight": "194.5"
  },
  {
	"EntryDate": "2021-10-07",
	"Weight": "197"
  },
  {
	"EntryDate": "2021-10-08",
	"Weight": "200"
  },
  {
	"EntryDate": "2021-10-09",
	"Weight": "199"
  },
  {
	"EntryDate": "2021-10-10",
	"Weight": "198"
  }
]
The following example creates a graph from the data in the my_weight_data.json file. YAML formatted information is used to specify the graph.
NOTE - Only two data sets are currently supported (X, Y)
```datacollection-graph
title: Weight over month
source: Data/my_weight_data.json
type: timeseries
fields:
- type: date
  name: EntryDate
  axis: x
  displayName: Entry Date
- type: double
  name: Weight
  axis: y
  displayName: Weight (lbs)
  dataColor: rgb(75, 192, 192)
```
Chart Type Options that are currently supported.
- bar
- line
- scatter
- timeseries
Here is an example of the chart that is generated.
The following example creates a table from the data in the my_weight_data.json file. YAML formatted information is used to specify the format of the table.
```datacollection-table
title: Weight entries
source: Data/my_weight_data.json
fields:
- type: date
  name: EntryDate
  displayName: Entry Date
  headerStyle: "text-align: center;width:200px;"
  fieldStyle: "text-align: left;"
- type: double
  name: Weight
  displayName: Weight (lbs)
  headerStyle: "text-align: center;width:200px;"
  fieldStyle: "text-align: left;"
```
Here is an example of the chart that is generated.
