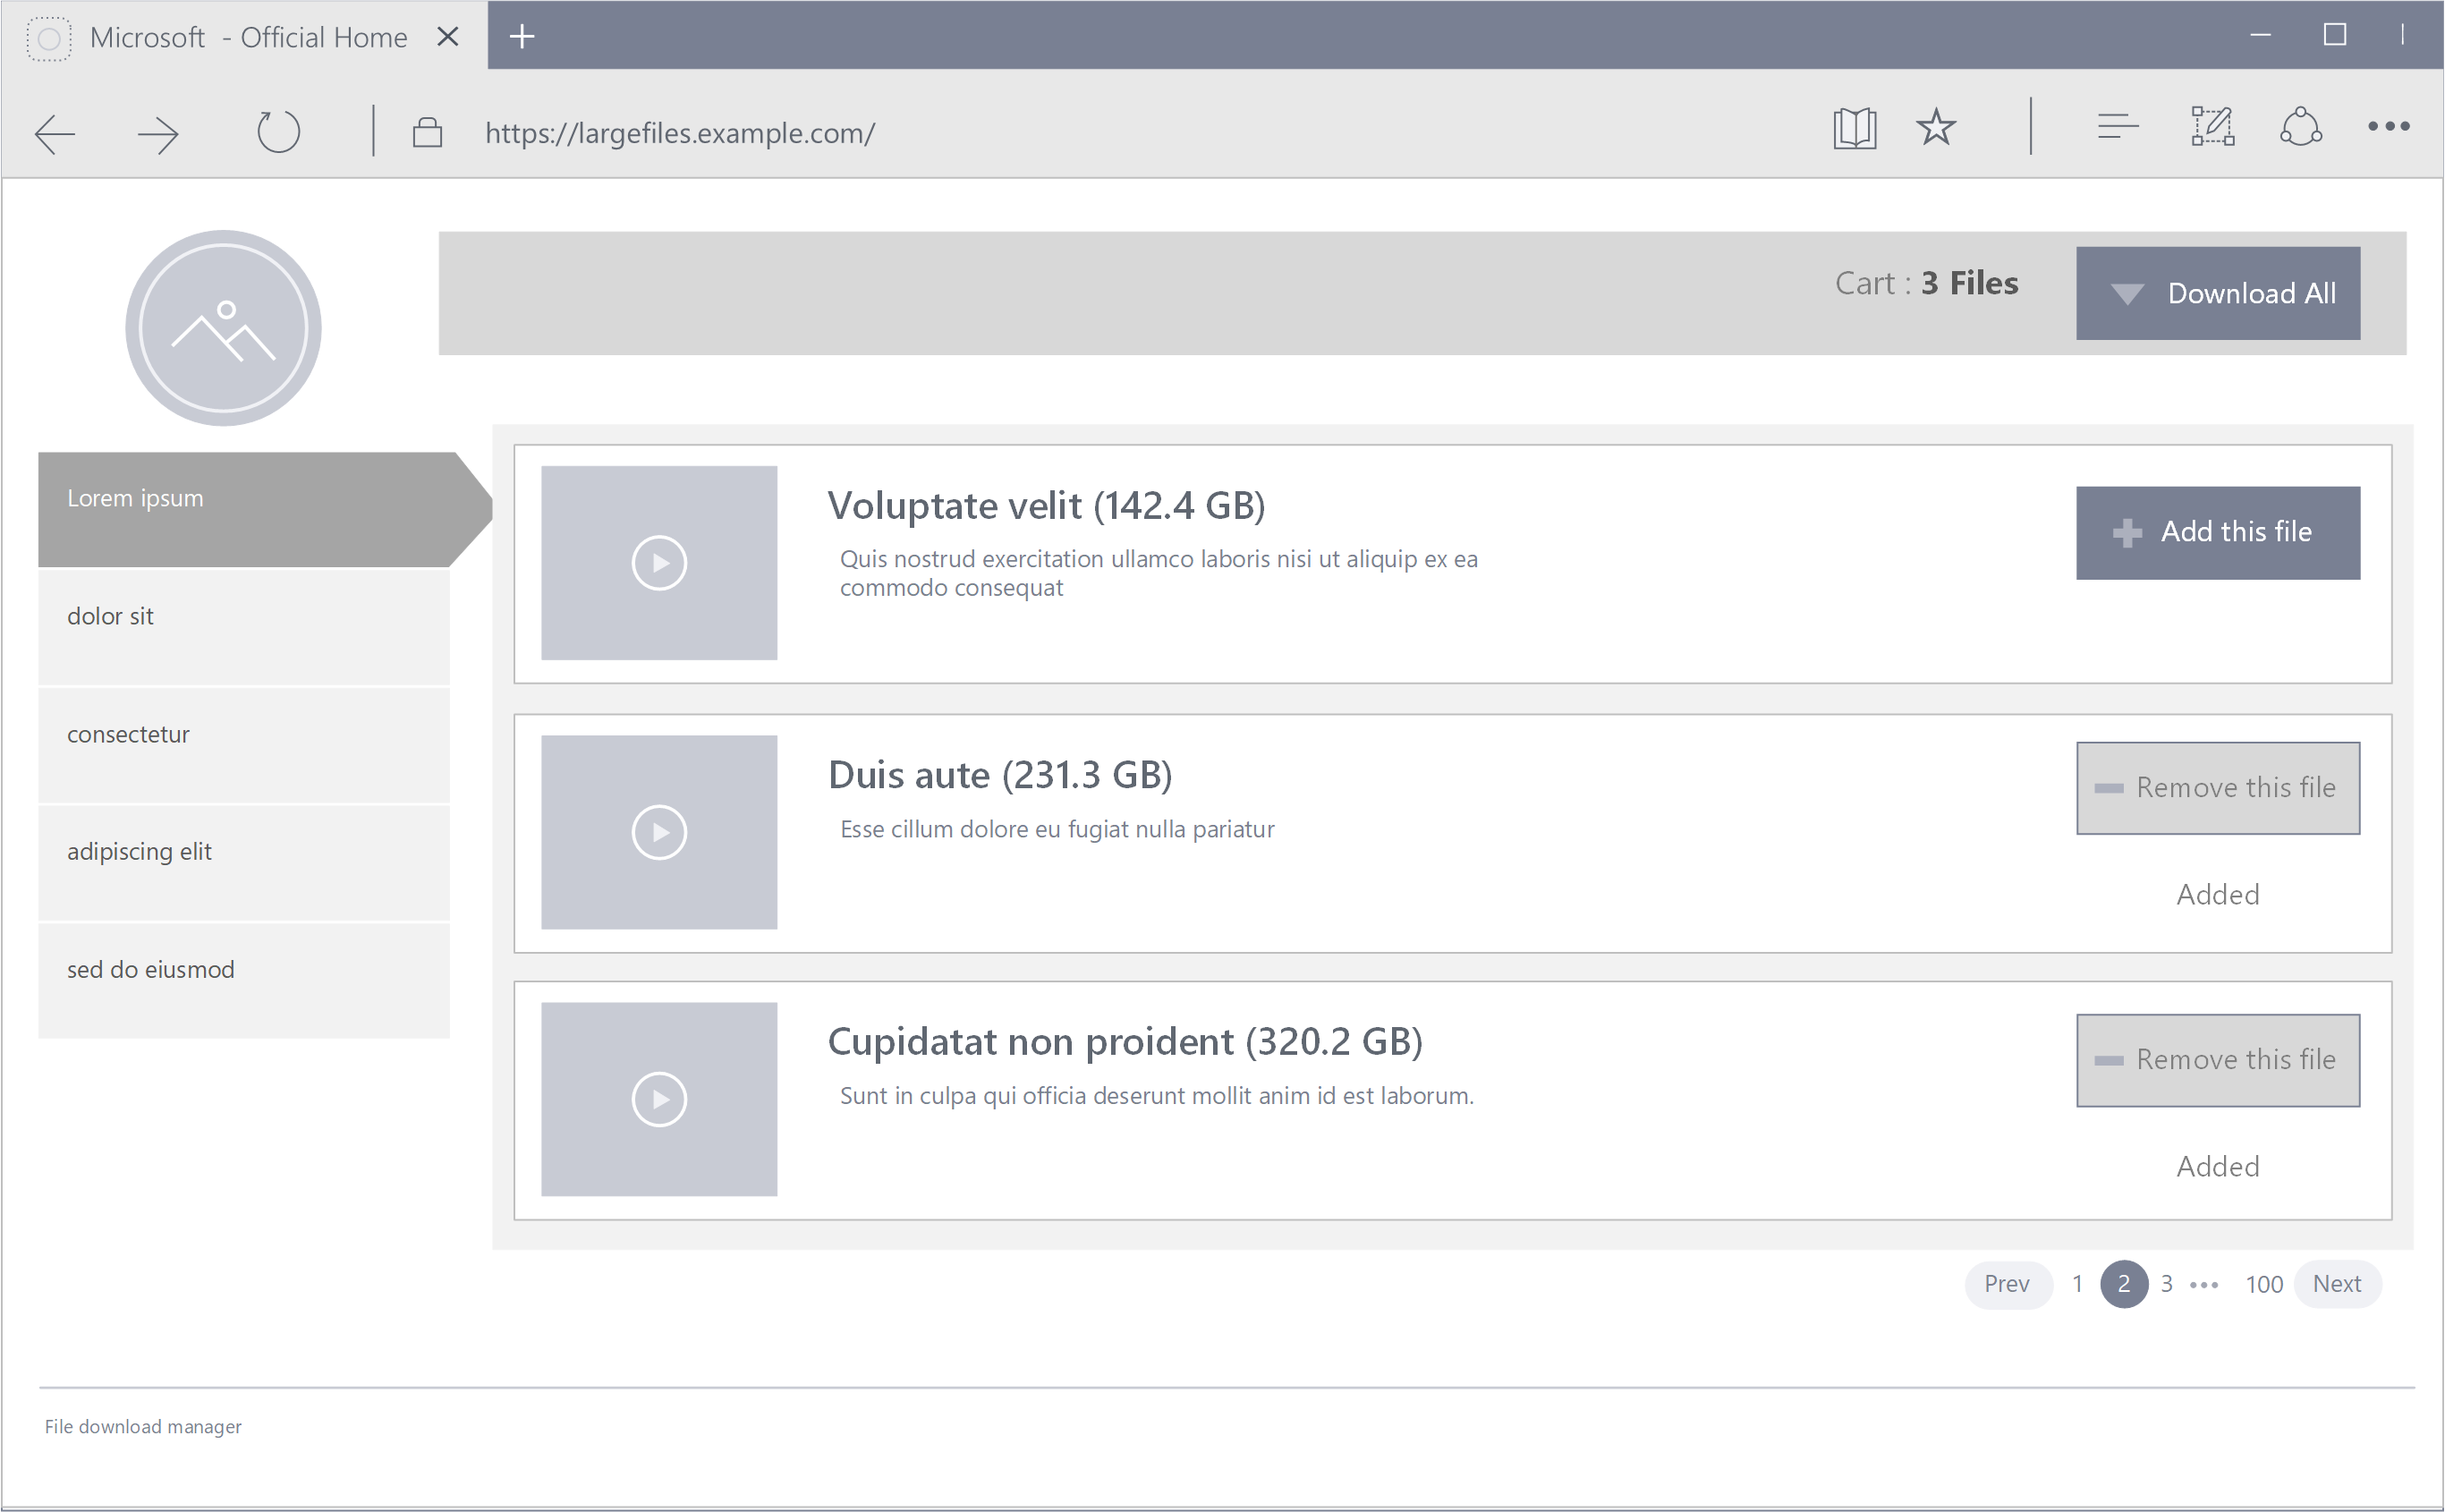
Example architecture to download very large files. Option to collect many files into one file.
This project demonstrates how to download large files using several Azure technologies:
- Azure Functions
- Azure Containers
- Azure Storage
Business Use Case:
- Users add or remove files to the cart
- Selecting
Download Allwill package selected files into one download
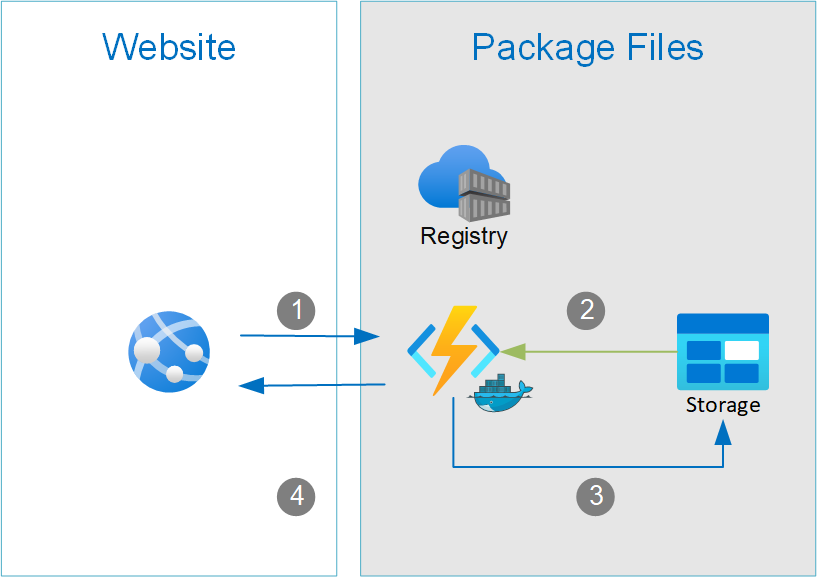
Locacal Architecture:
- The website sends a list of filenames to an Azure Function.
- Azure Functions retrieves the files and bundles them into a new package.
- Azure Functions saves the package in blob storage.
- Azure Functions returns a link to the newly uploaded package file.
This setup will deploy the core infrastructure needed to run the the solution:
# Global
export RG_NAME=large_files
export RG_REGION=westus
export STORAGE_ACCOUNT_NAME=largefilessa

# Container Instance
export ACR_REGISTRY_NAME=packagefiles
export ACR_USER=sp_largefileuser
export CONTAINER_IMAGE_NAME=packagefiles

# Function App
export FX_PLAN_NAME=largefilesplan
export FX_NAME=largefiles
export FX_RUNTIME=python
Create a resource group for this project
az group create --name $RG_NAME --location $RG_REGIONCreate a storage account.
az storage account create -n $STORAGE_ACCOUNT_NAME -g $RG_NAME -l $RG_REGION --sku Standard_LRSaz acr create --resource-group $RG_NAME --name $CONTAINER_NAME --sku Basic#Build image
docker build --pull --rm -f "dockerfile" -t $CONTAINER_IMAGE_NAME:latest "."
#Tag
docker tag $CONTAINER_IMAGE_NAME:latest $ACR_REGISTRY_NAME.azurecr.io/$CONTAINER_IMAGE_NAME:latest
# Push to Registry
az acr login --name $ACR_REGISTRY_NAME
docker push $ACR_REGISTRY_NAME.azurecr.io/$CONTAINER_IMAGE_NAME:latest# Create identity
az ad sp create-for-rbac --name $ACR_USER --skip-assignment --sdk-auth > local-sp.json
# Create the role assignment
ACR_REGISTRY_ID=$(az acr show --name $ACR_REGISTRY_NAME --query id --output tsv)
ACR_USER_ID=$(cat local-sp.json | grep clientId | awk -F\" '{print $4}')
az role assignment create --assignee $ACR_USER_ID --scope $ACR_REGISTRY_ID --role acrpull
Create a function app using a Private ACR image.
ACR_PASSWORD=$(cat local-sp.json | grep clientSecret | awk -F\" '{print $4}')

az functionapp plan create -g $RG_NAME -n $FX_PLAN_NAME --min-instances 1 --max-burst 3 --sku EP1 --is-linux true

az functionapp create -n $FX_NAME -g $RG_NAME -s $STORAGE_ACCOUNT_NAME --plan $FX_PLAN_NAME --runtime python --runtime-version 3.7 --deployment-container-image-name $ACR_REGISTRY_NAME.azurecr.io/$CONTAINER_IMAGE_NAME:latest --docker-registry-server-password $ACR_PASSWORD --docker-registry-server-user $ACR_USER_ID --functions-version 3 --os-type=LinuxSetup your dev environment by creating a virtual environment
# virtualenv \path\to\.venv -p path\to\specific_version_python.exe
python -m venv .venv
source .venv\scripts\activate

deactivateThis project enforces quite strict PEP8 and PEP257 (Docstring Conventions) compliance on all code submitted.
We use Black for uncompromised code formatting.
Summary of the most relevant points:
- Comments should be full sentences and end with a period.
- Imports should be ordered.
- Constants and the content of lists and dictionaries should be in alphabetical order.
- It is advisable to adjust IDE or editor settings to match those requirements.
Prefer f-strings over % or str.format.
#New
f"{some_value} {some_other_value}"
# Old, wrong
"{} {}".format("New", "style")
"%s %s" % ("Old", "style")
One exception is for logging which uses the percentage formatting. This is to avoid formatting the log message when it is suppressed.
_LOGGER.info("Can't connect to the webservice %s at %s", string1, string2)You'll need to install the test dependencies into your Python environment:
pip3 install -r requirements_dev.txtNow that you have all test dependencies installed, you can run linting and tests on the project:
isort .
codespell  --skip=".venv"
black LocalFunctionsProject
flake8 LocalFunctionsProject
pylint LocalFunctionsProject
pydocstyle LocalFunctionsProject- Dev Setup - Azure CLI https://docs.microsoft.com/en-us/cli/azure/install-azure-cli-linux?pivots=apt
- Dev Setup - VS Code on Windows WSL - https://docs.microsoft.com/en-us/windows/wsl/tutorials/wsl-vscode
- Azure Function App CLI docs https://docs.microsoft.com/en-us/cli/azure/functionapp?view=azure-cli-latest
- Python Azure SDK Storage https://docs.microsoft.com/en-us/azure/developer/python/azure-sdk-example-storage-use?tabs=cmd
- Azure Function Deployments https://docs.microsoft.com/en-us/azure/azure-functions/functions-deployment-technologies
- Azure Functions on a Custom Container https://docs.microsoft.com/en-us/Azure/azure-functions/functions-create-function-linux-custom-image?tabs=bash%2Cportal&pivots=programming-language-python
- Azure Functions Supported Docker Base https://hub.docker.com/_/microsoft-azure-functions-base

