This sample uses Auth0 along with PyJWT to protect endpoints in a Flask API server.
The add-authorization branch offers a working API server that exposes a public endpoint along with two protected endpoints. Each endpoint returns a different type of message: public, protected, and admin.
The GET /api/messages/protected and GET /api/messages/admin endpoints are protected against unauthorized access. Any requests that contain a valid access token in their authorization header can access the protected and admin data.
However, you should require that only access tokens that contain a read:admin-messages permission can access the admin data, which is referred to as Role-Based Access Control (RBAC).
Create a virtual environment under the root project directory:
macOS/Linux:
python3 -m venv venvWindows:
py -3 -m venv venvActivate the virtual environment:
macOS/Linux:
. venv/bin/activateWindows:
venv\Scripts\activateExecute the following command to install the project dependencies:
pip install -r requirements.txt-
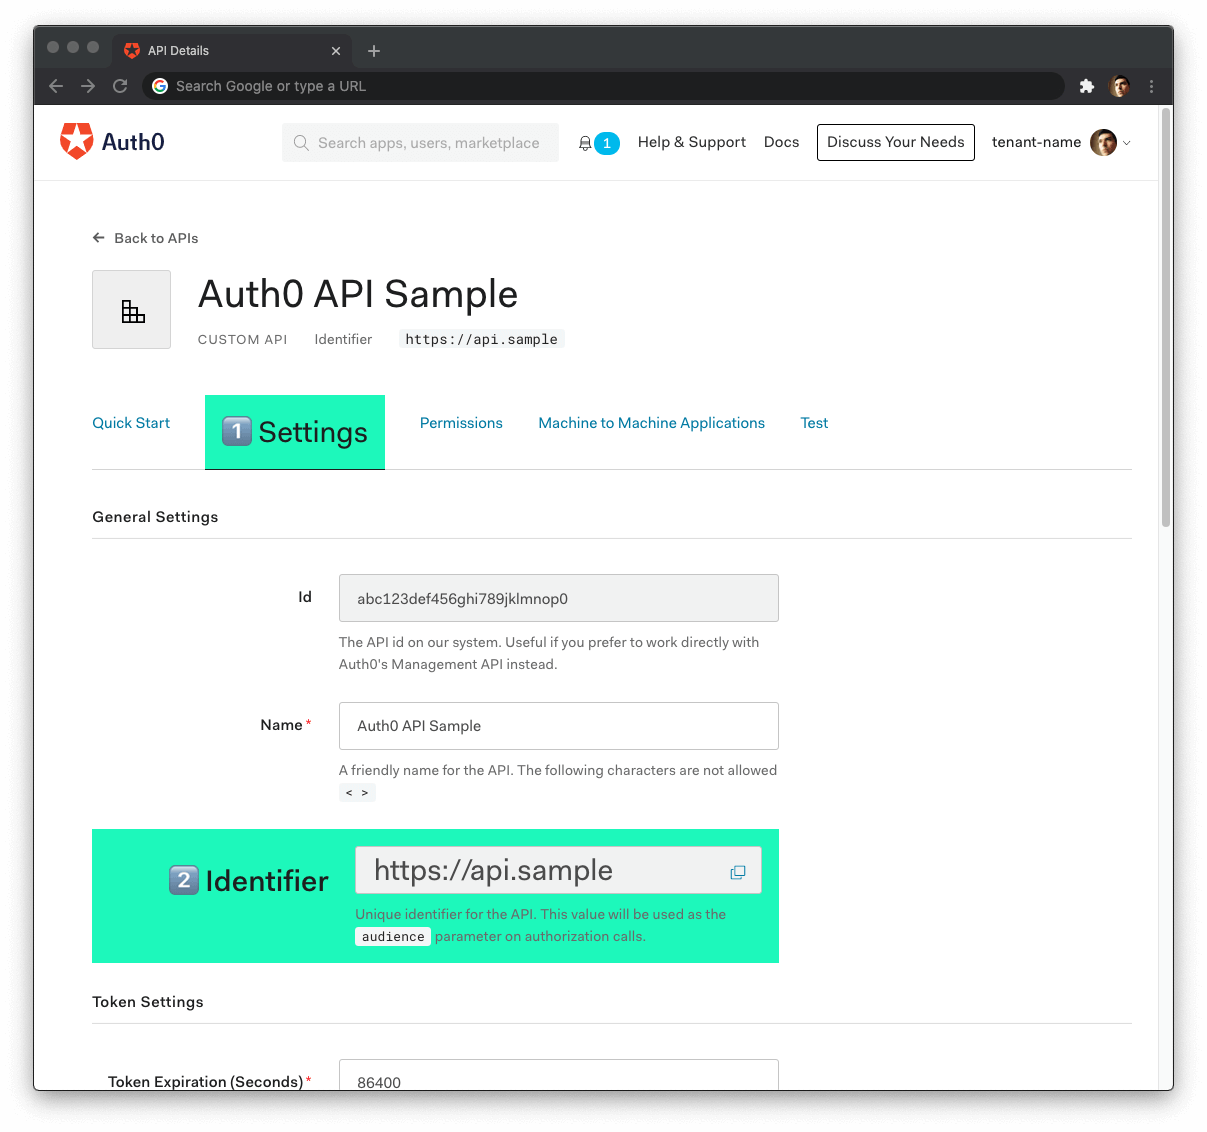
Open the APIs section of the Auth0 Dashboard.
-
Click on the Create API button.
-
Provide a Name value such as Hello World API Server.
-
Set its Identifier to
https://hello-world.example.comor any other value of your liking. -
Leave the signing algorithm as
RS256as it's the best option from a security standpoint. -
Click on the Create button.
View "Register APIs" document for more details.
Create a .env file under the root project directory and populate it with the following content:
CLIENT_ORIGIN_URL=http://localhost:4040
AUTH0_AUDIENCE=https://hello-world.example.com
AUTH0_DOMAIN=
Get the values for AUTH0_AUDIENCE and AUTH0_DOMAIN in .env from your Auth0 API registration page in the Dashboard.
Head back to your Auth0 API page, and follow these steps to get the Auth0 Audience:
-
Click on the "Settings" tab.
-
Locate the "Identifier" field and copy its value.
-
Paste the "Identifier" value as the value of
AUTH0_AUDIENCEin.env.
Now, follow these steps to get the Auth0 Domain value:
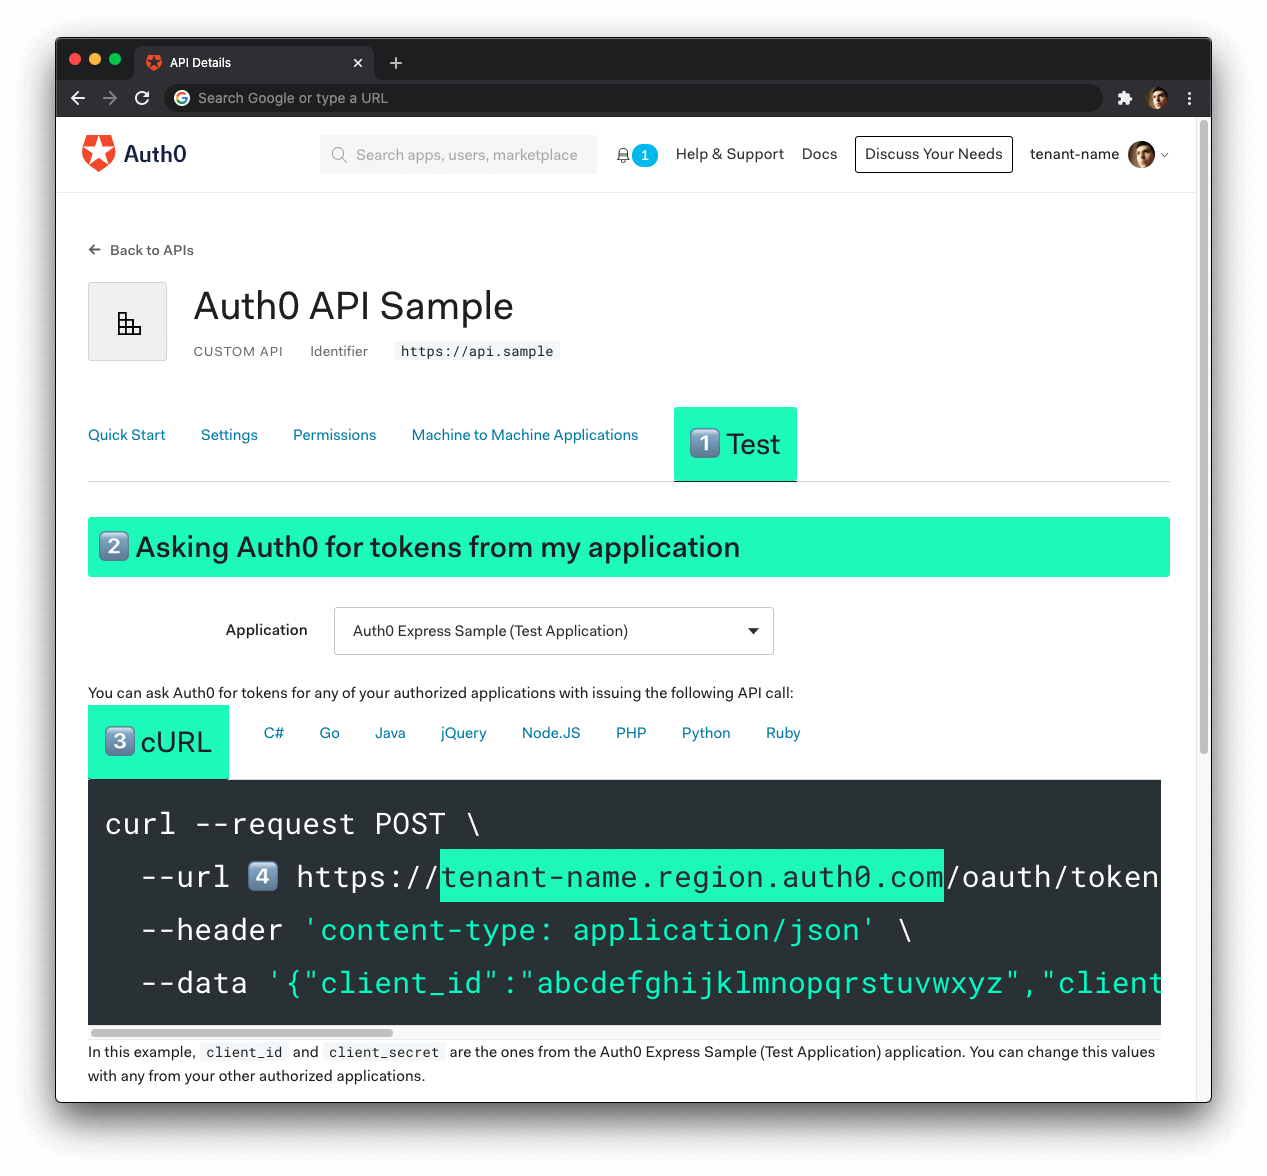
- Click on the "Test" tab.
- Locate the section called "Asking Auth0 for tokens from my application".
- Click on the cURL tab to show a mock
POSTrequest. - Copy your Auth0 domain, which is part of the
--urlparameter value:tenant-name.region.auth0.com. - Paste the Auth0 domain value as the value of
AUTH0_DOMAINin.env.
Tips to get the Auth0 Domain
-
The Auth0 Domain is the substring between the protocol,
https://and the path/oauth/token. -
The Auth0 Domain follows this pattern:
tenant-name.region.auth0.com. -
The
regionsubdomain (au,us, oreu) is optional. Some Auth0 Domains don't have it.
Run the project in development mode:
flask runThe GET /api/messages/admin endpoint requires the access token to contain the read:admin-messages permission. The best way to simulate that client-server secured request is to use any of the compatible Hello World client apps to log in as a user that has that permission.
You can use the Auth0 Dashboard to create an admin role and assign it the read:admin-messages permission. Then, you can assign the admin role to any user that you want to access the /admin endpoint.
If you need help doing so, check out the following resources:
The API server defines the following endpoints:
GET /api/messages/publicStatus: 200 OK{
"message": "The API doesn't require an access token to share this message."
}You need to protect this endpoint using Auth0.
GET /api/messages/protectedStatus: 200 OK{
"message": "The API successfully validated your access token."
}You need to protect this endpoint using Auth0 and Role-Based Access Control (RBAC).
GET /api/messages/adminStatus: 200 OK{
"message": "The API successfully recognized you as an admin."
}Status: Corresponding 400 status code{
"message": "Message that describes the error that took place."
}Status: 500 Internal Server Error{
"message": "Message that describes the error that took place."
}