Styx is an entirely serverless assumerole management platform. It's great for MSSPs, Consulting Firms, and AWS Power Users.

When you have lots of accounts, especially of those accounts are spread across many organizations, it can be a pain to track those account numbers and roles. AWS SSO is great for some use-cases, but sometimes good ol' AssumeRole is the way to go. With Styx you can organize and easily access your roles, limit cross-account access based on IAM user tags, produce consistent and reusable role trust policies, rapidly access them from anywhere, and switch between them effortlessly.
One config file, one command to run. That's about it.
Group accounts by Organizational Unit, Customer, Release Stage, or any other strategy as you see fit.
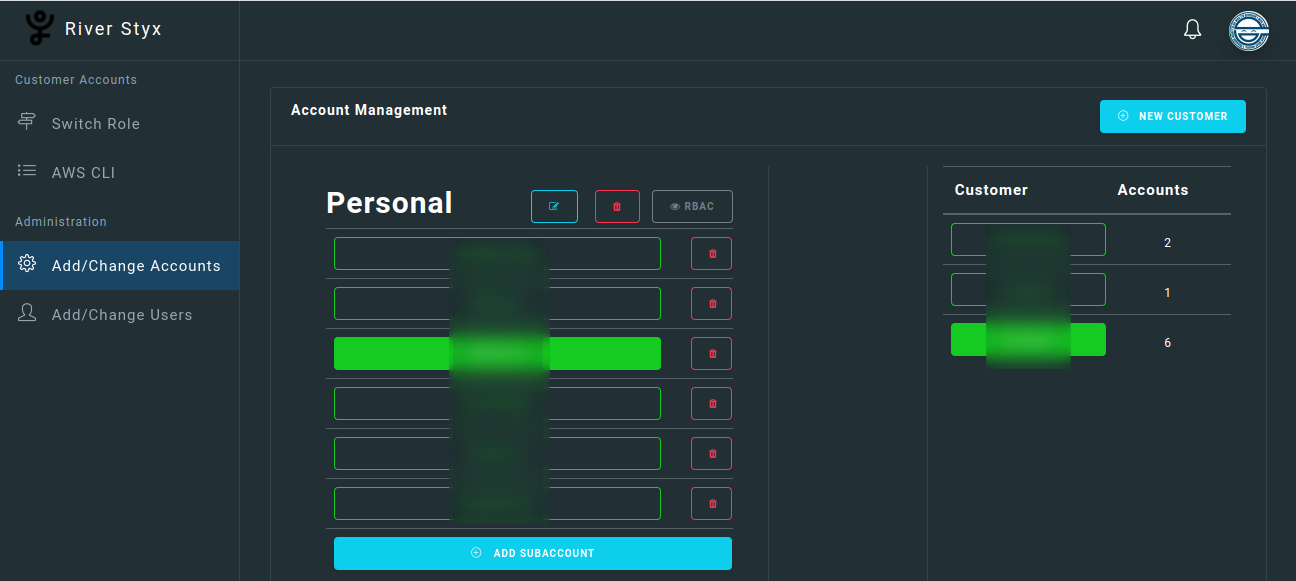
Control access to cross-account roles through granular tag-based authorizations.

Get the perfect cross-account, granular-scope, and reusable role trust policy in one click.

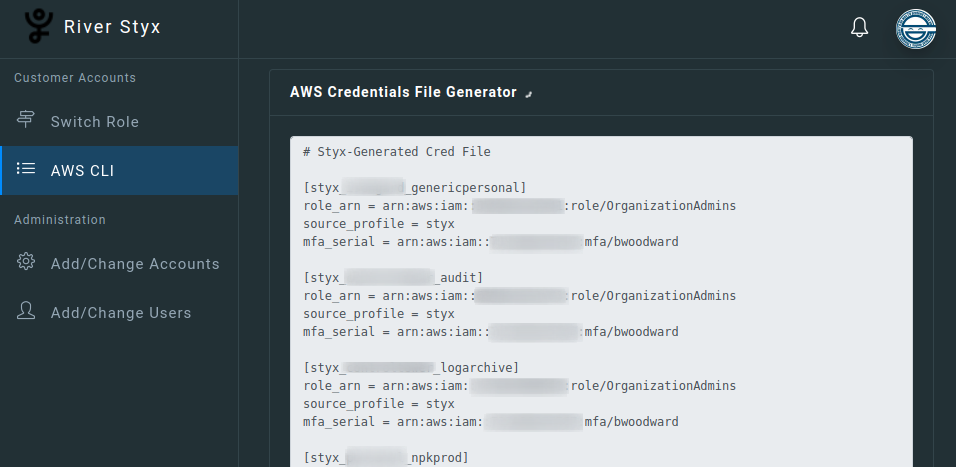
No more manual edits to ~/.aws/credentials. - Styx lets you generate AssumeRole entries for every role you're authorized to access.
Styx facilitates cross-account access without requiring any access to security-impacting secrets.
Brokering authorizations is always a bad idea. Instead, Styx merely facilitates authentication and authorization through cloud-native components.
Styx requires that you have the following installed:
- awscli (> v1.16)
- terraform (v0.13)
- jq
- jsonnet
- npm
$ git clone styx .
$ cd styx
styx$ cp settings.json.sample settings.json
Edit settings.json to taste. You can use an existing S3 bucket or specify a new one, and Styx will handle it appropriately. Most importantly, ensure that the 'awsProfile' value matches the profile name in ~/.aws/credentials:
[profileName]
aws_access_key_id = ...
aws_secret_access_key = ...
If you have multiple versions of Terraform installed, you can provide a path as an optional argument to the deploy.
styx$ ./deploy.sh [/path/to/terraform_v0.13]Styx will use the specified AWS cli profile to fully deploy Styx and provision the first user. If you'd like to change the configuration, simply run ./deploy.sh again afterward. Once it's done, you'll receive an email with the URL and credentials to your deployment.
NOTE: CloudFront may take several minutes to come up after the deployment is done. This is normal. Grab yourself a cup of coffee after the deploy and give the cloud a few minutes to do its magic.
You can change the settings of an install without losing your existing campaigns. Edit settings.json as necessary, then rerun deploy.sh. That easy!
styx$ vim settings.json
styx$ ./deploy.shYou can completely turn down styx and delete all of its data from AWS with a single command:
styx$ terraform destroy