Yuanhao Cai, Jing Lin, Zudi Lin, Haoqian Wang, Yulun Zhang, Hanspeter Pfister, Radu Timofte, Luc Van Gool
The first two authors contribute equally to this work
- 2024.03.21 : Our methods Retinexformer and MST++ (NTIRE 2022 Spectral Reconstruction Challenge Winner) ranked top-2 in the NTIRE 2024 Challenge on Low Light Enhancement. Code, pre-trained models, training logs, and enhancement results will be released in the repo of Retinexformer. Stay tuned! 🚀
- 2024.02.15 : NTIRE 2024 Challenge on Low Light Enhancement begins. Welcome to use our Retinexformer or MST++ (NTIRE 2022 Spectral Reconstruction Challenge Winner) to participate in this challenge! 🏆
- 2023.11.02 : Our MST++ is added to the Awesome-Transformer-Attention collection. 💫
- 2022.10.24 : We have provided Params and FLOPS evaluating function. Feel free to check and use them.
- 2022.10.23 : We have provided some visualization tool functions. Please feel free to check and use them.
- 2022.04.17 : Our paper has been accepted by CVPRW 2022, code and models have been released. 🚀
- 2022.04.02 : We win the First place of NTIRE 2022 Challenge on Spectral Reconstruction from RGB. 🏆
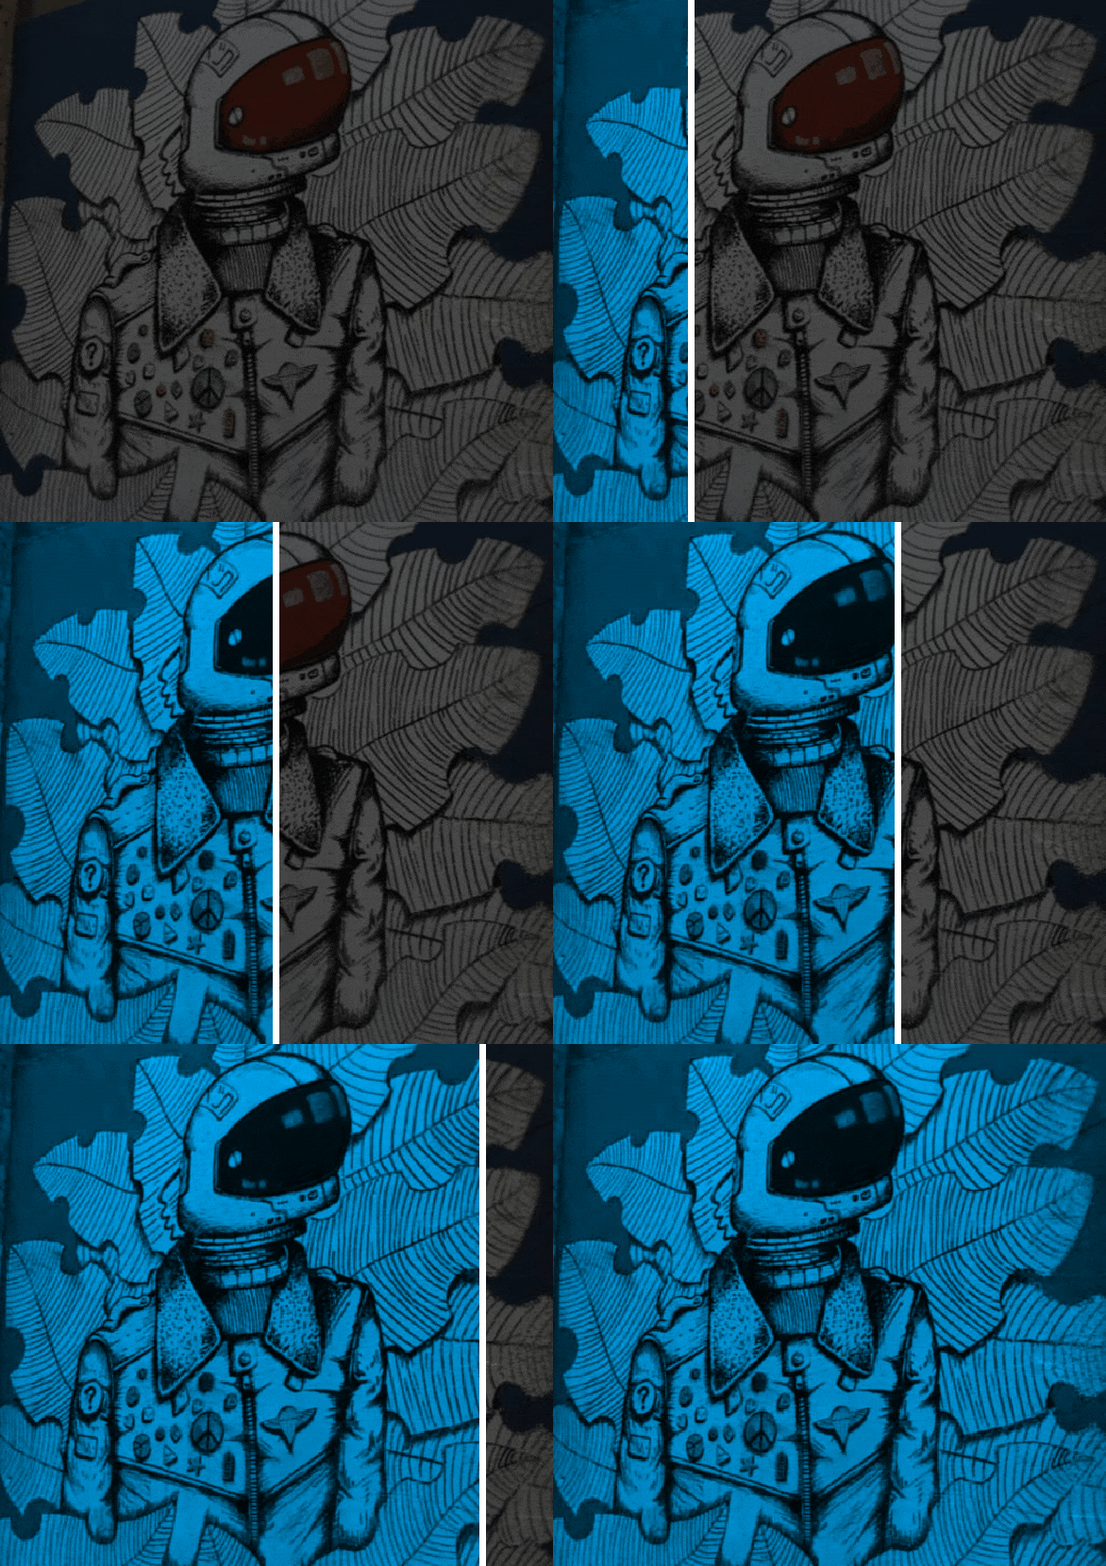
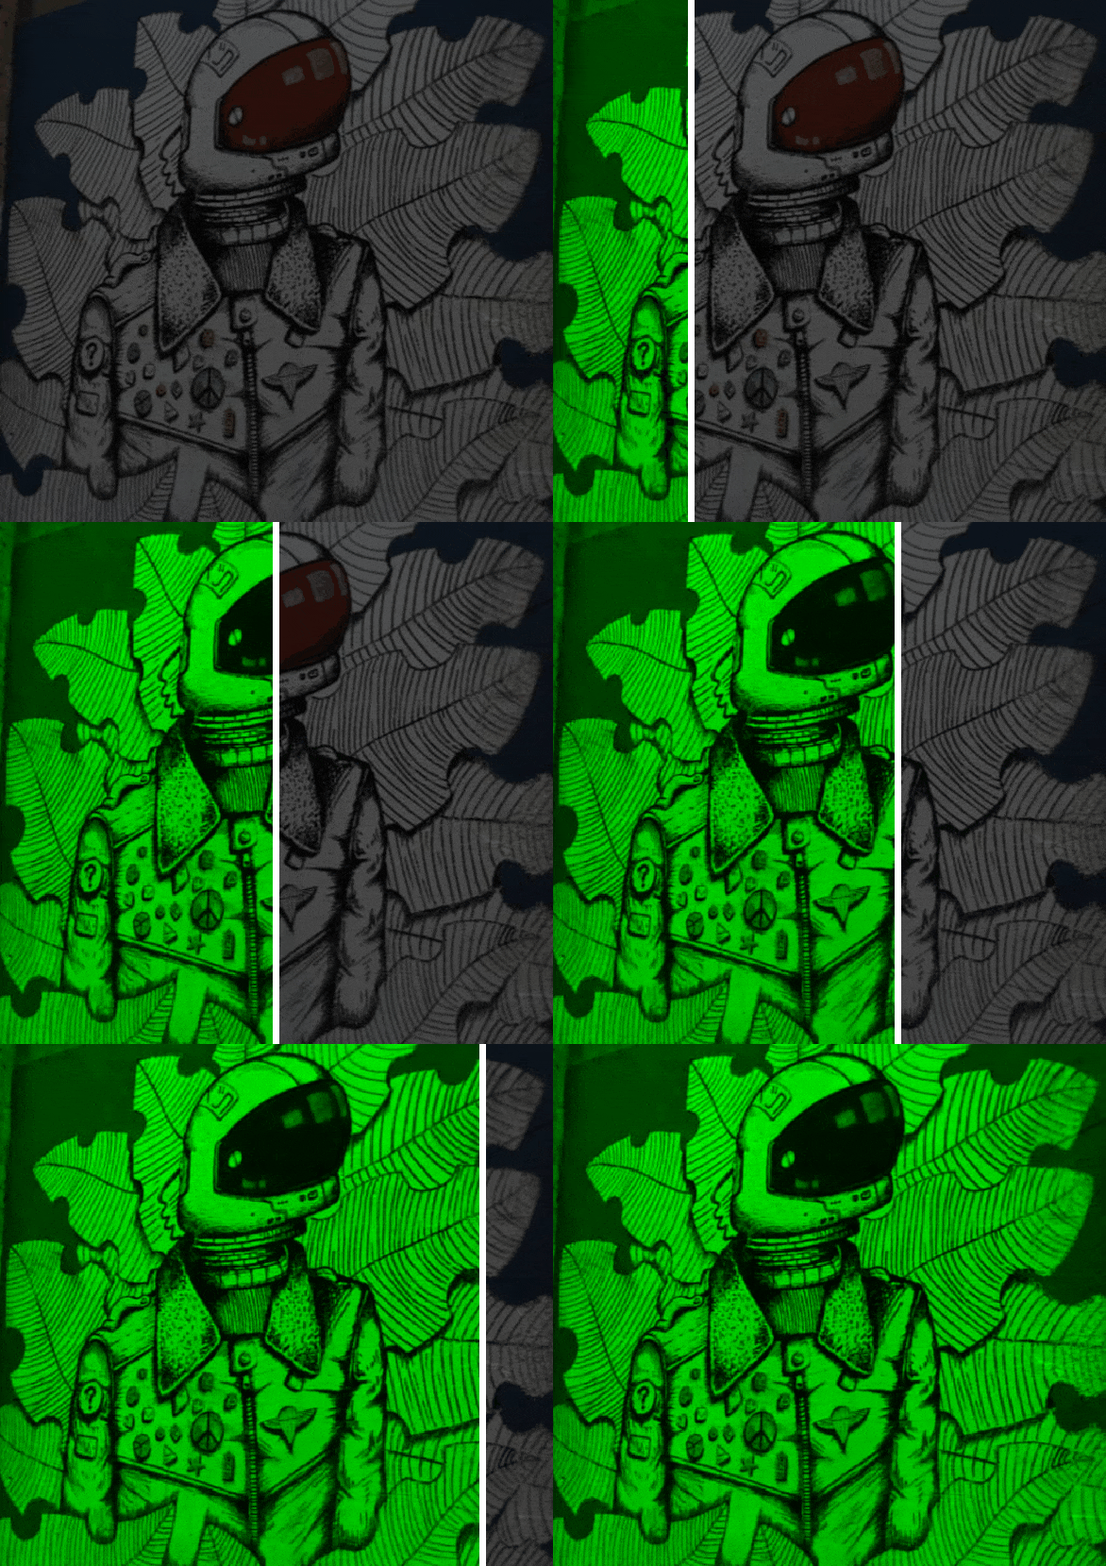
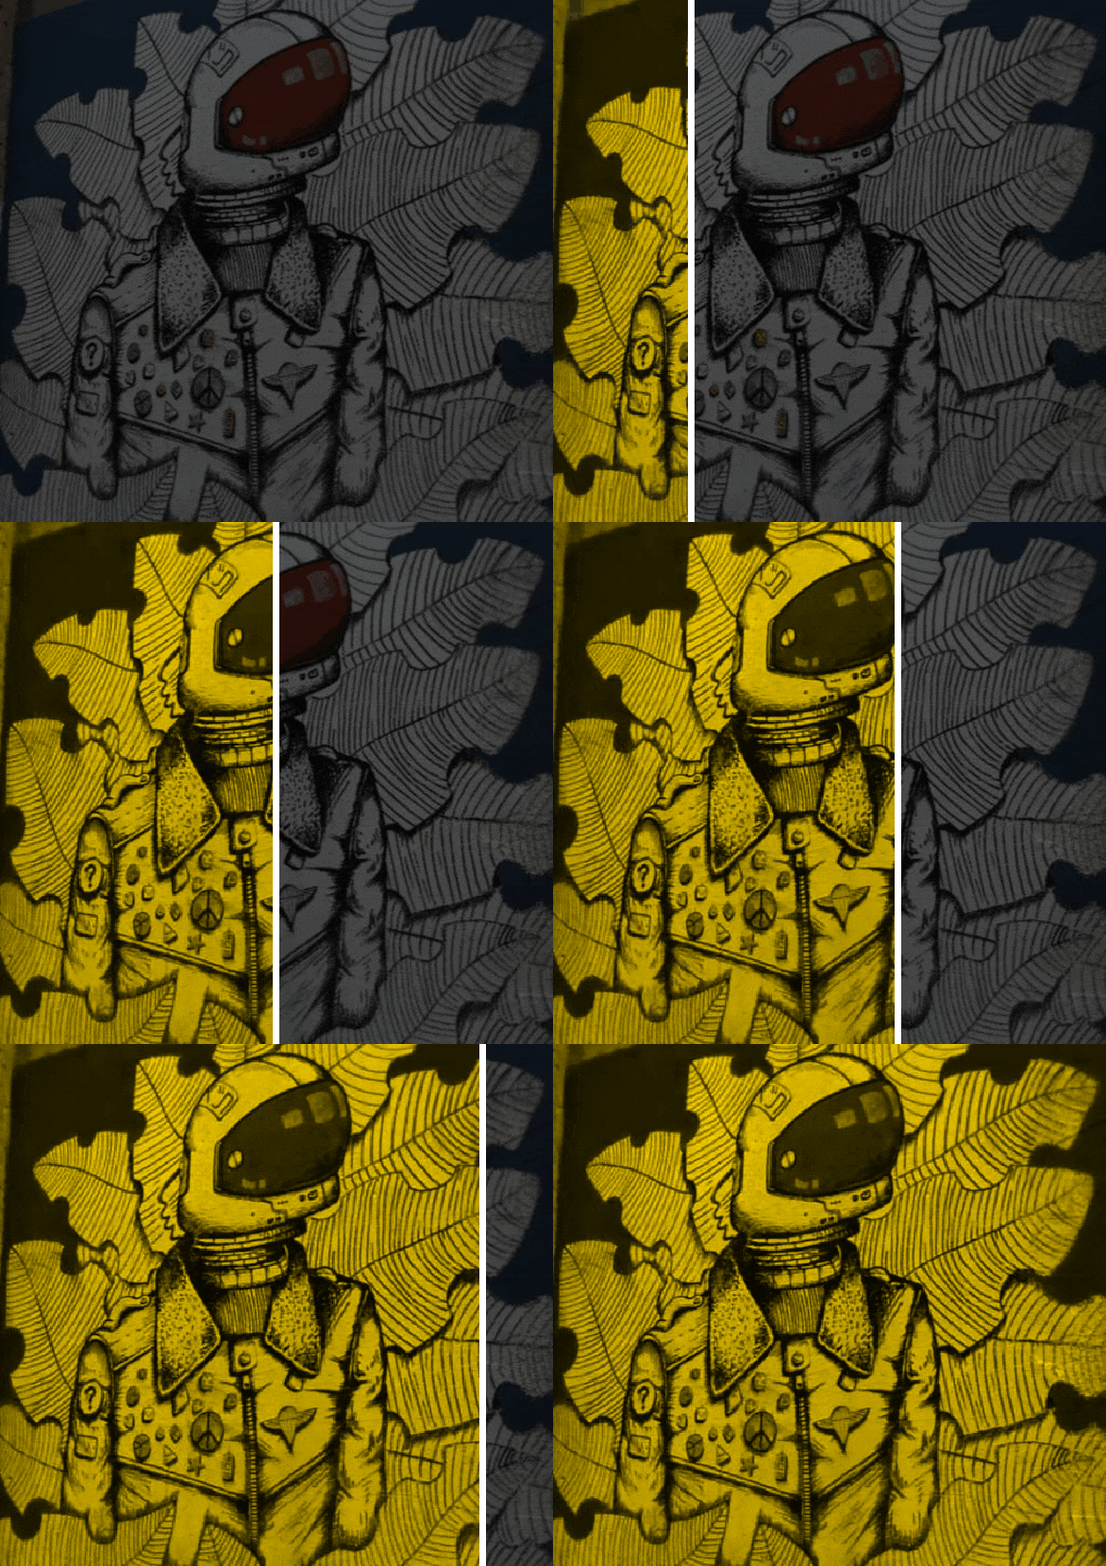
| 480 nm | 520 nm | 580 nm | 660 nm |
|---|---|---|---|
 |
 |
 |
 |
Abstract: Existing leading methods for spectral reconstruction (SR) focus on designing deeper or wider convolutional neural networks (CNNs) to learn the end-to-end mapping from the RGB image to its hyperspectral image (HSI). These CNN-based methods achieve impressive restoration performance while showing limitations in capturing the long-range dependencies and self-similarity prior. To cope with this problem, we propose a novel Transformer-based method, Multi-stage Spectral-wise Transformer (MST++), for efficient spectral reconstruction. In particular, we employ Spectral-wise Multi-head Self-attention (S-MSA) that is based on the HSI spatially sparse while spectrally self-similar nature to compose the basic unit, Spectral-wise Attention Block (SAB). Then SABs build up Single-stage Spectral-wise Transformer (SST) that exploits a U-shaped structure to extract multi-resolution contextual information. Finally, our MST++, cascaded by several SSTs, progressively improves the reconstruction quality from coarse to fine. Comprehensive experiments show that our MST++ significantly outperforms other state-of-the-art methods. In the NTIRE 2022 Spectral Reconstruction Challenge, our approach won the First place.
Our MST++ is mainly based on our work MST, which is accepted by CVPR 2022.
This repo is a baseline and toolbox containing 11 image restoration algorithms for Spectral Reconstruction.
We are going to enlarge our model zoo in the future.
Supported algorithms:
| Method | Params (M) | FLOPS (G) | MRAE | RMSE | PSNR | Model Zoo |
|---|---|---|---|---|---|---|
| HSCNN+ | 4.65 | 304.45 | 0.3814 | 0.0588 | 26.36 | Google Drive / Baidu Disk |
| HRNet | 31.70 | 163.81 | 0.3476 | 0.0550 | 26.89 | Google Drive / Baidu Disk |
| EDSR | 2.42 | 158.32 | 0.3277 | 0.0437 | 28.29 | Google Drive / Baidu Disk |
| AWAN | 4.04 | 270.61 | 0.2500 | 0.0367 | 31.22 | Google Drive / Baidu Disk |
| HDNet | 2.66 | 173.81 | 0.2048 | 0.0317 | 32.13 | Google Drive / Baidu Disk |
| HINet | 5.21 | 31.04 | 0.2032 | 0.0303 | 32.51 | Google Drive / Baidu Disk |
| MIRNet | 3.75 | 42.95 | 0.1890 | 0.0274 | 33.29 | Google Drive / Baidu Disk |
| Restormer | 15.11 | 93.77 | 0.1833 | 0.0274 | 33.40 | Google Drive / Baidu Disk |
| MPRNet | 3.62 | 101.59 | 0.1817 | 0.0270 | 33.50 | Google Drive / Baidu Disk |
| MST-L | 2.45 | 32.07 | 0.1772 | 0.0256 | 33.90 | Google Drive / Baidu Disk |
| MST++ | 1.62 | 23.05 | 0.1645 | 0.0248 | 34.32 | Google Drive / Baidu Disk |
Our MST++ siginificantly outperforms other methods while requiring cheaper Params and FLOPS.
Note: access code for Baidu Disk is mst1.
-
Python 3 (Recommend to use Anaconda)
-
NVIDIA GPU + CUDA
-
Python packages:
cd MST-plus-plus
pip install -r requirements.txt
-
Download training spectral images (Google Drive / Baidu Disk, code:
mst1), training RGB images (Google Drive / Baidu Disk), validation spectral images (Google Drive / Baidu Disk), validation RGB images (Google Drive / Baidu Disk), and testing RGB images (Google Drive / Baidu Disk) from the competition website of NTIRE 2022 Spectral Reconstruction Challenge. -
Place the training spectral images and validation spectral images to
/MST-plus-plus/dataset/Train_Spec/. -
Place the training RGB images and validation RGB images to
/MST-plus-plus/dataset/Train_RGB/. -
Place the testing RGB images to
/MST-plus-plus/dataset/Test_RGB/. -
Then this repo is collected as the following form:
|--MST-plus-plus
    |--test_challenge_code
    |--test_develop_code
    |--train_code
    |--dataset
        |--Train_Spec
            |--ARAD_1K_0001.mat
            |--ARAD_1K_0002.mat
            :
            |--ARAD_1K_0950.mat
  	|--Train_RGB
            |--ARAD_1K_0001.jpg
            |--ARAD_1K_0002.jpg
            :
            |--ARAD_1K_0950.jpg
        |--Test_RGB
            |--ARAD_1K_0951.jpg
            |--ARAD_1K_0952.jpg
            :
            |--ARAD_1K_1000.jpg
        |--split_txt
            |--train_list.txt
            |--valid_list.txt
note:If you train on your custom dataset, please use theLoss_MRAE_customfunction intrain_code/utils.pyto avoid Nan problem
(1) Download the pretrained model zoo from (Google Drive / Baidu Disk, code: mst1) and place them to /MST-plus-plus/test_develop_code/model_zoo/.
(2) Run the following command to test the model on the validation RGB images.
cd /MST-plus-plus/test_develop_code/

# test MST++
python test.py --data_root ../dataset/  --method mst_plus_plus --pretrained_model_path ./model_zoo/mst_plus_plus.pth --outf ./exp/mst_plus_plus/  --gpu_id 0

# test MST-L
python test.py --data_root ../dataset/  --method mst --pretrained_model_path ./model_zoo/mst.pth --outf ./exp/mst/  --gpu_id 0

# test MIRNet
python test.py --data_root ../dataset/  --method mirnet --pretrained_model_path ./model_zoo/mirnet.pth --outf ./exp/mirnet/  --gpu_id 0

# test HINet
python test.py --data_root ../dataset/  --method hinet --pretrained_model_path ./model_zoo/hinet.pth --outf ./exp/hinet/  --gpu_id 0

# test MPRNet
python test.py --data_root ../dataset/  --method mprnet --pretrained_model_path ./model_zoo/mprnet.pth --outf ./exp/mprnet/  --gpu_id 0

# test Restormer
python test.py --data_root ../dataset/  --method restormer --pretrained_model_path ./model_zoo/restormer.pth --outf ./exp/restormer/  --gpu_id 0

# test EDSR
python test.py --data_root ../dataset/  --method edsr --pretrained_model_path ./model_zoo/edsr.pth --outf ./exp/edsr/  --gpu_id 0

# test HDNet
python test.py --data_root ../dataset/  --method hdnet --pretrained_model_path ./model_zoo/hdnet.pth --outf ./exp/hdnet/  --gpu_id 0

# test HRNet
python test.py --data_root ../dataset/  --method hrnet --pretrained_model_path ./model_zoo/hrnet.pth --outf ./exp/hrnet/  --gpu_id 0

# test HSCNN+
python test.py --data_root ../dataset/  --method hscnn_plus --pretrained_model_path ./model_zoo/hscnn_plus.pth --outf ./exp/hscnn_plus/  --gpu_id 0

# test AWAN
python test.py --data_root ../dataset/  --method awan --pretrained_model_path ./model_zoo/awan.pth --outf ./exp/awan/  --gpu_id 0
The results will be saved in /MST-plus-plus/test_develop_code/exp/ in the mat format and the evaluation metric (including MRAE,RMSE,PSNR) will be printed.
We have provided a function my_summary() in test_develop_code/utils.py, please use this function to evaluate the parameters and computational complexity of the models, especially the Transformers as
from utils import my_summary
my_summary(MST_Plus_Plus(), 256, 256, 3, 1)(1) Download the pretrained model zoo from (Google Drive / Baidu Disk, code: mst1) and place them to /MST-plus-plus/test_challenge_code/model_zoo/.
(2) Run the following command to test the model on the testing RGB images.
cd /MST-plus-plus/test_challenge_code/

# test MST++
python test.py --data_root ../dataset/  --method mst_plus_plus --pretrained_model_path ./model_zoo/mst_plus_plus.pth --outf ./exp/mst_plus_plus/  --gpu_id 0

# test MST-L
python test.py --data_root ../dataset/  --method mst --pretrained_model_path ./model_zoo/mst.pth --outf ./exp/mst/  --gpu_id 0

# test MIRNet
python test.py --data_root ../dataset/  --method mirnet --pretrained_model_path ./model_zoo/mirnet.pth --outf ./exp/mirnet/  --gpu_id 0

# test HINet
python test.py --data_root ../dataset/  --method hinet --pretrained_model_path ./model_zoo/hinet.pth --outf ./exp/hinet/  --gpu_id 0

# test MPRNet
python test.py --data_root ../dataset/  --method mprnet --pretrained_model_path ./model_zoo/mprnet.pth --outf ./exp/mprnet/  --gpu_id 0

# test Restormer
python test.py --data_root ../dataset/  --method restormer --pretrained_model_path ./model_zoo/restormer.pth --outf ./exp/restormer/  --gpu_id 0

# test EDSR
python test.py --data_root ../dataset/  --method edsr --pretrained_model_path ./model_zoo/edsr.pth --outf ./exp/edsr/  --gpu_id 0

# test HDNet
python test.py --data_root ../dataset/  --method hdnet --pretrained_model_path ./model_zoo/hdnet.pth --outf ./exp/hdnet/  --gpu_id 0

# test HRNet
python test.py --data_root ../dataset/  --method hrnet --pretrained_model_path ./model_zoo/hrnet.pth --outf ./exp/hrnet/  --gpu_id 0

# test HSCNN+
python test.py --data_root ../dataset/  --method hscnn_plus --pretrained_model_path ./model_zoo/hscnn_plus.pth --outf ./exp/hscnn_plus/  --gpu_id 0
The results and submission.zip will be saved in /MST-plus-plus/test_challenge_code/exp/.
To train a model, run
cd /MST-plus-plus/train_code/

# train MST++
python train.py --method mst_plus_plus  --batch_size 20 --end_epoch 300 --init_lr 4e-4 --outf ./exp/mst_plus_plus/ --data_root ../dataset/  --patch_size 128 --stride 8  --gpu_id 0

# train MST-L
python train.py --method mst  --batch_size 20 --end_epoch 300 --init_lr 4e-4 --outf ./exp/mst/ --data_root ../dataset/  --patch_size 128 --stride 8  --gpu_id 0

# train MIRNet
python train.py --method mirnet  --batch_size 20 --end_epoch 300 --init_lr 4e-4 --outf ./exp/mirnet/ --data_root ../dataset/  --patch_size 128 --stride 8  --gpu_id 0

# train HINet
python train.py --method hinet  --batch_size 20 --end_epoch 300 --init_lr 2e-4 --outf ./exp/hinet/ --data_root ../dataset/  --patch_size 128 --stride 8  --gpu_id 0

# train MPRNet
python train.py --method mprnet  --batch_size 20 --end_epoch 300 --init_lr 2e-4 --outf ./exp/mprnet/ --data_root ../dataset/  --patch_size 128 --stride 8  --gpu_id 0

# train Restormer
python train.py --method restormer  --batch_size 20 --end_epoch 300 --init_lr 2e-4 --outf ./exp/restormer/ --data_root ../dataset/  --patch_size 128 --stride 8  --gpu_id 0

# train EDSR
python train.py --method edsr  --batch_size 20 --end_epoch 300 --init_lr 1e-4 --outf ./exp/edsr/ --data_root ../dataset/  --patch_size 128 --stride 8  --gpu_id 0

# train HDNet
python train.py --method hdnet  --batch_size 20 --end_epoch 300 --init_lr 4e-4 --outf ./exp/hdnet/ --data_root ../dataset/  --patch_size 128 --stride 8  --gpu_id 0

# train HRNet
python train.py --method hrnet  --batch_size 20 --end_epoch 300 --init_lr 1e-4 --outf ./exp/hrnet/ --data_root ../dataset/  --patch_size 128 --stride 8  --gpu_id 0

# train HSCNN+
python train.py --method hscnn_plus  --batch_size 20 --end_epoch 300 --init_lr 2e-4 --outf ./exp/hscnn_plus/ --data_root ../dataset/  --patch_size 128 --stride 8  --gpu_id 0

# train AWAN
python train.py --method awan  --batch_size 20 --end_epoch 300 --init_lr 1e-4 --outf ./exp/awan/ --data_root ../dataset/  --patch_size 128 --stride 8  --gpu_id 0
The training log and models will be saved in /MST-plus-plus/train_code/exp/.
(1) Download the pretrained model zoo from (Google Drive / Baidu Disk, code: mst1) and place them to /MST-plus-plus/predict_code/model_zoo/.
(2) Run the following command to reconstruct your own RGB image.
cd /MST-plus-plus/predict_code/

# reconstruct by MST++
python test.py --rgb_path ./demo/ARAD_1K_0912.jpg  --method mst_plus_plus --pretrained_model_path ./model_zoo/mst_plus_plus.pth --outf ./exp/mst_plus_plus/  --gpu_id 0

# reconstruct by MST-L
python test.py --rgb_path ./demo/ARAD_1K_0912.jpg  --method mst --pretrained_model_path ./model_zoo/mst.pth --outf ./exp/mst/  --gpu_id 0

# reconstruct by MIRNet
python test.py --rgb_path ./demo/ARAD_1K_0912.jpg  --method mirnet --pretrained_model_path ./model_zoo/mirnet.pth --outf ./exp/mirnet/  --gpu_id 0

# reconstruct by HINet
python test.py --rgb_path ./demo/ARAD_1K_0912.jpg  --method hinet --pretrained_model_path ./model_zoo/hinet.pth --outf ./exp/hinet/  --gpu_id 0

# reconstruct by MPRNet
python test.py --rgb_path ./demo/ARAD_1K_0912.jpg  --method mprnet --pretrained_model_path ./model_zoo/mprnet.pth --outf ./exp/mprnet/  --gpu_id 0

# reconstruct by Restormer
python test.py --rgb_path ./demo/ARAD_1K_0912.jpg  --method restormer --pretrained_model_path ./model_zoo/restormer.pth --outf ./exp/restormer/  --gpu_id 0

# reconstruct by EDSR
python test.py --rgb_path ./demo/ARAD_1K_0912.jpg --method edsr --pretrained_model_path ./model_zoo/edsr.pth --outf ./exp/edsr/  --gpu_id 0

# reconstruct by HDNet
python test.py --rgb_path ./demo/ARAD_1K_0912.jpg  --method hdnet --pretrained_model_path ./model_zoo/hdnet.pth --outf ./exp/hdnet/  --gpu_id 0

# reconstruct by HRNet
python test.py --rgb_path ./demo/ARAD_1K_0912.jpg  --method hrnet --pretrained_model_path ./model_zoo/hrnet.pth --outf ./exp/hrnet/  --gpu_id 0

# reconstruct by HSCNN+
python test.py --rgb_path ./demo/ARAD_1K_0912.jpg  --method hscnn_plus --pretrained_model_path ./model_zoo/hscnn_plus.pth --outf ./exp/hscnn_plus/  --gpu_id 0
You can replace './demo/ARAD_1K_0912.jpg' with your RGB image path. The reconstructed results will be saved in /MST-plus-plus/predict_code/exp/.
-
Put the reconstruted HSI in
visualization/simulation_results/results/. -
Generate the RGB images of the reconstructed HSIs
cd visualization/
Run show_simulation.mIf this repo helps you, please consider citing our works:
# MST
@inproceedings{mst,
  title={Mask-guided Spectral-wise Transformer for Efficient Hyperspectral Image Reconstruction},
  author={Yuanhao Cai and Jing Lin and Xiaowan Hu and Haoqian Wang and Xin Yuan and Yulun Zhang and Radu Timofte and Luc Van Gool},
  booktitle={CVPR},
  year={2022}
}


# MST++
@inproceedings{mst_pp,
  title={MST++: Multi-stage Spectral-wise Transformer for Efficient Spectral Reconstruction},
  author={Yuanhao Cai and Jing Lin and Zudi Lin and Haoqian Wang and Yulun Zhang and Hanspeter Pfister and Radu Timofte and Luc Van Gool},
  booktitle={CVPRW},
  year={2022}
}


# HDNet
@inproceedings{hdnet,
  title={HDNet: High-resolution Dual-domain Learning for Spectral Compressive Imaging},
  author={Xiaowan Hu and Yuanhao Cai and Jing Lin and  Haoqian Wang and Xin Yuan and Yulun Zhang and Radu Timofte and Luc Van Gool},
  booktitle={CVPR},
  year={2022}
}


