From pgMAP: a pipeline to enable guide RNA read mapping from dual-targeting CRISPR screens
-
Clone or fork the git repo from https://github.com/FredHutch/pgMAP_pipeline/ (if you are not sure of the difference between cloning and forking, check out the explainer here. Make sure you are on the main branch.
-
First time only: Build a Conda environment for Snakemake (defined by
workflow/envs/snakemake.yaml, for more detail see the Snakemake documentation). Running your analysis withinsnakemake_envwill enable you to use the same version of Snakemake and all other supporting packages that were used to develop pgMAP. To build thesnakemake_env, do one of the following:- Install Mamba, which is essentially a faster version of Conda that is used to run Snakemake, by doing one of the following:
- If you do not already have the Conda package manager installed, install Mambaforge
- If you do already have Conda installed, run the following command:
$ conda install -n base -c conda-forge mamba
- Next, create your Snakemake environment using Mamba by either:
- Running the command
$ mamba env create -f workflow/envs/snakemake.yamlfrom the mainpgMAP_pipelinefolder - Un-commenting line 5 in the script
run_snakemake.sh(command:$ mamba env create -f workflow/envs/snakemake.yaml)
- Running the command
- Install Mamba, which is essentially a faster version of Conda that is used to run Snakemake, by doing one of the following:
-
We suggest running the pgPEN tutorial, described below, in a separate folder before analyzing your own files.
-
Once you've successfully run the tutorial, copy your input FASTQ files into the folder
input/fastqs/. Important note: Your FASTQ filenames must include eitherR1andR2(for the two-read sequencing approach) orR1,R2, andR3(for the three-read sequencing approach). Additionally, all file extensions must include either.fastqor.fq. -
Duplicate and update the files in the
config/folder as described below:- Make a copy of
barcode_ref_file.sample.txtnamedbarcode_ref_file.txt. Update the sample and barcode information to match your experimental design and sequencing setup. Note that the barcode and sample ID must be separated by a single tab. - Make a copy of
config.sample.yamlnamedconfig.yaml. Update thebase_filenamevariable, the input file path (the default isinput/tutorial_fastqs), and the number of chunks to split your BAM files into. We suggest tryingn_chunks: 50for data from a full pgPEN CRISPR screen dataset.
- Make a copy of
-
Run the script
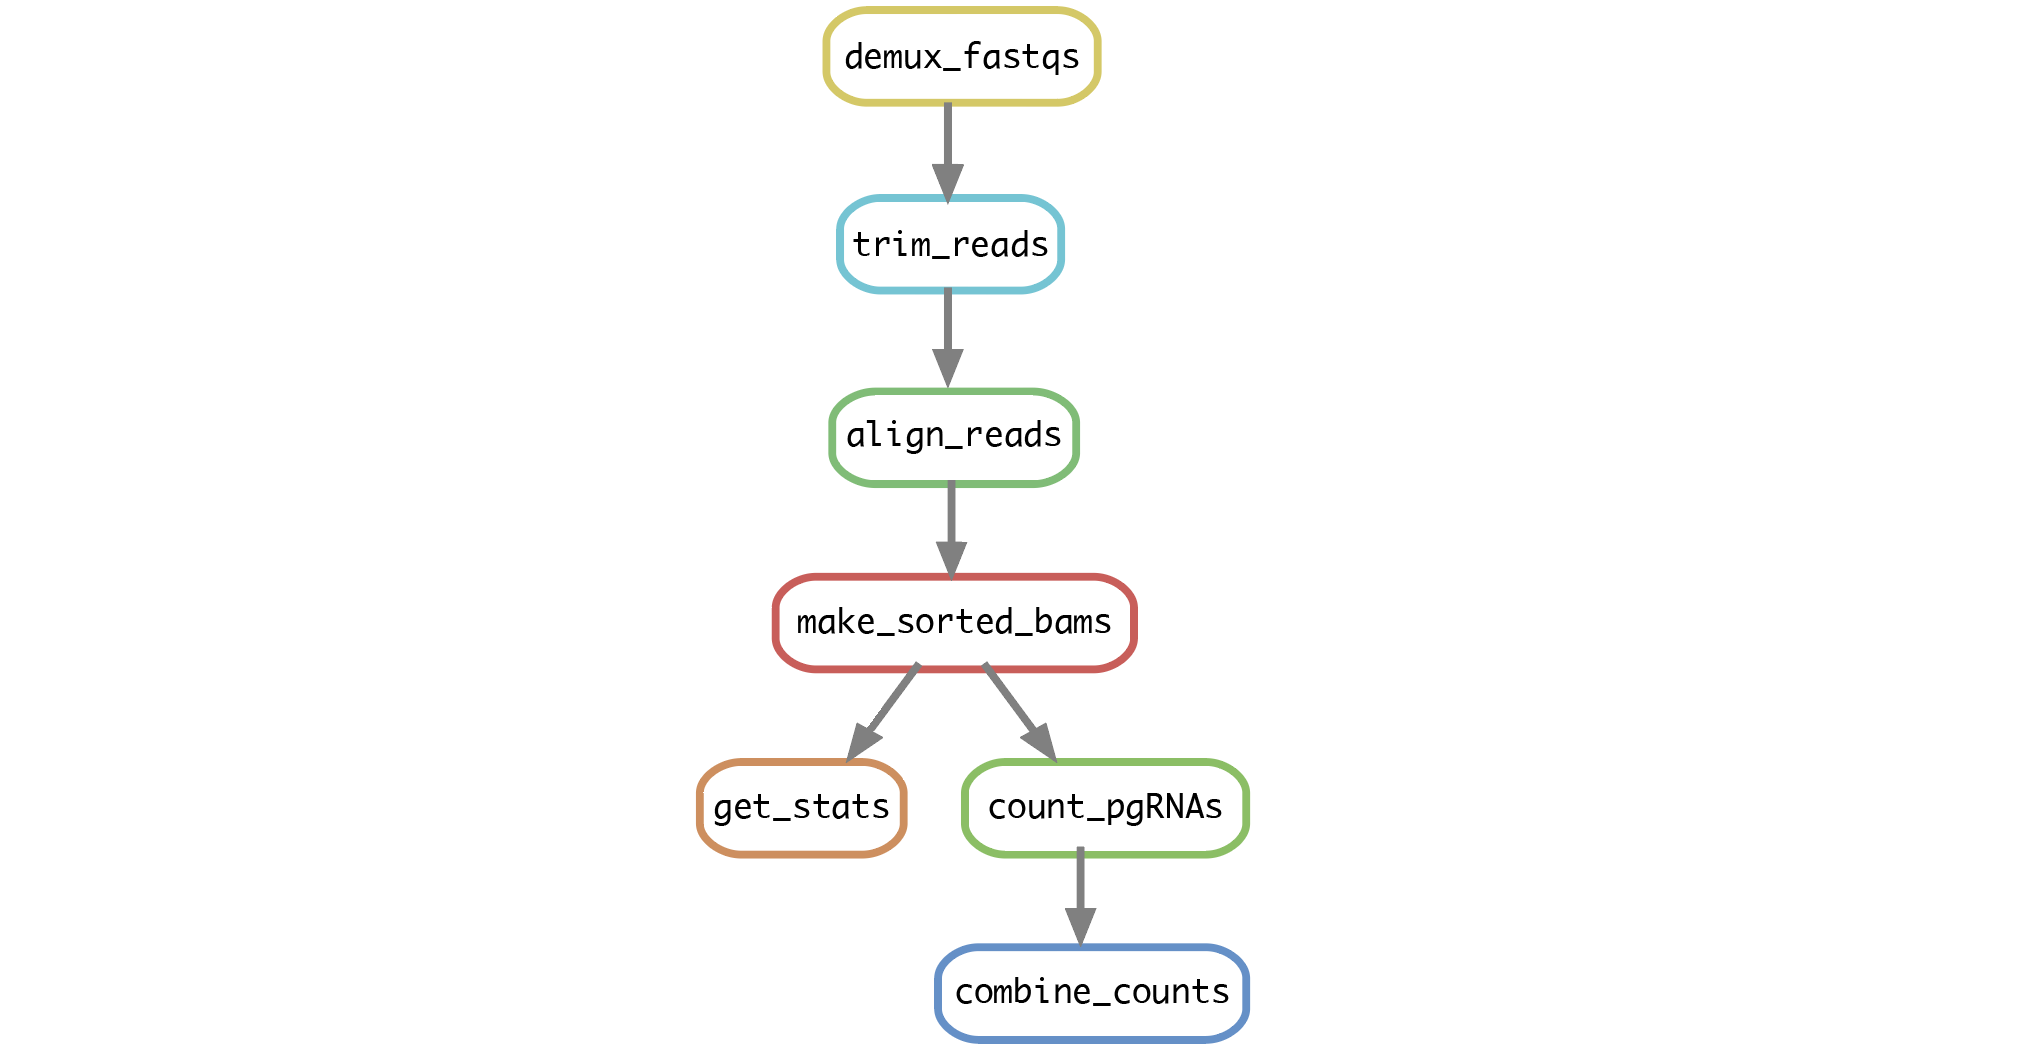
run_snakemake.shby entering the command:$ bash run_snakemake.sh. The following steps will run automatically for all samples specified inconfig/barcode_ref_file.txt:
Install Snakemake v7.1.0 using mambaforge as described here: https://snakemake.readthedocs.io/en/stable/tutorial/setup.html
Folder setup/running info as described here: https://snakemake.readthedocs.io/en/stable/snakefiles/deployment.html
- Downsampled pgPEN screen FASTQ files are used in the example, and can be found in the folder
input/tutorial_fastqs/:
PP_pgPEN_HeLa_S1_R1_001.fastq.gzPP_pgPEN_HeLa_S1_R2_001.fastq.gzPP_pgPEN_HeLa_S1_R3_001.fastq.gz
- Make a copy of or rename
config/barcode_ref_file.sample.txtasbarcode_ref_file.txt, which is a file of sequencing barcodes:
CTTGTA   sample2
ACTTGA   sample1
GGCTAC   sample3
These barcodes are used in the demultiplexing step of the pipeline and are unique to each sample and condition. For the tutorial, you do not need to change the default values.
-
Make a copy of or rename
config/config.sample.yamlasconfig.yaml. For the tutorial, you do not need to change the default values. -
pgMAP is now ready to run. Execute
run_snakemake_test.shon an interactive compute node:
$ bash run_snakemake.sh
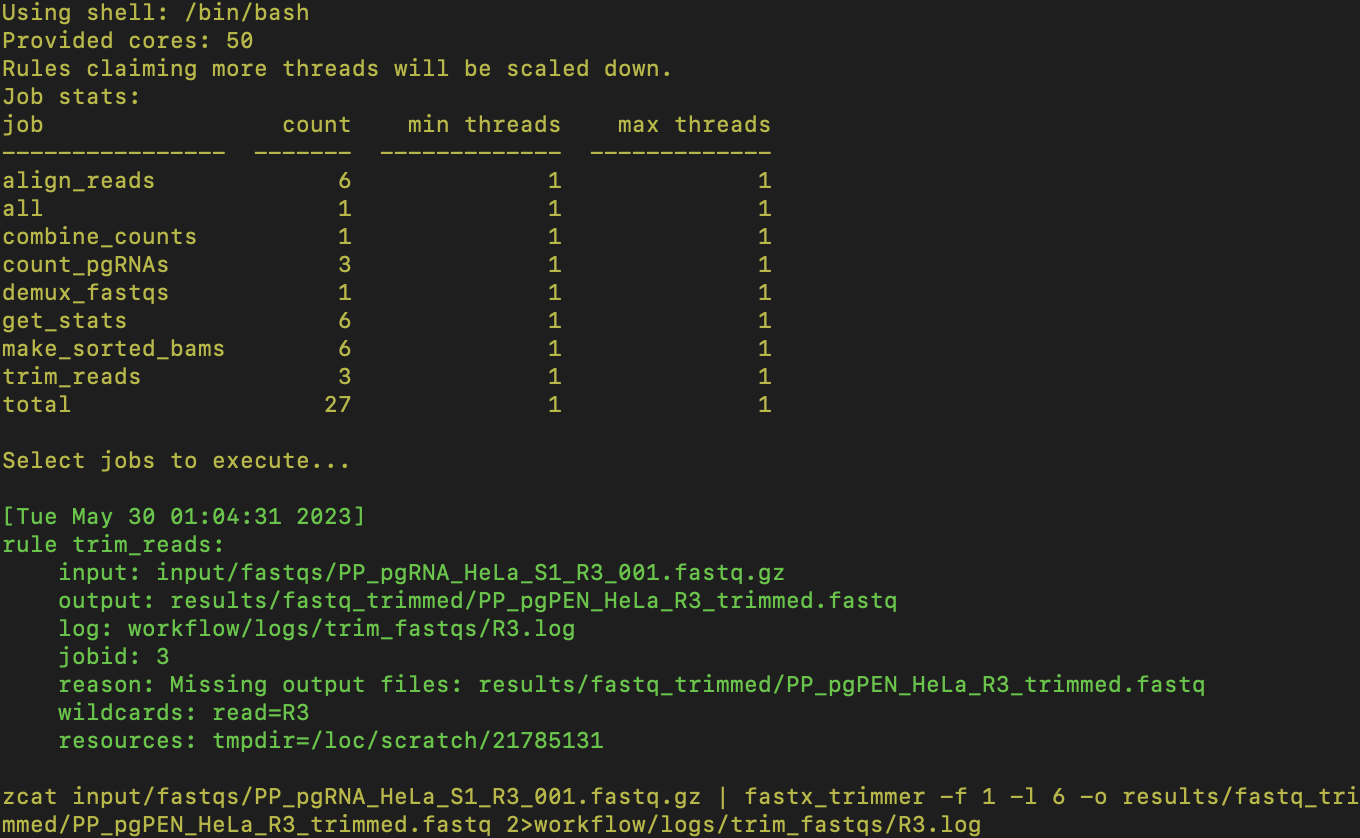
pgMAP will automatically install all required packages with dependencies. Snakemake will print output as the processes run and detail each step, including any errors that arise:

The resulting pgRNA counts can be found in results/pgRNA_counts/pgMAP_tutorial_pgRNA_counts.txt:
| id | seq_1 | seq_2 | counts_sample1 | counts_sample2 | counts_sample3 |
|---|---|---|---|---|---|
| AADAC_AADACL2_pg1 | AAGTCTGAAGCACTAAGAAG | AAAGAAAGTCAGAAACCCGA | 5 | 6 | 4 |
| AADAC_AADACL2_pg10 | ATTTCTATCCAAATCACTCA | GAAAAAATTTGACTGCAGCA | 4 | 2 | 6 |
| AADAC_AADACL2_pg11 | ATTTCTATCCAAATCACTCA | GTGATGTATTCATCTGAAAG | 0 | 2 | 3 |
| AADAC_AADACL2_pg12 | ATTTCTATCCAAATCACTCA | TGGGGGCAATTTAGCAACAG | 1 | 2 | 1 |
| AADAC_AADACL2_pg13 | GGTATTTCTGGAGATAGTGC | AAAGAAAGTCAGAAACCCGA | 1 | 2 | 2 |
| AADAC_AADACL2_pg14 | GGTATTTCTGGAGATAGTGC | GAAAAAATTTGACTGCAGCA | 1 | 2 | 2 |
To confirm that the correct counts were generated, you can compare your output to the file results/expected_tutorial_output/expected_pgMAP_tutorial_pgRNA_counts.txt.
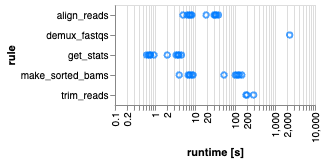
Snakemake will also generate reports in reports.html and workflow/report:
All log (workflow/logs/) and intermediate files (results/) are also accessible to users.
Please contact Phoebe Parrish (developer) at pparrish@fredhutch.org, Daniel Groso (co-developer) at dgroso@fredhutch.org, or Alice Berger (Principal Investigator) at ahberger@fredhutch.org with any questions about pgMAP.
pgMAP is available open-source under the MIT license.
Please cite pgMAP as arXiv:2306.00944

