- This tool is not affiliated, associated, or partnered with OnlyFans in any way. We are not authorized, endorsed, or sponsored by OnlyFans. All OnlyFans trademarks remain the property of Fenix International Limited.
- This is a theoritical program only and is for educational purposes. If you choose to use it then it may or may not work. You solely accept full responsability and indemnify the creator, hostors, contributors and all other involved persons from any any all responsability.
- There is no support offered for this nor are bug reports accepted. Do not open an issue, it will be closed and you will be banned. A command-line program to download media (make a print to file), like and unlike posts, and more from creators on OnlyFans. In addition if you do use this program please do not use this program to re-distribute content.
sess=auth_id=auth_uid_=- Status Down - This means that your auth details are bad, keep trying.
- onlyfans-scraper command not found - This means that you have not added the path to your directory. You will have to look this up on your own with google.
- 404 page not found or any other 404 error. - The post or profile can't be found. The user has been suspended or deleted or the post was removed and isn't completely deleted yet. No fix for this other than unsubscribing from the user. Do not open an issue for it.
- Discord: Closed - Not accepting new members.

Windows:
pip install onlyfans-scraper
or
pip install git+https://github.com/taux1c/onlyfans-scraper
If you're on macOS/Linux, then do this instead:
pip3 install onlyfans-scraper
or
pip3 install git+https://github.com/taux1c/onlyfans-scraper
Before you can fully use it, you need to fill out some fields in a auth.json file. This file will be created for you when you run the program for the first time.
These are the fields:
{
    "auth": {
        "app-token": "33d57ade8c02dbc5a333db99ff9ae26a",
        "sess": "",
        "auth_id": "",
        "auth_uniq_": "",
        "user_agent": "",
        "x-bc": ""
    }
}
It's really not that bad. I'll show you in the next sections how to get these bits of info.
You first need to run the program in order for the auth.json file to be created. To run it, simply type onlyfans-scraper in your terminal and hit enter. Because you don't have an auth.json file, the program will create one for you and then ask you to enter some information. Now we need to get that information.
If you've already used DIGITALCRIMINAL's OnlyFans script, you can simply copy and paste the auth information from there to here.
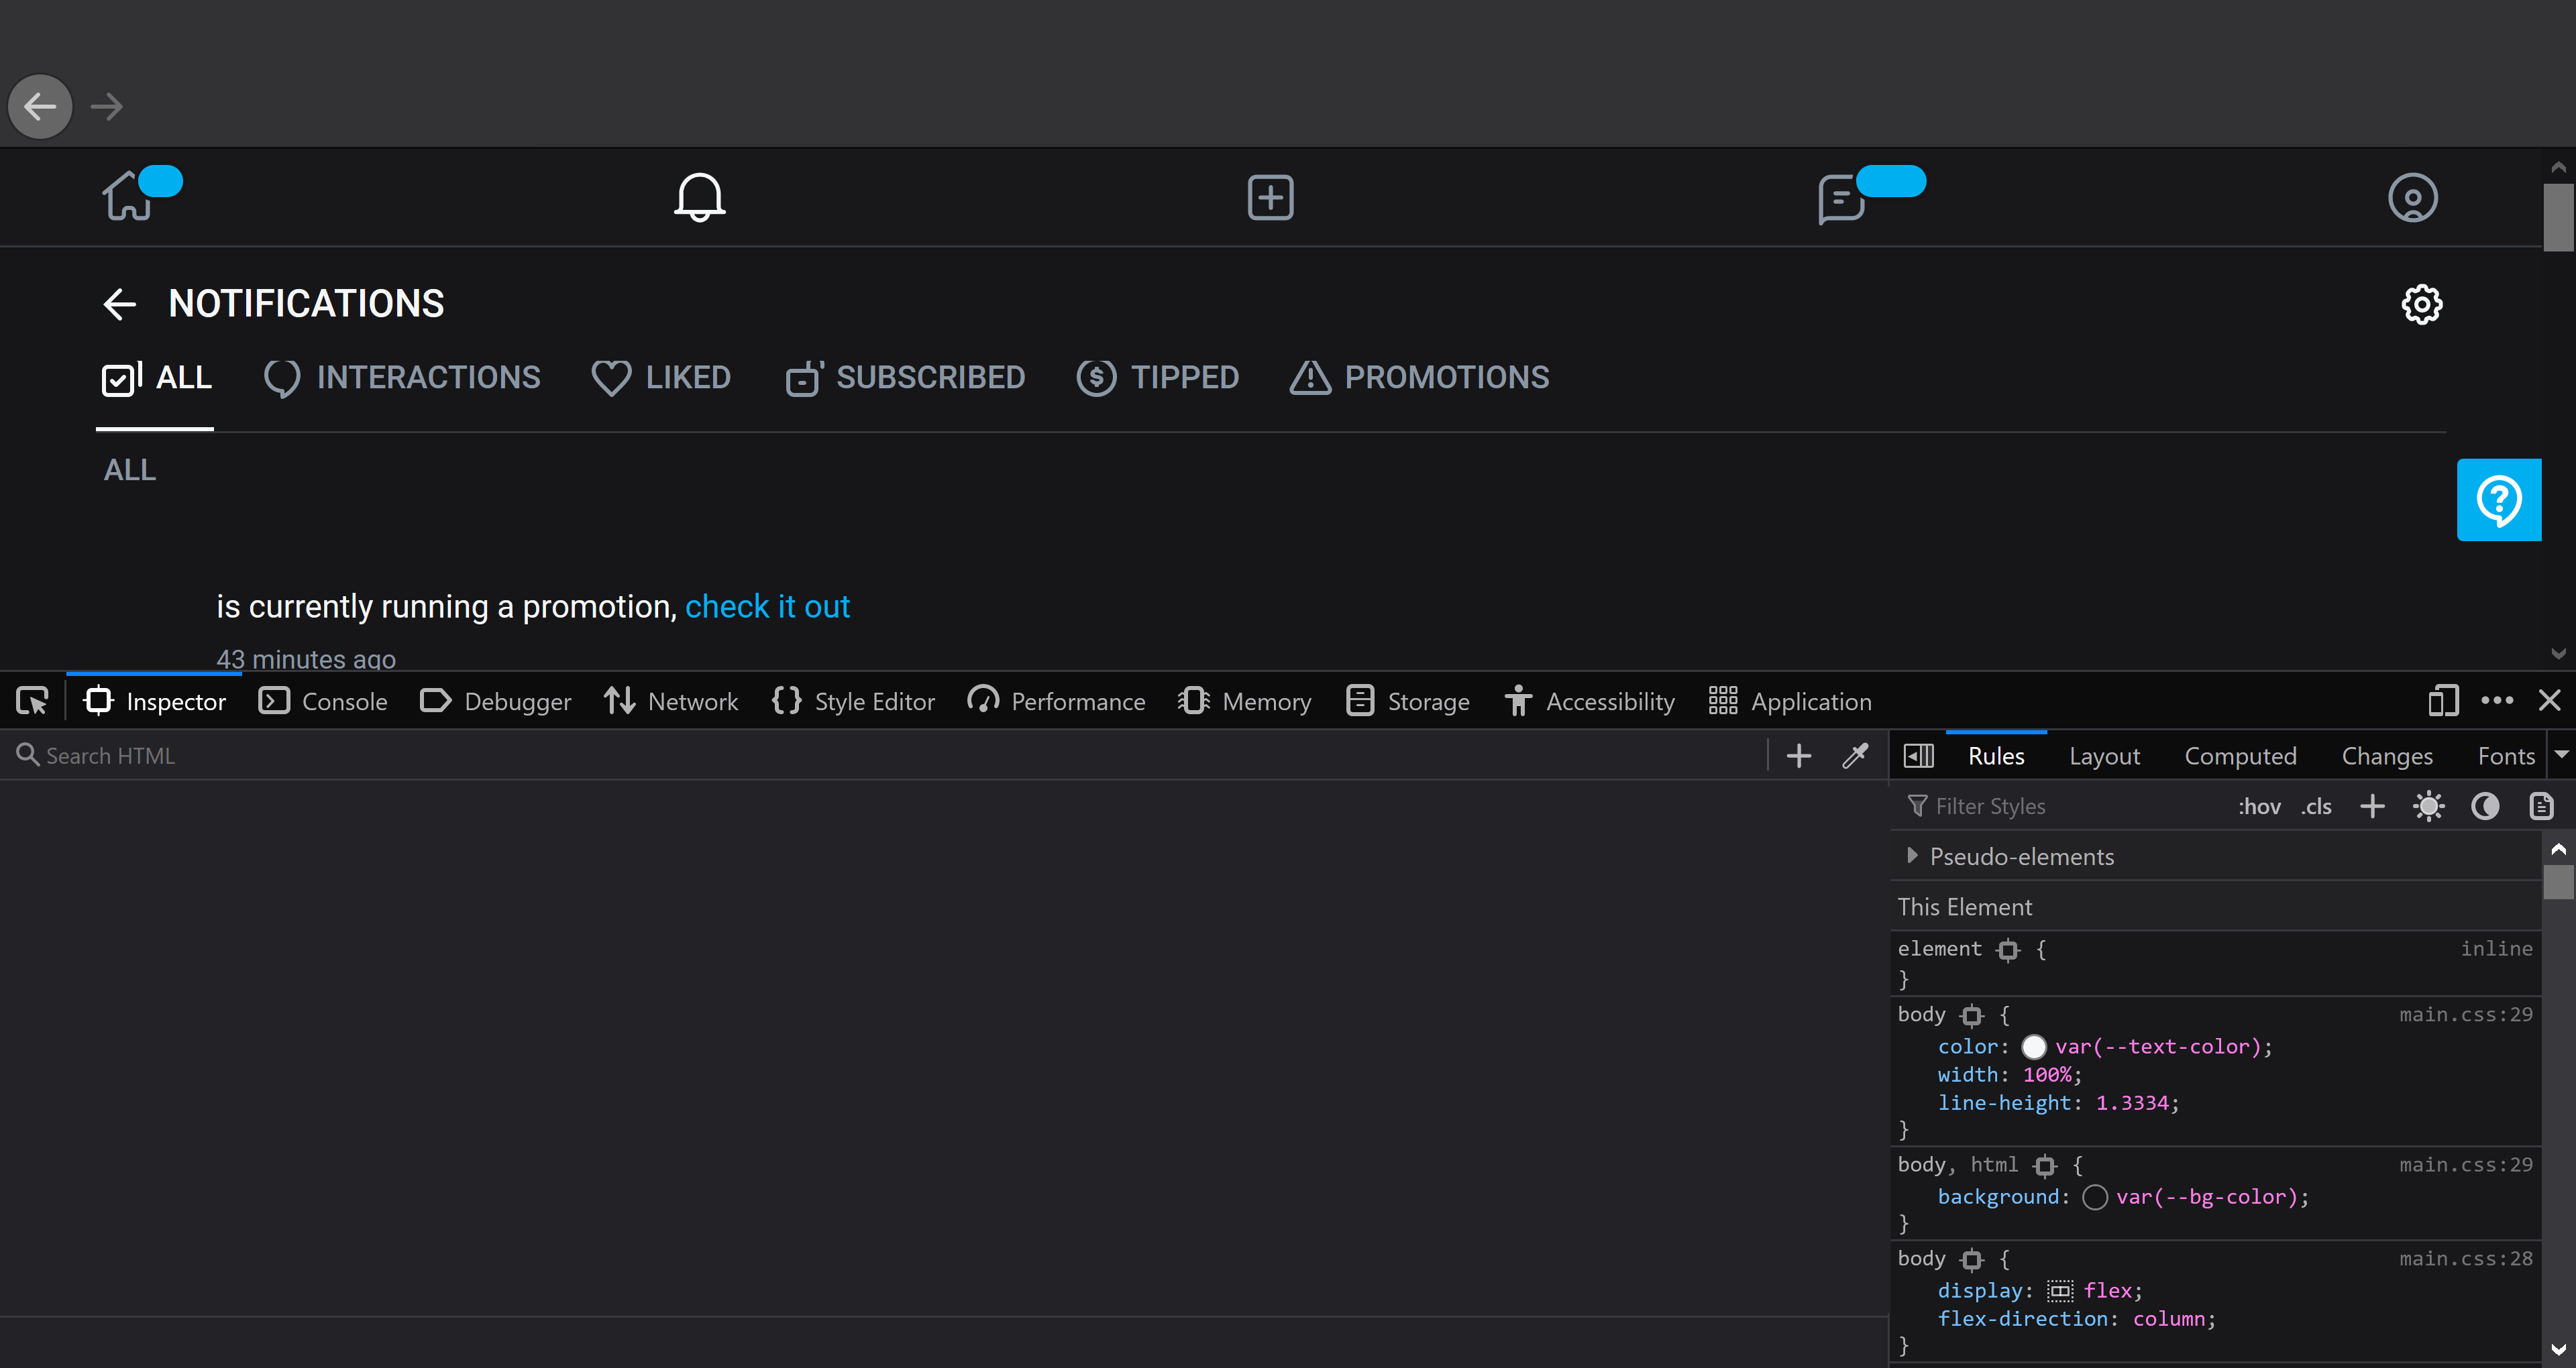
Go to your notification area on OnlyFans. Once you're there, open your browser's developer tools. If you don't know how to do that, consult the following chart:
| Operating System | Keys |
|---|---|
| macOS | altcmdi |
| Windows | ctrlshifti |
| Linux | ctrlshifti |
Once you have your browser's developer tools open, your screen should look like the following:

Click on the Network tab at the top of the browser tools:

Then click on XHR sub-tab inside of the Network tab:

Once you're inside of the XHR sub-tab, refresh the page while you have your browser's developer tools open. After the page reloads, you should see a section titled init appear:

When you click on init, you should see a large sidebar appear. Make sure you're in the Headers section:

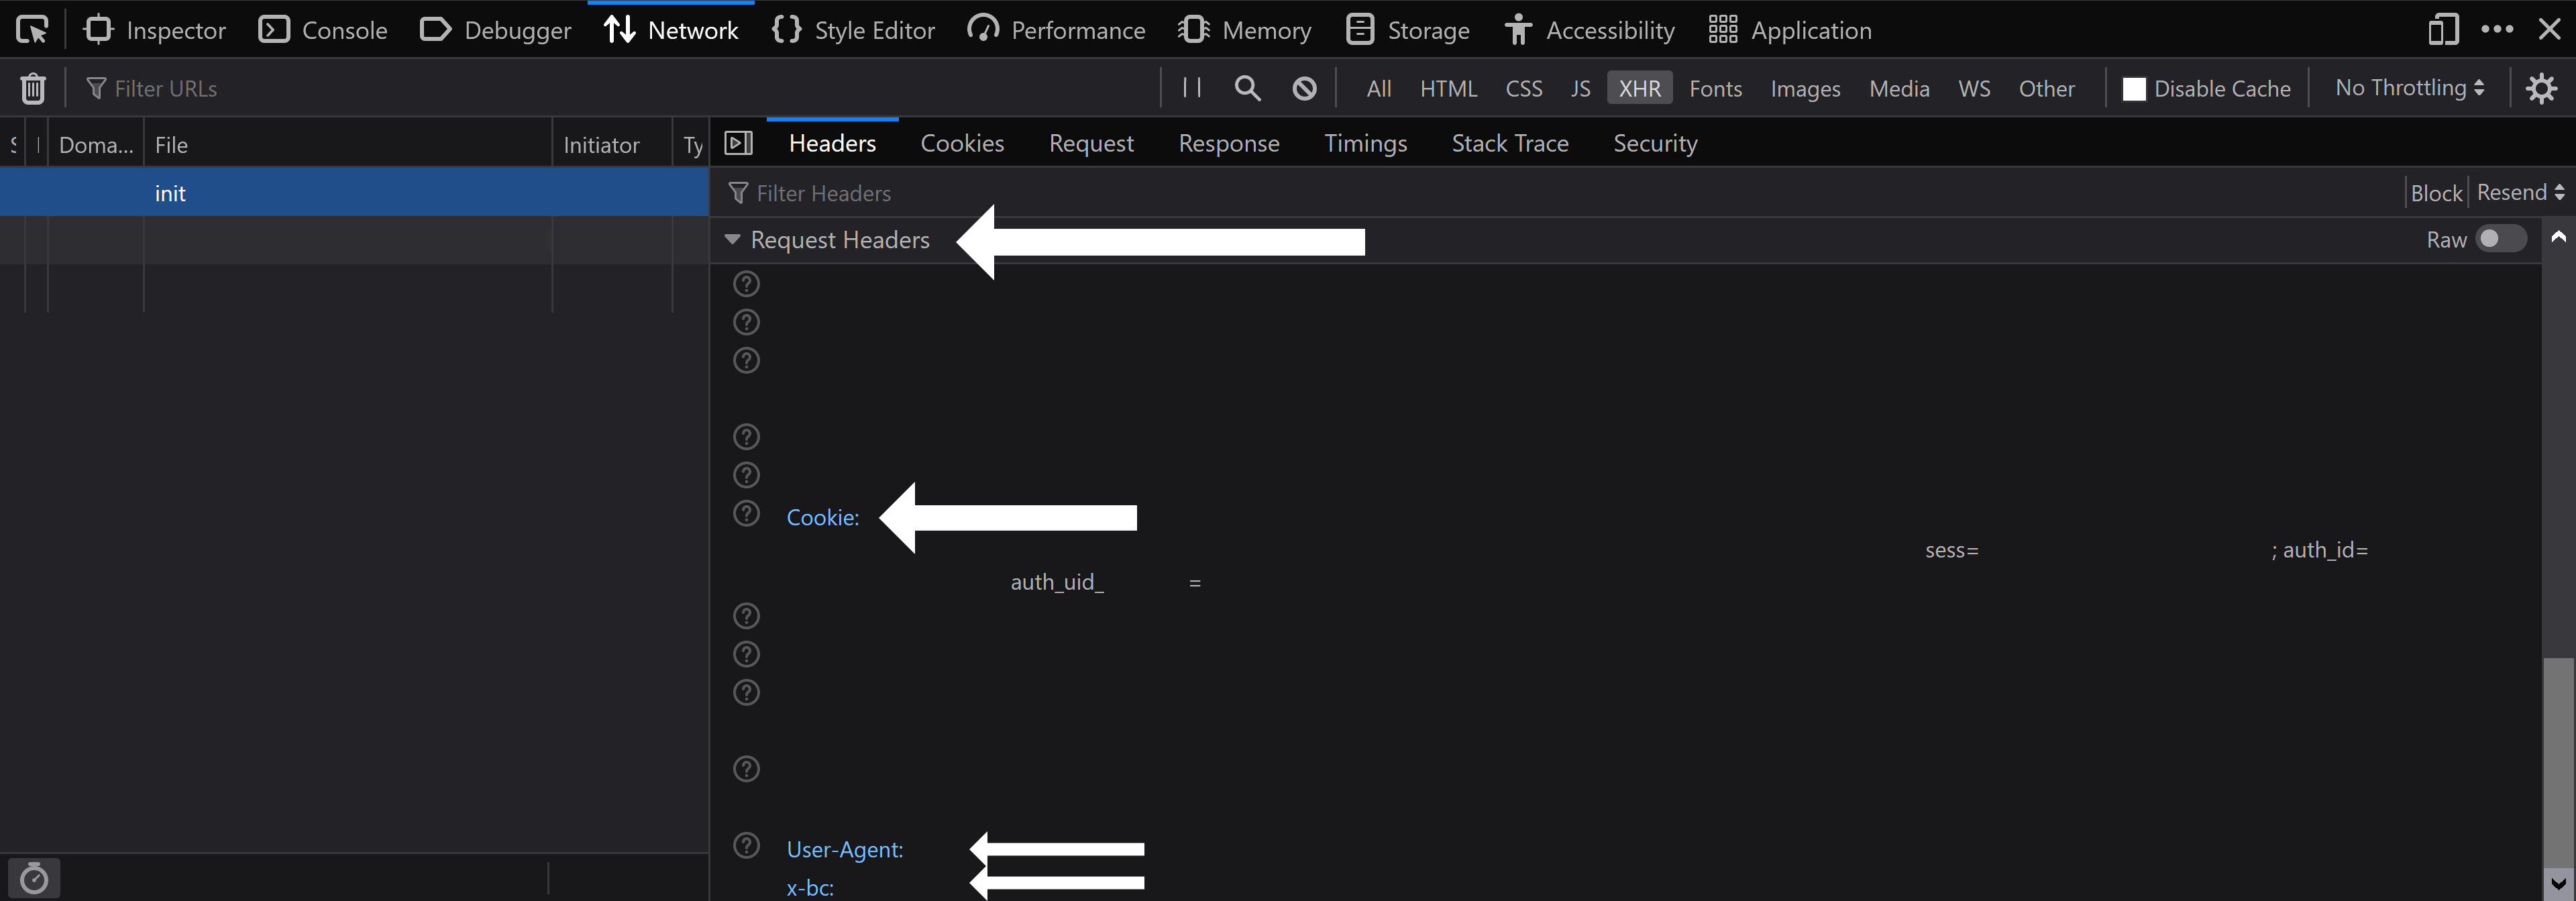
After that, scroll down until you see a subsection called Request Headers. You should then see three important fields inside of the Request Headers subsection: Cookie, User-Agent, and x-bc

Inside of the Cookie field, you will see a couple of important bits:
Your auth_uid_ will only appear if you have 2FA (two-factor authentication) enabled. Also, keep in mind that your auth_uid_ will have numbers after the final underscore and before the equal sign (that's your auth_id).
You need everything after the equal sign and everything before the semi-colon for all of those bits.
Once you've copied the value for your sess cookie, go back to the program, paste it in, and hit enter. Now go back to your browser, copy the auth_id value, and paste it into the program and hit enter. Then go back to your browser, copy the auth_uid_ value, and paste it into the program and hit enter (leave this blank if you don't use 2FA!!!).
Once you do that, the program will ask for your user agent. You should be able to find your user agent in a field called User-Agent below the Cookie field. Copy it and paste it into the program and hit enter.
After it asks for your user agent, it will ask for your x-bc token. You should also be able to find this in the Request Headers section.
You're all set and you can now use onlyfans-scraper.
Whenever you want to run the program, all you need to do is type onlyfans-scraper in your terminal:
onlyfans-scraper
That's it. It's that simple.
Once the program launches, all you need to do is follow the on-screen directions. The first time you run it, it will ask you to fill out your auth.json file (directions for that in the section above).
You will need to use your arrow keys to select an option:

If you choose to download content, you will have three options: having a list of all of your subscriptions printed, manually entering a username, or scraping all accounts that you're subscribed to.

You can also use this program to like all of a user's posts or remove your likes from their posts. Just select either option during the main menu screen and enter their username.
This program will like posts at a rate of around one post per second. This may be reduced in the future but OnlyFans is strict about how quickly you can like posts.
At the moment, you can only like ~1000 posts per day. That's not our restriction, that's OnlyFans's restriction. So choose wisely.
If you've used DIGITALCRIMINAL's script, you might've liked how his script prevented duplicates from being downloaded each time you ran it on a user. This is done through database files.
This program also uses a database file to prevent duplicates. In order to make it easier for user's to transition from his program to this one, this program will migrate the data from those databases for you (only IDs and filenames).
In order to use it select the last option (Migrate an old database) and enter the path to the directory that contains the database files (Posts.db, Archived.db, etc.).
For example, if you have a directory that looks like the following:
Users
|__ home
    |__ .sites
        |__ OnlyFans
            |__ melodyjai
                |__ Metadata
                    |__ Archived.db
                    |__ Messages.db
                    |__ Posts.db
Then the path you enter should be /Users/home/.sites/OnlyFans/melodyjai/Metadata. The program will detect the .db files in the directory and then ask you for the username to whom those .db files belong. The program will then move the relevant data over.
If you run into trouble try the discord, careful though we do bite. If you open an issue for any of the following you will be banned from opening future issues. These are not issues they are operator error.