Examples included are leveraging the Arista Test Drive (ATD) to learn about continuous integration and delivery (CI/CD) concepts.
The dual data center ATD is deployed by default with many devices. The topology allows users to run examples like data center interconnect. In our case, we only require a subset of nodes. Devices from site 1 (s1) will act as our development infrastructure, and devices in site 2 (s2) will be our production infrastructure. The diagram below exemplifies what we hope to accomplish at the end of this workflow.
This repository leverages the dual data center (DC) ATD. If you are not leveraging the ATD, you may still leverage this repository for a similar deployment. Please note some updates may have to be made for the reachability of nodes and CloudVision (CVP) instances. This example was created with Ansible AVD version 3.8.1.
You must install the base requirements if running outside of the ATD interactive developer environment (IDE).
python3 -m venv venv
source venv/bin/activate
ansible-galaxy collection install arista.avd arista.cvp --force
export ARISTA_AVD_DIR=$(ansible-galaxy collection list arista.avd --format yaml | head -1 | cut -d: -f1)
pip3 install -r ${ARISTA_AVD_DIR}/arista/avd/requirements.txtYou can ensure the appropriate AVD version is installed by running the following command.
ansible-galaxy collection listIf AVD version 3.8.1 or greater is not present, please upgrade to the latest stable version.
ansible-galaxy collection install arista.avd arista.cvp --force
export ARISTA_AVD_DIR=$(ansible-galaxy collection list arista.avd --format yaml | head -1 | cut -d: -f1)
pip3 config set global.disable-pip-version-check true
pip3 install -r ${ARISTA_AVD_DIR}/arista/avd/requirements.txtYou will be creating your own CI/CD pipeline in this workflow. Log in to your GitHub account and fork this repository to get started.
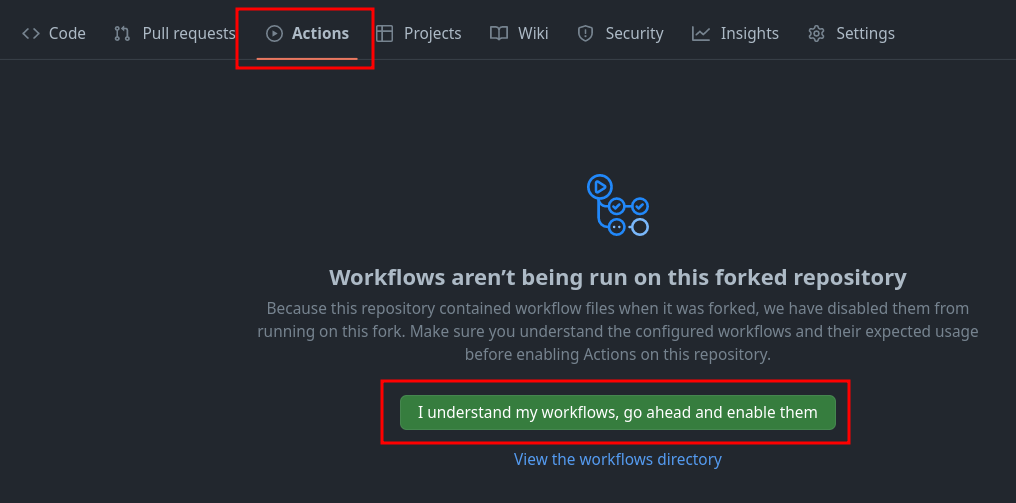
- Go to Actions
- Click
I understand my workflows, go ahead and enable them
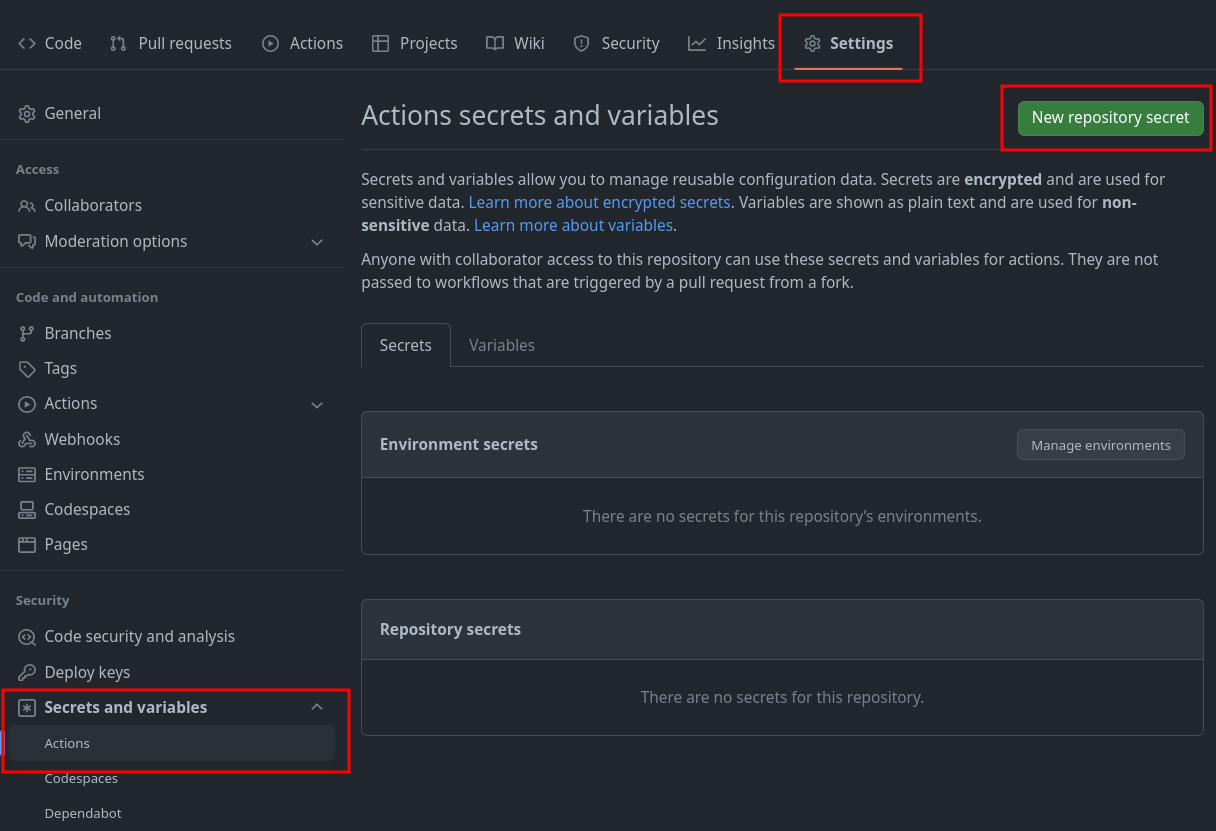
You will need to set one secret in your newly forked GitHub repository.
-
Go to
Settings -
Click
Secrets and variables -
Click
Actions -
Click
New repository secret -
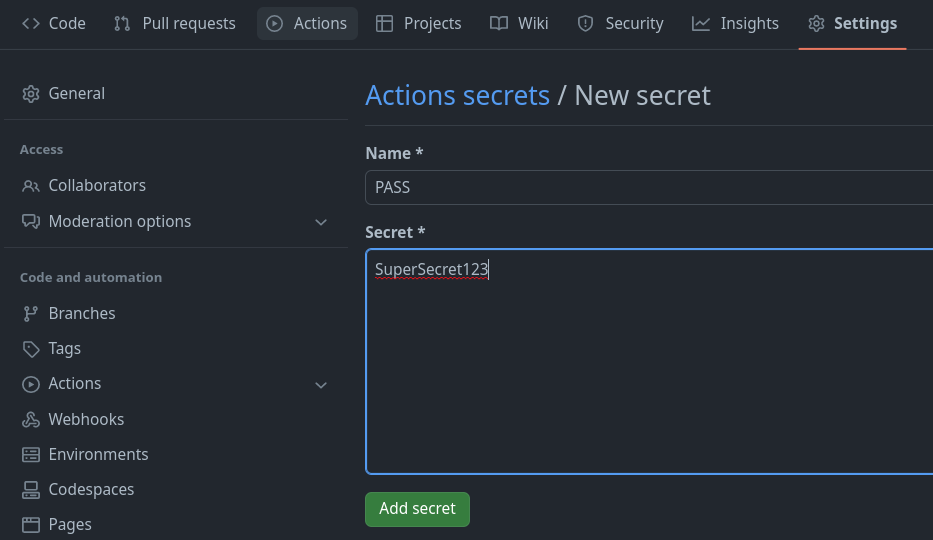
Enter the secret as follows
- Name: PASS
- Secret: Listed in ATD lab topology
-
Click
Add secret
NOTE: Our workflow uses this secret to authenticate with our CVP instance.
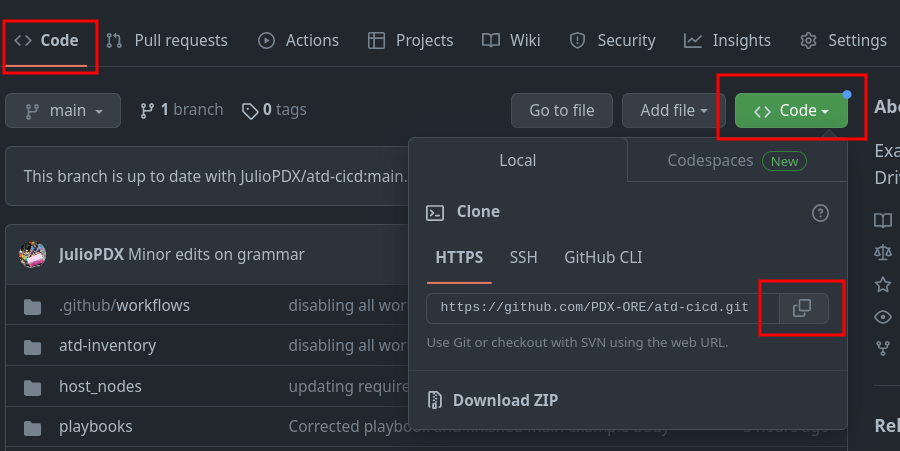
-
Click
Code -
From the IDE terminal run the following
cd labfiles
git clone <your copied URL>
cd atd-cicd
git config --global user.name "FirstName LastName"
git config --global user.email "name@example.com"
This repository relies on one environment variable to be set, our login credentials. From the ATD IDE, run the following command.
export PASS=<some password in local ATD>NOTE: The value of
PASSis the same secret used earlier. For example,export PASS=arista1234.
In a moment, we will be deploying changes to our environments. In reality, updates to a code repository would be done from a development or feature branch. We will follow this same workflow.
NOTE: This example will use the branch name of
new-dc, if you use your own naming scheme, make sure to make the appropriate updates.
git checkout -b new-dcEvery user will get a unique CVP instance deployed. There are two updates required.
-
Update the
ansible_hostvariable undercv_atd1in theatd-inventory/dev/hosts.ymlfile... cv_atd1: ansible_host: <atd-topo12345.topo.testdrive.arista.com> cv_collection: v3 execute_tasks: true ... -
Update the
ansible_hostvariable undercv_atd1in theatd-inventory/prod/hosts.ymlfile... cv_atd1: ansible_host: <atd-topo12345.topo.testdrive.arista.com> cv_collection: v3 execute_tasks: true ...
NOTE: These will be the same value. Make sure to remove any prefix like
https://or anything after.com
We have two changes in our hosts.yml files for production and development environments. The following can be executed from the terminal or GUI interface.
git add .
git commit -m "Updating host variables"
git push --set-upstream origin new-dc
NOTE: You will get a notification to sign in to GitHub. Follow these prompts.
GitHub actions allow us to automate almost every element of our repository. We can use them to check syntax, linting, unit testing, etc. In our case, we want to use GitHub actions to test new changes to our infrastructure and then deploy those changes. In this example, we simulate that Network Admins cannot manually change the nodes. Admins must execute changes from the pipeline.
In this repository, we have two workflow files located in our .github/workflows directory. Both workflows are identical but differ slightly in whether changes will be deployed in our development or production environment. Below is an example of the development workflow. In your IDE, uncomment both workflows. A shortcut is to highlight the workflow and type CTRL + /.
name: Test the dev network

on:
  push:
    branches-ignore:
      - main

jobs:
  test-deploy-dev:
    env:
      net: dev
      PASS: ${{ secrets.PASS }}
    timeout-minutes: 15
    runs-on: ubuntu-latest
    steps:
      - name: Hi
        run: echo "Hello World!"

      - name: Checkout
        uses: actions/checkout@v3

      - name: yaml-lint
        uses: ibiqlik/action-yamllint@v3
        with:
          file_or_dir: atd-inventory/dev/group_vars/ atd-inventory/dev/host_vars/
          config_file: .yamllint.yml

      - name: Start containers
        run: docker-compose -f "docker-compose.yml" up -d --build

      - name: Test with Batfish
        run: docker-compose run atd-cicd python3 batfish-test.py

      - name: Push configurations to dev
        run: docker-compose run atd-cicd ansible-playbook playbooks/atd-fabric-provision.yml

      - name: Stop containers
        if: always()
        run: docker-compose -f "docker-compose.yml" down
This workflow is relatively short but represents some interesting options. For starters, we set branches-ignore to main. Since we are testing our feature or development branches, we don't want this to run on main, representing our production environment. We set two environment variables, one to specify if this is dev or prod. We then pass along our PASS variable, which represents the credentials to connect to our CVP instance.
The initial checkout step makes the repository available to our workflow. We then use Docker Compose to stand up two containers. One to run the Batfish service and a small container with all pre-installed requirements. The second container interacts with the running Batfish service and our CVP instance. If we did not have the second container available, we would have to run through the exact steps you ran to prepare your environment in this workflow. The second container allows us to speed up our workflow. Below is an example of the docker-compose.yml file.
---
version: '3.3'
services:
  batfish:
    container_name: batfish
    volumes:
      - '.:/data'
    ports:
      - '9997:9997'
      - '9996:9996'
    image: batfish/batfish

  atd-cicd:
    container_name: atd-cicd
    volumes:
      - '.:/app'
    image: juliopdx/atd-cicd
    environment:
      - PASS=$PASS
- net=$netIn case you need to become more familiar with Batfish. It's an open-source tool from Intentionet. The idea is operators can create their configurations in whatever workflows fit their environment. The configurations can then be sent to the Batfish service for analysis. The checks are all performed offline without connecting to our network devices. For example, we could check things like compatible BGP and OSPF neighbors. The checks are far more extensive than these, and we encourage you to check out their documentation. The diagram below helps illustrate this idea.
In the Docker Compose file mentioned earlier, we use this Batfish service in our workflow. We then use the pybatfish Python package as our connector into this service to run any checks or ask the service questions about the network. Once these checks pass, we configure the infrastructure using the eos_config_deploy_cvp role within the AVD collection.
At the moment, this example deployment is using OSPF for the underlay. We want to migrate from OSPF to BGP. We have to make two minor updates to our group variables for development and production. In the atd-inventory/dev/group_vars/ATD_FABRIC_DEV.yml file, we have the variable underlay_routing_protocol set to OSPF. We can comment this out and leverage the default underlay of BGP used in AVD DC deployments.
# underlay_routing_protocol: OSPFPerform the same for the atd-inventory/prod/group_vars/ATD_FABRIC_PROD.yml file.
At this point, we can build the intended configurations for both environments. The first command defaults to the dev inventory, and the second has to be specified on the command line.
# Dev
ansible-playbook playbooks/atd-fabric-build.yml
# Prod
ansible-playbook playbooks/atd-fabric-build.yml -i atd-inventory/prod/hosts.yml
NOTE: You don't have to specify the inventory when interacting with the development environment because this is the default inventory in our `ansible.cfg file.
[defaults]
inventory =./atd-inventory/dev/hosts.yml
Feel free to check out the changes made to your local files. Please make sure the GitHub workflows are uncommented. We can now push all of our changes and submit a pull request.
git add .
git commit -m "Migrating from OSPF to BGP underlay"
git pushIf you navigate back to your GitHub repository, you should see an action executing.
- Click
Actions - Click on the latest action
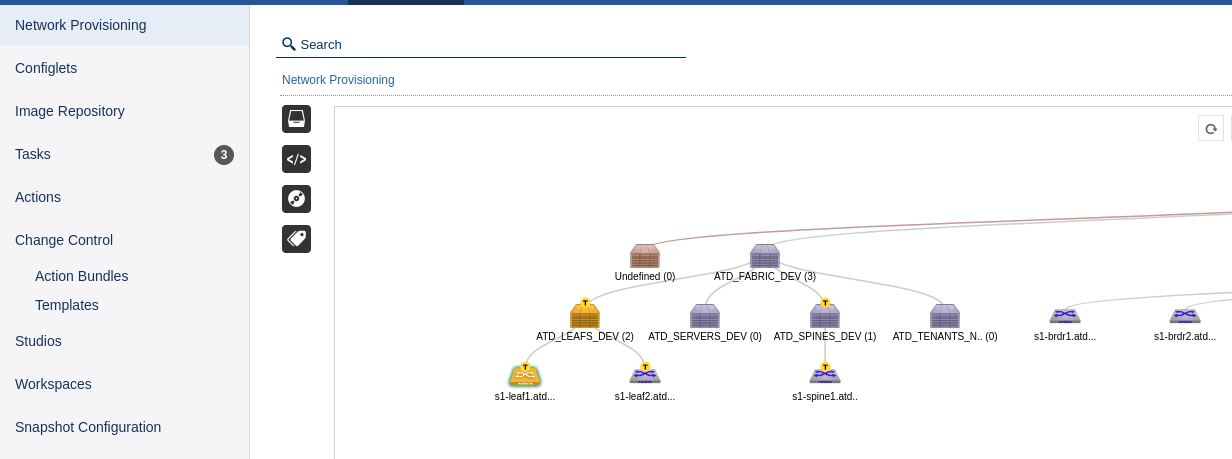
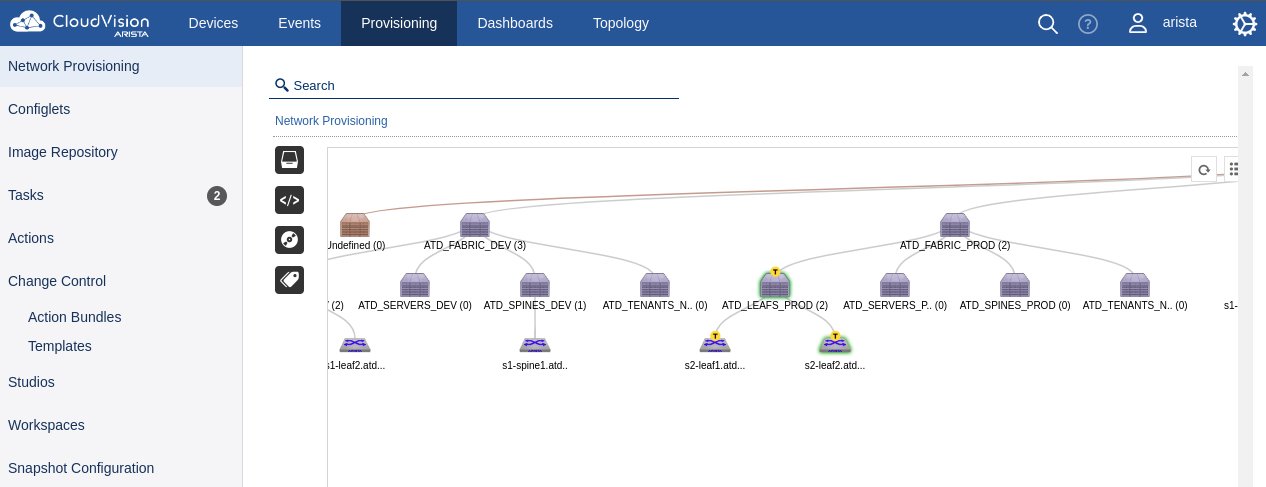
As this is executing, on your CVP instance, you should see new containers and tasks that will be executed.
We have activated our GitHub workflows, tested our configurations in our development environment, and pushed those changes to our nodes. We are now ready to create a pull request.
In your GitHub repository, you should see a tab for Pull requests.
- Click on
Pull requests - Click on
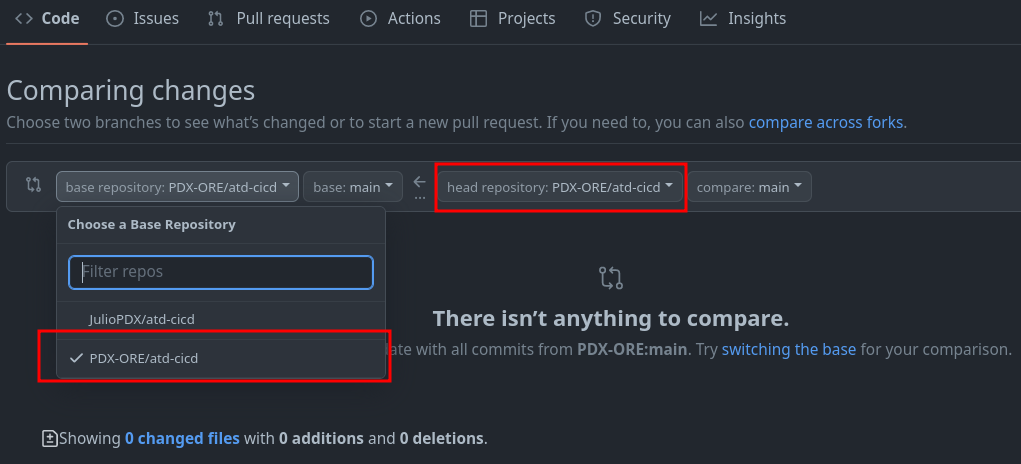
New pull request - Change the base repository to be your fork
- Change the compare repository to
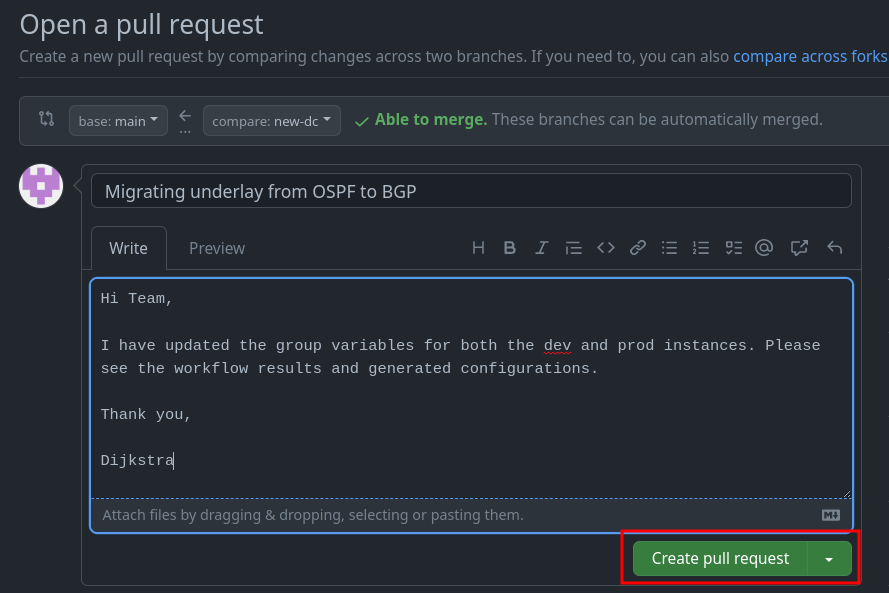
new-dc - Click
Create pull request
Add a title and enough of a summary to get the point across to other team members.
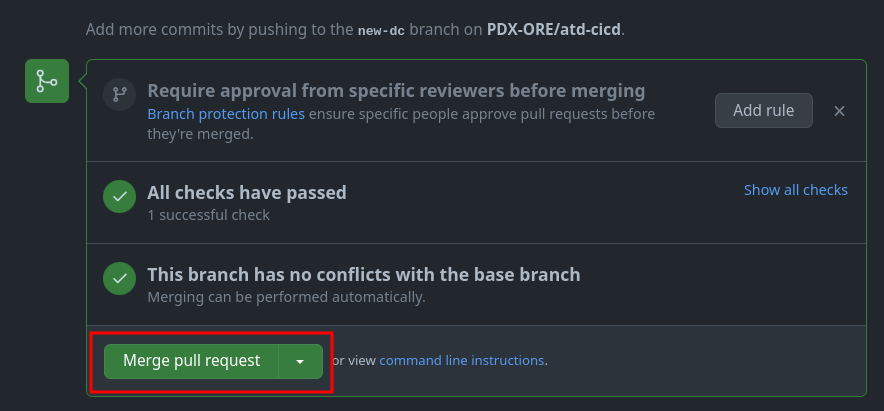
Once this is complete, click Create pull request. Since all checks have passed, we can merge our new pull request.
At this point, this will kick off our second workflow against the main branch. This is our production instance. If you go back to Actions, you can see this executing. Alternatively, you can see the updates running on CVP.
Congratulations, you have successfully deployed a development and production instance. Feel free to make additional changes or extend the testing pieces.
NOTE: If your topology shut down or time elapsed, you must run through the requirement installations and GitHub authentication on the next
git push.
In reality, AVD does not manage hosts. In this topology, hosts are just cEOS nodes. We have a playbook that will configure host1 from each environment. Again, to cut down on the number of devices for this example, the two hosts will be configured with two VRFs to send traffic across the network. An example of the configuration and execution command is below.
vrf instance BLUE
!
vrf instance RED
!
no ip routing vrf BLUE
no ip routing vrf RED
!
interface Ethernet1
   no switchport
   vrf BLUE
   ip address 10.10.10.1/24
!
interface Ethernet2
   no switchport
   vrf RED
   ip address 10.10.10.2/24
!
From the ATD IDE, execute the following playbook.
ansible-playbook playbooks/atd-host-provision.ymlOnce these tasks complete in CVP, you can connect to either s1-host1 or s2-host1 and test reachability.
s1-host1# ping vrf BLUE 10.10.10.2
PING 10.10.10.2 (10.10.10.2) 72(100) bytes of data.
80 bytes from 10.10.10.2: icmp_seq=1 ttl=64 time=31.0 ms
80 bytes from 10.10.10.2: icmp_seq=2 ttl=64 time=26.6 ms
80 bytes from 10.10.10.2: icmp_seq=3 ttl=64 time=18.8 ms
80 bytes from 10.10.10.2: icmp_seq=4 ttl=64 time=11.1 ms
80 bytes from 10.10.10.2: icmp_seq=5 ttl=64 time=10.8 ms

--- 10.10.10.2 ping statistics ---
5 packets transmitted, 5 received, 0% packet loss, time 57ms
rtt min/avg/max/mdev = 10.898/19.729/31.089/8.114 ms, pipe 4, ipg/ewma 14.488/24.842 ms
s1-host1#
s1-host1#show interfaces | include Ethernet|Hardware
Ethernet1 is up, line protocol is up (connected)
  Hardware is Ethernet, address is 02d2.56bf.117c (bia 02d2.56bf.117c)
Ethernet2 is up, line protocol is up (connected)
  Hardware is Ethernet, address is 9e60.6f70.7324 (bia 9e60.6f70.7324)
In this case, we can see Ethernet1 has a MAC address that ends with 117c, and Ethernet2 has a MAC address that ends with 7324. We can check where those MAC addresses were seen from the perspective of s1-leaf1.
s1-leaf1#show mac address-table
          Mac Address Table
------------------------------------------------------------------

Vlan    Mac Address       Type        Ports      Moves   Last Move
----    -----------       ----        -----      -----   ---------
 110    02d2.56bf.117c    DYNAMIC     Et4        1       0:07:02 ago
 110    9e60.6f70.7324    DYNAMIC     Vx1        1       0:07:02 ago
1199    001c.73c0.c613    DYNAMIC     Vx1        1       0:56:15 ago
Total Mac Addresses for this criterion: 3

          Multicast Mac Address Table
------------------------------------------------------------------

Vlan    Mac Address       Type        Ports
----    -----------       ----        -----
Total Mac Addresses for this criterion: 0
s1-leaf1#
We can see the MAC ending in 117c is connected to Ethernet 4 and the MAC ending in 7324 was seen on the VXLAN interface. We have successfully communicated through the fabric. Thank you for following along with this example. If you have any feedback or would like to report an issue/error, please open an issue on the main GitHub repository.
