In this module I'll show you how to get basic authentication and authorization working for a Blazor Hosted WebAssembly application using the Microsoft Identity subsystem, represented in Visual Studio as "Individual Accounts." I'll show you how to authorize markup, entire pages, and even code actions based on roles. I'll also show you how to manage roles for users.
☝️ Note: This code includes a dependency on Duende IdentityServer. This is an open source product with a reciprocal license agreement. If you plan to use Duende IdentityServer in production this may require a license fee. To see how to use Azure Active Directory for your identity please see https://aka.ms/aspnetidentityserver. To see if you require a commercial license for Duende IdentityServer please see https://aka.ms/identityserverlicense
The following prerequisites are needed for this demo.
.NET 7 is installed with Visual Studio, but you can always download the latest version of the .NET 7.0 SDK here.
For this demo, we are going to use the latest version of Visual Studio 2022.
Authentication: The process of confirming that a user is the person that they say they are. The user is represented by an Identity.
Authorization: Now that we know the user's Identity, what are we going to allow them to do? Authorization is allowing the user to access aspects of your application based on their Identity, and the roles or claims they present.
Role: A Role is simply a name, like admin, supervisor, or content_manager. You can assign users to one or more roles, and then check those roles at runtime to authorize the user to do or see an aspect of the application. We will use roles in this module.
Claim: A Claim is an assertion by the user, such as their name, or email address. It can also be very specific to an aspect of the application, such as "canClickTheCounterButton". A Claim is like a Role, but more specific to the action they want to perform or the aspect they want to access. Claims are being favored over roles, but role-based authentication is still very useful and very powerful.
There are many ways to do authentication and authorization in a Blazor WebAssembly application.
We are going to use the Microsoft Identity subsystem including support for roles.
The Blazor WebAssembly template gives us everything we need to generate an identity database, a standard schema used by the Microsoft Identity subsystem. Well, almost everything.
We're going to create a new Blazor WebAssembly application in which we will allow users to register. We can then authorize sections of markup, entire pages, and even code, based on whether or not the user is authenticated and what roles they are in.
In order to create roles and assign them to users, we'll need a little helper application which I've already written and discussed in BlazorTrain episode 84, Identity Management.
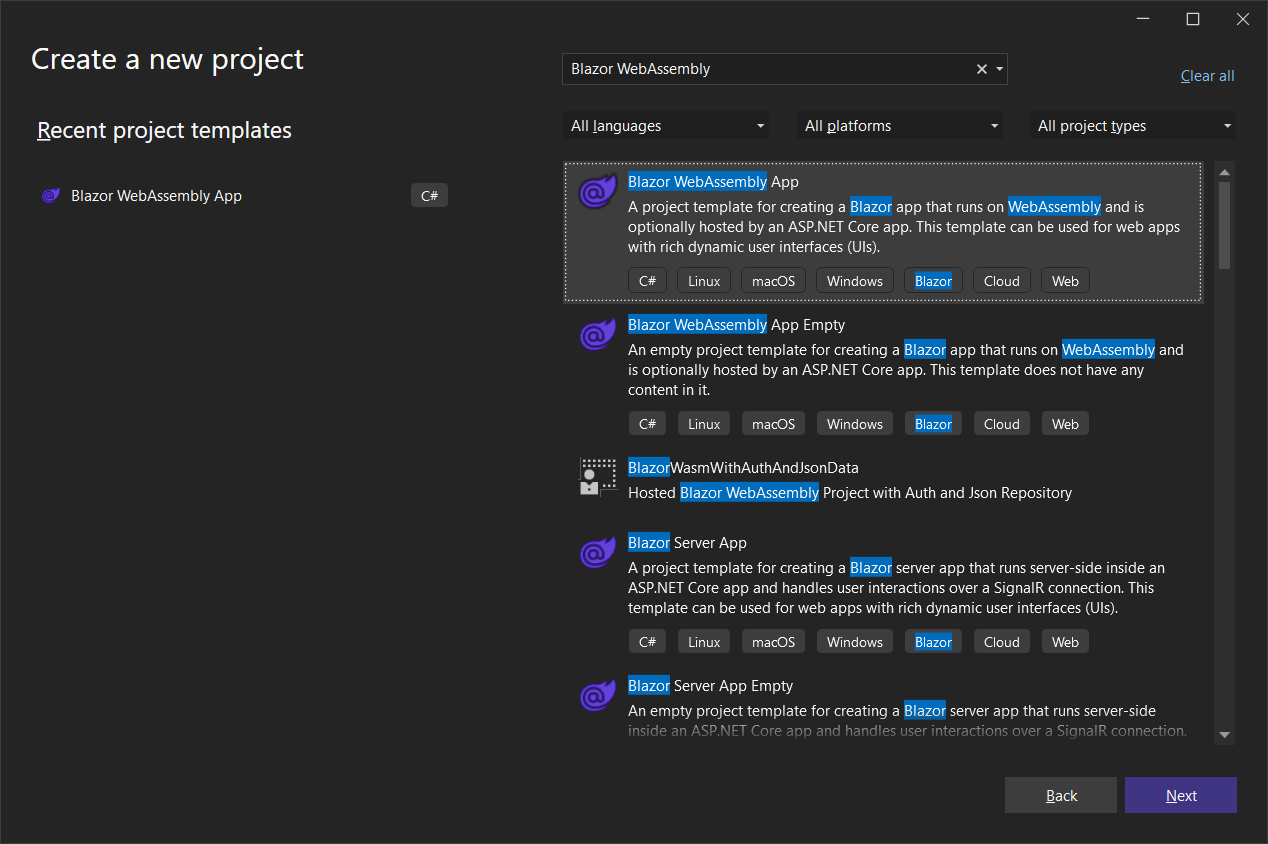
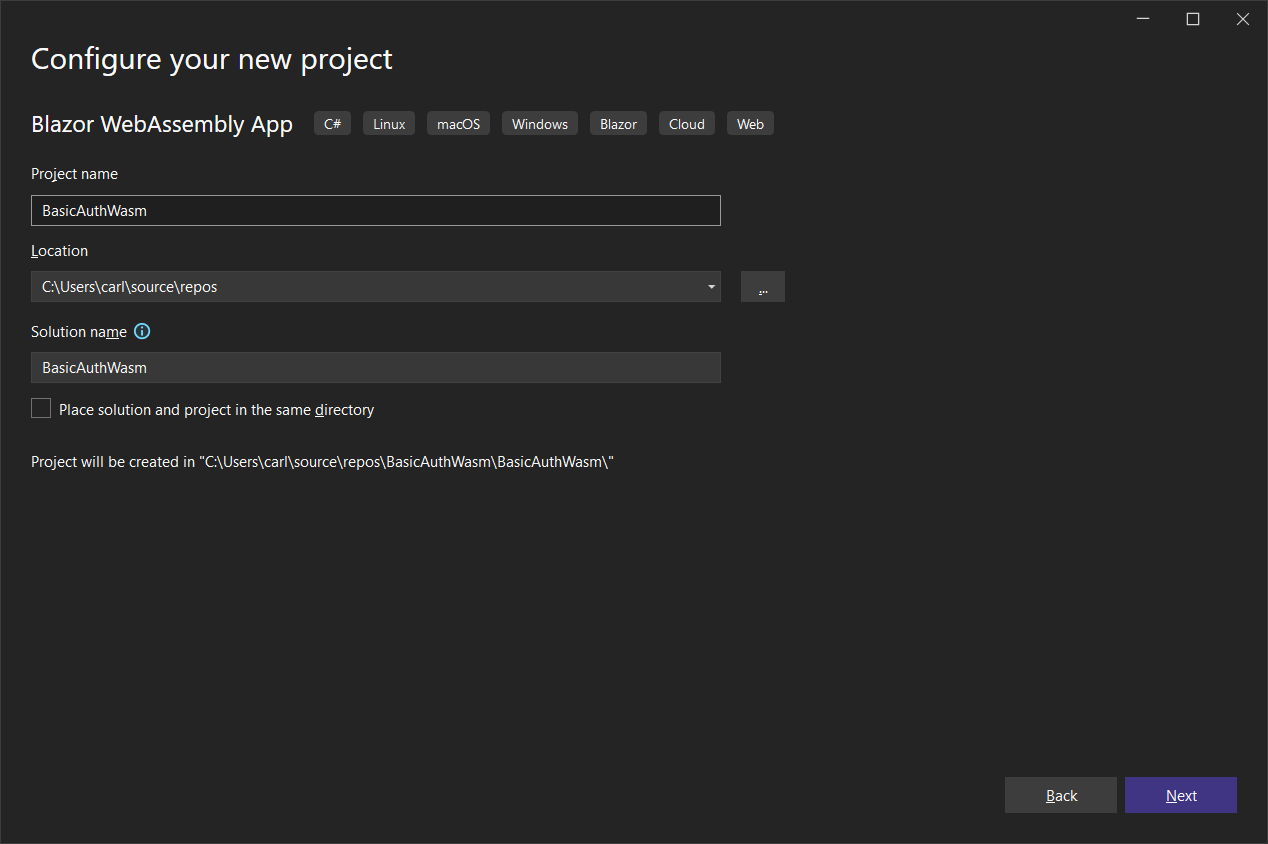
Create a new Blazor WebAssembly App project called BasicAuthWasm.
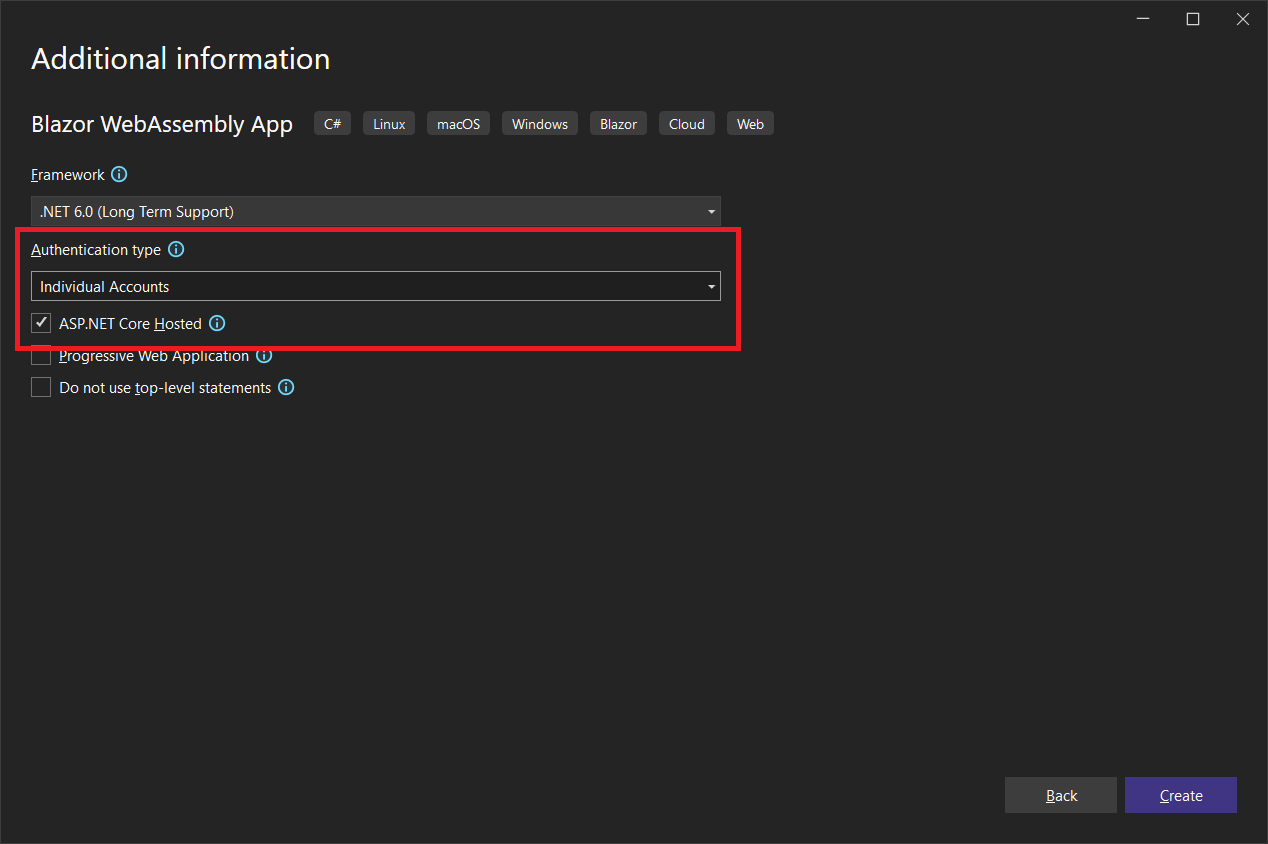
Make sure to set the Authentication type to Individual Accounts and also select ASM.NET Core Hosted.
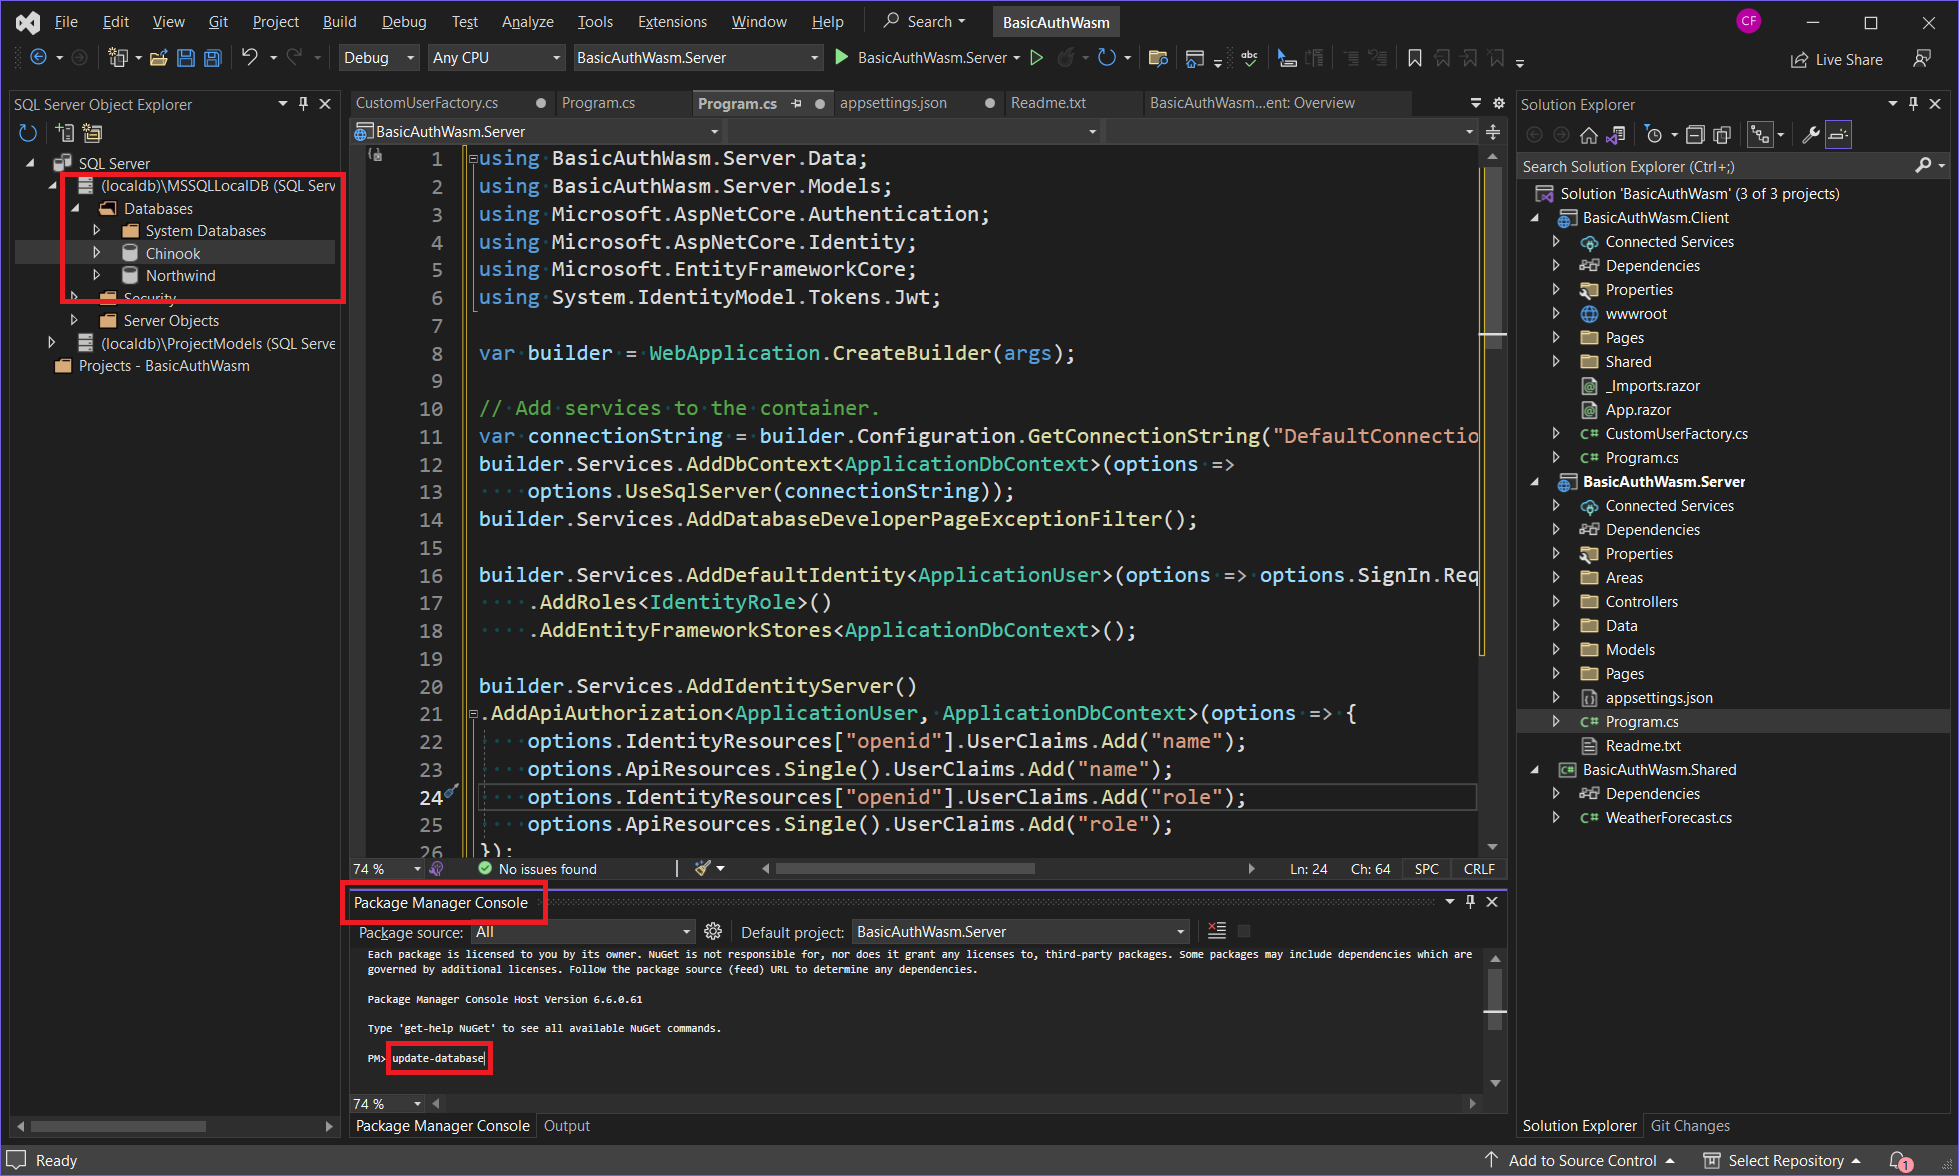
The template installs everything you need to create the identity database in your LocalDb SQL Server, but you still have to pull the trigger before the database is actually created.
A connection string has been created for you in appsettings.json with the name of the database that includes a random GUID string:
{
  "ConnectionStrings": {
    "DefaultConnection": "Server=(localdb)\\mssqllocaldb;Database=aspnet-BasicAuthWasm.Server-e208486f-f224-45f8-a9c5-c11f71bf7321;Trusted_Connection=True;MultipleActiveResultSets=true"
  },
  "Logging": {
    "LogLevel": {
      "Default": "Information",
      "Microsoft.AspNetCore": "Warning"
    }
  },
  "IdentityServer": {
    "Clients": {
      "BasicAuthWasm.Client": {
        "Profile": "IdentityServerSPA"
      }
    }
  },
  "AllowedHosts": "*"
}
You can leave that as is if you like, but I prefer to be a bit more specific to my app for this demo, so let's rename the database to simply BasicAuthWasm:
{
  "ConnectionStrings": {
    "DefaultConnection": "Server=(localdb)\\mssqllocaldb;Database=BasicAuthWasm;Trusted_Connection=True;MultipleActiveResultSets=true"
  },
  "Logging": {
    "LogLevel": {
      "Default": "Information",
      "Microsoft.AspNetCore": "Warning"
    }
  },
  "IdentityServer": {
    "Clients": {
      "BasicAuthWasm.Client": {
        "Profile": "IdentityServerSPA"
      }
    }
  },
  "AllowedHosts": "*"
}
Next, we need to add support for roles. You don't get that out of the box.
To the BasicAuthWasm.Client project, add the following class:
CustomUserFactory.cs:
using System.Security.Claims;
using System.Text.Json;
using Microsoft.AspNetCore.Components.WebAssembly.Authentication;
using Microsoft.AspNetCore.Components.WebAssembly.Authentication.Internal;

namespace BasicAuthWasm.Client;

public class CustomUserFactory
    : AccountClaimsPrincipalFactory<RemoteUserAccount>
{
    public CustomUserFactory(IAccessTokenProviderAccessor accessor)
        : base(accessor)
    {
    }

    public async override ValueTask<ClaimsPrincipal> CreateUserAsync(
        RemoteUserAccount account,
        RemoteAuthenticationUserOptions options)
    {
        var user = await base.CreateUserAsync(account, options);

        if (user.Identity.IsAuthenticated)
        {
            var identity = (ClaimsIdentity)user.Identity;
            var roleClaims = identity.FindAll(identity.RoleClaimType).ToArray();

            if (roleClaims != null && roleClaims.Any())
            {
                foreach (var existingClaim in roleClaims)
                {
                    identity.RemoveClaim(existingClaim);
                }

                var rolesElem = account.AdditionalProperties[identity.RoleClaimType];

                if (rolesElem is JsonElement roles)
                {
                    if (roles.ValueKind == JsonValueKind.Array)
                    {
                        foreach (var role in roles.EnumerateArray())
                        {
                            identity.AddClaim(new Claim(options.RoleClaim, role.GetString()));
                        }
                    }
                    else
                    {
                        identity.AddClaim(new Claim(options.RoleClaim, roles.GetString()));
                    }
                }
            }
        }

        return user;
    }
}
This ensures we can access the name and role claims on the client side.
In the client-side Program.cs, replace this:
builder.Services.AddApiAuthorization();with this:
builder.Services.AddApiAuthorization()
    .AddAccountClaimsPrincipalFactory<CustomUserFactory>();
In the BasicAuthWasm.Server project, replace Program.cs with the following:
using BasicAuthWasm.Server.Data;
using BasicAuthWasm.Server.Models;
using Microsoft.AspNetCore.Authentication;
using Microsoft.AspNetCore.Identity;
using Microsoft.EntityFrameworkCore;
using System.IdentityModel.Tokens.Jwt;

var builder = WebApplication.CreateBuilder(args);

// Add services to the container.
var connectionString = builder.Configuration.GetConnectionString("DefaultConnection");
builder.Services.AddDbContext<ApplicationDbContext>(options =>
    options.UseSqlServer(connectionString));
builder.Services.AddDatabaseDeveloperPageExceptionFilter();

builder.Services.AddDefaultIdentity<ApplicationUser>(options =>	options.SignIn.RequireConfirmedAccount = true)
    .AddRoles<IdentityRole>()
    .AddEntityFrameworkStores<ApplicationDbContext>();

builder.Services.AddIdentityServer()
.AddApiAuthorization<ApplicationUser, ApplicationDbContext>(options => {
    options.IdentityResources["openid"].UserClaims.Add("name");
    options.ApiResources.Single().UserClaims.Add("name");
    options.IdentityResources["openid"].UserClaims.Add("role");
    options.ApiResources.Single().UserClaims.Add("role");
});

JwtSecurityTokenHandler.DefaultInboundClaimTypeMap.Remove("role");

builder.Services.AddAuthentication()
    .AddIdentityServerJwt();

builder.Services.AddControllersWithViews();
builder.Services.AddRazorPages();

var app = builder.Build();

// Configure the HTTP request pipeline.
if (app.Environment.IsDevelopment())
{
    app.UseMigrationsEndPoint();
    app.UseWebAssemblyDebugging();
}
else
{
    app.UseExceptionHandler("/Error");
    // The default HSTS value is 30 days. You may want to change this for production scenarios, see https://aka.ms/aspnetcore-hsts.
    app.UseHsts();
}

app.UseHttpsRedirection();

app.UseBlazorFrameworkFiles();
app.UseStaticFiles();

app.UseRouting();

app.UseIdentityServer();
app.UseAuthentication();
app.UseAuthorization();


app.MapRazorPages();
app.MapControllers();
app.MapFallbackToFile("index.html");

app.Run();
We changed this:
builder.Services.AddDefaultIdentity<ApplicationUser>(options => options.SignIn.RequireConfirmedAccount = true)
    .AddEntityFrameworkStores<ApplicationDbContext>();
to this:
builder.Services.AddDefaultIdentity<ApplicationUser>(options => options.SignIn.RequireConfirmedAccount = true)
    .AddRoles<IdentityRole>()
    .AddEntityFrameworkStores<ApplicationDbContext>();
This allows us to use Identity Roles on the server side.
We also changed this:
builder.Services.AddIdentityServer()
    .AddApiAuthorization<ApplicationUser, ApplicationDbContext>();
to this:
builder.Services.AddIdentityServer()
.AddApiAuthorization<ApplicationUser, ApplicationDbContext>(options => {
    options.IdentityResources["openid"].UserClaims.Add("name");
    options.ApiResources.Single().UserClaims.Add("name");
    options.IdentityResources["openid"].UserClaims.Add("role");
    options.ApiResources.Single().UserClaims.Add("role");
});

JwtSecurityTokenHandler.DefaultInboundClaimTypeMap.Remove("role");
This gives us access to the name and role claims in Identity Server, which does the authentication.
Now we can create the Identity Database.
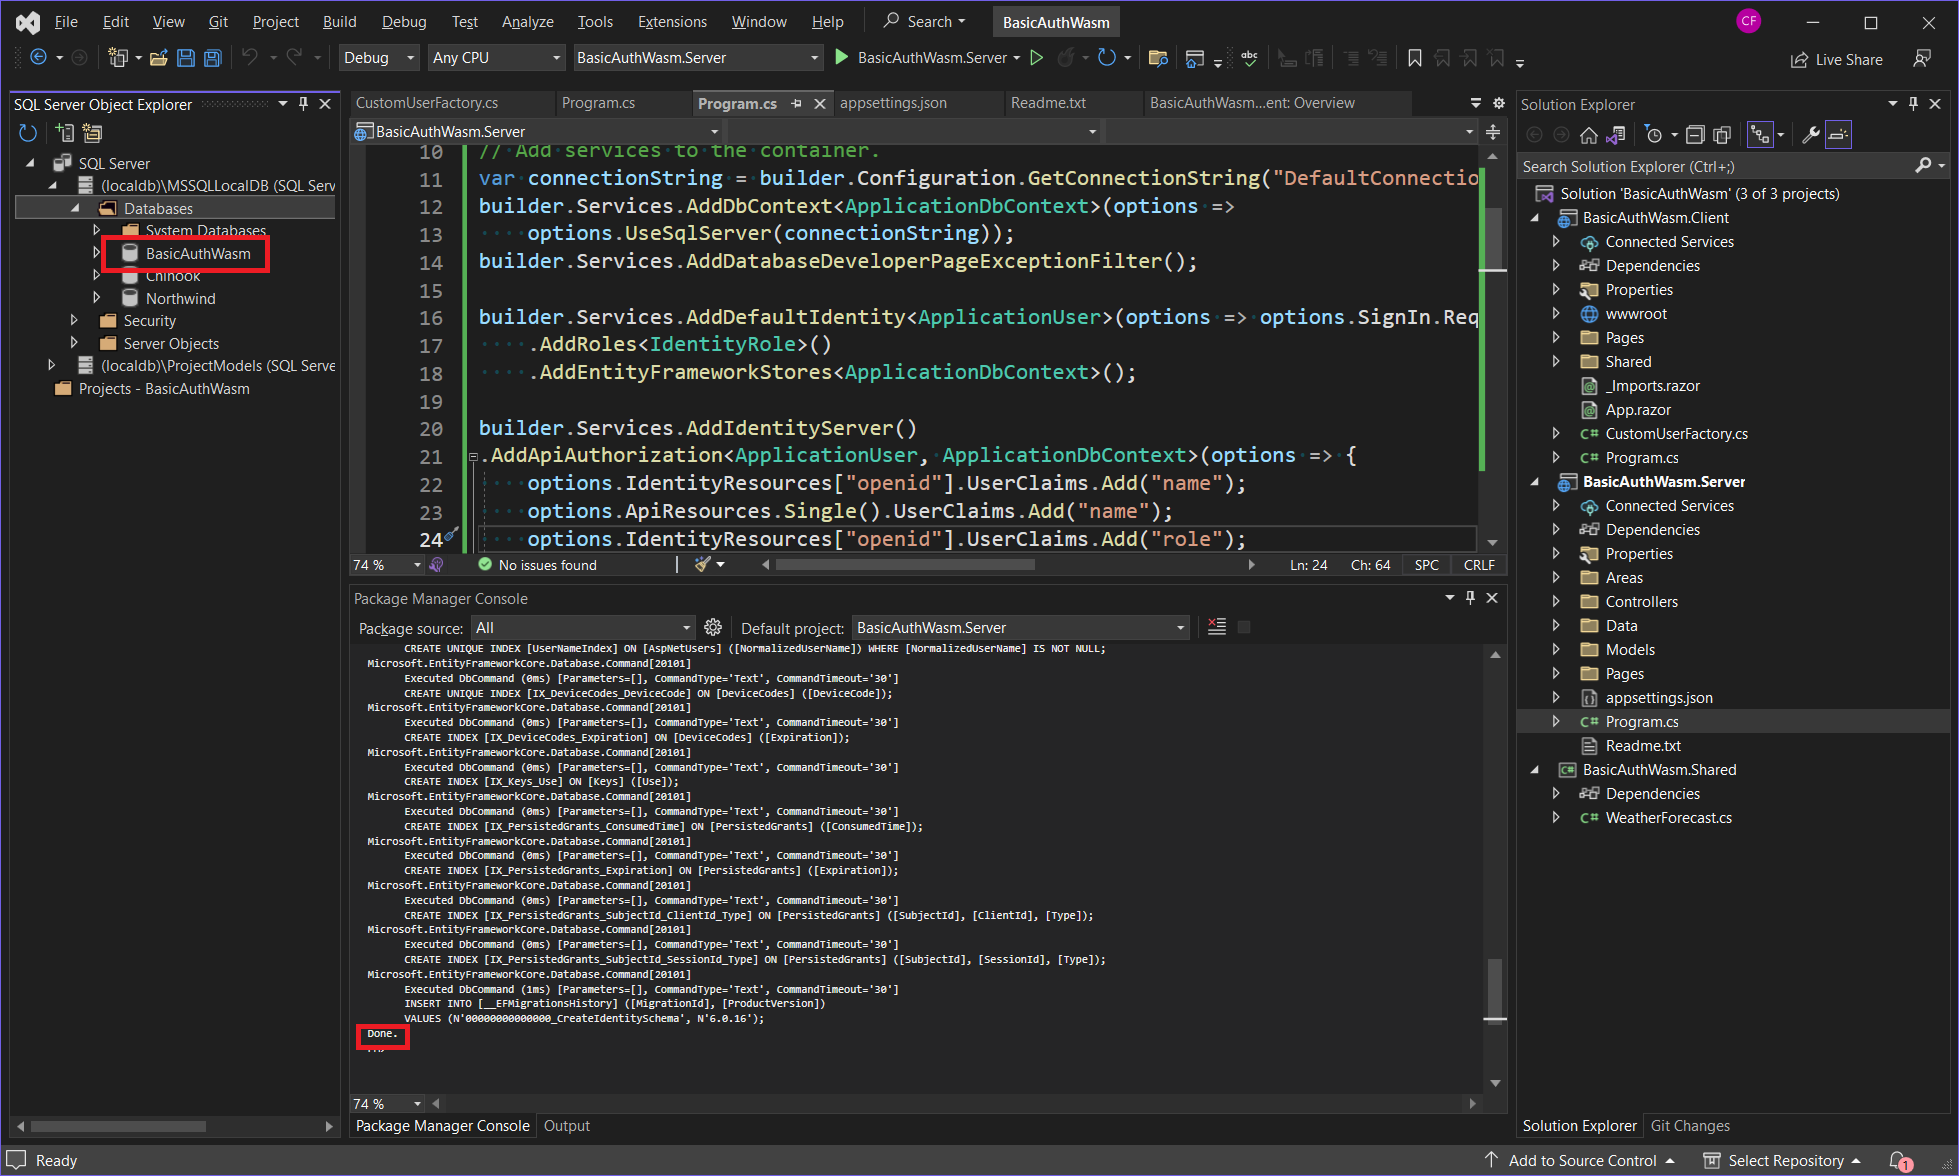
If you open the Sql Server Object Explorer window, and expand the localdb databases, you will see only the databases that you've already created.
Execute this command in the Package Manager Console window:
update-database
When it is done, you can refresh the list of databases to see the BasicAuthWasm database.
Let's start by doing a little authorization of markup.
Replace \shared\NavMenu.razor with the following:
<div class="top-row ps-3 navbar navbar-dark">
    <div class="container-fluid">
        <a class="navbar-brand" href="">BasicAuthWasm</a>
        <button title="Navigation menu" class="navbar-toggler" @onclick="ToggleNavMenu">
            <span class="navbar-toggler-icon"></span>
        </button>
    </div>
</div>

<div class="@NavMenuCssClass" @onclick="ToggleNavMenu">
    <nav class="flex-column">
        <div class="nav-item px-3">
            <NavLink class="nav-link" href="" Match="NavLinkMatch.All">
                <span class="oi oi-home" aria-hidden="true"></span> Home
            </NavLink>
        </div>
        <AuthorizeView>
            <div class="nav-item px-3">
                <NavLink class="nav-link" href="counter">
                    <span class="oi oi-plus" aria-hidden="true"></span> Counter
                </NavLink>
            </div>
        </AuthorizeView>
        <AuthorizeView Roles="admin">
            <div class="nav-item px-3">
                <NavLink class="nav-link" href="fetchdata">
                    <span class="oi oi-list-rich" aria-hidden="true"></span> Fetch data
                </NavLink>
            </div>
        </AuthorizeView>
    </nav>
</div>

@code {
    private bool collapseNavMenu = true;

    private string? NavMenuCssClass => collapseNavMenu ? "collapse" : null;

    private void ToggleNavMenu()
    {
        collapseNavMenu = !collapseNavMenu;
    }
}
You can see that I've enclosed the NavLink to Counter in an <AuthorizeView> component:
<AuthorizeView>
    <div class="nav-item px-3">
        <NavLink class="nav-link" href="counter">
            <span class="oi oi-plus" aria-hidden="true"></span> Counter
        </NavLink>
    </div>
</AuthorizeView>
This means the user must be authenticated (logged in) before they can see that NavLink.
Also, look at the <AuthorizeView> I put around the link to the FetchData NavLink:
<AuthorizeView Roles="admin">
    <div class="nav-item px-3">
        <NavLink class="nav-link" href="fetchdata">
            <span class="oi oi-list-rich" aria-hidden="true"></span> Fetch data
        </NavLink>
    </div>
</AuthorizeView>
Not only does the user need to be logged in to see this NavLink, but they must be in the admin role. More on roles later.
☝️ You can use
<AuthorizeView>around any bit of markup in any component or page to restrict it.
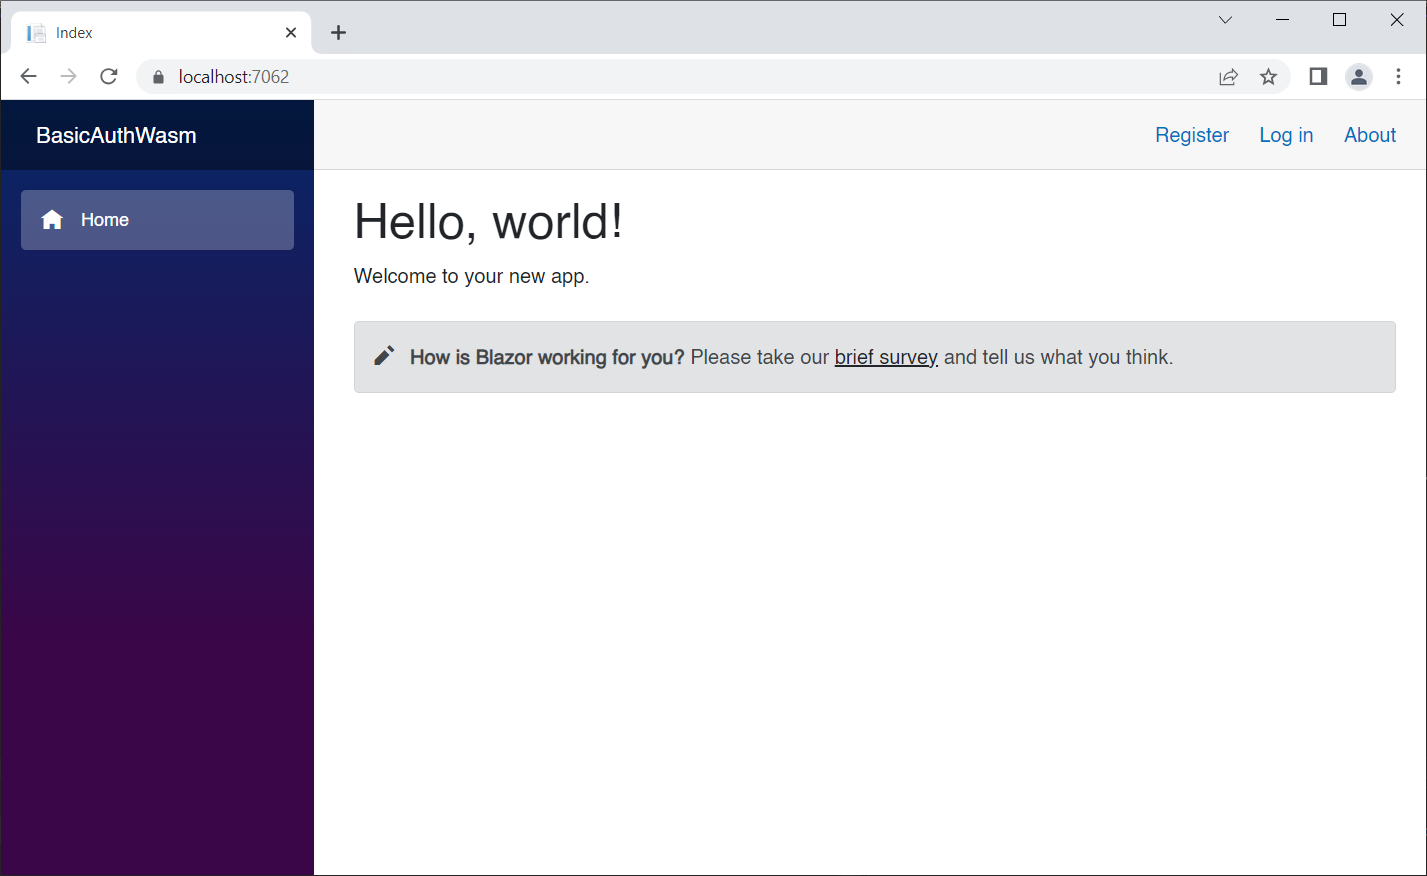
Run the app to ensure we can't see these NavLinks:
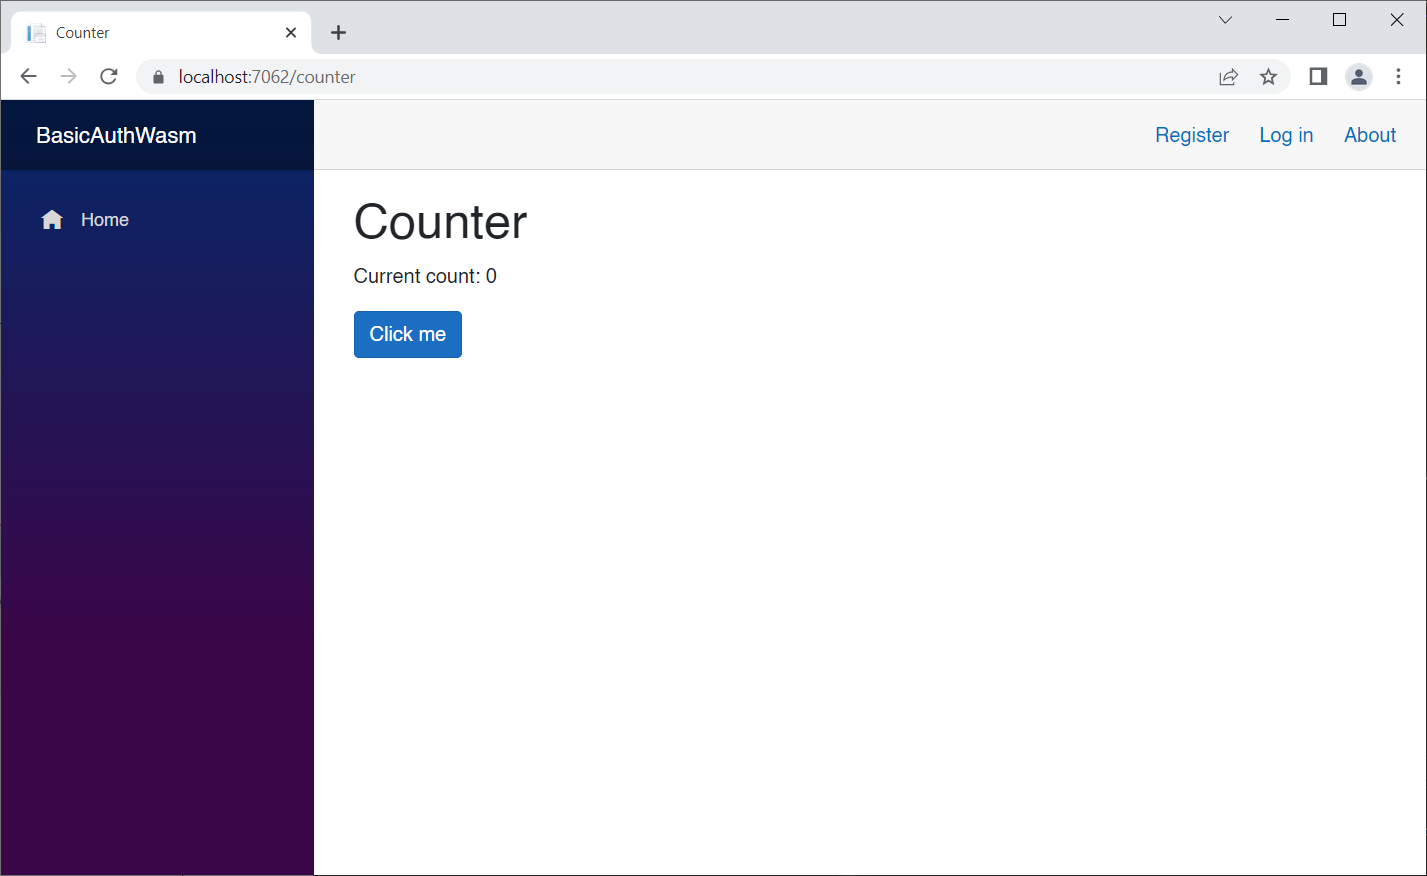
However, you should note that the user can still use the Counter page just by specifying the route in the URL:
This is possible because we only restricted the NavLink objects. In order to really secure the app, we will need to restrict the Counter page.
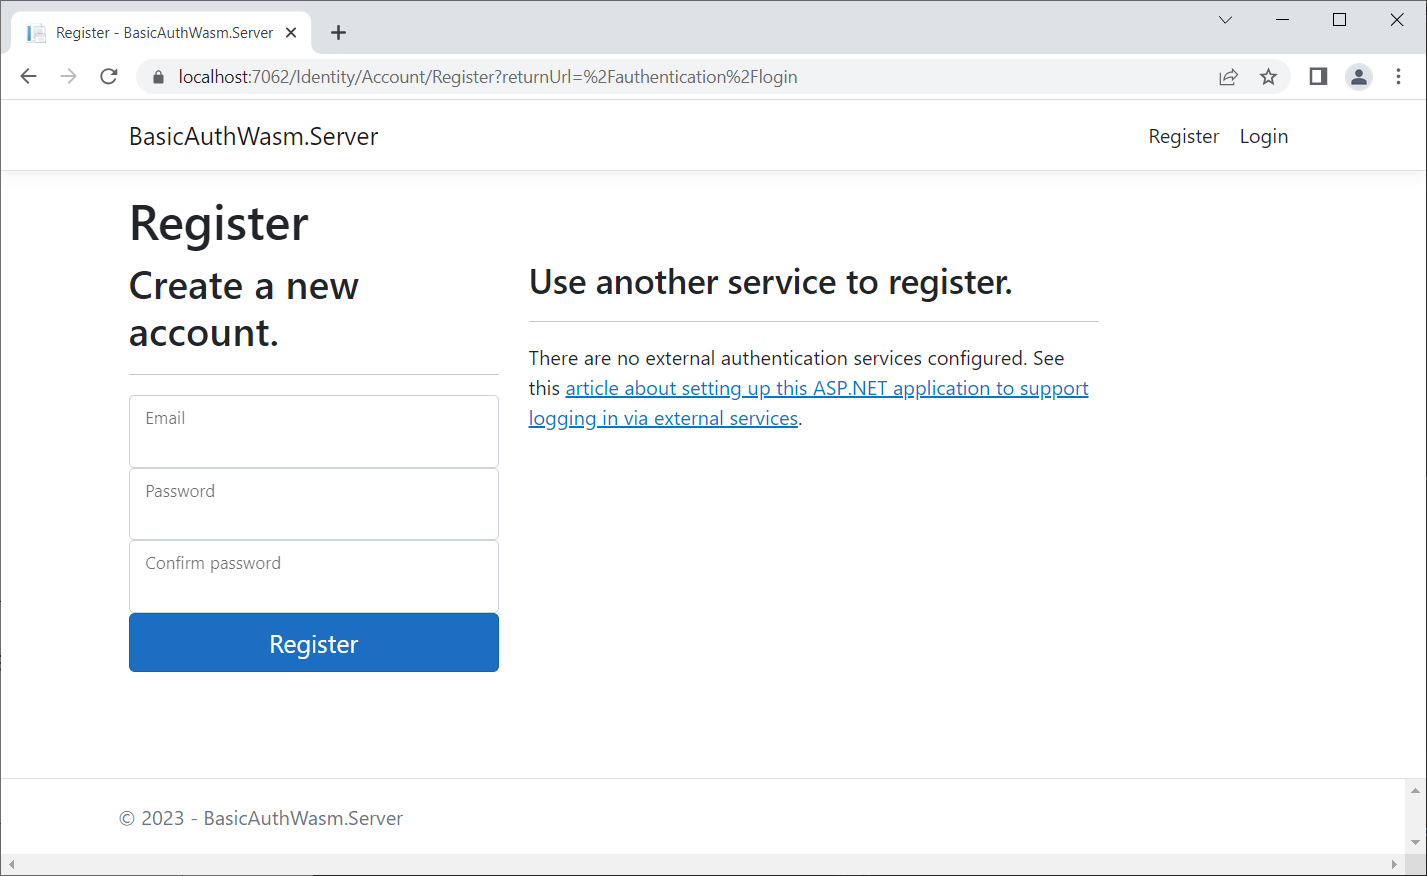
Click the Register link in the top-right. You'll be presented with a screen that looks like this:
Enter a user name and password. It doesn't have to be secure. This is your private database on your desktop. My password is "P@ssword1".
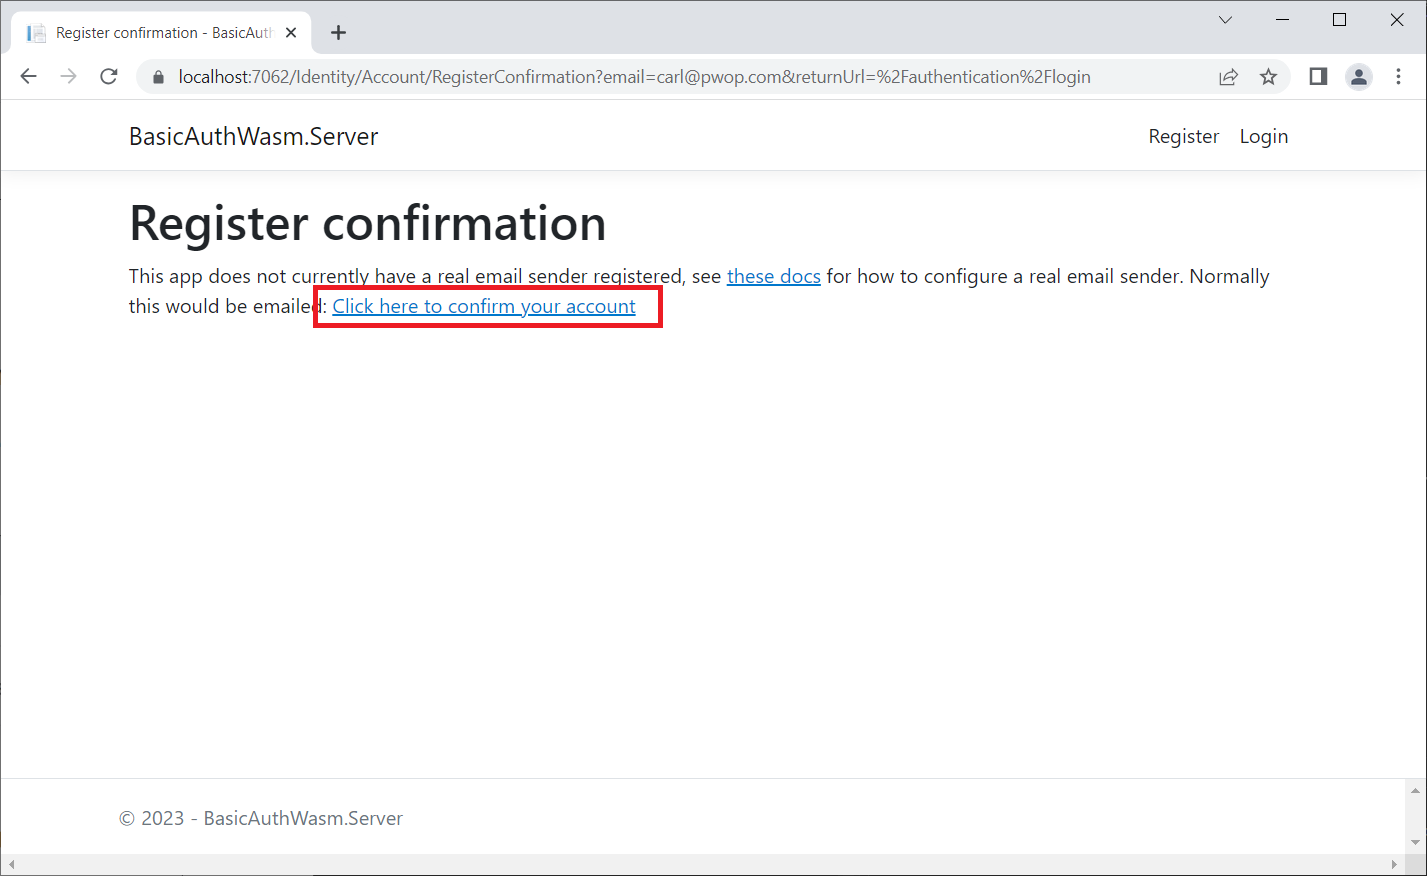
Click the Register button and you'll be asked to click on a link in order to confirm your account.
This is a shortcut because you don't have an email sender registered, so the app can't do an email verification.
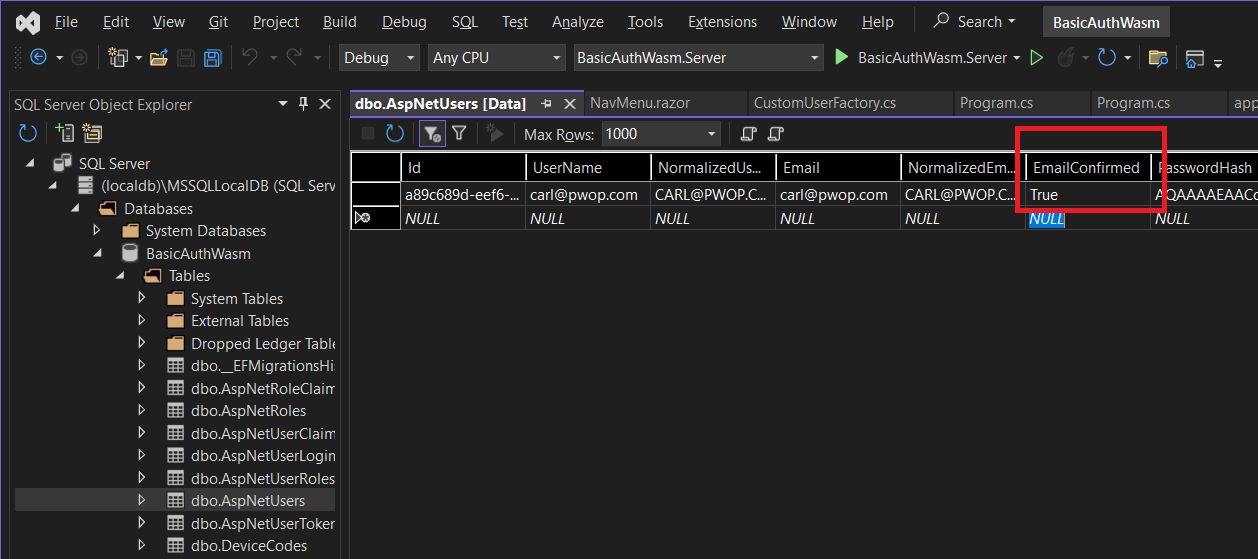
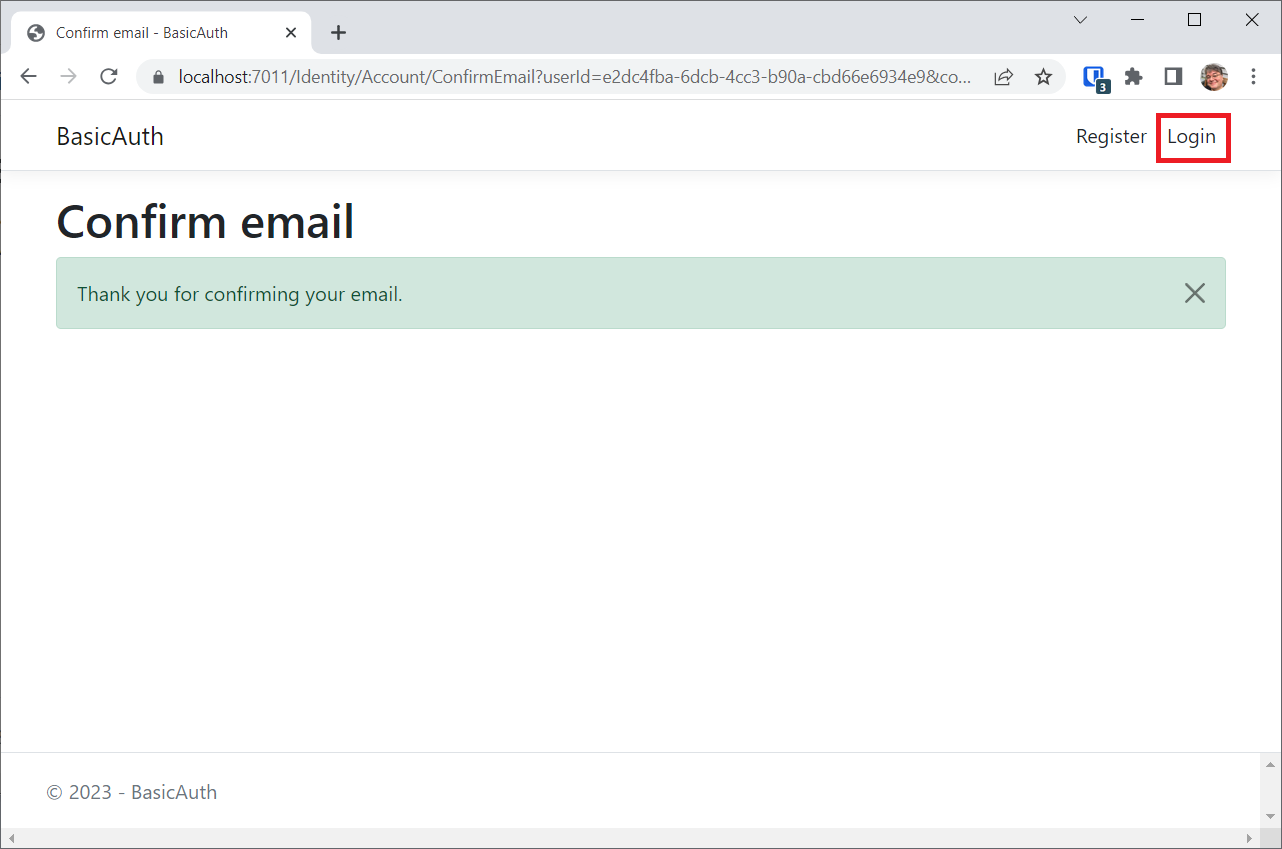
Once you click this link, you can look in the dbo.AspNetUsers table, and see that the EmailConfirmed field in your user record has been set to True. If you do not do this, authentication will fail.
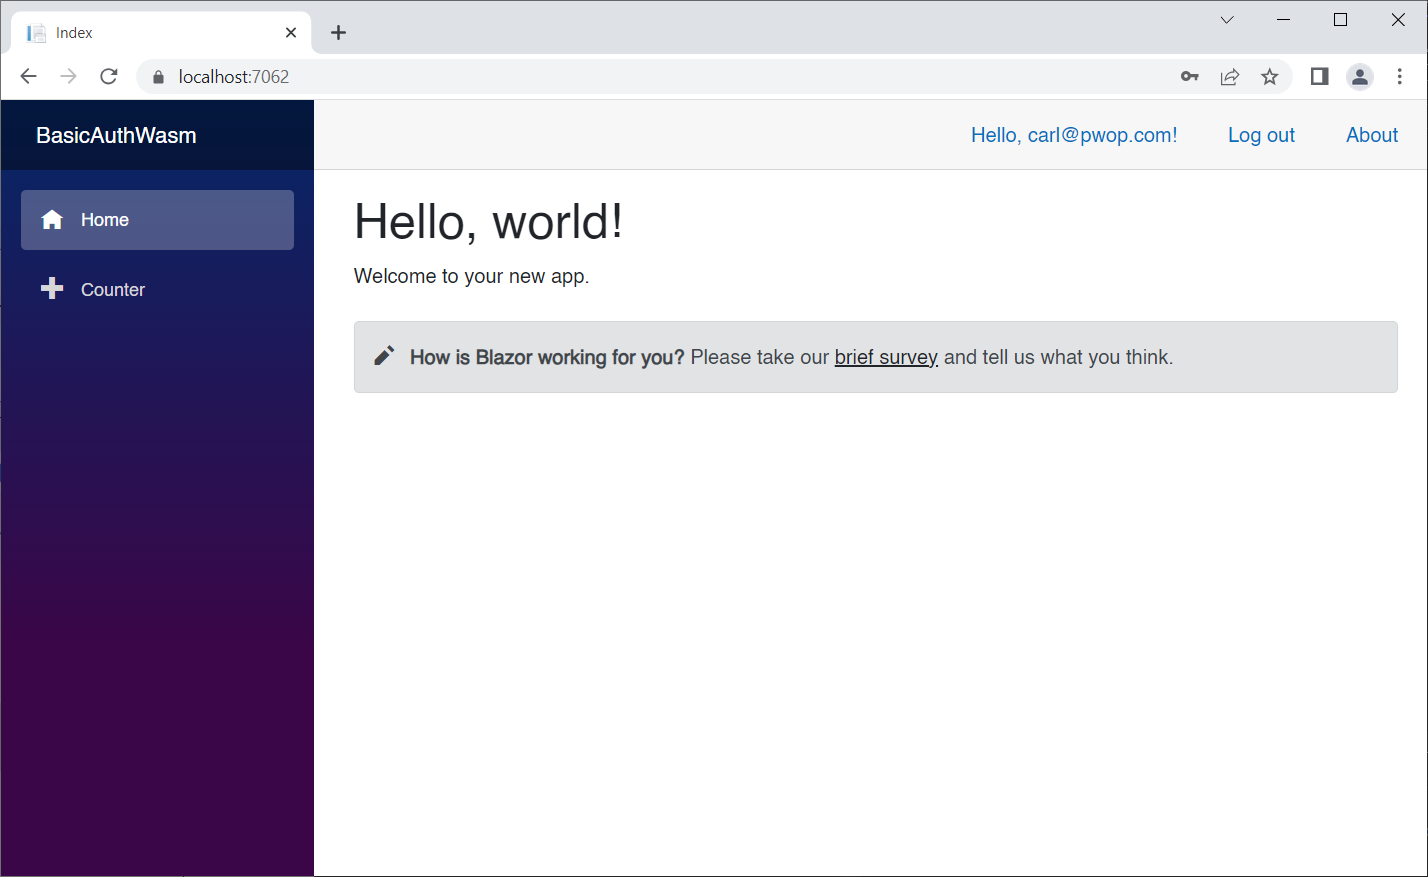
After successfully registering, you can log in.
Now you can see that the NavLink for the Counter page is enabled, but the FetchData NavLink is still not showing. That's because we require the user to be in the admin role, remember?
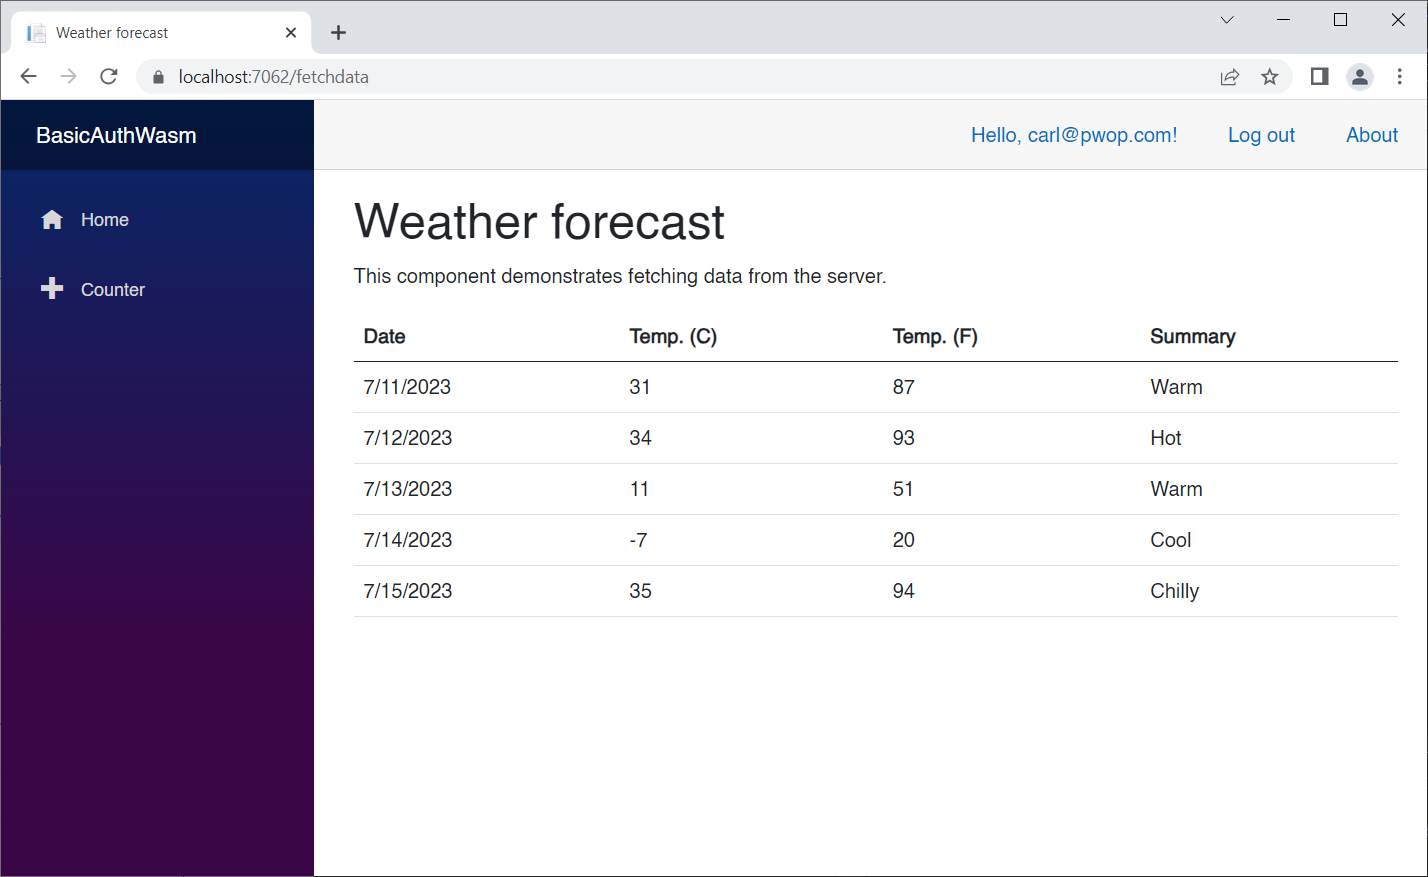
However, we can still navigate to the FetchData page by specifying the route:
Let's button up our two authorized pages now.
Add the following to Counter.razor at line 2:
@using Microsoft.AspNetCore.Authorization
@using Microsoft.AspNetCore.Components.WebAssembly.Authentication
@attribute [Authorize]
This will require the user to be authenticated (logged in) in order to see the page.
Notice that FetchData.razor already has an [Authorize]attribute at line 5. If the user tries to access the FetchData page without being logged in, they would be denied access.
Let's modify to require a role called admin.
@attribute [Authorize(Roles = "admin")]This requires the user to be authenticated AND in the admin role.
Log out and log in again. Now you can not:
- access either Counter or FetchData if you are not logged in, even if you specify the route in the url
- access FetchData if you are not in the admin role
The Visual Studio template doesn't provide a means to manage roles and users. To address this, I built a netstandard class library based on this GitHub repo by mguinness.
It's called IdentityManagerLibrary. Download or clone the repo, and set IdentityManagerBlazorServer as the startup project.
All you have to do is set the ConnectionString to the Identity Database in the appsettings.json file to the BasicAuthWasm database, run it, and you'll be able to add roles and users.
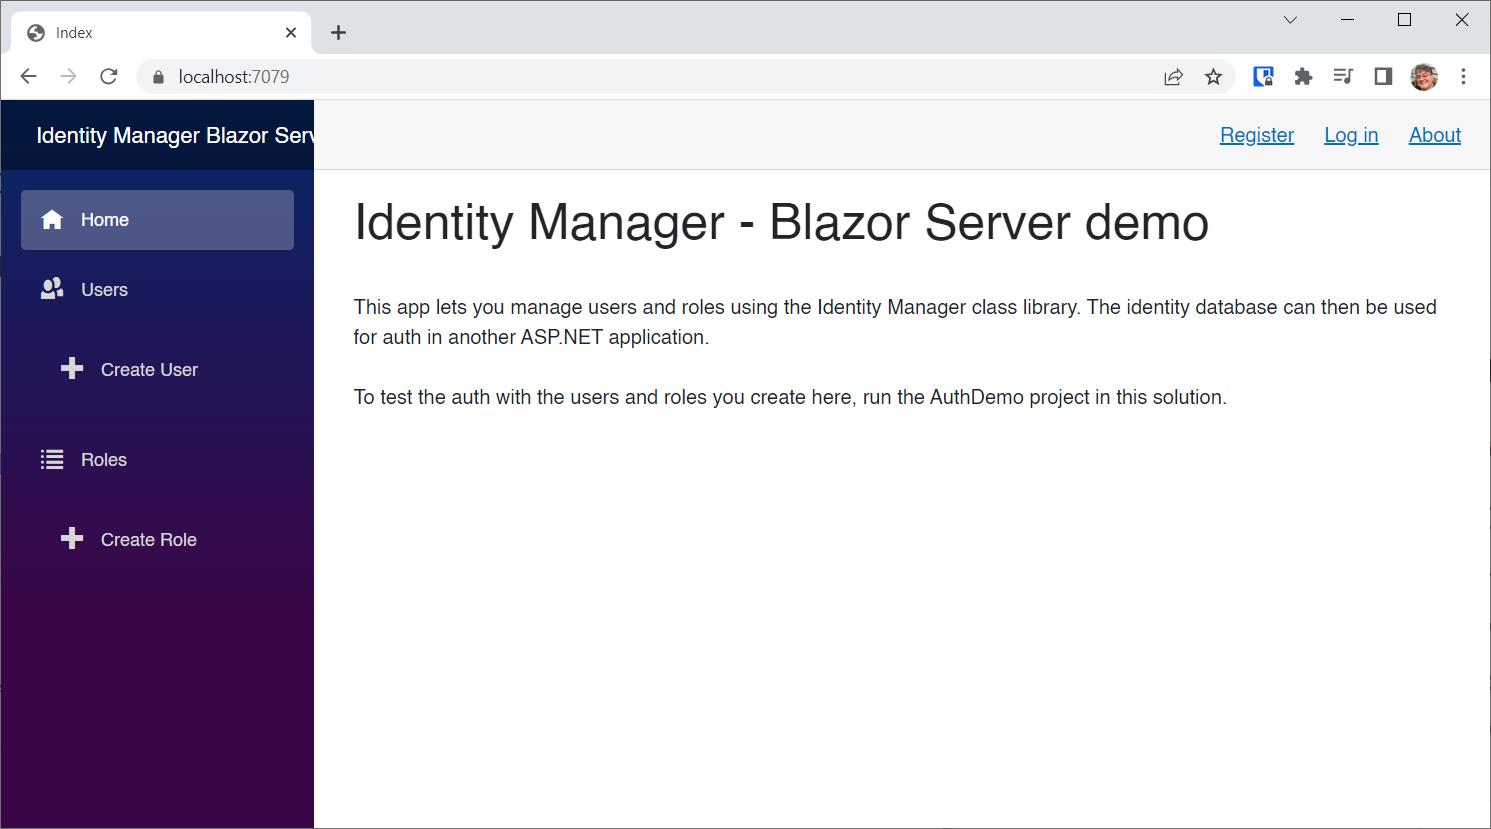
After changing the connection string, run the app:
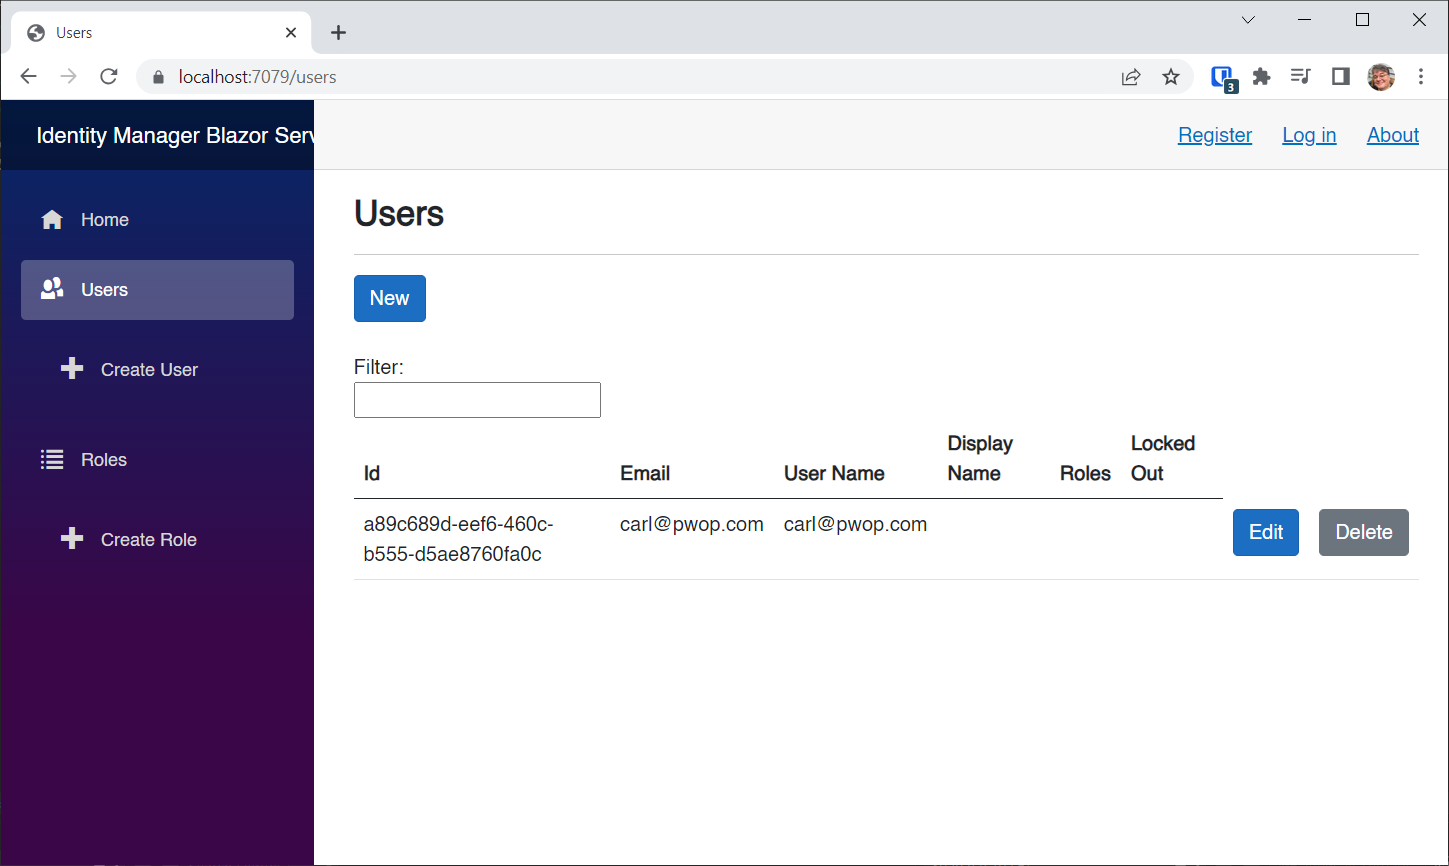
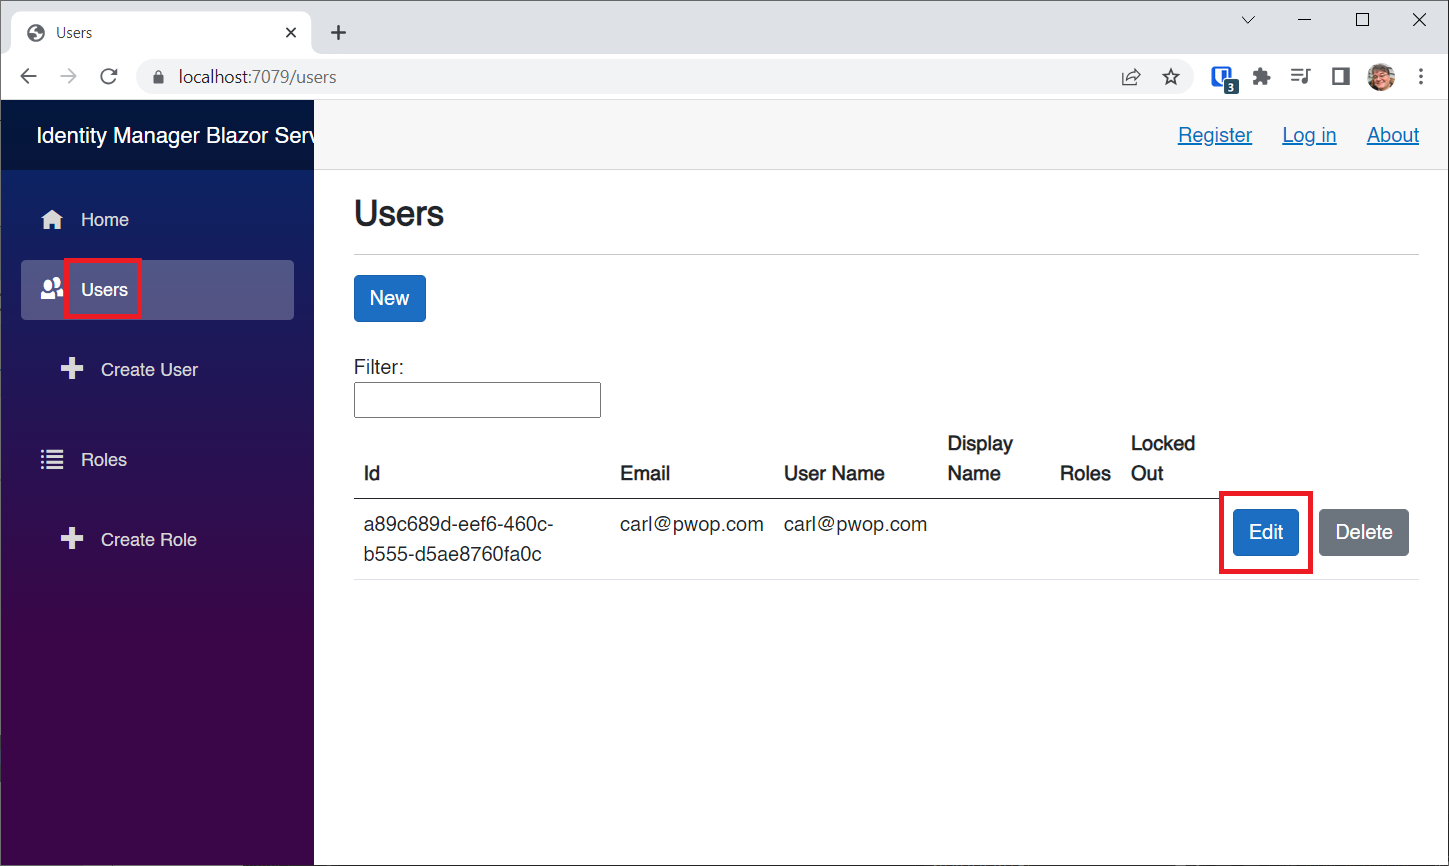
Click on the Users NavLink.
There's my user with no roles set.
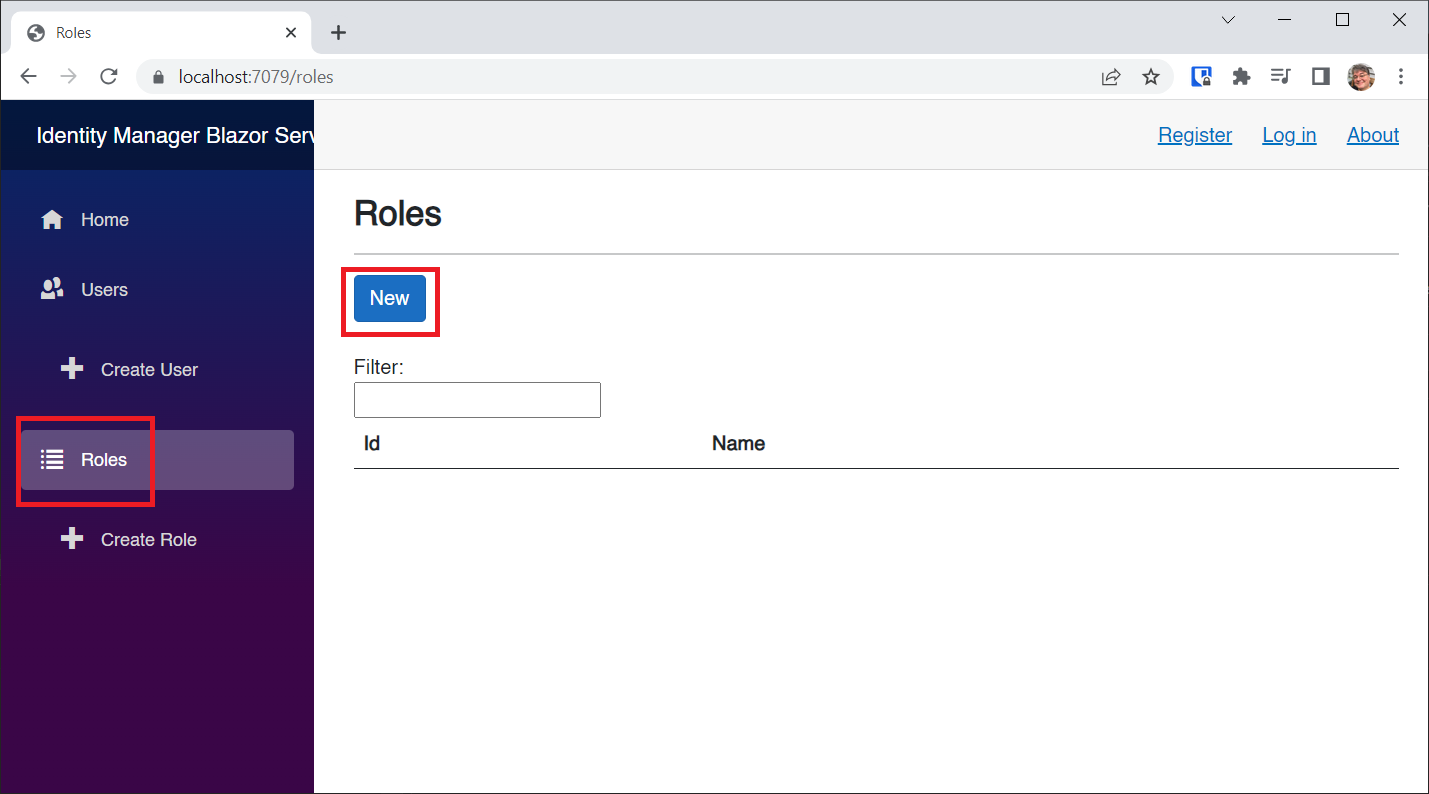
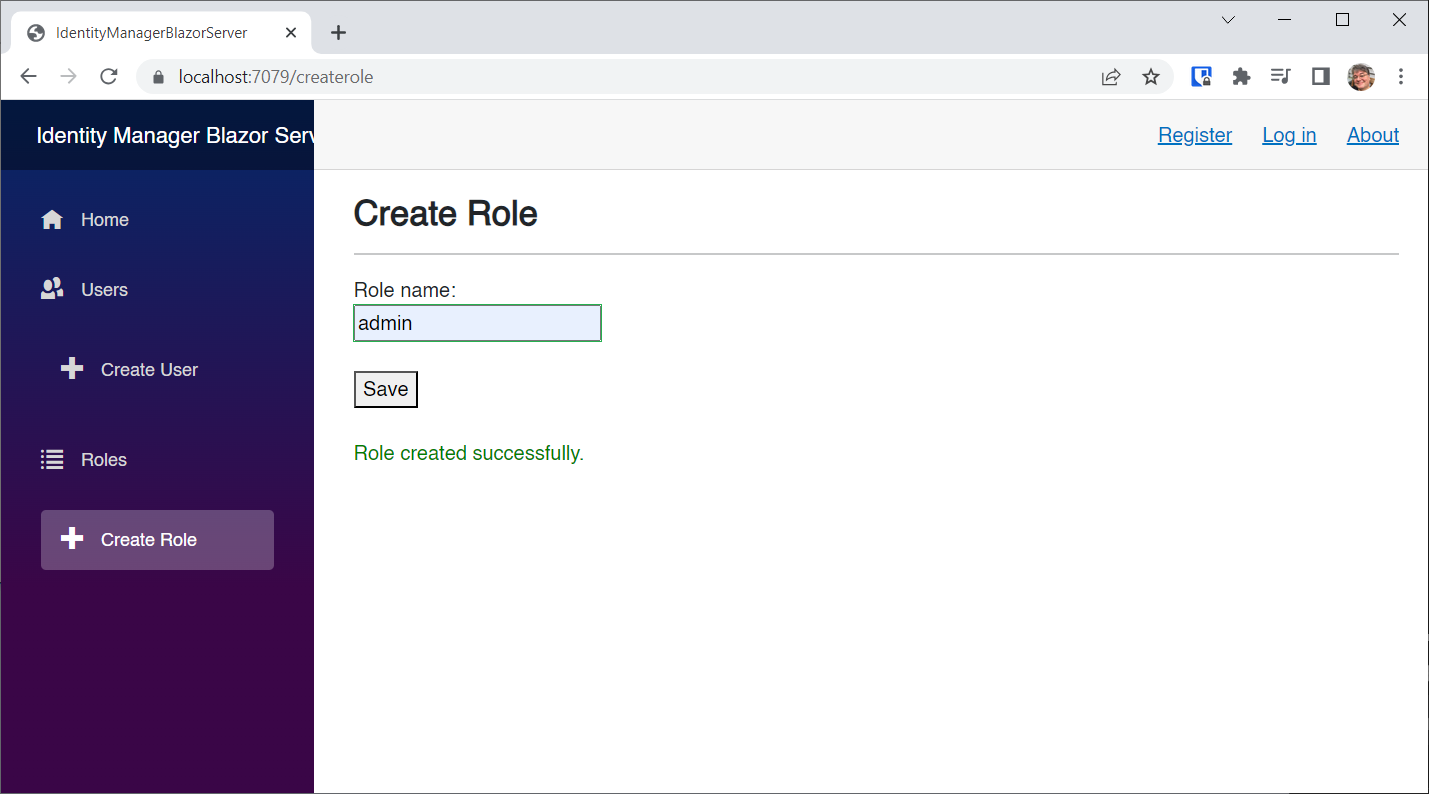
Click the Roles NavLink and then click the New button to add a role:
Enter admin as the role name, and click the Save button:
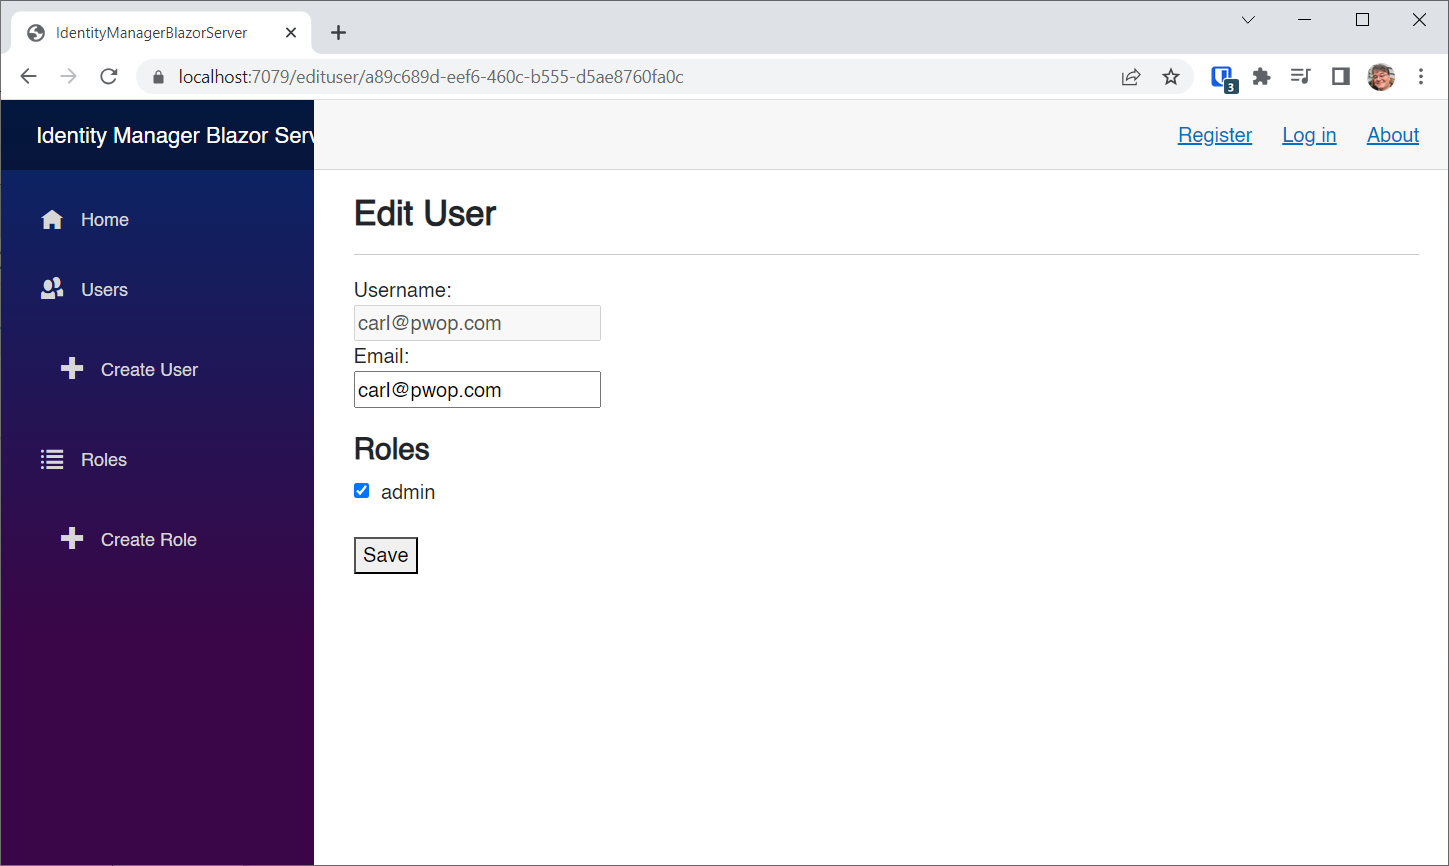
Now, navigate back to the Users page and click the Edit button to edit our user:
Select the admin role, and click the Save button:
Leave this app running if you can, and run the BasicAuthWasm app again.
☝️ If you are logged in, you must log out and log in again in order to get a current authentication token.
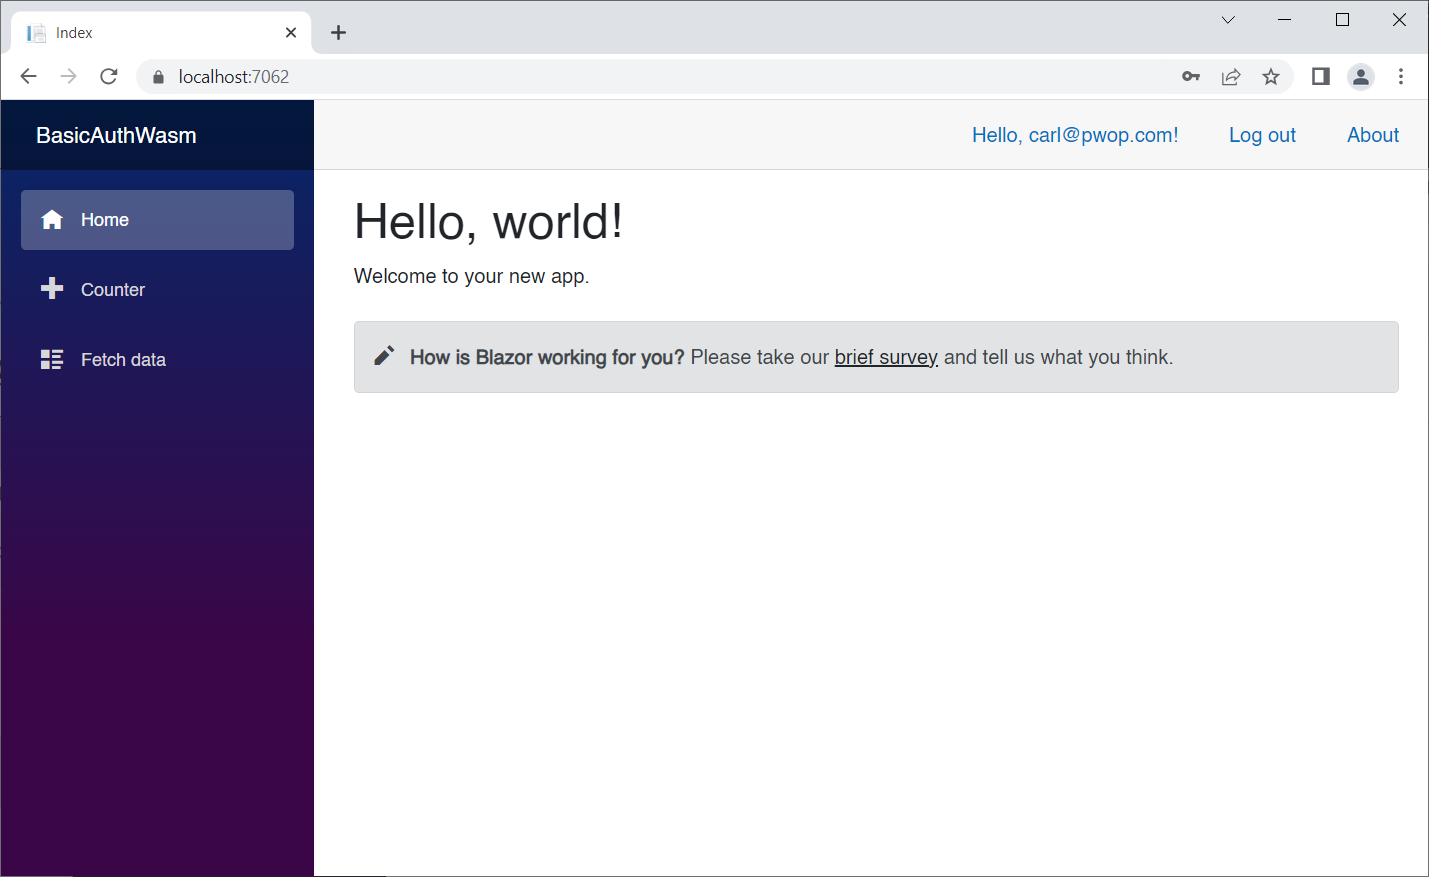
Now we can see both Navlinks on the left, and we can also access both Counter and FetchData:
So far we have been authorizing markup with <AuthorizeView> and entire pages using the @attribute [Authorize] attribute. We can also inspect the logged-in user to determine whether they are authenticated and what roles they are in. That let's us use code logic to determine if the user has permission to execute specific code.
Take a look at App.razor:
<CascadingAuthenticationState>
    <Router AppAssembly="@typeof(App).Assembly">
        <Found Context="routeData">
            <AuthorizeRouteView RouteData="@routeData" DefaultLayout="@typeof(MainLayout)">
                <NotAuthorized>
                    @if (context.User.Identity?.IsAuthenticated != true)
                    {
                        <RedirectToLogin />
                    }
                    else
                    {
                        <p role="alert">You are not authorized to access this resource.</p>
                    }
                </NotAuthorized>
            </AuthorizeRouteView>
            <FocusOnNavigate RouteData="@routeData" Selector="h1" />
        </Found>
        <NotFound>
            <PageTitle>Not found</PageTitle>
            <LayoutView Layout="@typeof(MainLayout)">
                <p role="alert">Sorry, there's nothing at this address.</p>
            </LayoutView>
        </NotFound>
    </Router>
</CascadingAuthenticationState>
When you specify the Individual Accounts option in the Visual Studio project wizard, your entire application has access to the authentication state as a cascading parameter.
Replace Counter.razor with the following:
@page "/counter"
@using Microsoft.AspNetCore.Authorization
@using Microsoft.AspNetCore.Components.WebAssembly.Authentication
@attribute [Authorize]
@using System.Security.Claims

<PageTitle>Counter</PageTitle>

<h1>Counter</h1>

<p role="status">Current count: @currentCount</p>

<button class="btn btn-primary" @onclick="IncrementCount">Click me</button>

<br/><br/>
<div style="color:red;">
    @errorMessage
</div>

@code {
    private int currentCount = 0;
    string errorMessage = string.Empty;

    ClaimsPrincipal user = null;

    [CascadingParameter]
    private Task<AuthenticationState>? authenticationState { get; set; }

    private void IncrementCount()
    {
        errorMessage = "";

        // this should never happen because viewing the page is authorized
        if (user == null) return;

        // this should also never happen because viewing the page is authorized
        if (!user.Identity.IsAuthenticated) return;

        if (user.IsInRole("counterClicker"))
        {
            // success!
            currentCount++;
        }
        else
        {
            // wah-wah
            errorMessage = "You do not have permission to increment the counter.";
        }
    }

    protected override async Task OnInitializedAsync()
    {
        if (authenticationState is not null)
        {
            var authState = await authenticationState;
            user = authState?.User;
        }
    }
}
In the @code block we've added a couple things:
string errorMessage = string.Empty;

ClaimsPrincipal user = null;

[CascadingParameter]
private Task<AuthenticationState>? authenticationState { get; set; }
We will use the errorMessage to display an error if the user does not have access.
The ClaimsPrincipal represents the logged in user.
The AuthenticationState cascading parameter lets us access the ClaimsPrincipal. This is done in the OnInitializedAsync() method:
protected override async Task OnInitializedAsync()
{
    if (authenticationState is not null)
    {
        var authState = await authenticationState;
        user = authState?.User;
    }
}
The real magic happens here:
private void IncrementCount()
{
    errorMessage = "";

    // this should never happen because viewing the page is authorized
    if (user == null) return;

    // this should also never happen because viewing the page is authorized
    if (!user.Identity.IsAuthenticated) return;

    if (user.IsInRole("counterClicker"))
    {
        // success!
        currentCount++;
    }
    else
    {
        // wah-wah
        errorMessage = "You do not have permission to increment the counter.";
    }
}
According to this, the user has to be in the counterClicker role in order to increment the counter. This check is done like so:
if (user.IsInRole("counterClicker"))
{
   ...
But before we can do that check, we have to make sure user is not null, and that the user is authenticated. These checks are likely not to fail, but it's good practice to check for every contingency.
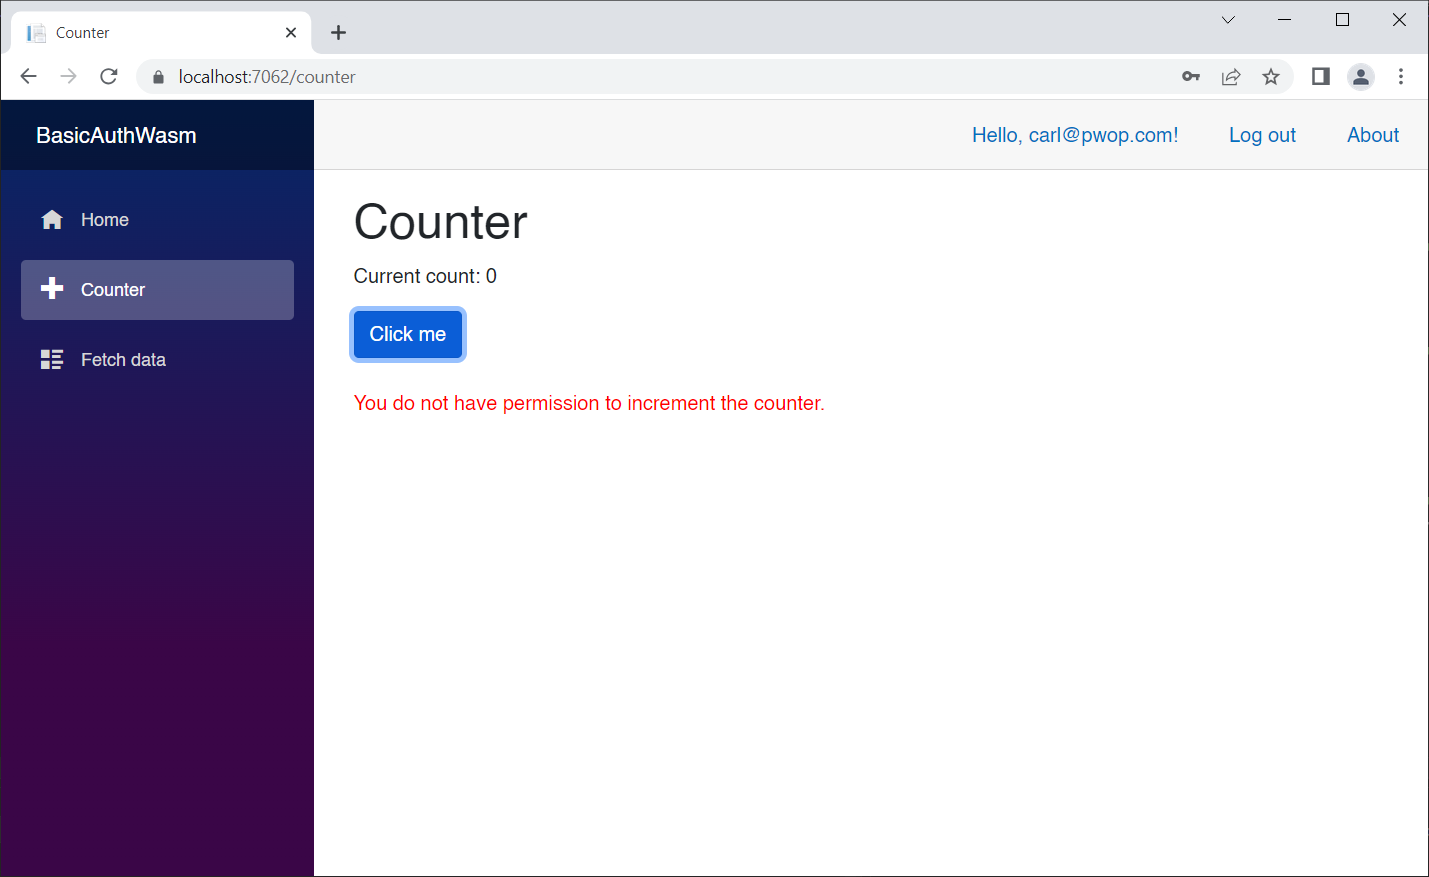
Run the app, log out if you're logged-in, log in, go to the Counter page, and click the button:
That's what we expected!
Now run the IdentityManagerBlazorServer app, add the counterClicker role, then assign it to our user.
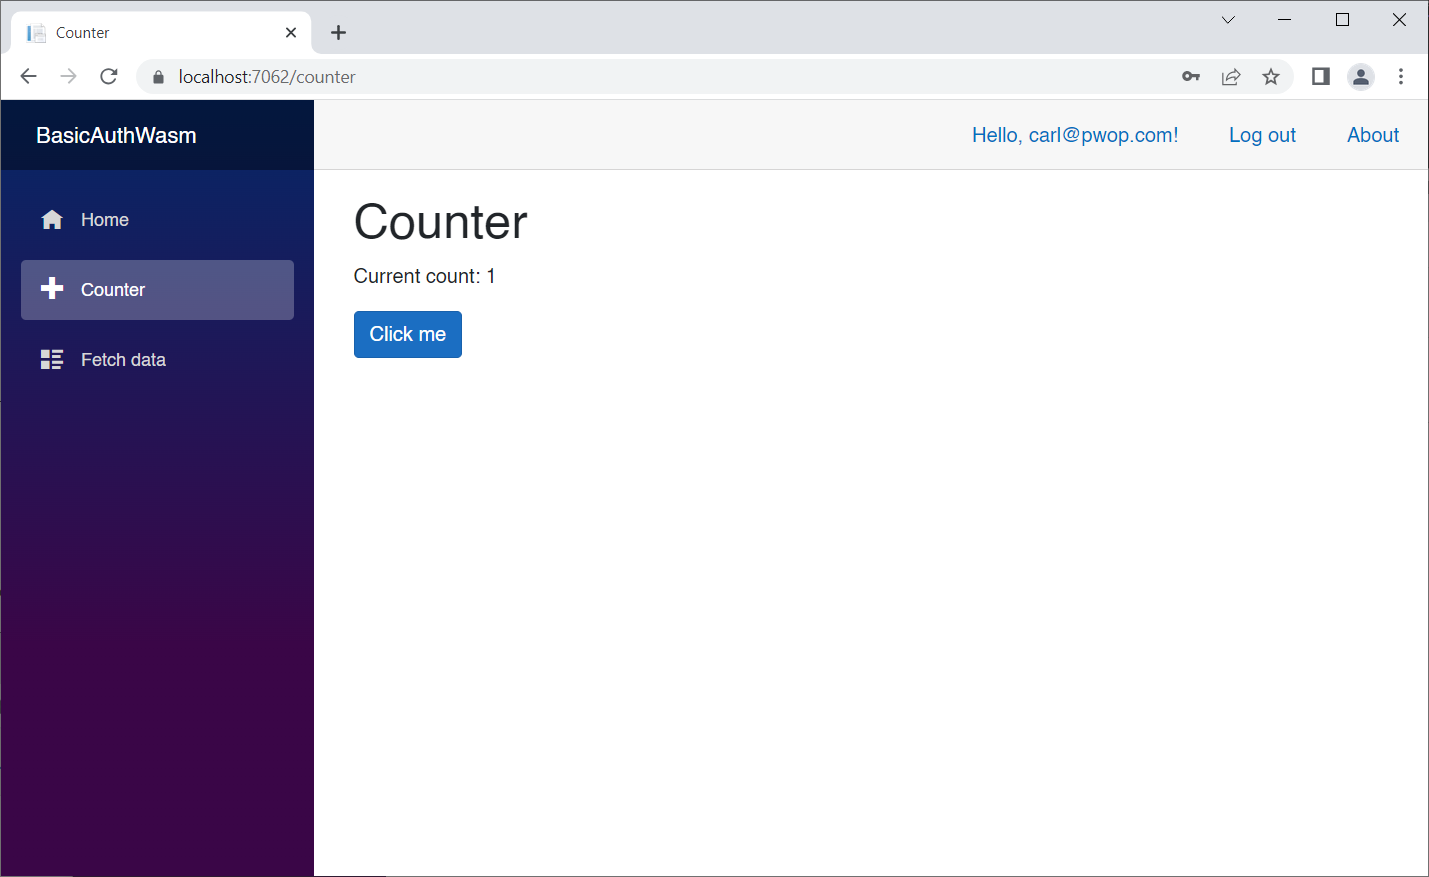
Run the AuthDemo app again, log out, log in, and try the counter button again. It now works as expected:
In this module we:
-
Created a new Blazor Hosted WebAssembly project with basic Individual Accounts Identity-based authentication.
-
Added a Custom Claims Principal class so we can access roles on the client
-
On the server, we added support for Identity Roles in Program.cs
- We also added support for Identity Server to handle roles
-
Modified the Identity Database connection string in appsettings.json
-
Generated the database with the
update-databasecommand -
Ran the app and registered a new user
-
Authorized markup in NavMenu.razor
-
Authorized the Counter.razor and FetchData.razor pages
-
Used the IdentityManagerBlazorServer app to add roles and assign them
-
Authorized access to code using a
ClaimsPrincipalobject representing the user
To watch a video of me creating this code from scratch check out BlazorTrain episode 27.
The complete list of videos with links to code can be found at https://blazortrain.com
