Sanity is the platform for structured content that allows you to manage your text, images and other media with APIs.
Sanity projects do not come with a GraphQL API by default. After creating the Sanity project you need to deploy the GraphQL API manually.
You can deploy the API only by using the command-line interface. Go into your project's directory and run:
sanity graphql deploy
The above command deploys the GraphQL API and also enables the GraphQL Playground. After the command finishes, it outputs the API endpoint.
If you want to see the endpoint again, you can run the following command in your project's directory:
sanity graphql list
It displays information about your GraphQL API, including the endpoint.
To add Sanity as a Remote Schema, you need the GraphQL API endpoint. You can retrieve it from the terminal and it should look as follows:
https://<yourProjectId>.api.sanity.io/v1/graphql/<dataset>/<tag>
Note: Your dataset is public by default. If it's public, everybody can access it without a token. That means you can add it to Hasura as a Remote Schema without needing any other information.
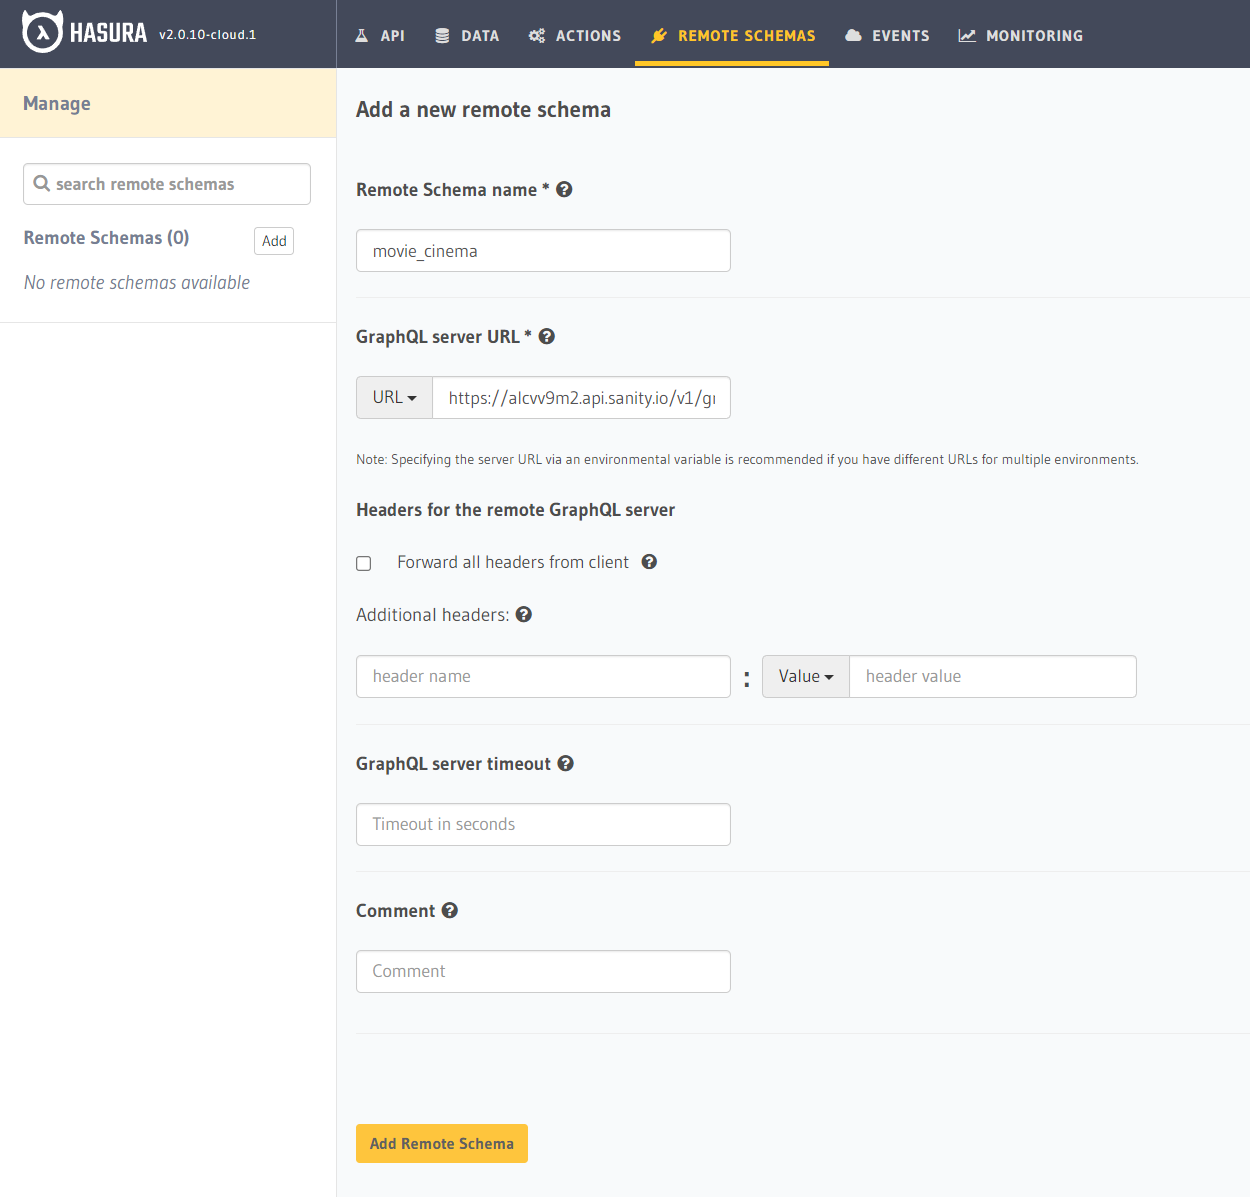
Head over to the Hasura Console, go to the "Remote Schemas" page and click on the "Add" button.
- Give your Remote Schema a name
- Add the GraphQL endpoint
- Click on "Add Remote Schema"
You are done! You can use the GraphQL API in Hasura.
Let's secure the API so only authenticated users can access it.
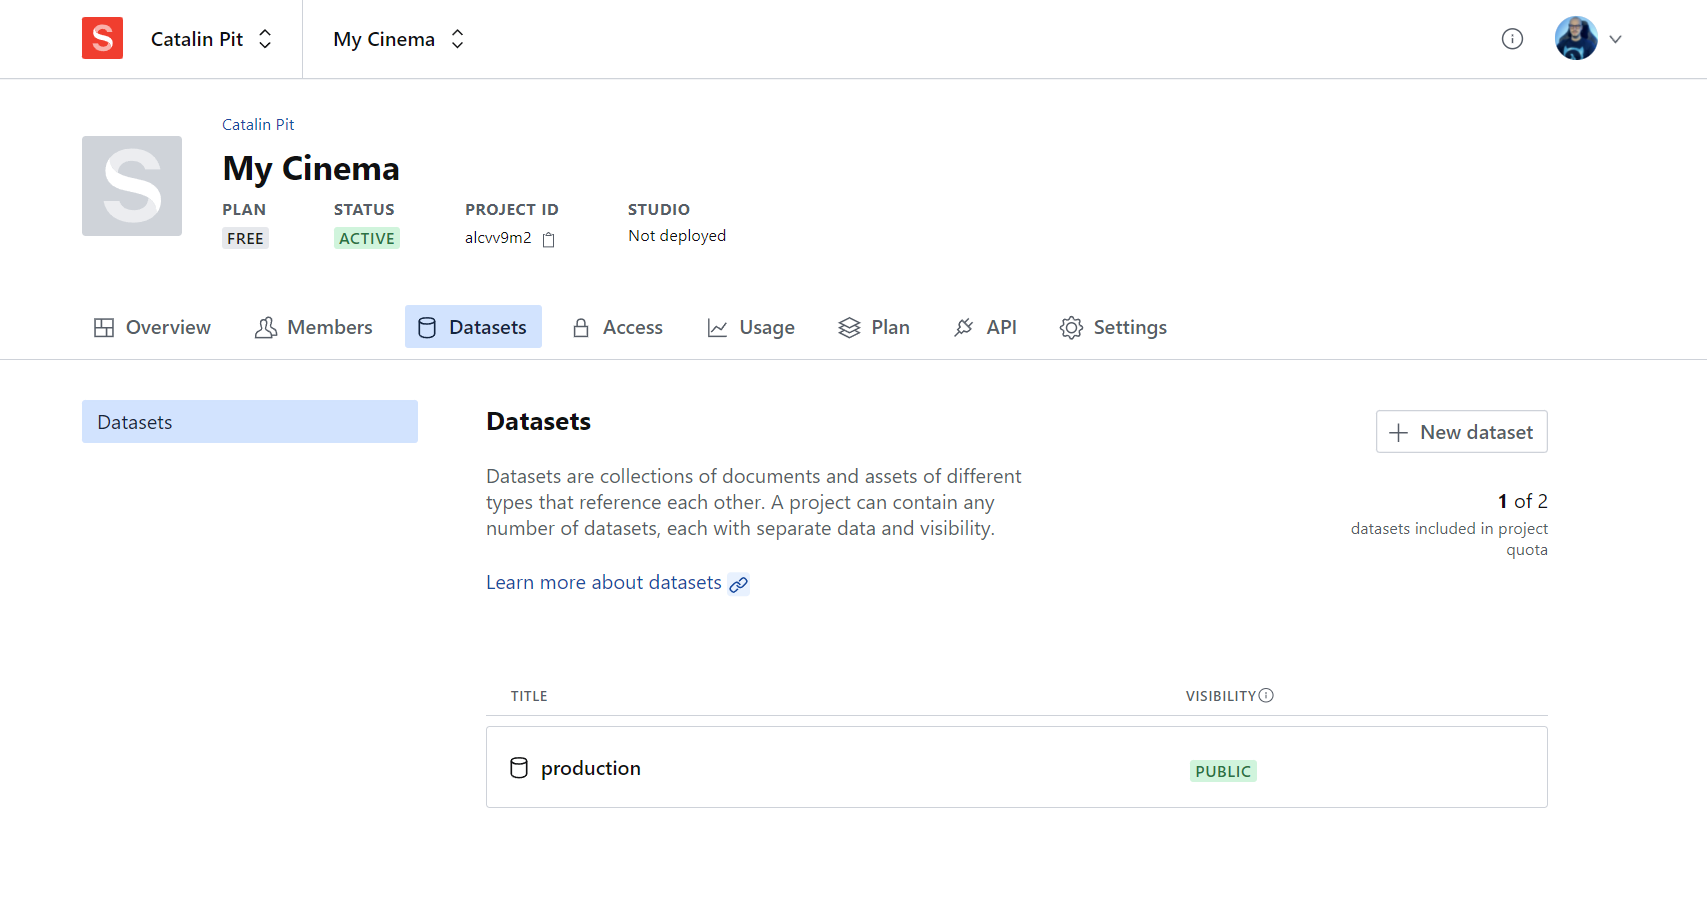
Go to your Sanity dashboard and choose your project.
After that, click on the Datasets option. Once you are on the Datasets page, click on the dataset. In this example, my dataset is named "production".
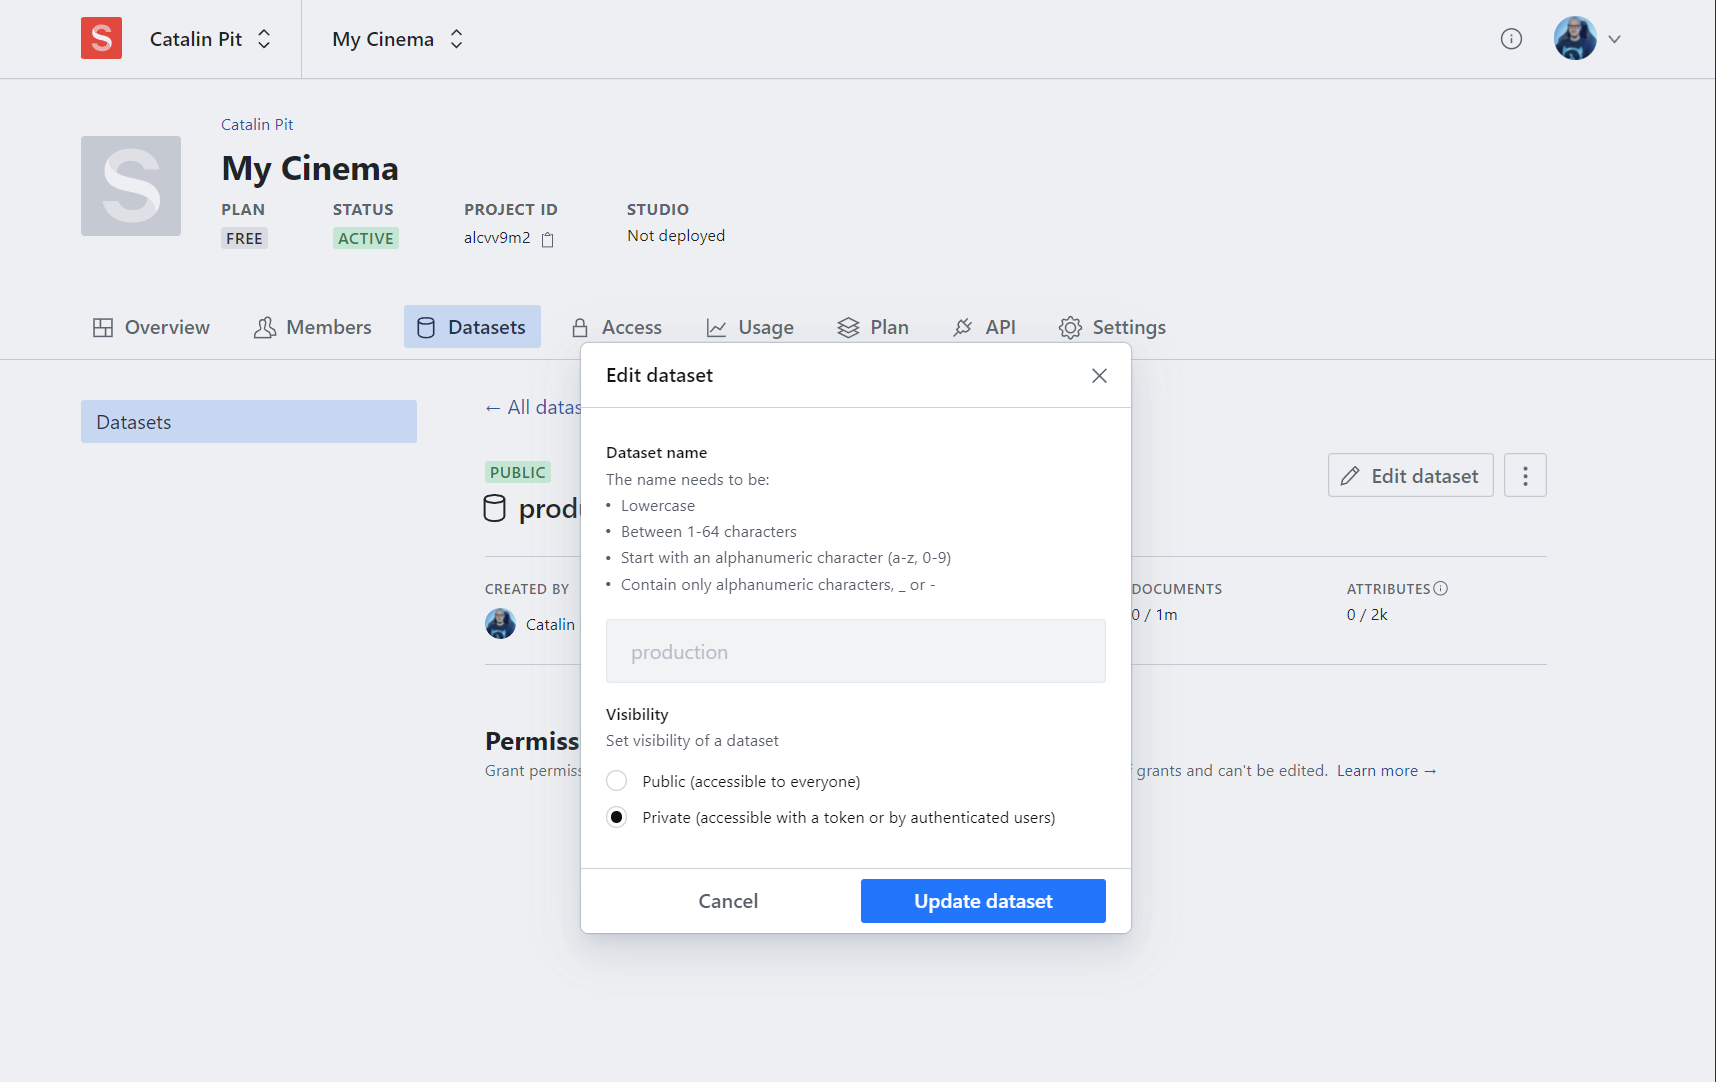
Click on the Edit dataset button and a new pop-up will appear. Change the Visibility to Private and save it.
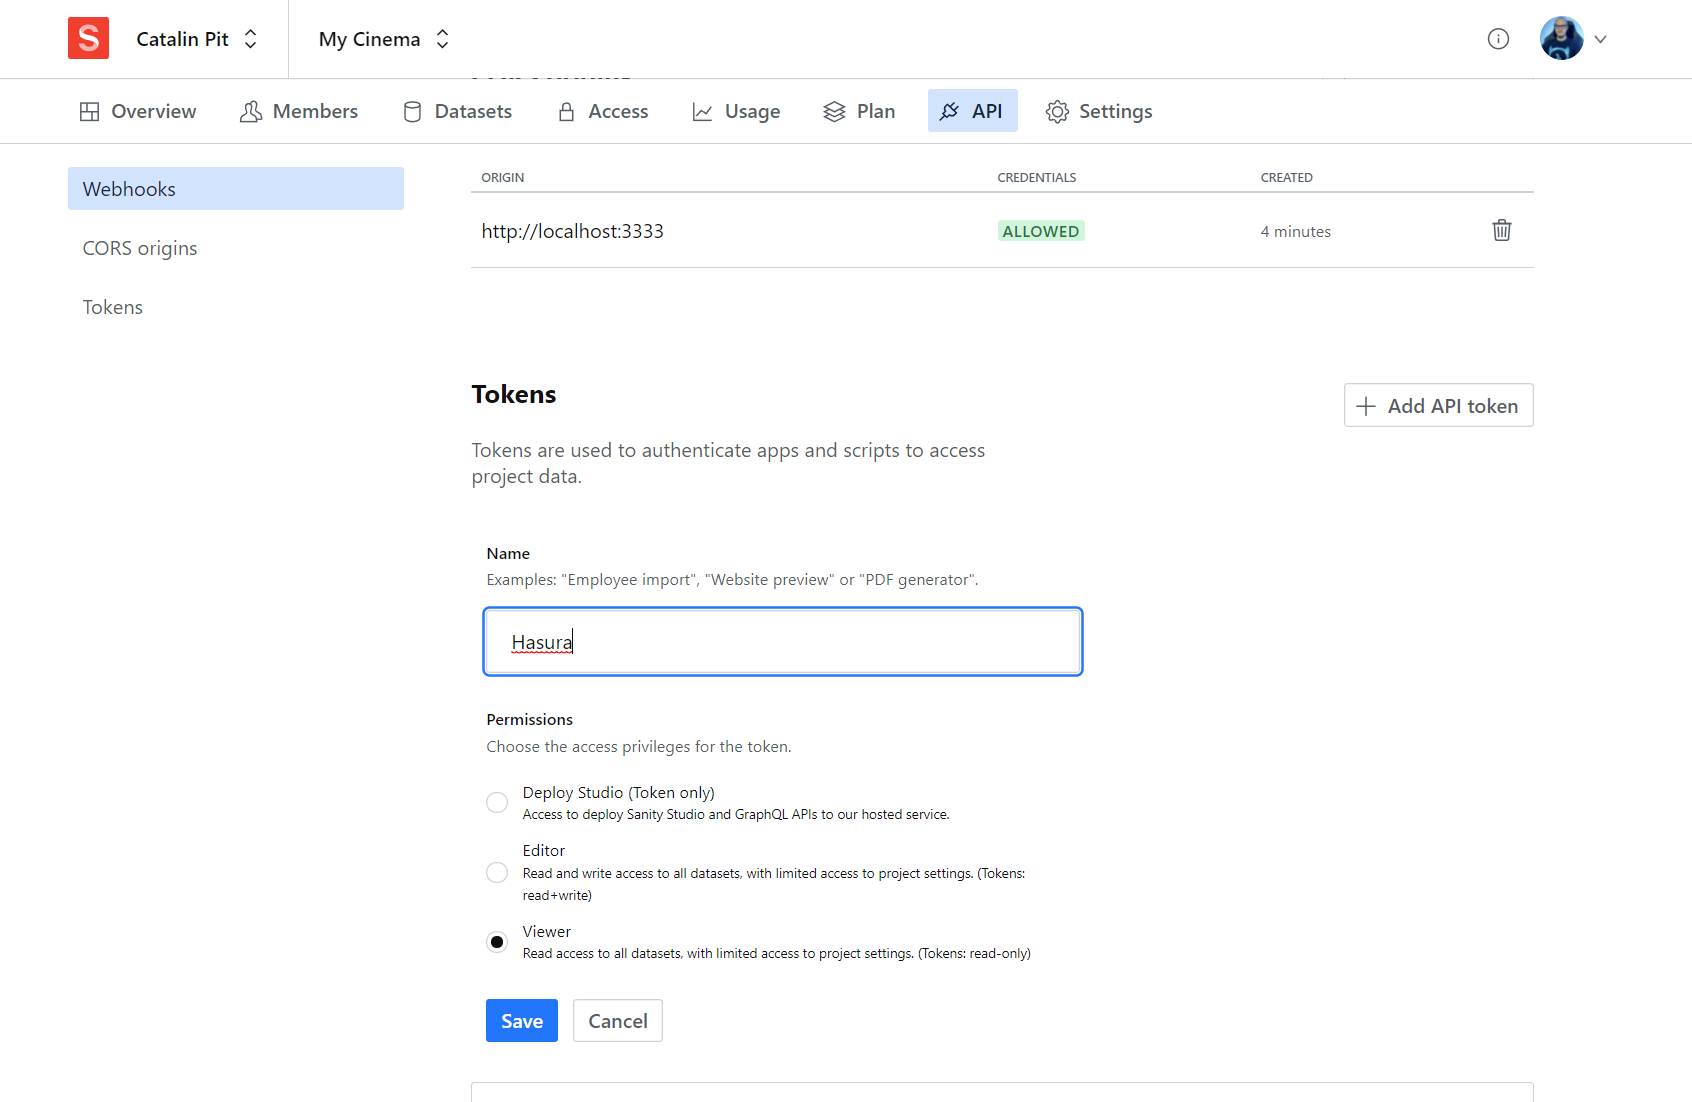
Now that your API is protected, you need to define a token. Go to the API page, scroll down and click on the Add API token.
Enter the token name and choose the appropriate permissions. In this case, the token is read-only.
Save it and copy the token.
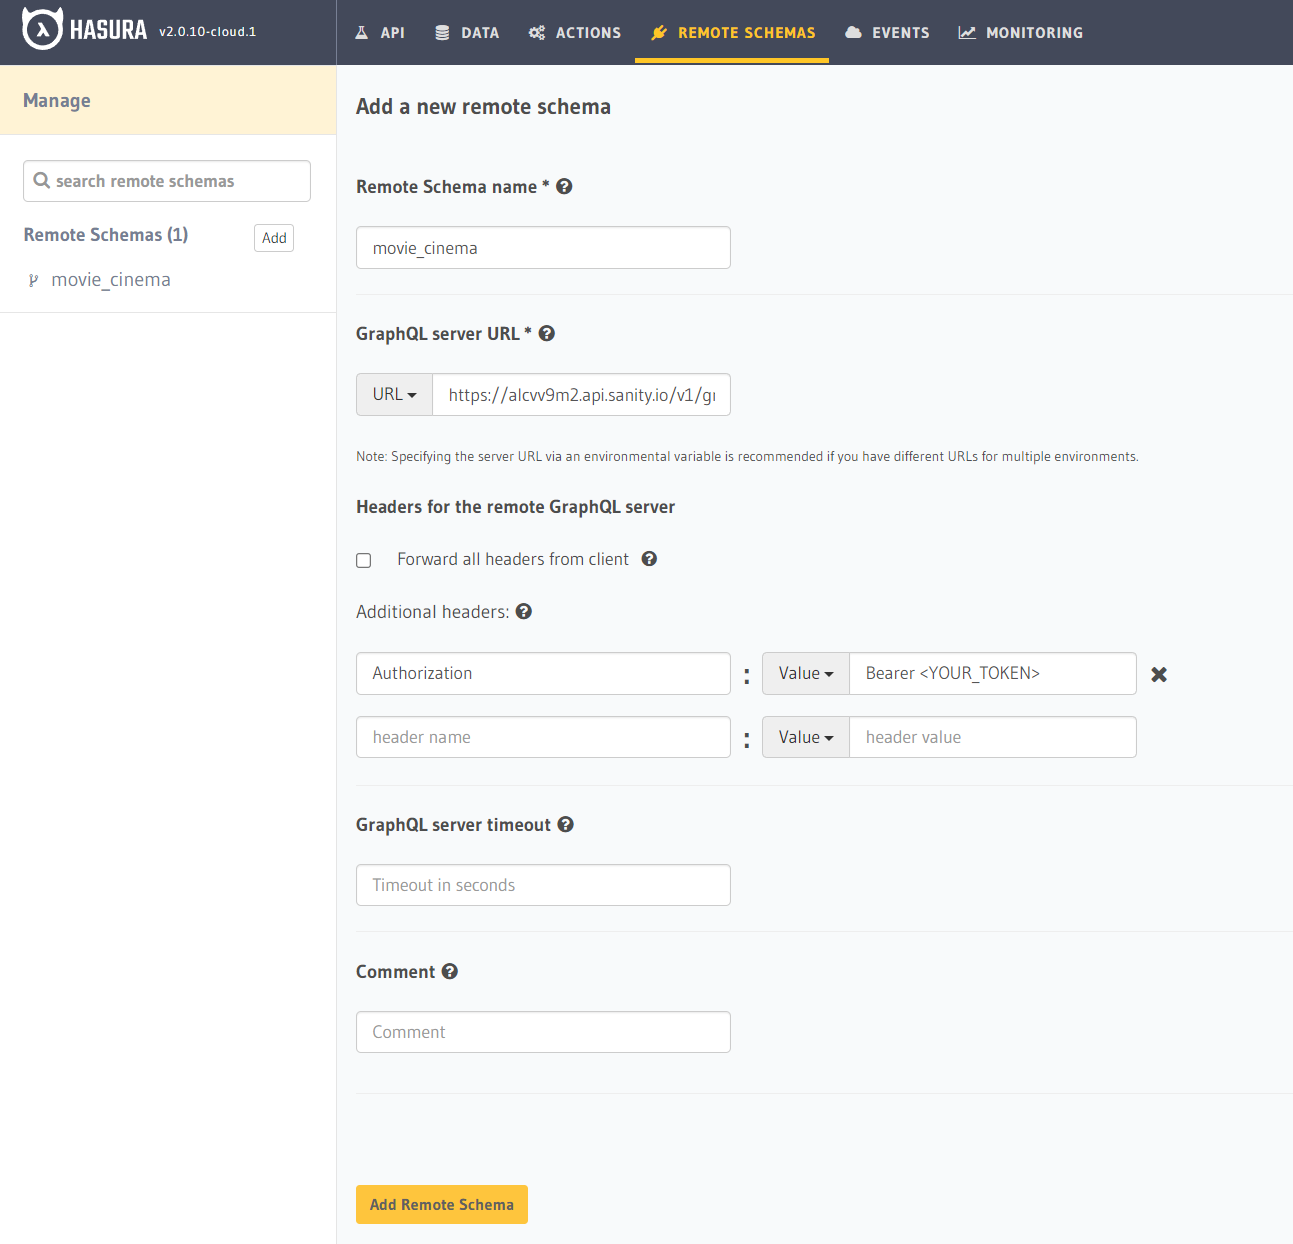
Now go to the "Remote Schemas" in Hasura and click on the "Add" button. After that, add the following information:
- Remote Schema name
- GraphQL endpoint URL
- Authorization header under the "Additional headers" section
See the image above for reference.
Save it and you are done!
