Hello and welcome! My name is Cecilia, and in this amazing project, I will demonstrate how to set up Jenkins to automatically test a Node.js application as changes are pushed to a repository.
What is Jenkins? Jenkins is an open source automation server which is designed to automate repetitive technical tasks within in the continuous integration and continuous delivery (CI/CD) pipeline.
In this project, Jenkins will be integrated with Github. Github is a provider of internet hosting for software development and version control using Git. Jenkins will be alerted when new code is pushed to the specified Github repository. After Jenkins is alerted, it will then examine and test the code within Docker containers, to isolate the test environment from the Jenkins host machine!
Before we begin the project, there are some pre-requisite tools and software that must be installed and set up:
- Ubuntu 20.04 server
- Jenkins
- Oracle JDK 11
- Nginx
- Docker
- A registered domain name
- You can purchase a domain name from Google Domains, get one for free with Freenom, or use the domain registrar of your choice.
Installing Jenkins
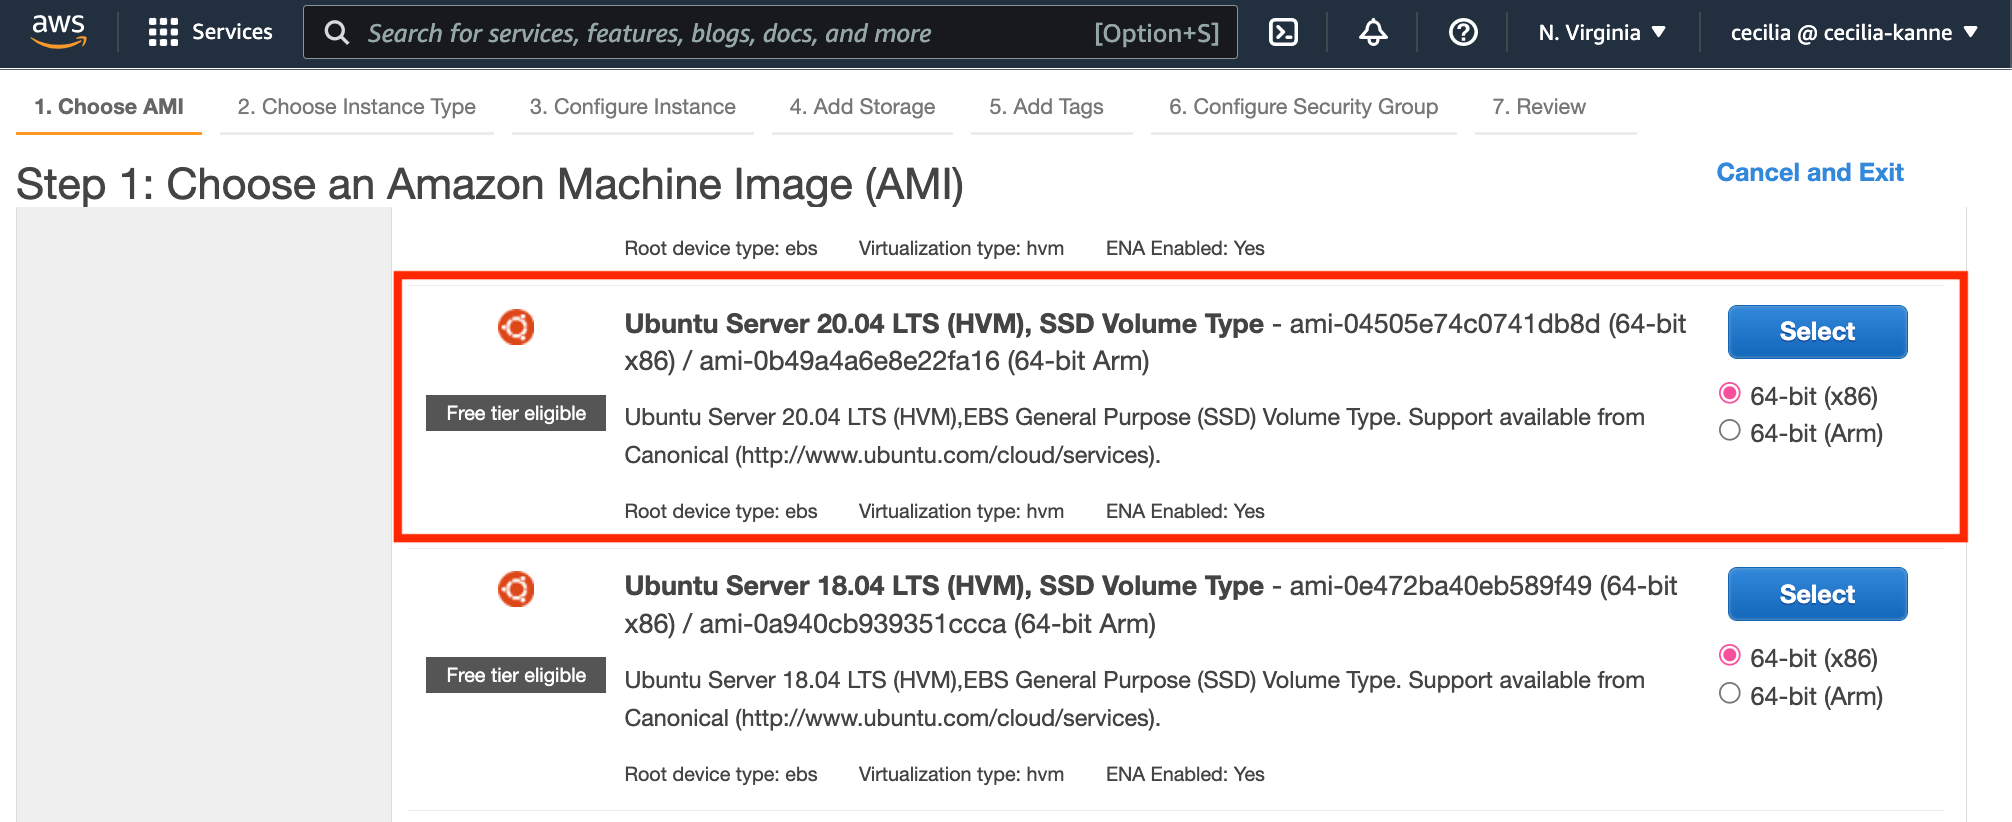
After the pre-requisites are complete, we will create an Ubuntu 20.04 server. First, sign in to the AWS Management Console. Then, navigate to the EC2 service and create an Ubuntu 20.04 server.
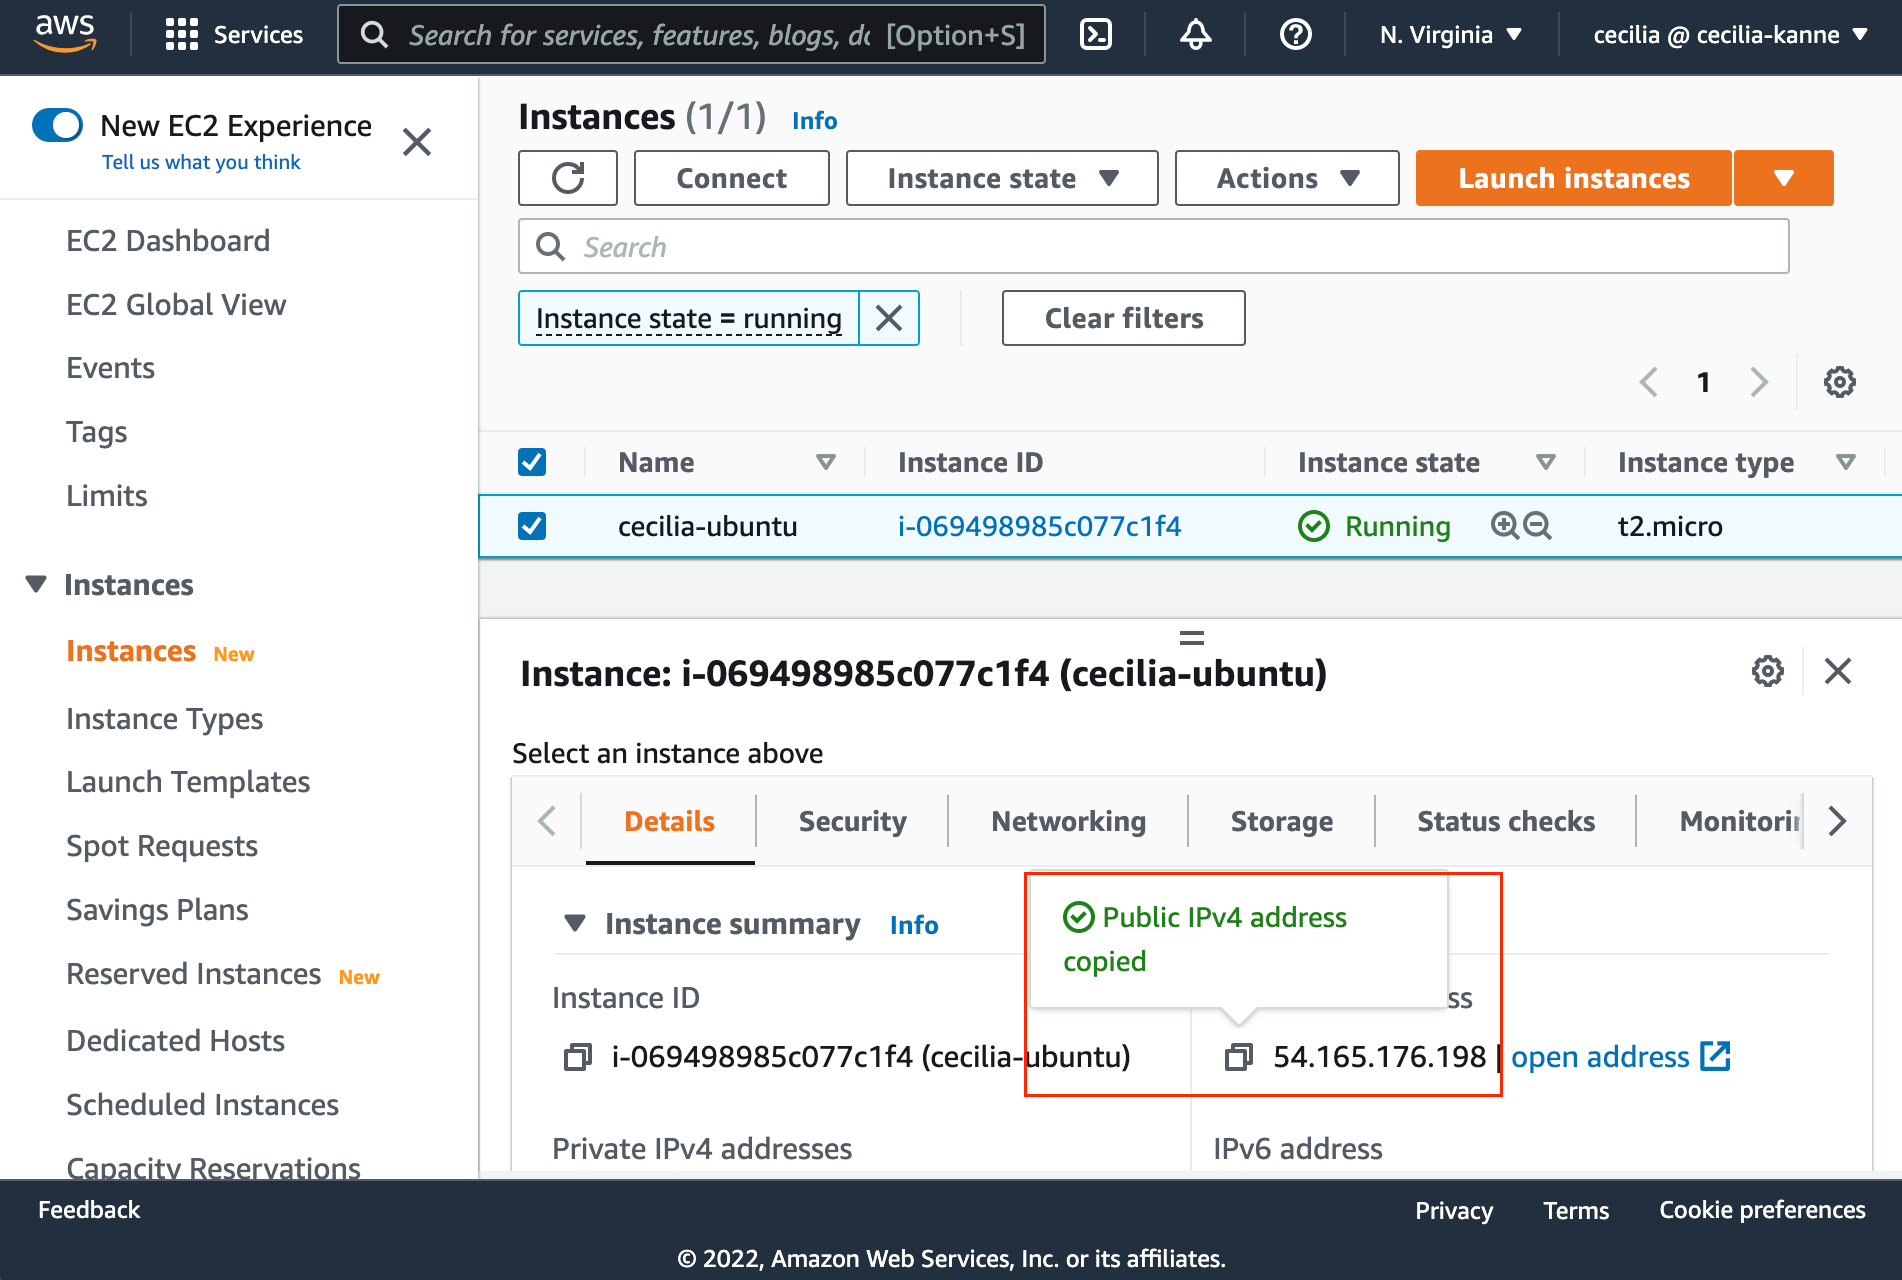
Select t2.micro as the instance type, and then leave everything else as default. Select Review & Launch at the bottom of the screen. Create or use an existing keypair, then launch the instance. Once the instance is running, copy the public IPv4 address.
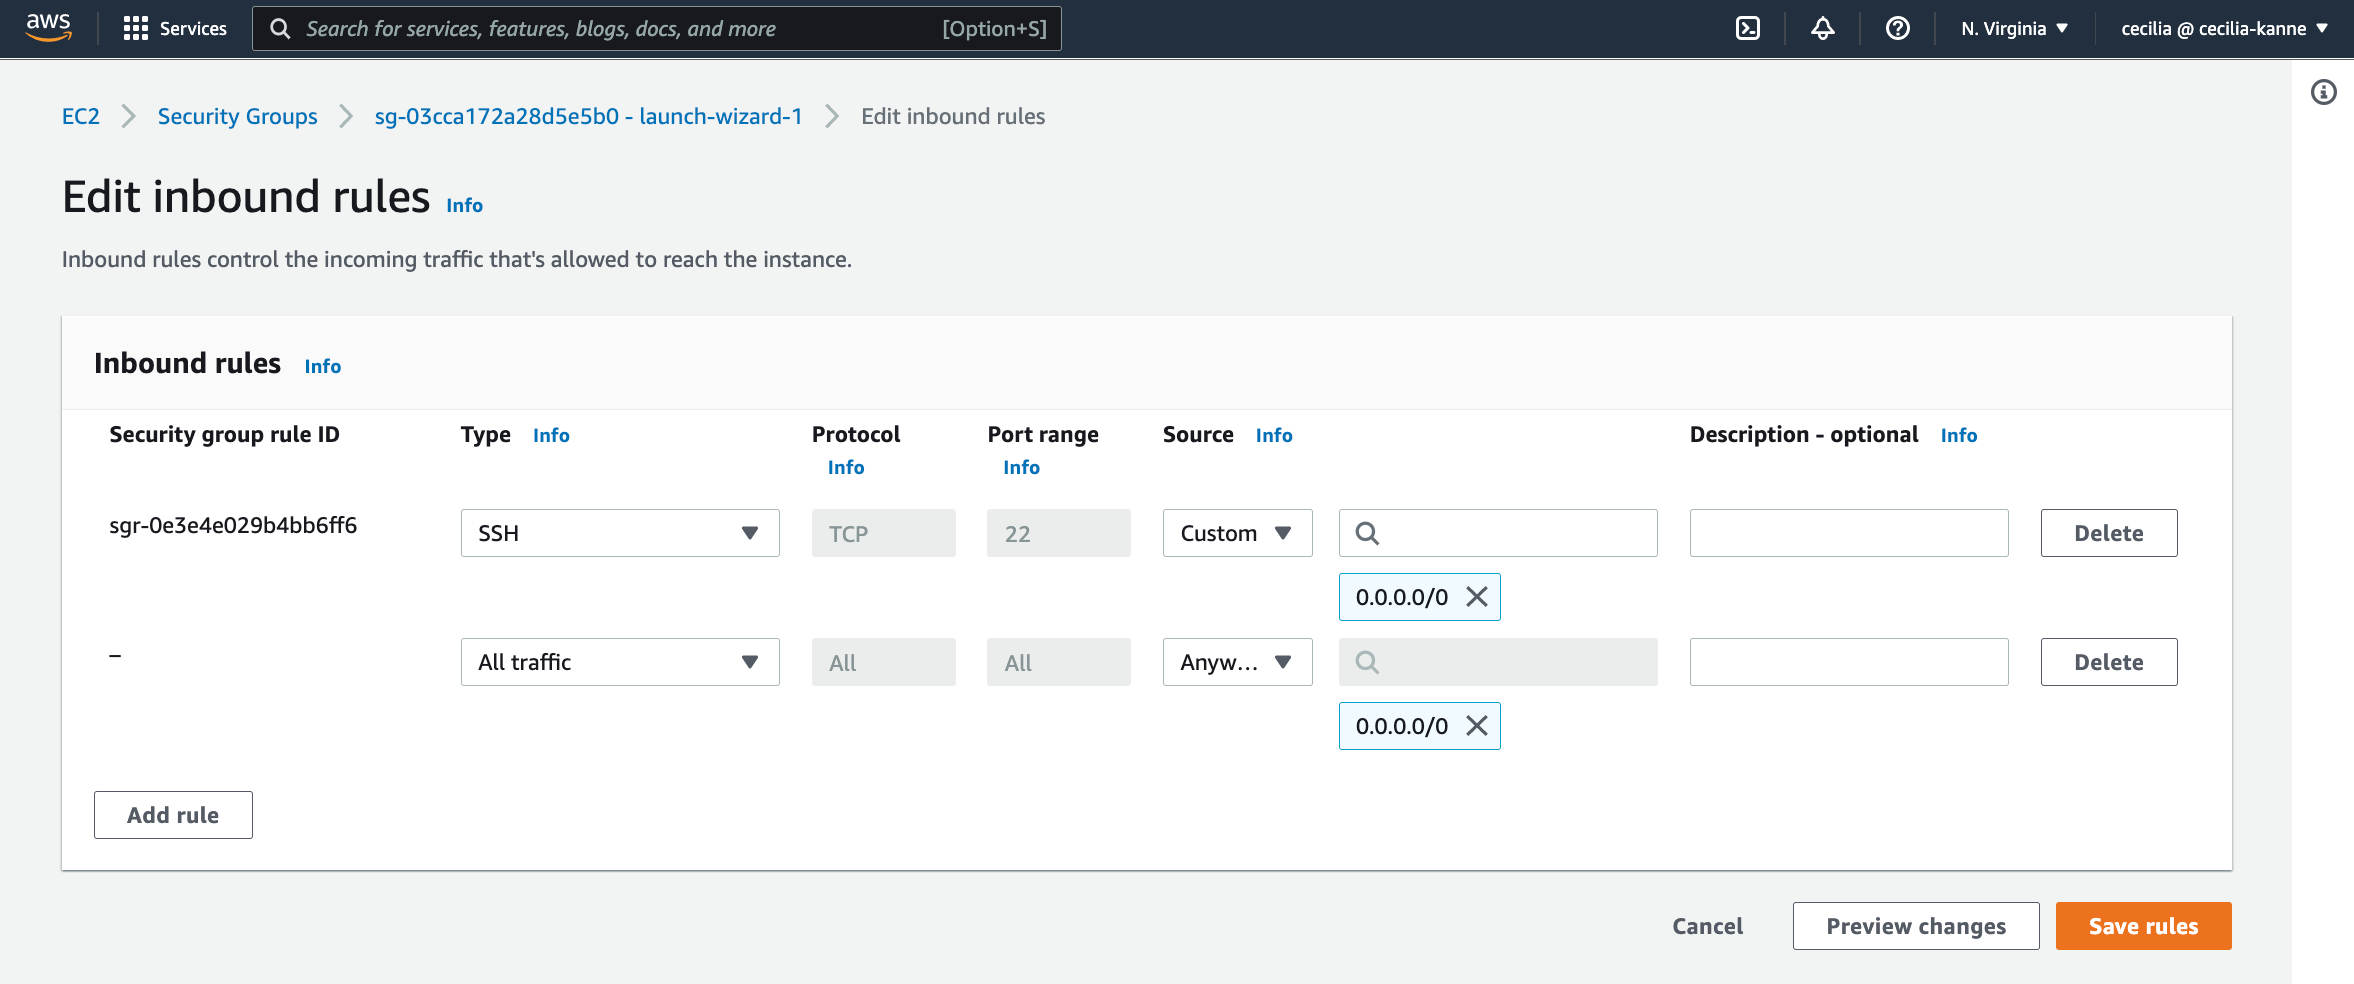
Next, navigate to the security group inbound rules. Add a rule to allow All Traffic from anywhere.
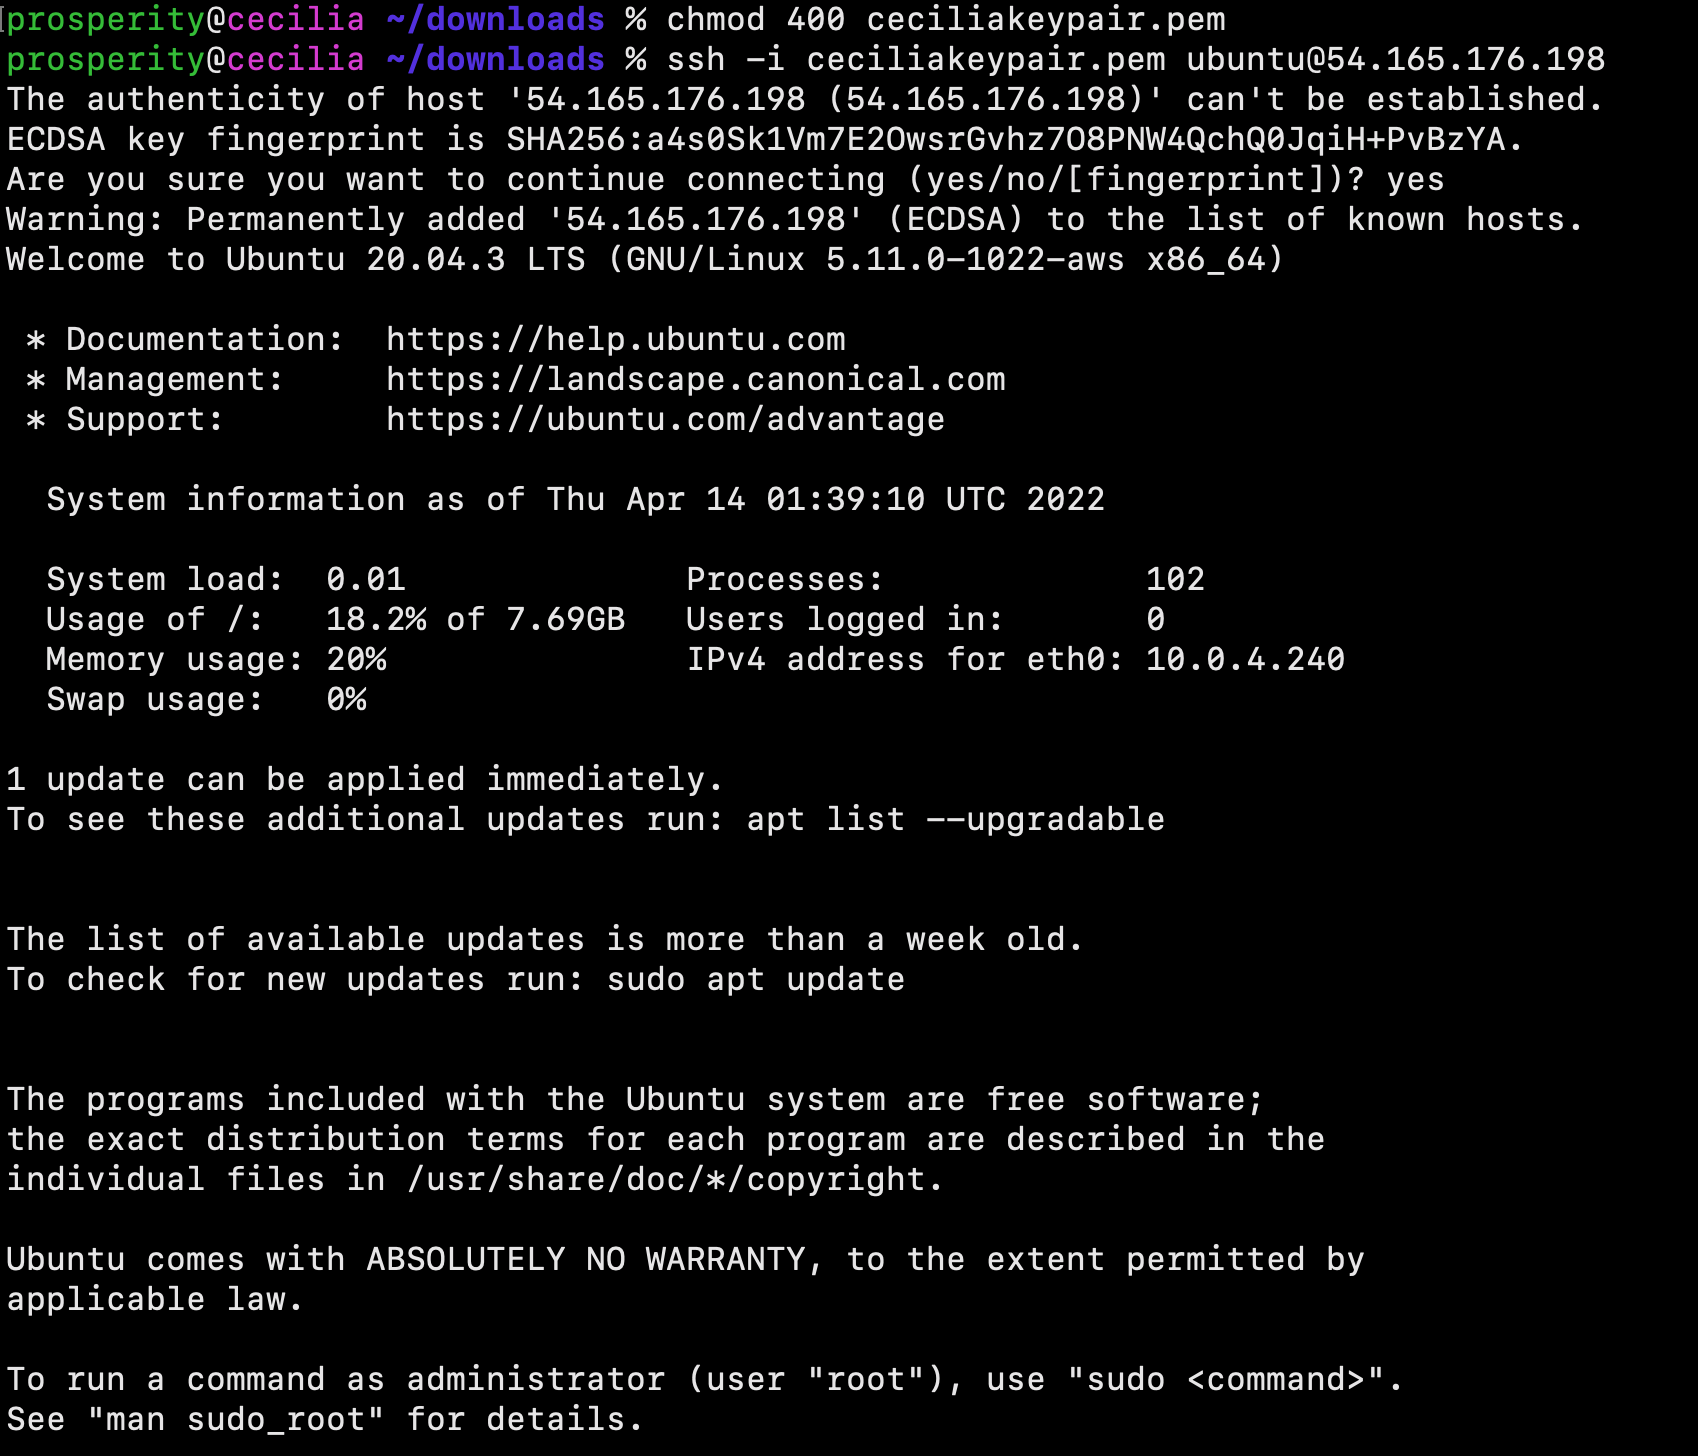
Open Terminal on your local PC and then SSH into the Ubuntu server.
Next, use the following command to add the official Jenkins repository key to the system:
$ wget -q -O - https://pkg.jenkins.io/debian-stable/jenkins.io.key | sudo apt-key add -
Next, use the following command to append the Debian package repository address to the server’s sources.list:
$ sudo sh -c 'echo deb http://pkg.jenkins.io/debian-stable binary/ > /etc/apt/sources.list.d/jenkins.list'
Run an update command, so that the new repository can be utilized.
$ sudo apt update
Finally, install Jenkins and it's dependencies.
$ sudo apt install jenkins
Now that Jenkins and its dependencies are in place, we will start the Jenkins server using systemctl:
$ sudo systemctl start jenkins
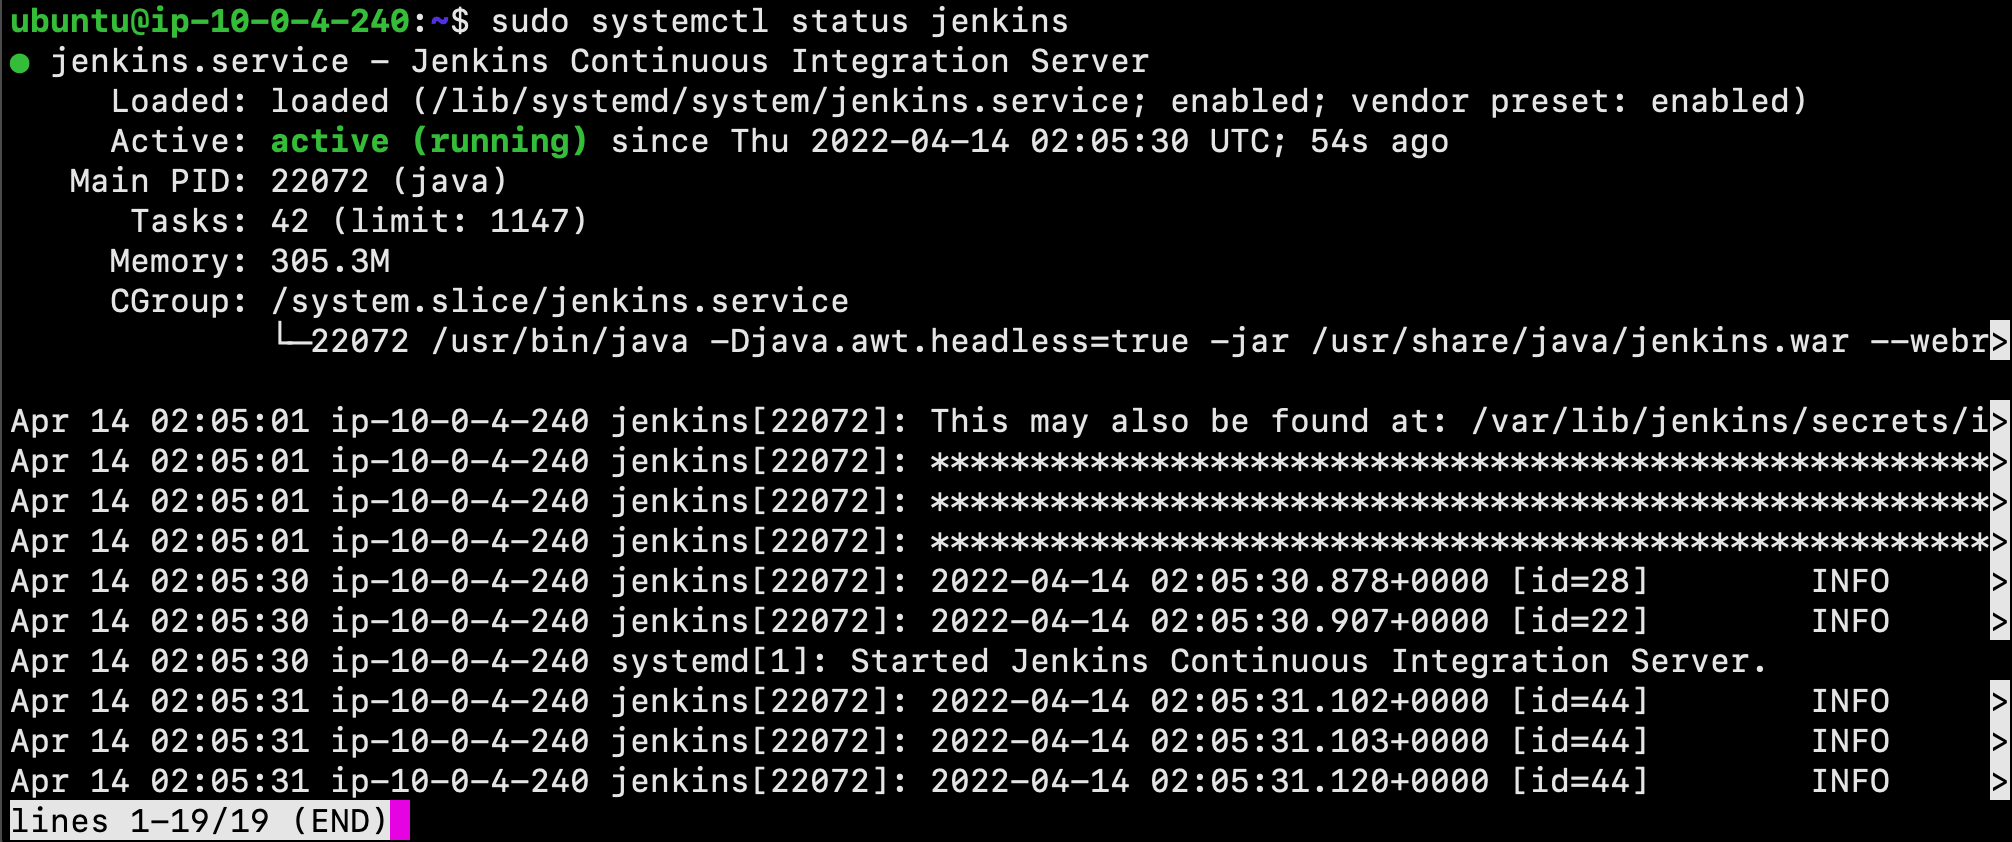
Next, use the status command to verify that Jenkins started successfully:
$ sudo systemctl status jenkins
Adjust the UFU firewall rules, so that we can reach it from a web browser to complete the initial setup:
$ sudo ufw allow 8080
Please Note: If the firewall is inactive, the following commands will allow OpenSSH and enable the firewall:
$ sudo ufw allow ssh
$ sudo ufw enable
Next, check ufw’s status to confirm the new rules:
$ sudo ufw status
Great job! Jenkins is now installed and our firewall configured.
Configuring Jenkins
Enter the following in the URL of your web browser to visit Jenkins on its default port, 8080. Please note: Be sure to replace the corresponding text with your Ubuntu server's IP address or domain name:
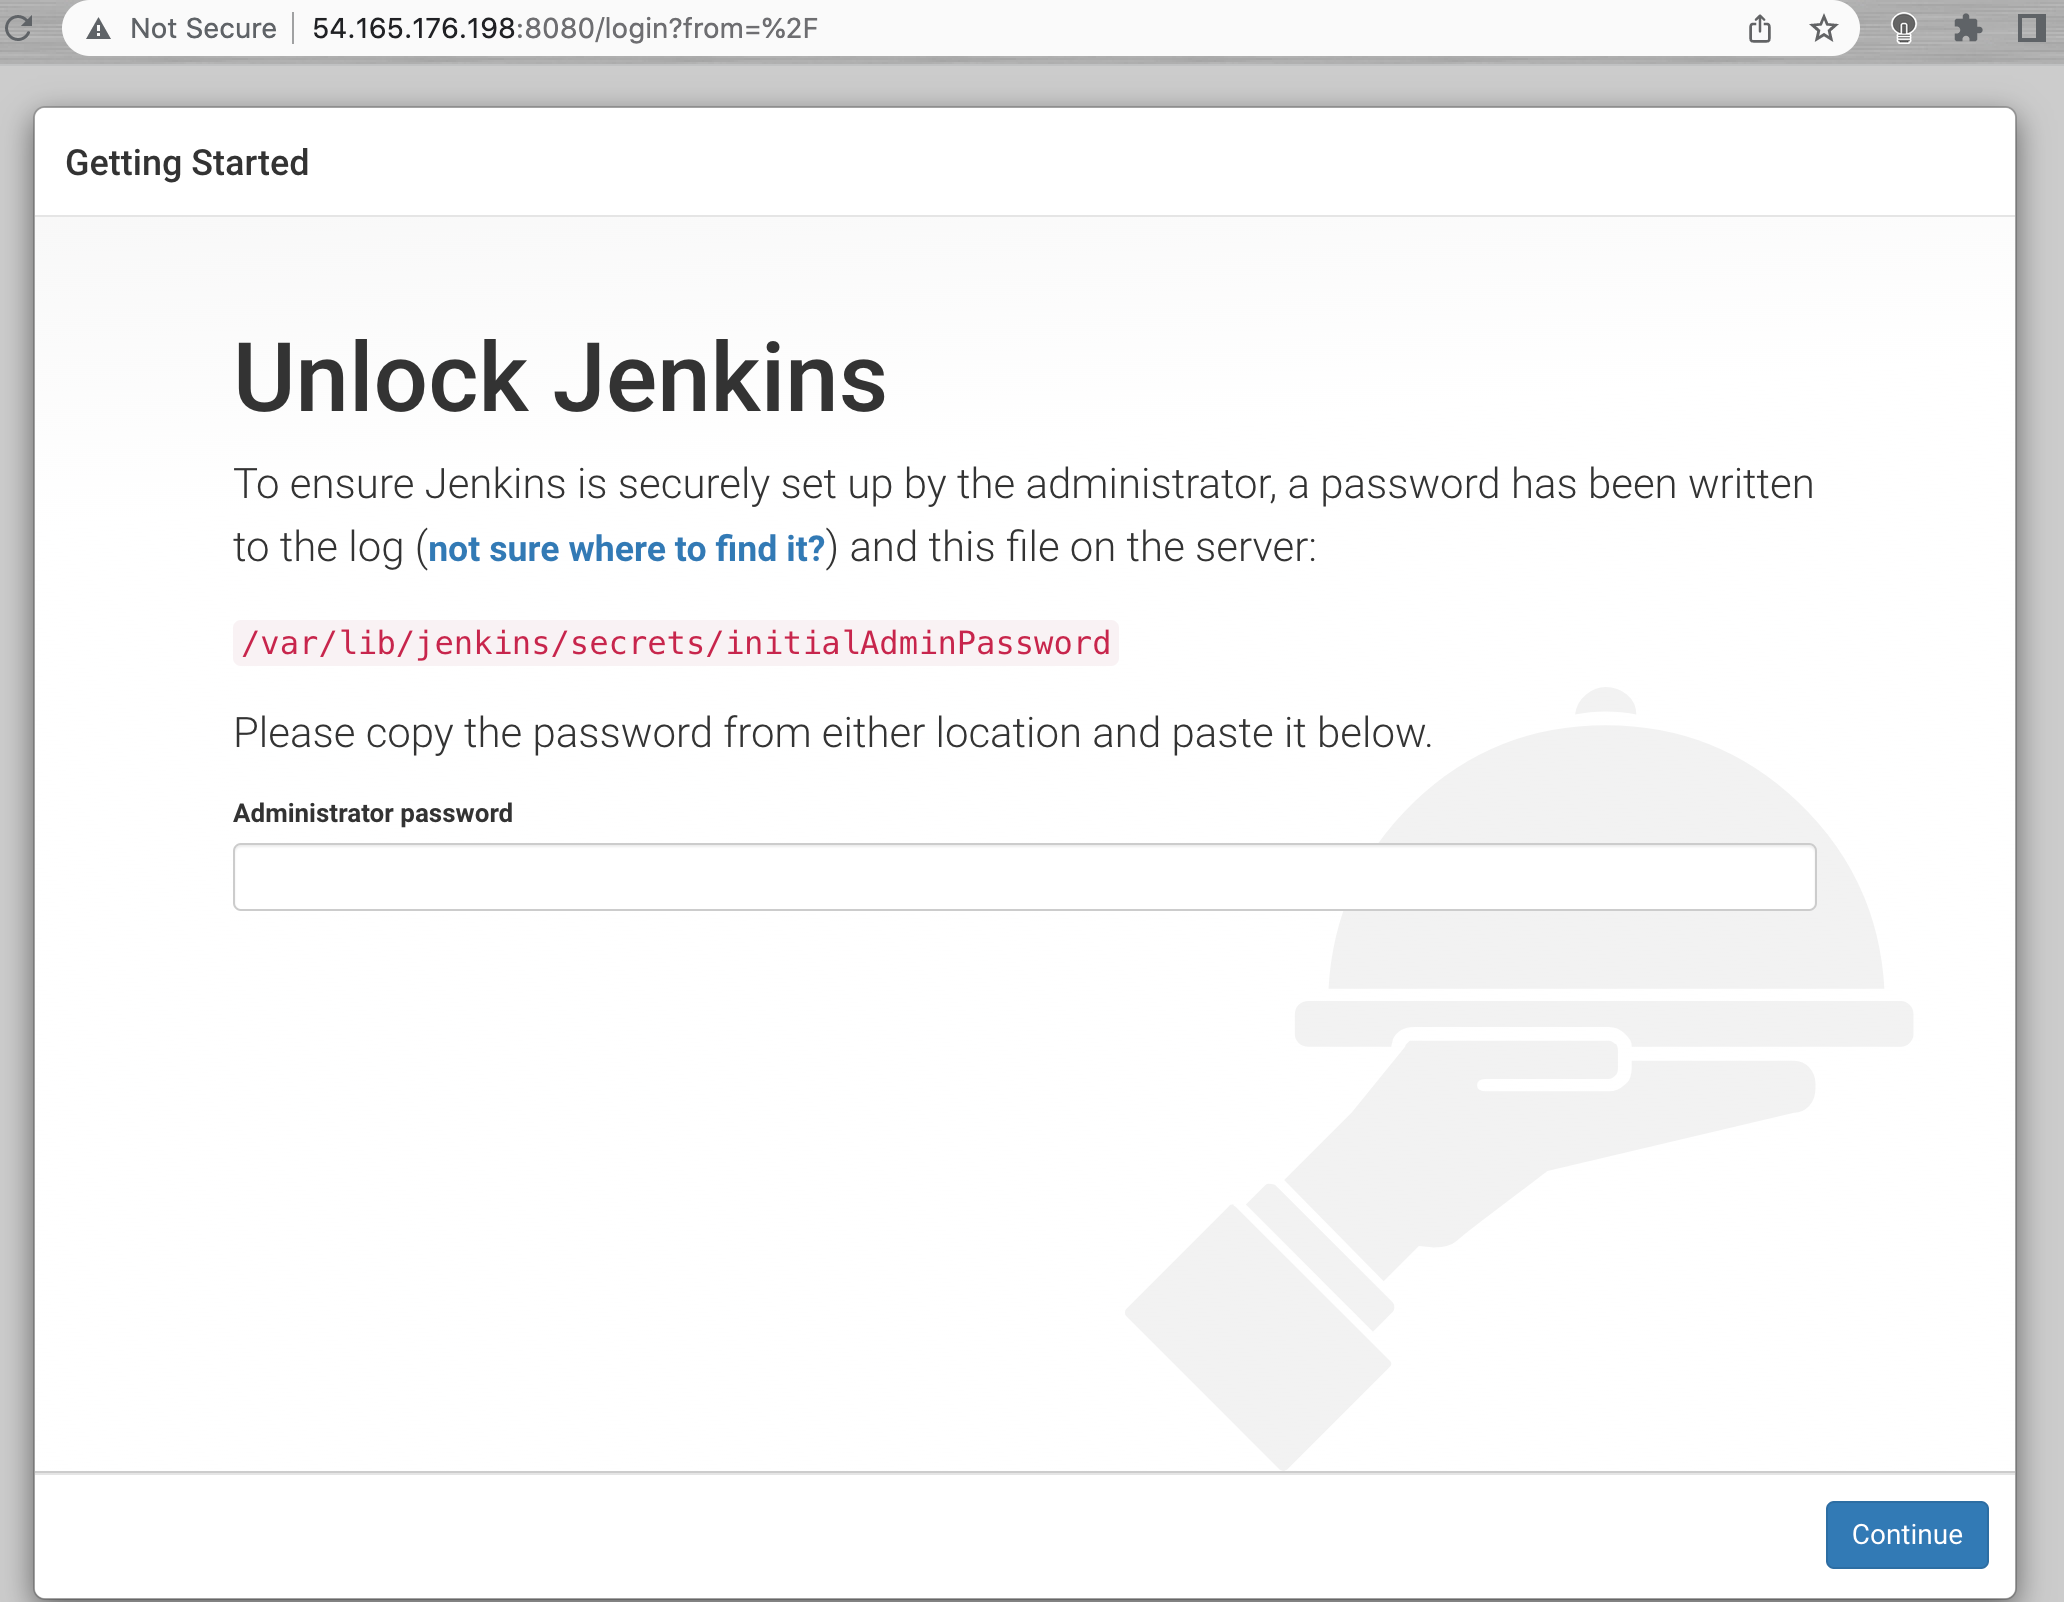
http://your_server_ip_or_domain:8080You should receive the Unlock Jenkins screen, which displays the location of the initial password:
To retrieve the administrator password, from the terminal window of your local PC, use the cat command:
$ sudo cat /var/lib/jenkins/secrets/initialAdminPassword
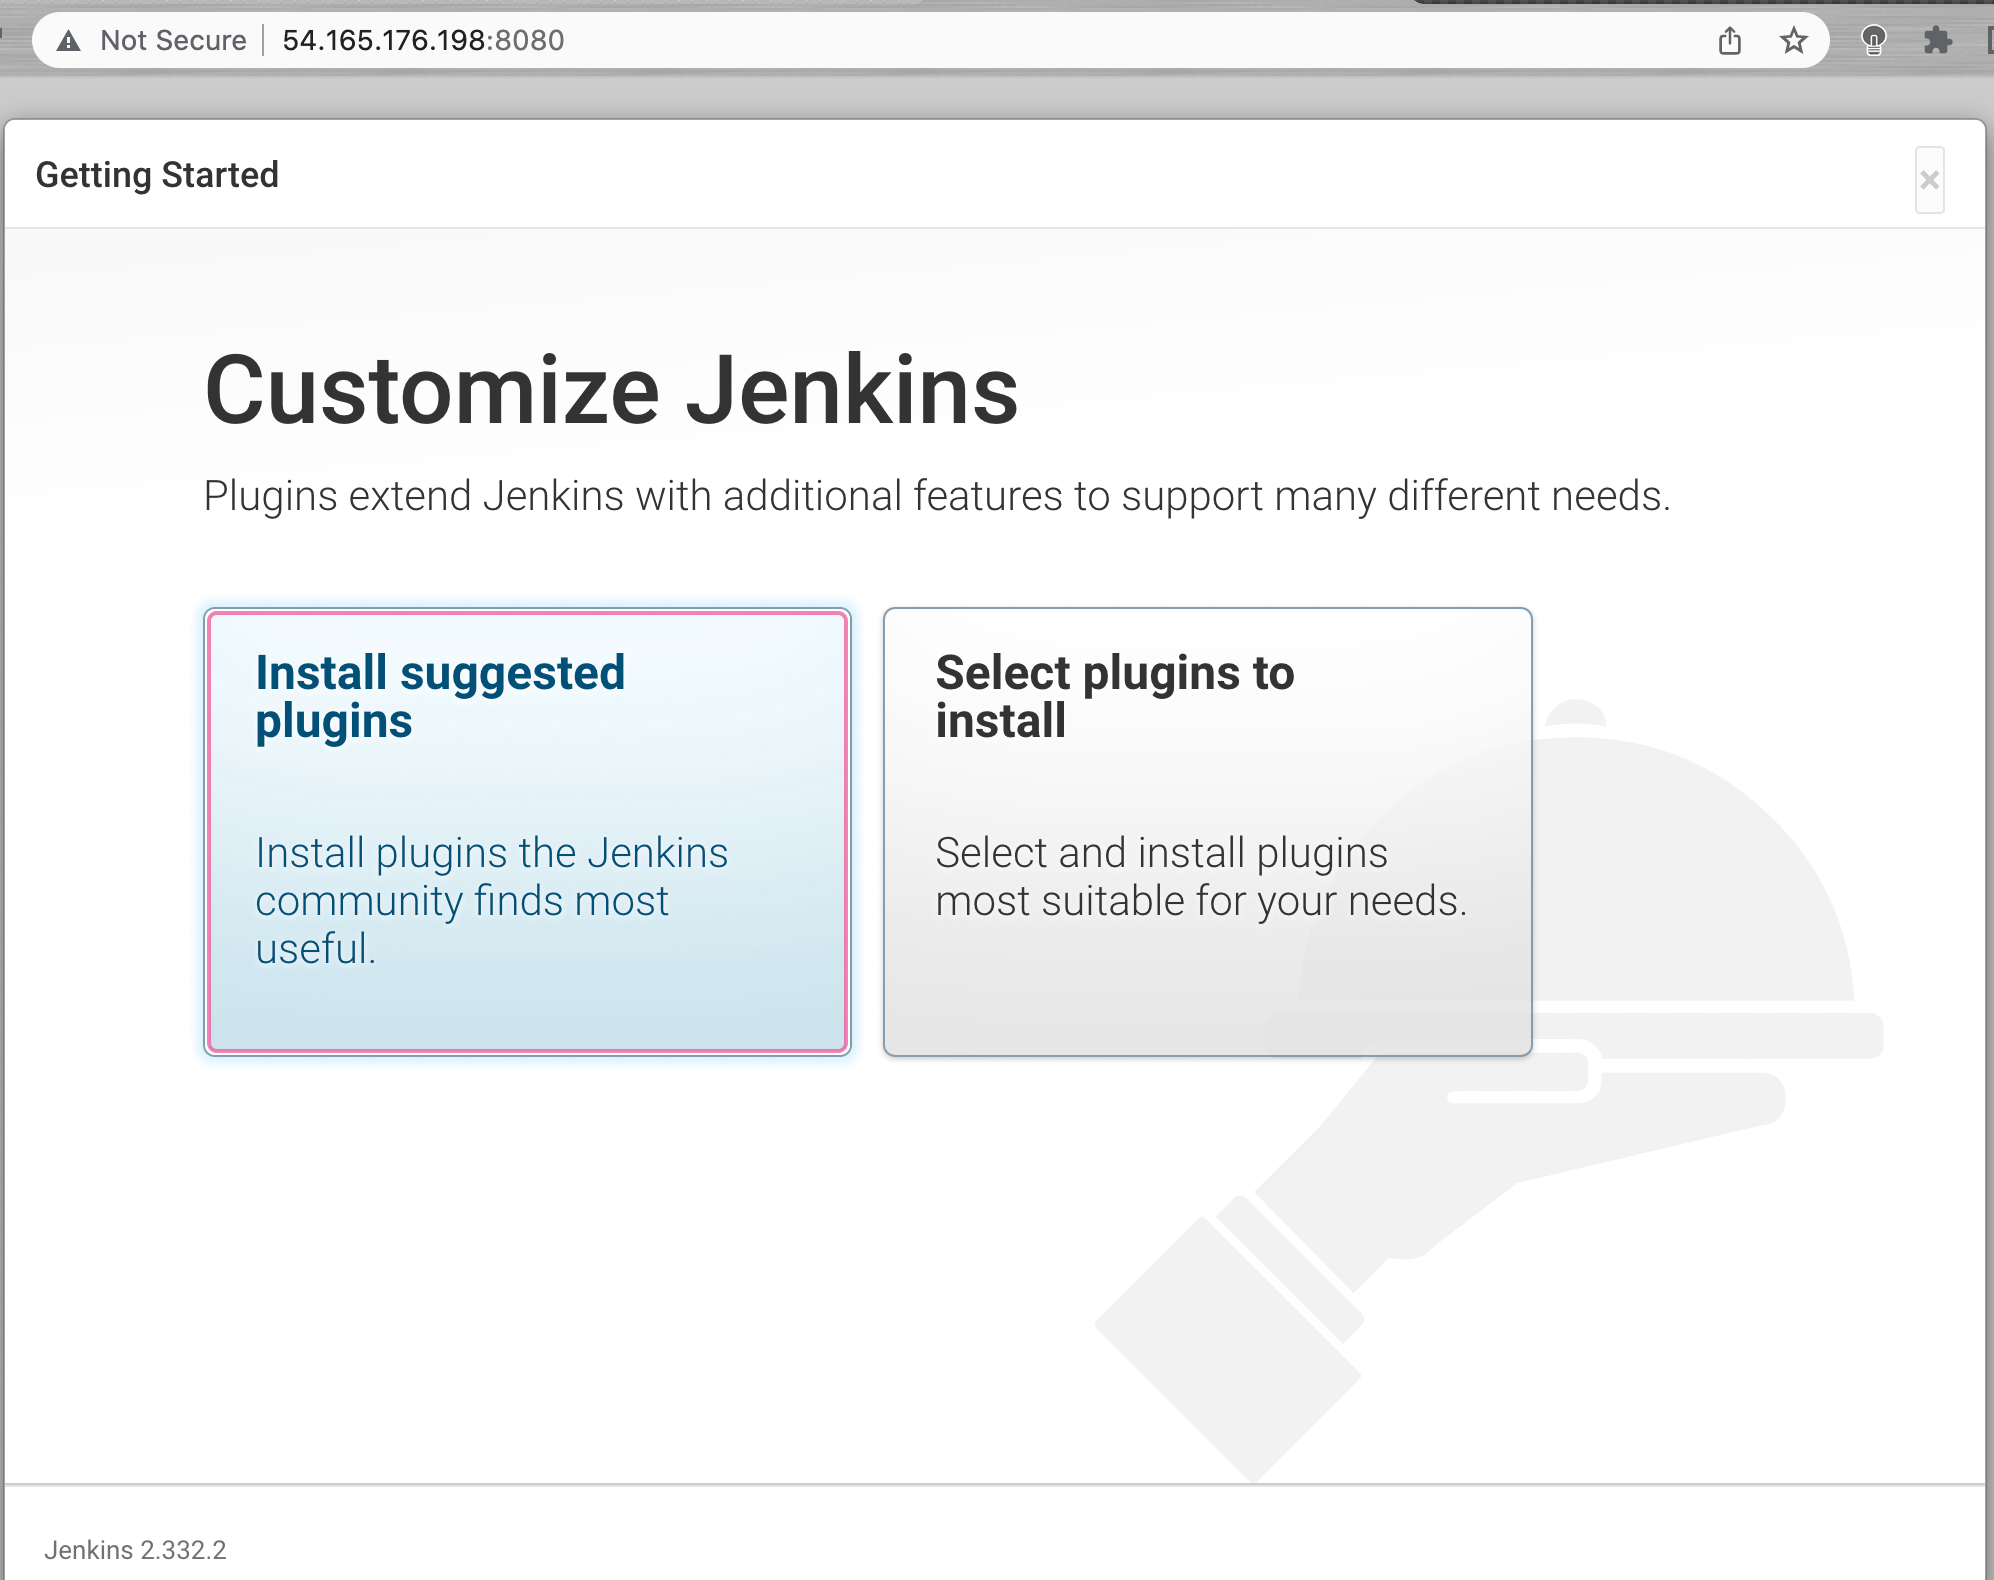
The next screen presents the option of installing suggested plugins or selecting specific plugins:
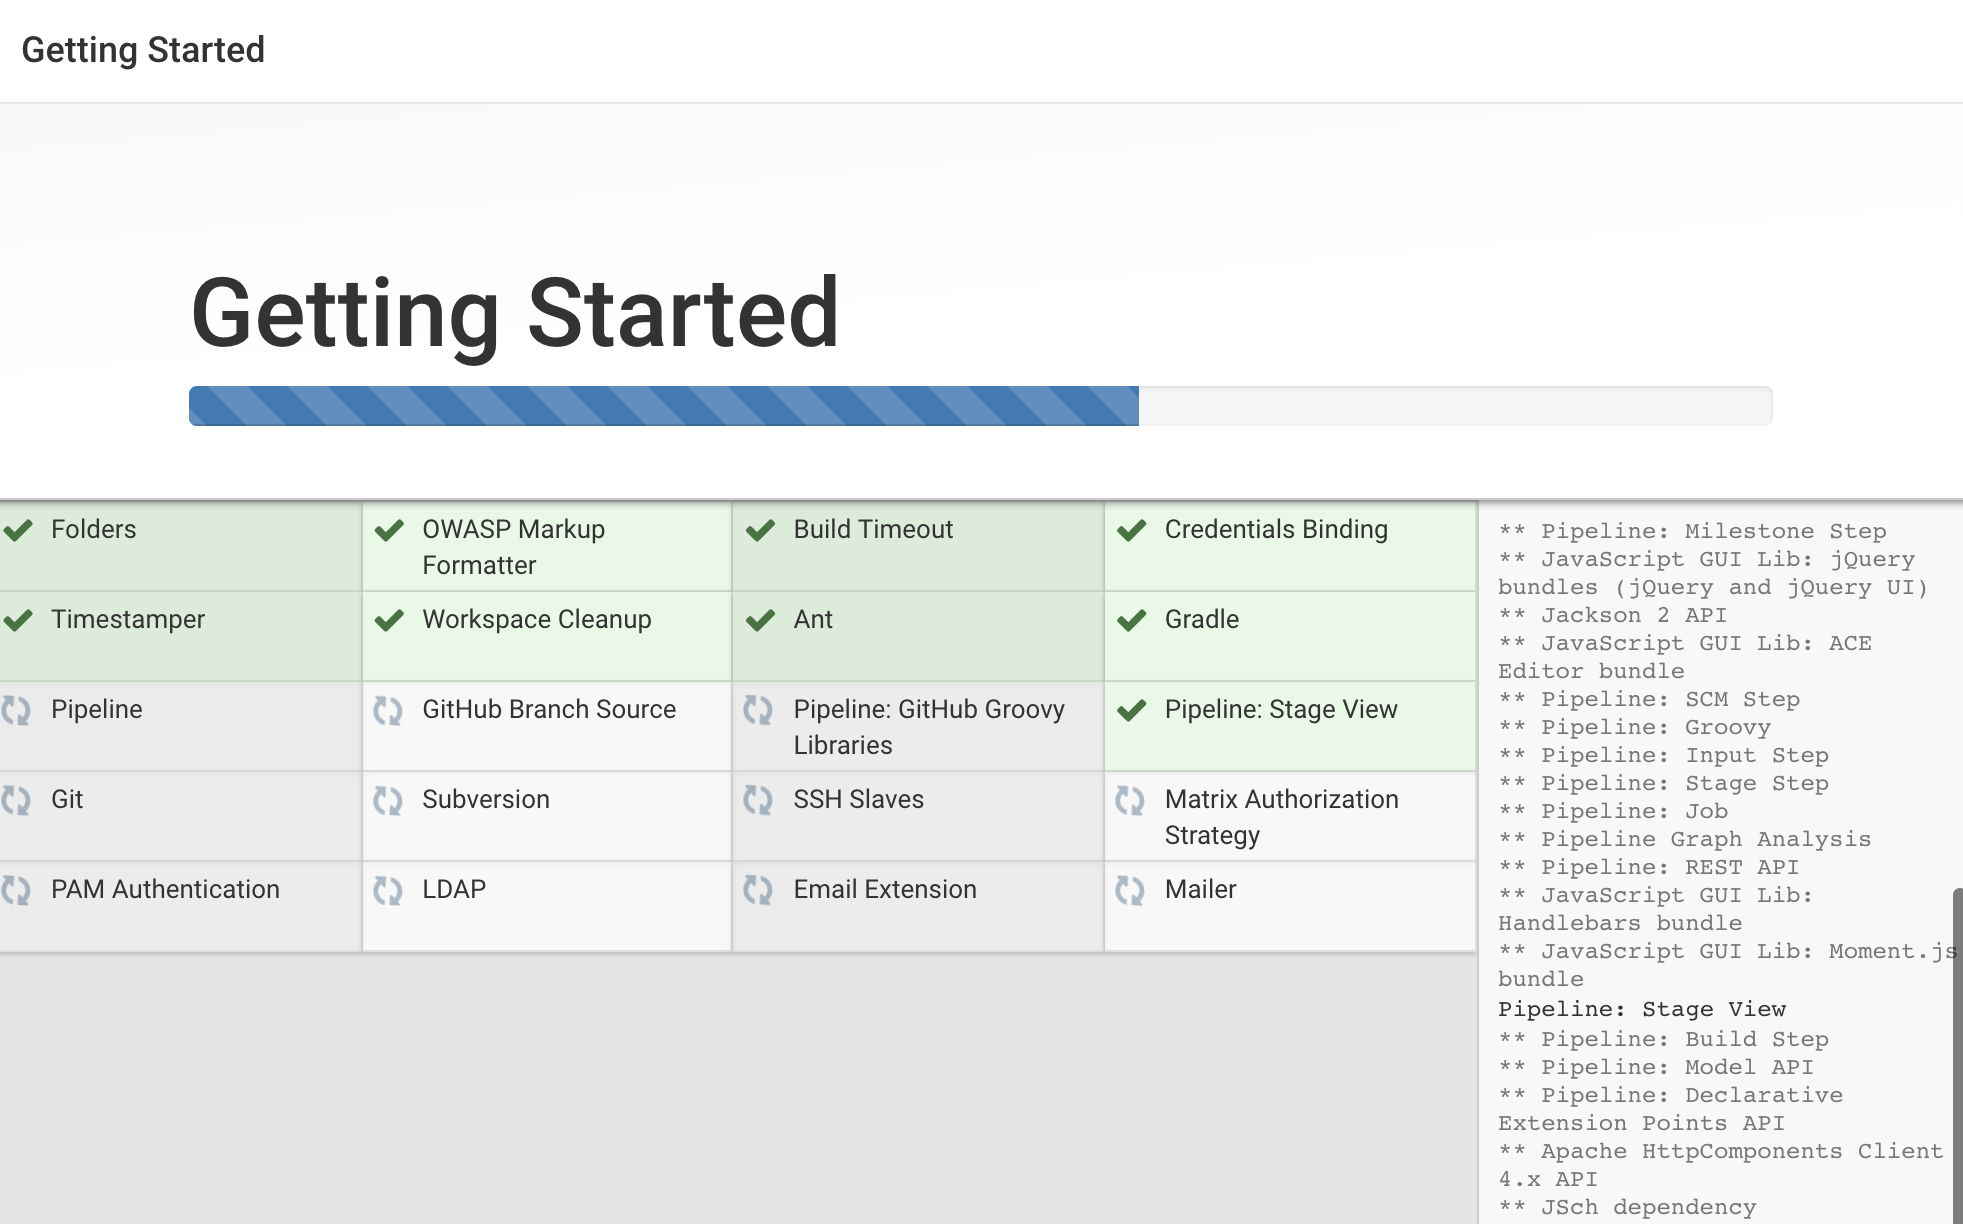
Next, select the Install suggested plugins option. This will automatically begin the installation process:
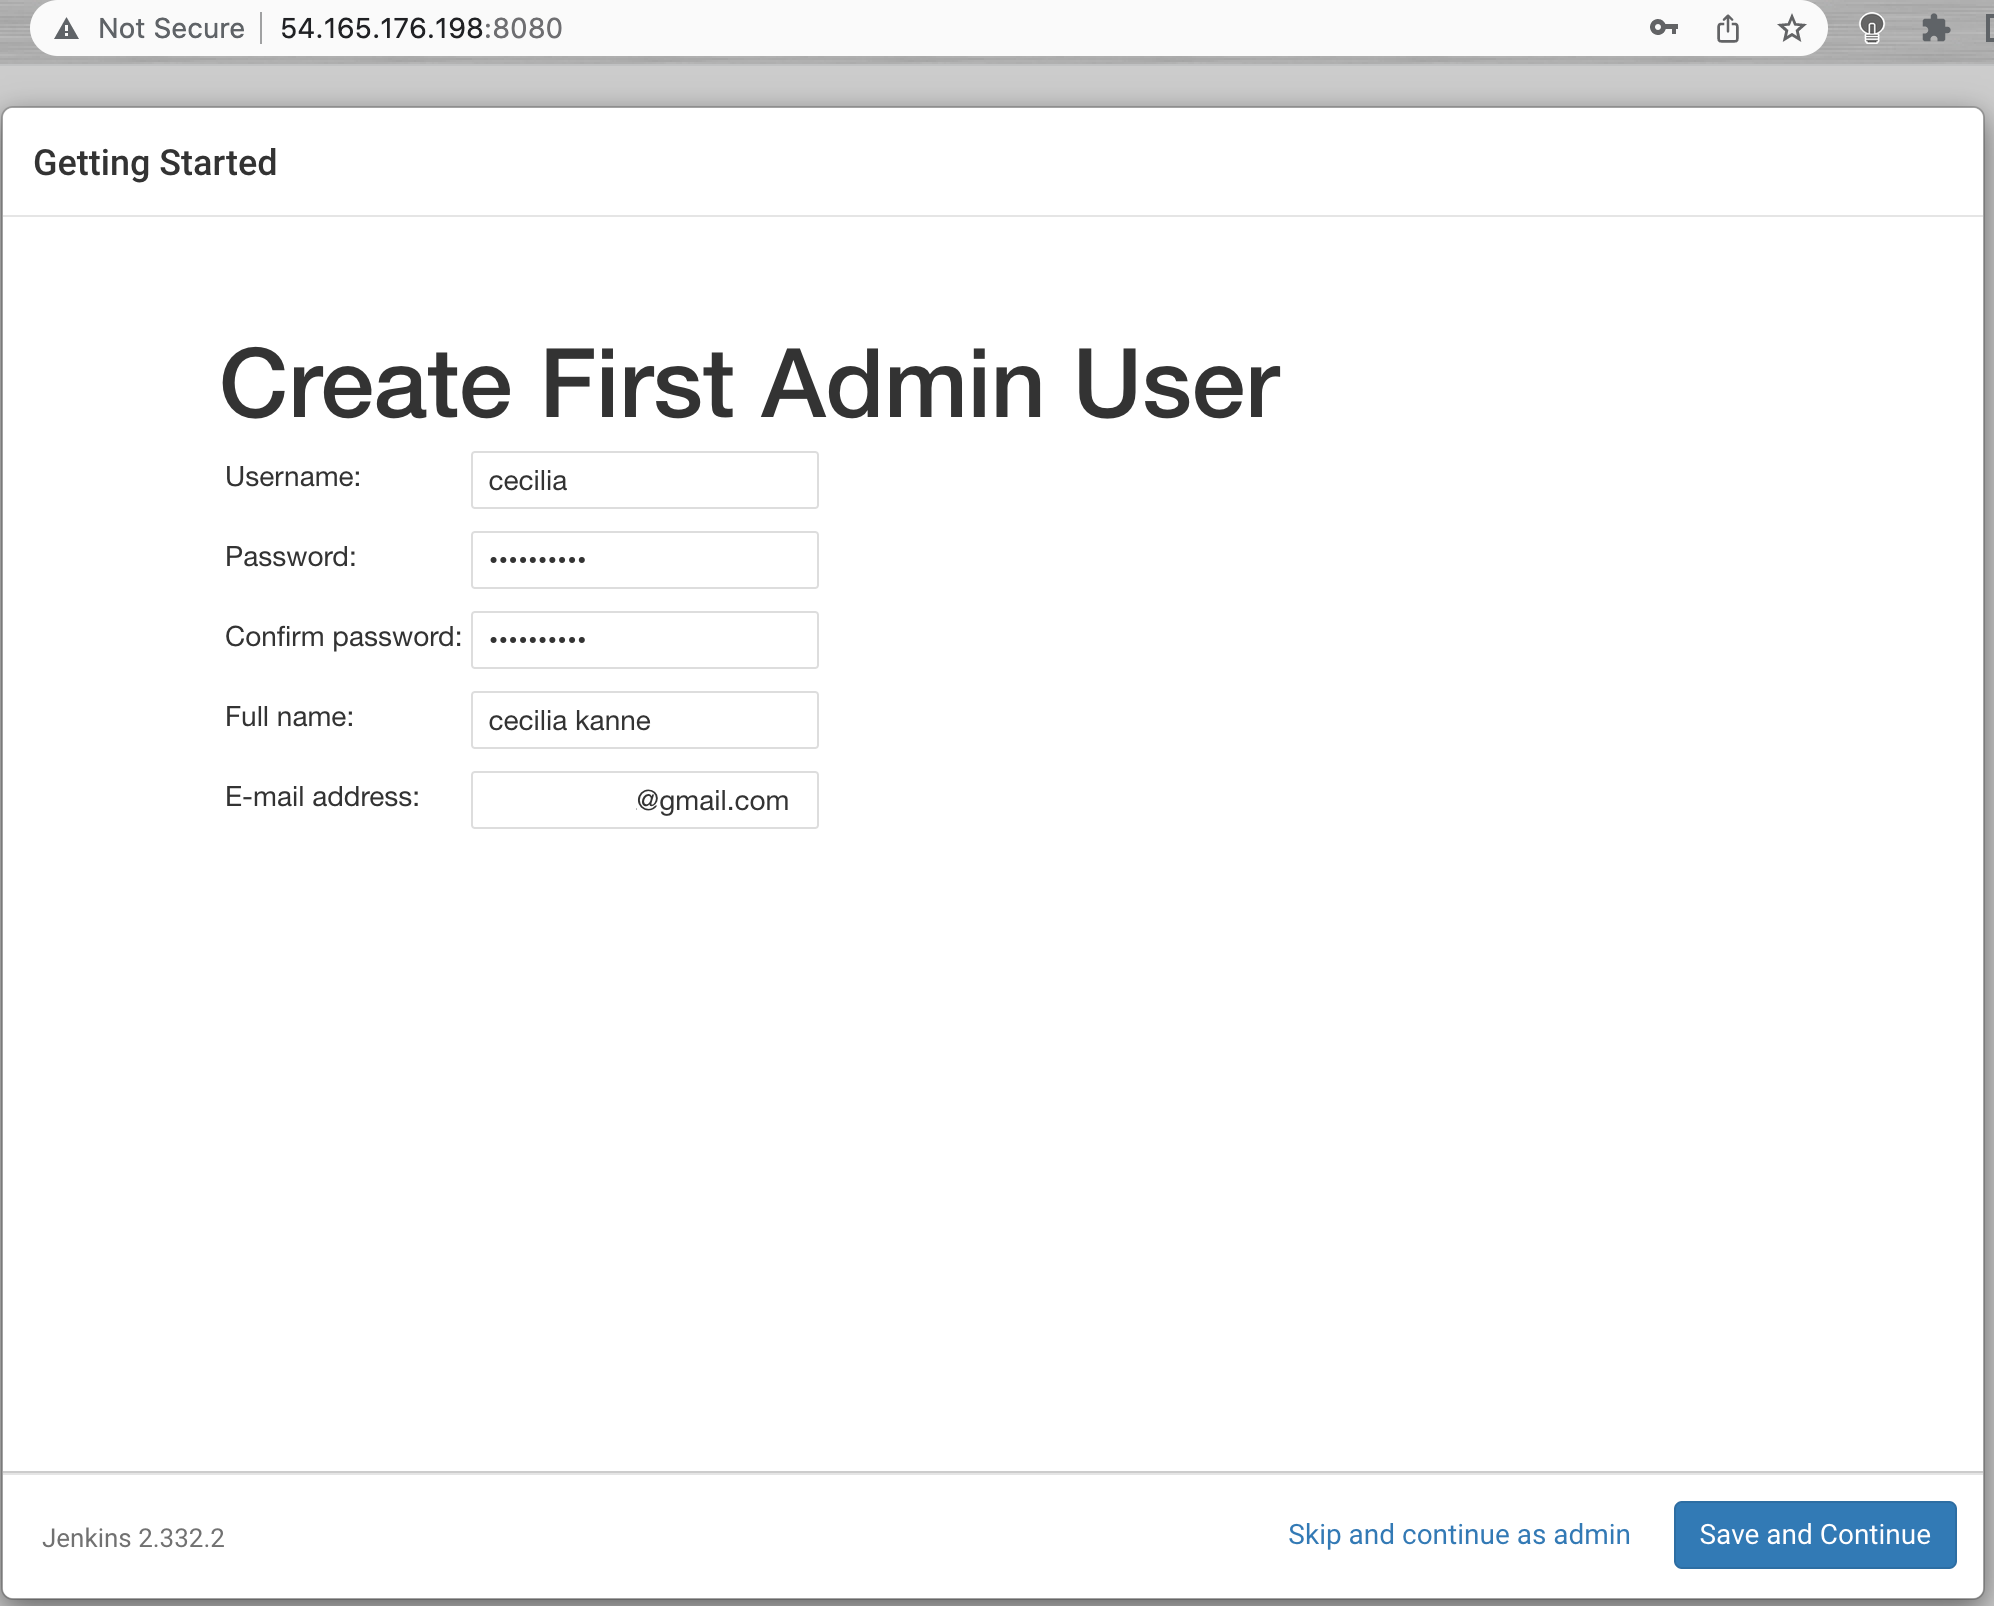
Once the installation is complete, you’ll be prompted to set up the first administrative user. Enter the username and password for your user:
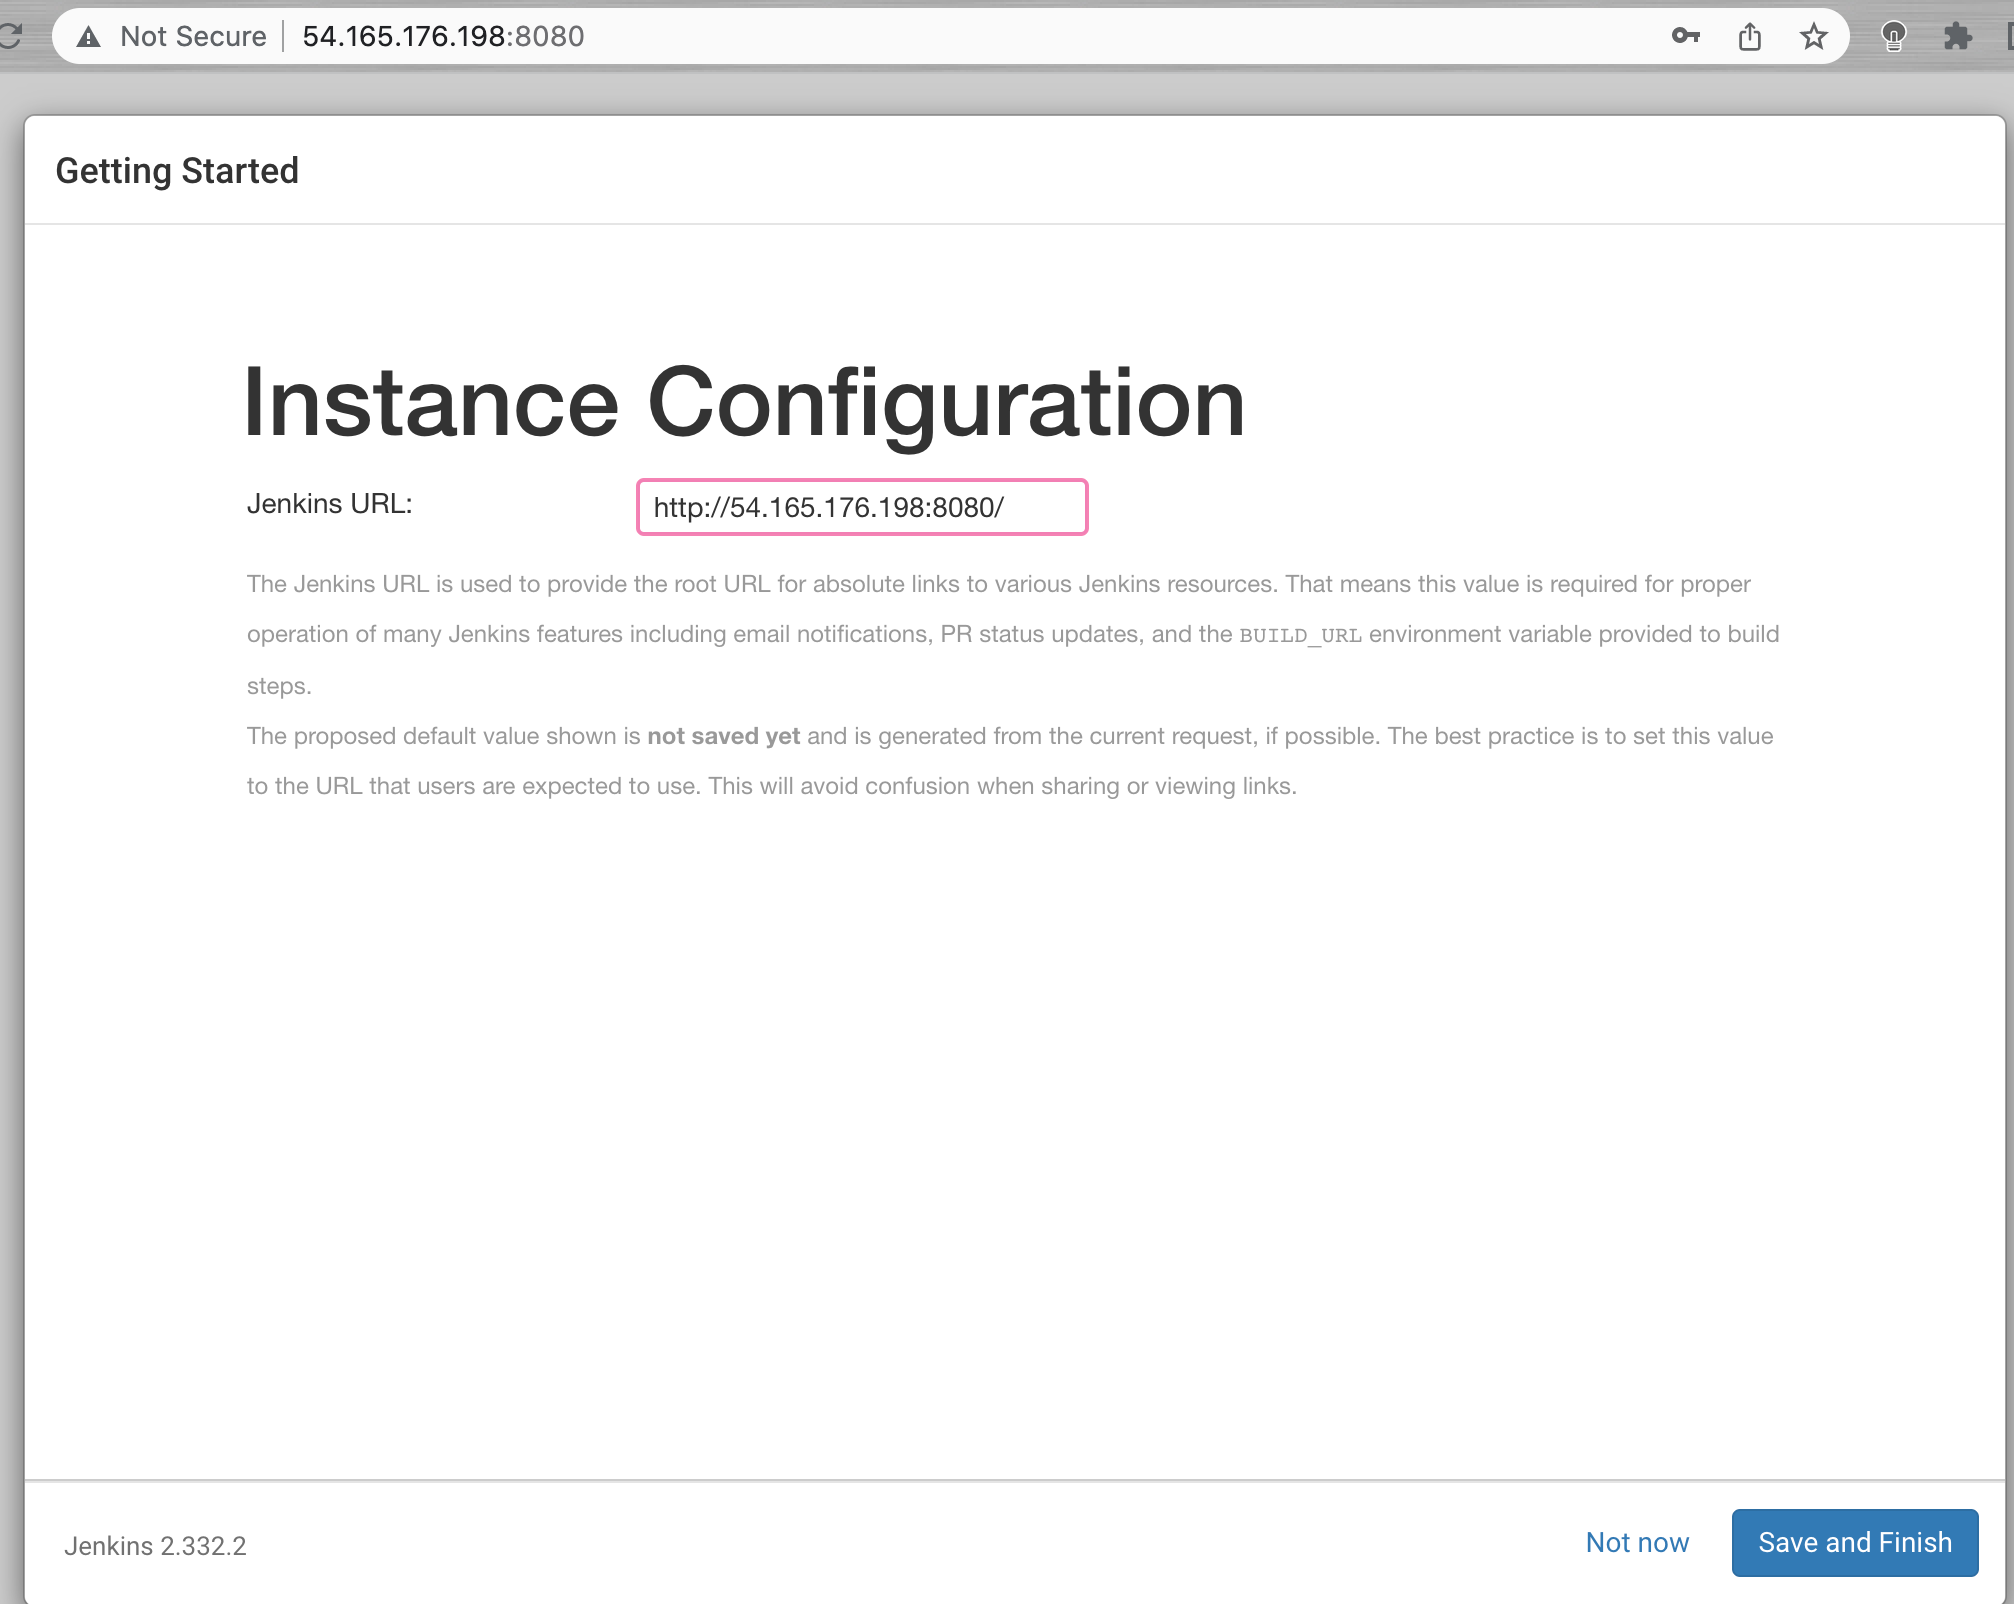
You’ll receive an Instance Configuration page that will ask you to confirm the preferred URL for your Jenkins instance.
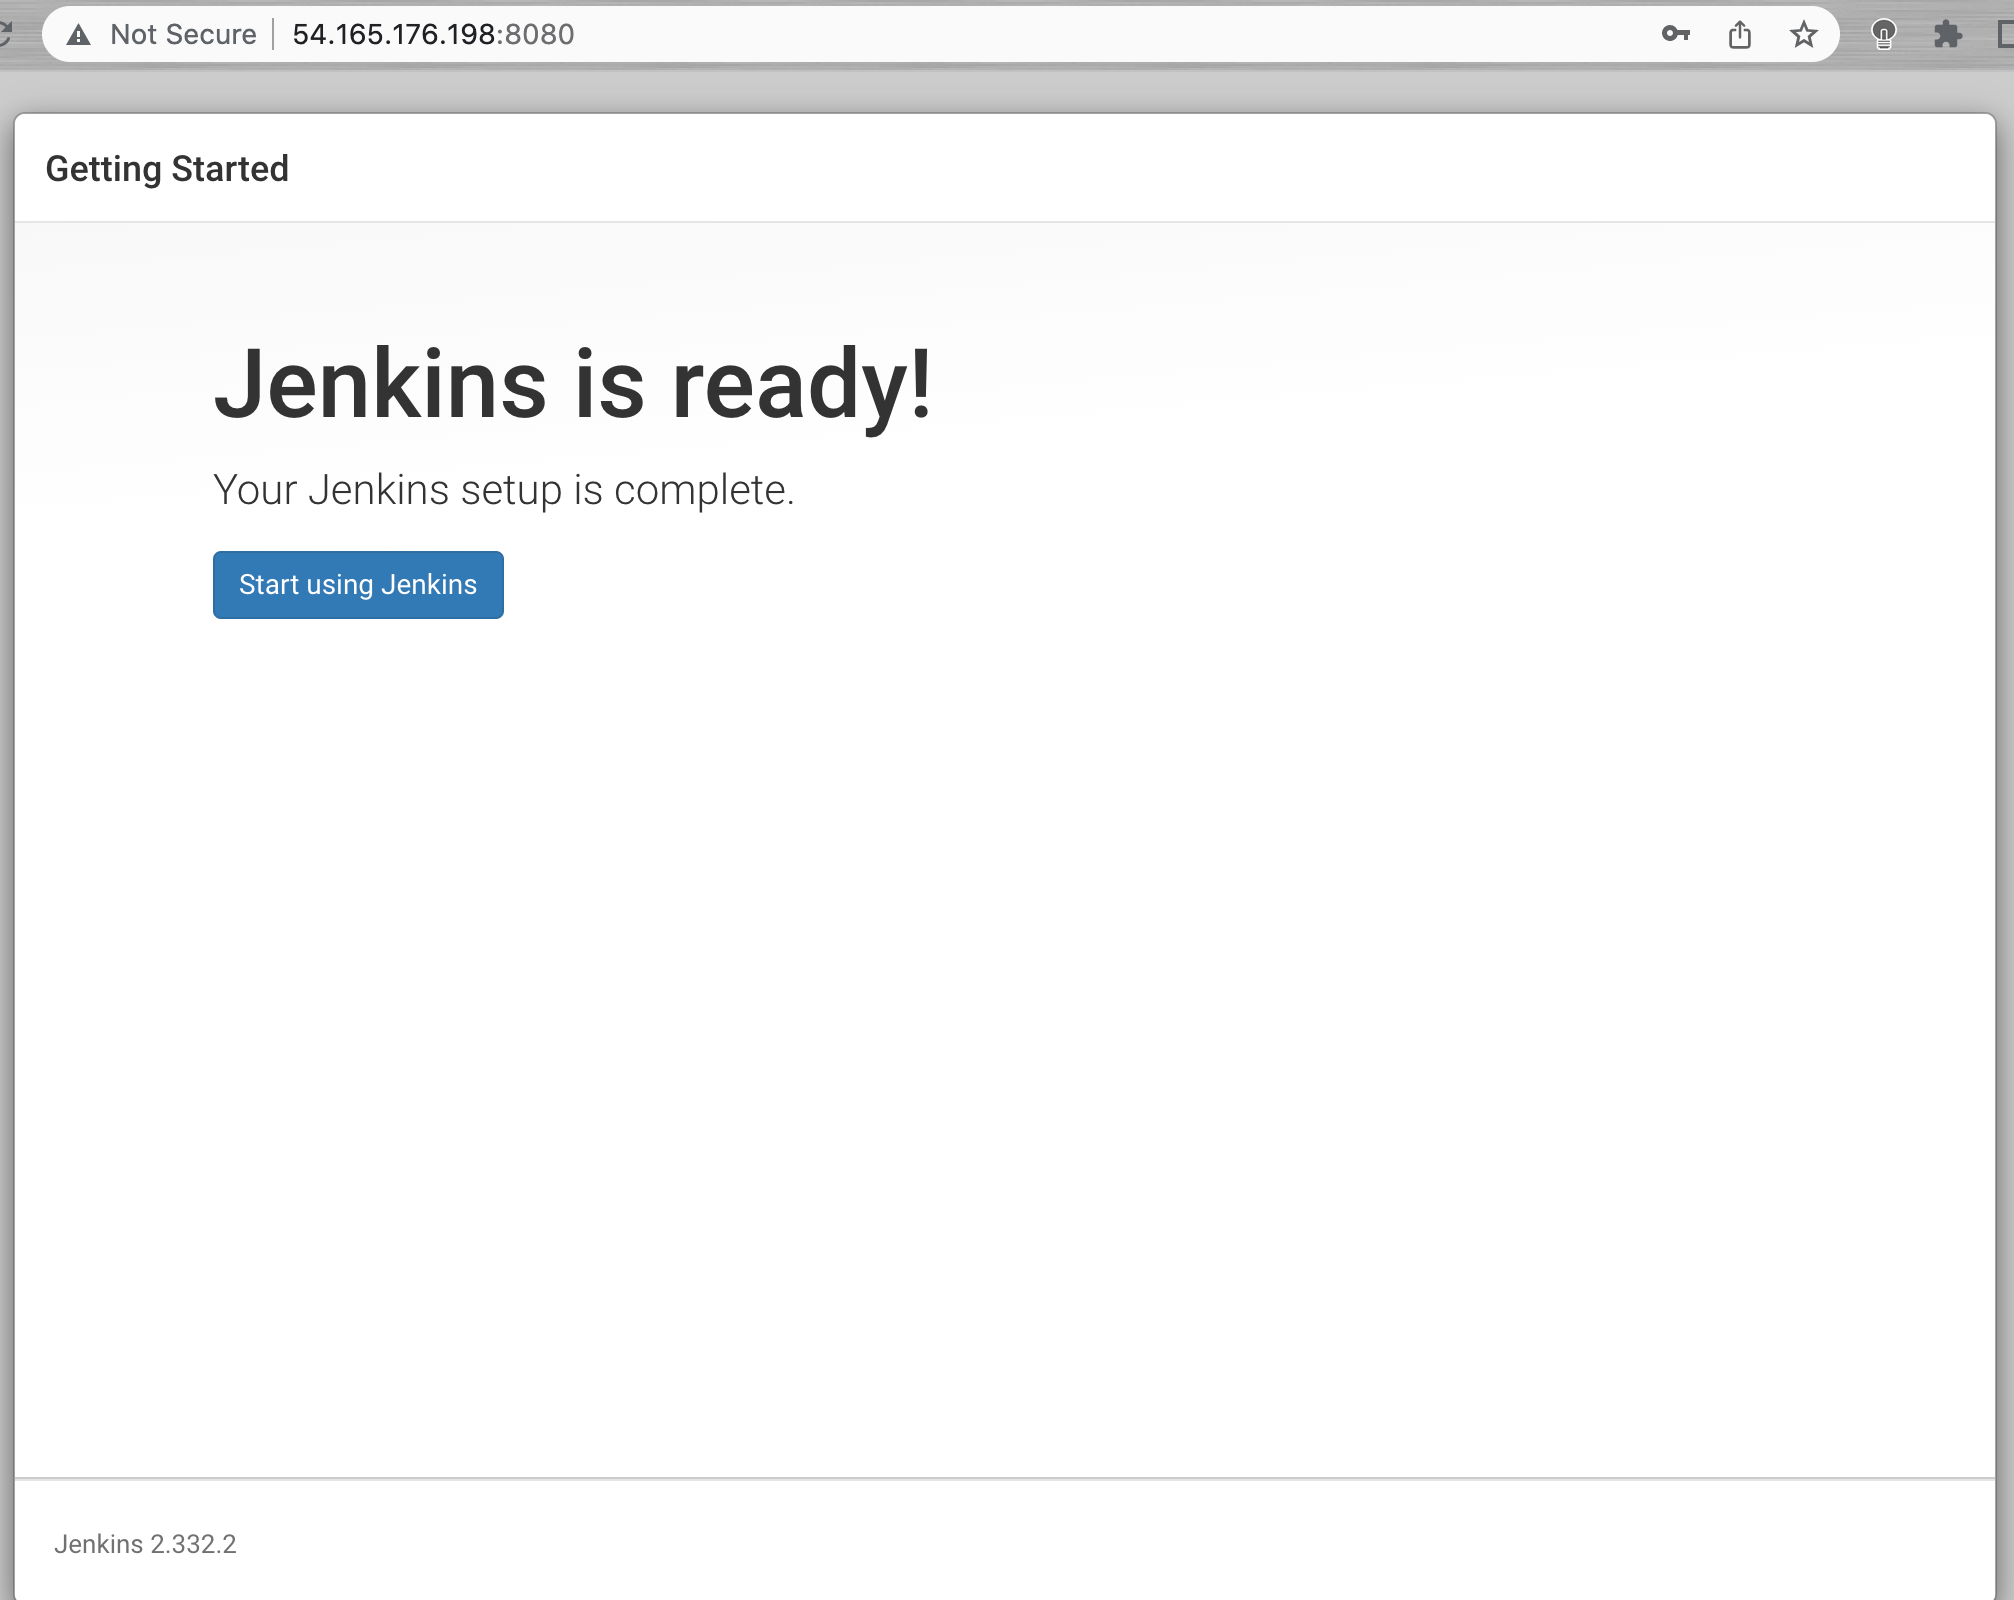
After confirming the appropriate information, click Save and Finish. You’ll receive a confirmation page confirming that “Jenkins is Ready!”
Excellent job! You have completed a successful installation of Jenkins.
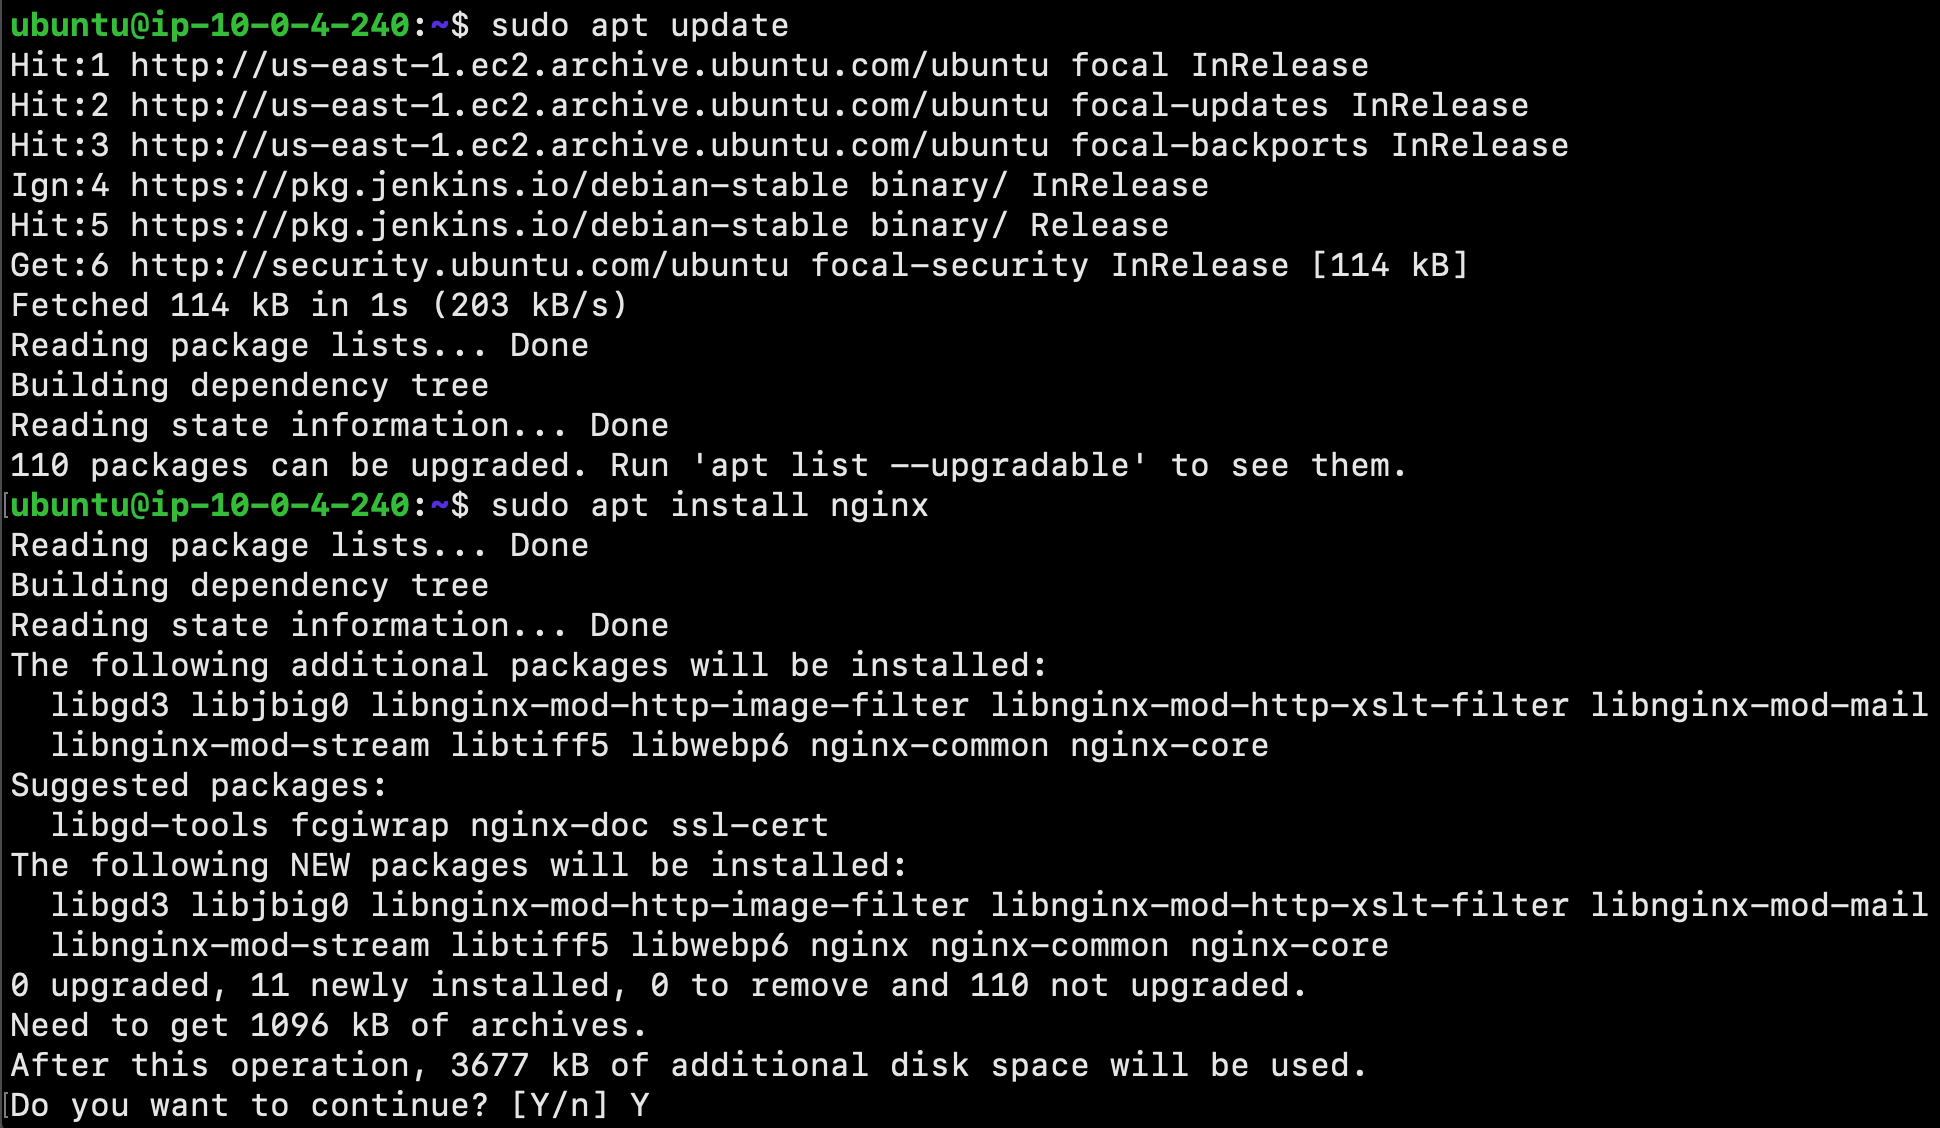
Install Nginx using the following commands:
$ sudo apt update
$ sudo apt install nginx
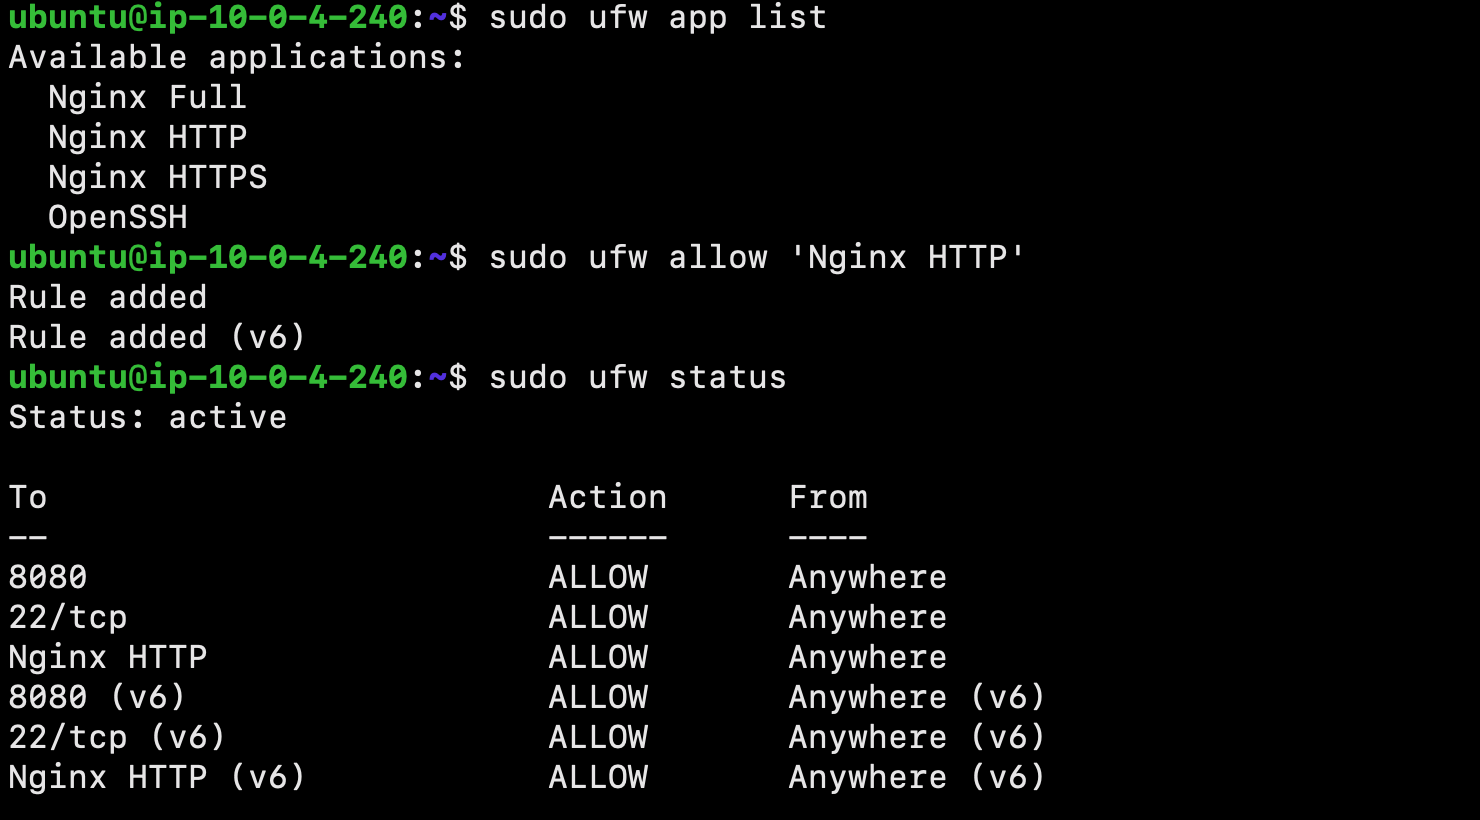
Next, we will adjust the firewall to allow access to the service. List the application configurations that ufw knows using the following command:
$ sudo ufw app list
It is best security practice to enable the most restrictive profile that will still allow the traffic you’ve configured. However, for this project, we will only need to allow traffic on port 80.
Enable this using the following command:
$ sudo ufw allow 'Nginx HTTP'
This configuration can be verified using the following:
$ sudo ufw status
The output will indicated which HTTP traffic is allowed:
Checking your Web Server
We can check with the systemd init system to make sure the service is running by using the following command:
$ systemctl status nginx
Great job! The service has started successfully. However, the best way to test this is to actually request a page from Nginx.
To access the default Nginx landing page and confirm that the software is running properly, we can navigate to our server’s public IP address. If you do not know your server’s IP address, it can be retrieved using the icanhazip.com tool:
$ curl -4 icanhazip.com
Enter your server’s IP address into your browser’s address bar using the following format:
http://your_server_ip
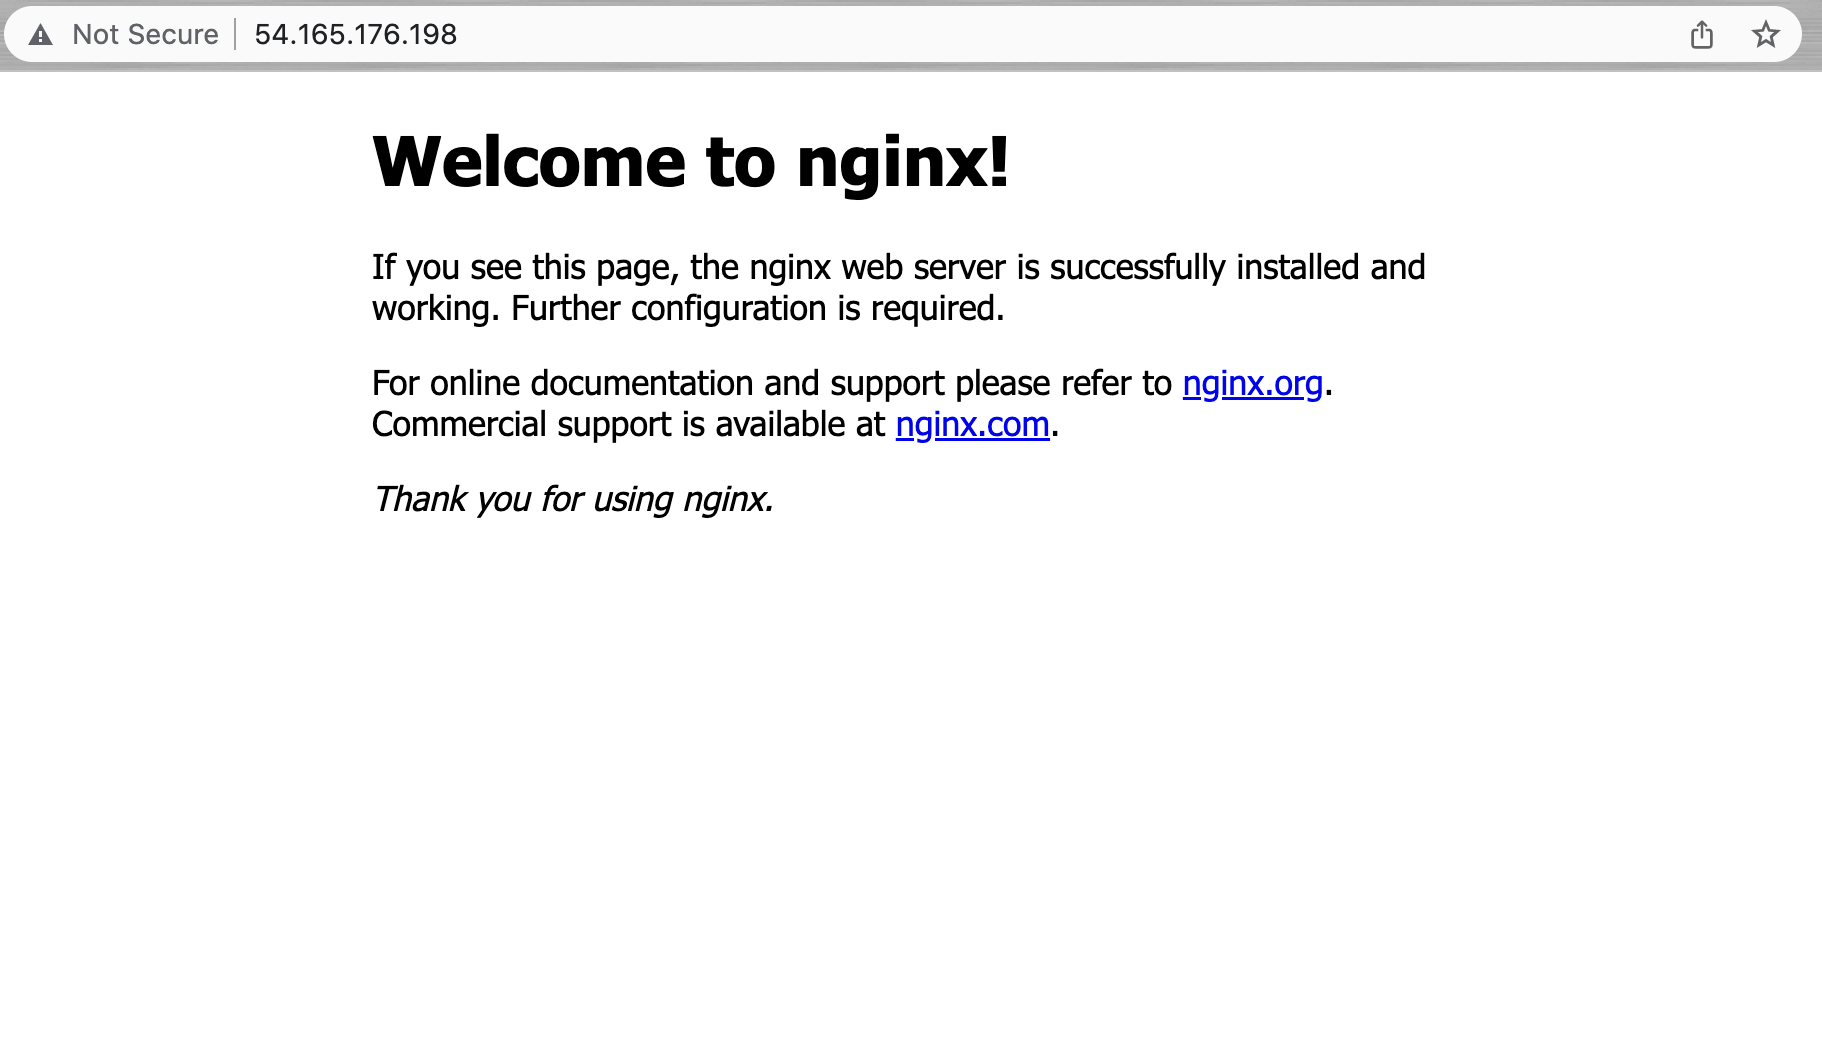
You should receive the default Nginx landing page:
Nice job! If you have accessed this page, your server is running correctly and it is ready to be managed!
Now that you have your web server up and running, let’s review some basic management commands!
To stop your web server, type:
$ sudo systemctl stop nginx
To start the web server when it is stopped, type:
$ sudo systemctl start nginx
To stop and then start the service again, type:
$ sudo systemctl restart nginx
If you are only making configuration changes, Nginx can often reload without dropping connections. To do this, type:
$ sudo systemctl reload nginx
By default, Nginx is configured to start automatically when the server boots. This behavior can disabled by typing:
$ sudo systemctl disable nginx
To re-enable the service to start up at boot, you can type:
$ sudo systemctl enable nginx
Excellent work! You have now learned basic management commands and should be ready to configure the site to host more than one domain.
When using the Nginx web server, server blocks can be used to encapsulate configuration details and host more than one domain from a single server.
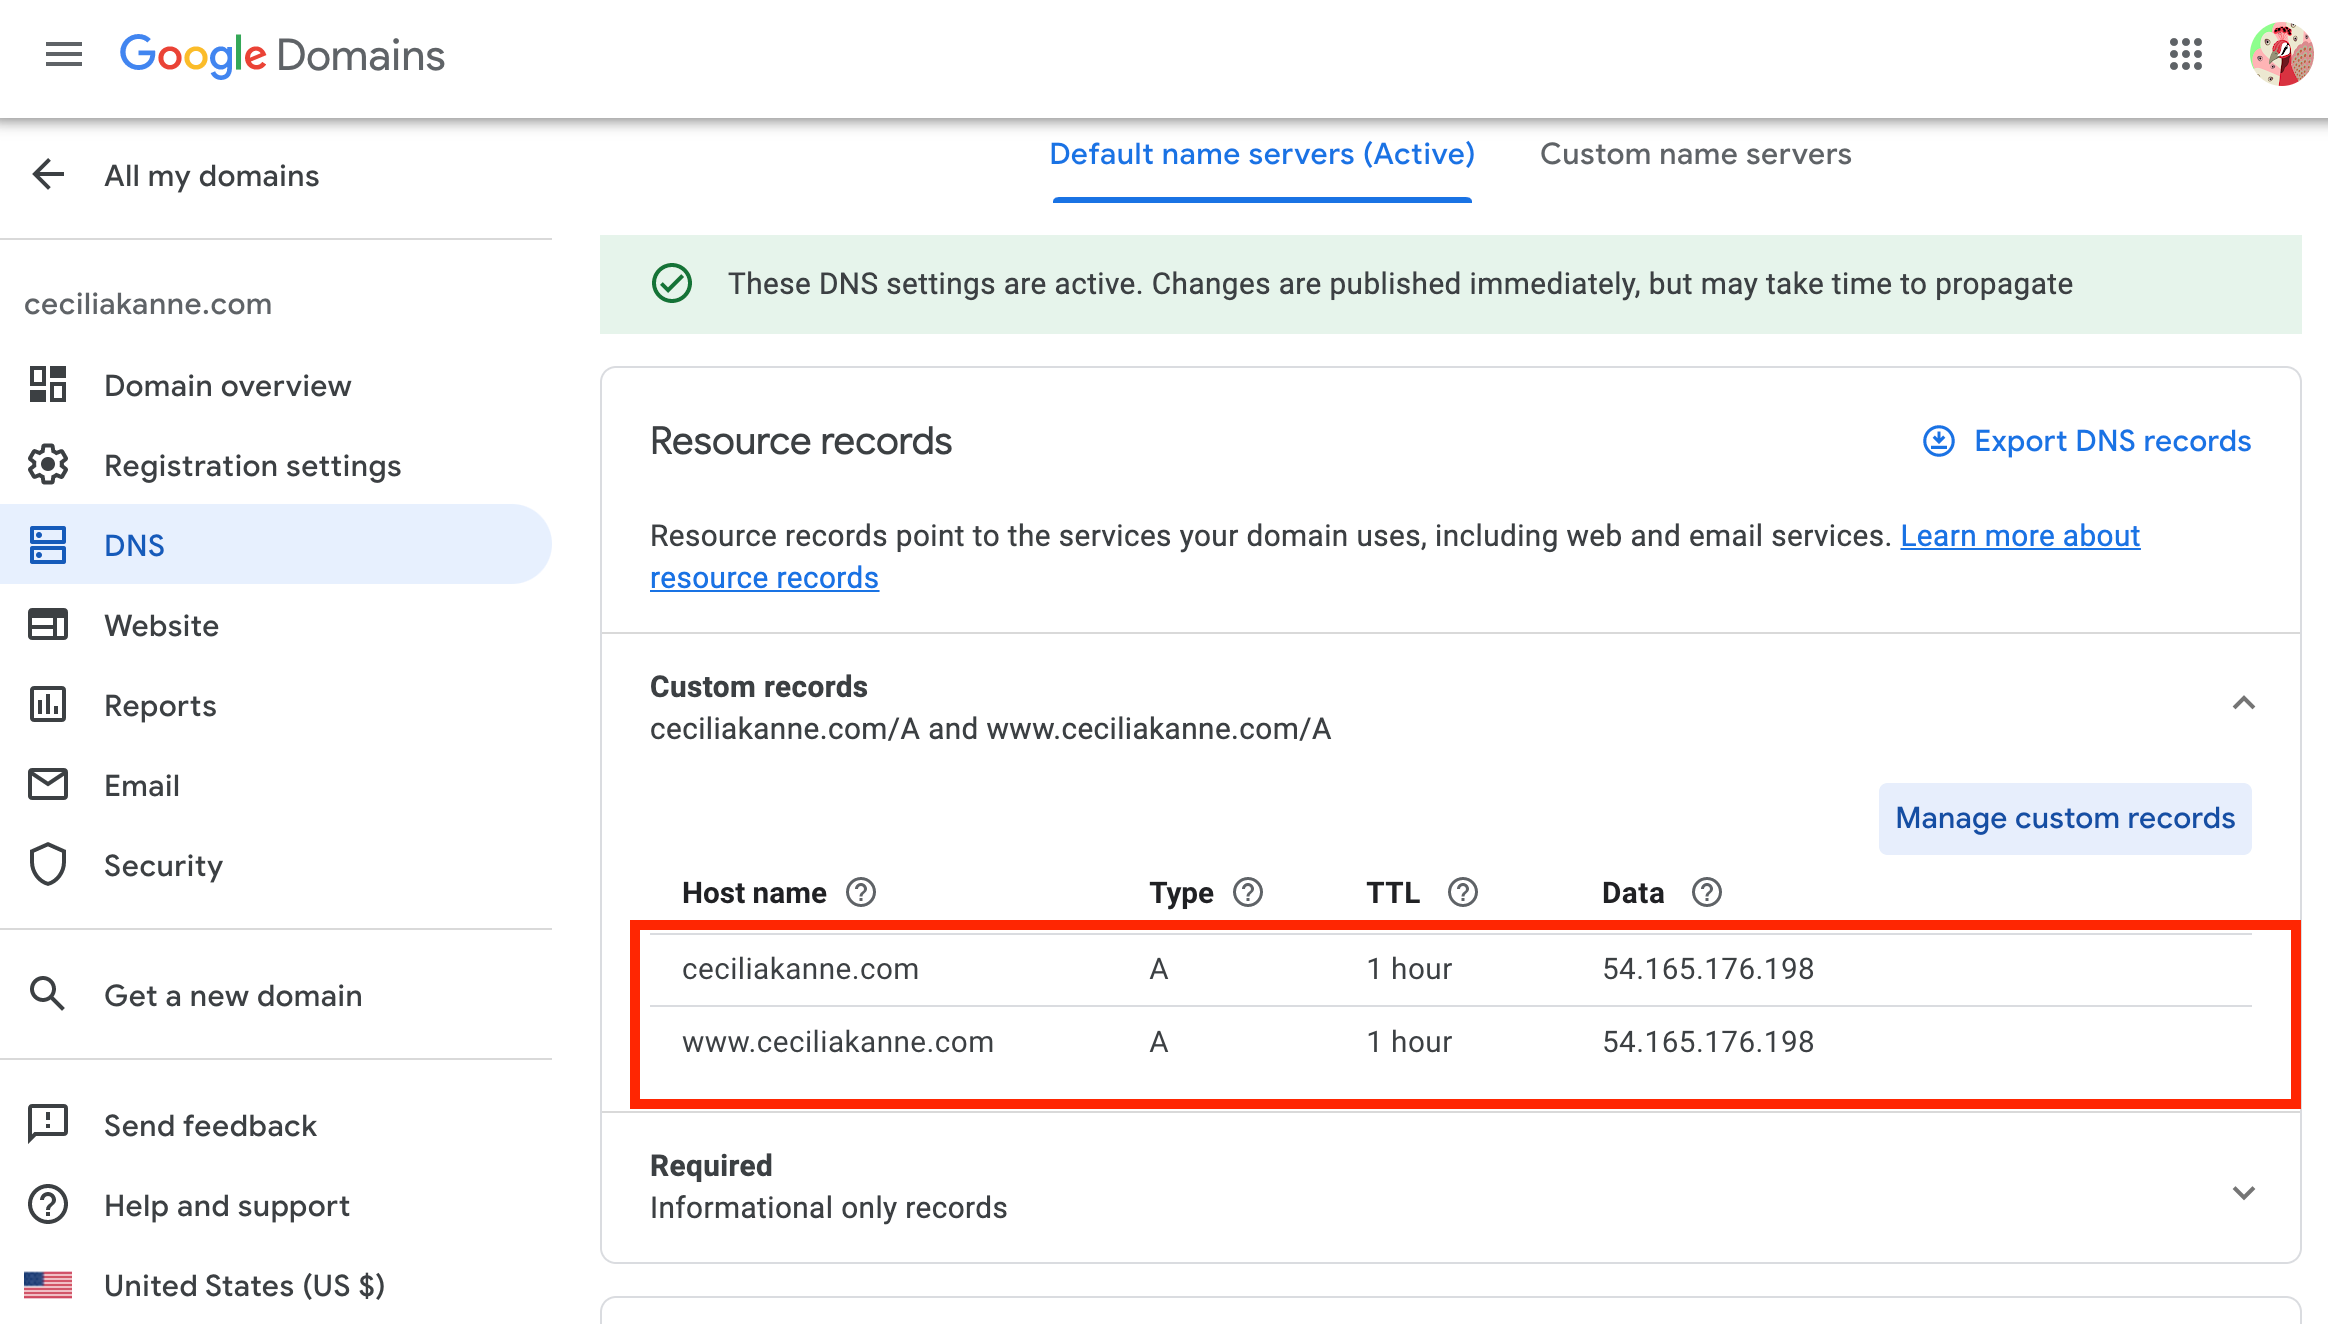
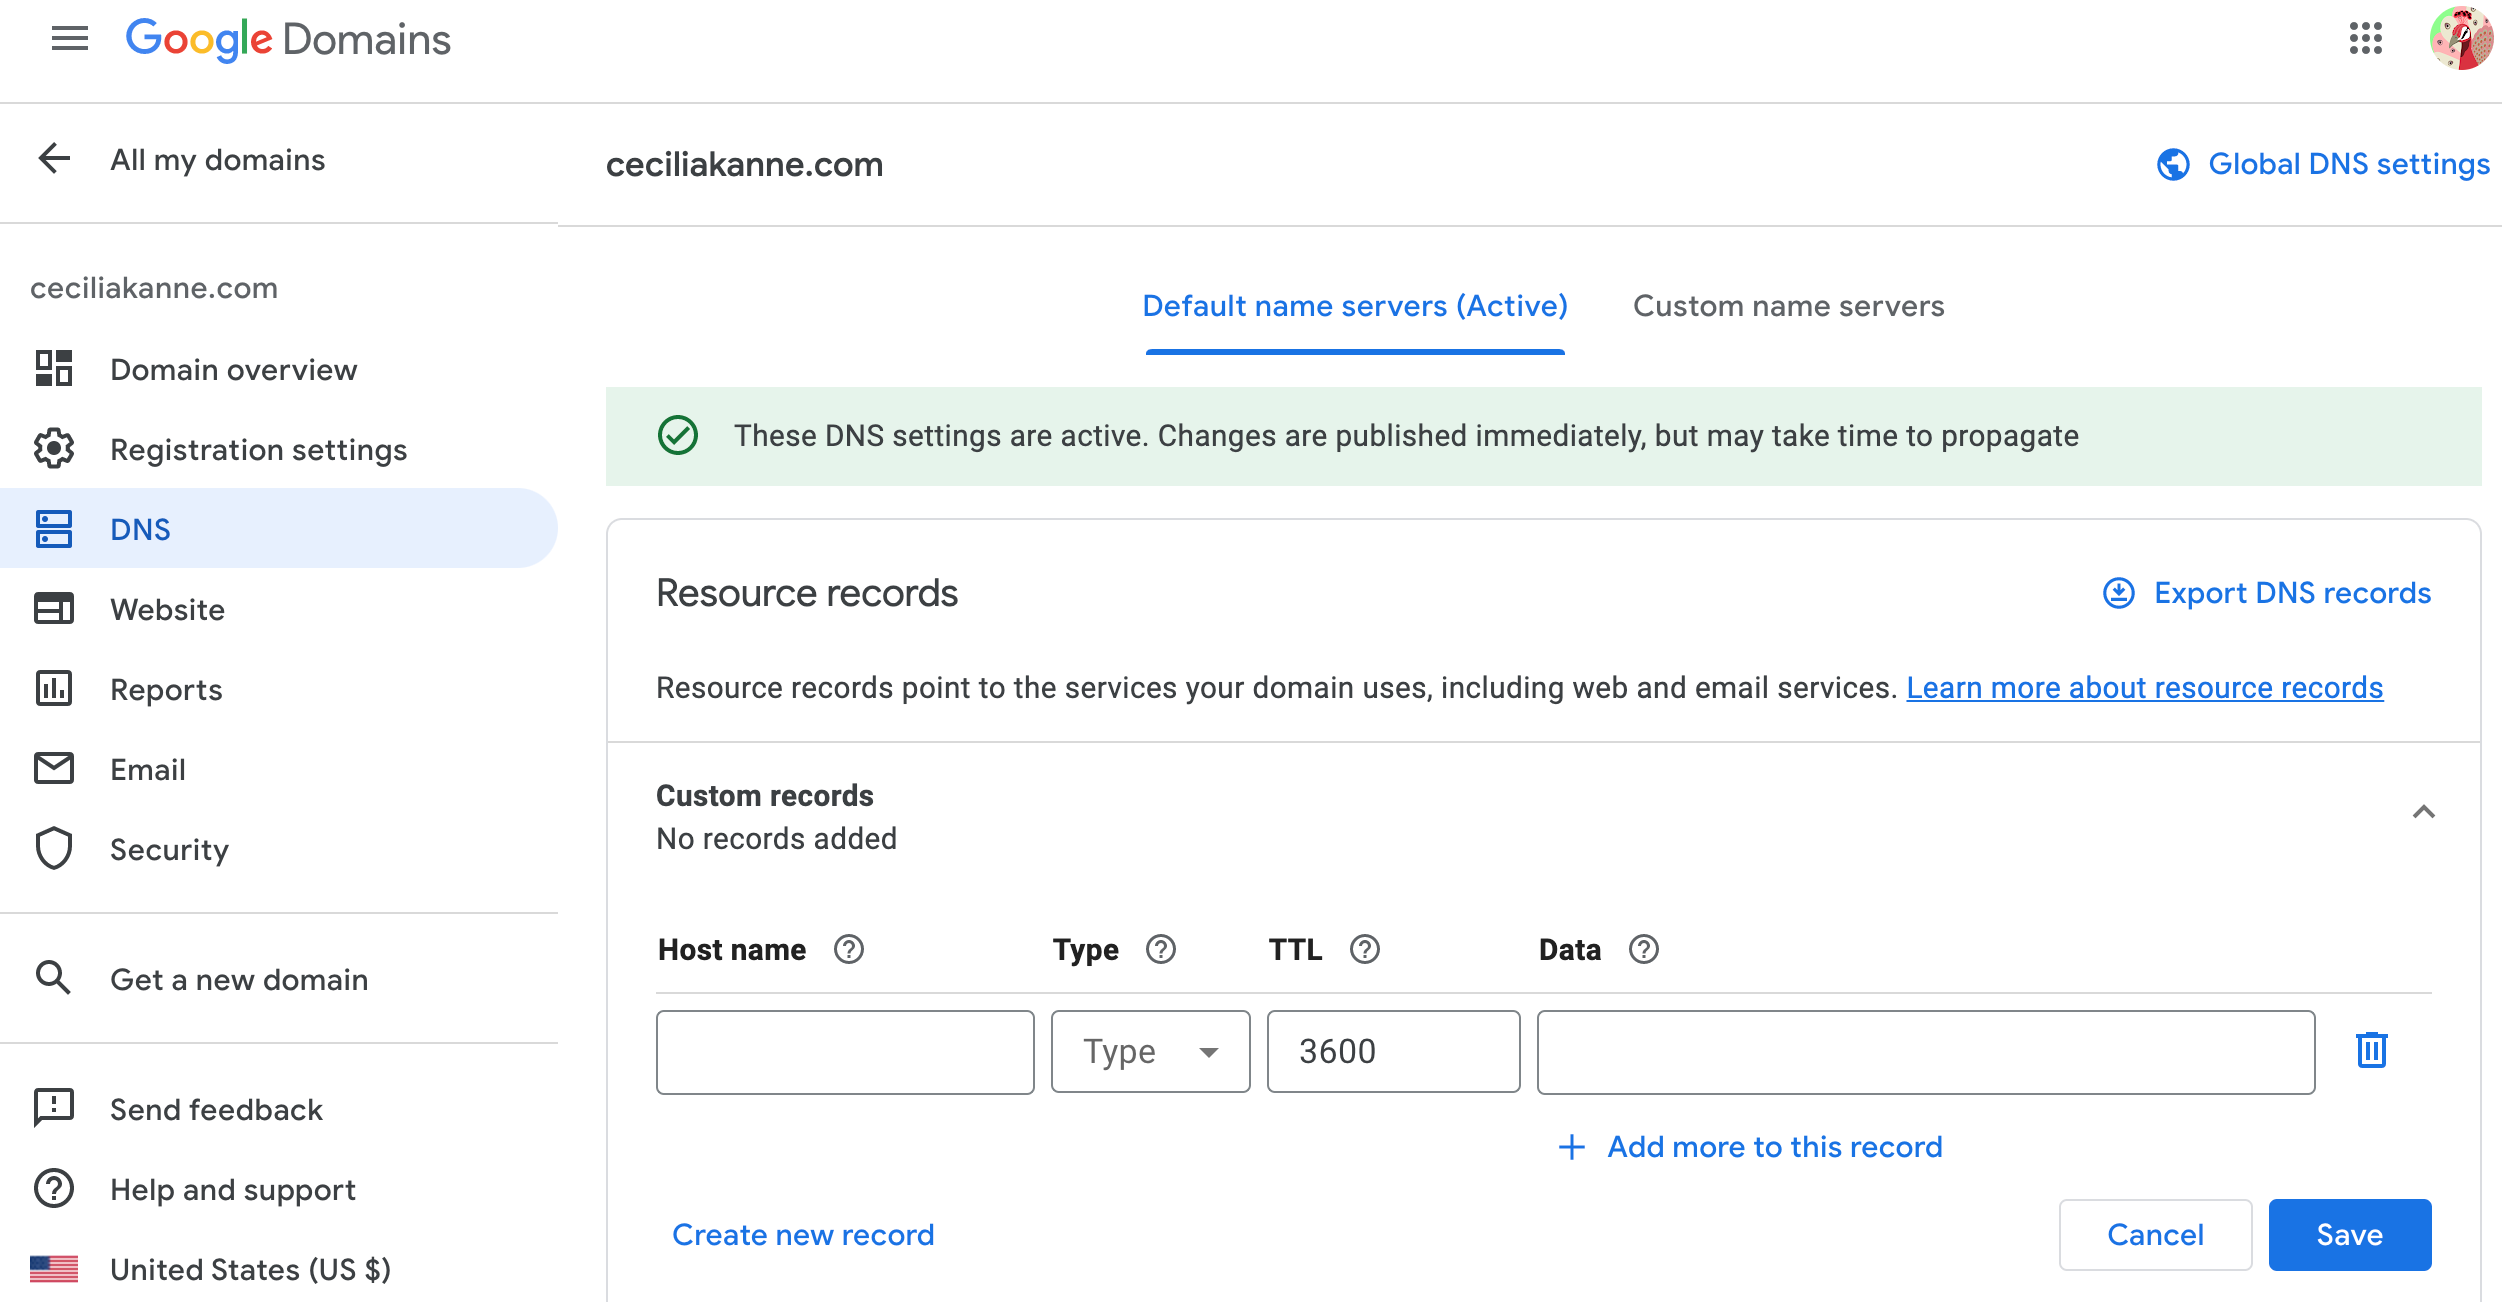
Before we proceed in this section, ensure that you have a registered domain name. Also ensure that both of the following DNS records set up for your server:
- An A record with
example.compointing to your server’s public IP address. - An A record with
www.example.compointing to your server’s public IP address.
We will create a directory structure within /var/www for our your_domain site, leaving /var/www/html in place as the default directory to be served if a client request doesn’t match any other sites. Create the directory for your_domain using the following command:
PLEASE NOTE: you should replace your_domain with your own domain name
$ sudo mkdir -p /var/www/your_domain/html
Next, assign ownership of the directory with the $USER environment variable:
$ sudo chown -R $USER:$USER /var/www/your_domain/html
To ensure that your permissions are correct use the following command:
$ sudo chmod -R 755 /var/www/your_domain
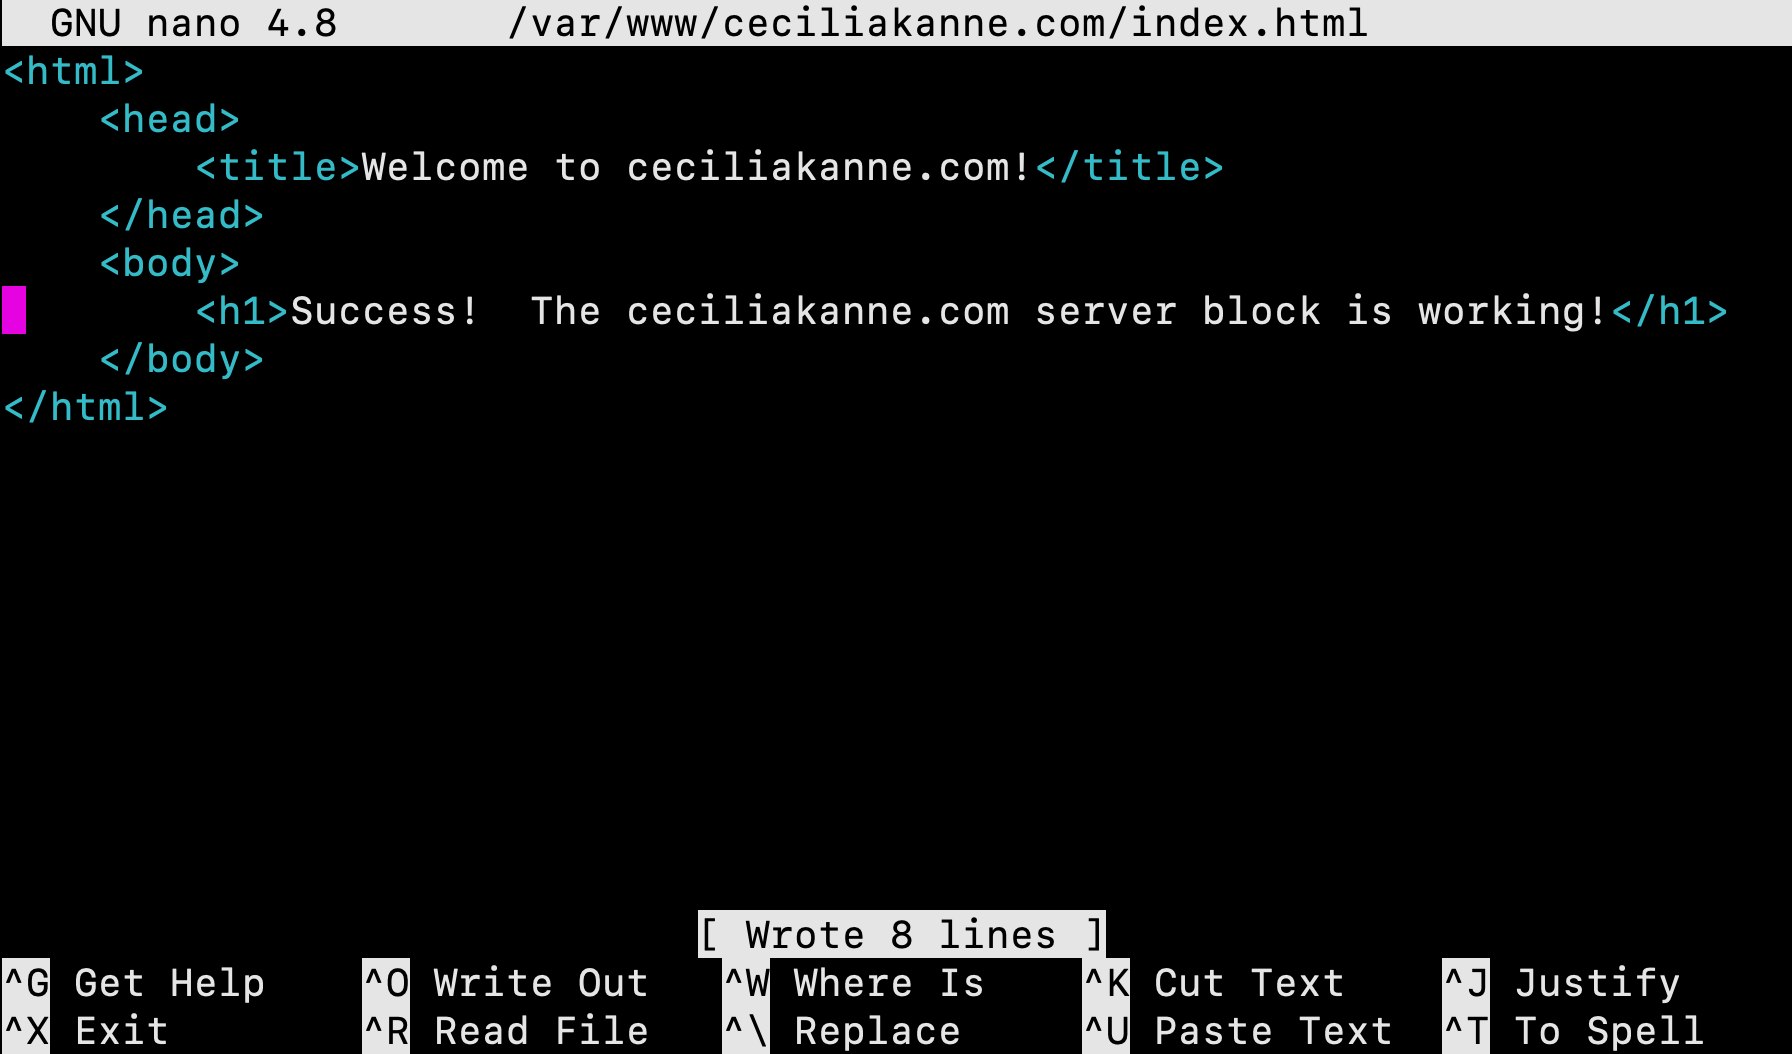
Next, create a sample index.html page using nano or your favorite editor:
$ sudo nano /var/www/your_domain/html/index.html
Inside the file, add the following sample HTML:
<html>
    <head>
        <title>Welcome to your_domain!</title>
    </head>
    <body>
        <h1>Success! The your_domain server block is working!</h1>
    </body>
</html>
Save and close the file by pressing Ctrl+X to exit, then when prompted to save, Y and then Enter.
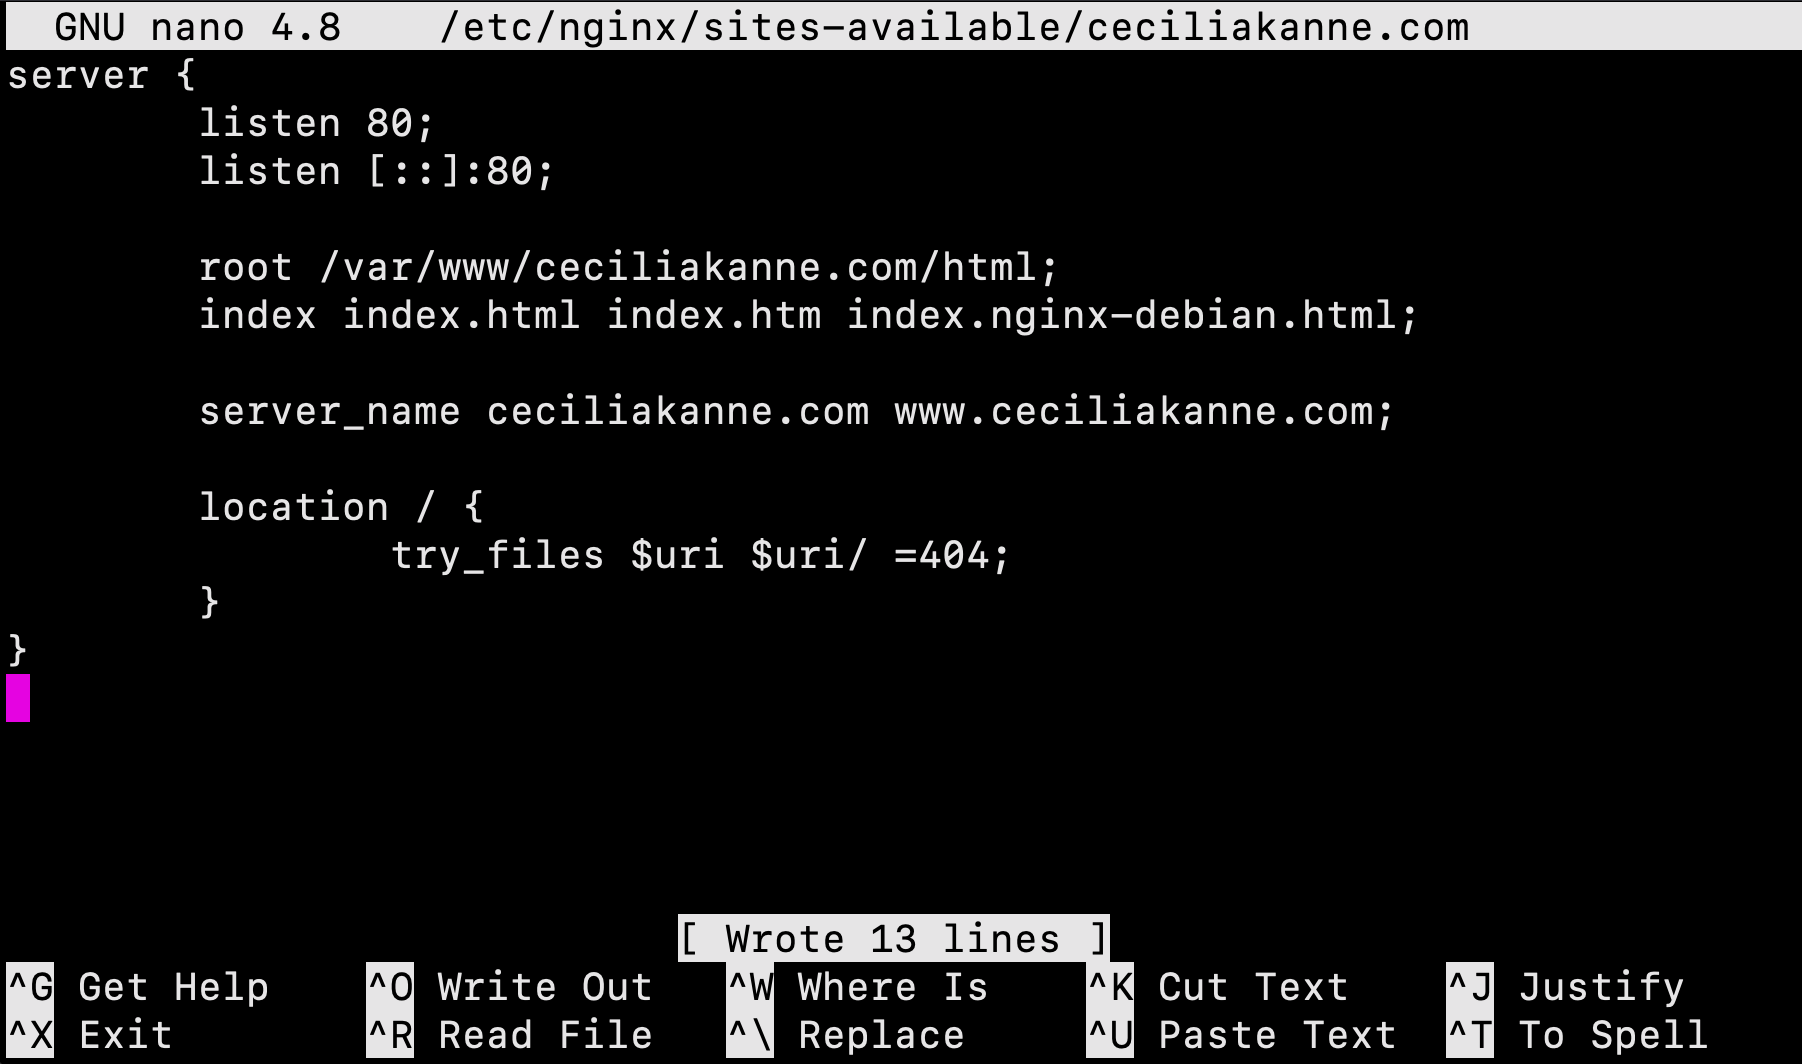
In order for Nginx to serve this content, it’s necessary to create a server block with the correct directives. Let's create a new one as follows:
$ sudo nano /etc/nginx/sites-available/your_domain
Next, add the following configuration block:
server {
        listen 80;
        listen [::]:80;

        root /var/www/your_domain/html;
        index index.html index.htm index.nginx-debian.html;

        server_nameyour_domain www.your_domain;

        location / {
                try_files $uri $uri/ =404;
        }
}
Next, enable the file by creating a link from it to the sites-enabled directory, which Nginx reads from during startup:
$ sudo ln -s /etc/nginx/sites-available/your_domain /etc/nginx/sites-enabled/
Great job! Two server blocks are now enabled and configured to respond to requests based on their listen and server_name directives:
your_domain: Will respond to requests foryour_domainandwww.your_domain.default: Will respond to any requests on port 80 that do not match the other two blocks.
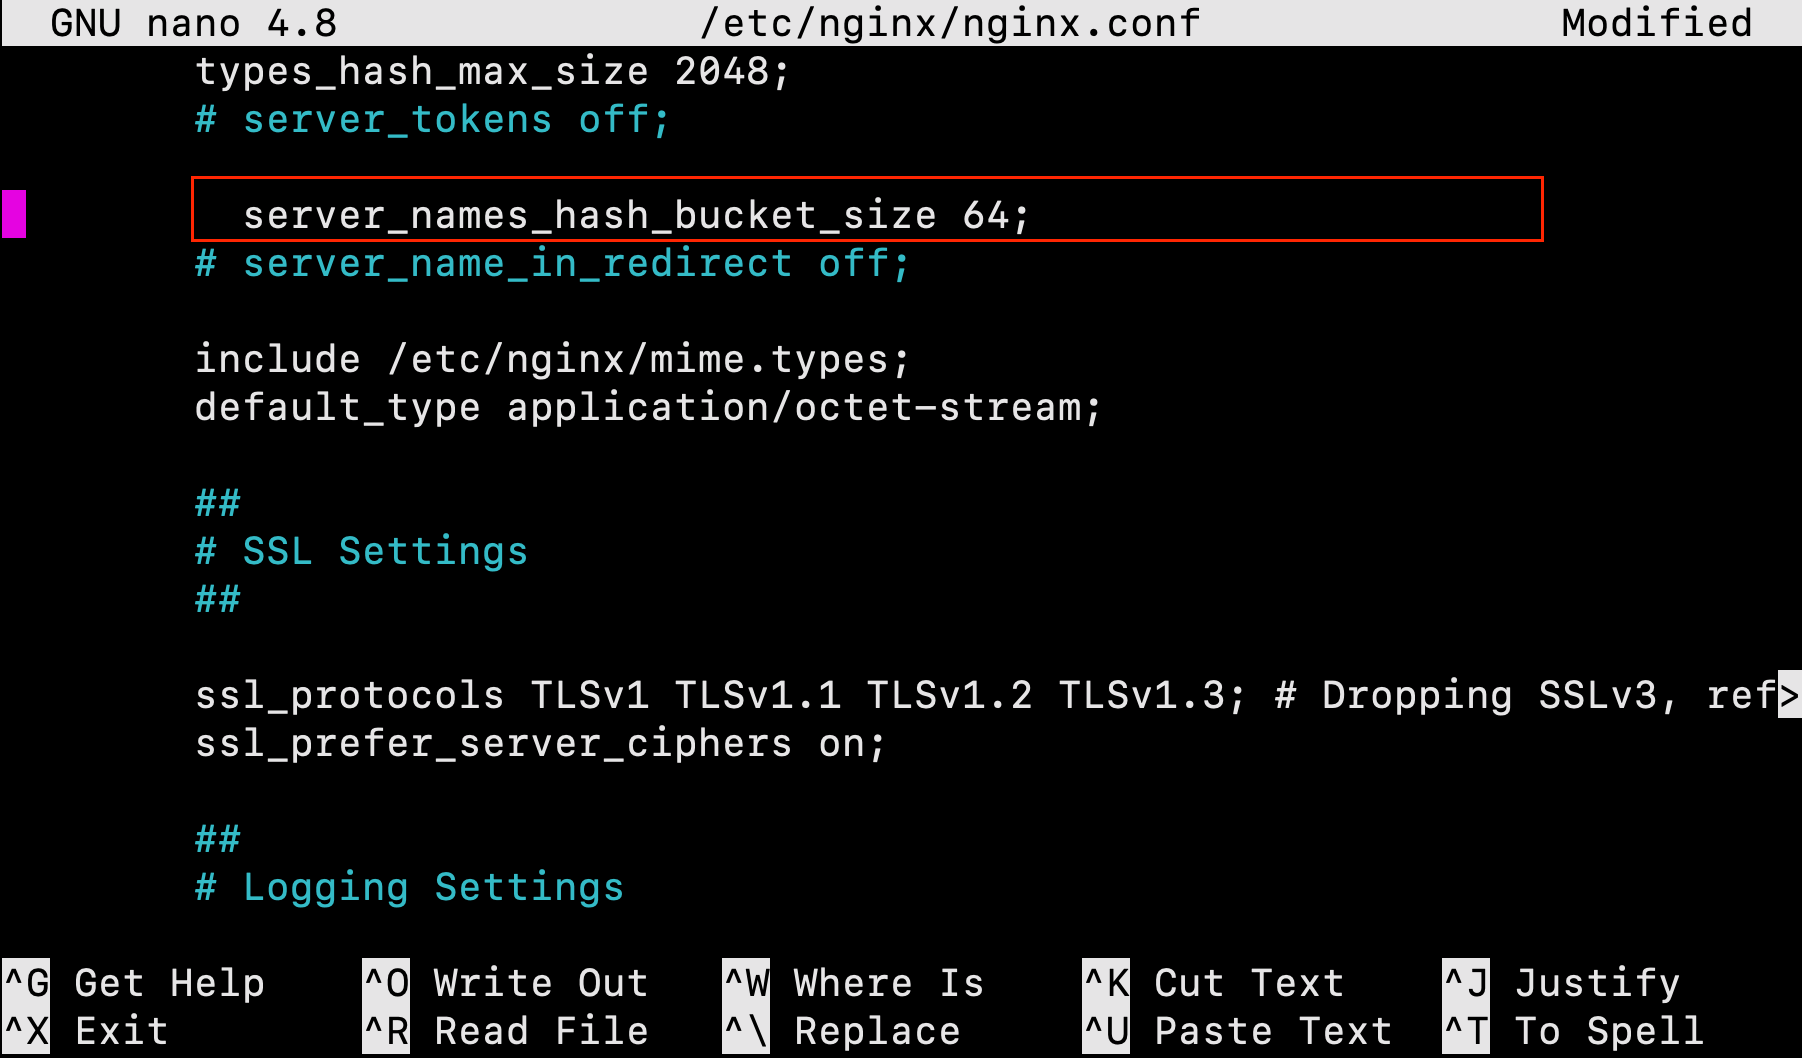
To avoid a possible hash bucket memory problem that can arise from adding additional server names, we must make a minor adjustment.
First, open the file:
$ sudo nano /etc/nginx/nginx.conf
Next, scroll down and find the server_names_hash_bucket_size directive and remove the # symbol to uncomment the line. Save and close the file when you are finished.
Next, test to make sure that there are no syntax errors in any of your Nginx files:
$ sudo nginx -t
If there aren’t any problems, restart Nginx to enable your changes:
$ sudo systemctl restart nginx
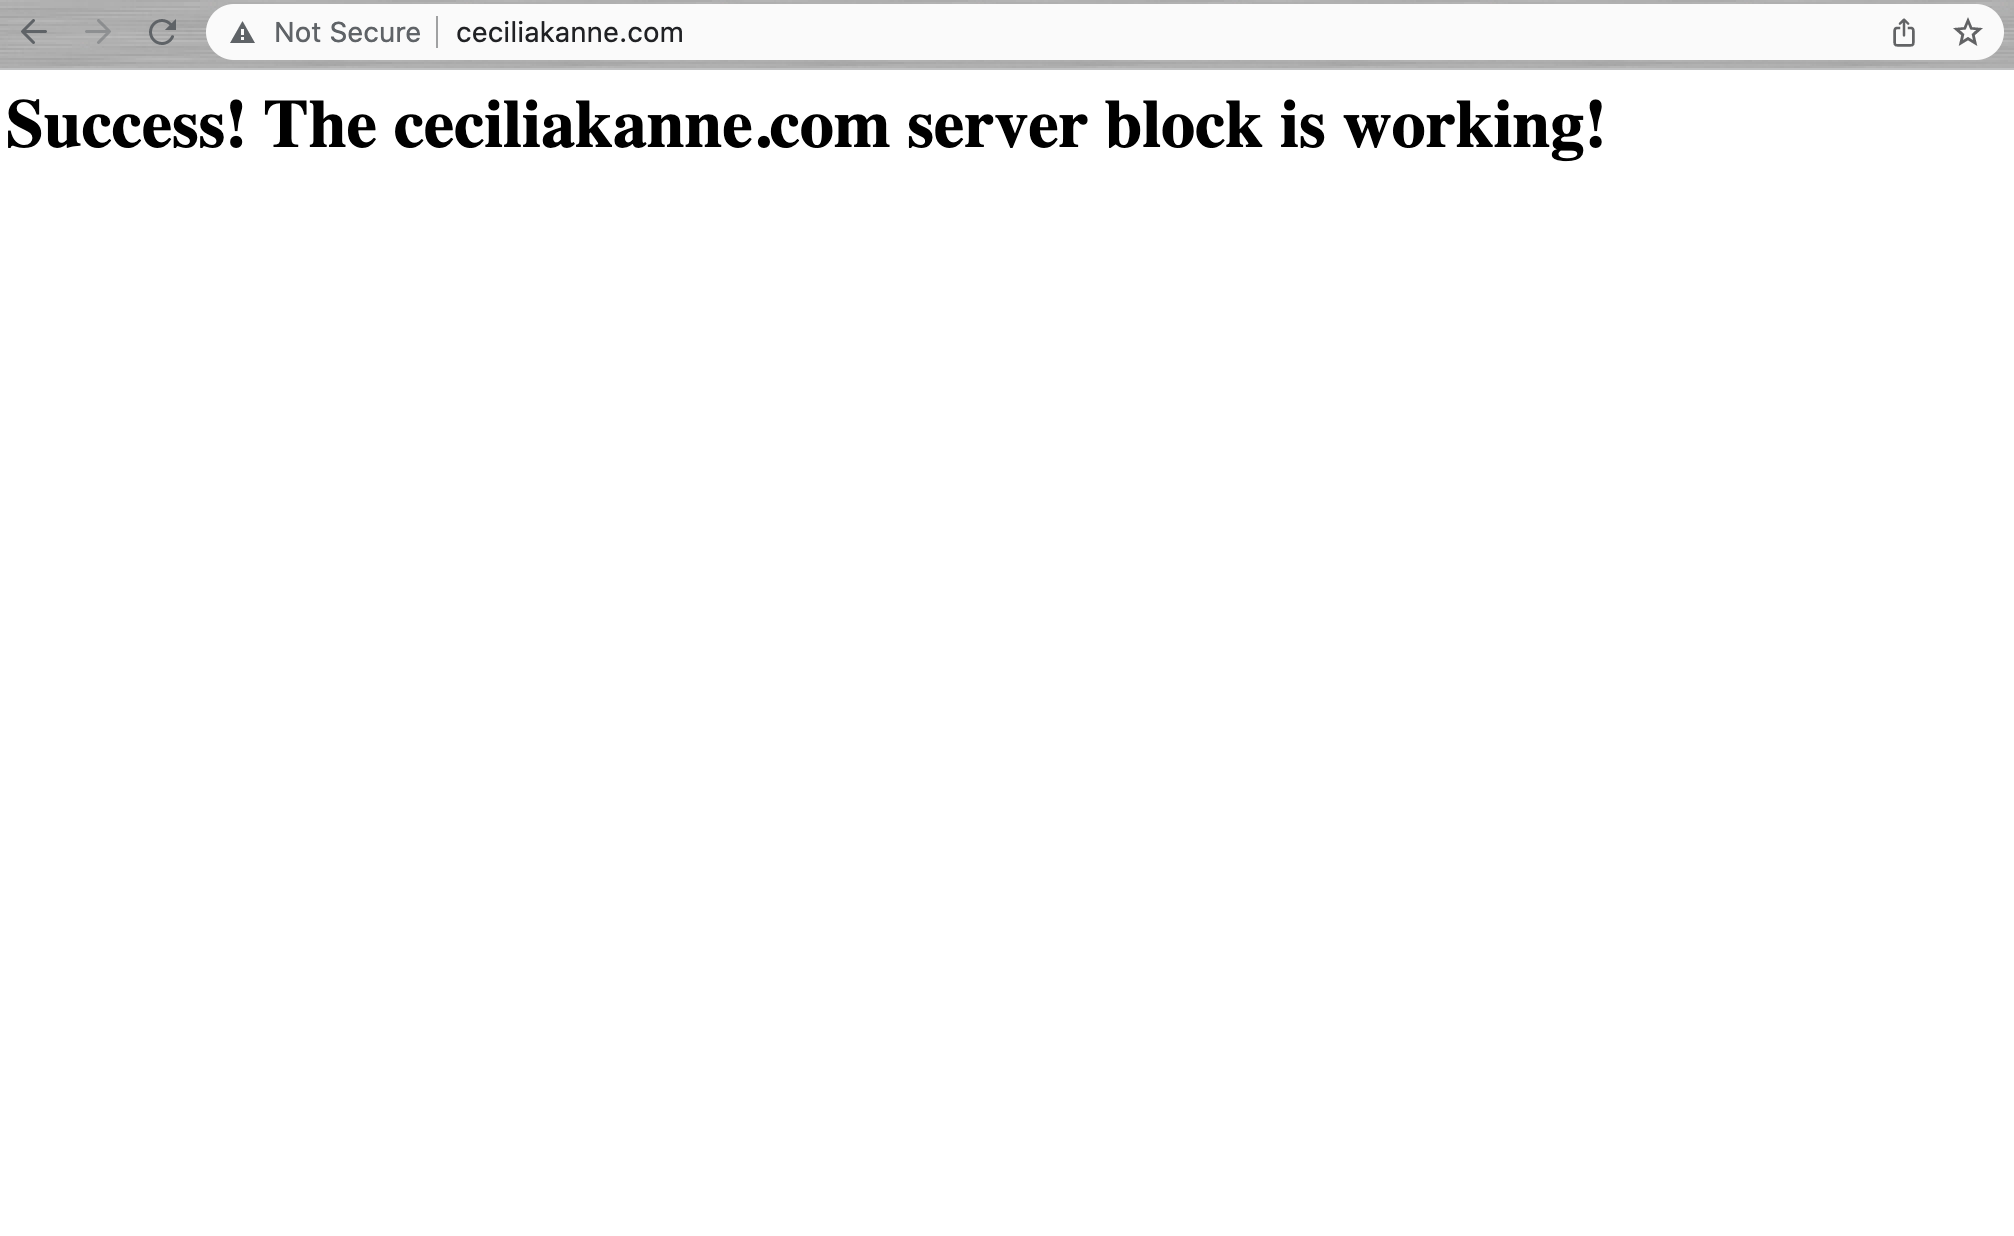
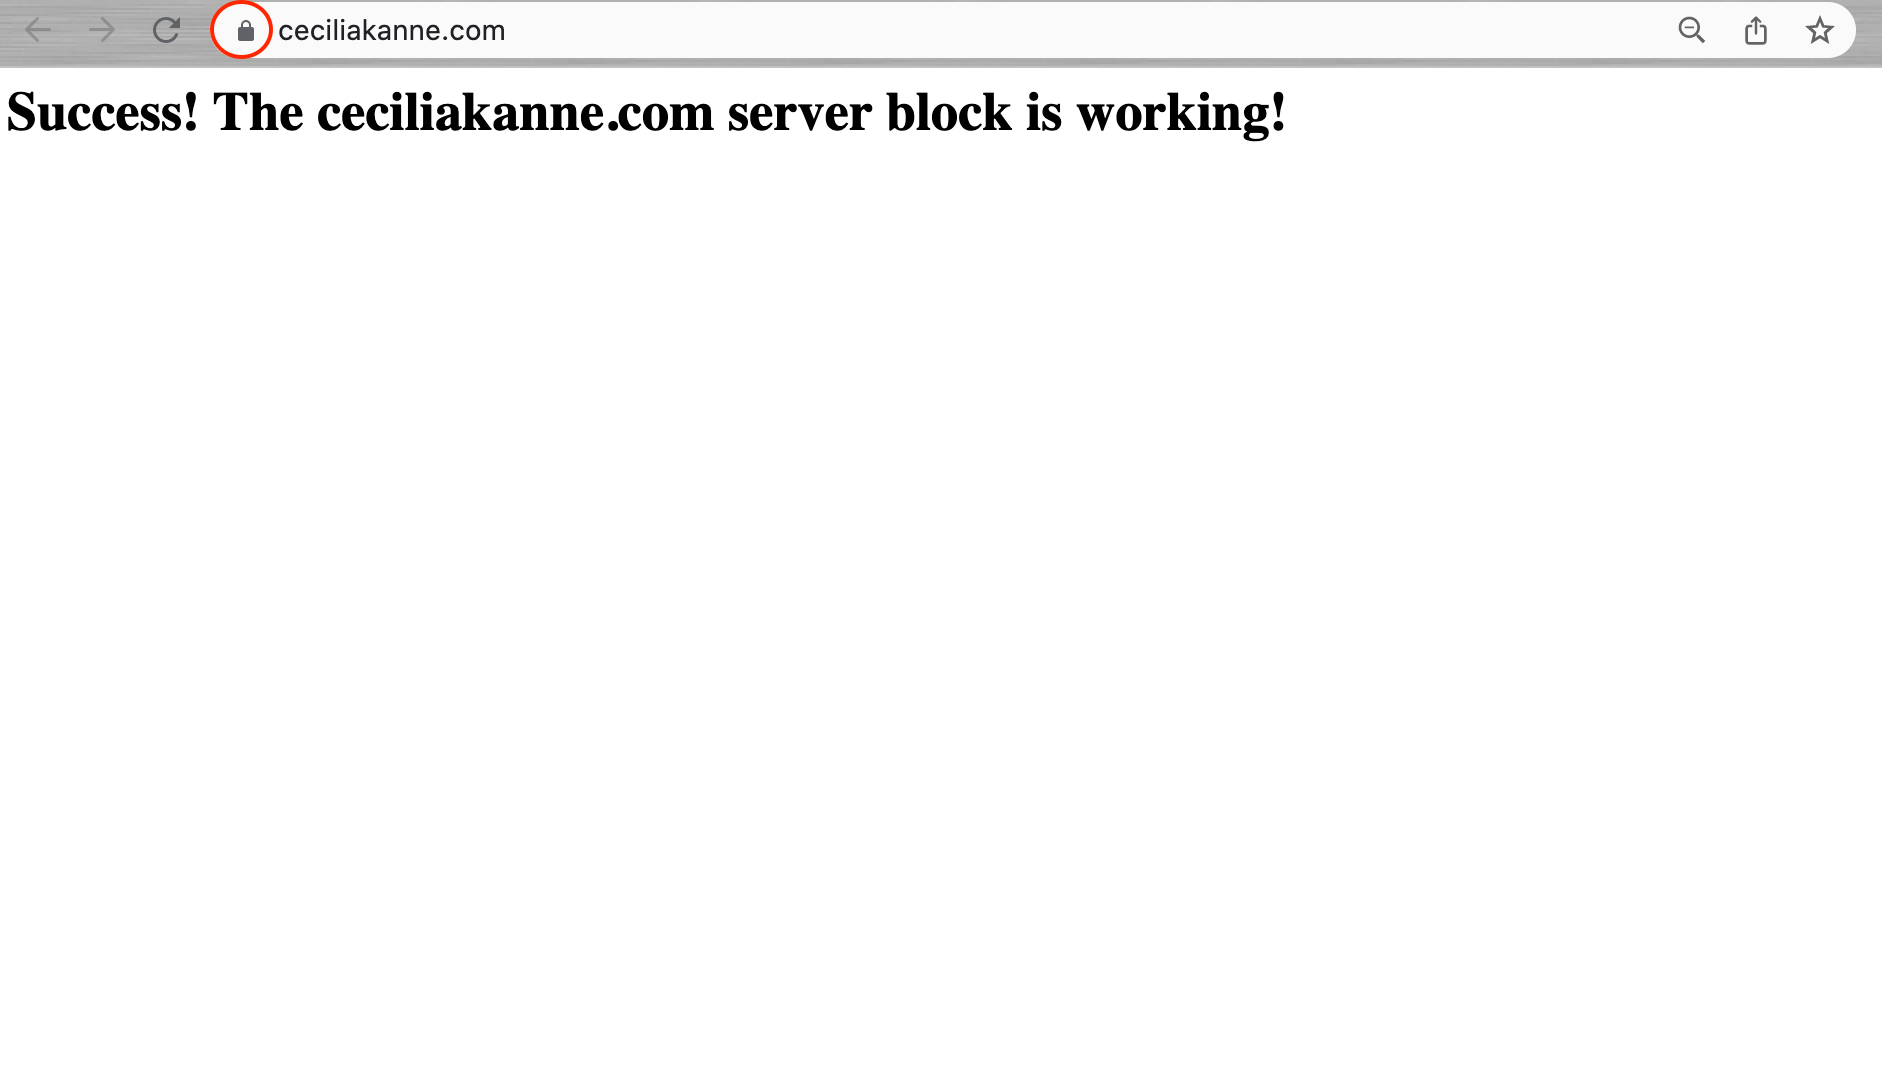
Good job! Nginx should now be serving your domain name. You can test this by navigating to http://your_domain, where you should see something like this:
Now that you have our web server installed, we have many options for the type of content to serve and the technologies you want to use to create a richer experience!
In this section, we will instal the Let’s Encrypt client certbot, downloaded SSL certificates for your domain, configured Nginx to use these certificates, and set up automatic certificate renewal.
Let’s Encrypt is a Certificate Authority (CA) that provides an easy way to obtain and install free TLS/SSL certificates, thereby enabling encrypted HTTPS on web servers.
Installing Certbot
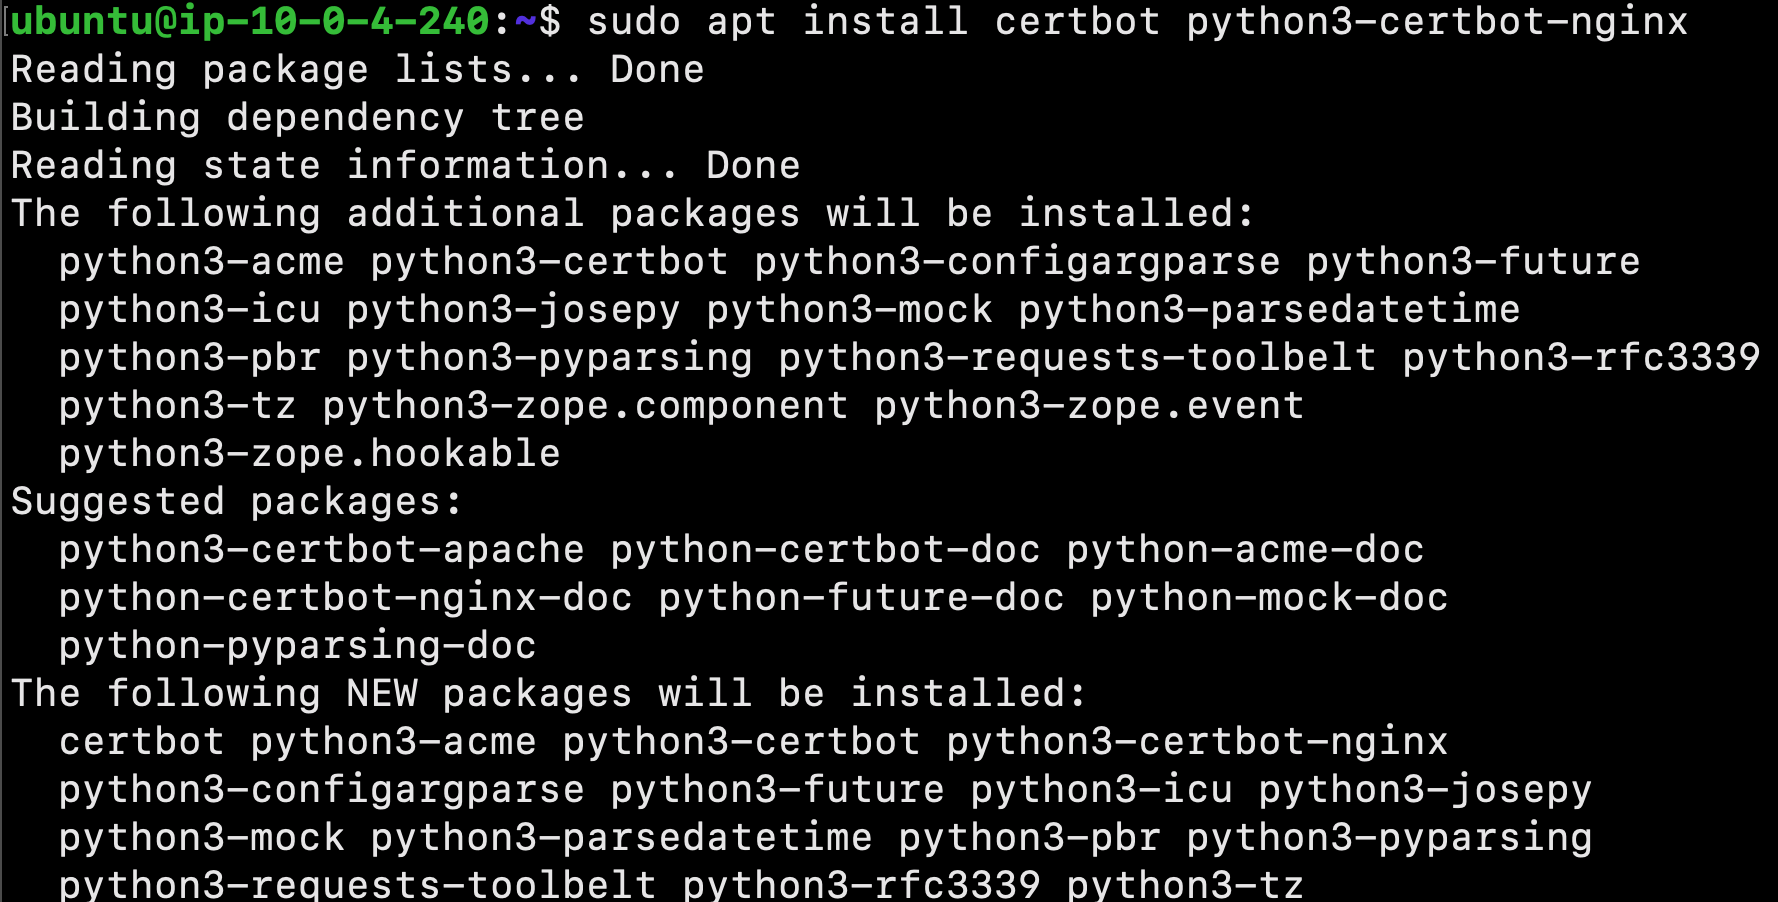
Begin by installing Certbot and it’s Nginx plugin with apt:
$ sudo apt install certbot python3-certbot-nginx
Certbot is now ready to use!
Confirming Nginx’s Configuration
Certbot needs to be able to find the correct server block in your Nginx configuration for it to be able to automatically configure SSL.
There should be a server block for your domain at /etc/nginx/sites-available/example.com with the server_name directive already set appropriately. To check this, open the configuration file:
$ sudo nano /etc/nginx/sites-available/example.com
Next, find the existing server_name line. It should look like this:
Next, save the file, quit your editor, and verify the syntax of your configuration edits:
$ sudo nginx -t
Once your configuration file’s syntax is correct, reload Nginx to load the new configuration:
$ sudo systemctl reload nginx
Certbot can now find the correct server block and update it automatically.
Allowing HTTPS Through the Firewall
Now that we have the ufw firewall enabled, we must adjust the settings to allow for HTTPS traffic. Use the following command to view the current settings:
$ sudo ufw status
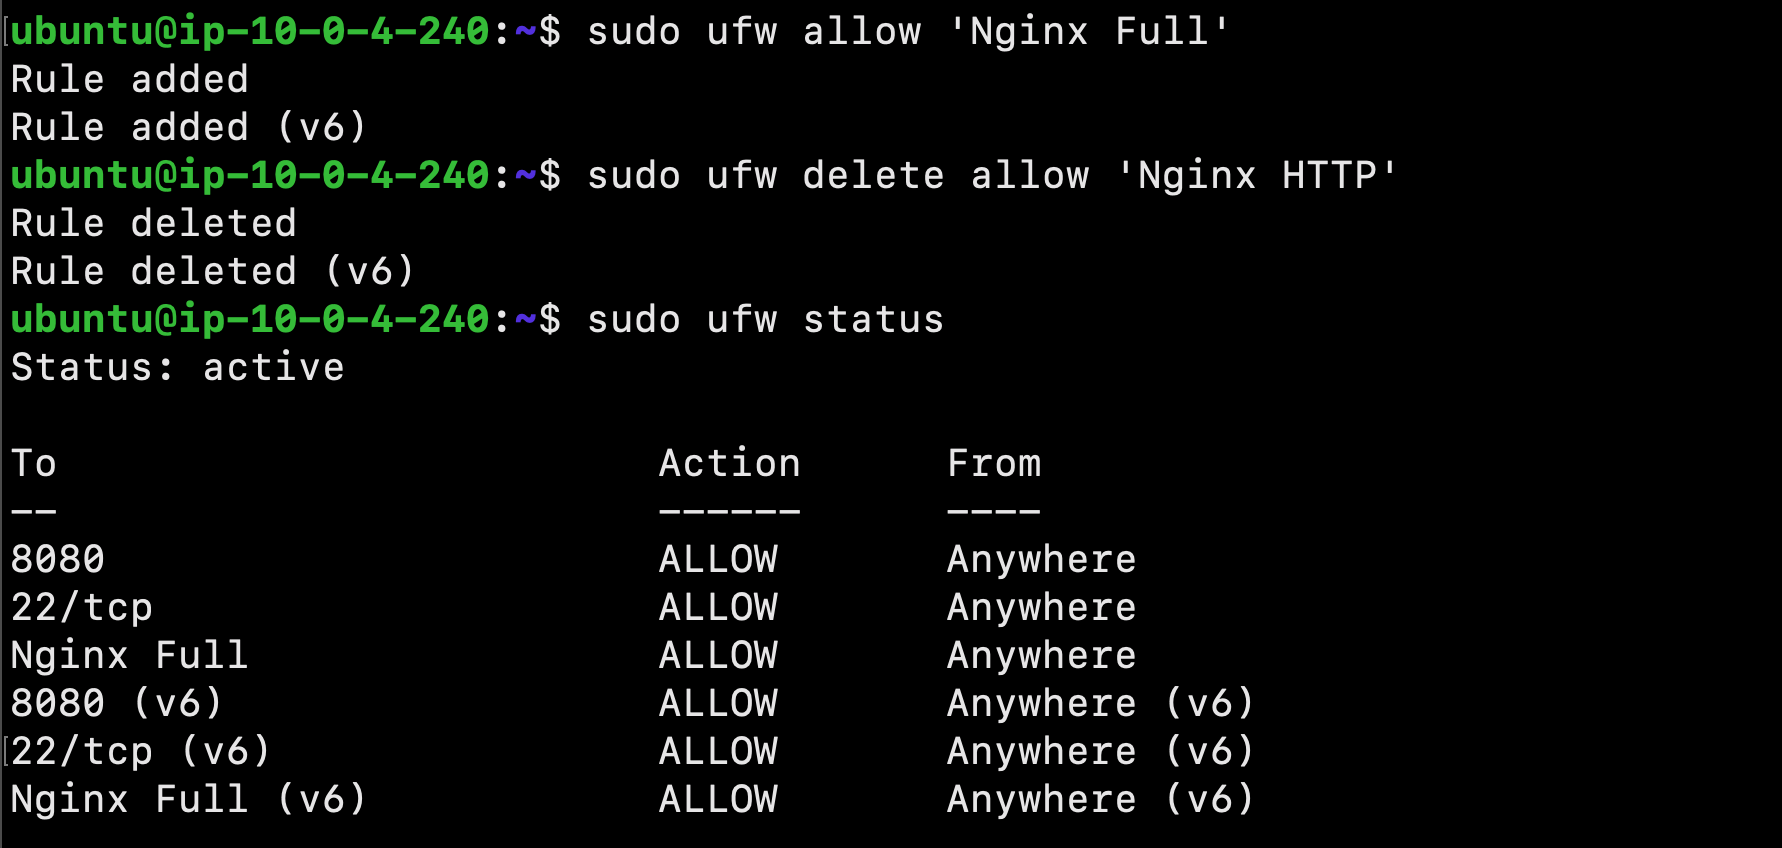
To let in HTTPS traffic, allow the Nginx Full profile and delete the redundant Nginx HTTP profile allowance:
$ sudo ufw allow 'Nginx Full'
$ sudo ufw delete allow 'Nginx HTTP'
Next, type the following command to view the status:
$ sudo ufw status
Obtaining an SSL Certificate
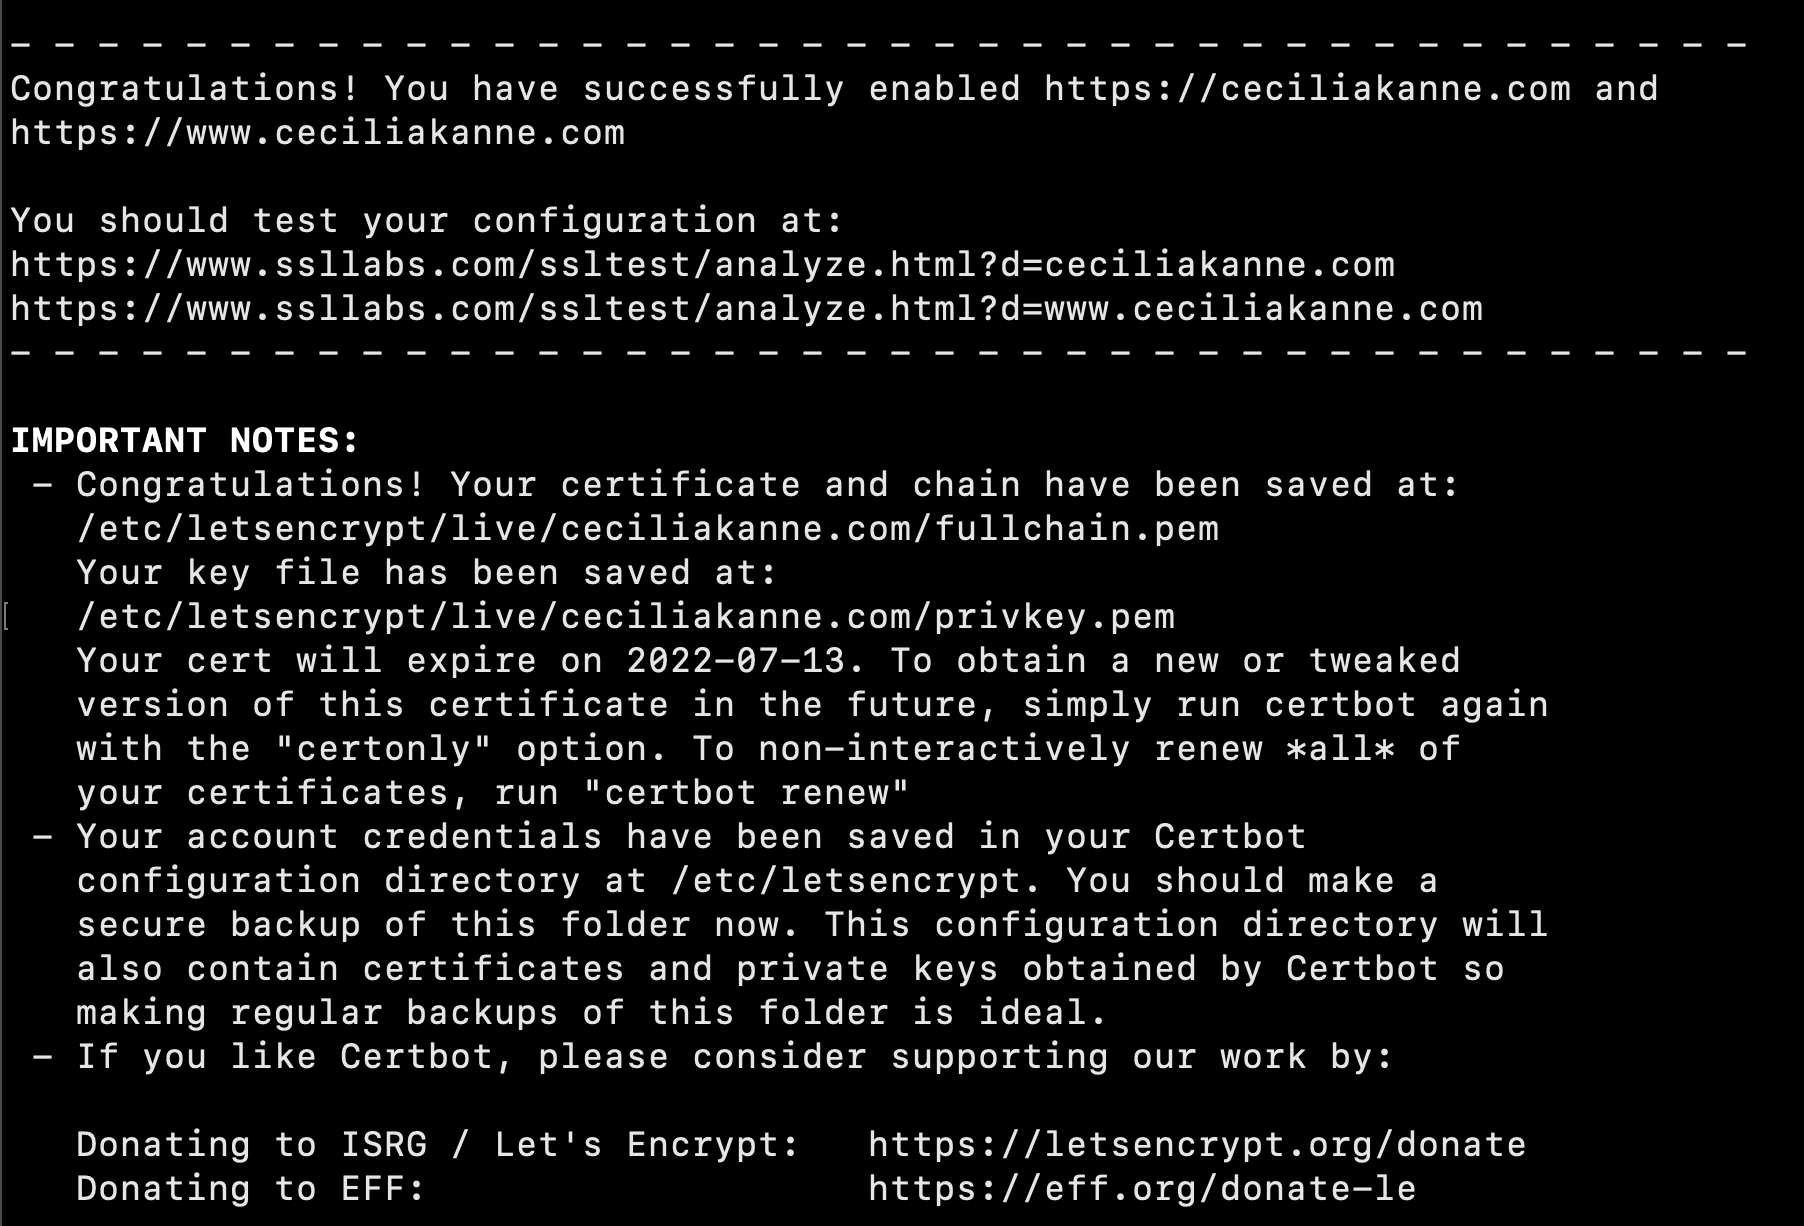
Certbot provides a variety of ways to obtain SSL certificates through plugins. The Nginx plugin will reconfigure and reload the Nginx config as needed. To use this plugin, type the following:
$ sudo certbot --nginx -d example.com -d www.example.com
If this is your first time running certbot, you will be prompted to enter an email address and agree to the terms of service.
Next, certbot will communicate with the Let’s Encrypt server, then run a challenge to verify that you control the domain you’re requesting a certificate for. Select your choice then hit ENTER. The configuration will be updated, and Nginx will reload.
Great job! Your certificates are downloaded, installed, and loaded. Try reloading your website using https:// and notice your browser’s security indicator. It should indicate that the site is properly secured, usually with a lock icon.
Verifying Certbot Auto-Renewal
Let’s Encrypt’s certificates are only valid for ninety days. This is to encourage users to automate their certificate renewal process. You can query the status of the timer with systemctl:
$ sudo systemctl status certbot.timer
To test the renewal process, you can do a dry run with certbot:
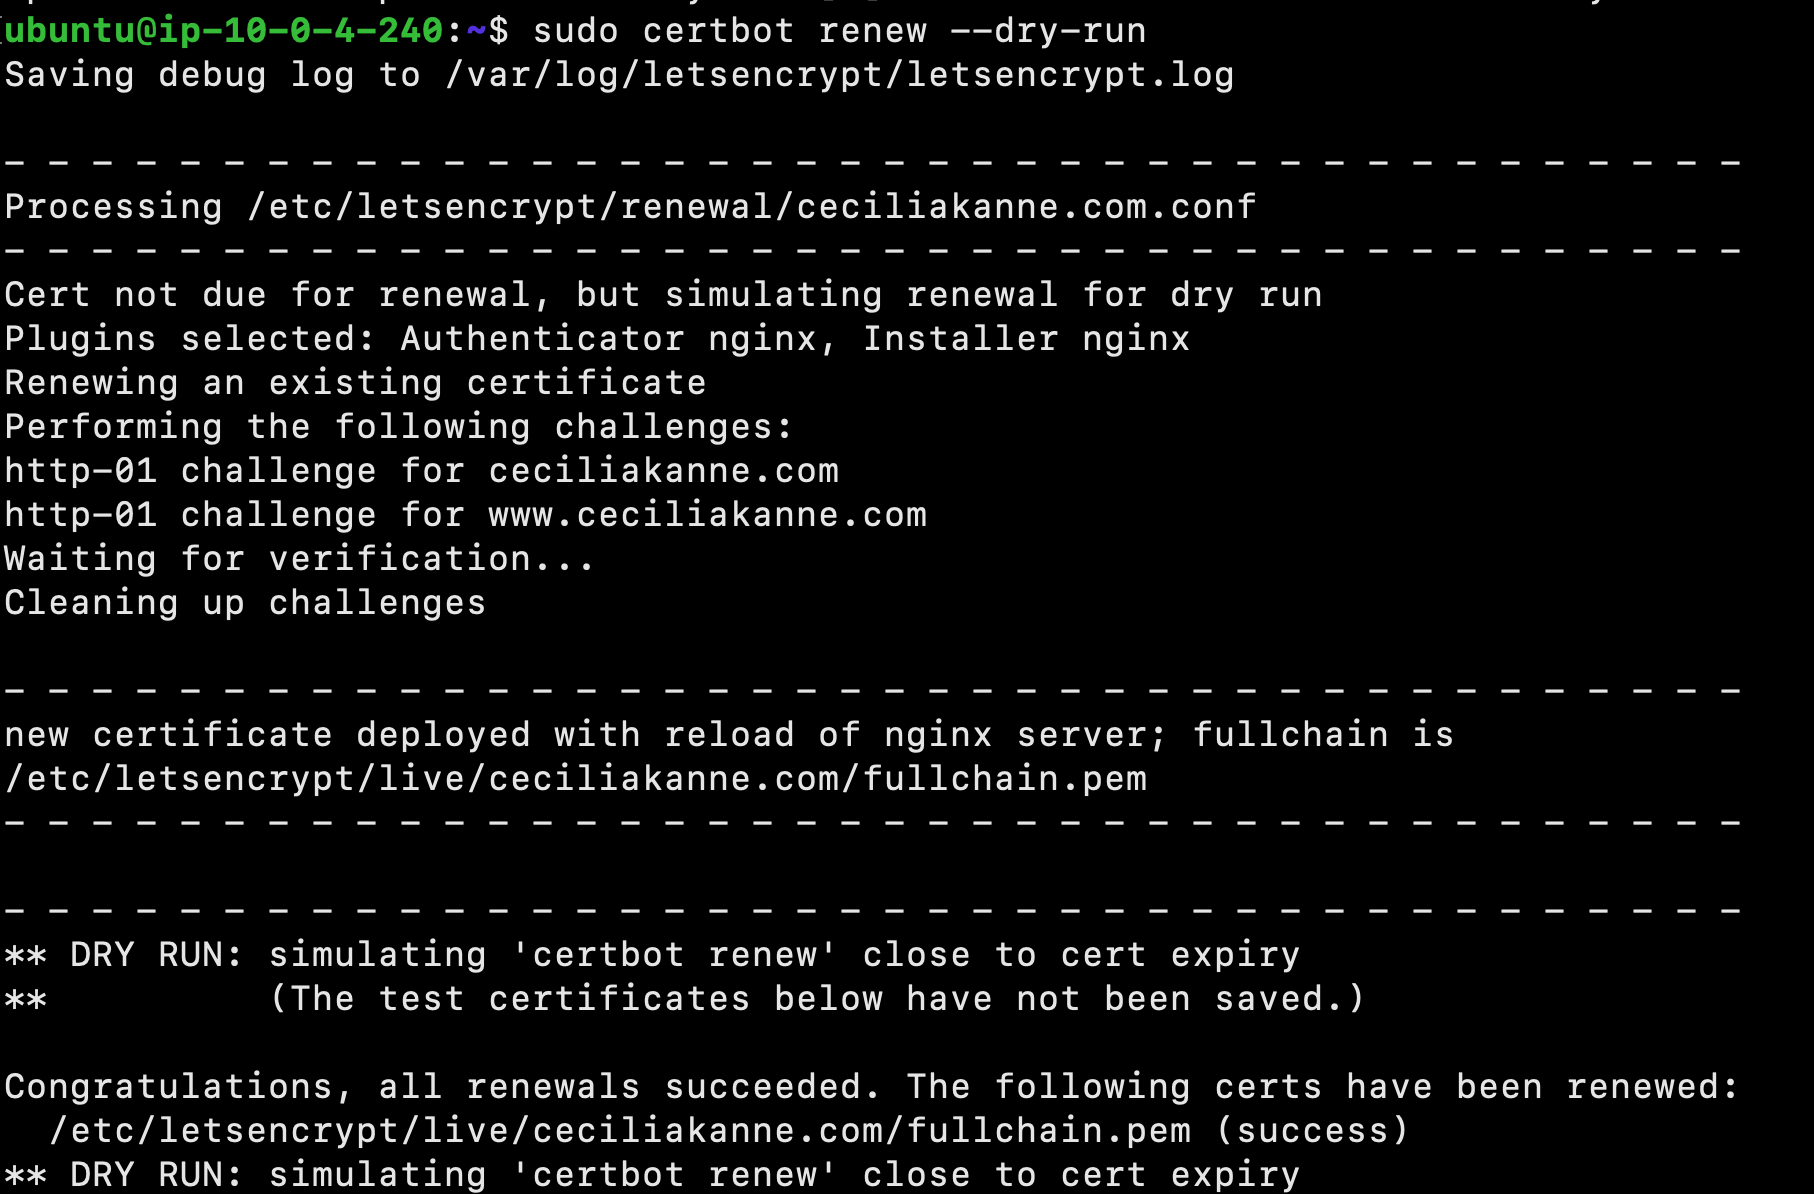
$ sudo certbot renew --dry-run
By default, Jenkins comes with its own built-in Winstone web server listening on port 8080. It is best security practice to secure Jenkins with SSL, to protect passwords and sensitive data transmitted through the web interface.
Let's configure this by adding the reverse proxy settings:
$ sudo nano /etc/nginx/sites-available/example.com
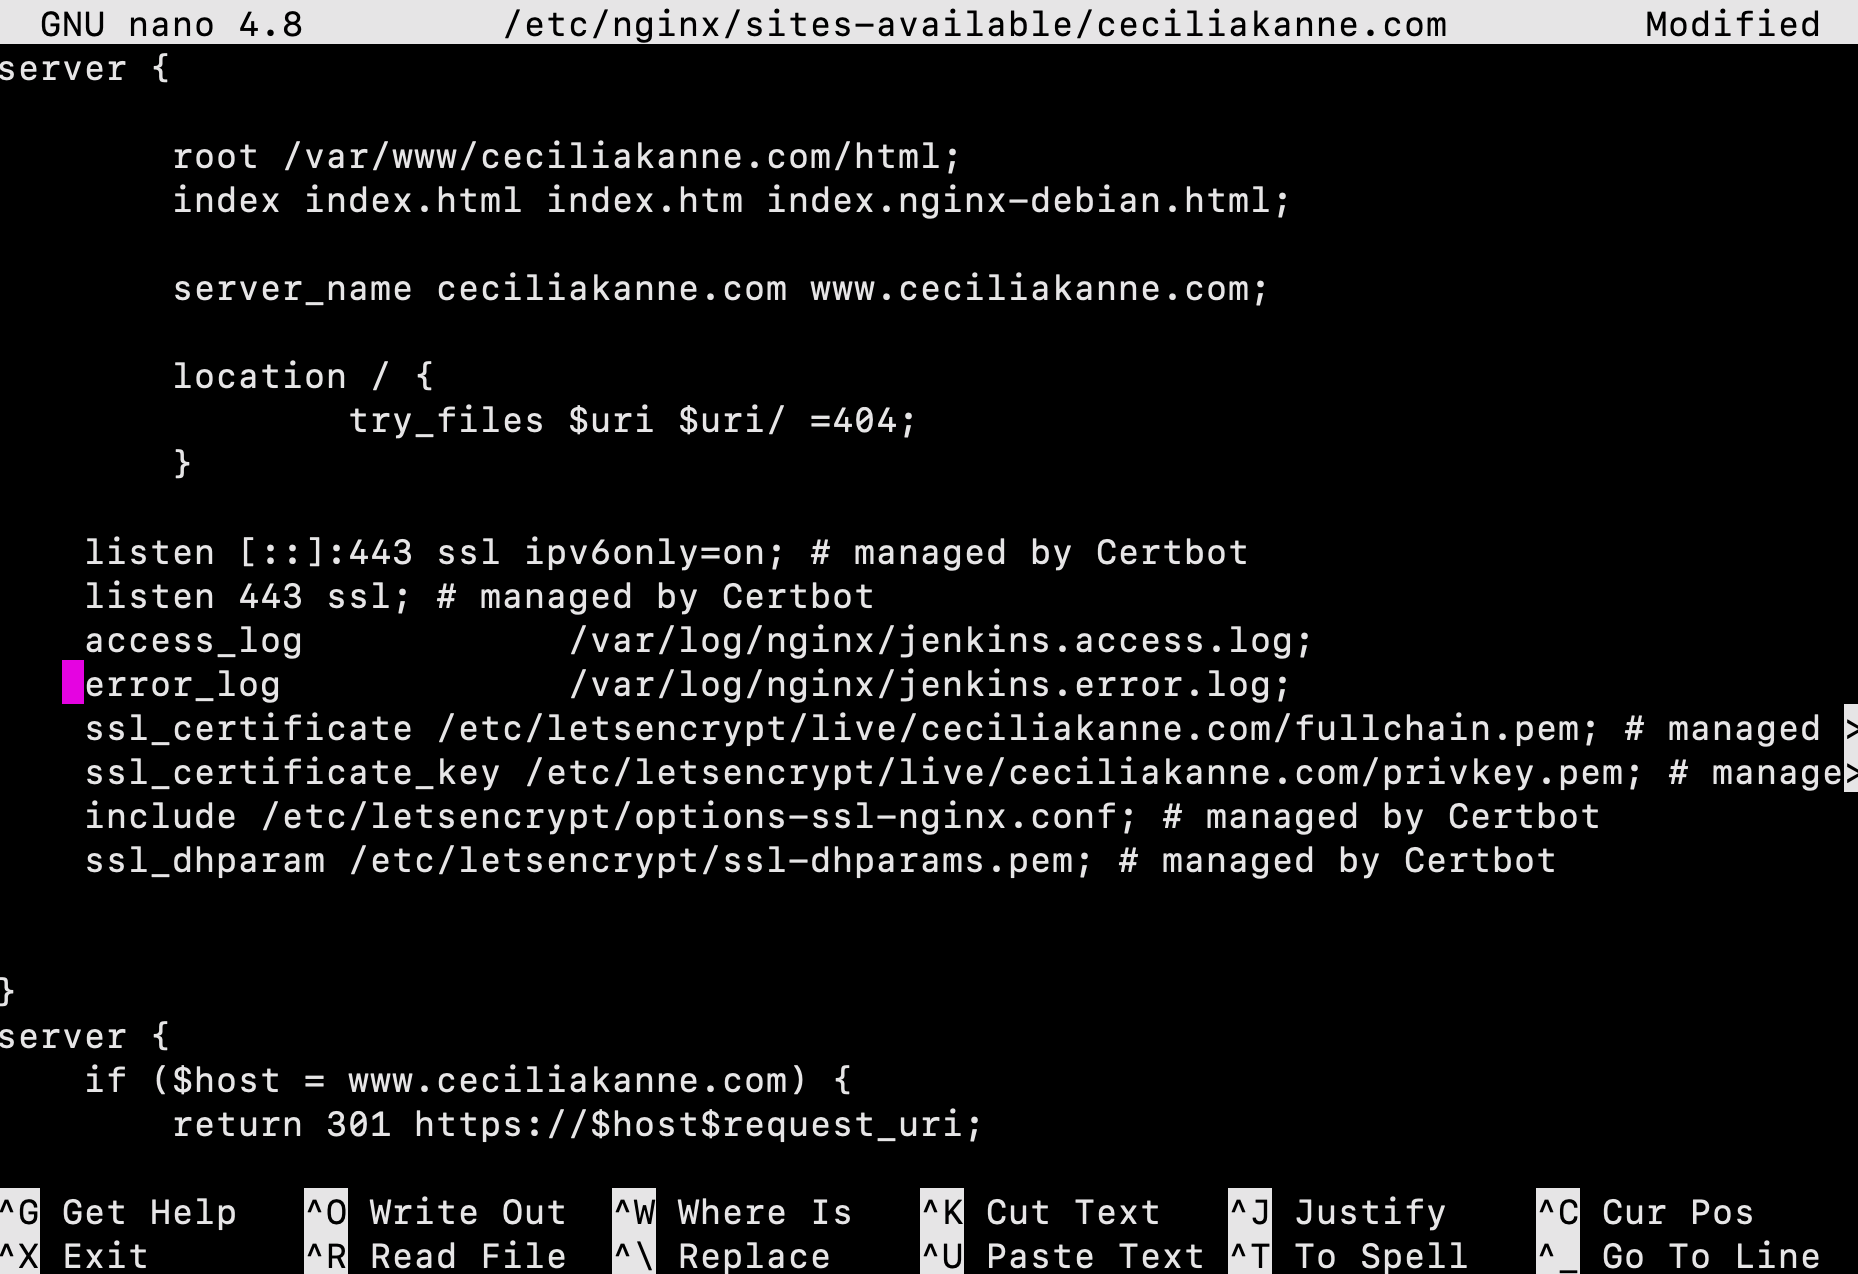
In the server block with the SSL configuration settings, add Jenkins-specific access and error logs:
server {

        # SSL Configuration
        #
        listen [::]:443 ssl ipv6only=on; # managed by Certbot
        listen 443 ssl; # managed by Certbot
        access_log            /var/log/nginx/jenkins.access.log;
        error_log             /var/log/nginx/jenkins.error.log;

        }
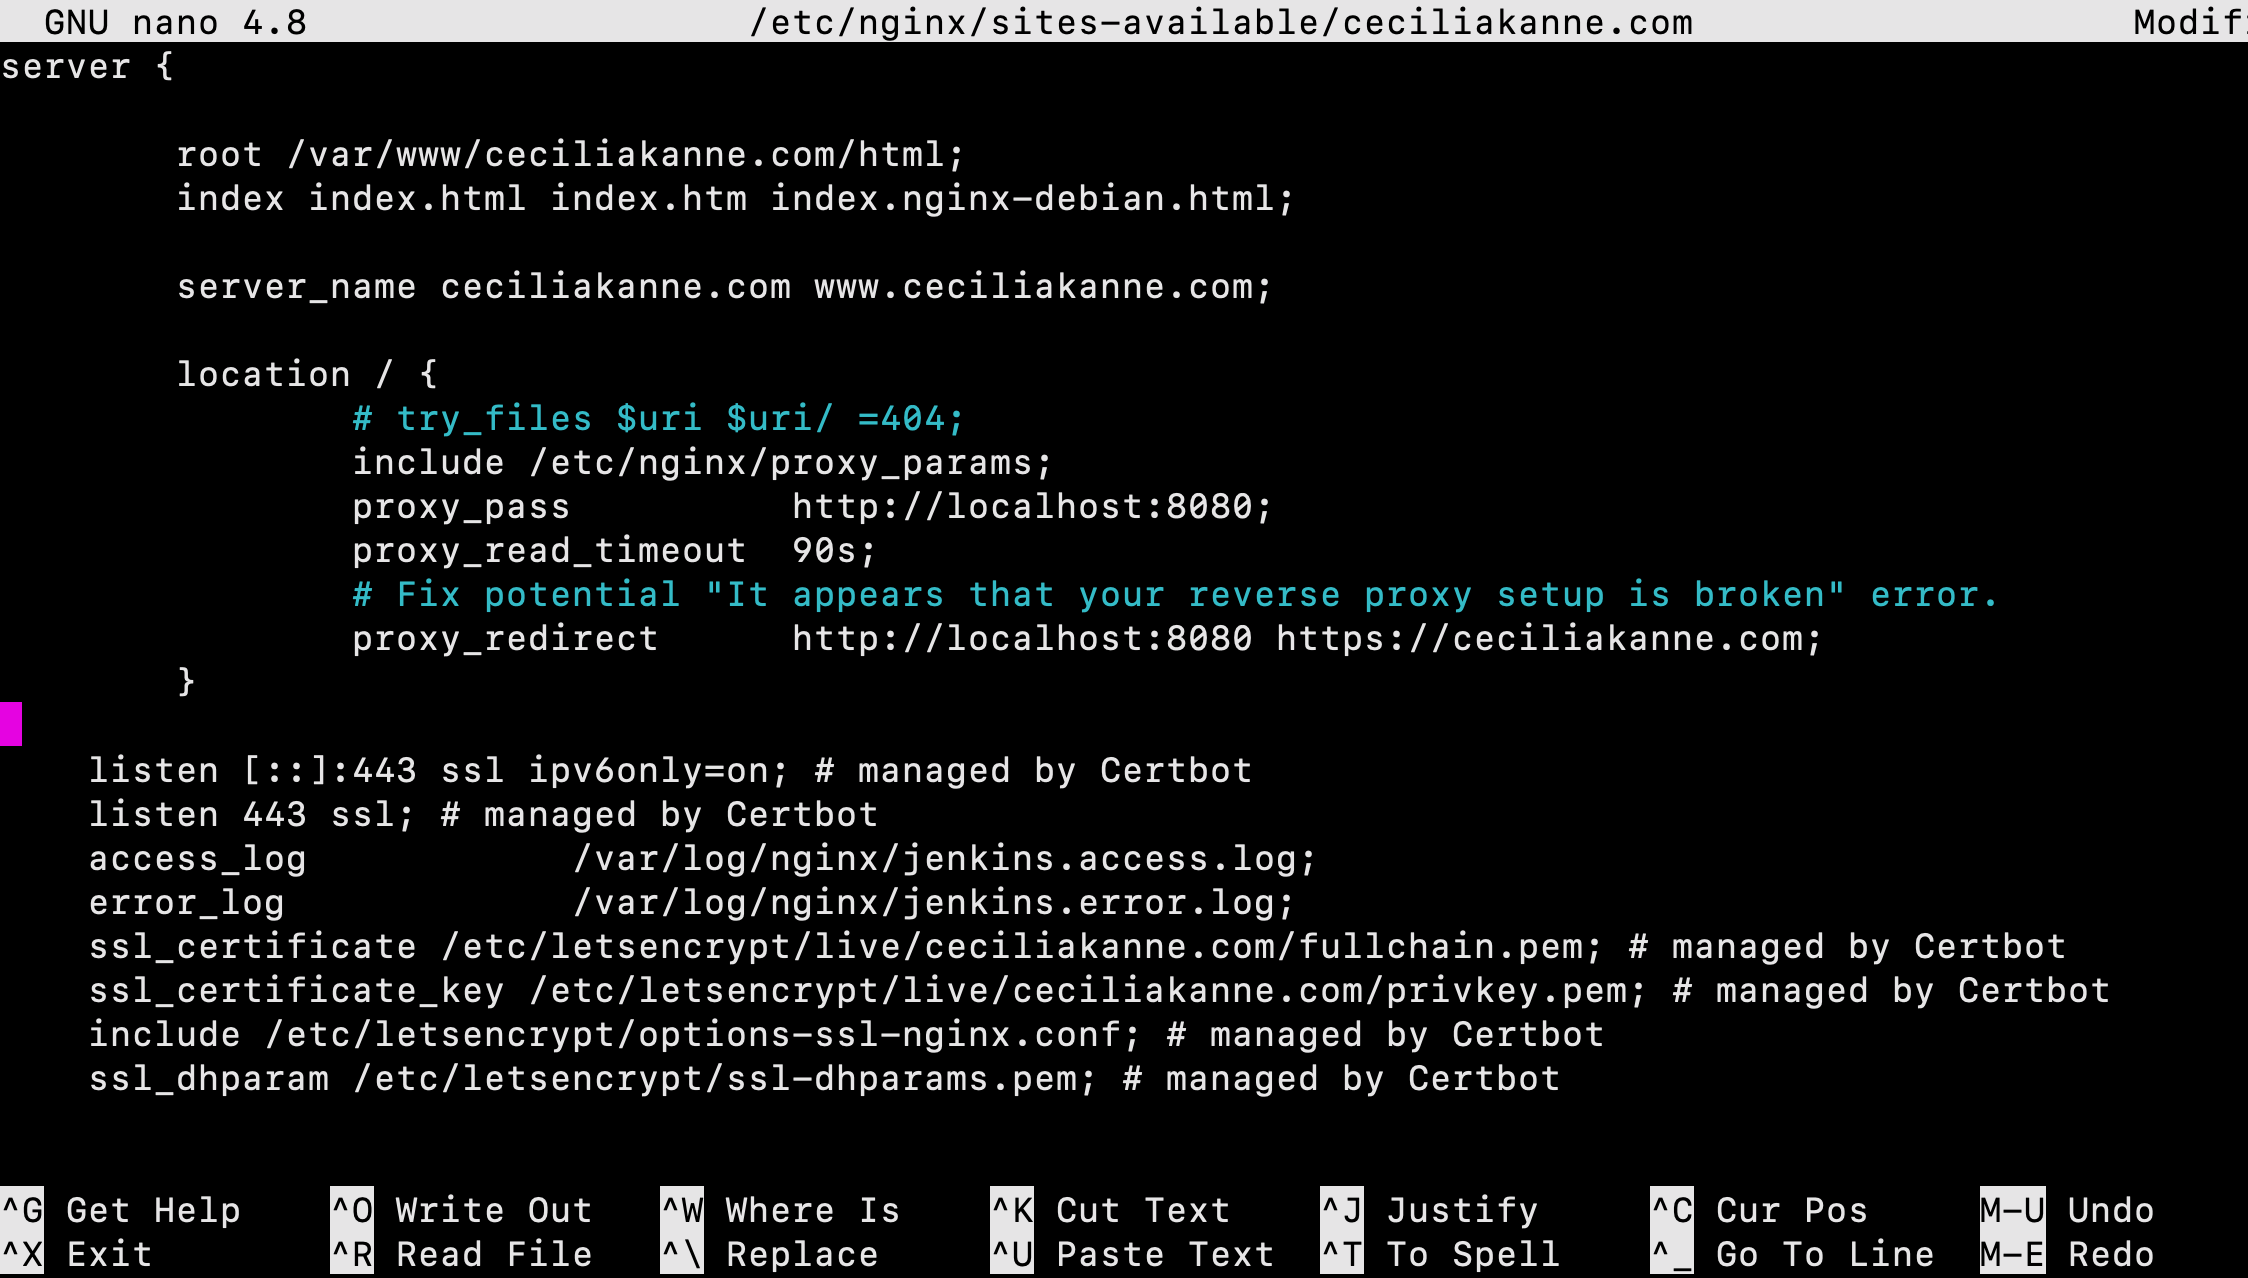
Since we’re sending all requests to Jenkins, we’ll comment out the default try_files line, which would otherwise return a 404 error before the request reaches Jenkins. Next, configure and add the proxy settings.
PLEASE NOTE: Be sure to substitute your SSL-secured domain name for example.com in the proxy_redirect line below:
location / {
    # First attempt to serve request as file, then
    # as directory, then fall back to displaying a 404.
    try_files $uri $uri/ =404;
    include /etc/nginx/proxy_params;
    proxy_pass          http://localhost:8080;
    proxy_read_timeout  90s;
    # Fix potential "It appears that your reverse proxy setup is broken" error.
    proxy_redirect      http://localhost:8080 https://example.com;
Once you’ve made these changes, save the file and exit the editor.
Test our configuration using the following command:
$ sudo nginx -t
If all is well, the command will return:
-
nginx: the configuration file /etc/nginx/nginx.conf syntax is ok -
nginx: configuration file /etc/nginx/nginx.conf test is successful
If not, fix any reported errors until the test passes.
Configuring Jenkins
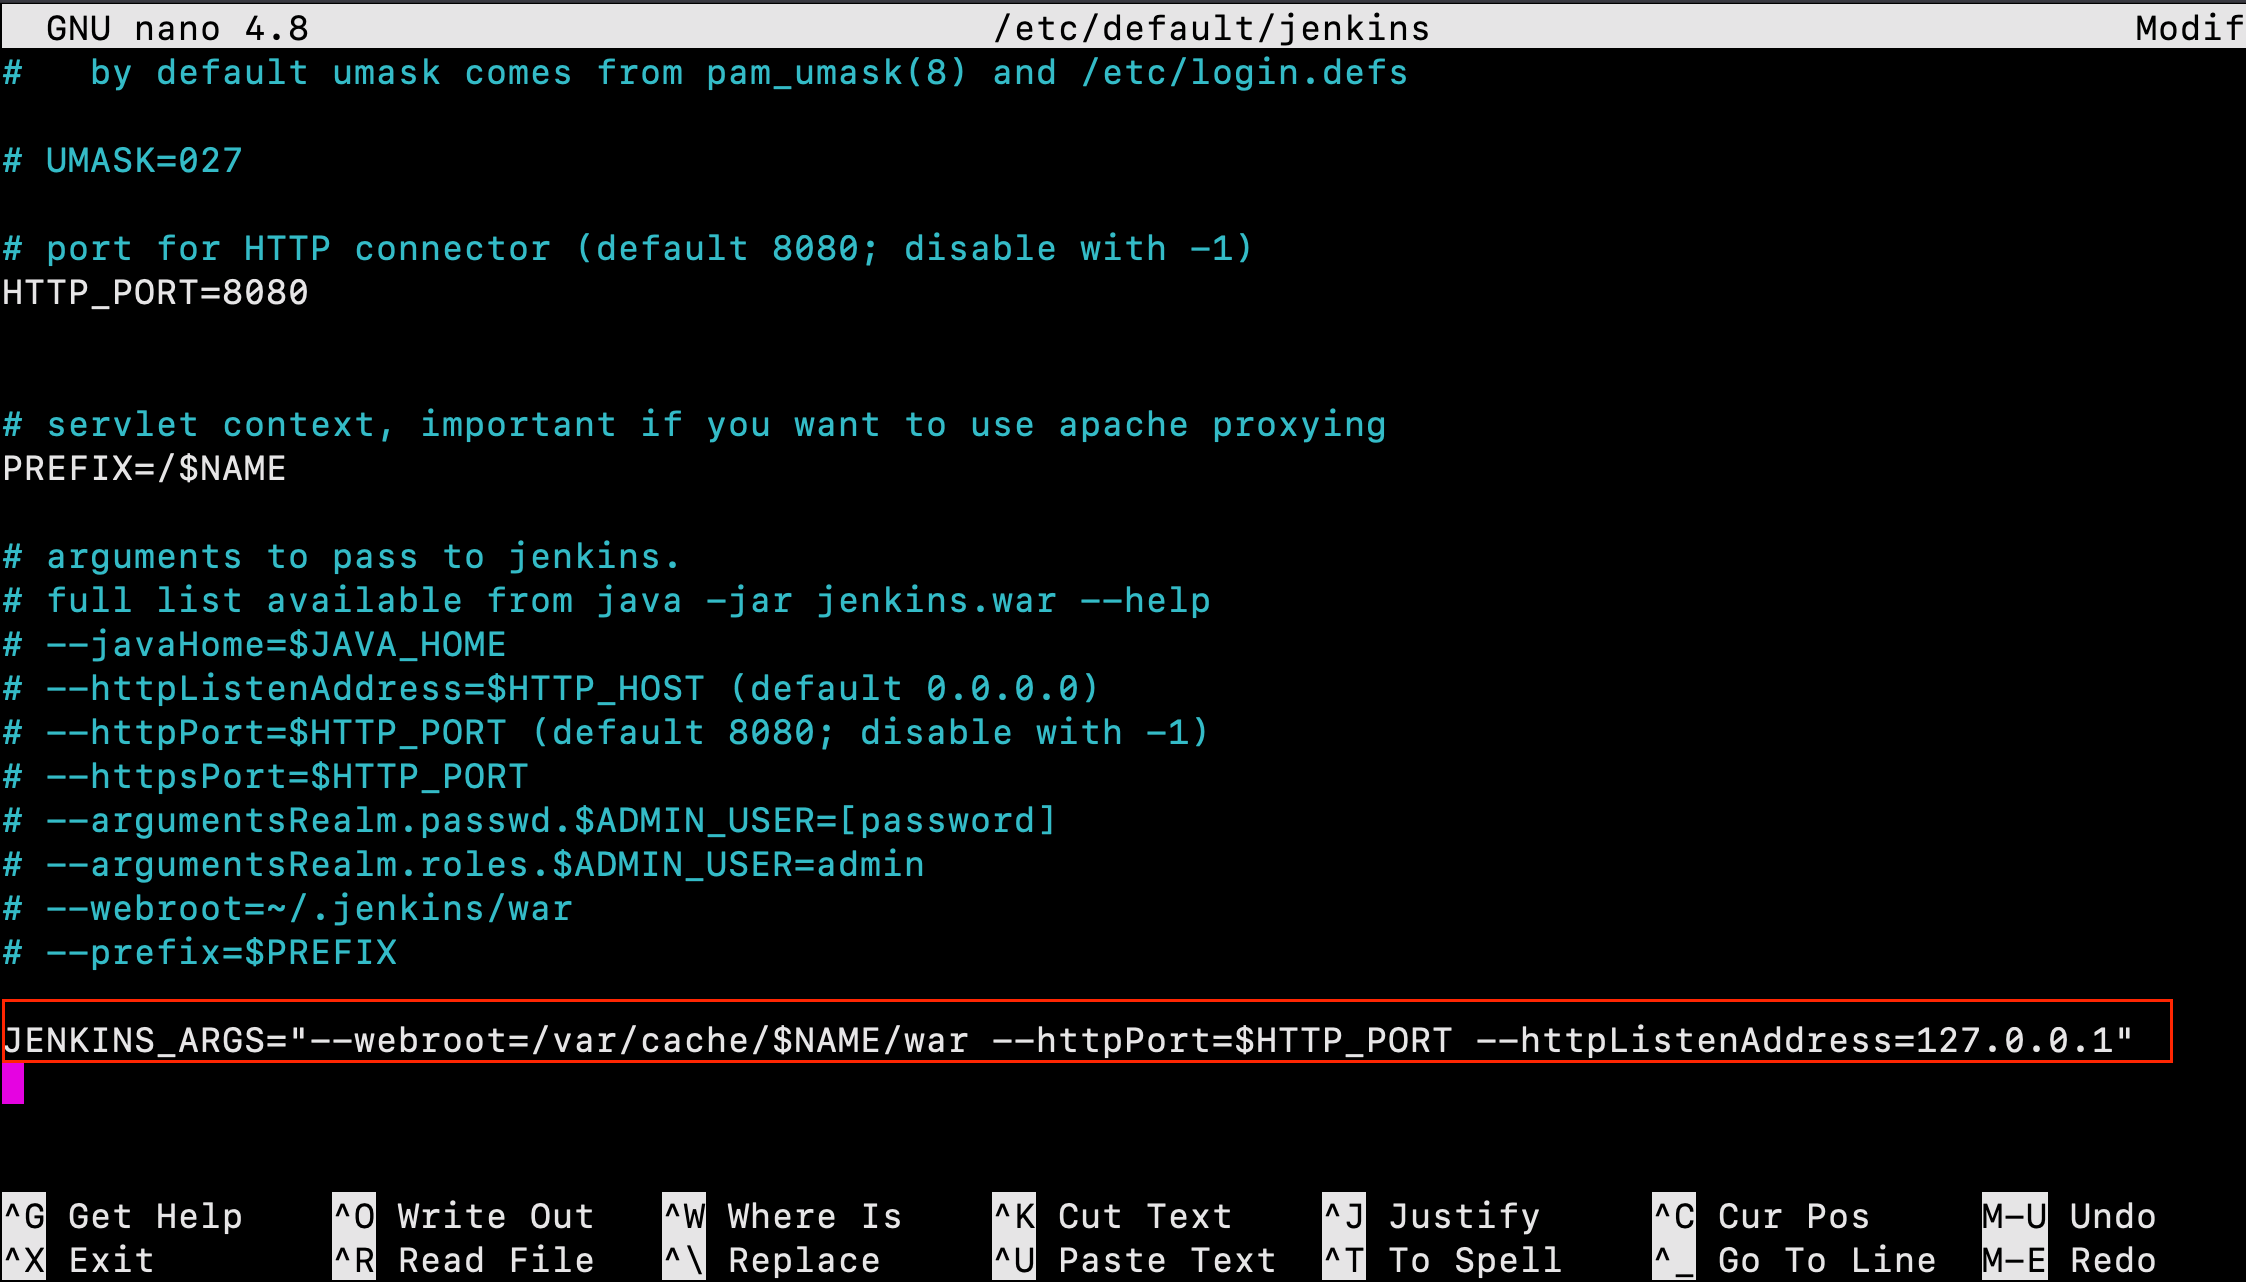
In order for Jenkins to work with Nginx, we must update the Jenkins configuration so that the Jenkins server listens only on the localhost interface. Modify the /etc/default/jenkins configuration file to make these adjustments:
$sudo nano /etc/default/jenkins
Locate the JENKINS_ARGS line and add --httpListenAddress=127.0.0.1 to the existing arguments:
JENKINS_ARGS="--webroot=/var/cache/$NAME/war --httpPort=$HTTP_PORT --httpListenAddress=127.0.0.1"
Save and exit the file.
Next, restart Jenkins to use the new configuration settings:
$ sudo systemctl restart jenkins
Since systemctl doesn’t display output, check the status:
$ sudo systemctl status jenkins
Next, restart Nginx:
$ sudo systemctl restart nginx
Check the status:
$ sudo systemctl status nginx
Now that servers have been restarted, we can visit the domain using either HTTP or HTTPS!
Testing the Configuration
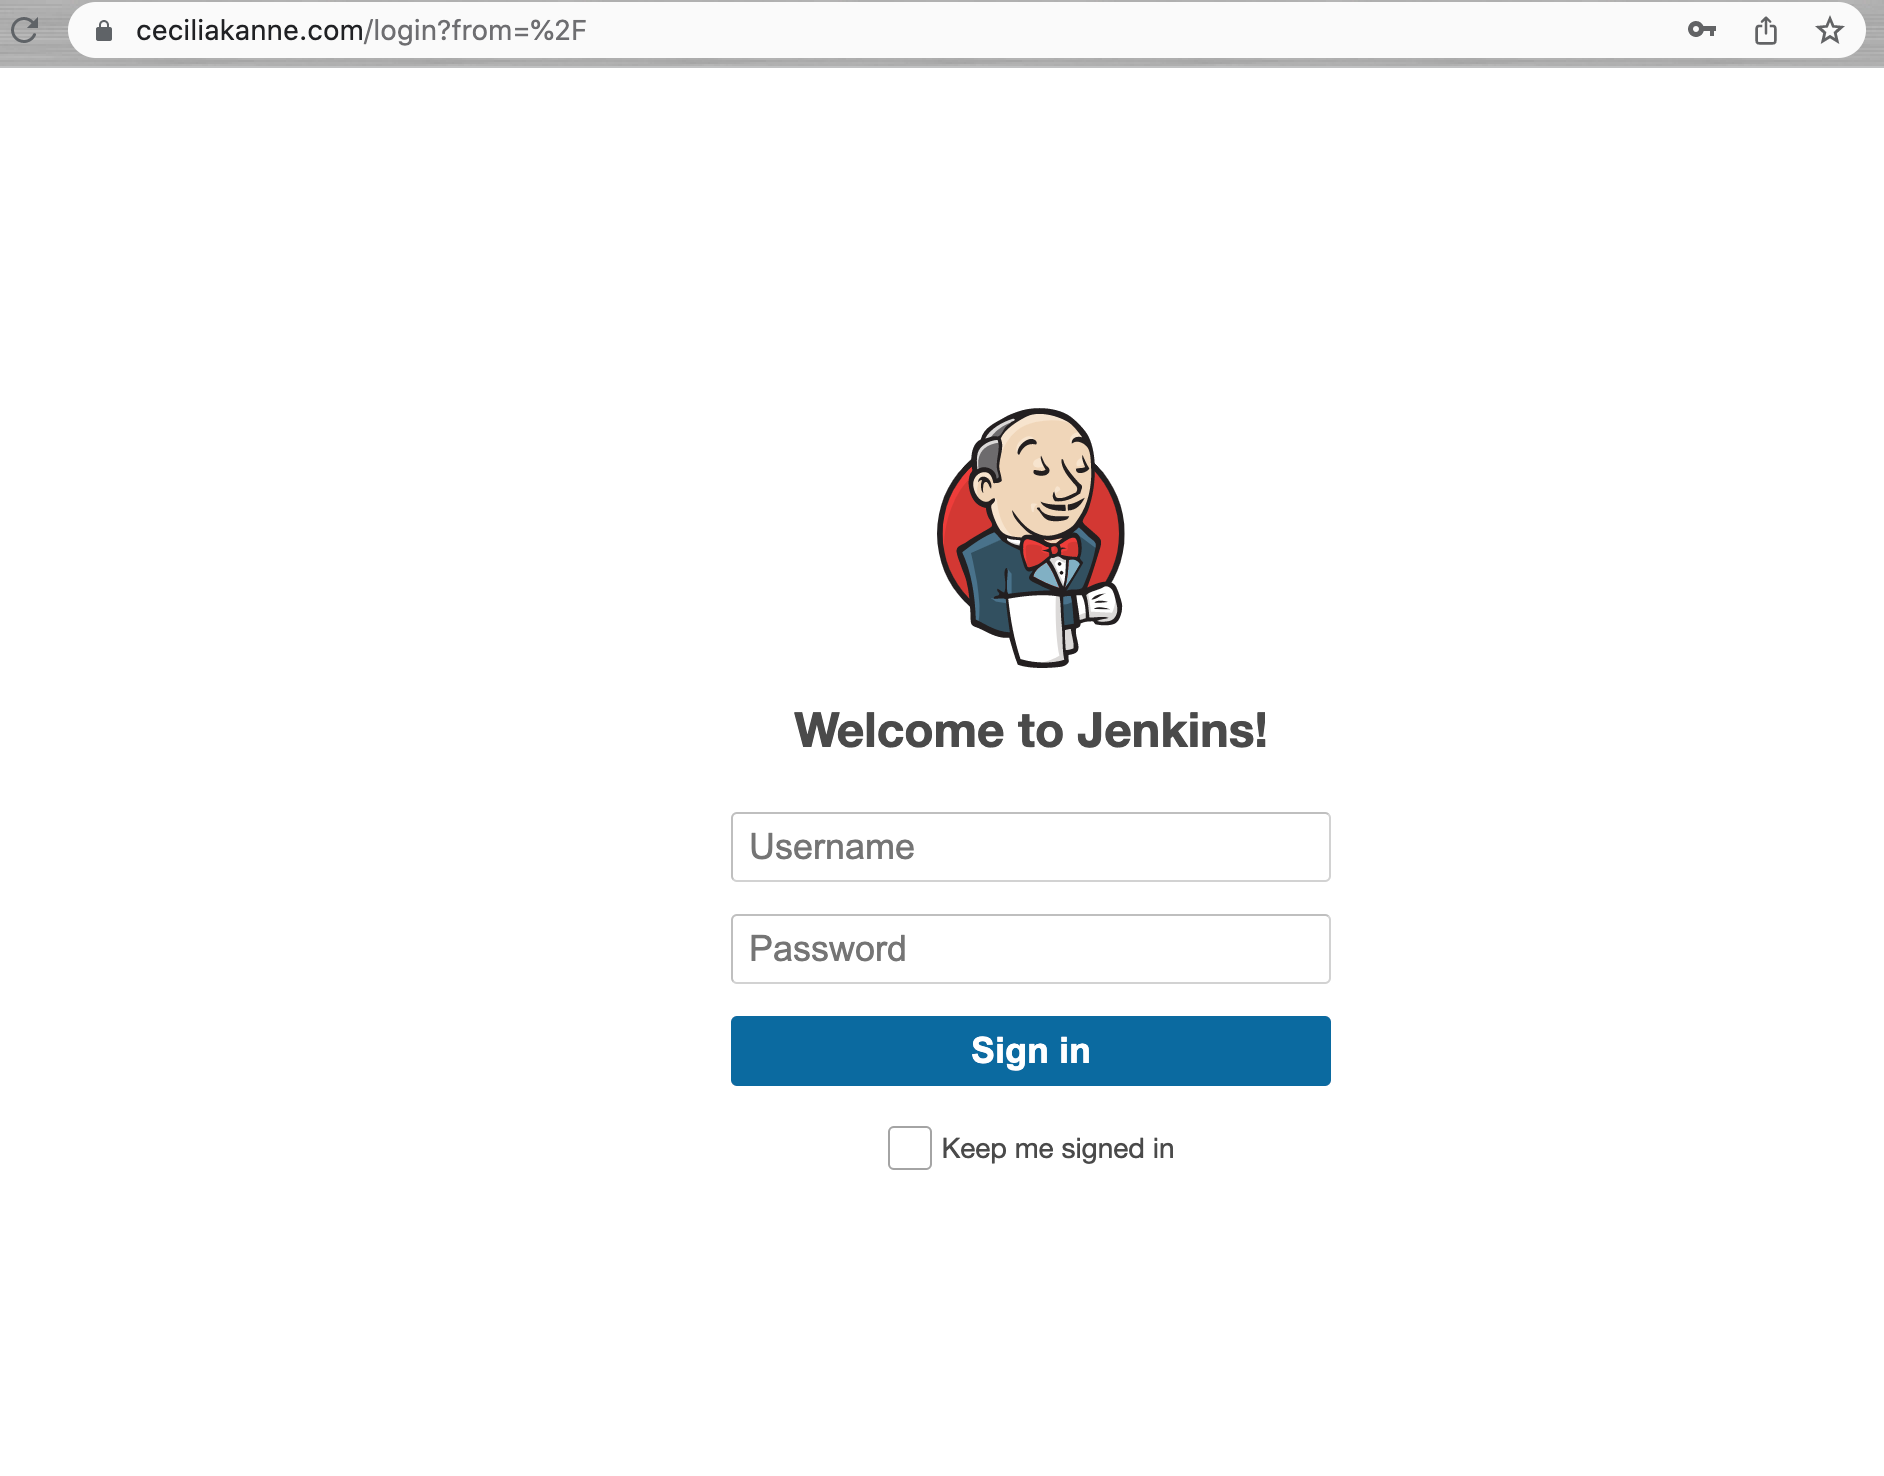
Now that encryption is enabled, we can test the configuration by resetting the administrative password.
You can enter the administrative username you created in the User field, and the password that you selected in the Password field.
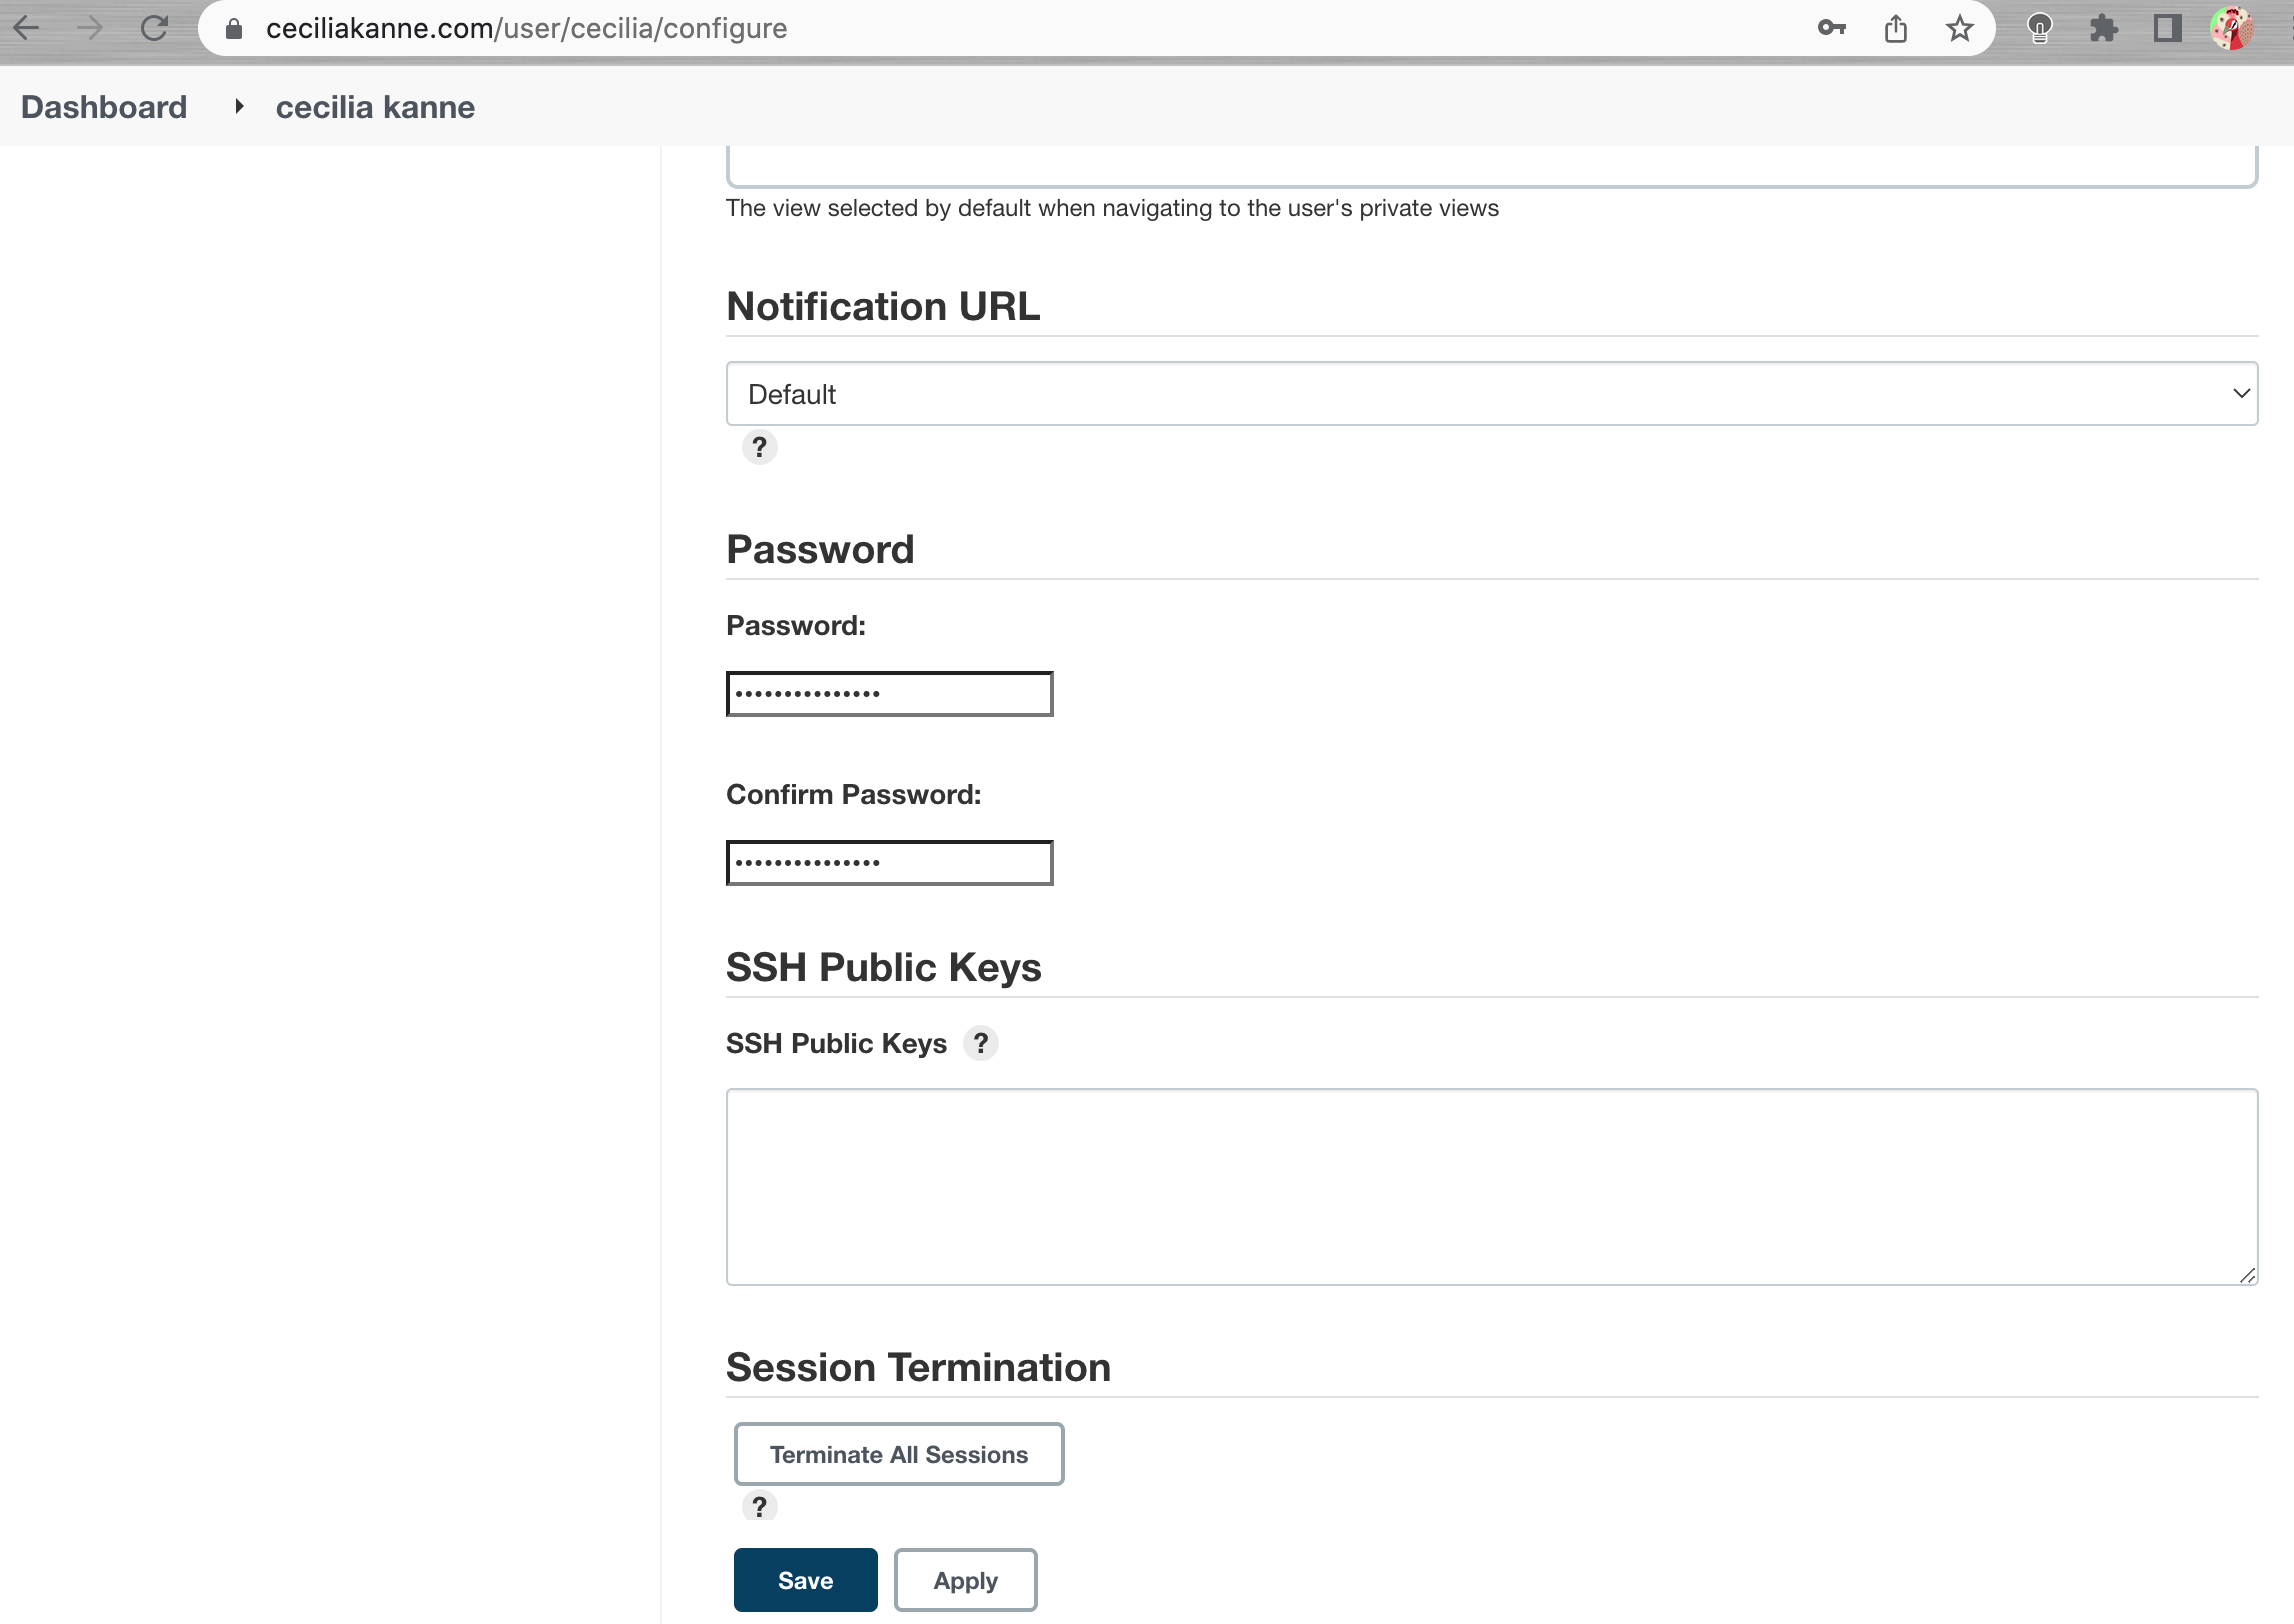
Once logged in, you can change the password to be sure it’s secure. To do this, click on your username in the upper-right-hand corner of the screen. On the main profile page, select Configure. This will take you to a new page, where you can enter and confirm a new password:
Confirm the new password by clicking Save. You can now use the Jenkins web interface securely!
Now that Jenkins is secure, we can set up a continuous integration pipeline to automatically test code changes. To best control our testing environment, we will run our application’s tests within Docker containers.
By default, the Linux user responsible for running the Jenkins process cannot access Docker. To fix this, we need to add the jenkins user to the docker group:
$ sudo usermod -aG docker jenkins
Next, confirm that the jenkins user has been added successfully:
$ grep docker /etc/group
In order for the Jenkins to use its new membership, you need to restart the process:
$ sudo systemctl restart jenkins
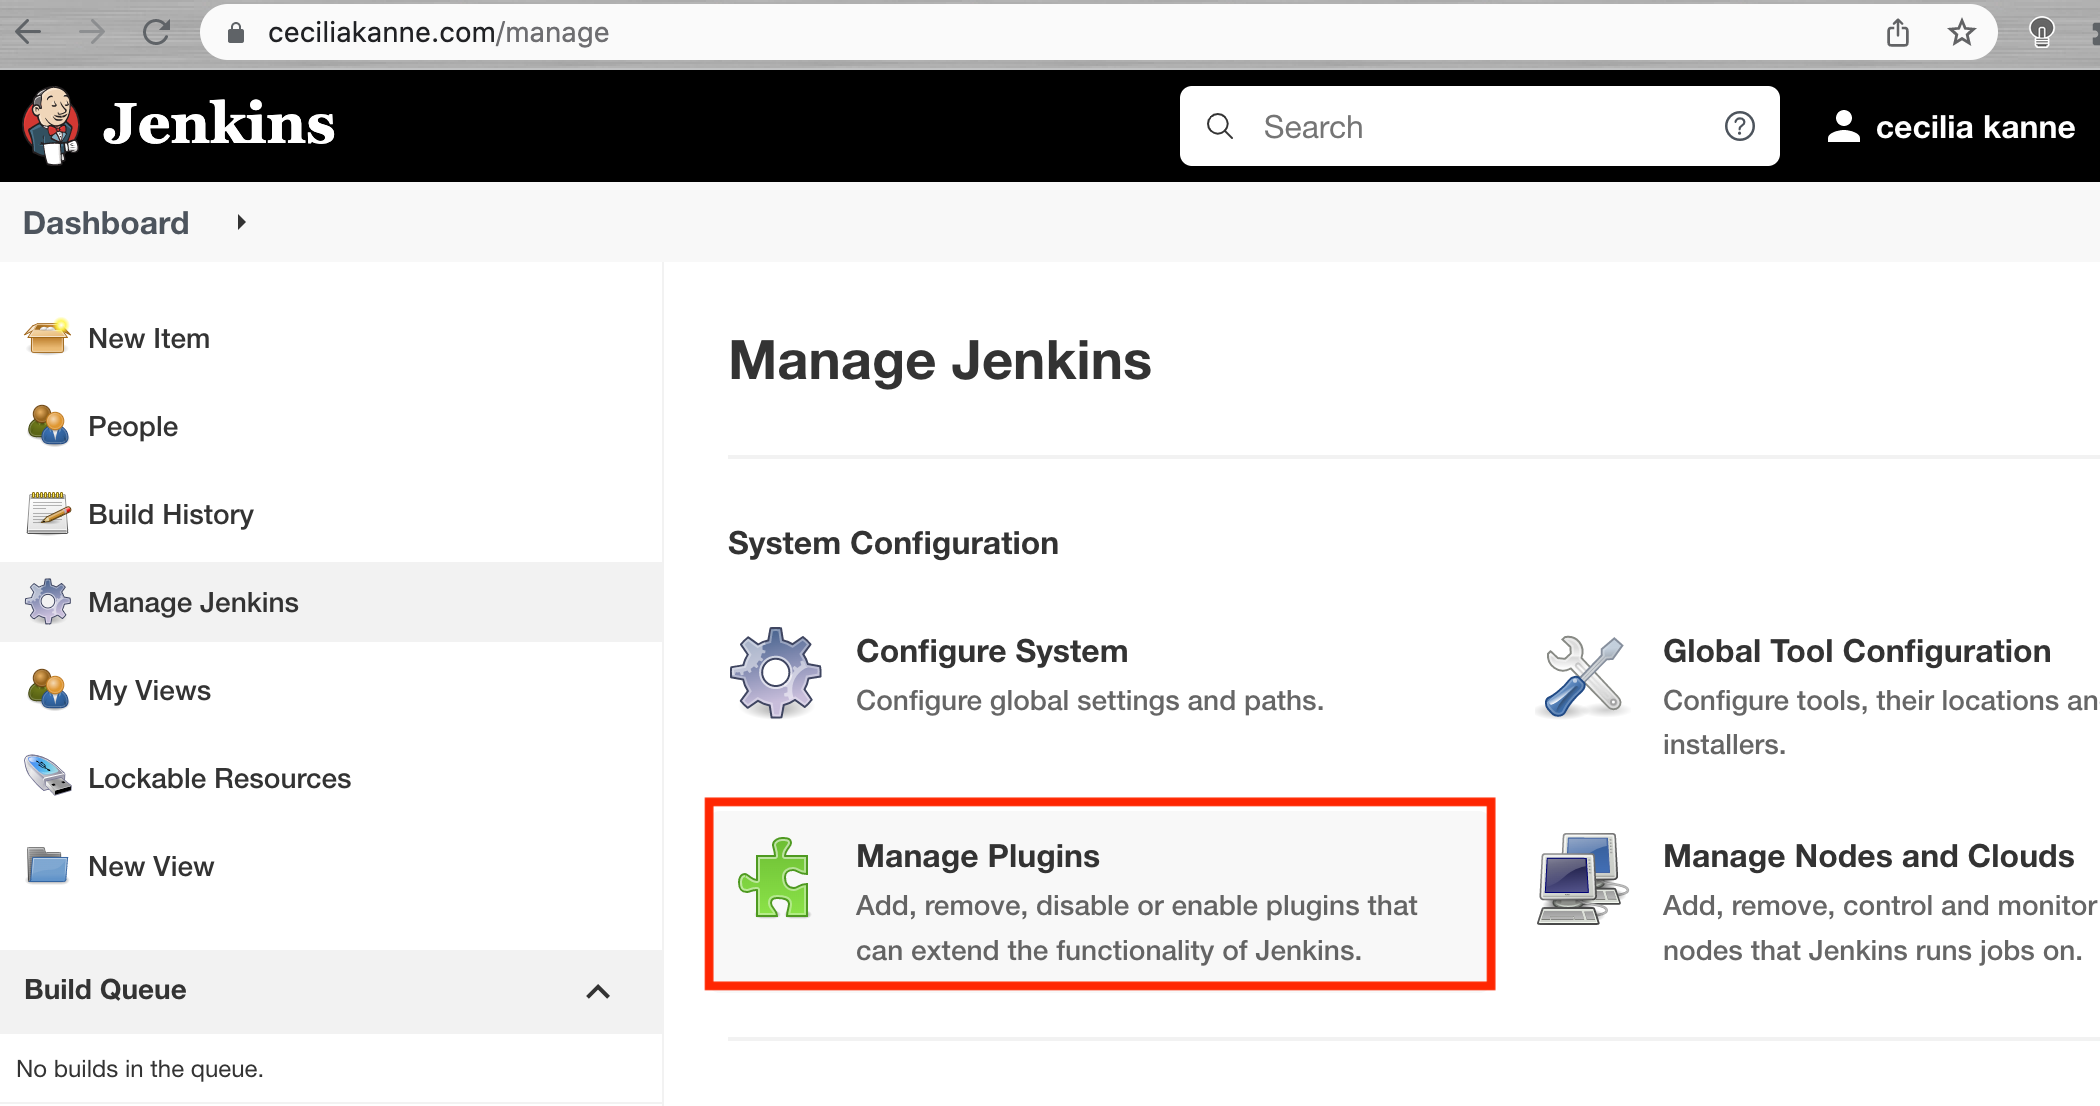
Next, ensure that the docker and docker-pipeline plugins are also enabled. First, click Manage Jenkins from the sidebar, and then Manage Plugins from the next menu.
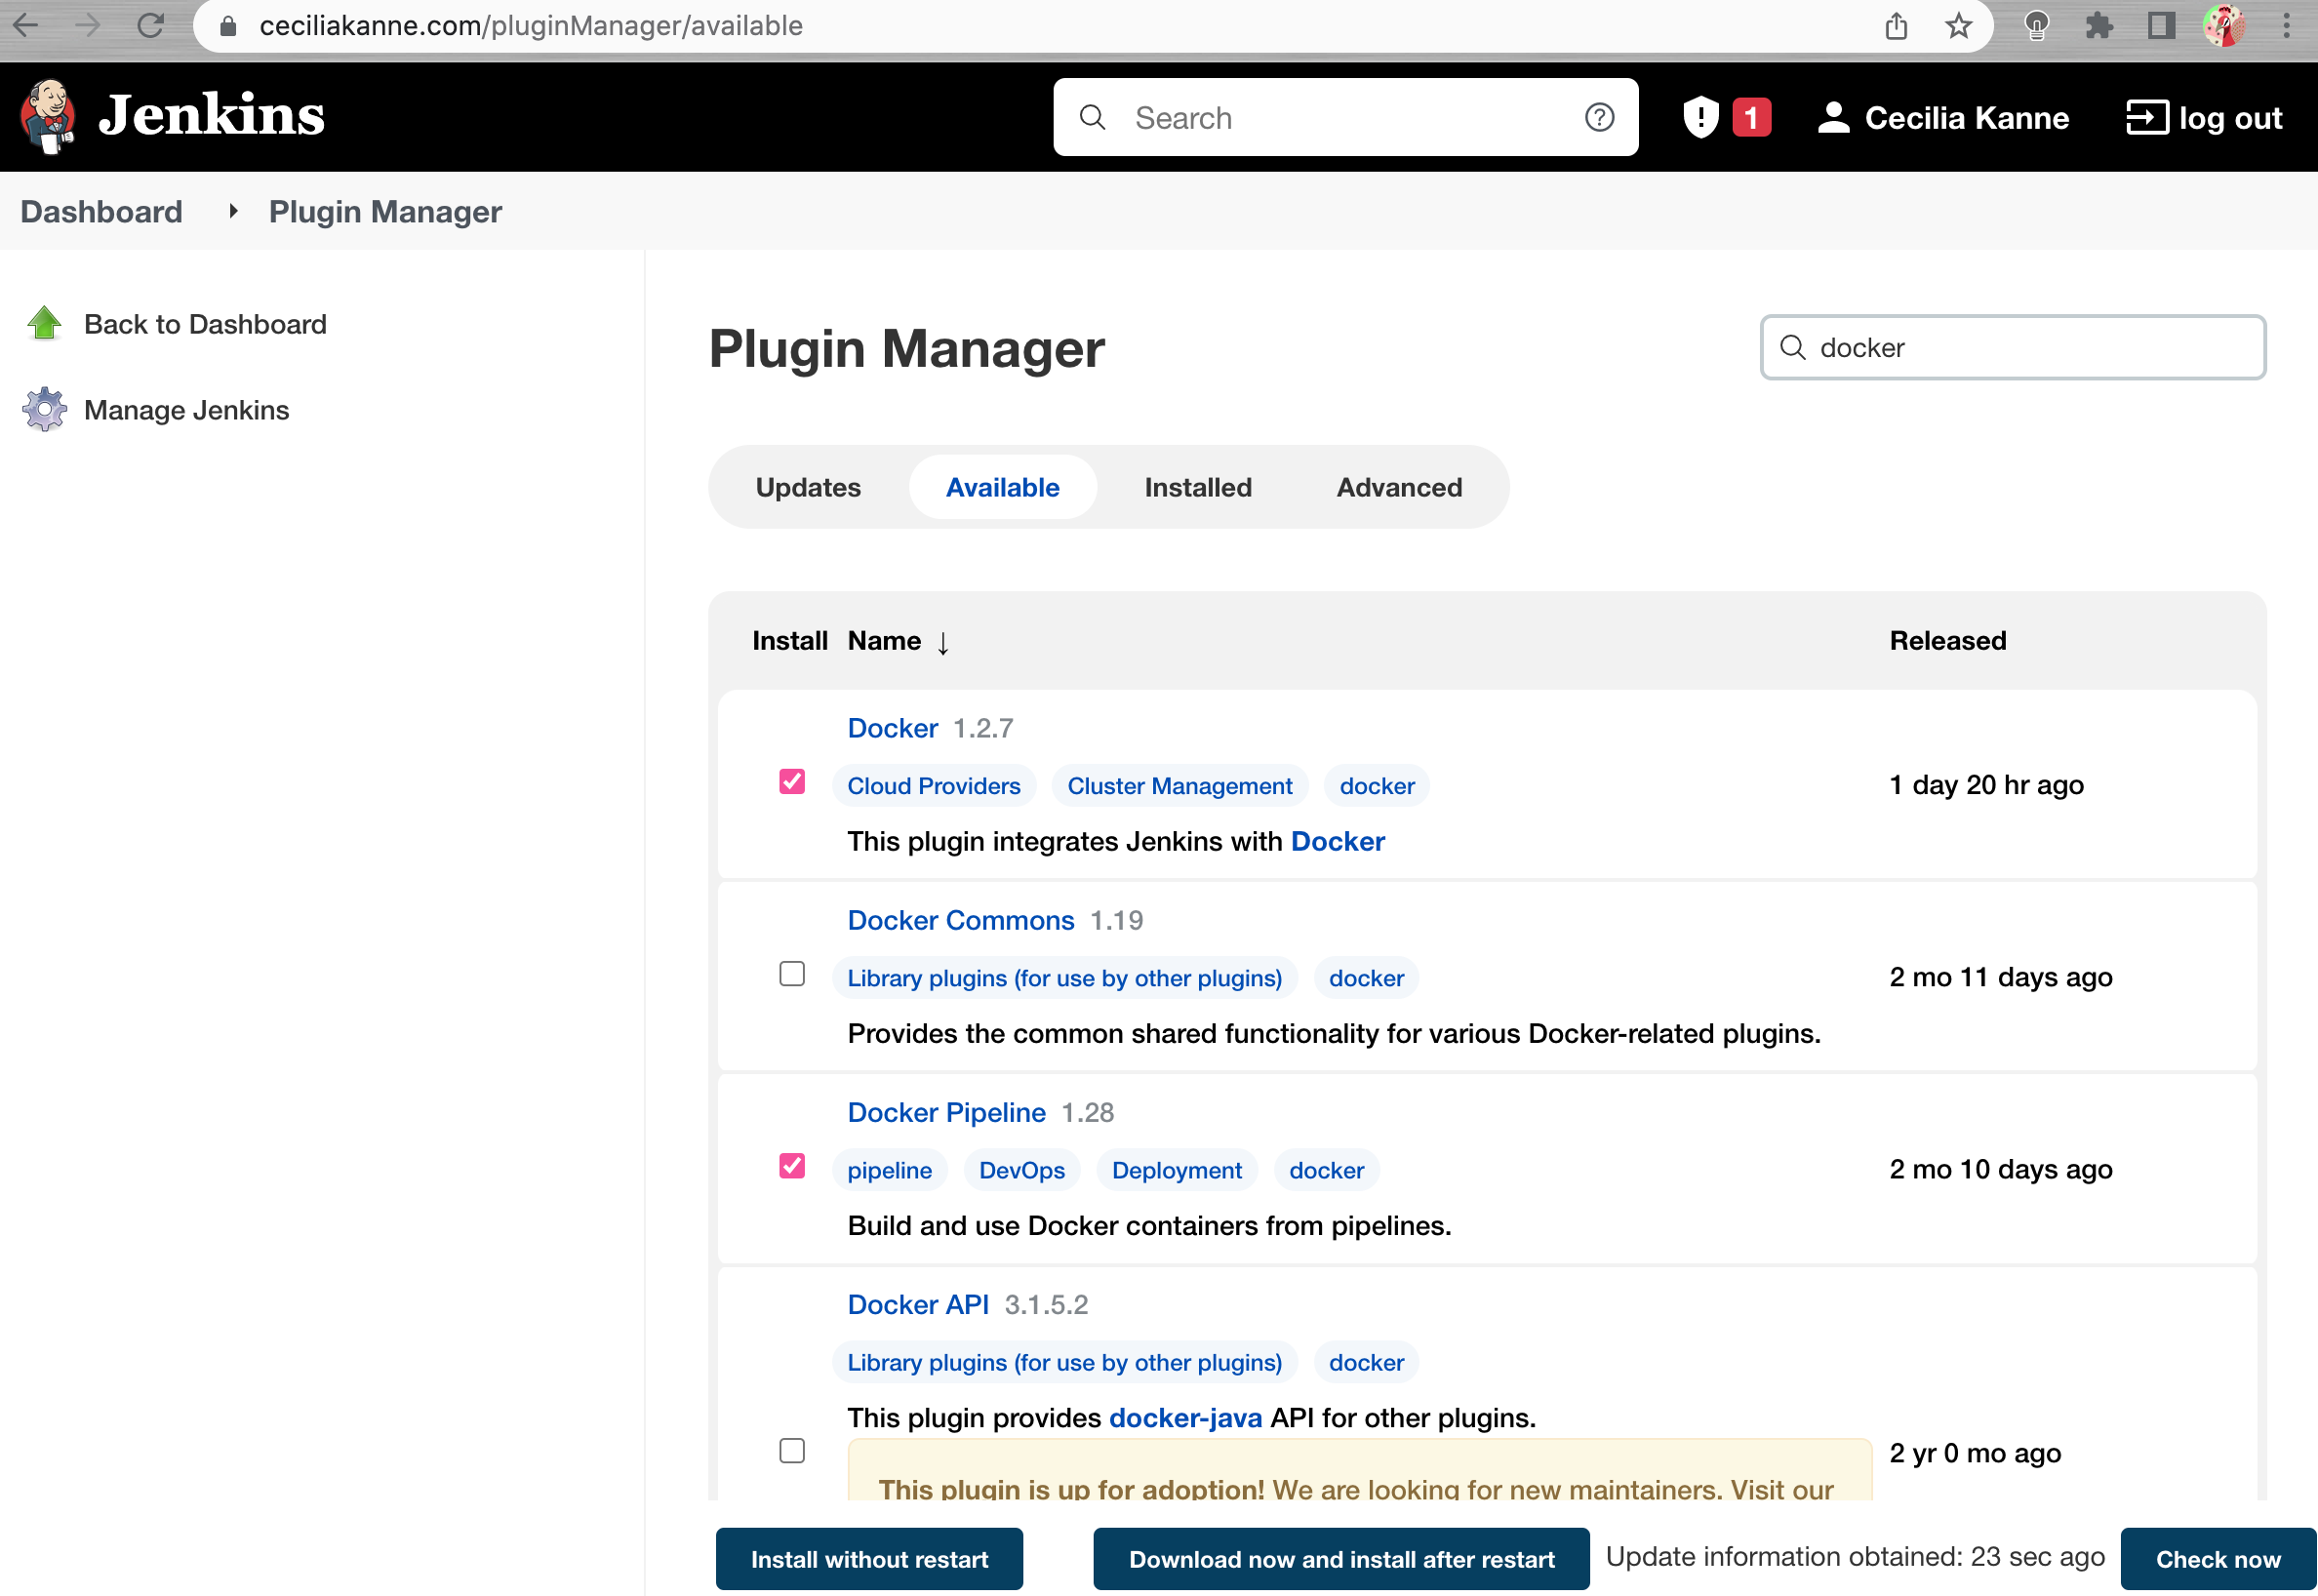
Click on the Available tab of the plugin menu to search for new plugins, and type docker into the search bar. Select both Docker and Docker Pipeline.
When finished, scroll to the bottom of the page and click Download now and install after restart.
Create a Personal Access Token in GitHub
In order for Jenkins to watch your GitHub projects, we must create a Personal Access Token in our GitHub account.
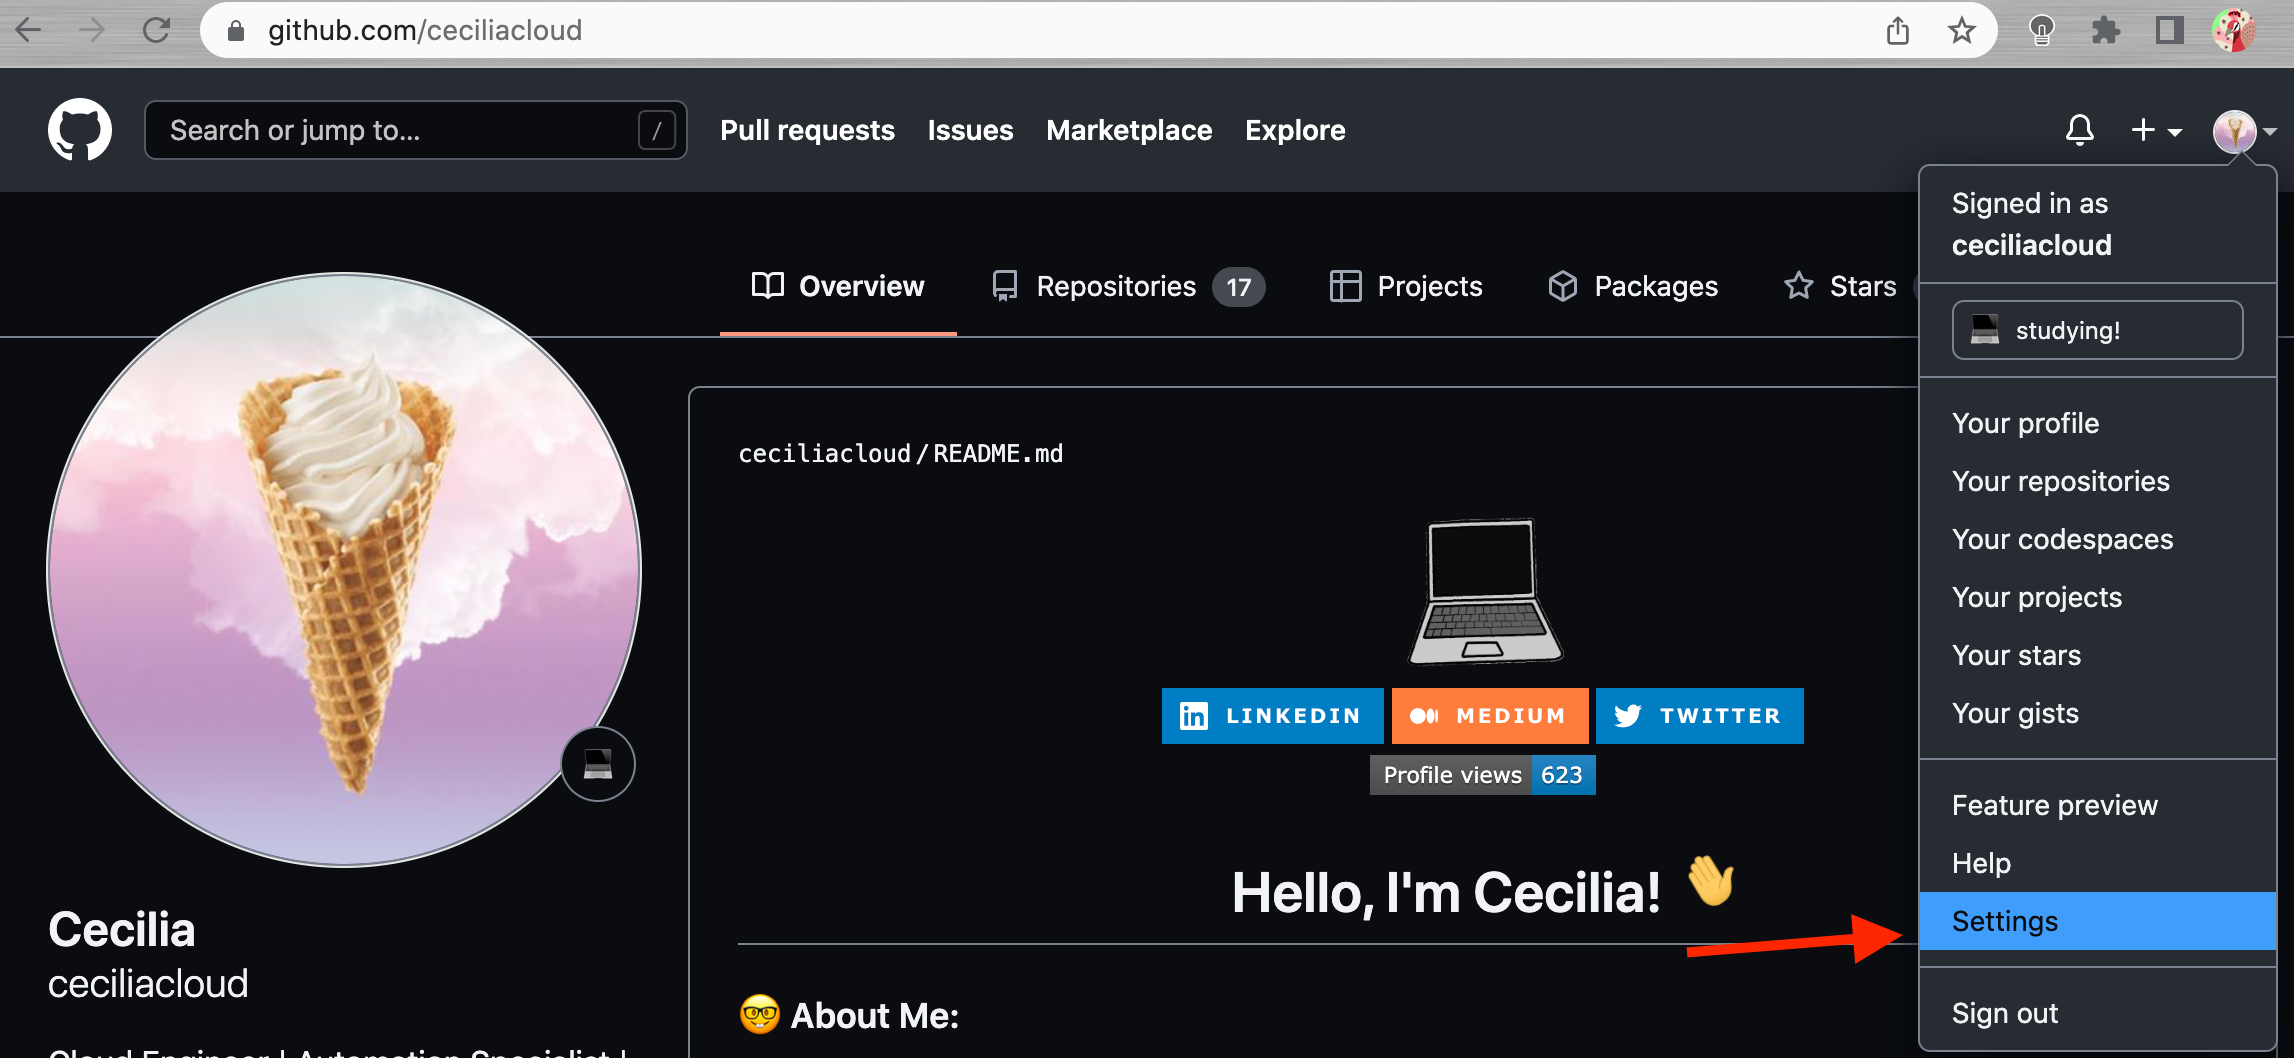
Begin by visiting GitHub and signing into your account. Next, click on your user icon in the upper-right hand corner and select Settings from the drop down menu:
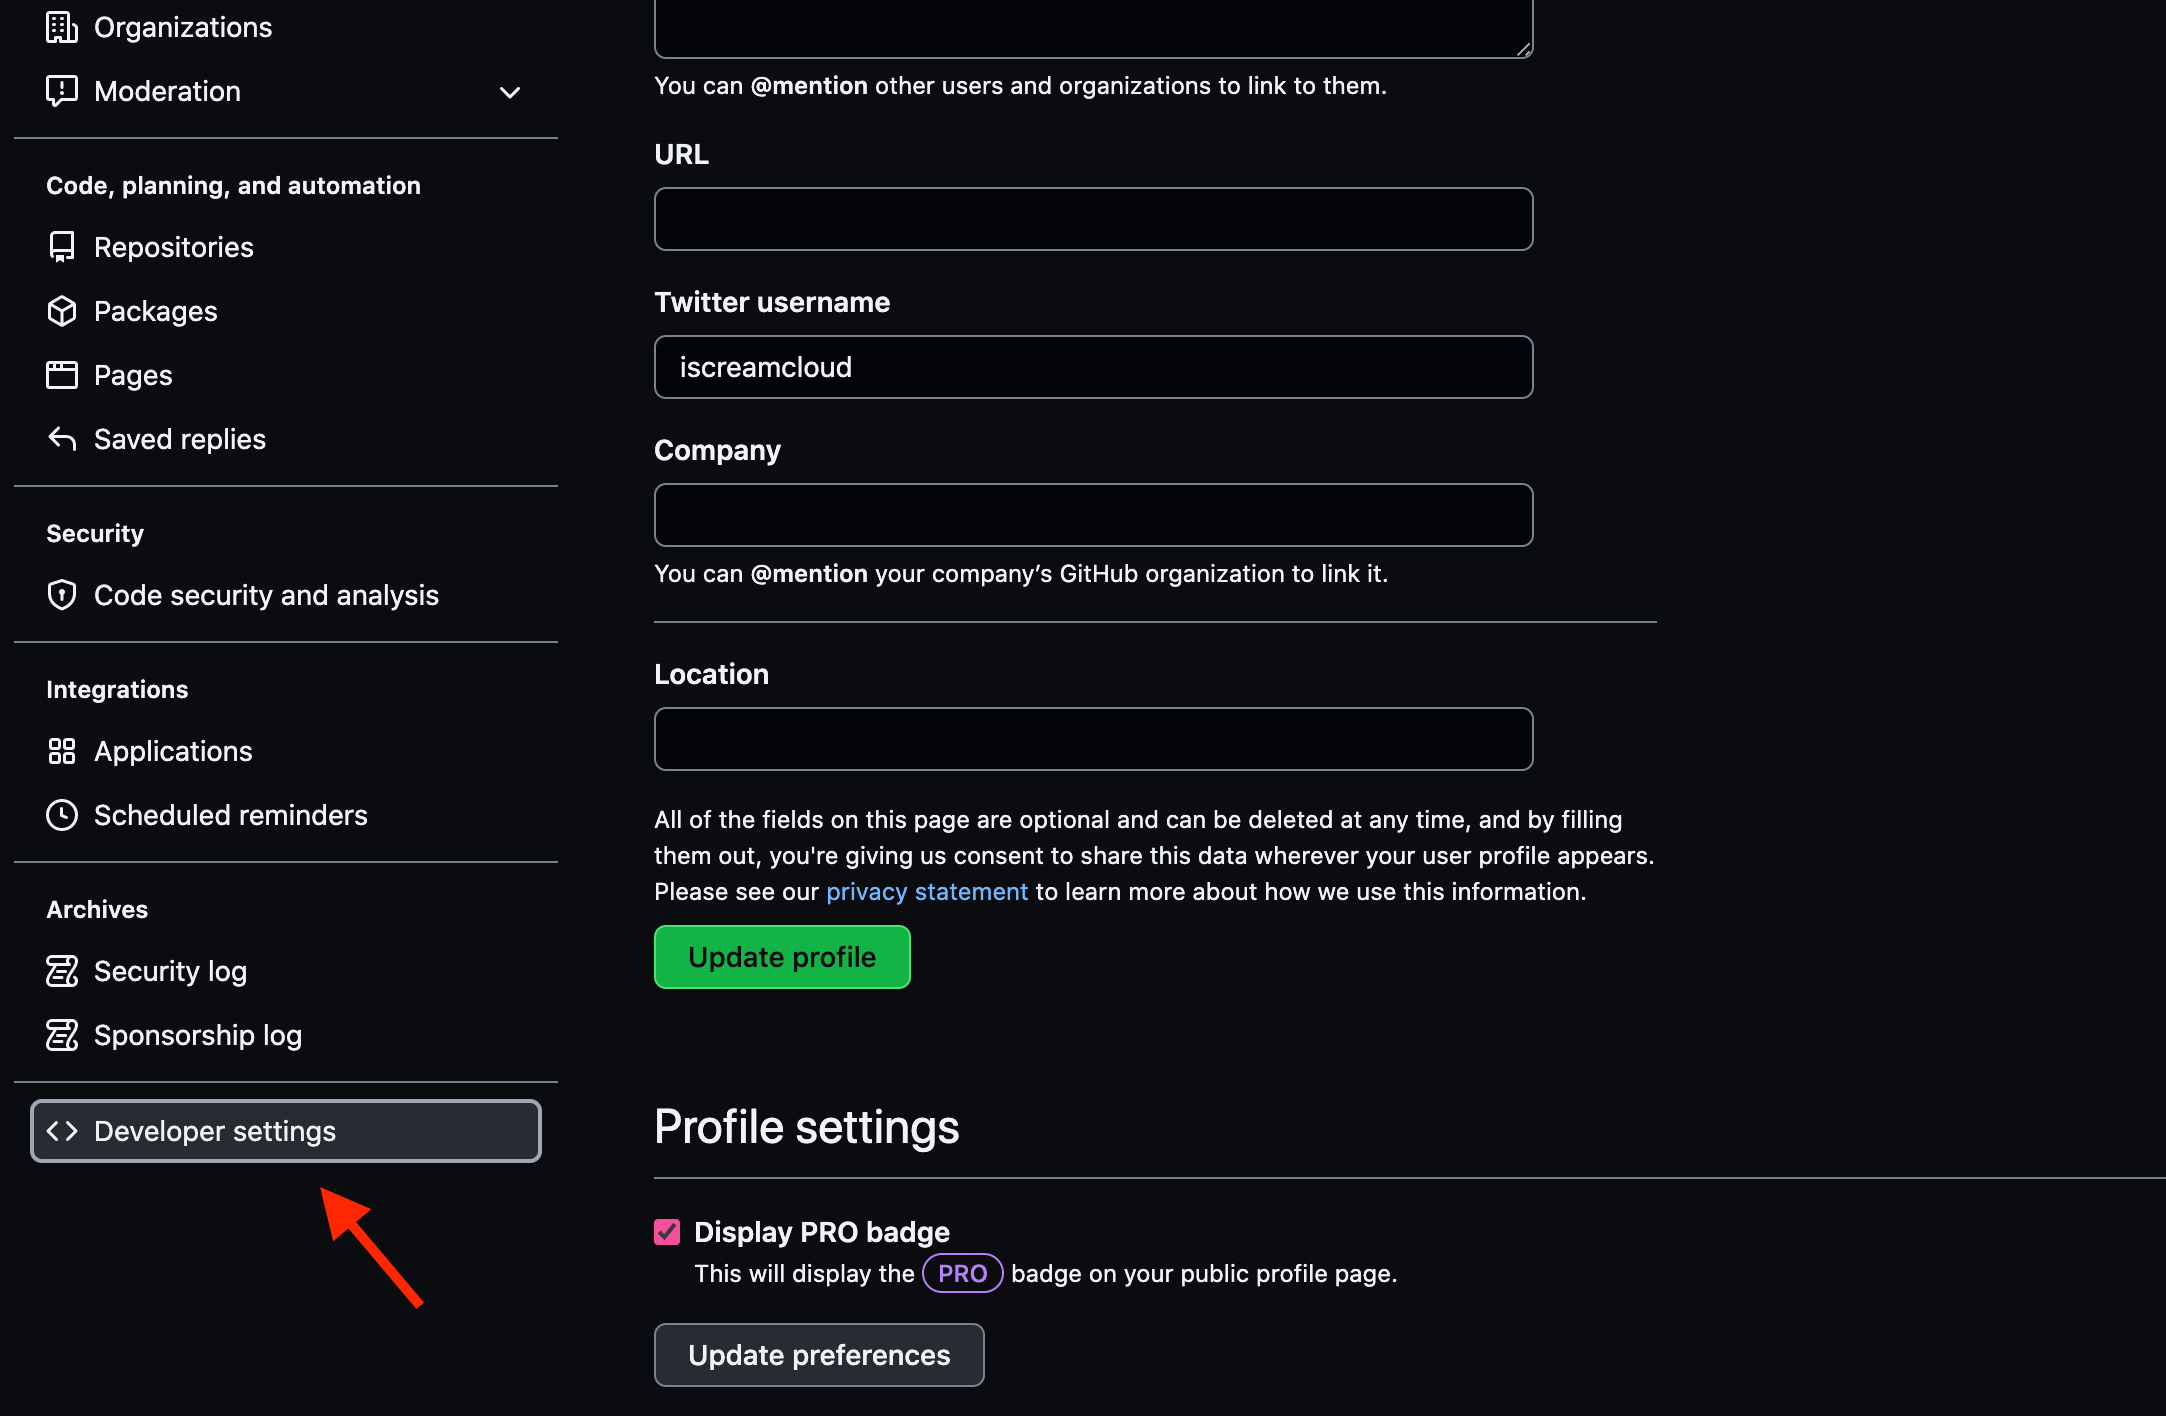
On the page that follows, locate the Developer settings section of the left-hand menu:
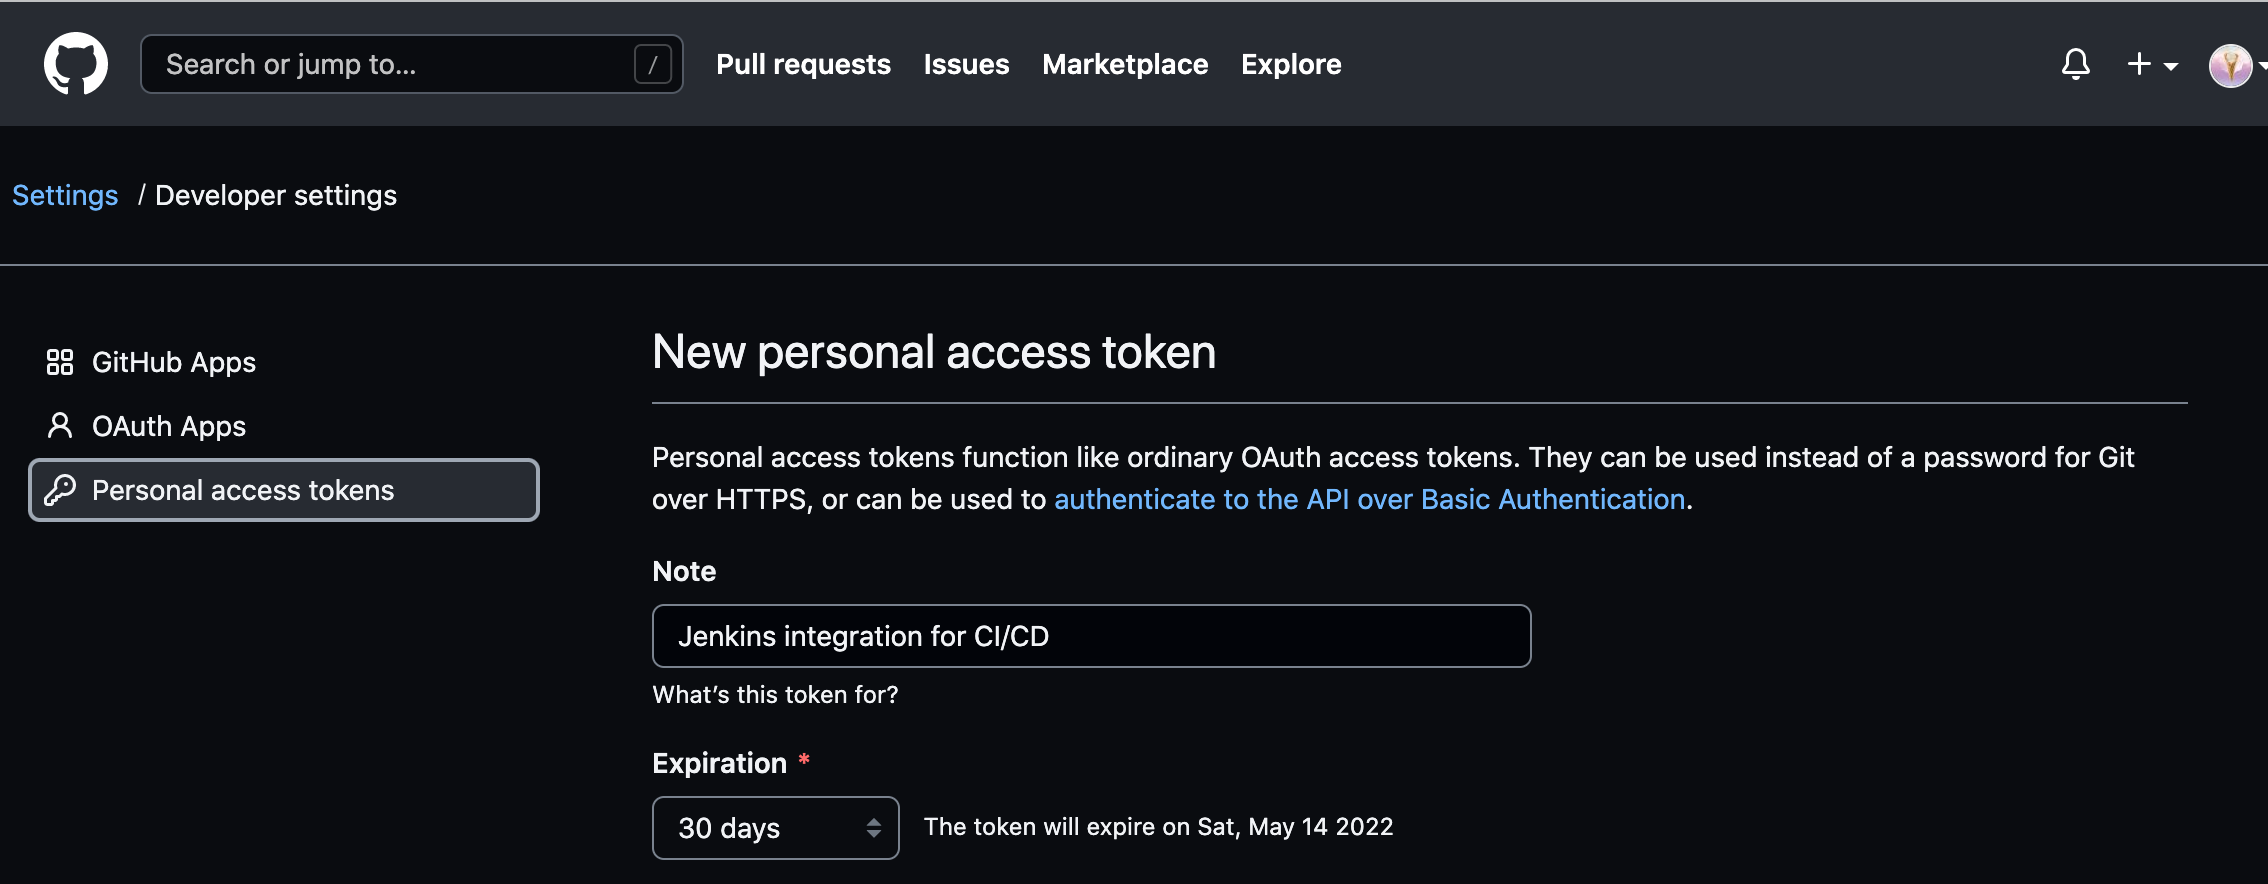
Next, click Personal access tokens. Click on Generate new token button on the next page. You will be taken to a page where you can define the scope for your new token.
In the Token description box, add a description that will allow you to recognize it later:
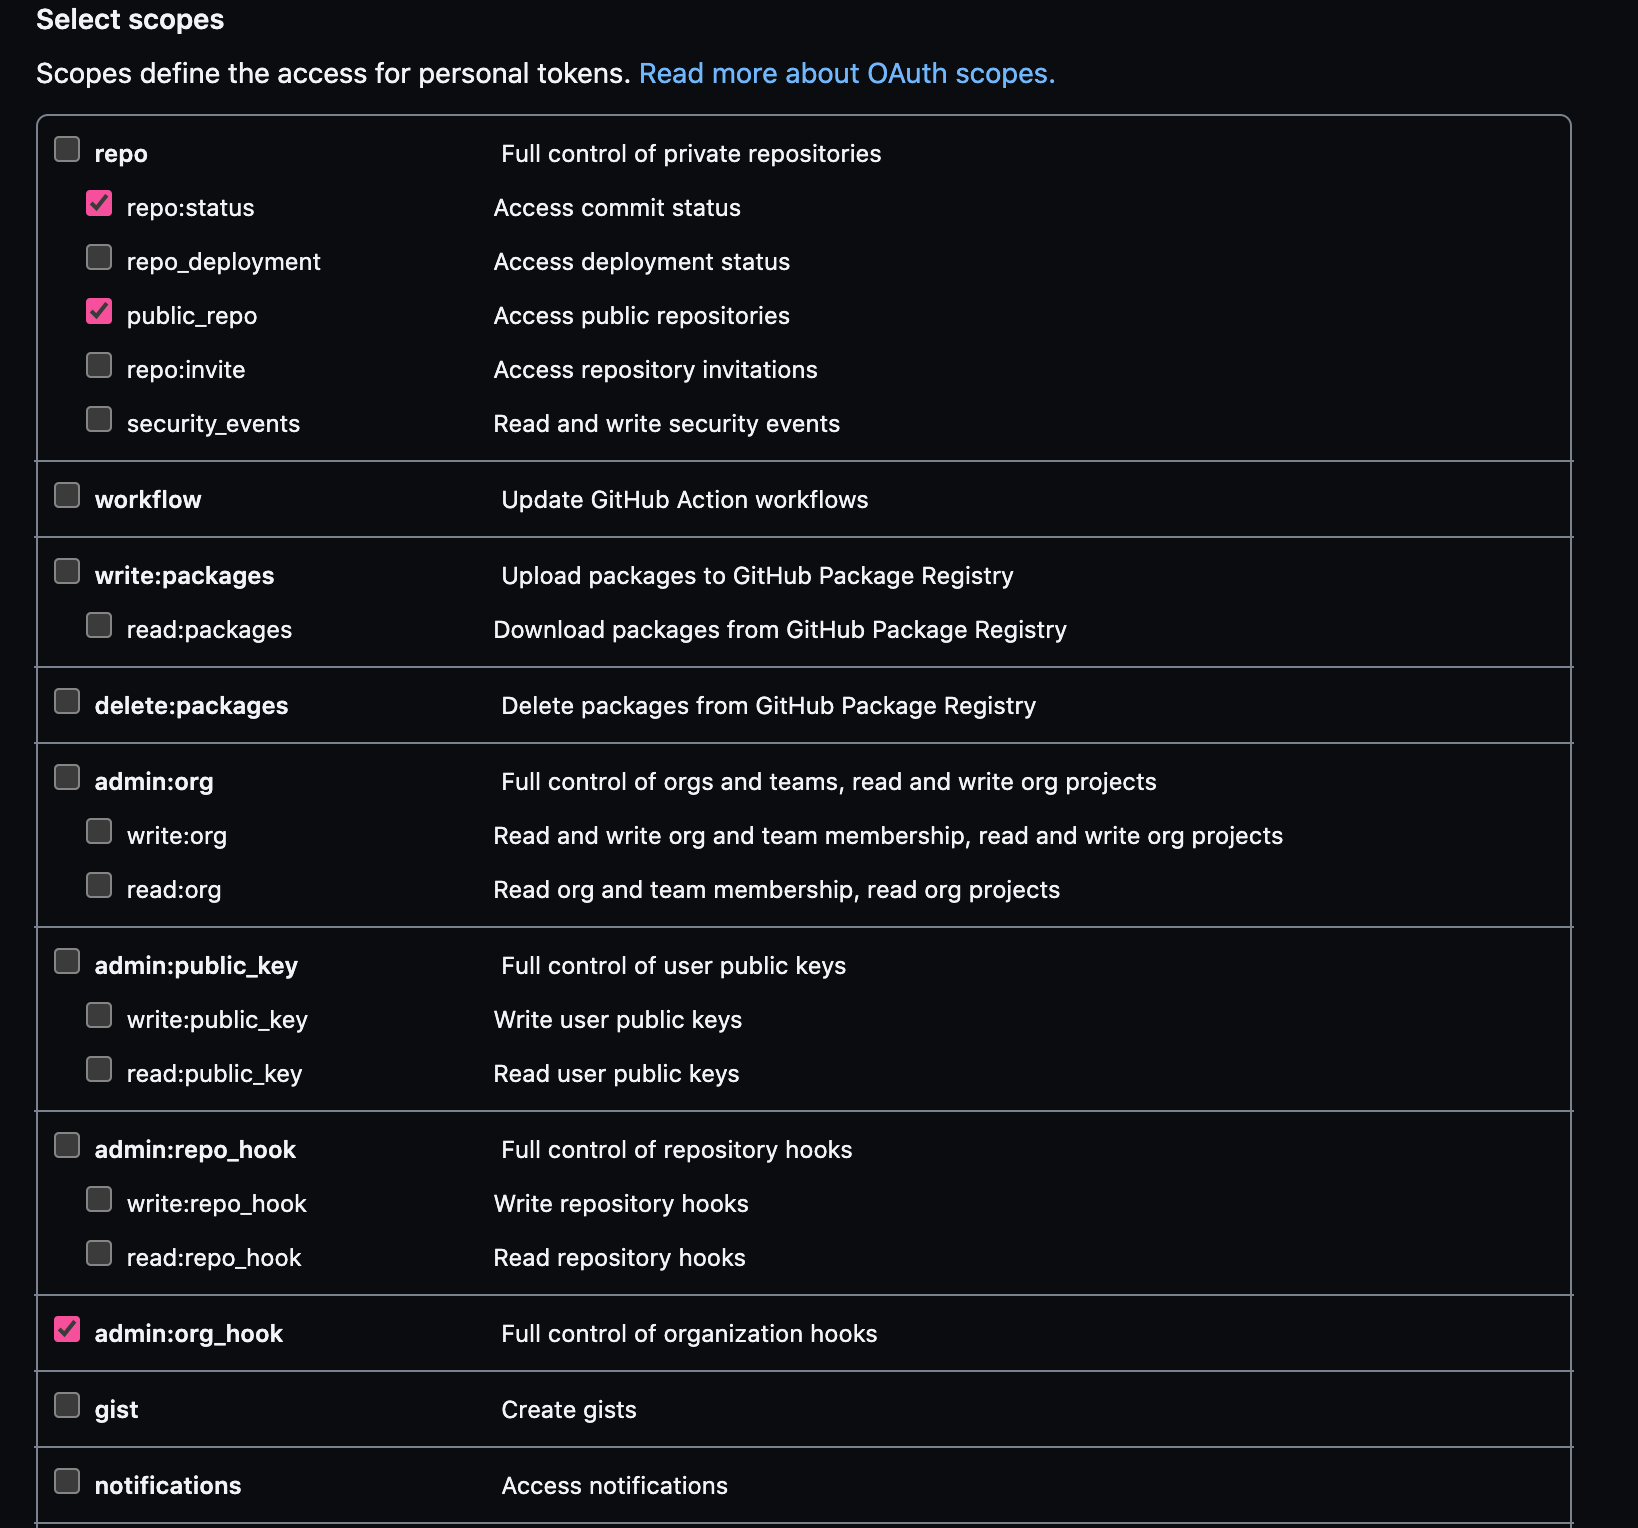
In the Select scopes section, check the following boxes:
- repo:status
- repo:public_repo
- admin:org_hook
These scopes will allow Jenkins to update commit statuses and to create webhooks for the project.
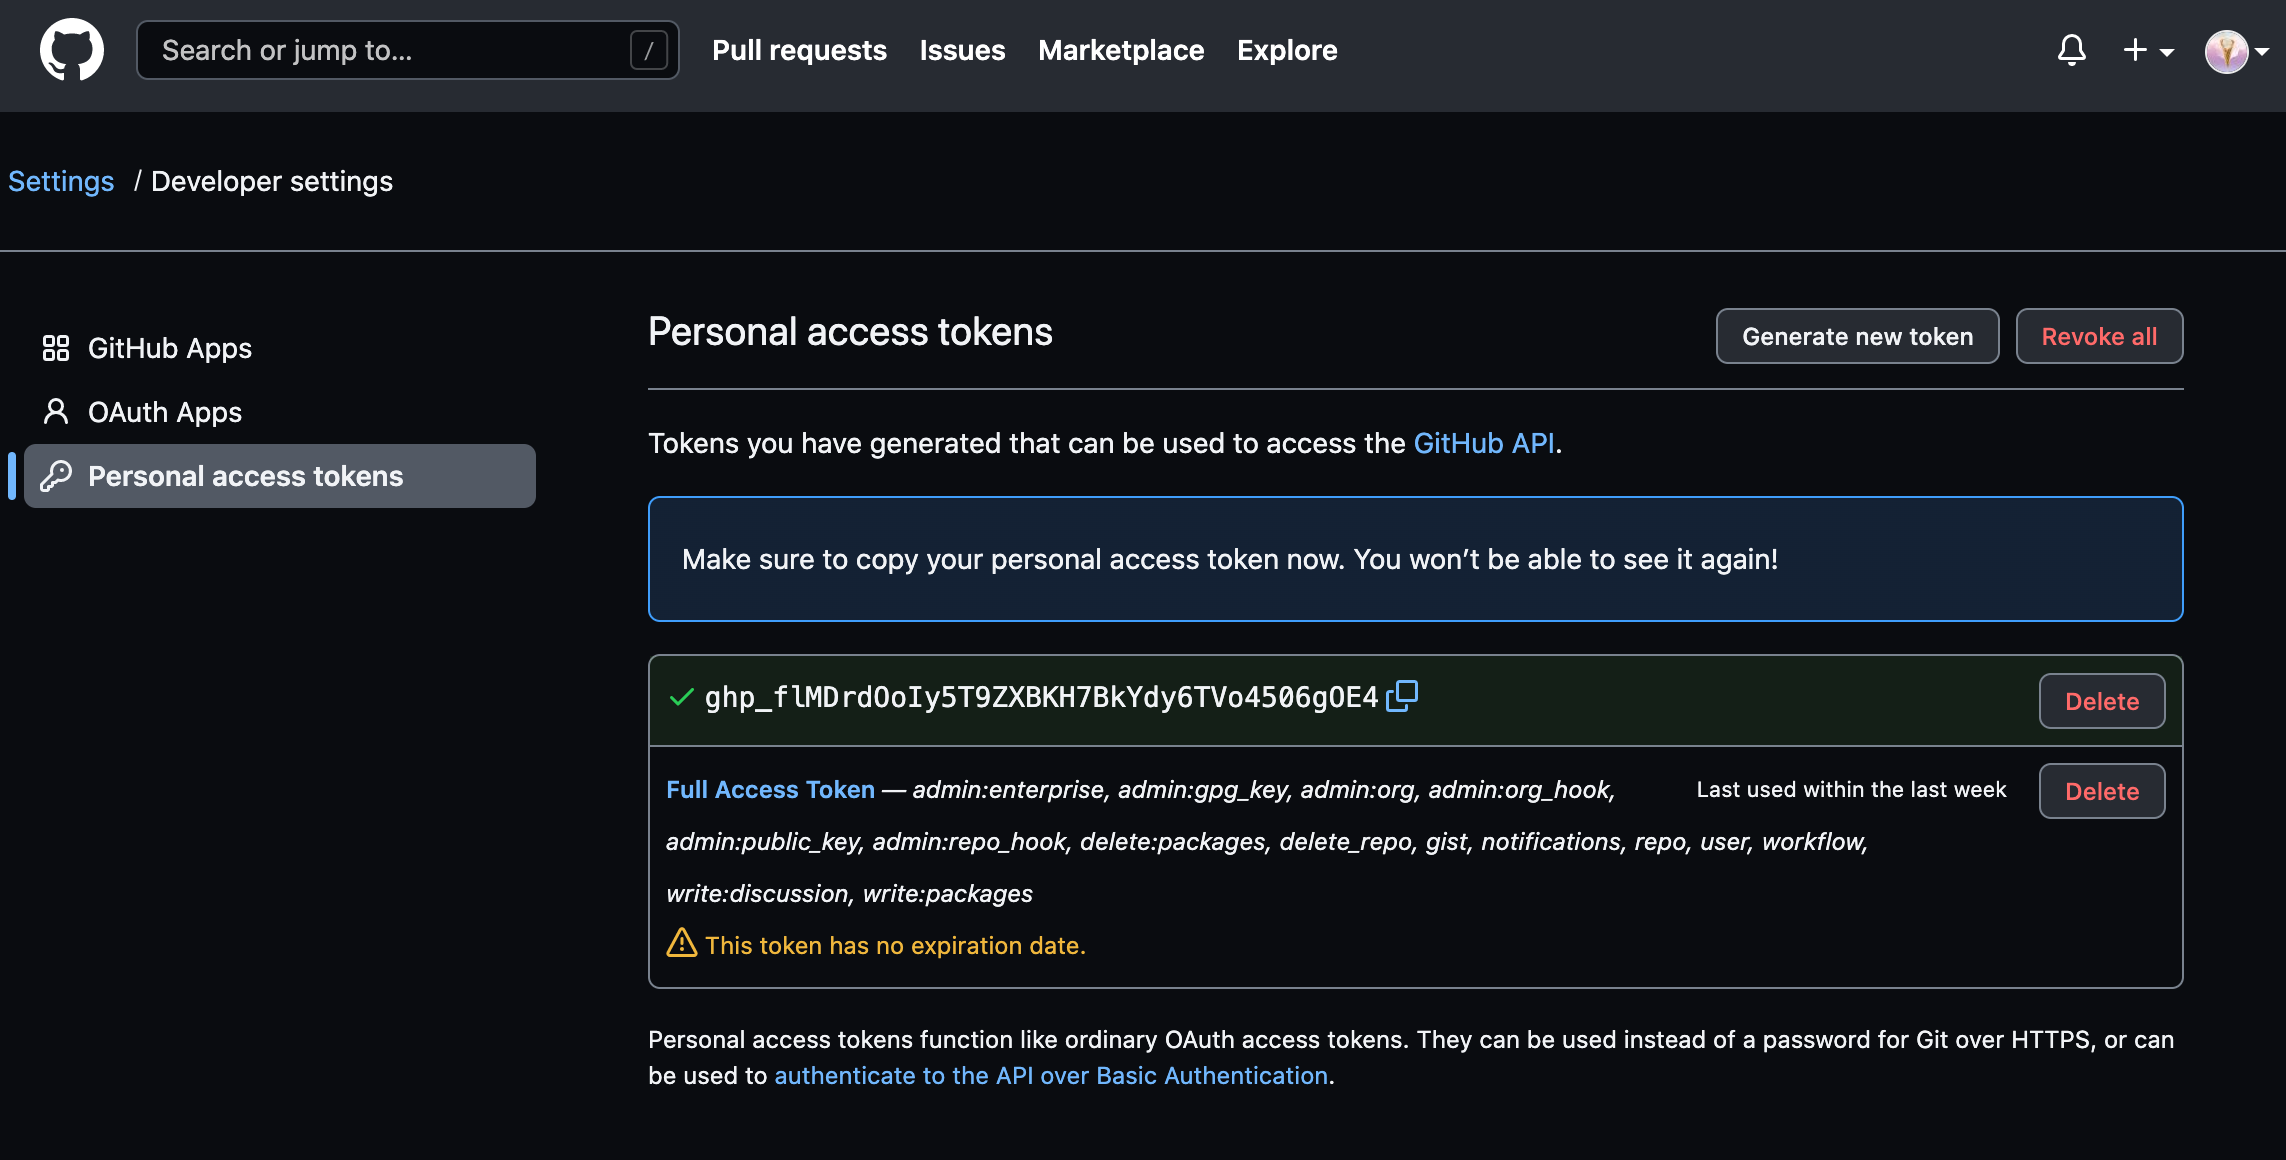
When you are finished, click Generate token at the bottom of the page. The new token will displayed:
PLEASE NOTE: Copy the token now so that we can reference it later. There is no way to retrieve the token once you leave this page!
Add the GitHub Personal Access Token to Jenkins
Now that we have a token, we need to add it to our Jenkins server so it can automatically set up webhooks.
Log into your Jenkins web interface using the administrative account you configured during installation.
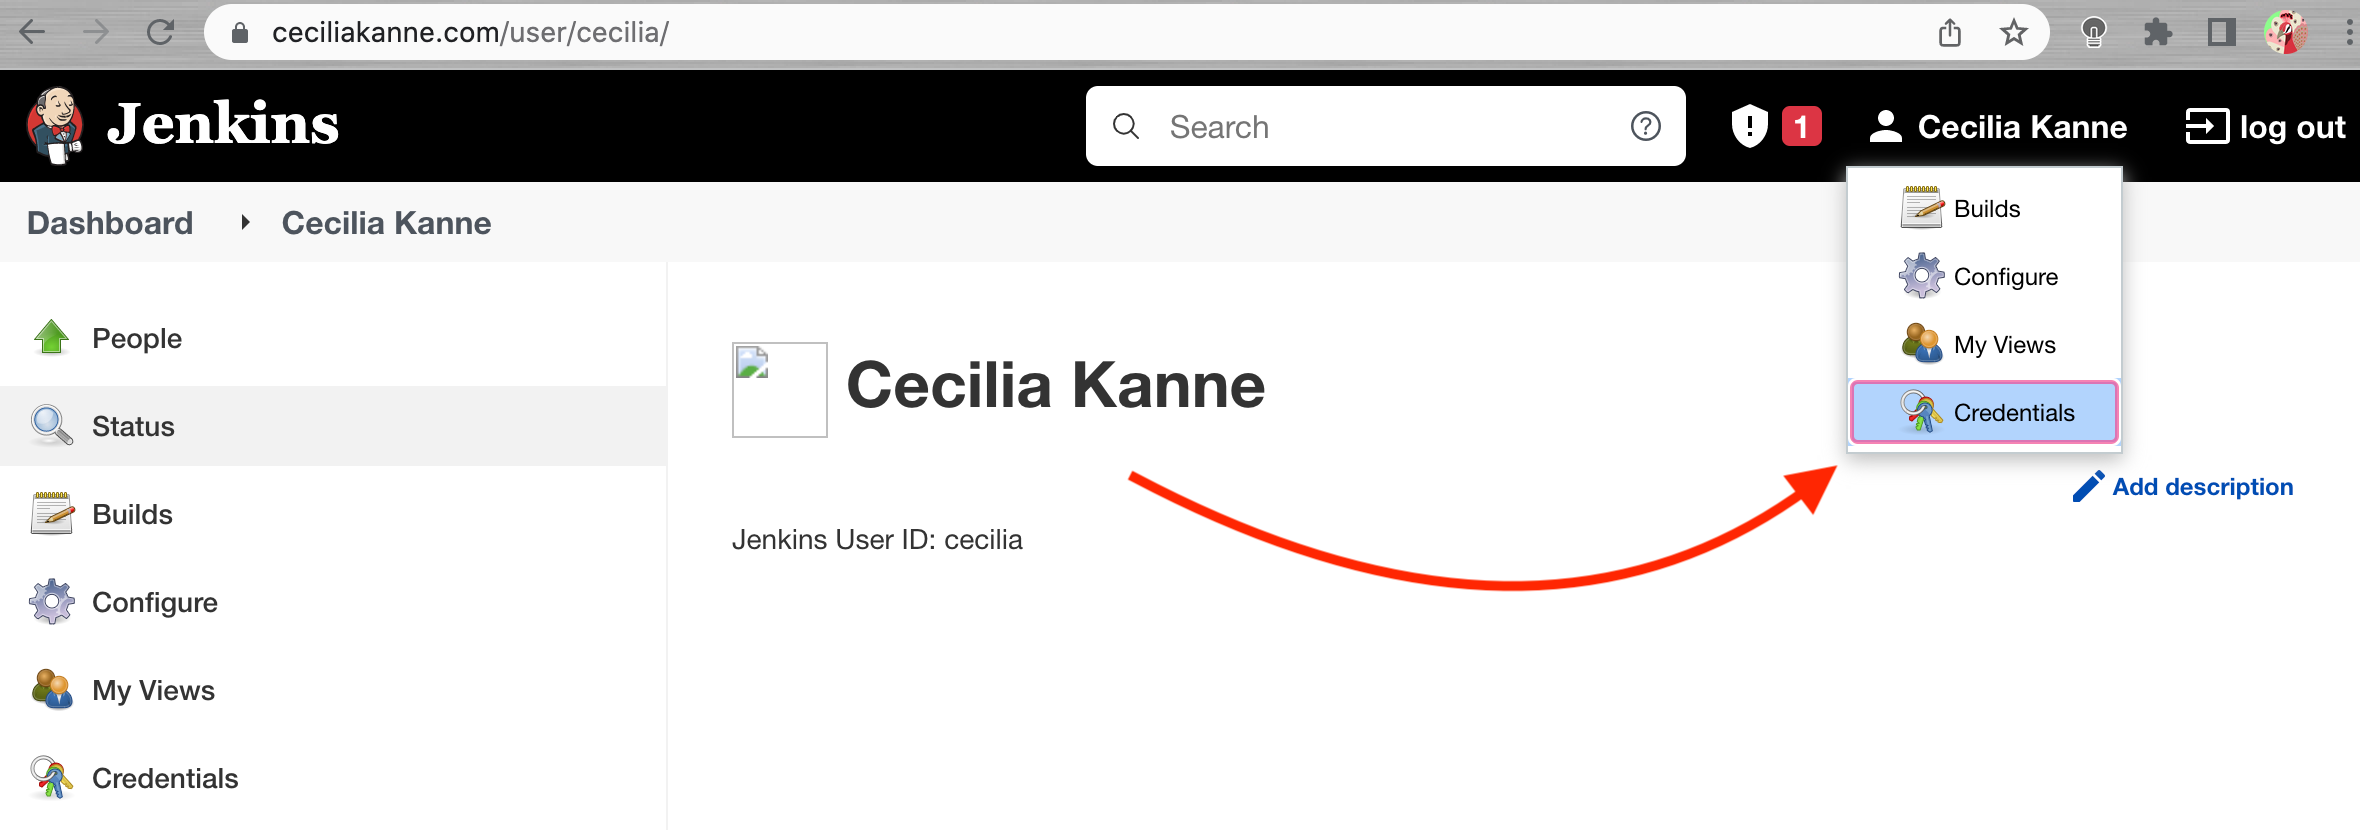
Click on your username in the top-right corner to access your user settings, and from there, click credentials in the left-hand menu.
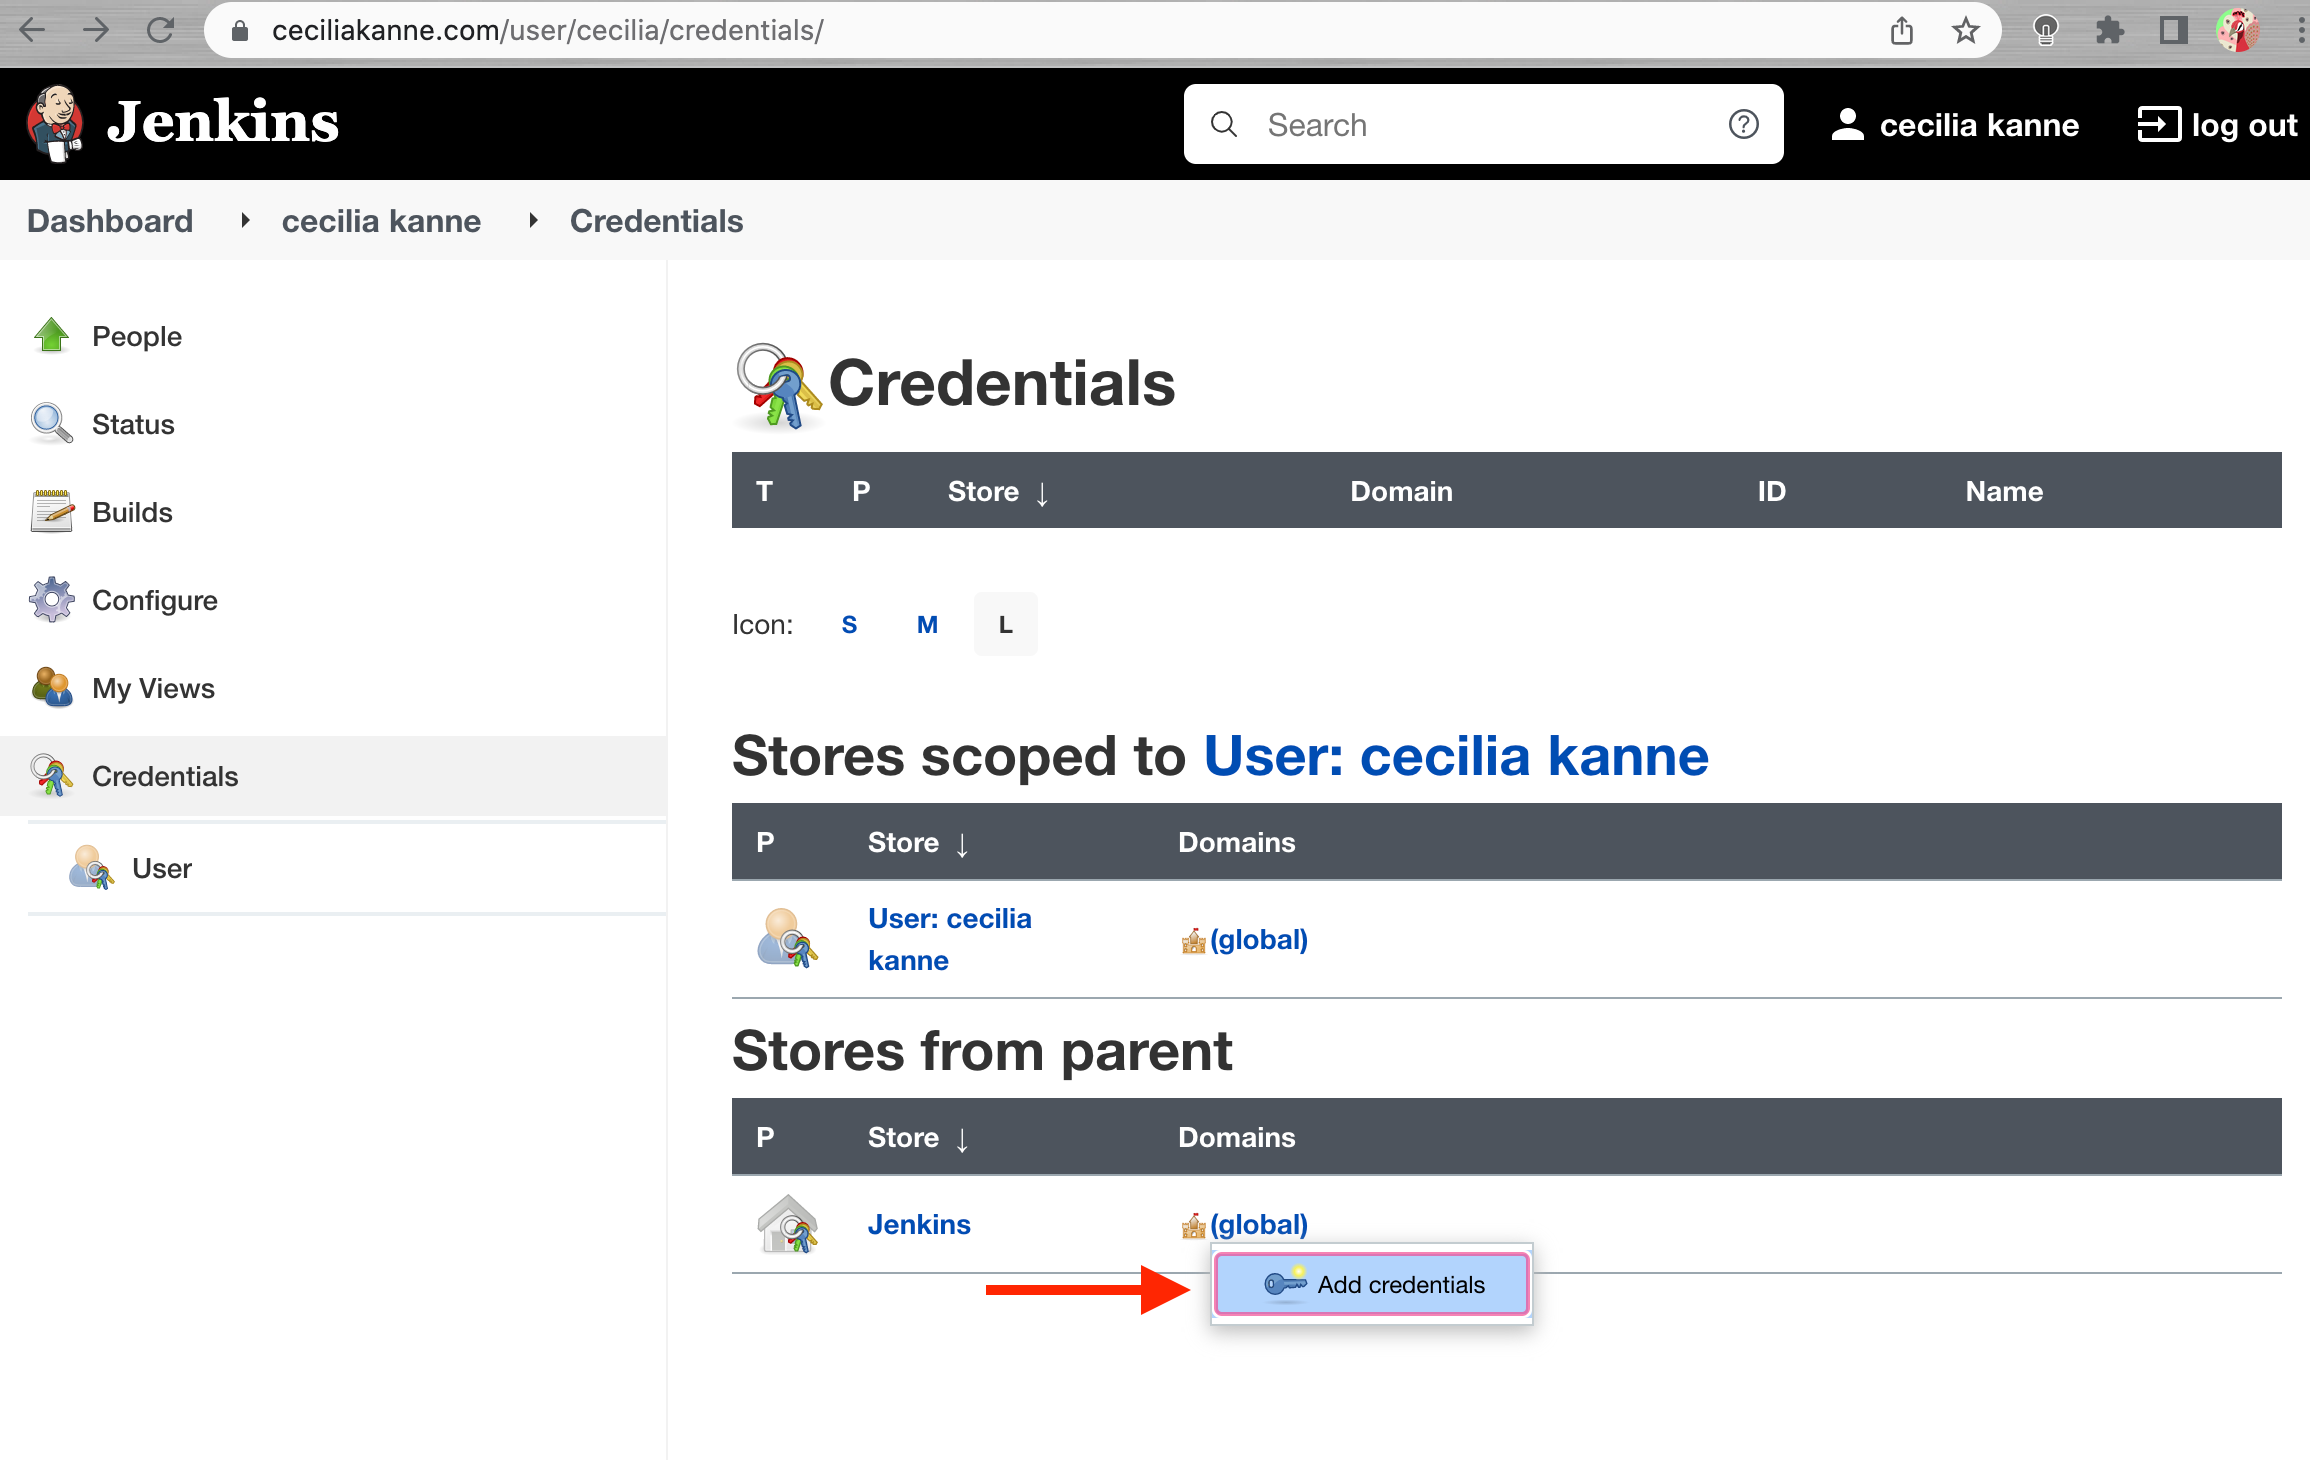
On the next page, click the arrow next to (global) within the Jenkins scope.
In the box that appears, click Add credentials:
You will be taken to a form to add new credentials.
Under the Kind drop down menu, select Secret text. In the Secret field, paste your GitHub personal access token. Fill out the Description field so that you will be able to identify this entry at a later date. You can leave the Scope as Global and the ID field blank:
Click the OK button when you are finished.
Set Up Jenkins Access to GitHub
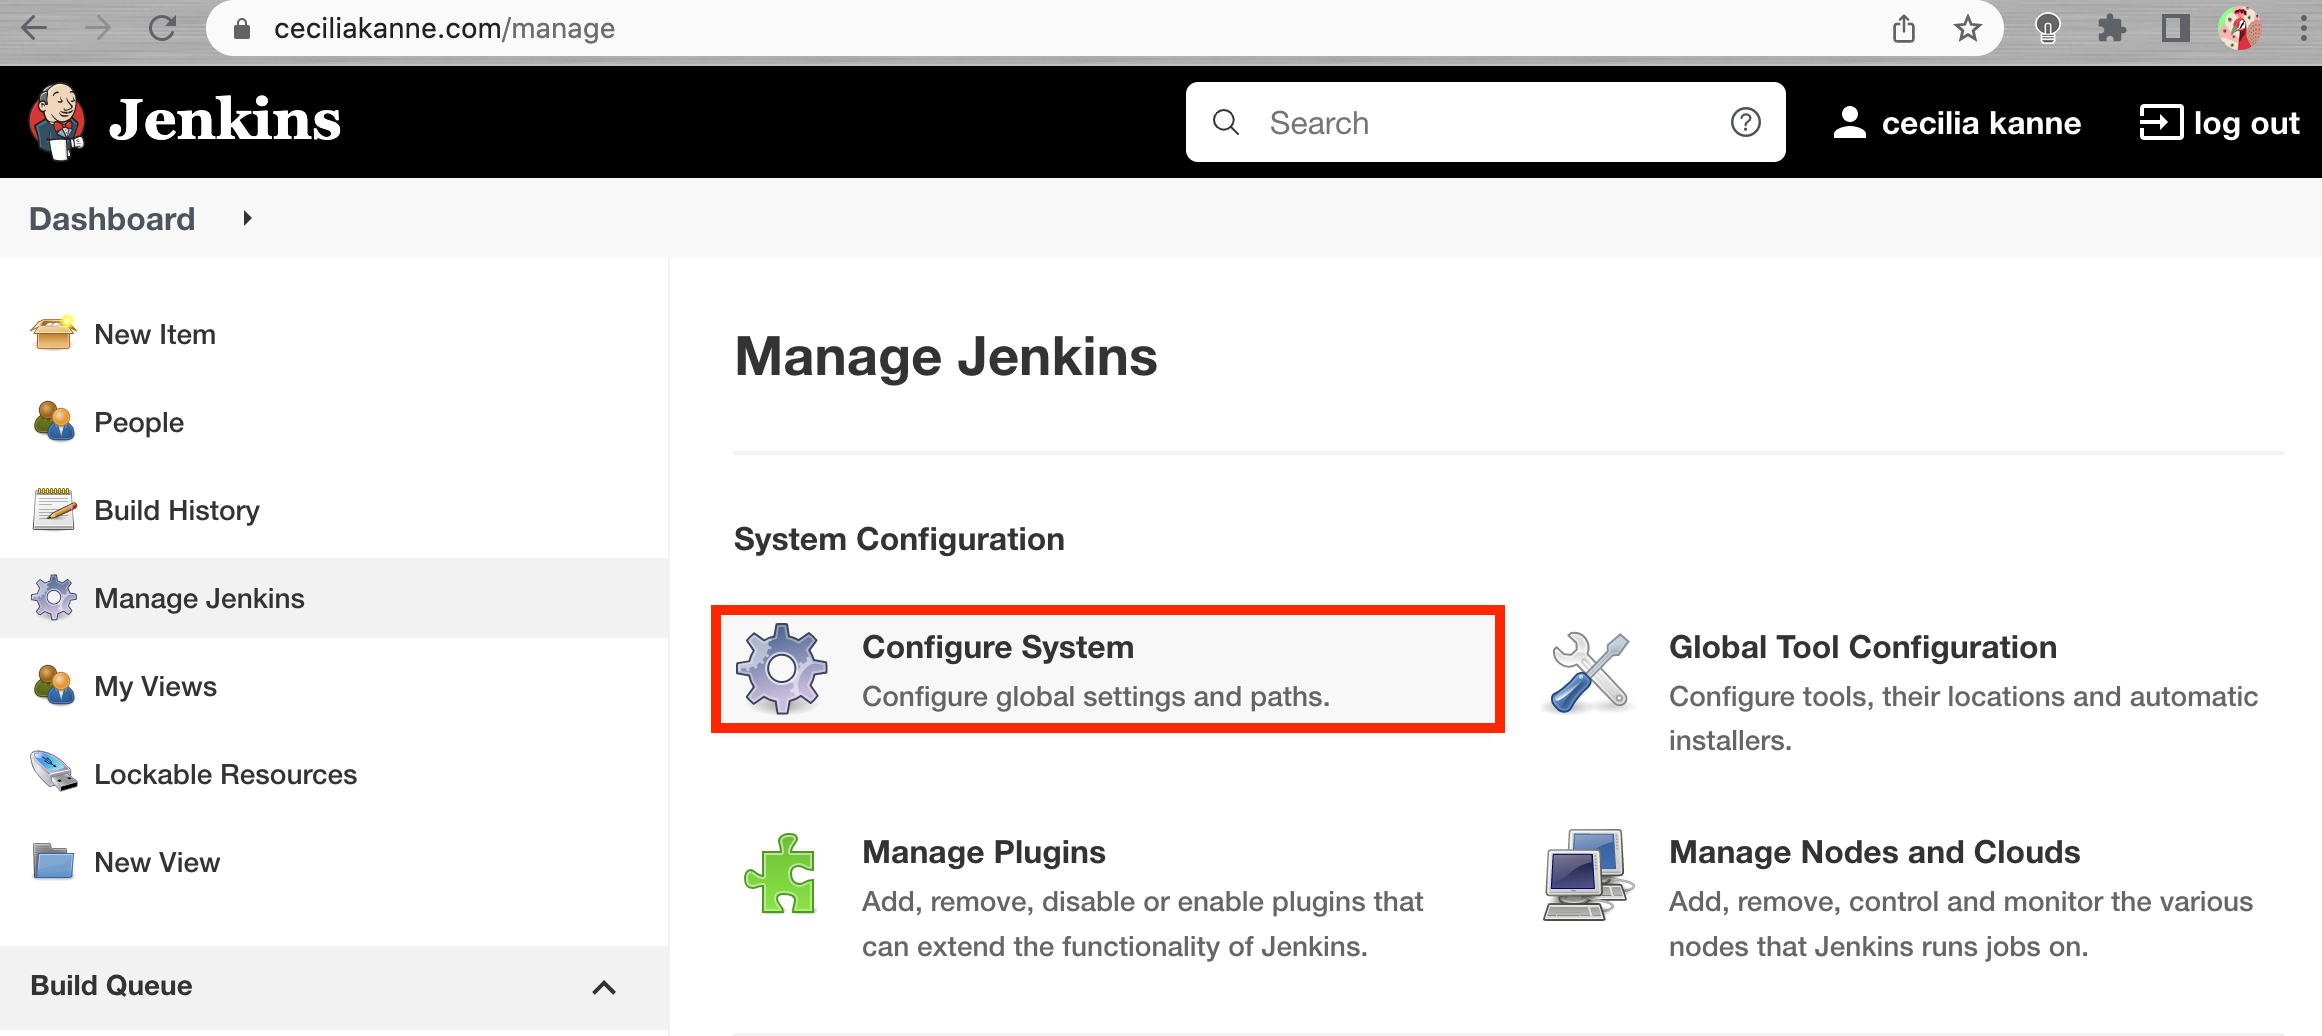
In the main Jenkins dashboard, click Manage Jenkins in the left hand menu. In the list of links on the following page, click Configure System:
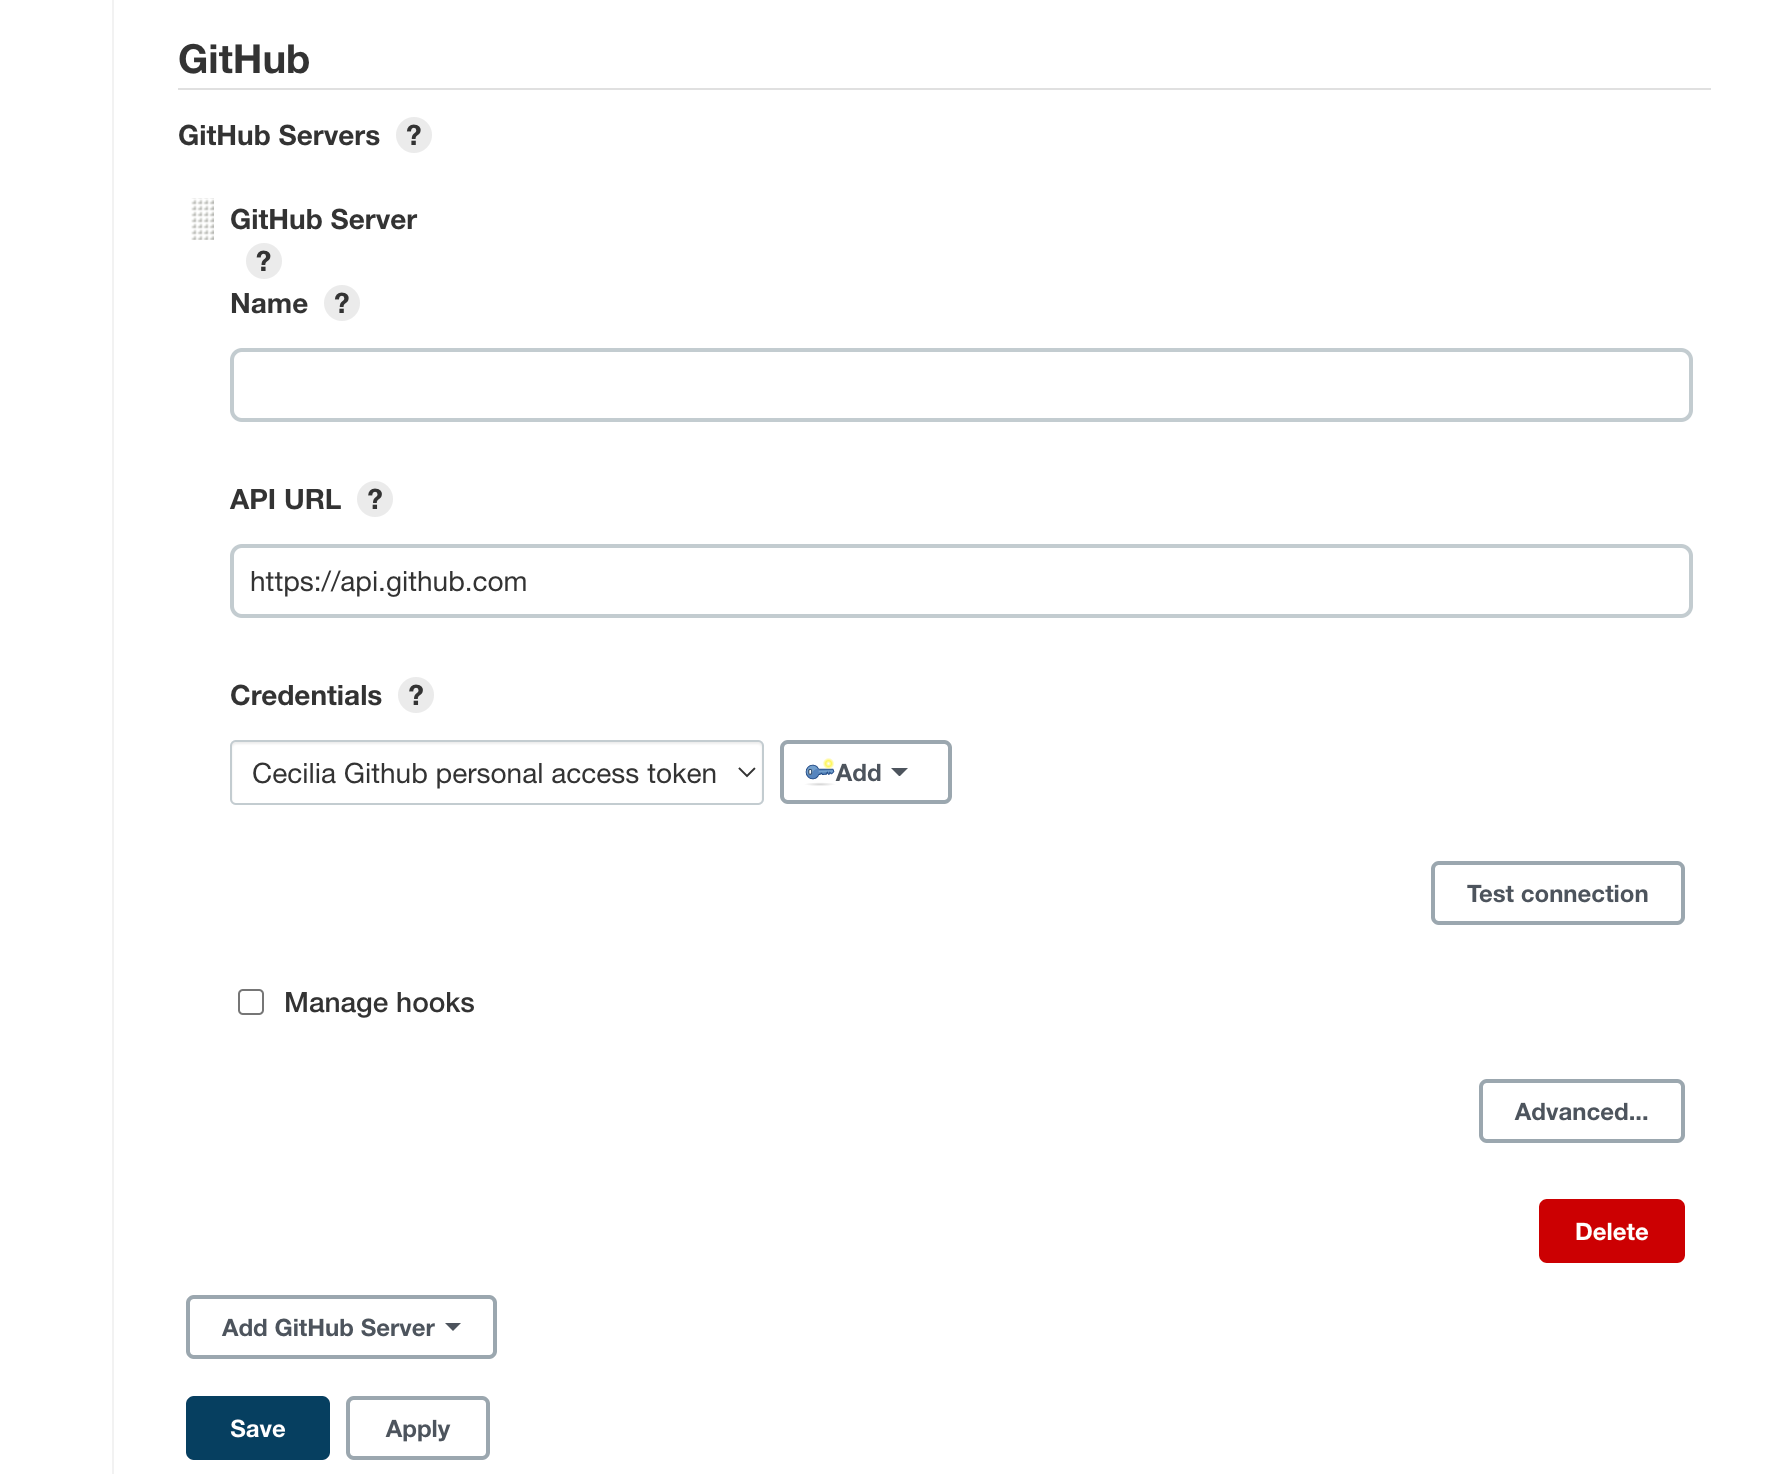
Scroll through the options on the next page until you find the GitHub section. Click the Add GitHub Server button and then select GitHub Server.
The section will expand to prompt for some additional information. In the Credentials drop down menu, select your GitHub personal access token that you added in the last section.
Click the Test connection button. Jenkins will make a test API call to your account and verify connectivity:
When you are finished, click the Save button to implement your changes.
Set Up the Demonstration Application in your GitHub Account
To demonstrate how to use Jenkins to test an application, we will be using a “hello world” program created with Hapi.js. Since we are setting up Jenkins to react to pushes to the repository, you need to have your own copy of the demonstration code.
Visit the project repository and click the Fork button in the upper-right corner to make a copy of the repository in your account:
A copy of the repository will be added to your account.
Next, we will set up Jenkins to use the GitHub personal access token to watch our repository. Back in the main Jenkins dashboard, click New Item in the left hand menu.
Enter a name for your new pipeline in the Enter an item name field. Afterwards, select Pipeline as the item type:
Scroll down to the bottom and click the OK button.
On the next screen, check the GitHub project box. In the Project url field that appears, enter your project’s GitHub repository URL.
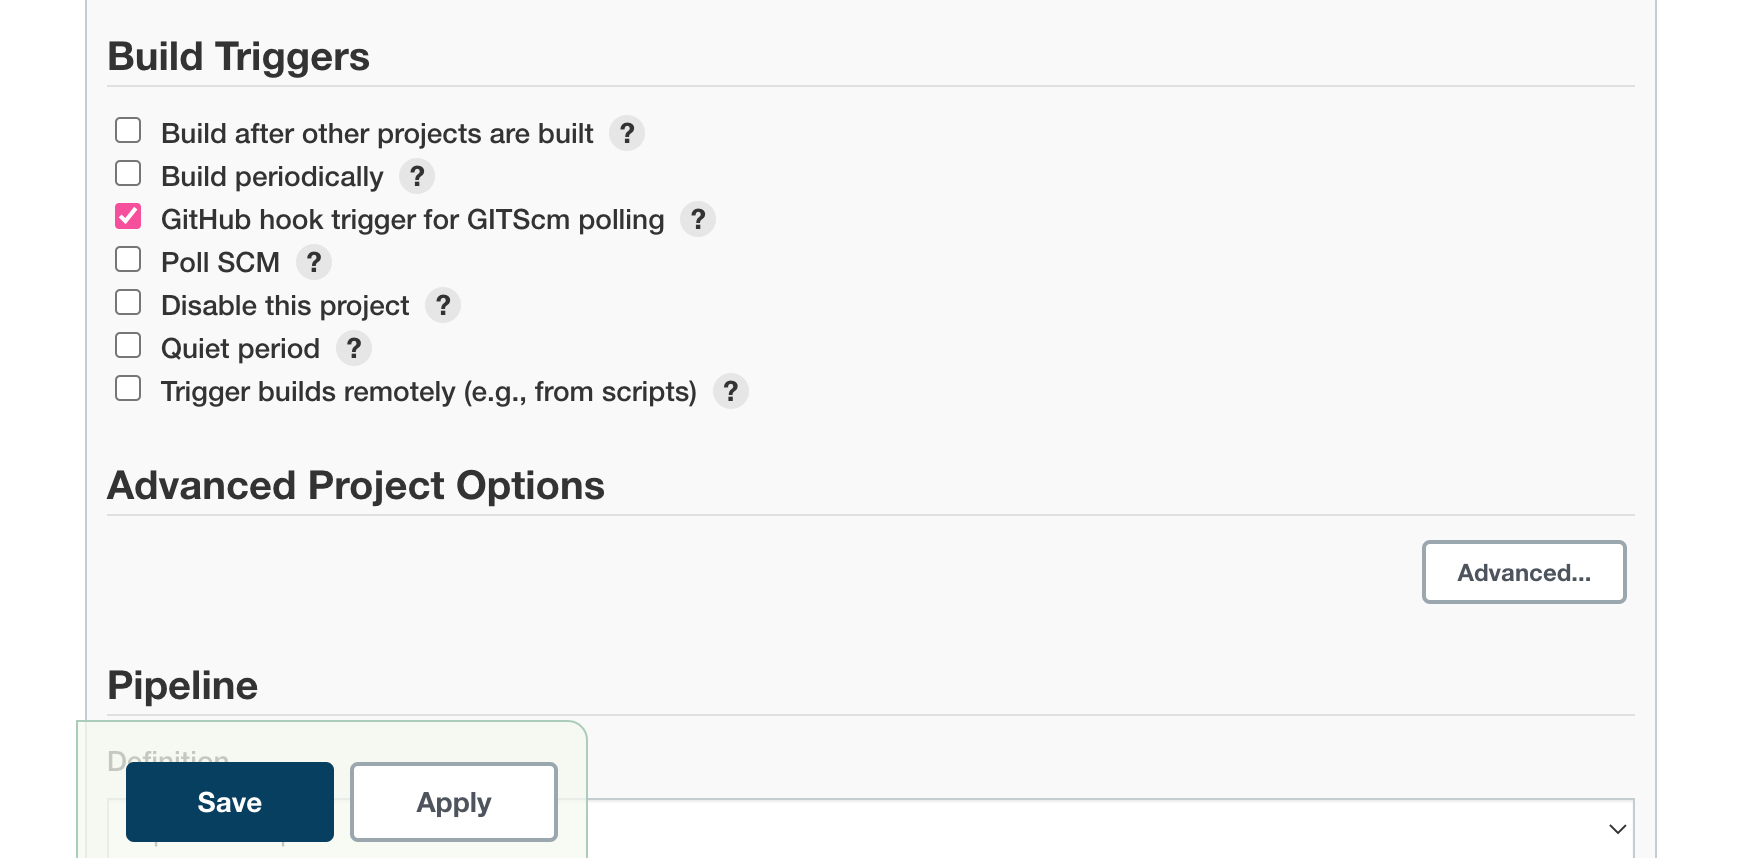
Next, in the Build Triggers section, check the GitHub hook trigger for GITScm polling box:
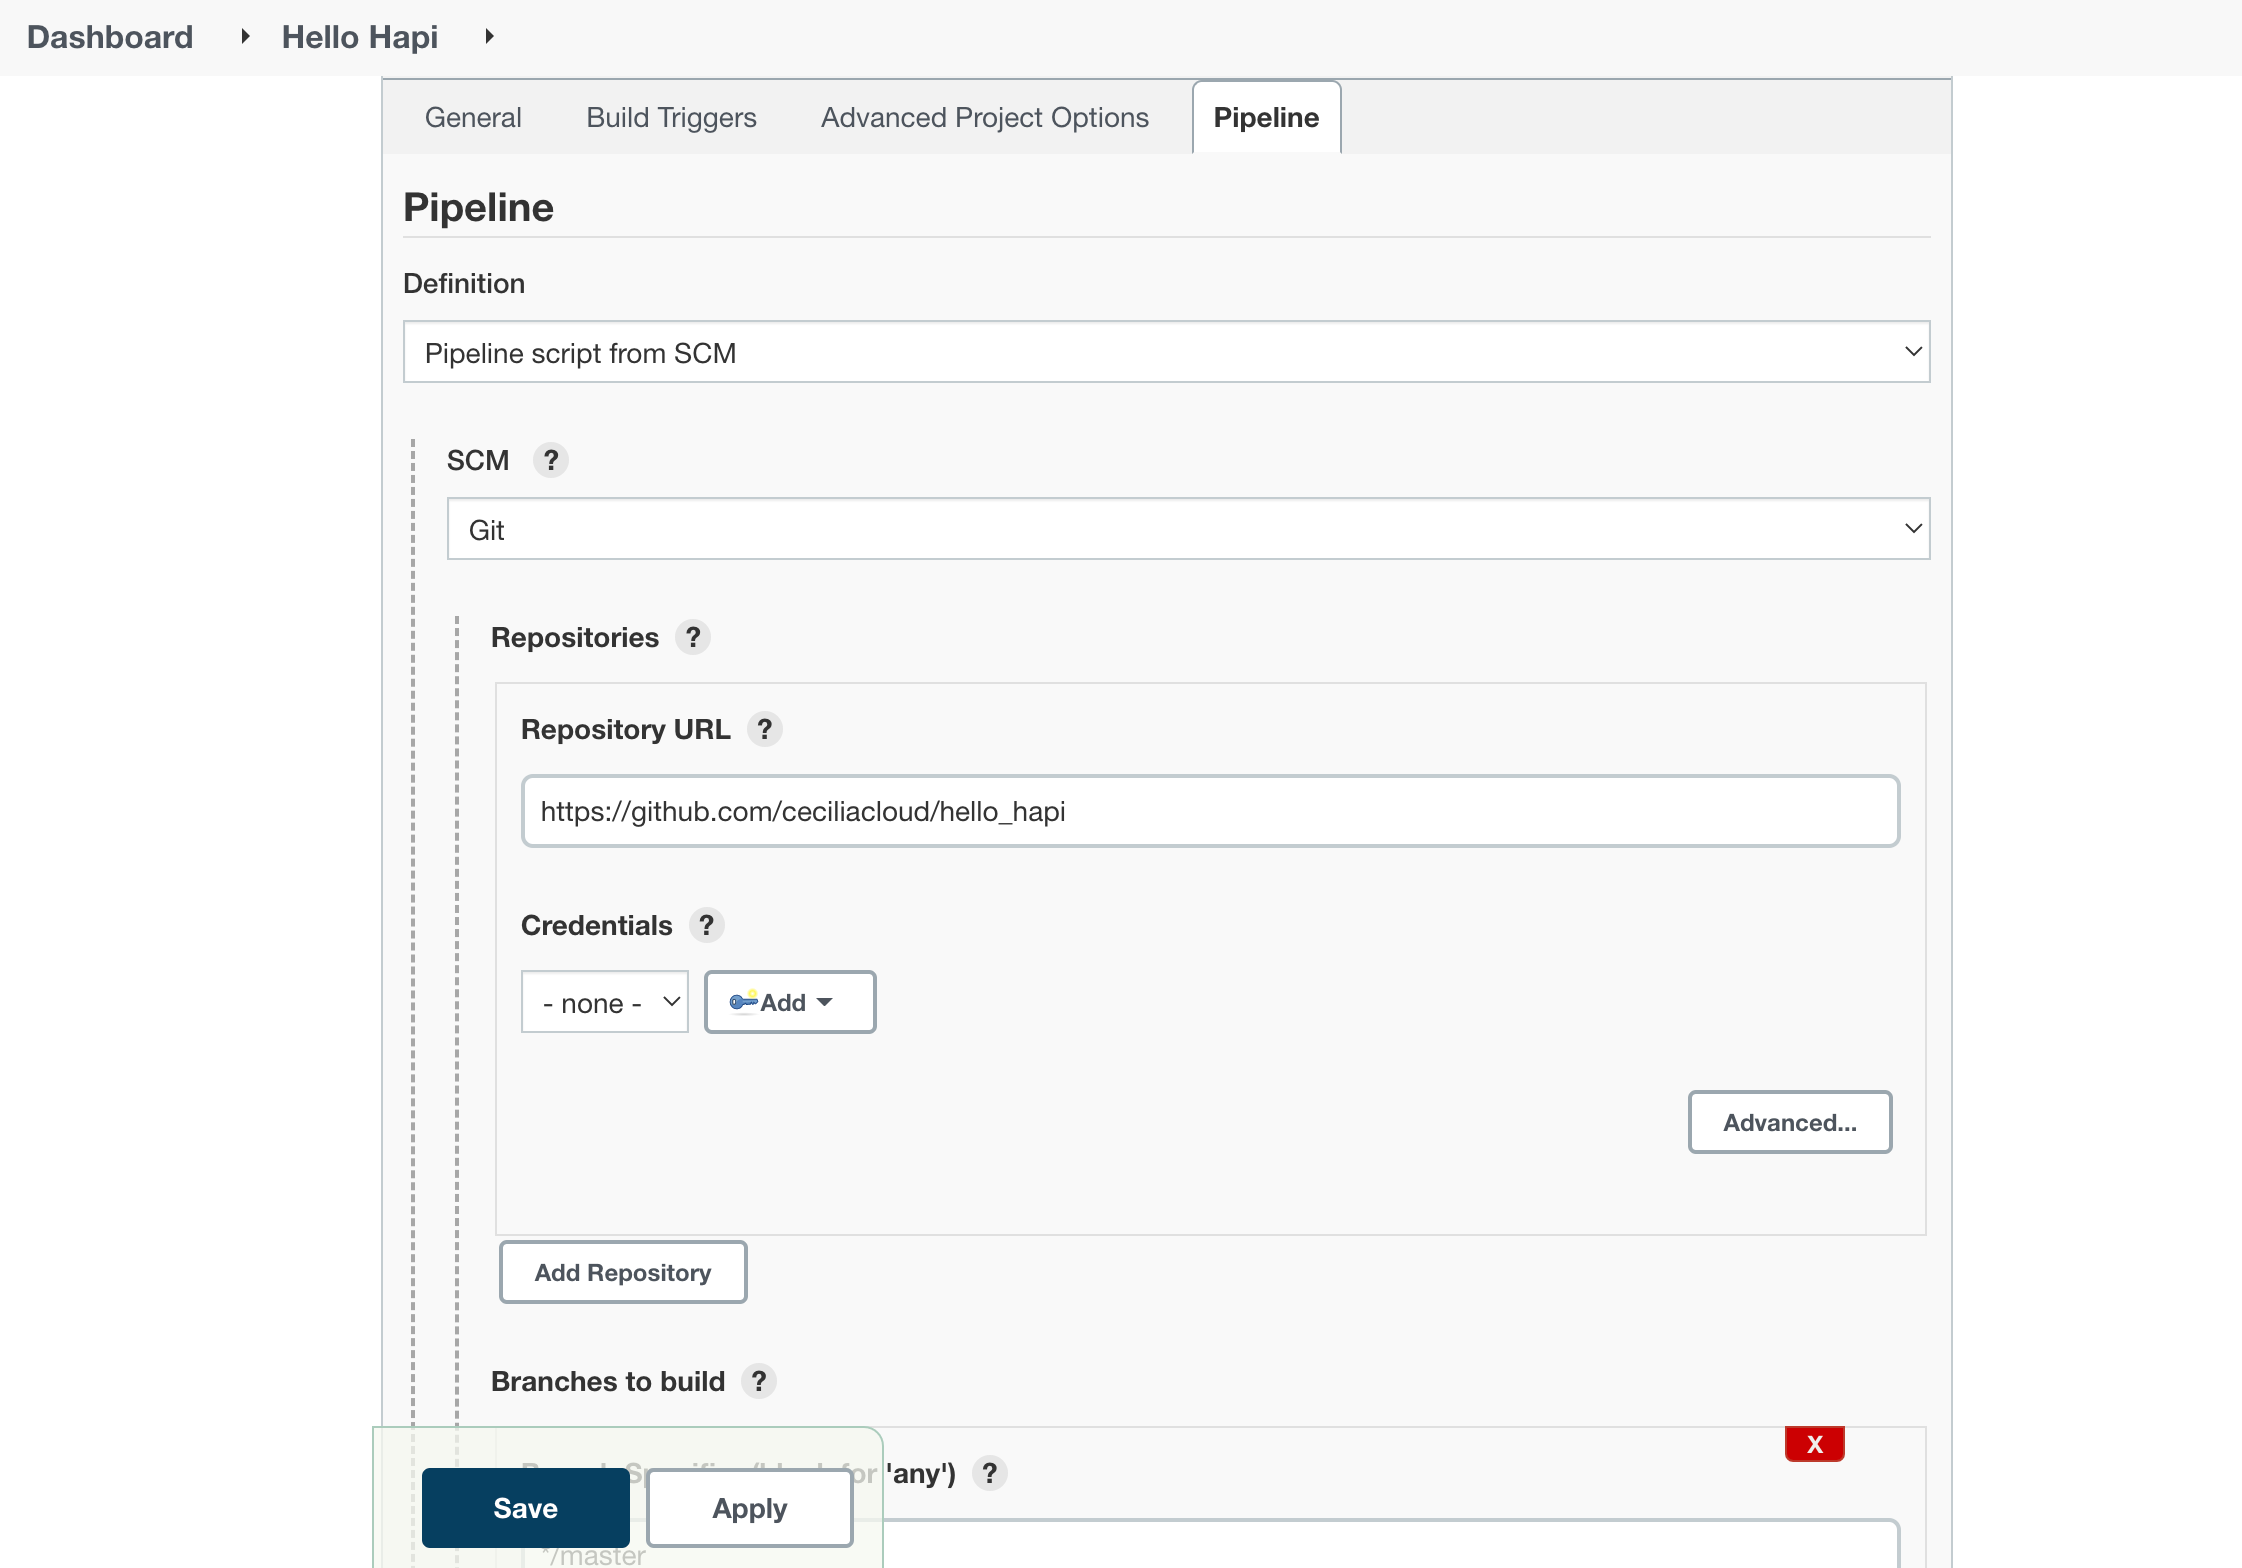
In the Pipeline section, we need to tell Jenkins to run the pipeline defined in the Jenkinsfile in our repository. Change the Definition type to Pipeline script from SCM.
In the new section that appears, choose Git in the SCM menu. In the Repository URL field that appears, enter the URL to your fork of the repository again:
When you are finished, click the Save button at the bottom of the page.
Performing an Initial Build and Configuring the Webhooks
In order to trigger Jenkins to set up the appropriate hooks, we need to perform a manual build the first time. In your pipeline’s main page, click Build Now in the left hand menu:
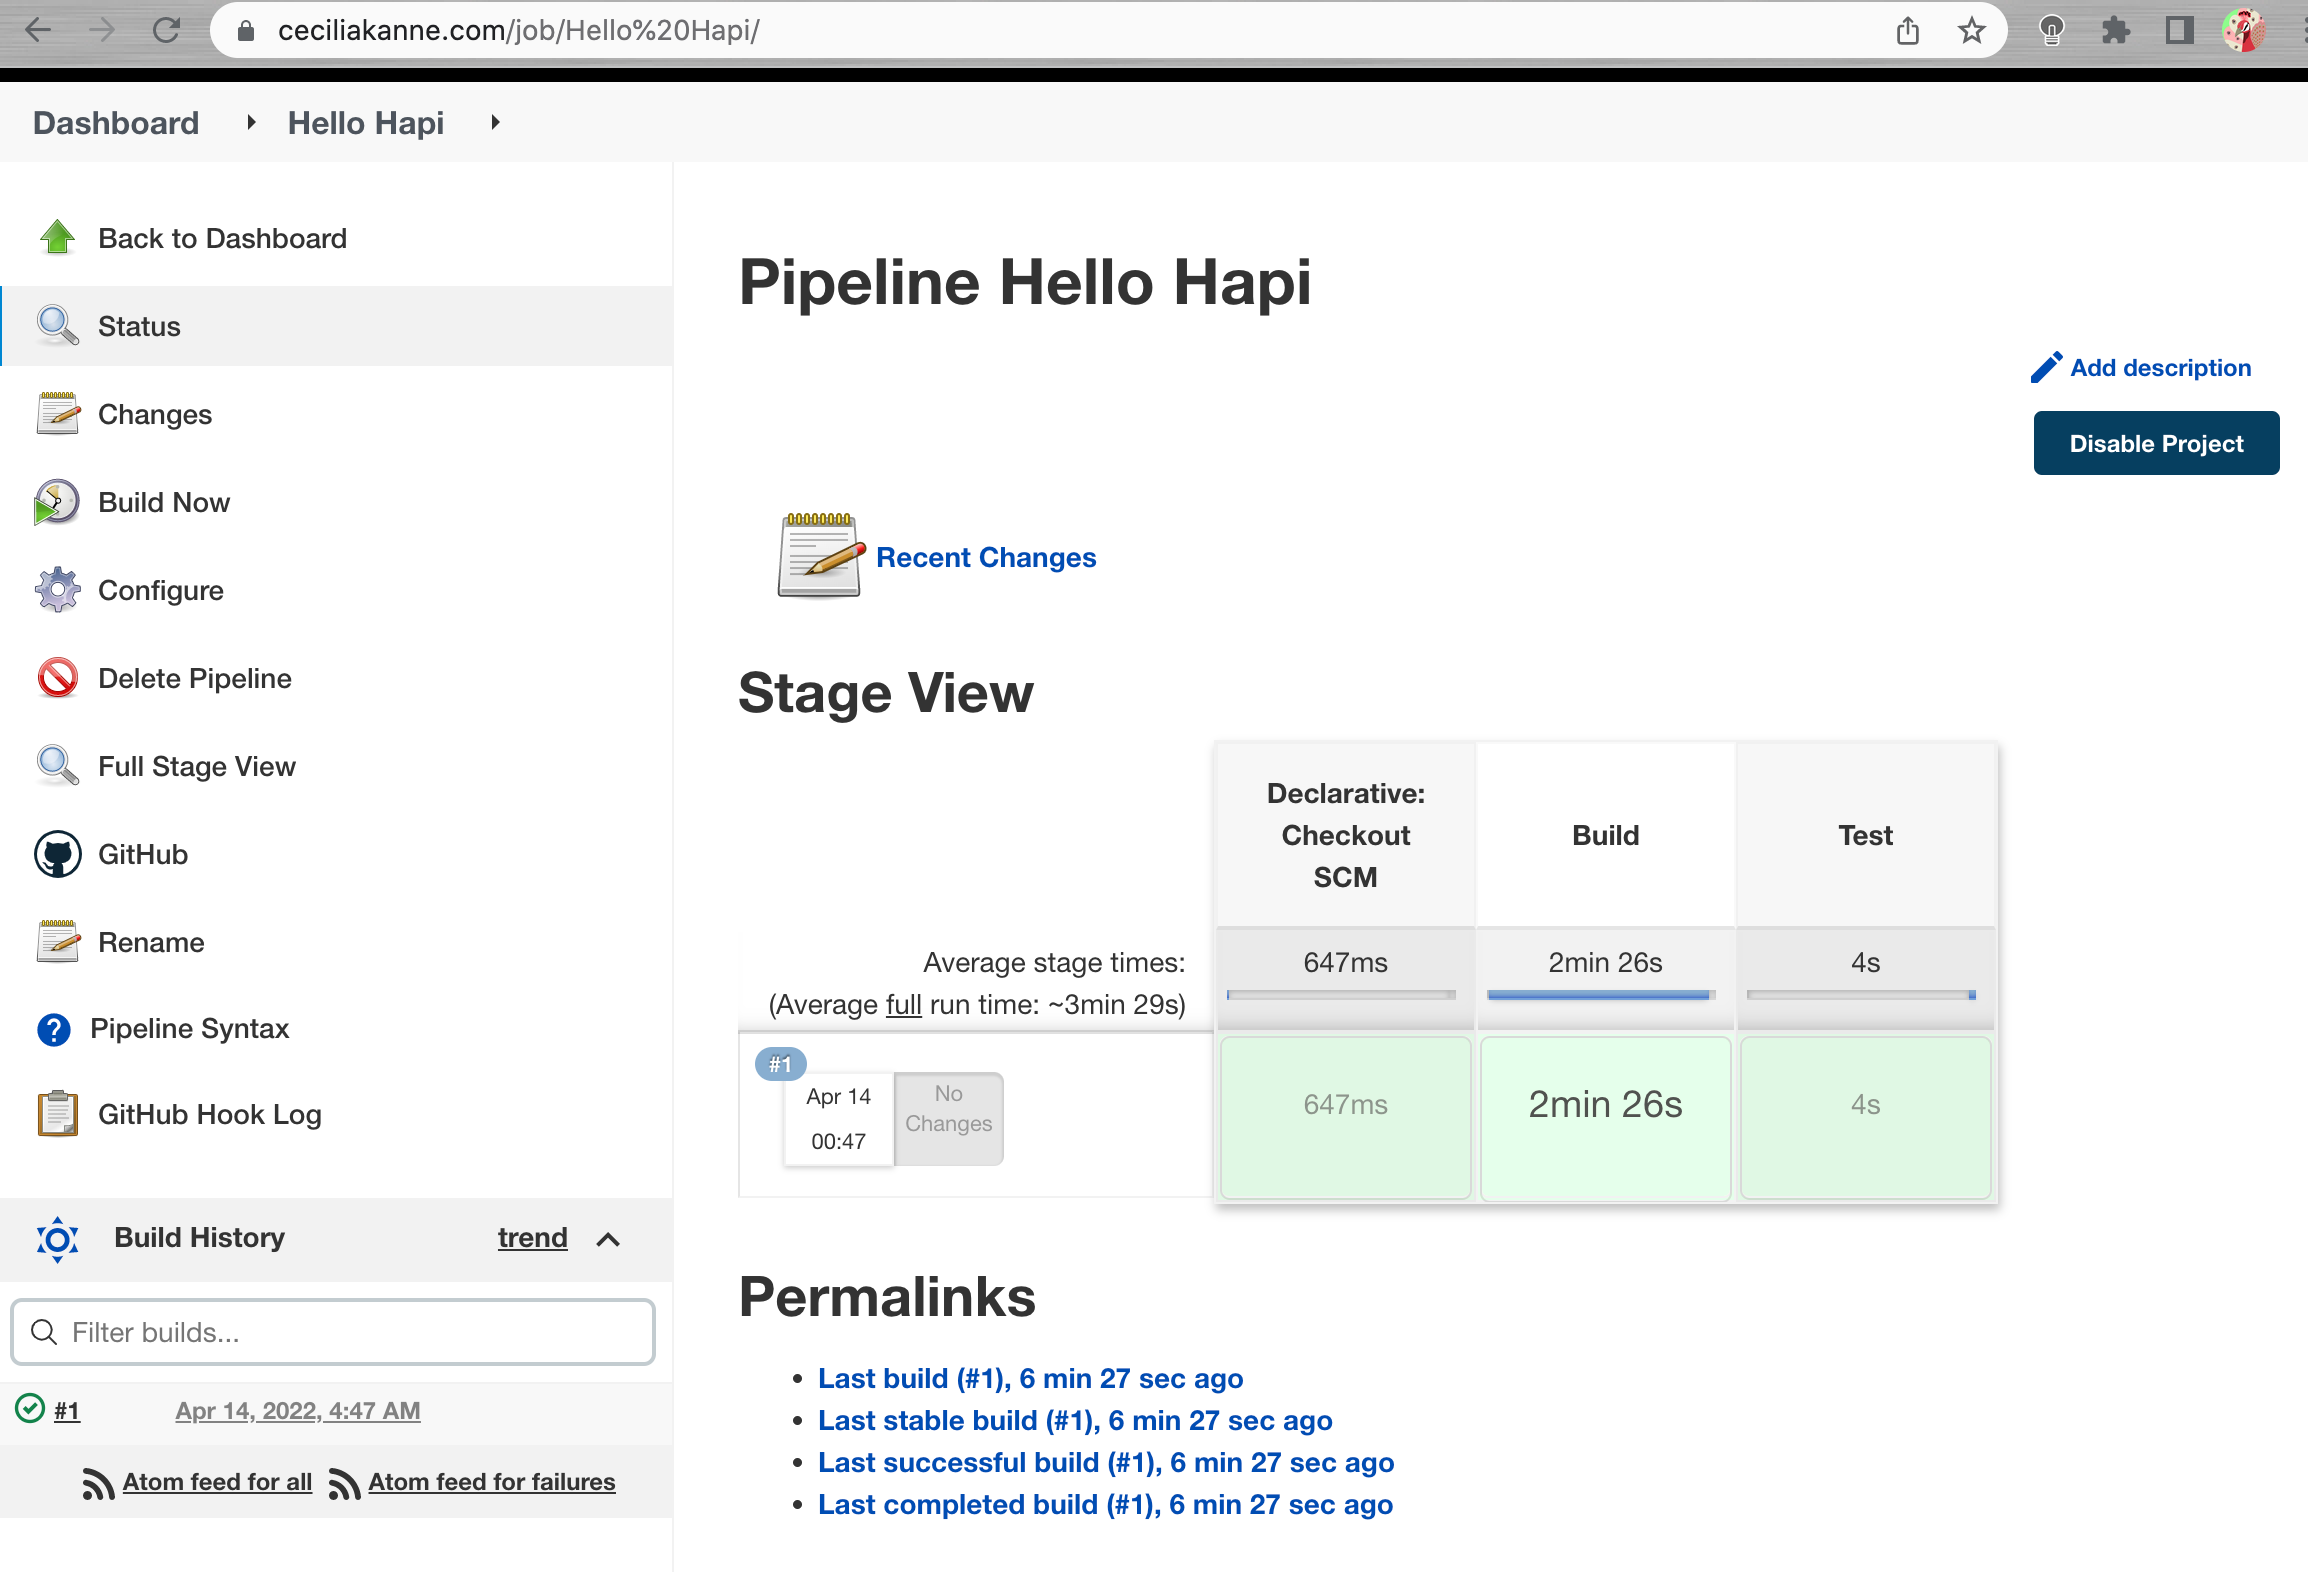
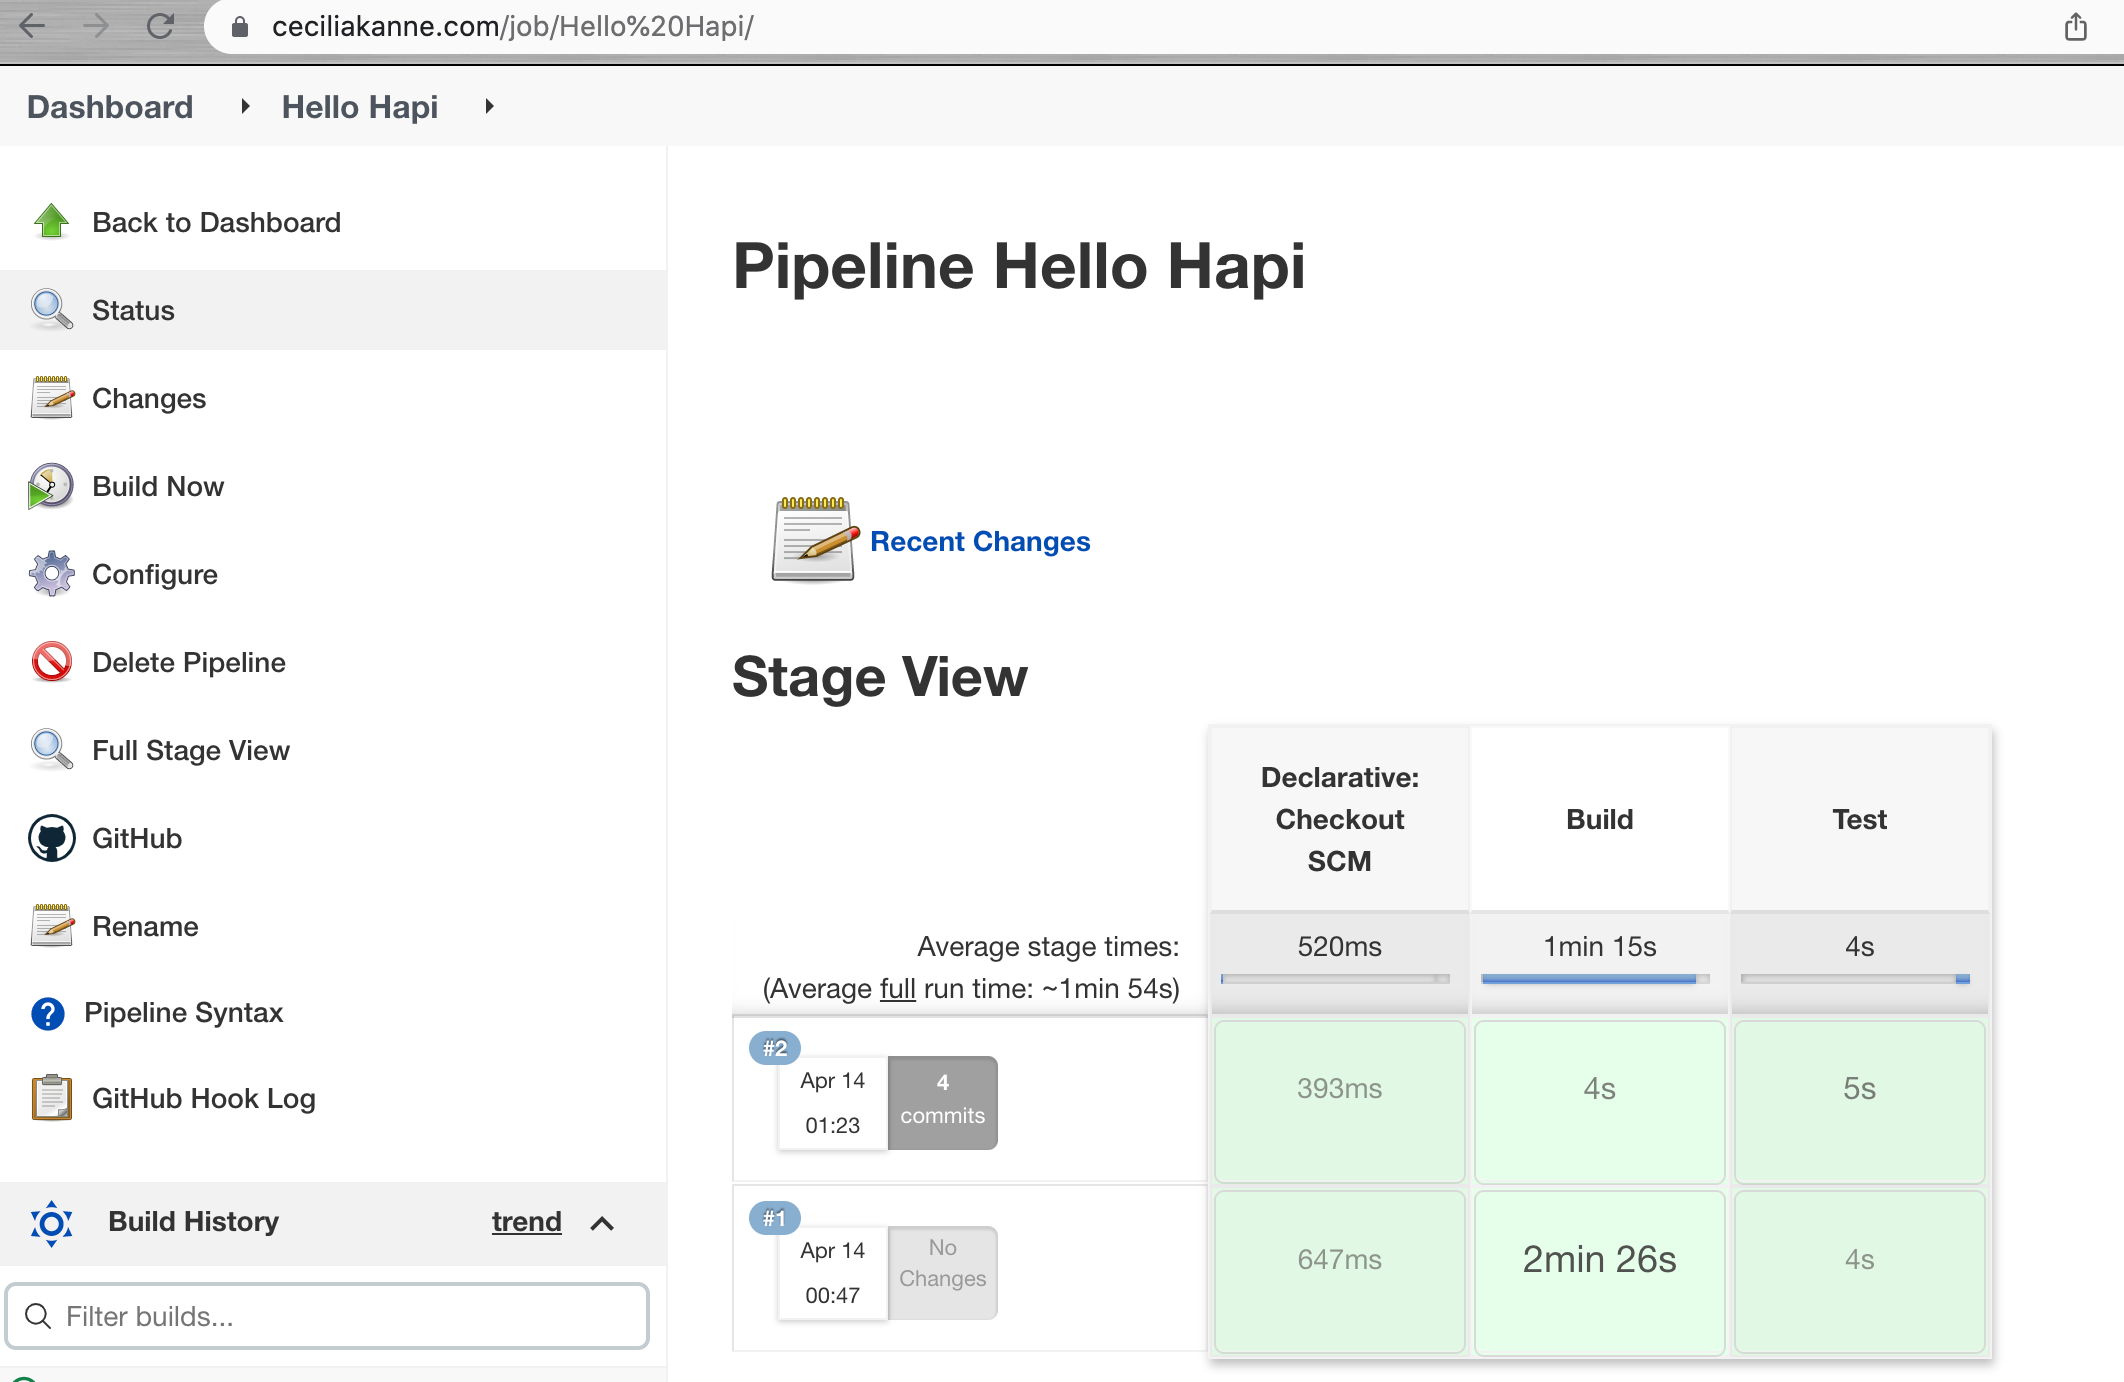
A new build will be scheduled. In the Build History box in the lower left corner, a new build should appear in a moment. Additionally, a Stage View will begin to be drawn in the main area of the interface. This will track the progress of your testing run as the different stages are completed:
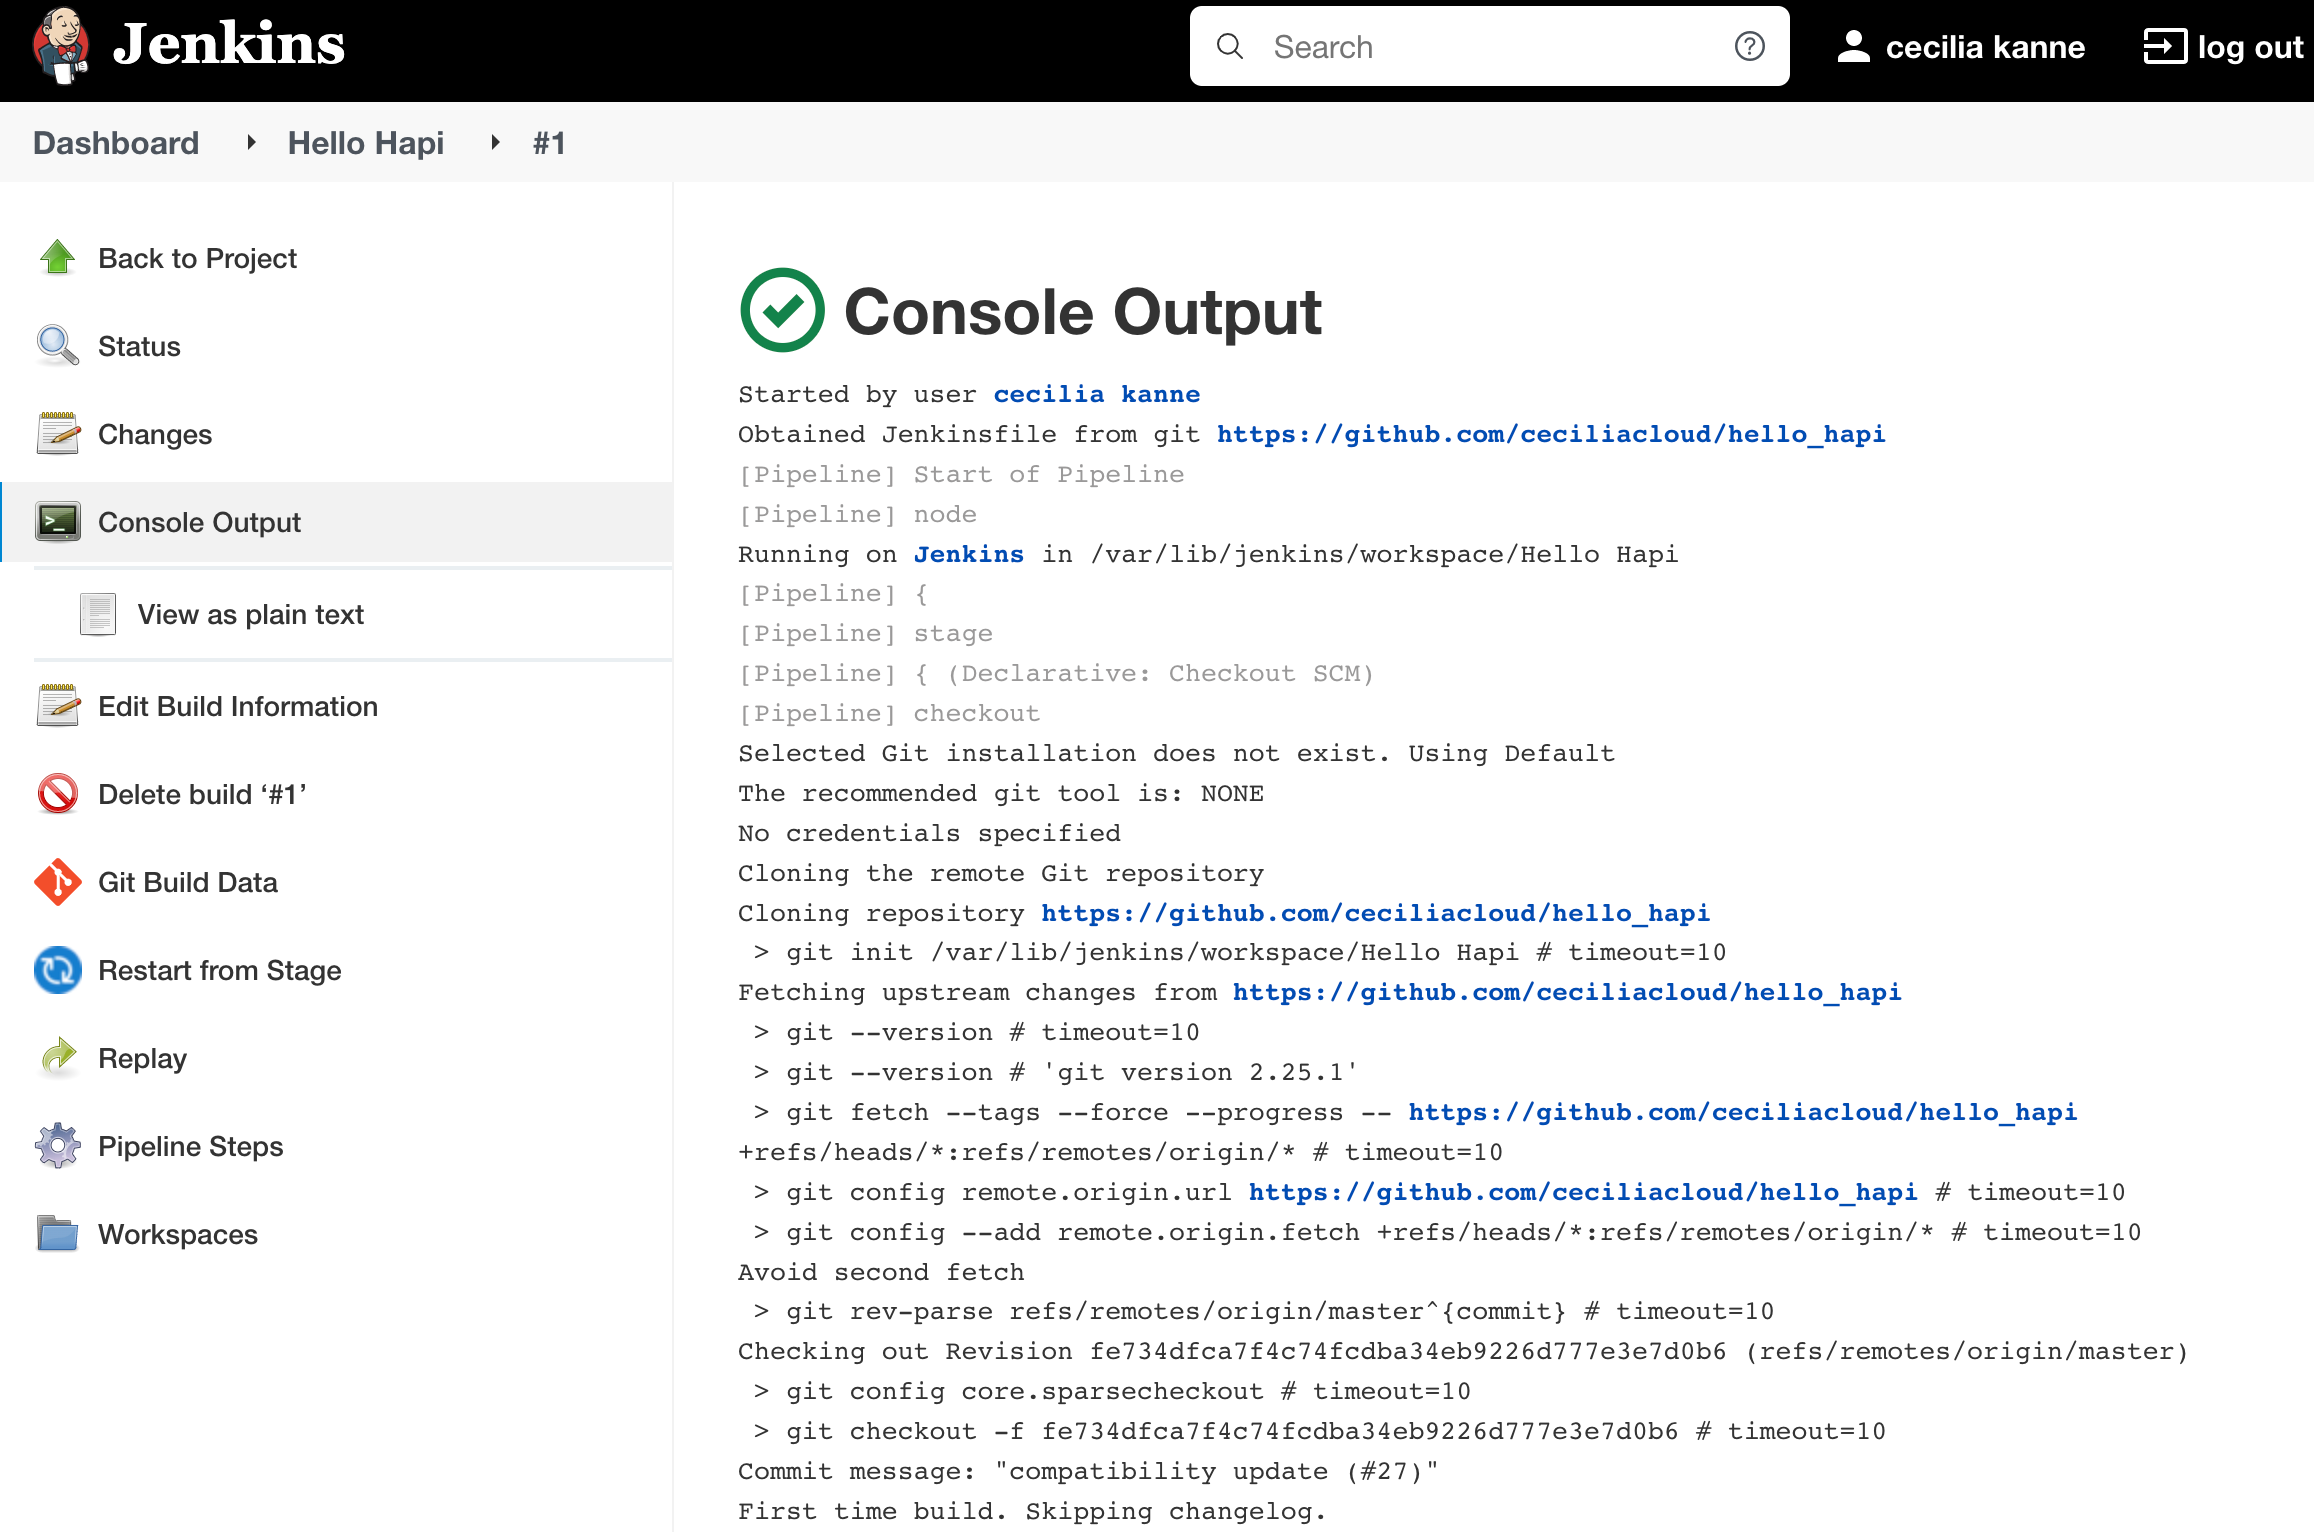
In the Build History box, click on the number associated with the build to go to the build detail page. From here, you can click the Console Output button in the left hand menu to see details of the steps that were run:
Click the Back to Project item in the left hand menu when you are finished in order to return to the main pipeline view.
Now that we’ve built the project once, we can have Jenkins create the webhooks for our project. Click Configure in the left hand menu of the pipeline:
No changes are necessary on this screen, just click the Save button at the bottom. Now that the Jenkins has information about the project from the initial build process, it will register a webhook with our GitHub project when you save the page.
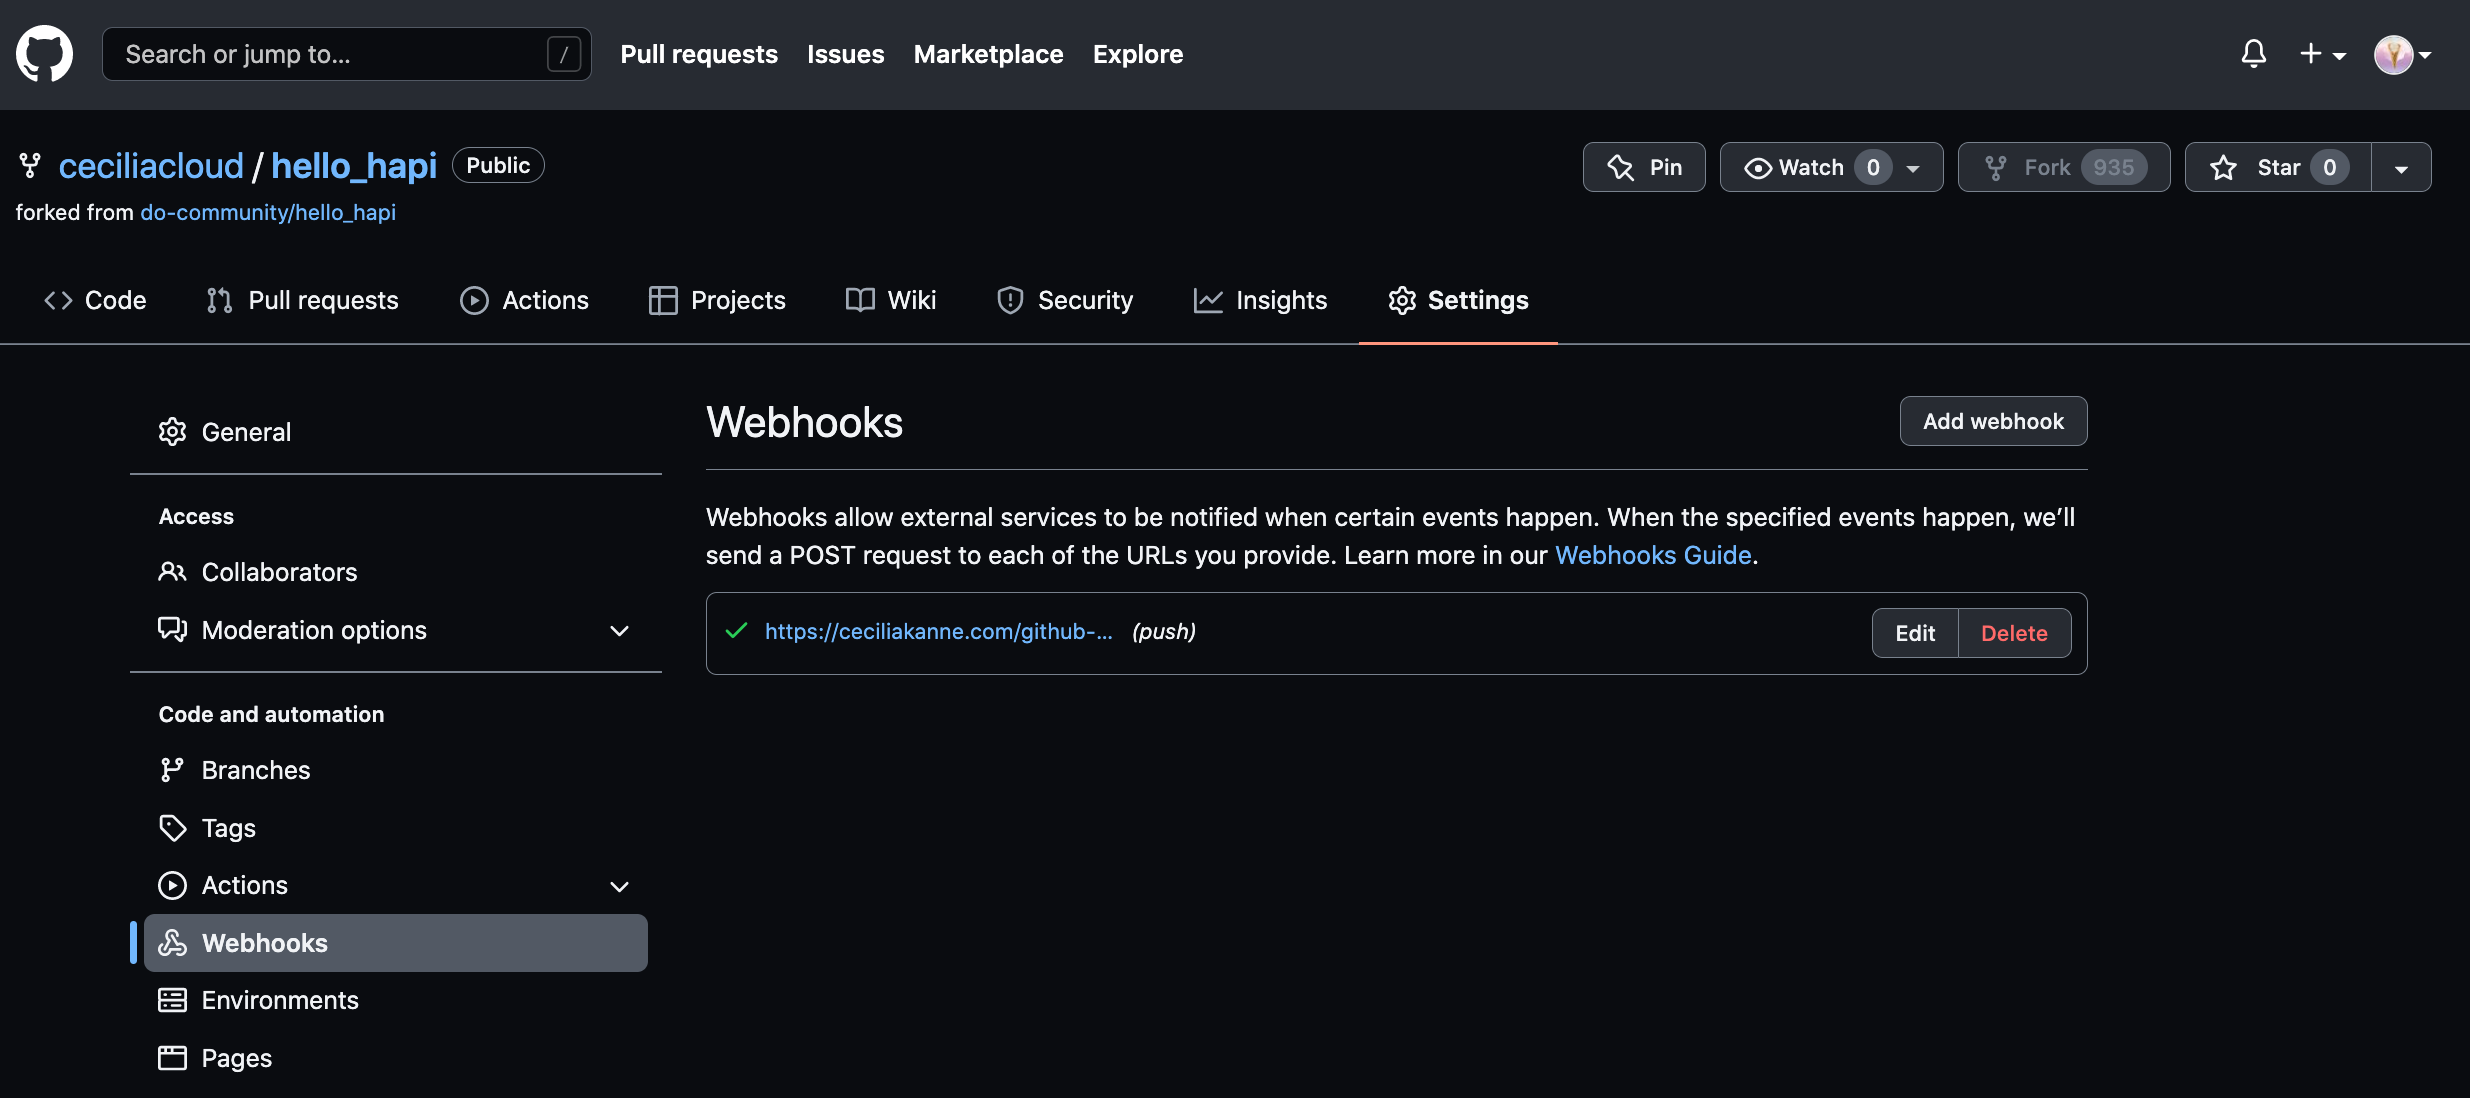
You can verify this by going to your GitHub repository and clicking the Settings button. On the next page, click Webhooks from the side menu. You should see your Jenkins server webhook in the main interface:
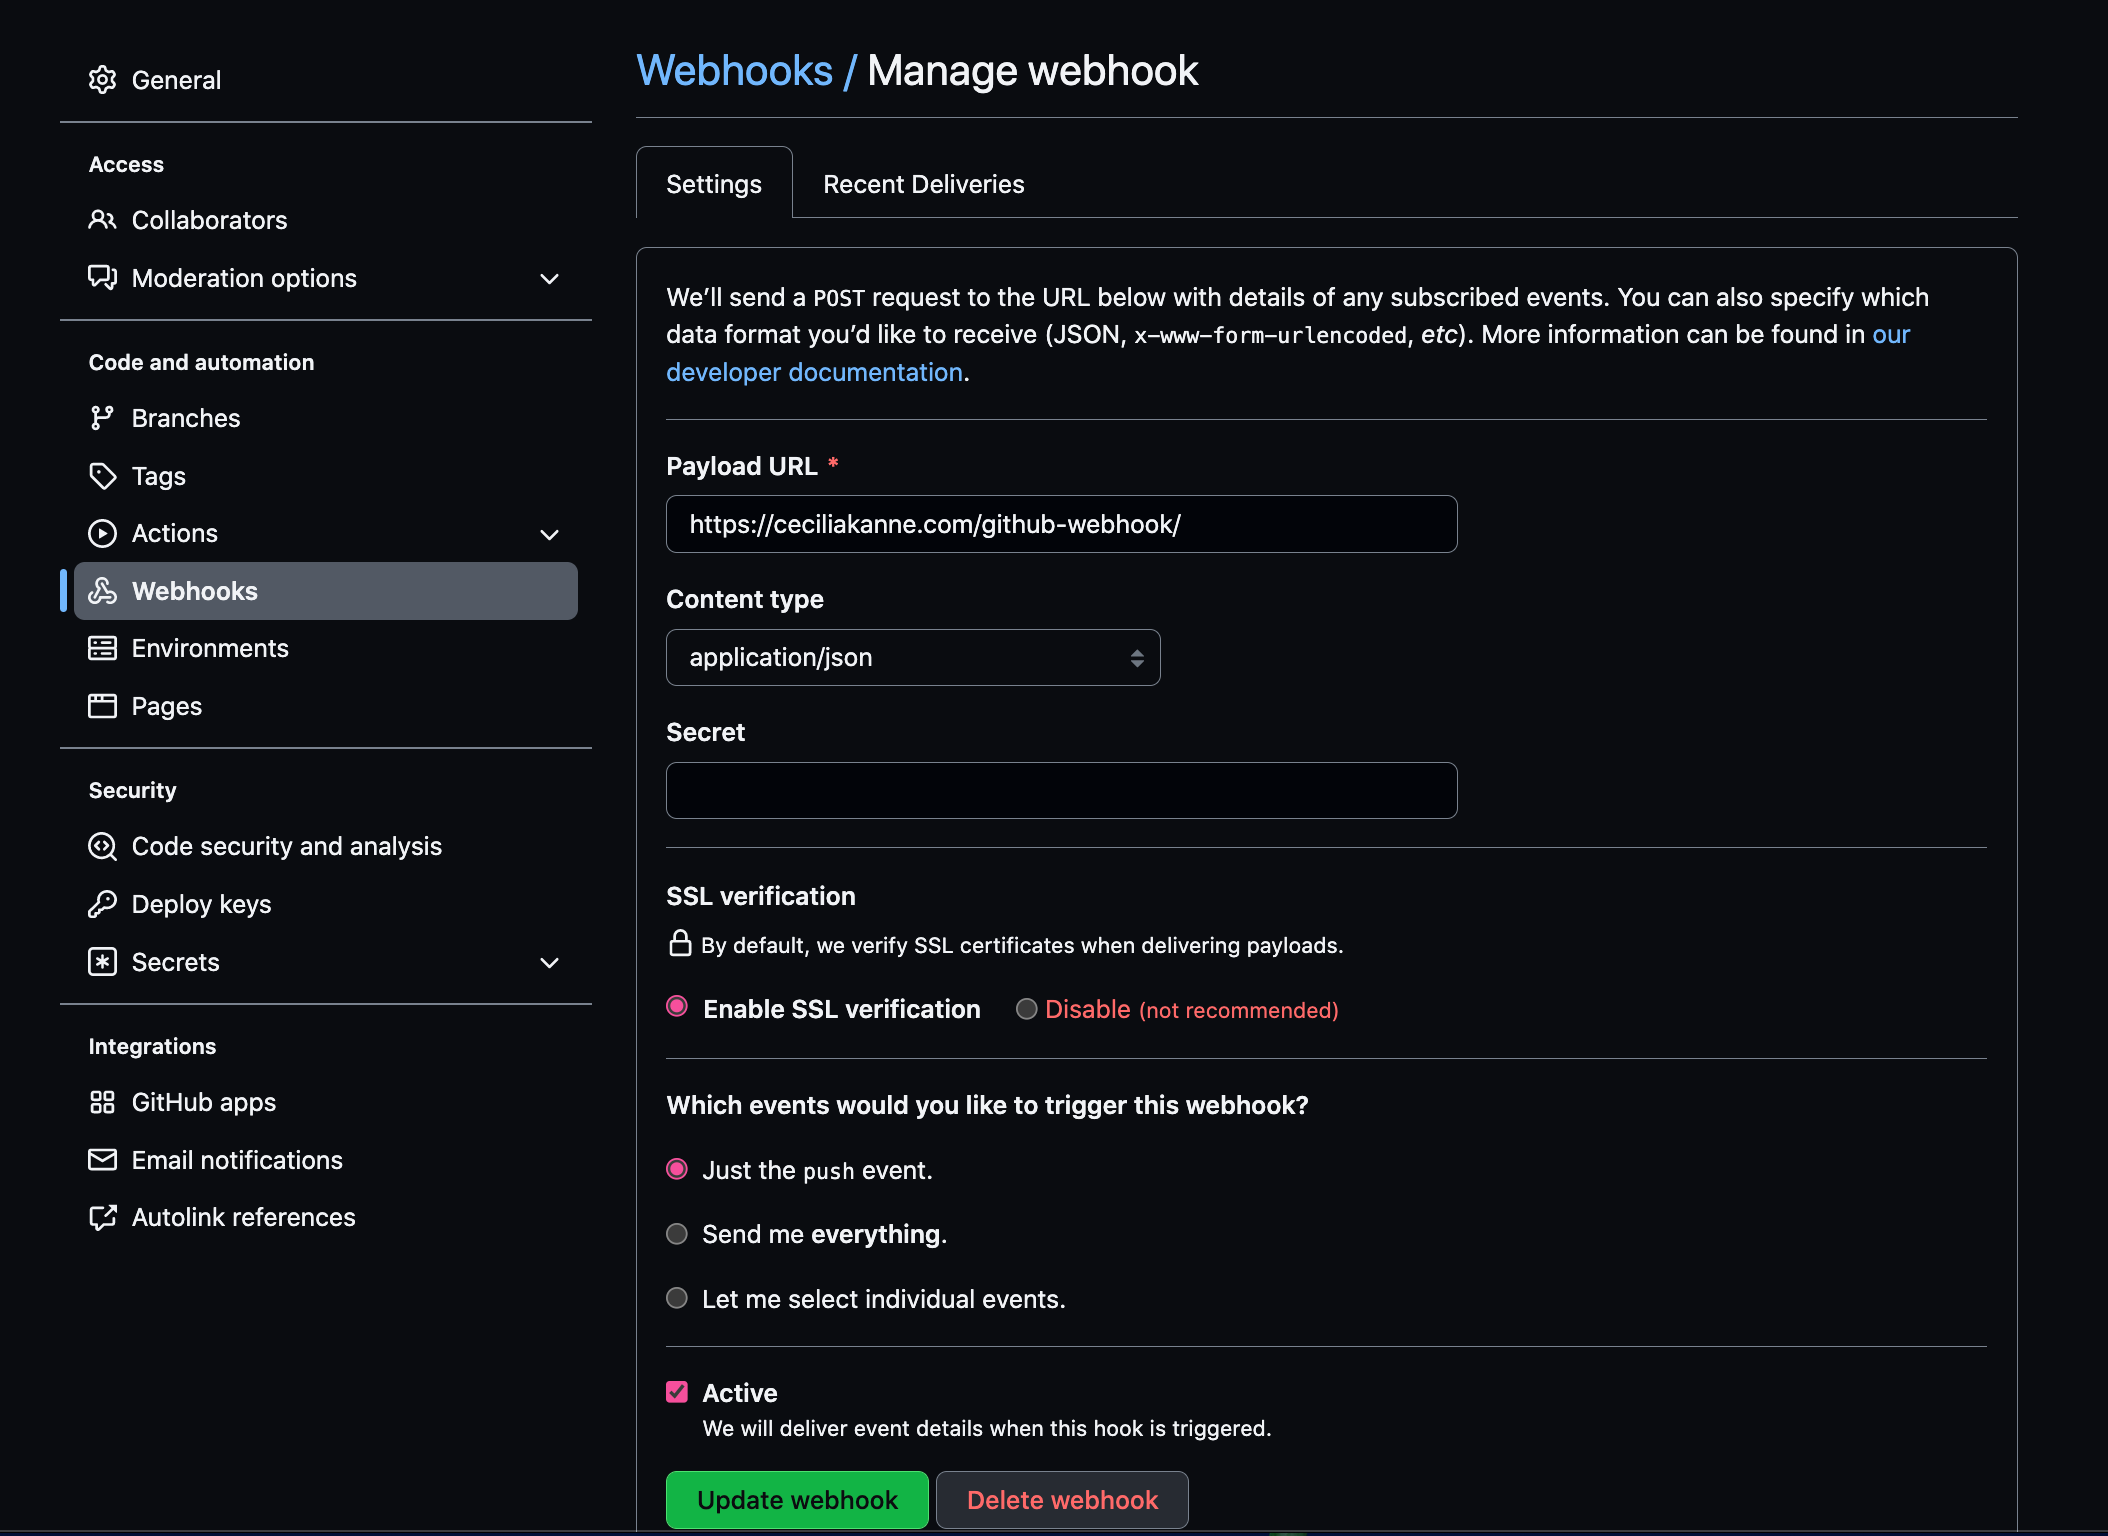
If for any reason Jenkins failed to register the hook (for example, due to upstream API changes or outages between Jenkins and Github), you can quickly add one yourself by clicking Add webhook and ensuring that the Payload URL is set to https://my-jenkins-server:8080/github-webhook and the Content type is set to application/json.
Now, when you push new changes to your repository, Jenkins will be notified. It will then pull the new code and retest it using the same procedure.
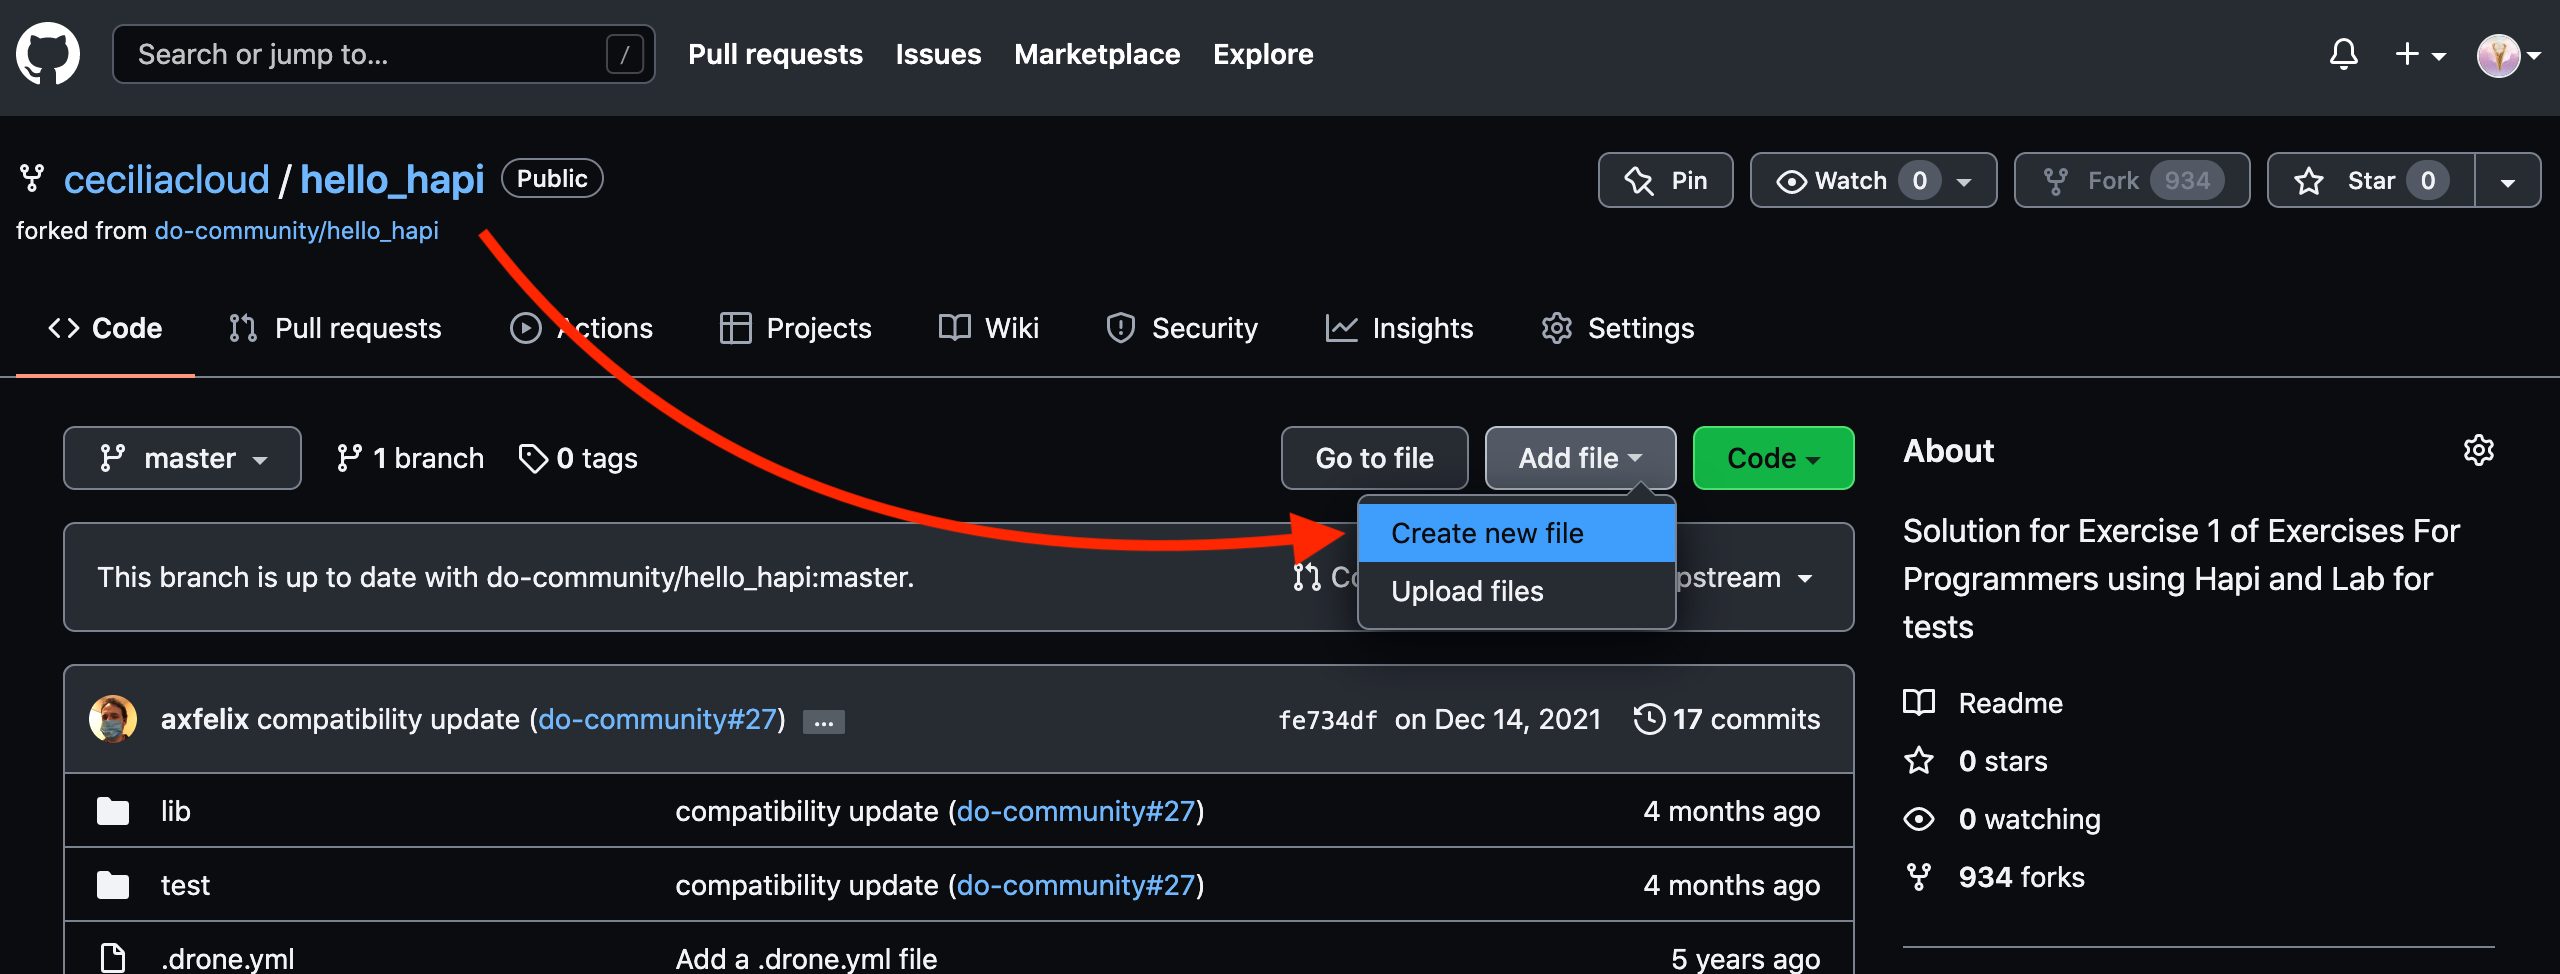
To demonstrate this, in our repository page on GitHub, click the Create new file button to the left of the green Clone or download button.
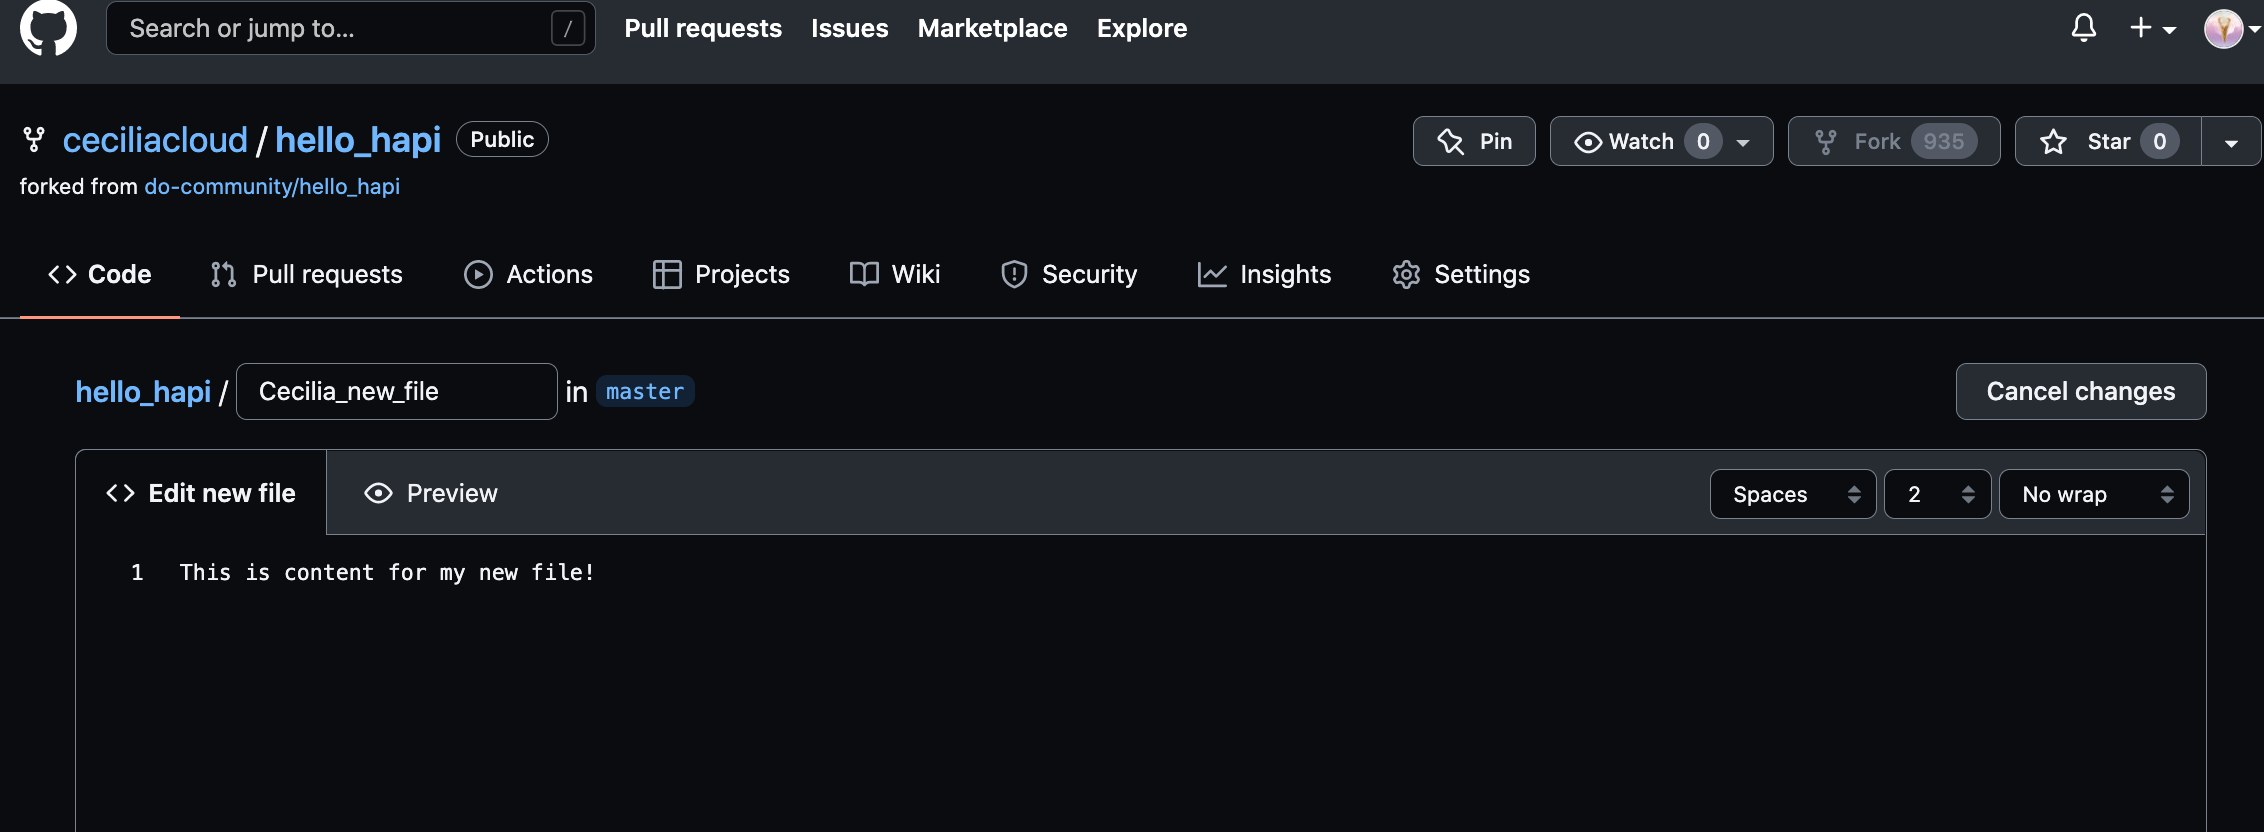
On the next page, choose a filename and some dummy contents:
Click the Commit new file button at the bottom when you are finished.
If you return to your Jenkins interface, you will see a new build automatically started:
You can kick off additional builds by making commits to a local copy of the repository and pushing it back up to GitHub!
In this section, we will terminate the resources that were created during this tutorial. This will help to avoid charges from AWS.
Navigate to the AWS management console, and terminate the EC2 instance.
Next, remove the DNS records from your domain name.
Wonderful job! Thank you for viewing my project and following along. We learned how to configure Jenkins to watch a GitHub project and automatically test any new changes that are committed. Jenkins pulled code from the repository and then ran the build and testing procedures from within isolated Docker containers. The resulting code was deployed by adding additional instructions to the same Jenkinsfile.
I hope you enjoyed it! For more details on similar projects and more, please visit my GitHub portfolio: https://github.com/ceciliacloud

