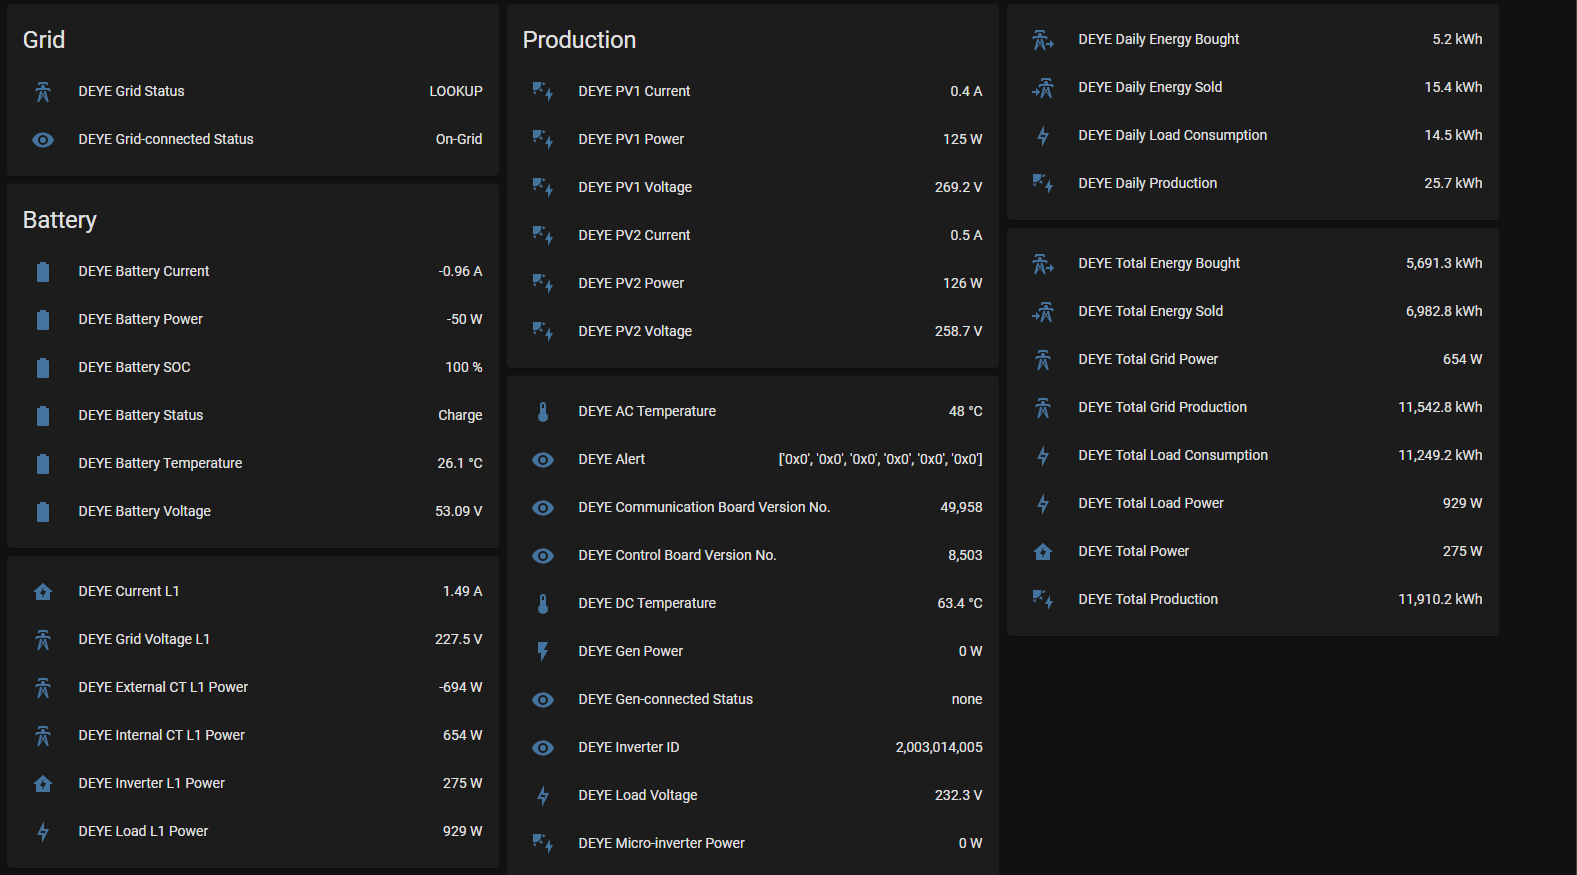
This is a Home Assistant component for interacting with Solarman data collectors used with a variety of inverters. The integration allows Home Assistant to connect in direct-mode over the local network to the collector to extract the information, and no cables are required.
It has been tested with a 5kW DEYE/SUNSYNK inverter. The collector is reported to be used in Omnik, Hosola, Goodwe, Solax, Ginlong, Samil, Sofar and Power-One Solar inverters, you may get success from any of these as well.
This component uses version 5 of the communication protocol. If your collector is older and this component does not work, try the following integration which is similar, but uses version 4 of the protocol:
https://github.com/heinoldenhuis/home_assistant_omnik_solar
This method is prefered.
For this, it is highly recomended to use the "Samba share" add-on (you will need to enable advanced mode in your user profile).
Clone or download the repo, and copy the "solarman" folder in "custom_components" to the "custom_components" folder in home assistant.
After that, the folder structure should look as follows:
custom_components
├── solarman
│   ├── __init__.py
│   ├── const.py
│   ├── manifest.json
│   ├── parameters.yaml
│   ├── parser.py
│   ├── solarman.py
│   └── sensor.py
├── {other components}
Then proceed to configuration.
- Get the IP and Serial Number to use in the configuration.
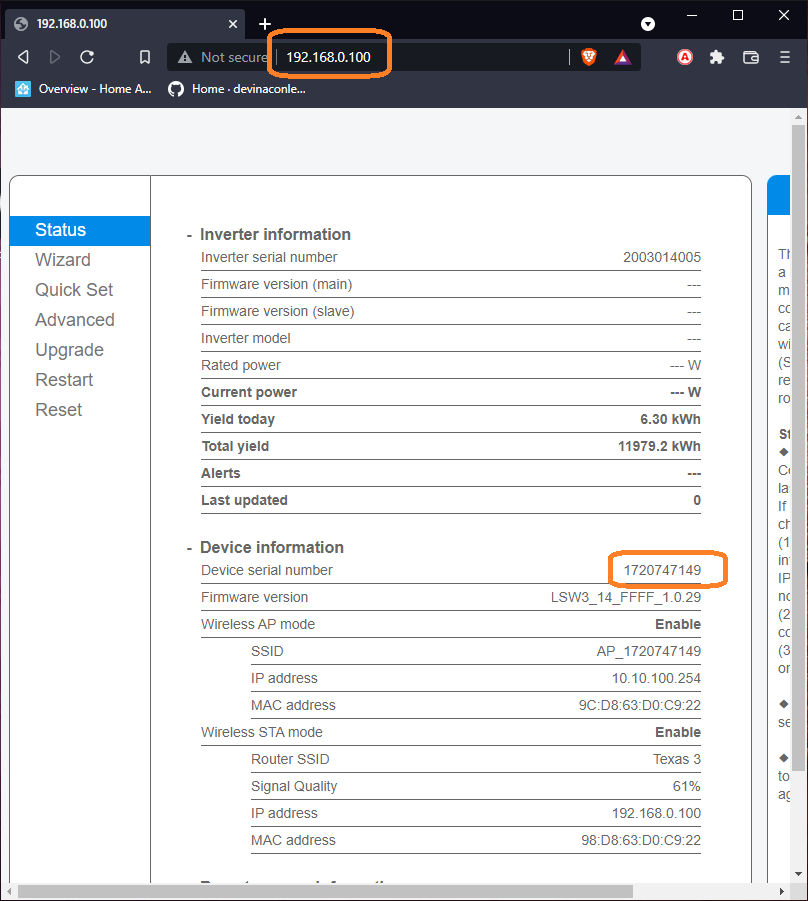
Find the internal IP of the logger on the DHCP server, and then open a browser and navigate to that address. If you are prompted for a username/password, use "admin" as username and "admin" as password.
Once logged in, expand the "Device information" and note the Device serial number, as well as the IP used.
-
Check the version of the solarman logger. If the serial number starts with 17xxxxxxx or 21xxxxxxx (protocol V5), the component should work. If not, you may need to try the component for V4 of the protocol mentioned above.
-
On your DHCP server, reserve the IP for the WiFi data logger so that it will not change.
-
In your configuration.yaml file, add the solarman platform under "sensor"
sensor:
  - platform: solarman
    name: DEYE
    inverter_host: 192.168.0.100
    inverter_port: 8899
    inverter_serial: 1720747149
    inverter_mb_slaveid: 1
    scan_interval: 30
lookup_file: sofar_lsw3.yaml| Parameter | Description |
|---|---|
| name | This name will be prefixed to all parameter values (change as you like) |
| inverter_host | The IP address of the data logger |
| inverter_port | Always 8899 |
| inverter_serial | The serial number of the data collector |
| inverter_mb_slaveid | The Modbus Slave ID of the inverter. Defaults to 1 |
| scan_interval | Time in seconds between refresh intervals |
| lookup_file | ** The yaml file to use for parameter-definition |
** This parameter is optional, and if not specified will revert to parameters.yaml. If you customize the parameters, create a lookup file "customize.yaml" and refer to it so that it will not be overwritten during updates.
| Lookup File | Inverters supported | Notes |
|---|---|---|
| parameters.yaml | DEYE/Sunsynk/SolArk Hybrid inverters | used when no lookup specified |
| deye_string.yaml | DEYE/Sunsynk/SolArk String inverters | eg. SUN-4/5/6/7/8/10/12K-G03 Plus |
| sofar_lsw3.yaml | SOFAR Inverters |
Once the component is running, it will add the following entities to Home Assistant

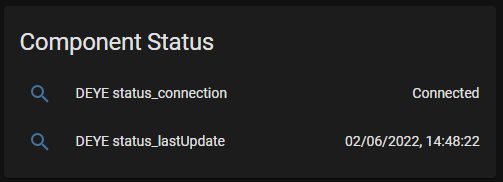
Apart from the inverter-parameters, it will also add status entities to view the status of the solarman component.

The entities includes the device classes to enable it to be added to the Energy Dashboard introduced with Home Assistant Core 2021.8.
To configure the energy dashboard with the infirmation provided by this component, see configuring energy dashboard
This integration was tested agains the DEYE 5kW inverter, and it is possible that the parameter-definitions for other inverters may differ. If you want to try your hand at it, refer to customizing parameters.yaml
