SHOU-Ceres 浙软2023夏令营基础软件与智能软件分营
本项目是基于Unikraft的一个实验项目,目的是掌握使用Unikraft并理解部分源码,并可以在此基础上做一部分扩展。
.
├── MySolution ——任务一的Unikraft官方实验的解决方案
├── libvirtdir ——任务二的Libvirt配置文件
└── README.md ——项目设计文档
- 完成Unikraft社区的Session练习,已完成Session 1,2,4
- 阅读并理解线程调度模块源码,说明它的整体架构和原理
阅读源码,可以看到Unikraft的库文件分为了两个部分,一部分在unikraft/lib/posix-process中,另一部分在unikraft/lib/uksched中,对应了框架图中位于不同层的库结构。其中posix-process库是基于posix标准的进程库,uksched库是Unikraft的线程调度库,使开发者既可以直接使用posix标准的进程库统一标准的接口,也可以根据UniKraft的特性使用uksched库进行线程调度,从而提升了开发的灵活性。
uksched库的主要结构如下:
uksched ├── Config.uk
├── Makefile.uk
├── exportsyms.uk
├── extra.ld
├── include
│ └── uk
│ ├── sched.h
│ ├── sched_impl.h
│ ├── tcb_impl.h
│ ├── thread.h
│ ├── wait.h
│ └── wait_types.h
├── sched.c
└── thread.c
其中,Config.uk和Makefile.uk是Unikraft的配置文件,exportsyms.uk是导出符号的配置文件,extra.ld是链接脚本,include文件夹中是头文件,sched.c和thread.c是库的源文件。可以看到uksched库主要实现的是调度和线程的相关功能,其中sched.c中实现了调度器的初始化、线程的创建、调度、退出等功能,thread.c中实现了线程的创建、线程的退出、阻塞、唤醒等功能,而线程锁、信号量等功能放在了其他依赖库中,如uklock等。
uksched库中包含了两个重要的数据结构uk_thread和uk_sched,分别对应了线程和调度器。
struct uk_thread {
	struct ukarch_ctx    ctx;	/**< Architecture context */
	struct ukarch_ectx *ectx;	/**< Extended context (FPU, VPU, ...) */
	uintptr_t           tlsp;	/**< Current active TLS pointer */
	__uptr            uktlsp;	/**< Unikraft TLS pointer */

	UK_TAILQ_ENTRY(struct uk_thread) queue;
	uint32_t flags;
	__snsec wakeup_time;
	struct uk_sched *sched;

	struct {
		struct uk_alloc *t_a;
		void            *stack;
		struct uk_alloc *stack_a;
		void            *uktls;
		struct uk_alloc *uktls_a;
	} _mem;				/**< Associated allocs (internal!) */
	uk_thread_gc_t _gc_fn;		/**< Extra gc function (internal!) */
	void *_gc_argp;			/**< Argument for gc fn (internal!) */

	uk_thread_dtor_t dtor;		/**< User provided destructor */
	void *priv;			/**< Private field, free for use */

	const char *name;		/**< Reference to thread name */
	UK_TAILQ_ENTRY(struct uk_thread) thread_list;
};- ctx: 线程的上下文,包含了线程的寄存器信息,用于线程的切换
- ectx: 扩展上下文,包含了线程的浮点寄存器信息,用于浮点运算的保存
- tlsp: 线程的TLS指针,用于线程的TLS访问
- uktlsp: Unikraft的TLS指针,用于Unikraft的TLS访问
- queue: 线程队列,用于线程的调度
- flags: 线程的标志位,用于线程的状态标记
- wakeup_time: 线程的唤醒时间,用于线程的调度
- sched: 线程所属的调度器,用于线程的调度
- _mem: 线程的内存分配器,用于线程的内存管理
- _gc_fn: 线程的垃圾回收函数,用于线程的垃圾回收
- _gc_argp: 线程的垃圾回收函数参数,用于线程的垃圾回收
- dtor: 线程的析构函数,用于线程的析构
- priv: 线程的私有字段,用于线程的私有数据
- name: 线程的名称,用于线程的标识
- thread_list: 线程列表,用于线程的管理
struct uk_sched {
	uk_sched_yield_func_t yield;

	uk_sched_thread_add_func_t      thread_add;
	uk_sched_thread_remove_func_t   thread_remove;
	uk_sched_thread_blocked_func_t  thread_blocked;
	uk_sched_thread_woken_func_t    thread_woken;

	uk_sched_start_t sched_start;

	/* internal */
	bool is_started;
	struct uk_thread_list thread_list;
	struct uk_thread_list exited_threads;
	struct uk_alloc *a;       /**< default allocator for struct uk_thread */
	struct uk_alloc *a_stack; /**< default allocator for stacks */
	struct uk_alloc *a_uktls; /**< default allocator for TLS+ectx */
	struct uk_sched *next;
};- yield: 调度器的调度函数,用于线程的调度
- thread_add: 调度器的线程添加函数,用于线程的添加
- thread_remove: 调度器的线程移除函数,用于线程的移除
- thread_blocked: 调度器的线程阻塞函数,用于线程的阻塞
- thread_woken: 调度器的线程唤醒函数,用于线程的唤醒
- sched_start: 调度器的启动函数,用于调度器的启动
- is_started: 调度器的启动标志位,用于调度器的状态标记
- thread_list: 调度器的线程列表,用于线程的管理
- exited_threads: 调度器的退出线程列表,用于线程的管理
- a: 调度器的内存分配器,用于调度器的内存管理
- a_stack: 调度器的栈内存分配器,用于调度器的栈内存管理
- a_uktls: 调度器的TLS内存分配器,用于调度器的TLS内存管理
- next: 调度器的下一个调度器,用于调度器的管理
uklock库:线程锁,用于线程的同步, 位于unikraft/lib/uklock中,包含了互斥锁、读写锁、信号量等功能。posix-futex库:posix标准的同步机制库,位于unikraft/lib/posix-futex中,用于实现标准接口方便应用程序的迁移。ukschedcoop库:协作式调度库,位于unikraft/lib/ukschedcoop中,用于实现协作式调度。
根据任务书的内容进行操作,完成了Session 1的内容。
仿真和虚拟两种模式下运行效率对比:


可以看到,用户态运行时间基本相同,而内核态运行时间差别较大。猜测是程序较为简单,仿真模式下是将运行架构的CPU指令对应映射到主机架构上,而虚拟模式是用主机的硬件模拟运行架构的硬件和交互。因此在简单程序下,虚拟模式的内核态运行时间较长。
运行在kvm上的x86架构的启动程序位置在 unikraft/plat/kvm/x86/multiboot.c,首先使用ukplat_bootinfo_get函数检索引导信息的指针,然后将multiboot_info中的命令行和加载程序加载到引导信息中,接着将multiboot_info中的模块和内存映射范围加入内存区域列表中,最后调用unikraft/plat/kvm/x86/setup.c中的_ukplat_entry进行平台启动。
在setup.c中,_ukplat_entry函数首先对控制台、中断向量表、CPU、中断控制器、命令行进行了初始化,然后分配引导堆栈,并为系统设置了内存,打印引导信息,之后进行SMP、系统调用的初始化(如果系统支持的话),最后将引导堆栈切换到刚才分配的堆栈,并调用_ukplat_entry2函数。在_ukplat_entry2中,调用boot.c中的ukplat_entry_argp开始系统的启动,并传递命令行参数。
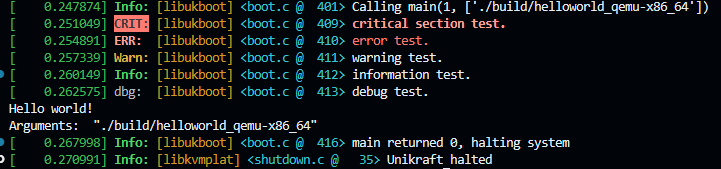
在boot.c中,完成系统的启动。完成系统启动后在 409 行,rc = main(argc, argv);运行主程序。
不同等级内核消息如下:
| 构建方式 | build目录空间 | image所占空间 |
|---|---|---|
| nolibc + kraft | 18M | 140K |
| nolibc + make | 19M | 140K |
| newlibc + kraft | 364M | 696K |
| newlibc + make | 364M | 696K |
删除Config.uk后,重新配置和重新构建都没有报错,配置时无应用配置选项,构建完成后运行程序为没有选择应用配置的结果。
基准测试结果如下:


基准测试结果如下:

分步骤移植Libvirt的支持,首先完成Helloworld的移植,然后移植Session 1中的Store Strings。最后,跑通Unikraft上的Nginx。
迁移过程中遇到了诸多问题。
-
在Github的Codespace中无法使用systemctl,且无root权限。故,将项目重新迁移到虚拟机中进行libvirt的环境配置。
-
虚拟机中通过
virsh创建,一直有无法连接到kvm的错误,但是使用qemu-system-x86_64是可以运行镜像包的。经过检查和搜索发现,虚拟机未开启CPU的虚拟化设置,打开设置并重新运行虚拟机。之后又遇到了镜像包的权限问题,修改libvirt配置文件,将运行镜像所用用户修改为root,最后运行成功完成了迁移初体验。
踩了很多坑,最开始作为磁盘设备进行配置,需要对原目录进行打包处理,打包为qcow2格式的磁盘镜像文件。
<devices>
    <disk type='file' device='disk'>
        <driver name='qemu' type='qcow2'/>
        <source file='/home/ceres/CodingRepository/UnikraftLab/libvirtdir/storestrings/fs0.qcow2'/>
        <target dev='vda' bus='virtio'/>
    </disk>
</deices>
这样处理导致了Unikraft找不到文件系统,可能需要对源程序进行修改,或者挂载到相应位置,没有找到参考解决方法,无果。
然后,有尝试使用附加命令行进行手动文件系统的挂在。
<os>
    <commandline xmlns="http://libvirt.org/schemas/domain/qemu/1.0">
        <arg value="-fsdev"/>
        <arg value="local,id=myid,path=/home/ceres/CodingRepository/UnikraftLab/libvirtdir/storestrings/fs0,security_model=none"/>
        <arg value="-device"/>
        <arg value="virtio-9p-pci,fsdev=myid,mount_tag=rootfs,disable-modern=on,disable-legacy=off"/>
    </commandline>
</os>
效果依旧不理想,且有无virto设备支持的报错。
最后,经过搜索发现,因为镜像包中已经打包了9pfs文件系统,可以直接通过文件系统的配置来实现简单的文件系统挂载。
<devices>
<filesystem type='mount' accessmode='passthrough'>
<source dir='/home/ceres/CodingRepository/UnikraftLab/libvirtdir/storestrings/fs0'/>
<target dir='rootfs'/>
</filesystem>
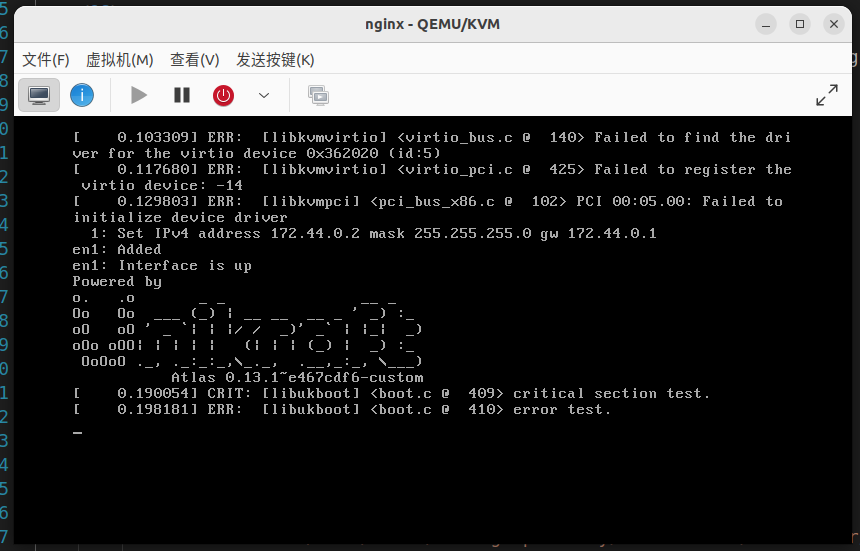
<devices>至此,完成了文件系统的挂载,并成功在Libvirt中运行起了Unikraft版本的Storestrings,但是网络未配置成功,无法进行网络通信。于是又根据官方参考文档,使用附加命令行进行网络配置。
<os>
    <cmdline>
        <arg>netdev.ipv4_addr=172.44.0.2 </arg>
        <arg>netdev.ipv4_gw_addr=172.44.0.1 </arg>
        <arg>netdev.ipv4_subnet_mask=255.255.255.0 --</arg>
    </cmdline>
</os>
完成了网络配置,通过 nc 172.44.0.2 1234 测试可以进行网络通信,完成了Storestrings的移植。
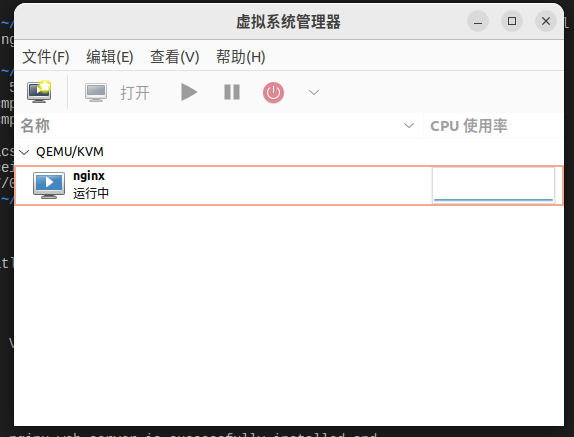
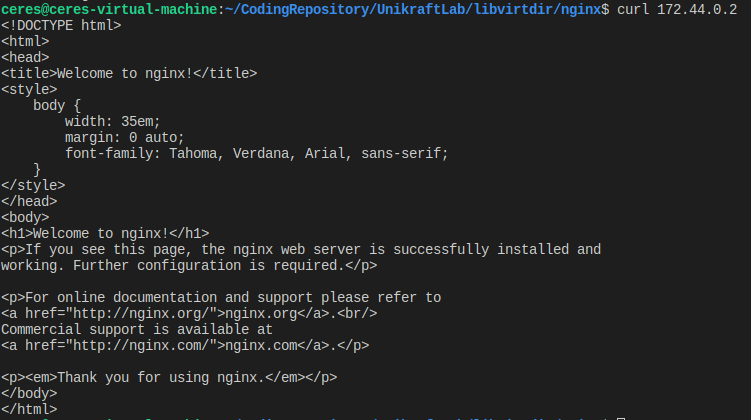
将Storestrings的配置文件复制过来,修改内核文件名和相应路径,修改内核的启动参数,完成了Nginx的移植。运行效果如下。

- 虚拟系统管理器
- 浏览器中效果