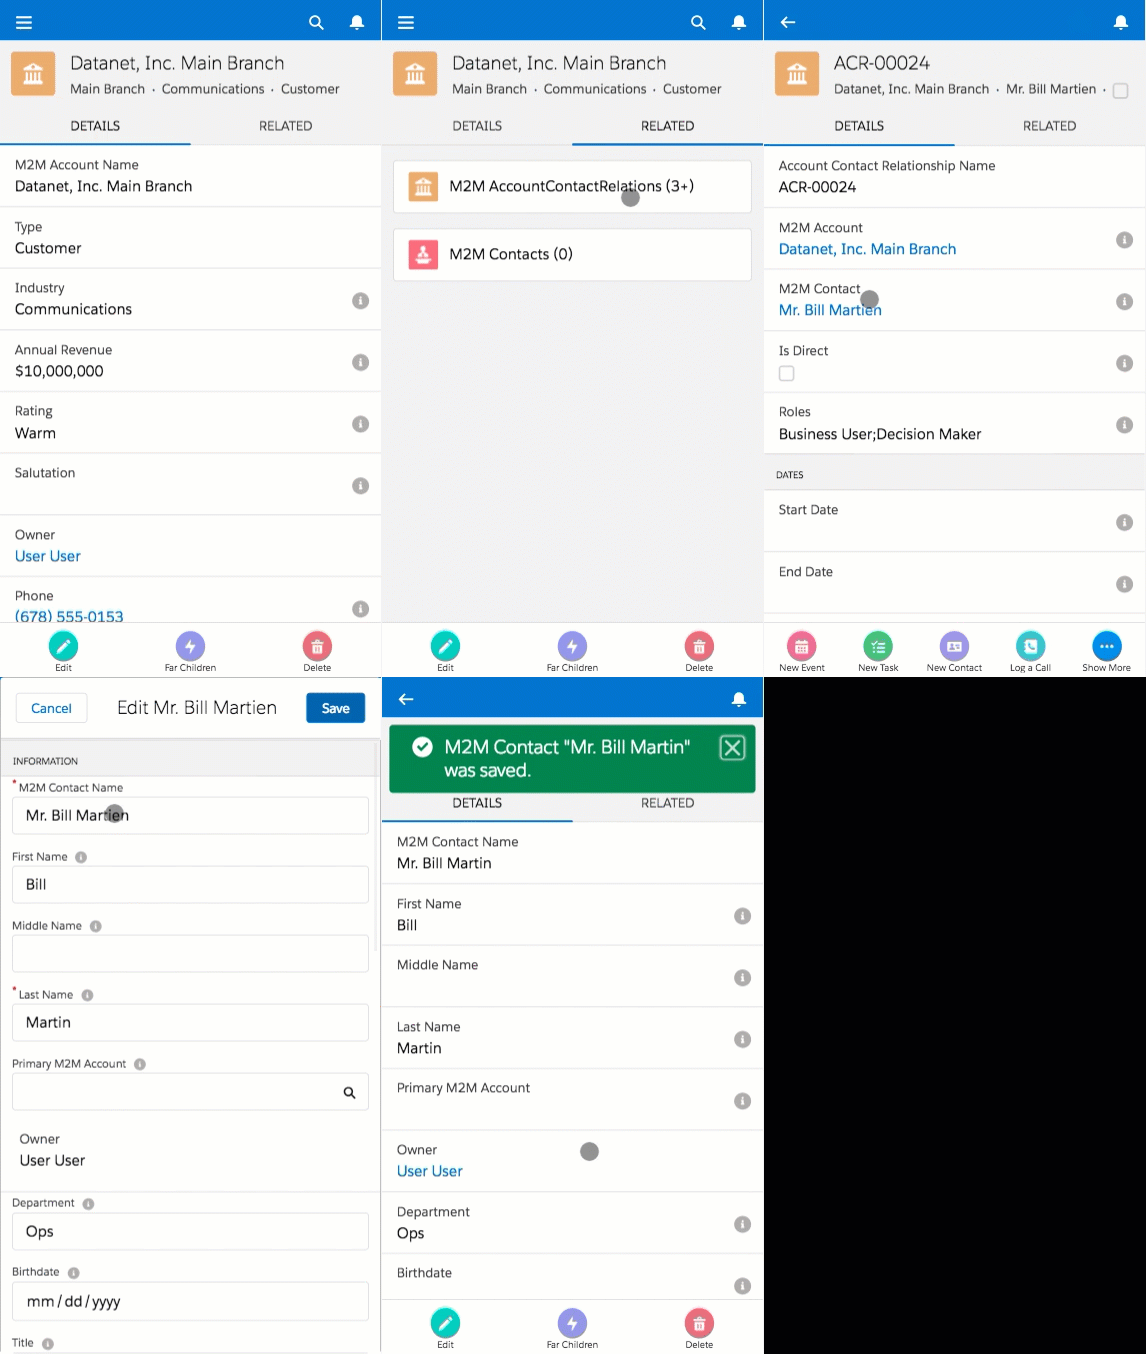
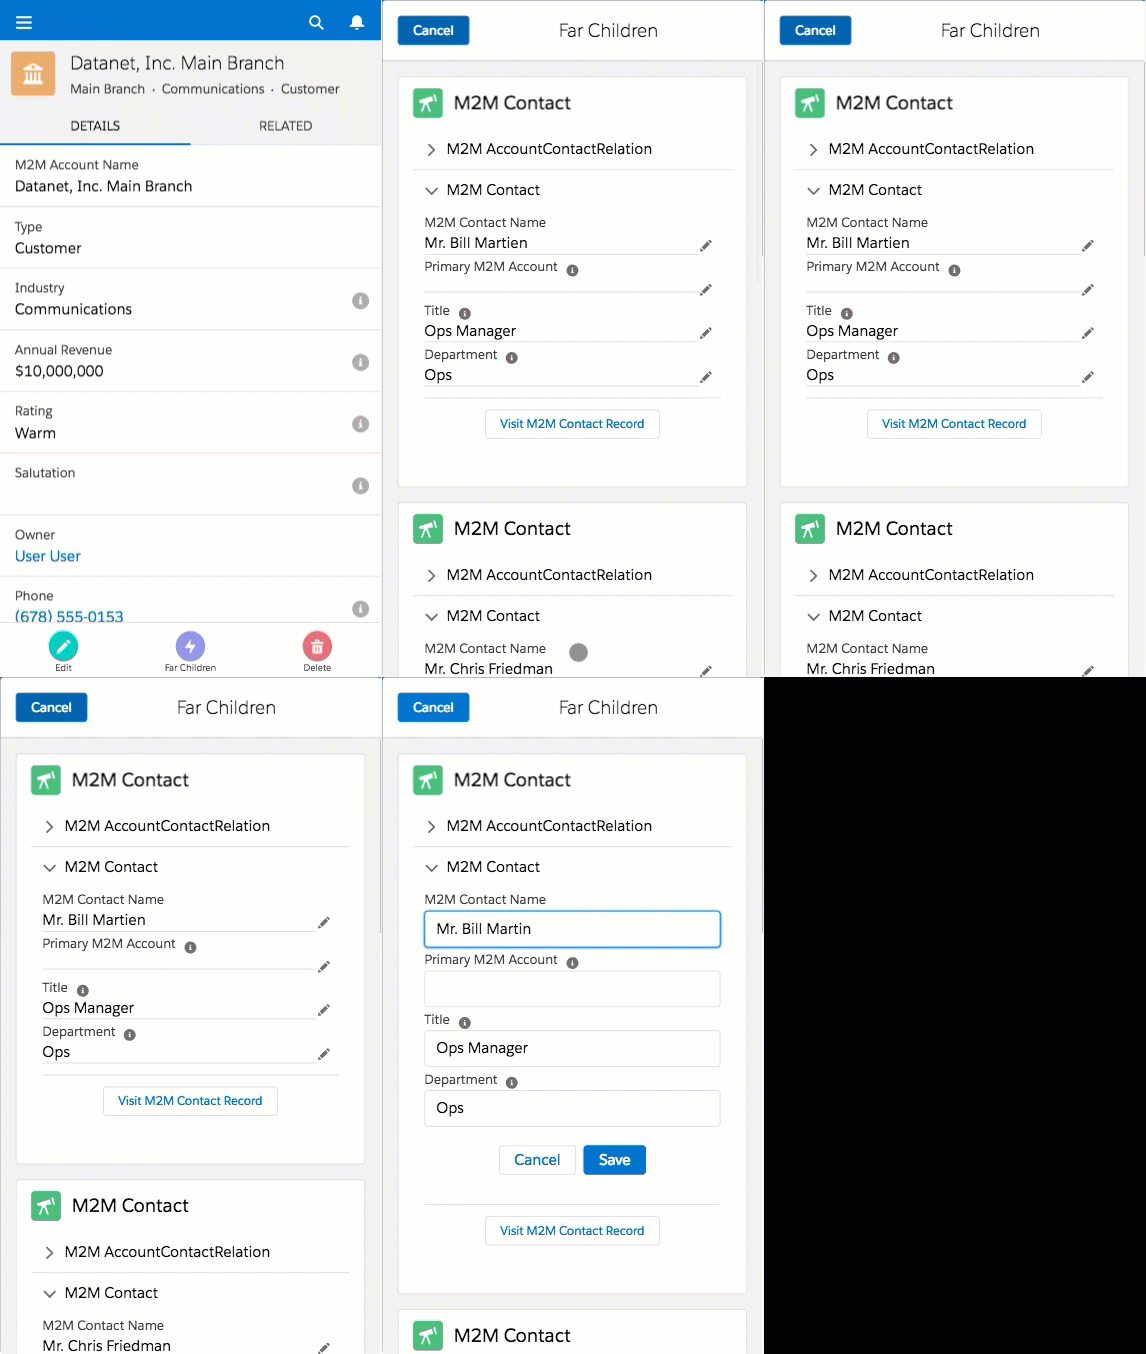
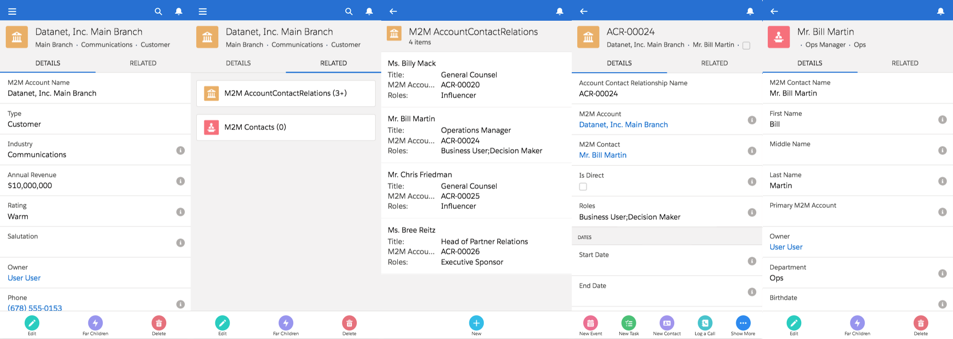
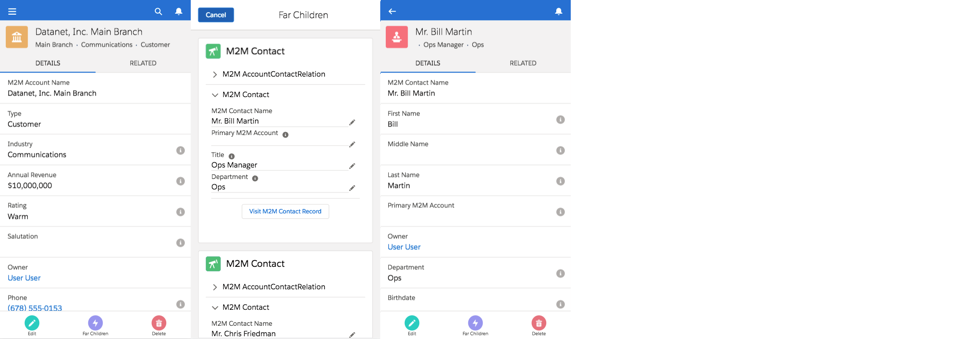
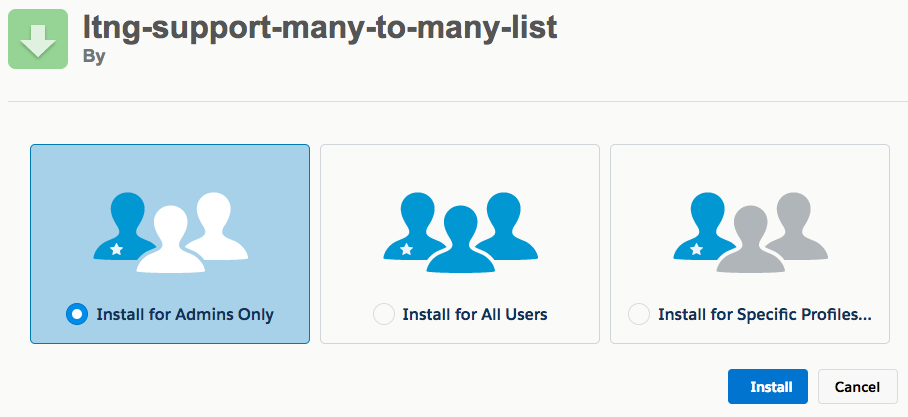
Please see the Installation section below for more on how to install on your Sandbox / Demo org.
Please note: sample code (metadata api and dx formats) are is also available in the mdapi and dx folders above
A Many-to-Many relationship is a relationship between two things where the relationship isn't exclusive.
In Salesforce terms for example, an Opportunity (representing a possible sale) can involve multiple types of products.
Yet that same type of product may be sold on other Opportunities.
The goal of this demo is to make it simple to navigate (or even to see and edit the data) quickly and easily in desktop and mobile.
NOTE: This project is for demonstration purposes. For more information, please see the Licensing section below
A Many-to-Many relationship is a relationship between two things where the relationship isn't exclusive.
In Salesforce terms for example, an Opportunity (representing a possible sale) can involve multiple types of products.
Yet that same type of product may be sold on other Opportunities.
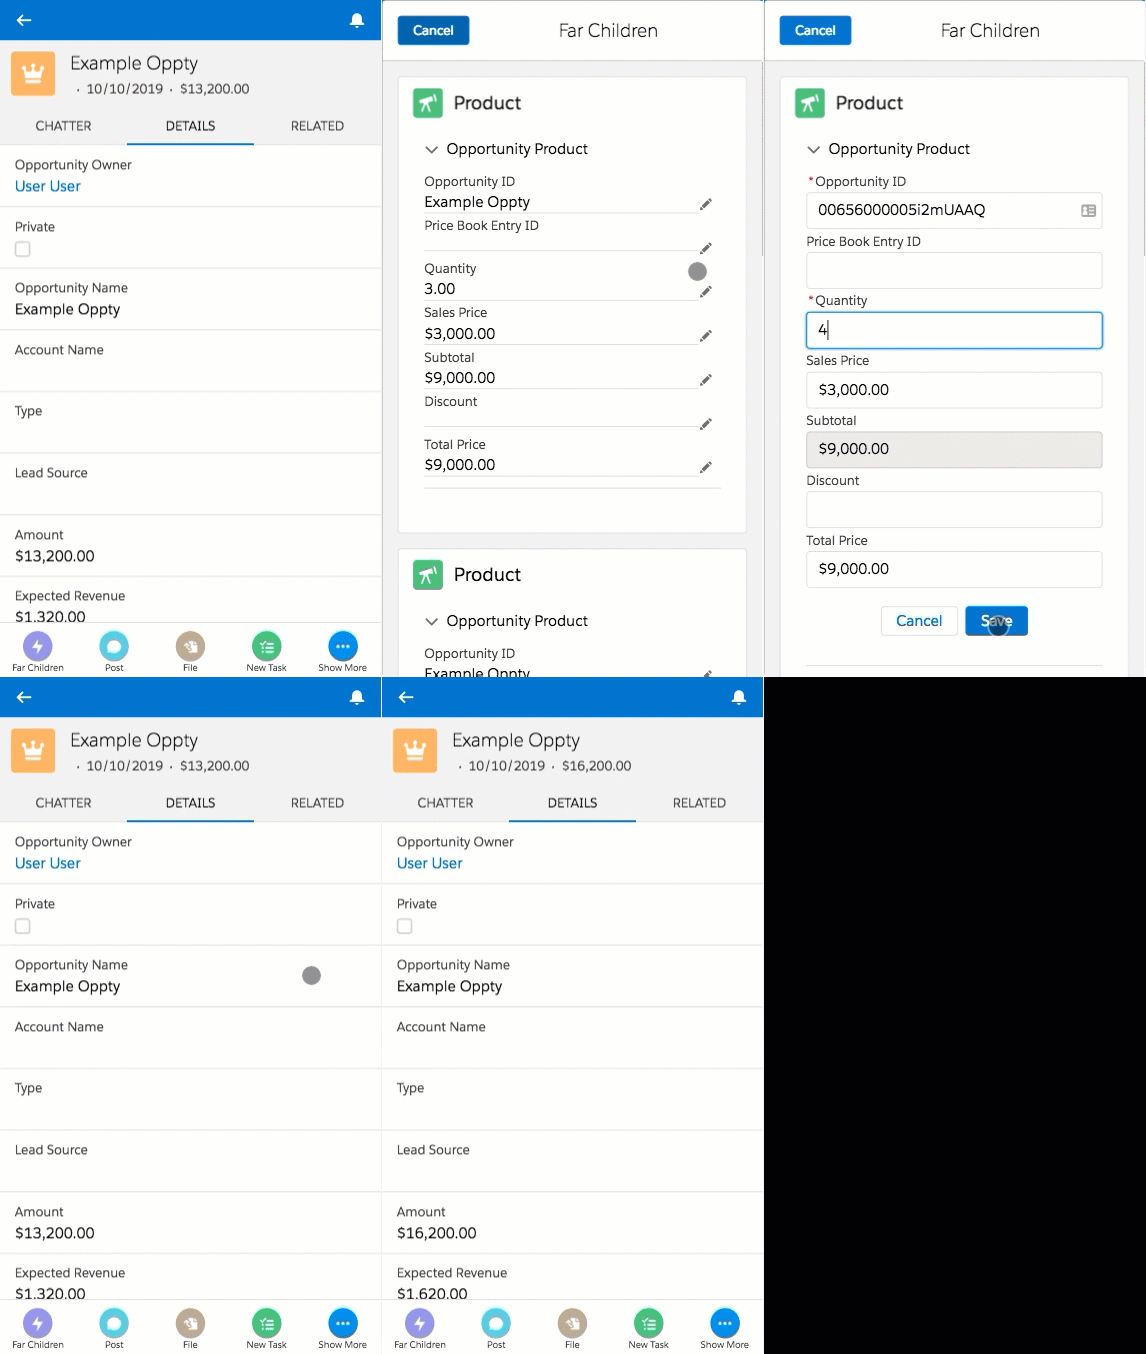
This can be quite difficult to do from Mobile.
(1 click to get to the compact layout, 2 to get to the full layout)
.
All in a way that is configurable
and can be exposed in Quick Actions or App Builder pages
and works in both Desktop and Mobile (through Quick Actions, App Builder pages, and so on...)
From any object, like showing (and editing) Opportunity Products - on mobile.
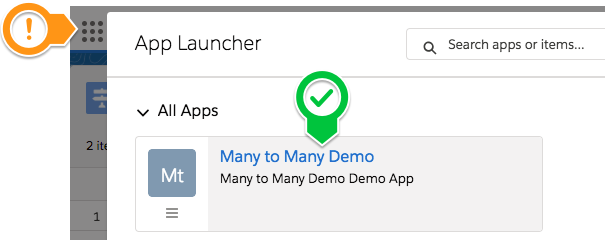
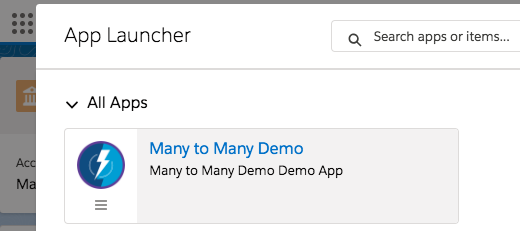
1. Find the Many to Many Demo app in the App Launcher
2. Run the Setup button on the Many to Many Demo Setup tab
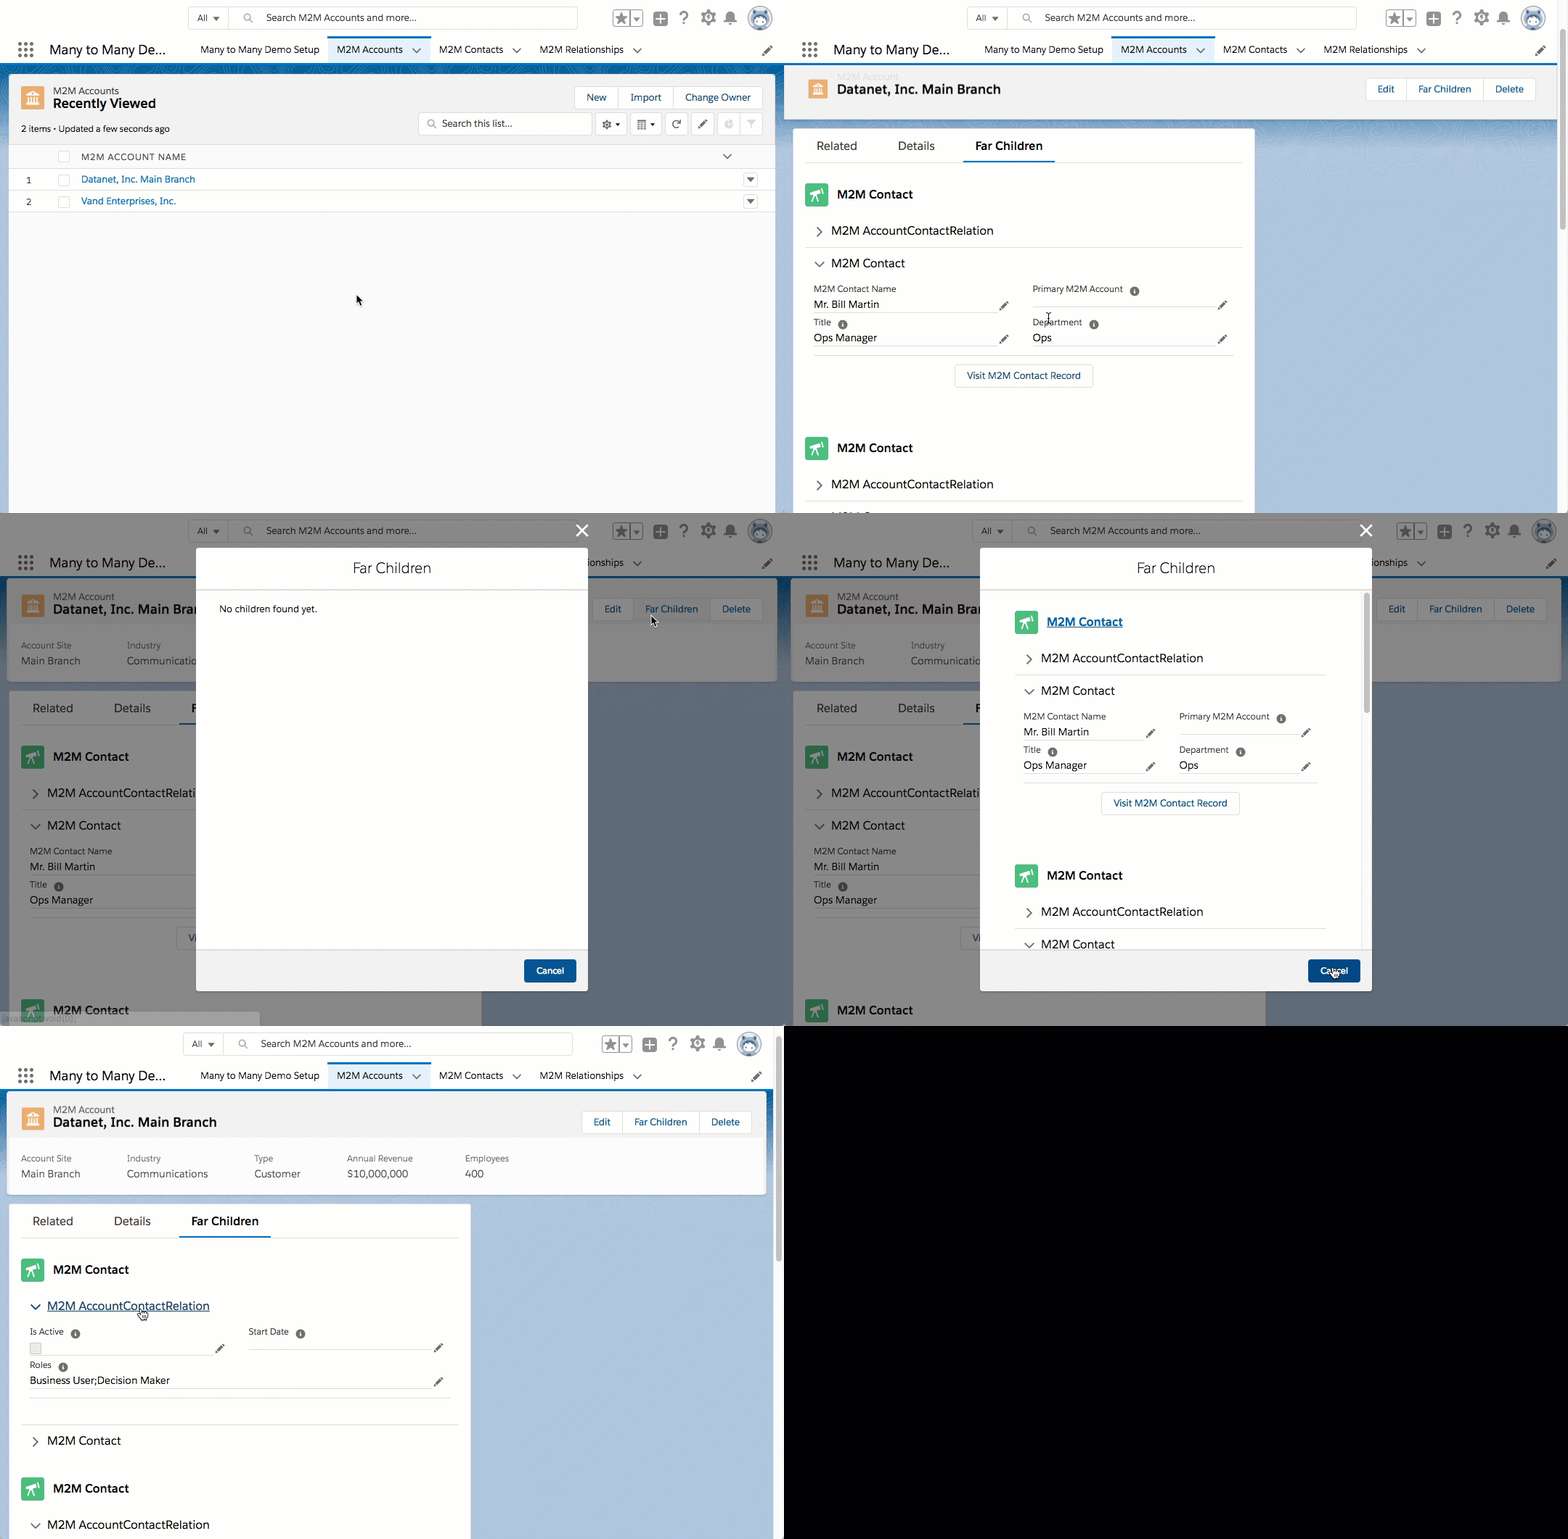
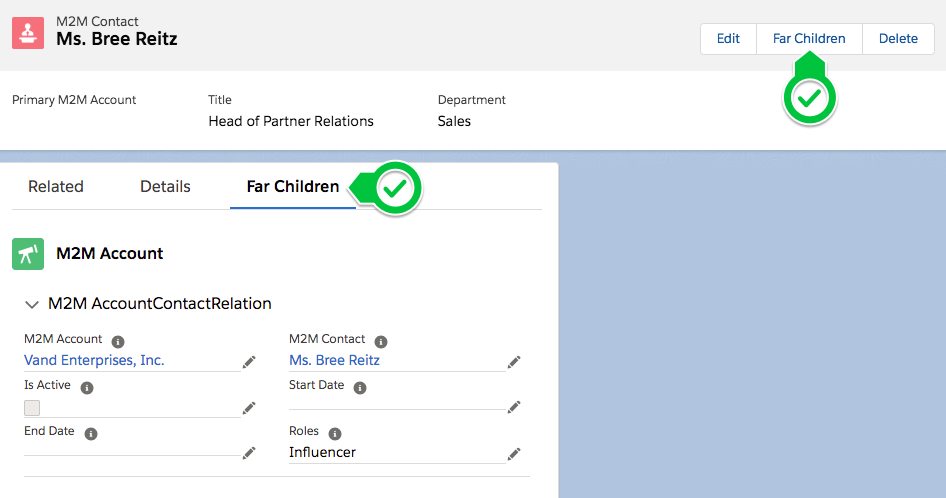
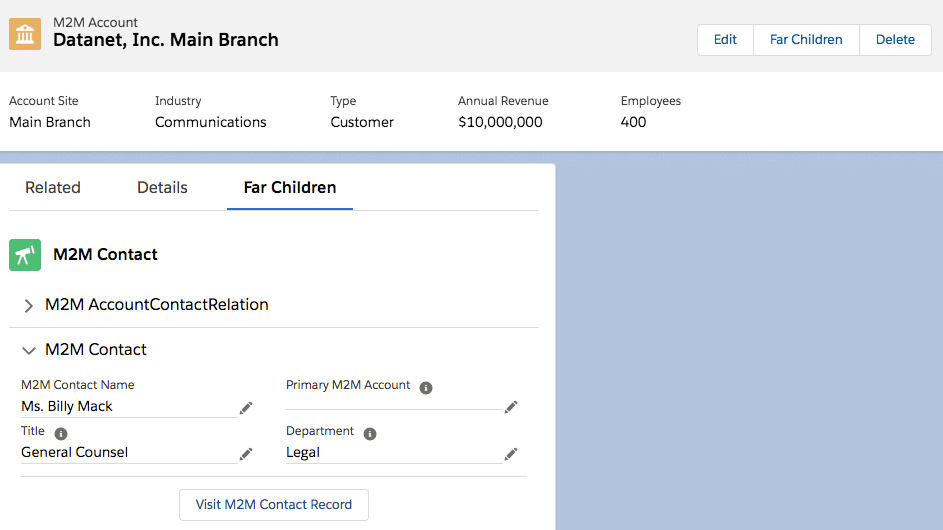
3. See the Far Children under any of the provided M2M Accounts or Contacts
(Gimme the short version)
1. Installation the app
2. Setup a M2M Relationship record
This doesn't create the relationship, but defines which ones we want to show - and how we want to show it (like defining which fields)
For example: Account and Contact (with Account Contact Relation)
3. Reference it on a Lightning App Builder Page or through a QuickAction
(Continuing the example above, by exposing out the component on the Contact page layouts / app builder page, the component knows which Relation to use and orients it to show the Accounts and Account Contact Relations)
A One-to-Many relationship is when one type record can relate to multiples of another type of record.
For example: a Book can have many Pages.
In this case, a single Page can't belong to more than one Book, otherwise it would be hard to read.
A Many-to-Many relationship is when the relationship isn't exclusive.
For example a Book can have many Authors, but an Author may also have written many Books.
A CRM example of a Many-to-Many Relationship would be:
you can have Opportunities with more than one Product, but that same Product can be used in other Opportunities.
In this case, we use a Junction Object to link them: an OpportunityProduct - aka. OpportunityLineItem.
This special object references both the Opportunity along with the Product, and contains information that would apply only for this instance of a Product on this Opportunity. Such as the Number of Products to be ordered.
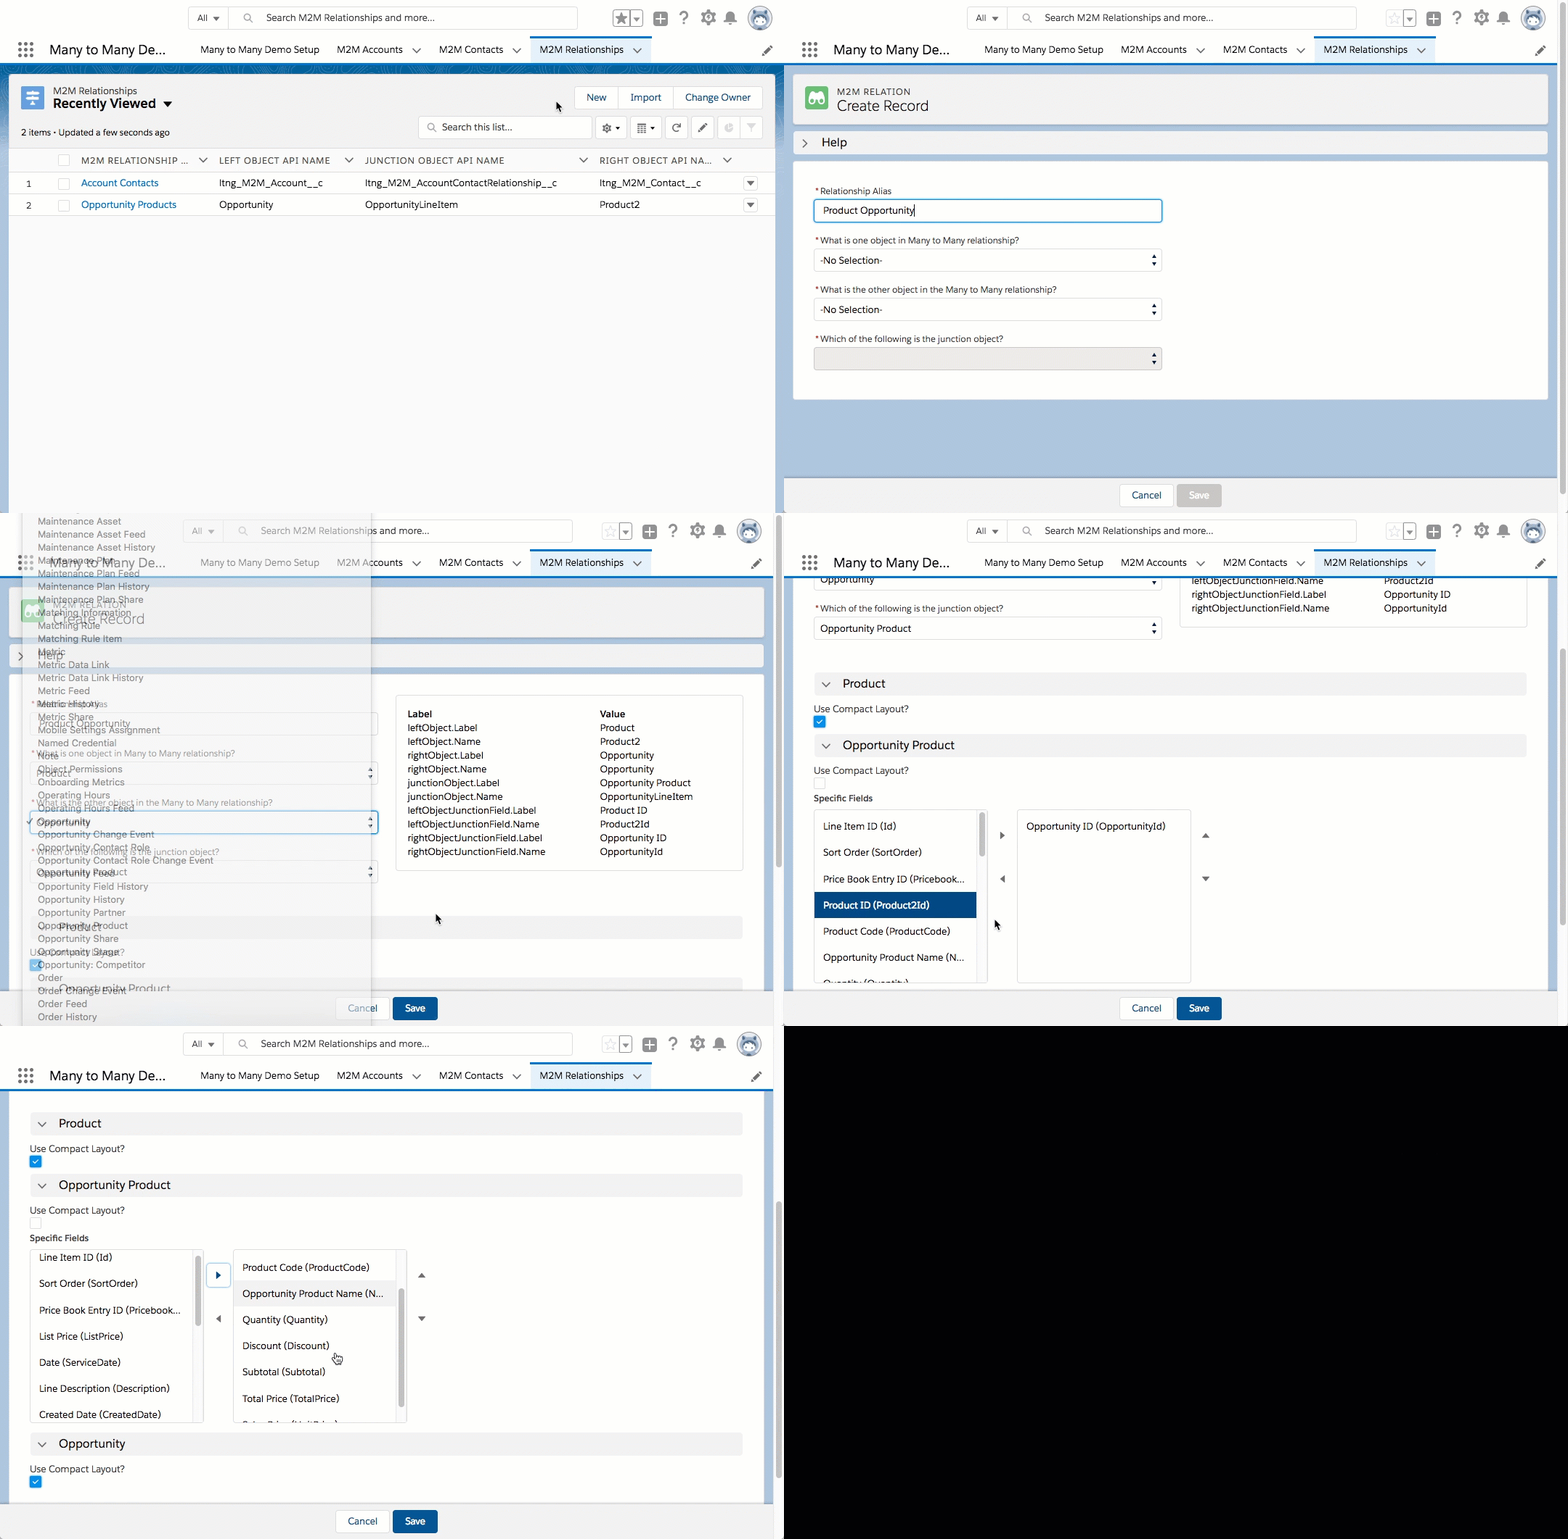
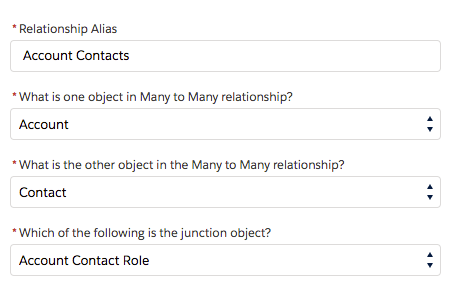
1. Create a new M2M Relationships record, under the Many to Many Demo app.
2. Define the Relationship Alias
This will be shown to the user if there are multiple relationships for an object.
3. Define the Relationship Objects
Here we define two objects that are related using a Junction Object (that relates to both of the other objects.
(Like Opportunity Product - relating Opportunity and Product, or Account Contact Role - relating Account and Contact)
Simply selecting either of the two objects (i.e. Account or Contact), will automatically show the Junction Objects known to the system.
It does not matter whether Account or Contact is first, as the same relationship can be used for both (it flips the relationship automatically).
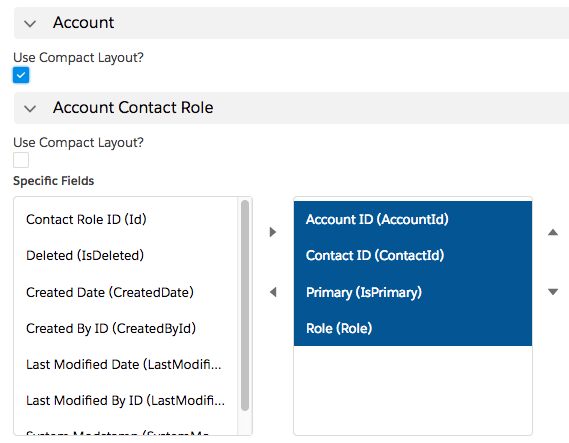
4. Define the fields to show for the relationship
You can either use:
-
the Compact Layout - the one assigned for that Object
-
Or specify the fields to show and the order
(Note: if the
Use Compact Layout?is not checked and no fields are selected, then that object won't be shown. This can be helpful for special occasions, like hiding Product for Opportunity Products on Mobile)
We can see the component either through an App Builder Page, or Quick Action on either / both of the objects defined in the relationship.
For example, if we made a relationship for Account and Contact, we can expose the same definition on both the Account and Contact record detail pages.
(It is perfectly fine to only show the relationship on one side, such as Opportunity for an Opportunity Product relationship)
Alternatively, we can create a QuickAction instead of a new App Builder page - for either / both of the objects.
(This will work on both Desktop and Mobile)
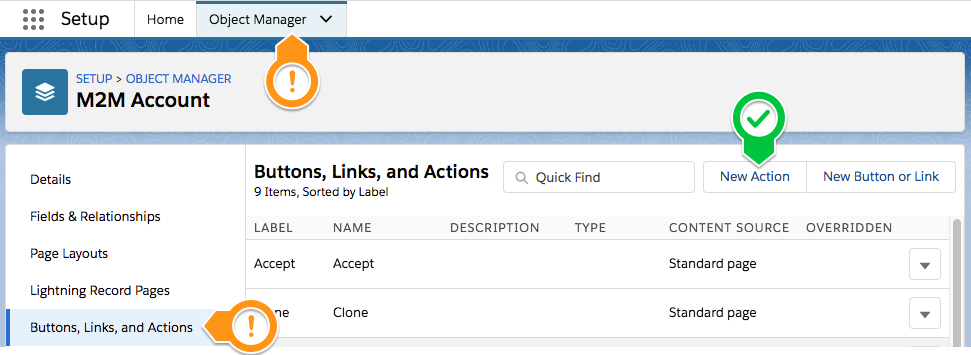
1. Create a new Action
Under the Object Manager find one of the Children to expose the 'Far Child' component. Then click New Action under the Button, Links, and Actions.
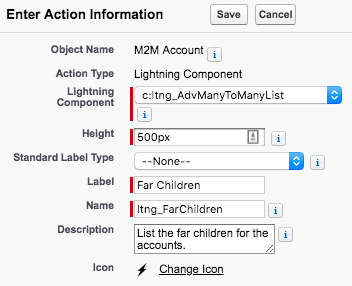
2. Define the QuickAction
When defining the Lightning Component QuickAction, be sure to use the ltng_AdvManyToManyList component.
| What to Set | What does it mean? | Example |
|---|---|---|
| Action Type | The type of Quick Action | Lightning Component |
| Lightning Component | Which Lightning Component to show | ltng_AdvManyToManyList |
| Height | The Height of the QuickAction Modal | 500px or so |
| Standard Label Type | Whether to use a standard label - or a custom label (none) | Recommend: --None-- |
| Label | The name of the QuickAction the user will see | ex: 'Far Children', but can also be 'Contacts' or 'Accounts' |
| Name | The API Name of the QuickAction - used for maintenance | MyFarChildQuickAction |
| Description | Admin visible description for why we have the Quick Action | List of Contacts from this Account |
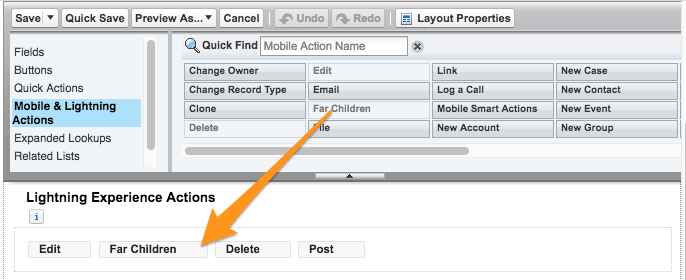
3. Add Quick Action to Page Layout
Remember to add the Quick Action to the Object's Page Layout
Now, when you visit the page that shows the QuickAction / Lightning App Builder Page for any of those records.
For example: if we make a relationship for Account and Contact, made an App Builder page for Account Records, and a QuickAction for Contact records - then those Pages / Quick Actions can then show the component.
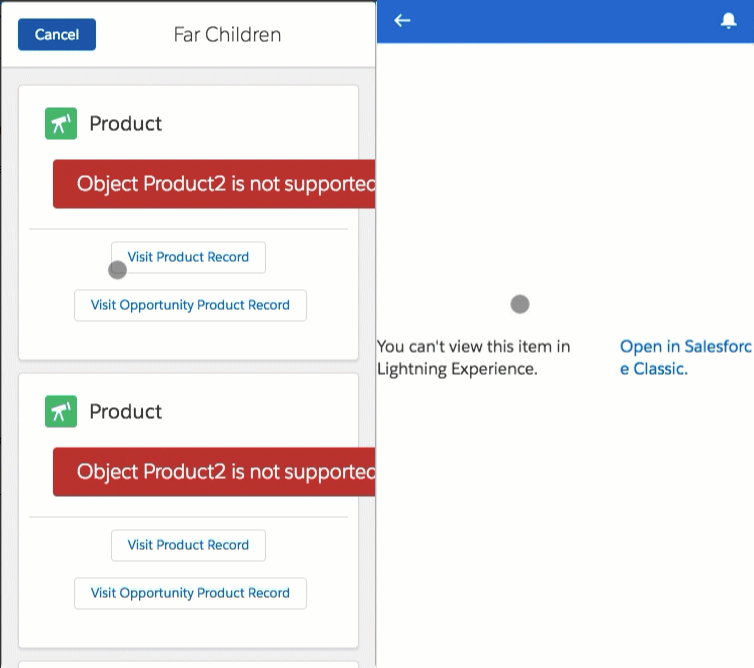
Wait. What is that about Products on Salesforce Mobile?
Currently Products (Product2) is not supported in Salesforce Mobile.
Is it supported?
In this demonstration, we we actually are doing something slight, but important.
- We hide the Product2 recod in the component list
- We expose any Product Specific info on the Opportunity Product.
As only Product (Product2) and not Opportunity Products have this limitation, this may work in most cases.
However, please follow up with your team as necessary.
1. We hide the Product2 record in the component list
This is describe above in the Define the Relationship to Show section above
Specifically, if the Use Compact Layout? is not checked and no fields are selected, then that object won't be shown.
This can be helpful for special occasions, like hiding Product for Opportunity Products on Mobile
2. We expose the Product Information we need on the Opportunity Product
In this example, we don't really show any information from the Product (like Product Family, Category, etc.) but there are times that is needed.
As the Opportunity Product - the junction object - looks at both the Opportunity and the Product, we know the records that we want to show information from.
There are a couple options on how this can be done, and may deserve further discussions with your team.
Such as:
- Formula Fields
- Will always show the current value on Product - if it changes frequently
- Will count against your Object Spanning References, but these are distinct objects, so multiple fields pointing to Product will count as one spanning relationship. See here for more
- Flows / Triggers on Opportunity Product
- Will copy the information from the Product associated onto the Opportunity Product when Product2 is defined.
- Works well if Product information doesn't change frequently, but may require further development effort (possibly batch) to update if needed at a later date.
There are three methods available for you to install this demo, so you can play around with it:
(Please note, all are intended as demonstrations and are not intended for deployment to Production as is)
This works very similar to an App Exchange install.
Please login to an available sandbox and click the link below.
https://test.salesforce.com/packaging/installPackage.apexp?p0=04t6A0000038HaNQAU
(or simply navigate to https://YOUR_SALESFORCE_INSTANCE/packaging/installPackage.apexp?p0=04t6A0000038HaNQAU
if you are already logged in)
It is recommended to install for Admins Only (but all options will work)
Next, click on the 'dice' and open the 'URL Hack Demo' app.
and run Setup from the Demo Setup tab.
This will then perform any additional setup (such as creating records, etc).
Thats it. See the How to Use section for how to use the app.
This assumes you have already installed the Salesforce CLI and Connected the Salesforce CLI to your org.
However, the Salesforce CLI can be used with any org and does not require Salesforce DX to be enabled. (Although enabling the DX / Dev Hub would give some great benefits, and would only require care of certain object permissions: Scratch Org Info, ActiveScratchOrg, NamespaceRegistry - as they are not available in all orgs)
1. Run the following command:
sfdx force:mdapi:deploy -d mdapi -u [[orgAlias]] -w
2. Add the permission set to your user
sfdx force:user:permset:assign -n ManyToManyDemoAdmin -u [[orgAlias]]
Thats it. See the How to Use section for how to use the app.
sfdx force:org:open -u [[orgAlias]]
