Advanced Lane Finding Project
The goals / steps of this project are the following:
- Compute the camera calibration matrix and distortion coefficients given a set of chessboard images.
- Apply a distortion correction to raw images.
- Use color transforms, gradients, etc., to create a thresholded binary image.
- Apply a perspective transform to rectify binary image ("birds-eye view").
- Detect lane pixels and fit to find the lane boundary.
- Determine the curvature of the lane and vehicle position with respect to center.
- Warp the detected lane boundaries back onto the original image.
- Output visual display of the lane boundaries and numerical estimation of lane curvature and vehicle position.
Rubric Points
Here I will consider the rubric points individually and describe how I addressed each point in my implementation.
1. Provide a Writeup / README that includes all the rubric points and how you addressed each one. I submit my writeup as markdown.
You're reading it!
1. Briefly state how you computed the camera matrix and distortion coefficients. Provide an example of a distortion corrected calibration image.
The code for this step is contained camera.py, the function calibrate_camera()
I start by preparing "object points", which will be the (x, y, z) coordinates of the chessboard corners in the world. Here I am assuming the chessboard is fixed on the (x, y) plane at z=0, such that the object points are the same for each calibration image. Thus, inner_points_coordinates is just a replicated array of coordinates, and detected_obj_points will be appended with a copy of it every time I successfully detect all chessboard corners in a test image. detected_img_points will be appended with the (x, y) pixel position of each of the corners in the image plane with each successful chessboard detection.
I then used the output detected_obj_points and detected_img_points to compute the camera calibration and distortion coefficients using the cv2.calibrateCamera() function. I applied this distortion correction to the test image using the cv2.undistort() function and obtained this result:

Here is the code to undistort an image,
def undistort_image(image, intrinsic, distortion):
    return cv2.undistort(image, intrinsic, distortion, None, intrinsic)
and here is an example result, please take a look at the the difference of the white car between two images.

2. Describe how (and identify where in your code) you used color transforms, gradients or other methods to create a thresholded binary image. Provide an example of a binary image result.
I used a combination of color and gradient thresholds to generate a binary image, all thresholding code are placed in file image_filter.py:
(1) the function 'sobel_filter()' applies sobel operator to the input image, and then use x gradient and magnitude and direction of gradient to threshold out interesting pixel position.
(2) the function 'hls_filter()' and hls_filter() use color thresholding to filter out interesting pixel positions, the s-channel is especially useful for this project.
Here's an example of my output for this step. the green pixels are those thresholded by sobel operator, and the blue pixels are those thresholded by color.
3. Describe how (and identify where in your code) you performed a perspective transform and provide an example of a transformed image.
The code for my perspective transform includes a function called warp_image(), which appears in lines 73 through 76 in the file image_filter.py. The warp_image() function takes as inputs an image (image), as well as warp matrix warp_matrix. I use cv2.warpPerspective() to calculate the warp matrix when necessary, and chose the hardcode the source and destination points in the following manner:
warp_config = {
    "src_rect": np.float32([[584, 457], [707, 457], [1102, 676], [299, 676]]),
    "dst_rect": np.float32([[325, 0], [960, 0], [960, 720], [325, 720]]),
}
I verified that my perspective transform was working as expected by drawing the src and dst points onto a test image and its warped counterpart to verify that the lines appear parallel in the warped image.
4. Describe how (and identify where in your code) you identified lane-line pixels and fit their positions with a polynomial?
Then I did some other stuff and fit my lane lines with a 2nd order polynomial kinda like this:
(4.1) applying undistortion, thresholding and warp to the input image, resulting a binary image which is used by next step;
(4.2) there're two situations:
(4.2.1) searching from scrach, the function is defined in file lane_detector.py as sliding_window_detect(), it basically performs following steps:
calculate the histogram along x-axis, and find the peak of the left and rigt half as the base position for left and right lane.
then starting from the base x positions, sliding a widow of size 200x80 along y-axis to identify the lane-line pixels.
at last use numpy.polyfit() to fit a 2nd order polynomial for both lane-lines.
(4.2.2) searching based on previous result, the function is defined in lane_detector.py as detect_based_prev_result(), it basically performs the following steps:
use previous fitted polynomial to calculate y coordinate for each valid pixel's x coordinate,
then plus and minus 100 to the calculated x value, defining a search region, and find out the pixels lived in the left and right region;
at last use numpy.polyfit() to fit a 2nd order polynomial for both lane-lines.
here is an example results of the fitted polynomial:

5. Describe how (and identify where in your code) you calculated the radius of curvature of the lane and the position of the vehicle with respect to center.
The function get_curvature() defined in utils.py calculate the radius of cuvature in meters;
The function get_center_offset() defined in utils.py calculate position offset between the car and the center of road of cuvature in meters;
6. Provide an example image of your result plotted back down onto the road such that the lane area is identified clearly.
I implemented this step in lines 214 through 228 in my code in lane_detector.py in the function pipe_line() of class LaneDetector.
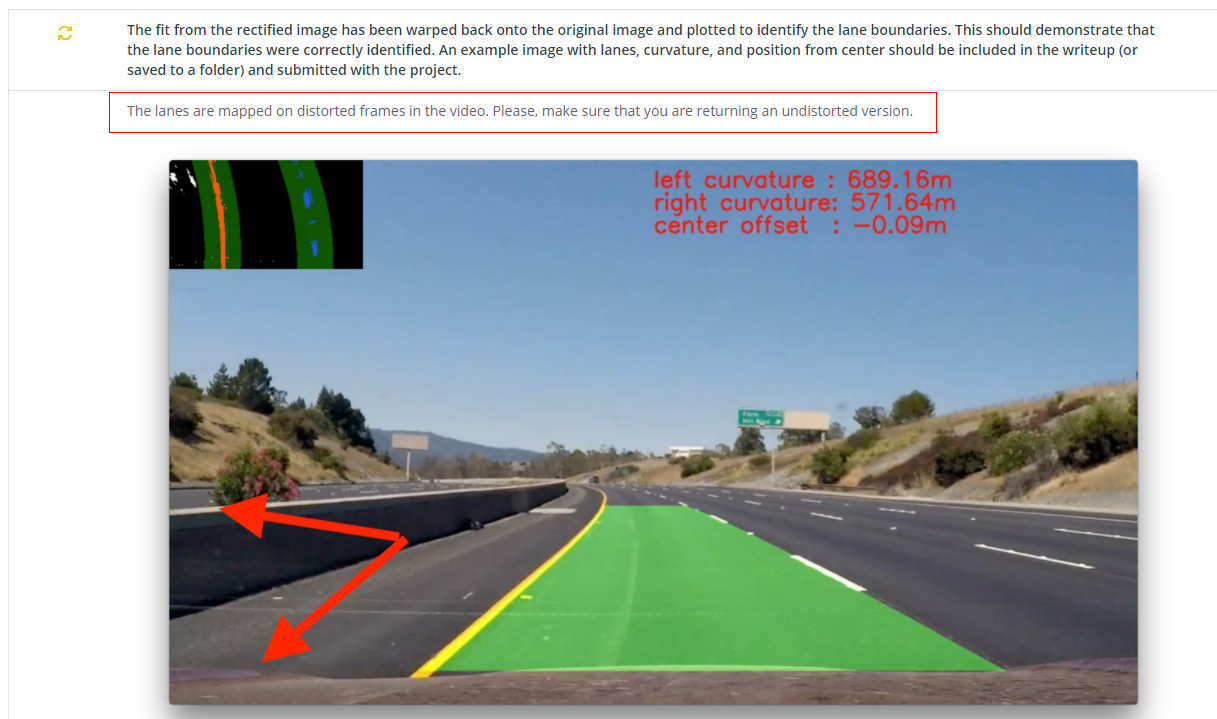
####fix the failed review item####

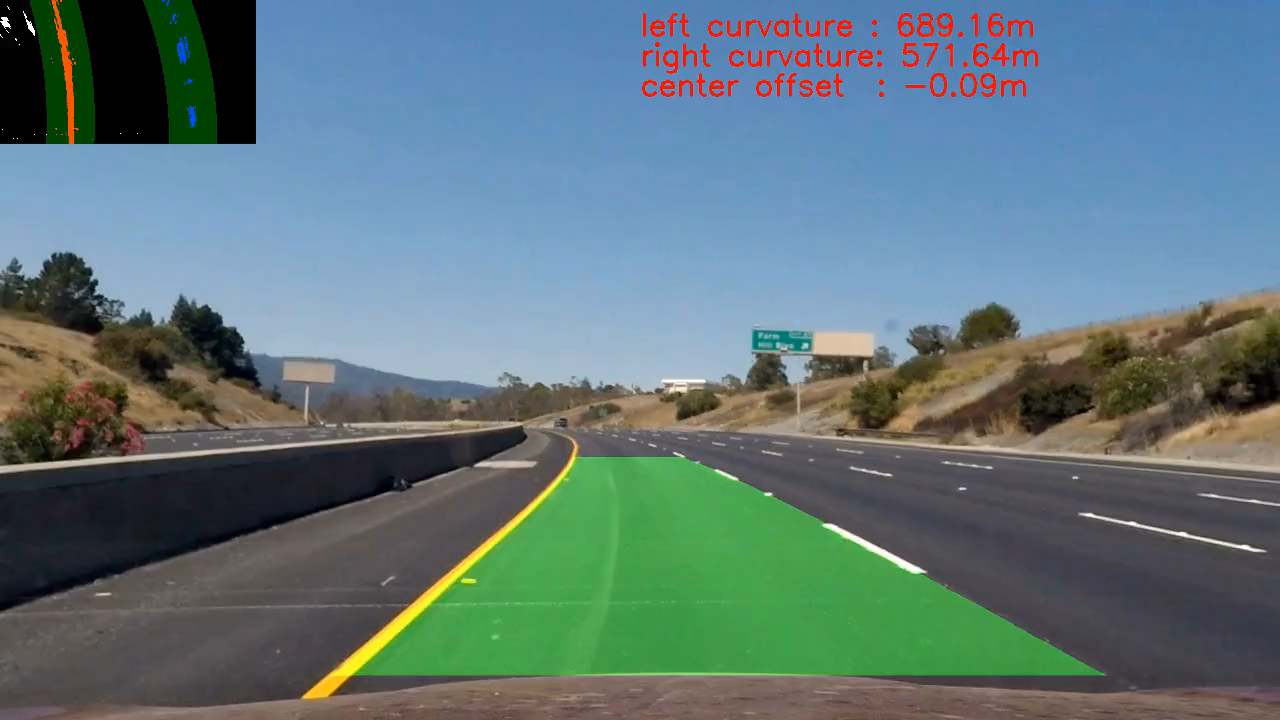
I fix the problem by undistorting the input image and combine the undistorted image with the detection result.
I uploaded the updated result video and the following example result image.
Following is the related code from line 227 to 229 in the file lane_detector.py in the function pipe_line() of class LaneDetector:
227        # undistort the input image and combine with the detected road region as the result image
228        undistorted_input = undistort_image(rgb_image, self._cam_intrinsic, self._cam_distortion)
229        result_img = cv2.addWeighted(undistorted_input, 1, newwarp, 0.4, 0)
Here is an example of the result(the sub-image on top-left is mid-result of the pipeline, just for demonstrating how the algorithms works)

1. Provide a link to your final video output. Your pipeline should perform reasonably well on the entire project video (wobbly lines are ok but no catastrophic failures that would cause the car to drive off the road!).
Here's a link to my video result
1. Briefly discuss any problems / issues you faced in your implementation of this project. Where will your pipeline likely fail? What could you do to make it more robust?
Here I'll talk about the approach I took, what techniques I used, what worked and why, where the pipeline might fail and how I might improve it if I were going to pursue this project further.
(1) on my first version the pipeline performs not well when the car passing the tree shade, to fix the problem, i tuned the source and destination points for calculating the warp matrix, and i also use some of previous result to smooth the current one, finnally i got the result video listed above.
i also tried the 1-D convolution sliding search and made some improvement to the code in the course, but it does not fix the problem.
(2) the sanity check i used is really simple, i believe there're some better conditions to check for accepting the current detected result, for example, the curvature difference between two lanes, the distance between two lanes;
(3) lots of thresholds were chosen by hand, it's better to do some adaptive thresholding, we can take use of the color or other features of the lane-lines to design some more advanced technique.
(4) it's necessary to evaluate how good the detected left and right lane lines are, and we can use the better one to fix the worse one.

