COPYRIGHT (C) 2023 BRISTOL-MYERS SQUIBB, NJ, USA. ALL RIGHTS RESERVED
Permission is hereby granted, free of charge, to any person obtaining a copy of this software and associated documentation files (the "Software"), to deal in the Software without restriction, including without limitation the rights to use, copy, modify, merge, publish, distribute, sublicense, and/or sell copies of the Software, and to permit persons to whom the Software is furnished to do so, subject to the following conditions:
The above copyright notice and this permission notice shall be included in all copies or substantial portions of the Software.
THE SOFTWARE IS PROVIDED "AS IS", WITHOUT WARRANTY OF ANY KIND, EXPRESS OR IMPLIED, INCLUDING BUT NOT LIMITED TO THE WARRANTIES OF MERCHANTABILITY, FITNESS FOR A PARTICULAR PURPOSE AND NONINFRINGEMENT. IN NO EVENT SHALL THE AUTHORS OR COPYRIGHT HOLDERS BE LIABLE FOR ANY CLAIM, DAMAGES OR OTHER LIABILITY, WHETHER IN AN ACTION OF CONTRACT, TORT OR OTHERWISE, ARISING FROM, OUT OF OR IN CONNECTION WITH THE SOFTWARE OR THE USE OR OTHER DEALINGS IN THE SOFTWARE.
A repo for reproducing results in article: Masked Image Modeling Advances 3D Medical Image Modeling
Install conda (Recommended) & Setup the Python environment
# Conda Installation
$ wget https://repo.continuum.io/miniconda/Miniconda3-latest-Linux-x86_64.sh -O miniconda.sh
$ bash miniconda.sh -b -p $HOME/miniconda
$ source "$HOME/miniconda/etc/profile.d/conda.sh"
$ hash -r
$ conda config --set always_yes yes --set changeps1 no
$ conda update -q conda
$ conda info -a
# Create the environment
$ conda create -n <name> python=3.8
# Install Pytorch (careful with the cuda version)
$ conda install pytorch torchvision torchaudio cudatoolkit=11.3 -c pytorch
# Clone the repo and setup
$ git clone https://github.web.bms.com/chenz53/bmssl.git
$ cd bmssl
$ python3 -m pip install -r requirements.txt
$ python3 setup.py develop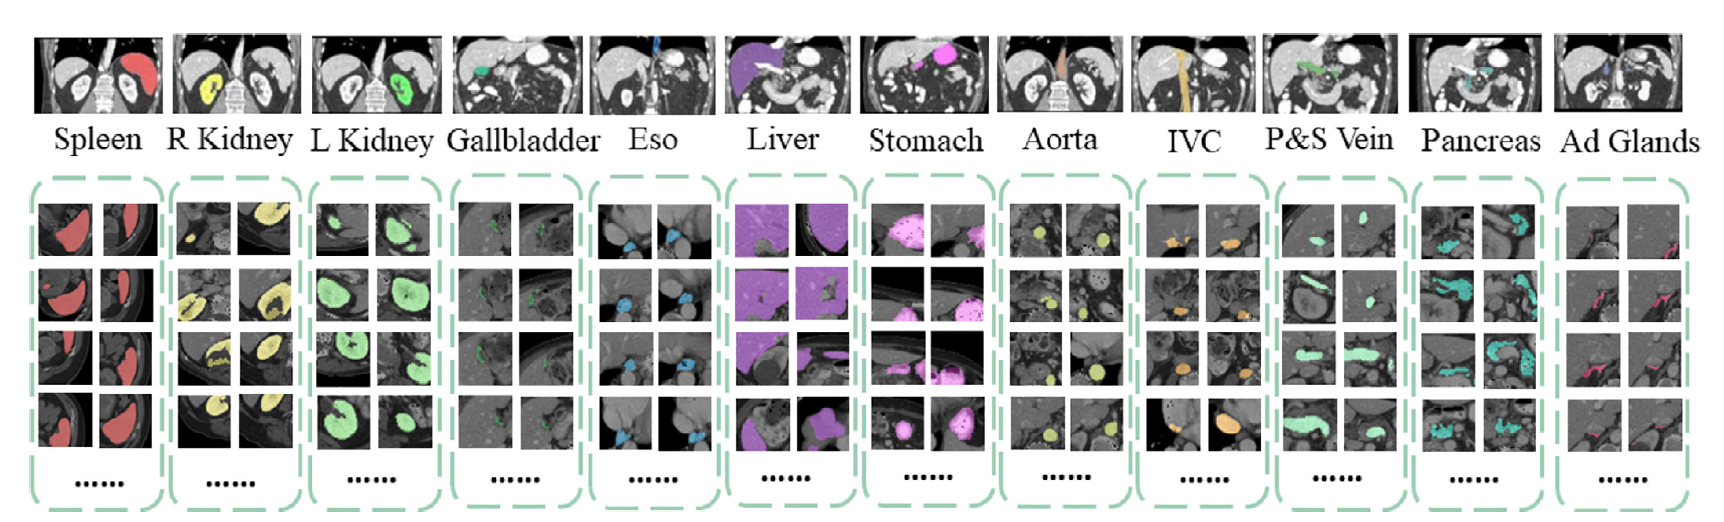
The training data is from the BTCV challenge dataset.
- Target: 13 abdominal organs including 1. Spleen 2. Right Kidney 3. Left Kideny 4.Gallbladder 5.Esophagus 6. Liver 7. Stomach 8.Aorta 9. IVC 10. Portal and Splenic Veins 11. Pancreas 12.Right adrenal gland 13.Left adrenal gland.
- Task: Segmentation
- Modality: CT
- Size: 30 3D volumes (24 Training + 6 Validation)
Please download the json file from this link.
We provide the json file that is used to train our models in the following link.
Once the json file is downloaded, please place it in the same folder as the dataset. Note that you need to provide the location of your dataset directory by using --data_dir.
Modality: MRI Size: 1470 3D volumes (1251 Training + 219 Validation) Challenge: RSNA-ASNR-MICCAI Brain Tumor Segmentation (BraTS) Challenge
-
Register and download the official BraTS 21 dataset from the link below and place then into "TrainingData" in the dataset folder:
https://www.synapse.org/#!Synapse:syn27046444/wiki/616992
For example, the address of a single file is as follows:
"TrainingData/BraTS2021_01146/BraTS2021_01146_flair.nii.gz"
-
Download the json file from this link and placed in the same folder as the dataset.
The sub-regions considered for evaluation in BraTS 21 challenge are the "enhancing tumor" (ET), the "tumor core" (TC), and the "whole tumor" (WT). The ET is described by areas that show hyper-intensity in T1Gd when compared to T1, but also when compared to “healthy” white matter in T1Gd. The TC describes the bulk of the tumor, which is what is typically resected. The TC entails the ET, as well as the necrotic (NCR) parts of the tumor. The appearance of NCR is typically hypo-intense in T1-Gd when compared to T1. The WT describes the complete extent of the disease, as it entails the TC and the peritumoral edematous/invaded tissue (ED), which is typically depicted by hyper-intense signal in FLAIR [BraTS 21].
The provided segmentation labels have values of 1 for NCR, 2 for ED, 4 for ET, and 0 for everything else.

Figure from Baid et al. [3]
First, configure the yaml files in code/configs/ssl/ and set the experimental settings, then run
sh slurm_train.shIn slurm_train.sh, the wrap command stands for the command using train.sh, the command will be in the following style:
sh train.sh code/experiments/(path/to/your/experiment/main.py) code/configs/(path/to/your/experiment/config)