- Very good linearity over 1mm (centred on ~1.75)
- Good linearity over 2-3mm (3mm filament is theoretically compatable, but remains untested)
- No thermal drift on the sensor
- Low drag
- Filament width compensation (of course)
- Logging filament diameter
- Undersize runout
- Oversize runout (so really oversized filament doesn't get stuck in the heatbreak)
- Delayed runout
I mainly started this project ages ago because my local filament manufacturer doesn't know what QC is and happily ships filament with more than +/- 0.25mm tolerances. This isn't my first attempt at a filament width sensor but it is by far my best. With this I can print massively undersized or oversized or perfectly sized filament without ever having to touch my extrusion multiplier.
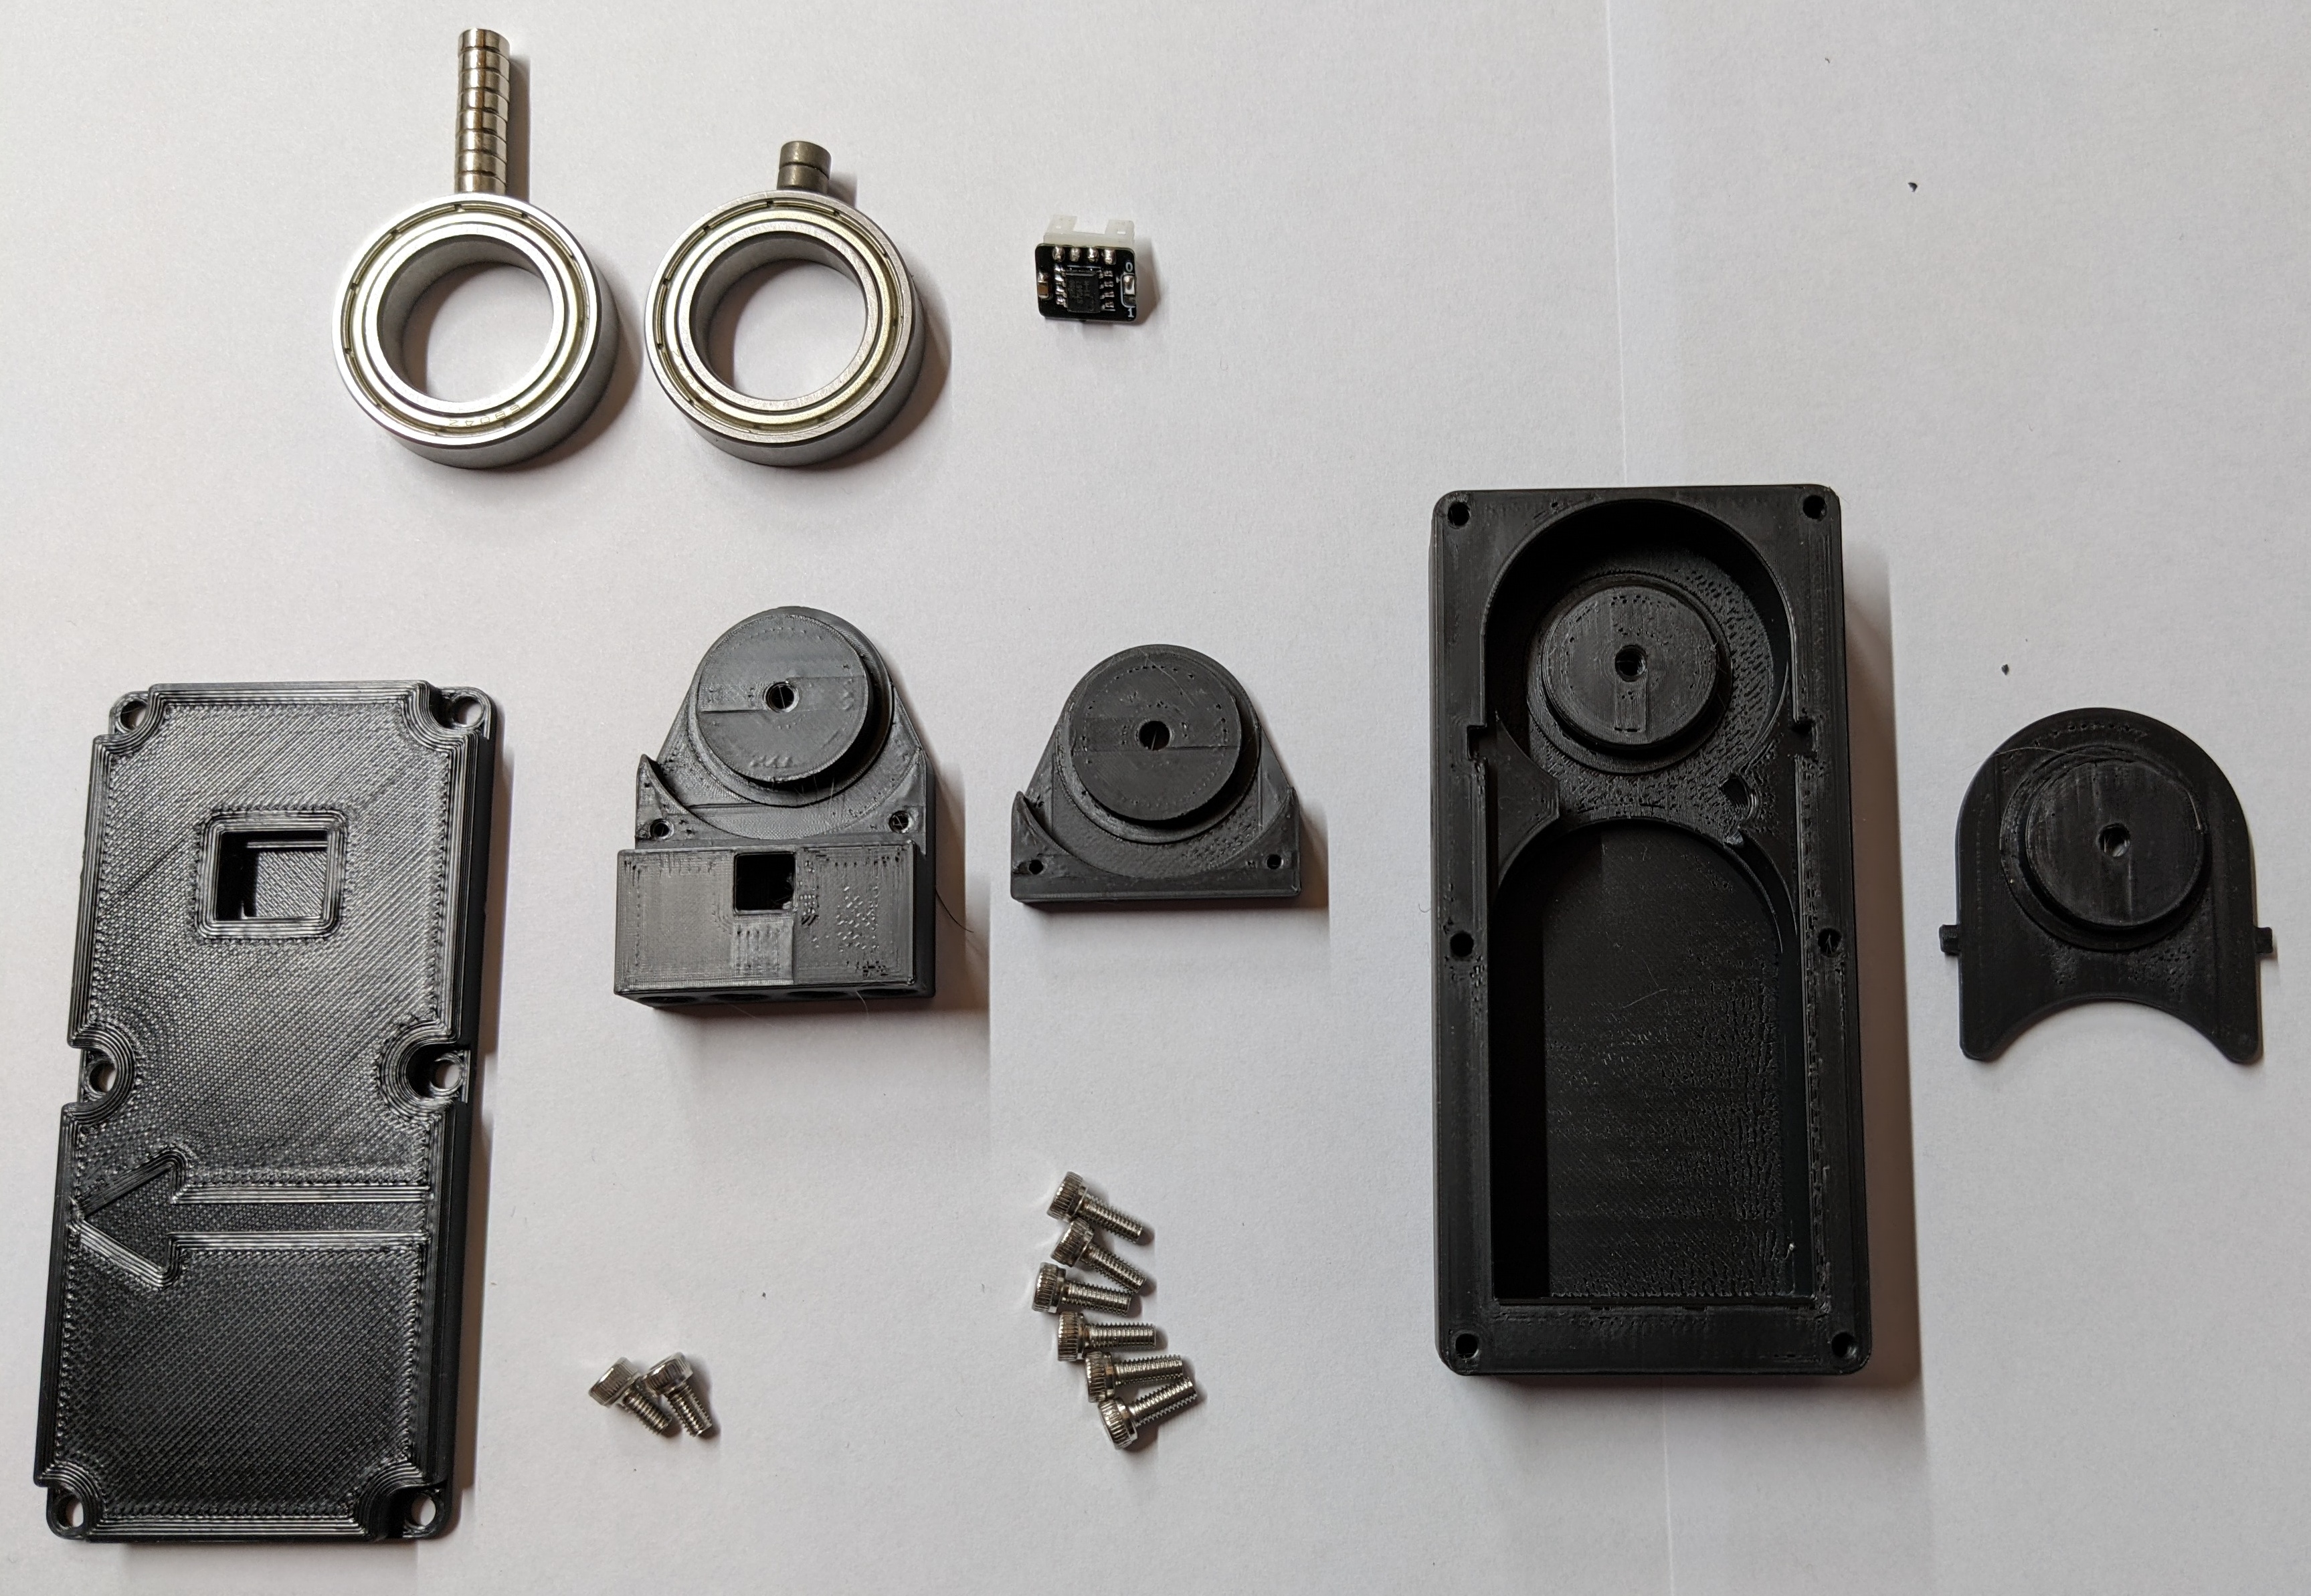
- 1x Sensor PCB
- 1x JST PH 4pin female cable
- 2x 6804 ball bearing
- 2x 6x3mm OR 1x 6x6mm magnet (if you can, get SmCO ones, they have less thermal drift)
- 2x 5x15 coil spring, 0.6mm wire diameter OR 8x 6x3mm neodymium magnets, the cheap kind
- 8x m3x8 screws
- Fine-ish sanding pad/sandpaper
- Pliers
- Sidecutters
- Hammer or some other heavy object to hit stuff with
- 1.5mm and 2mm drill bit or other cylindrical metal objects of known size in that range for calibration
Unless you want to constantly recalibrate this thing you need to print it in ABS or some other option that doesn't creep (definitely not PLA or Nylon), also avoid fiber filled filaments. The files are designed to print in the orientation they come in and do not require supports.
For MainBody IRONING IS REQUIRED since it is pretty much impossible to sand the inside sliding surface well enough, for the rest except the lid it is just highly recommended.
Except for MainBody the parts need to be printed on a smooth buildplate.
Use at least 3 perimeters and 5 top and bottom layers.
This is kind of a precision instrument and the quality of the final result heavily depends on how well it was assembled. Unfortunately this involves sanding.
 Pretend the two m3x6 screws on this picture are also m3x8
Make sure the walls of the sliding surface on the bottom and the sides are smooth and have nothing sticking out. In most cases this should be fine off the printer but in this one there was a little defect in the walls. Also make sure the top surface for the lid is smooth and flat.
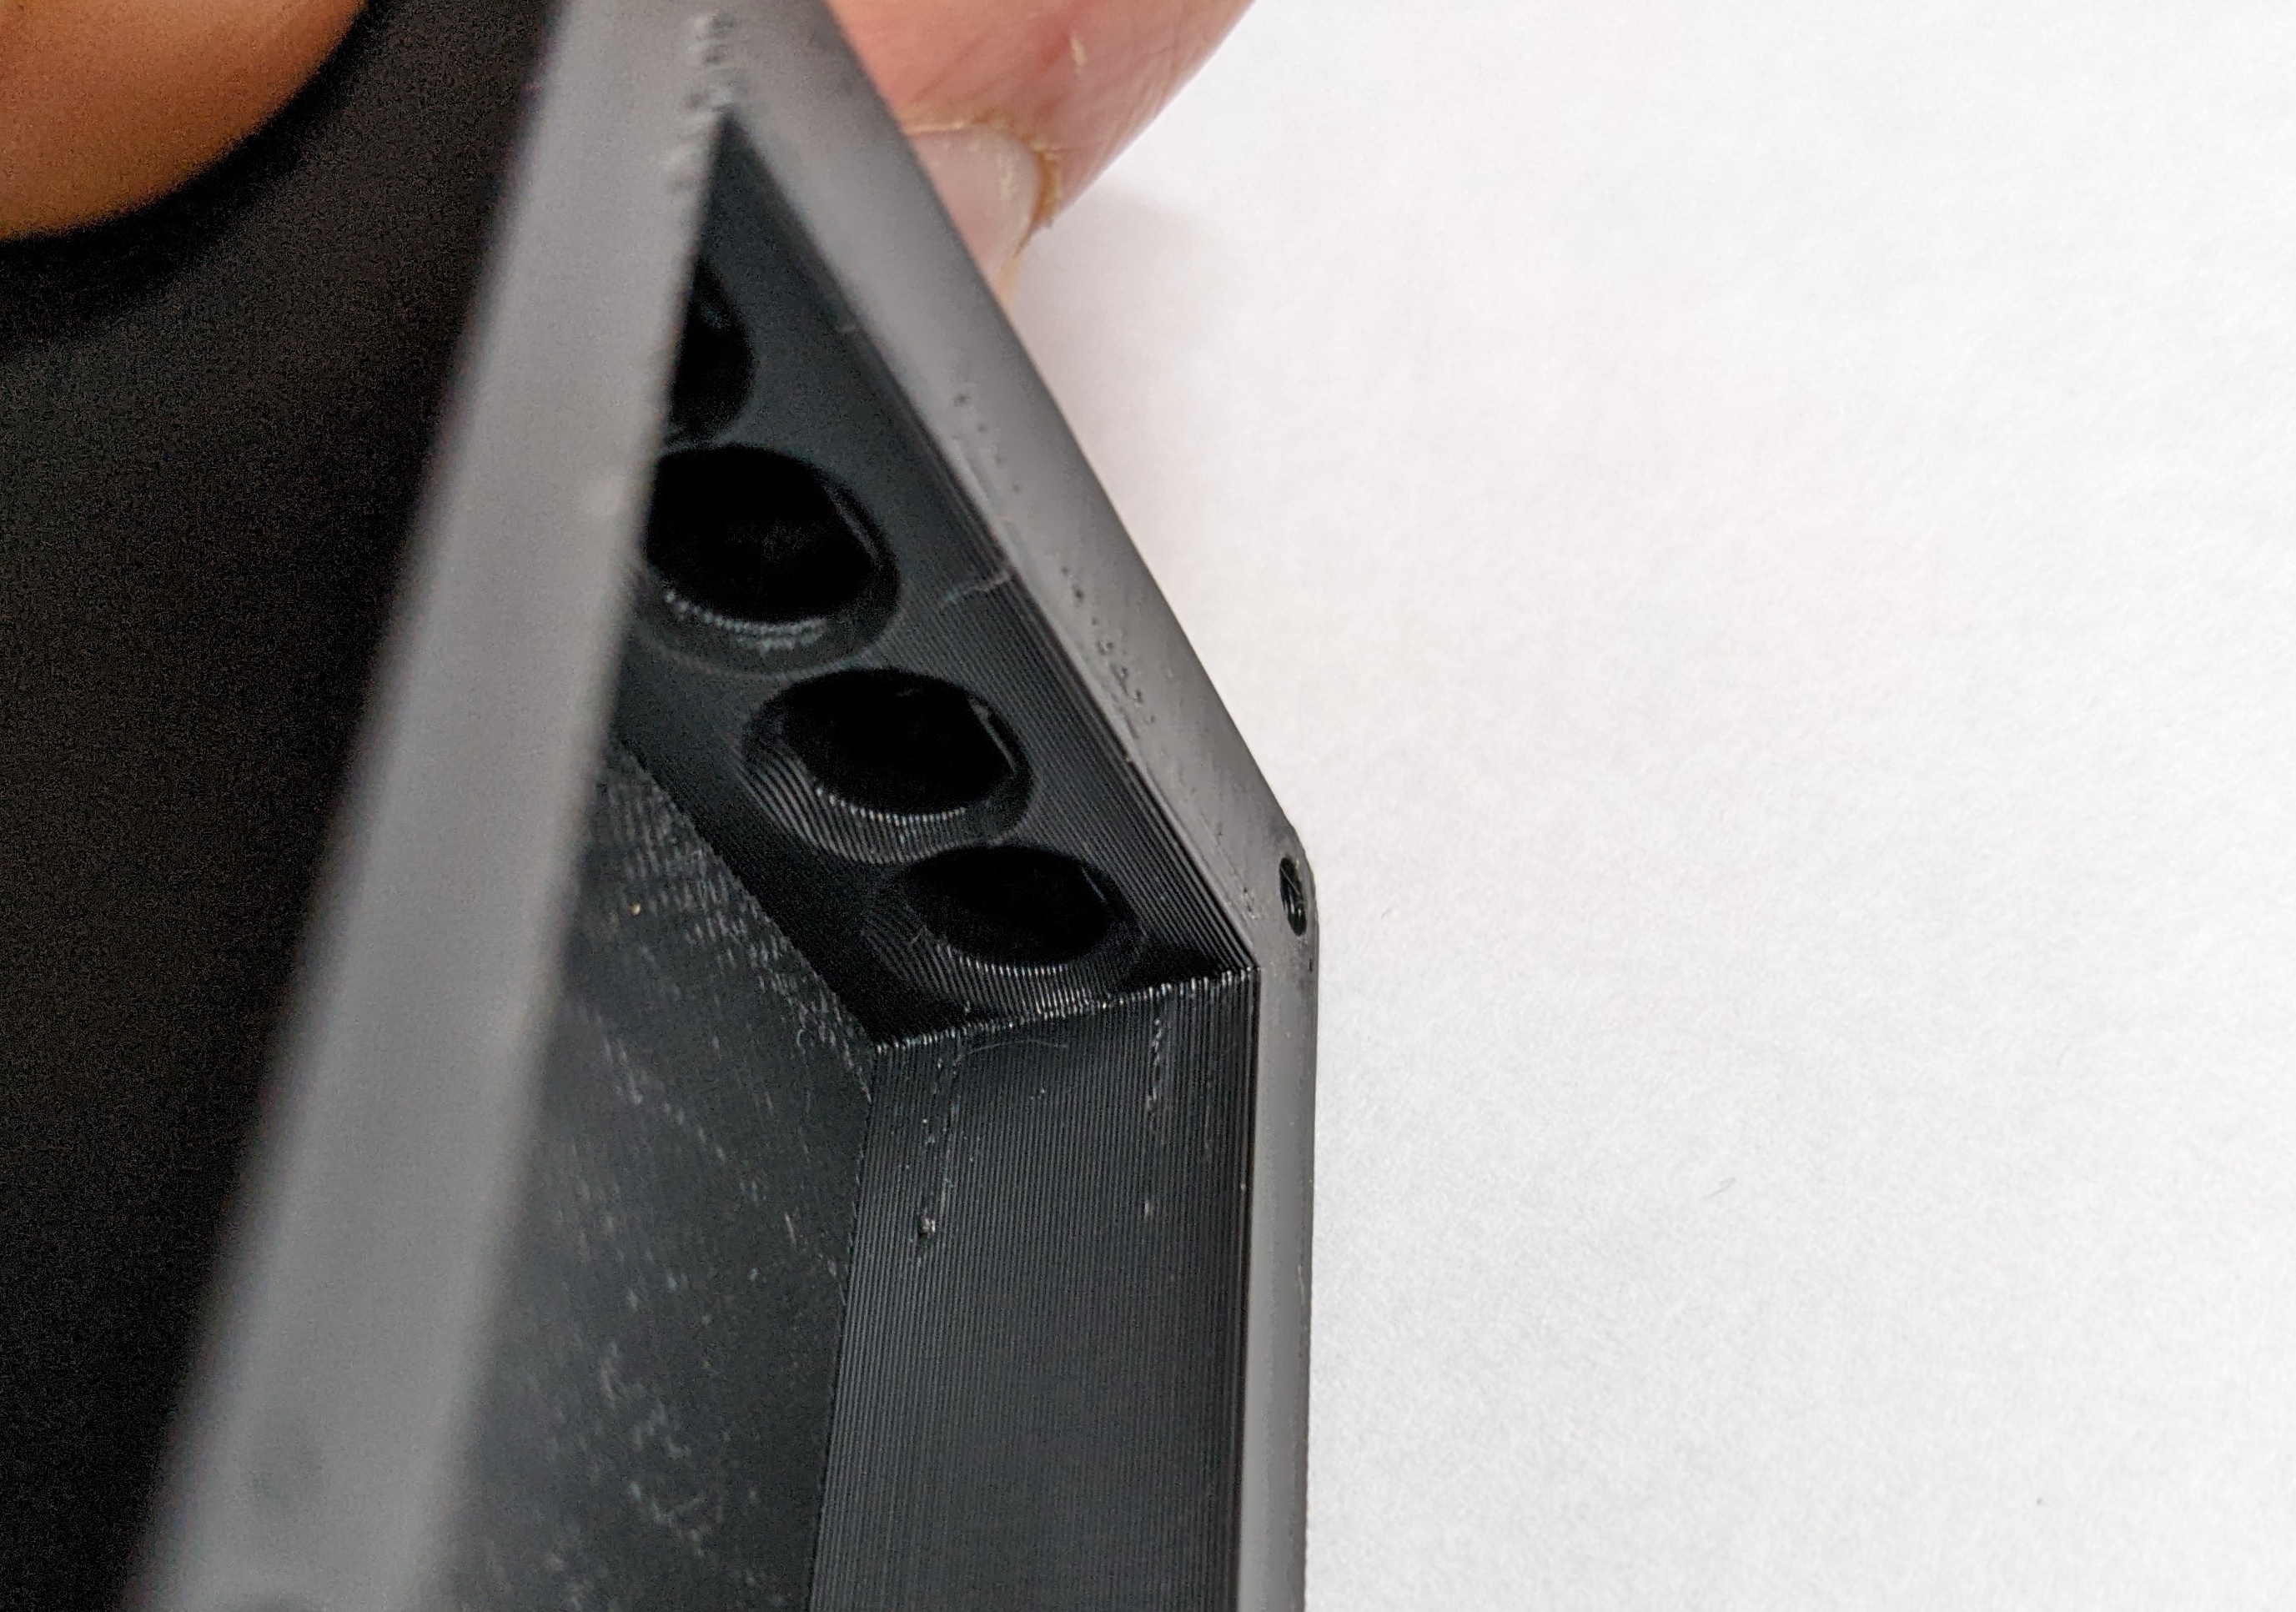
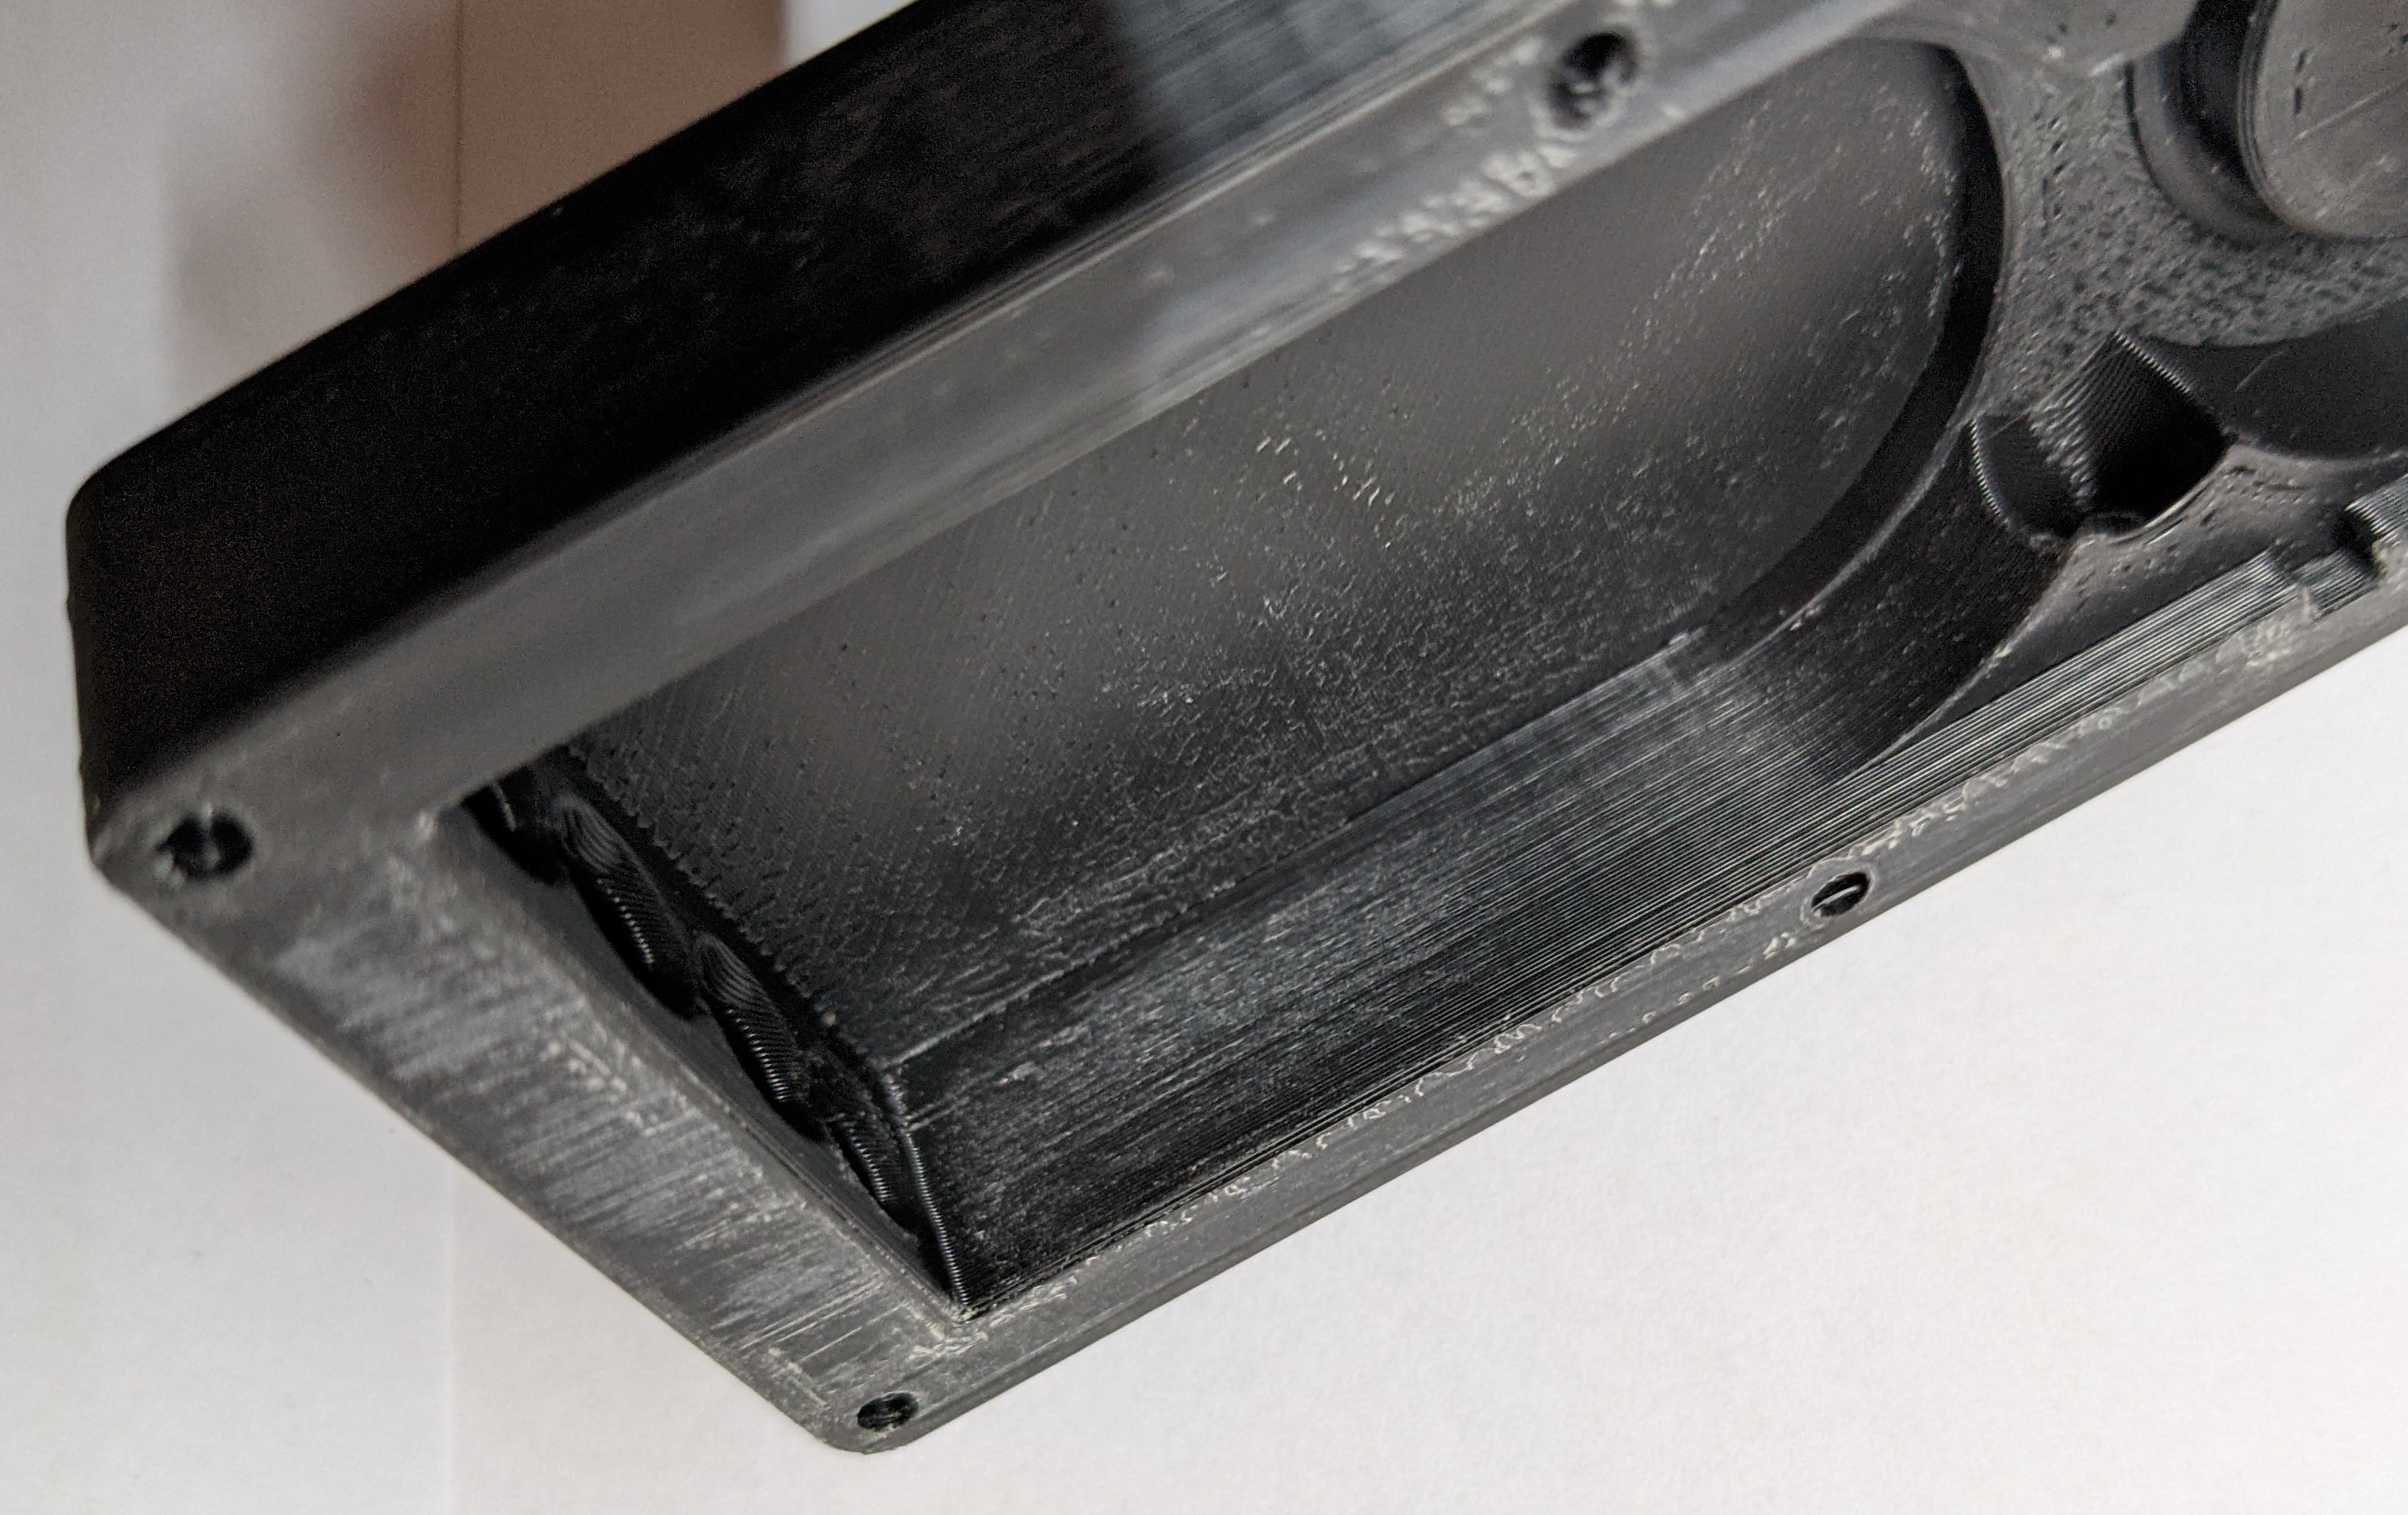
Place the bearing on MainPlunger and place BearingTop on top of that.
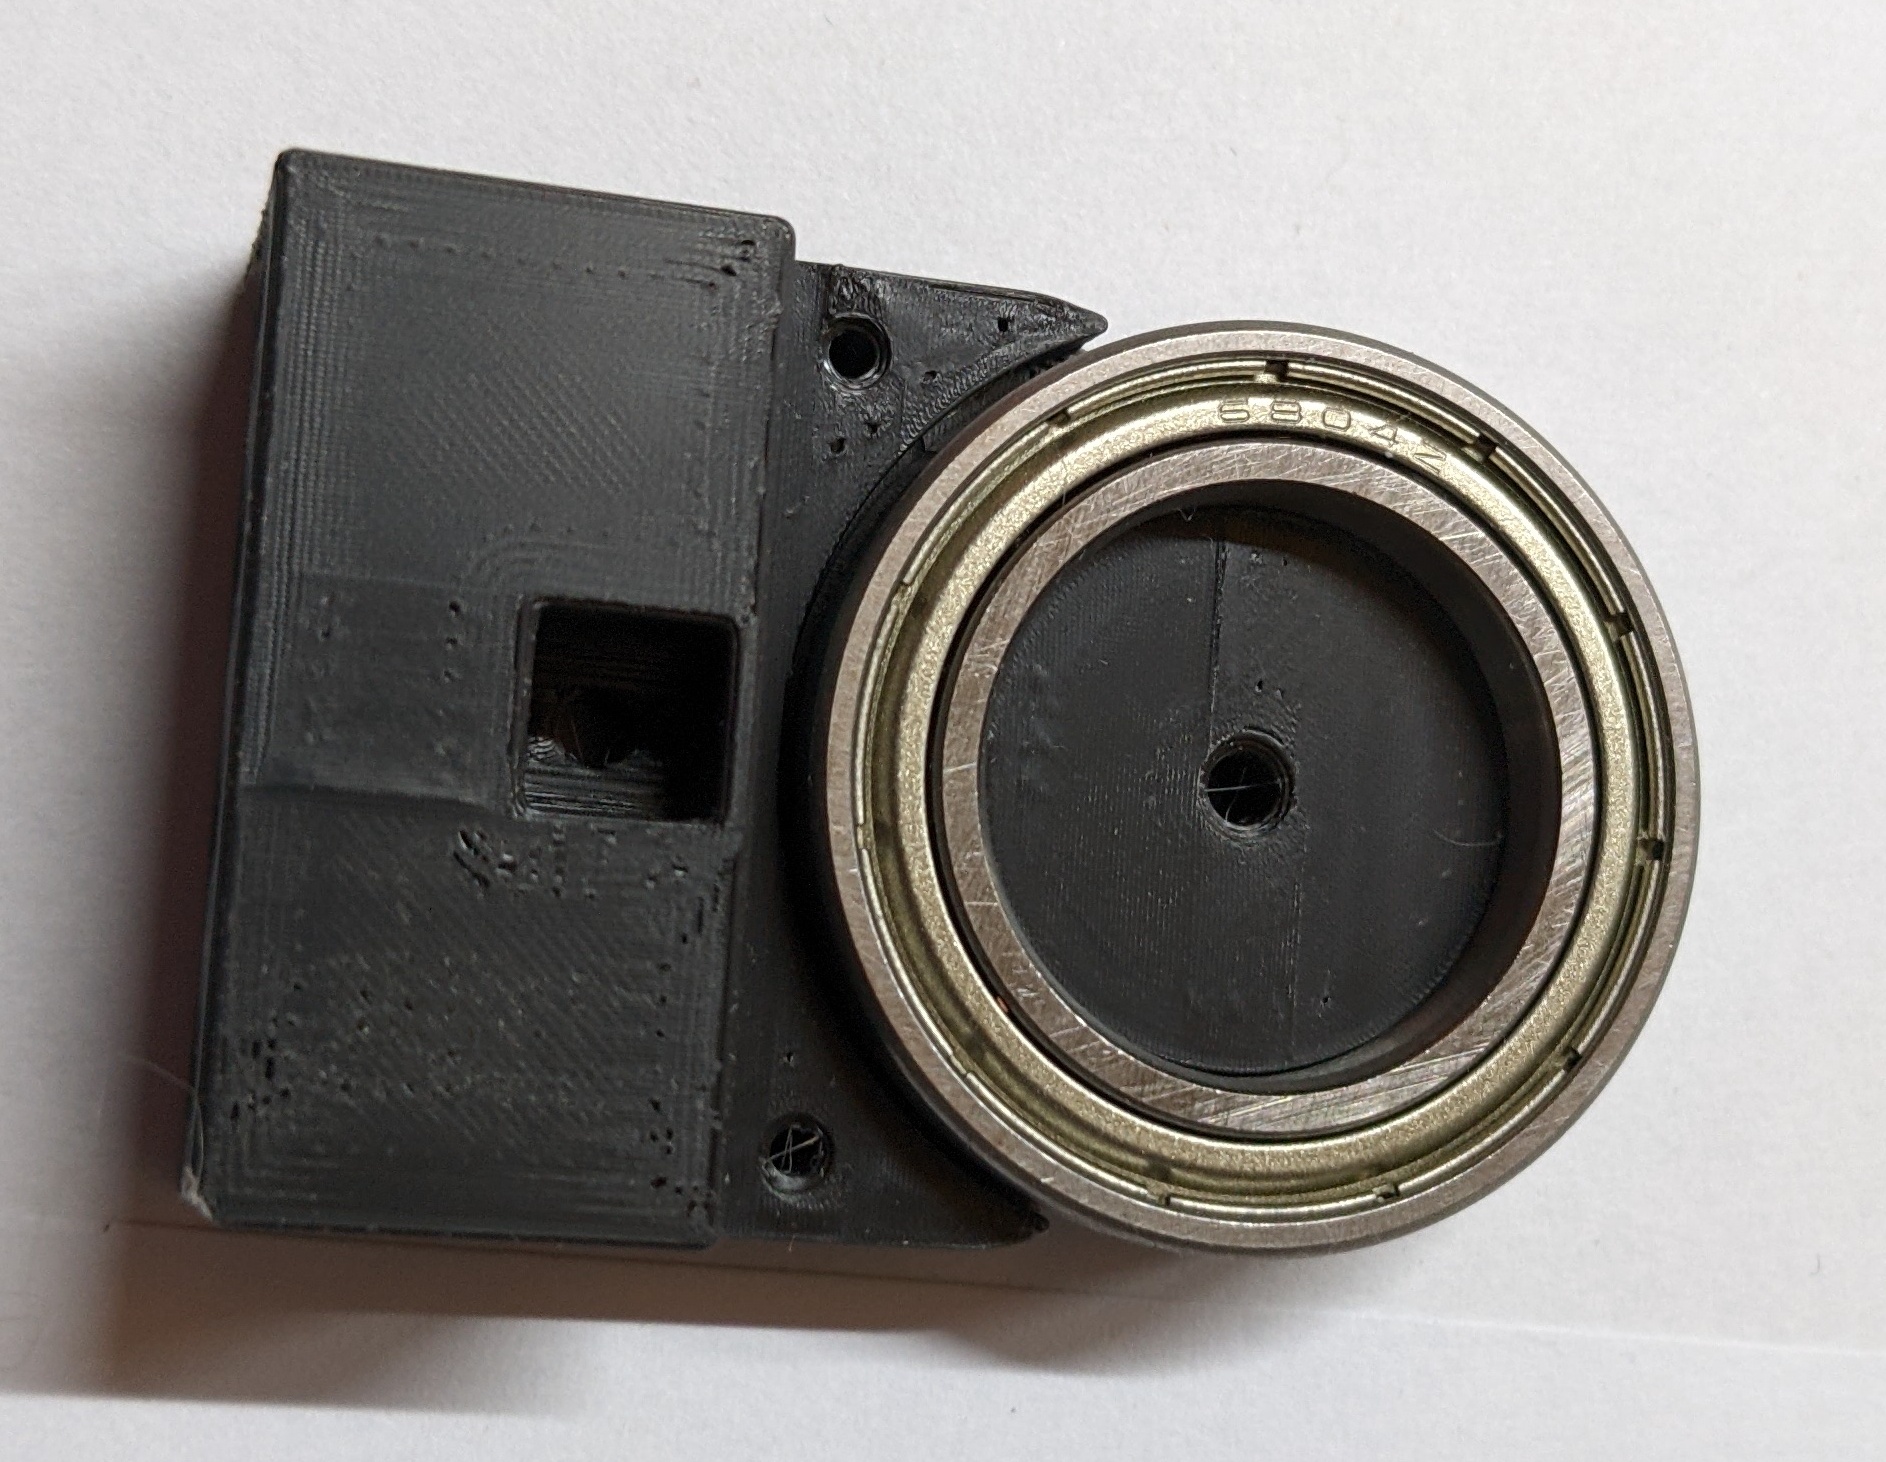
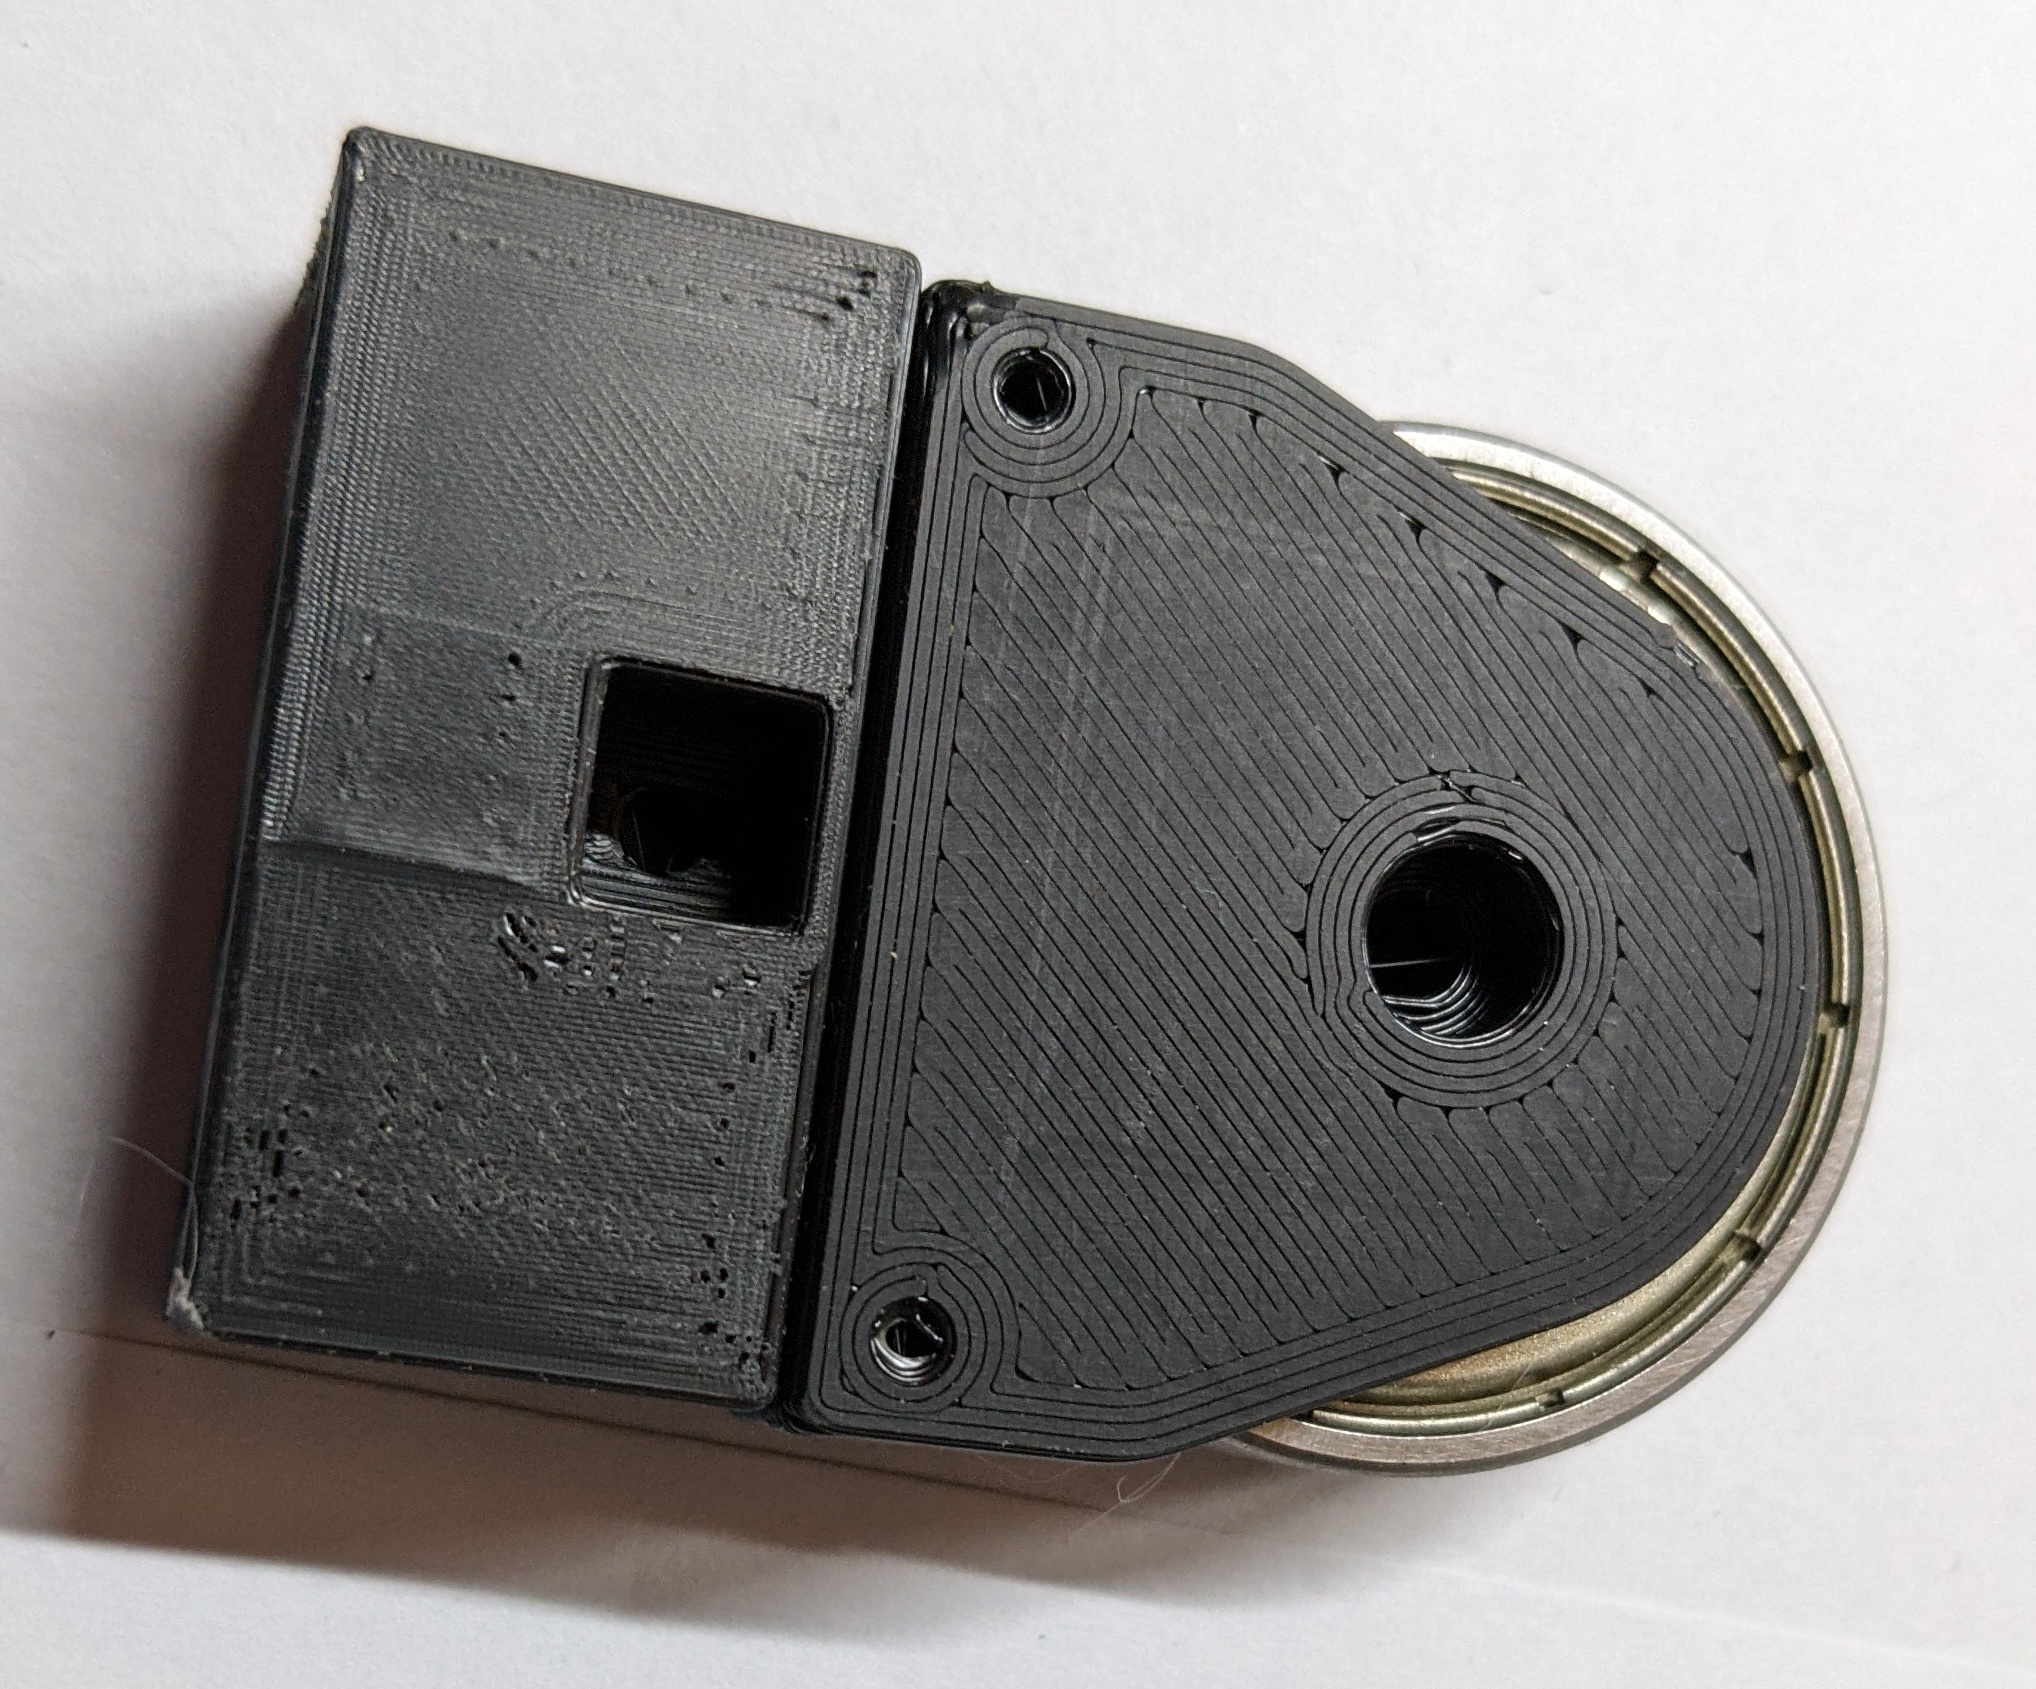 Take a piece of the filament you printed with, sharpen the end, then push it through the pin hole. You may need to drill out the holes in BearingTop if the filament doesn't fit. Push them in most of the way, cut the filament a couple mm from the top, and hammer it in the rest of the way. Once it is all the way in snip it off as flush as you can.
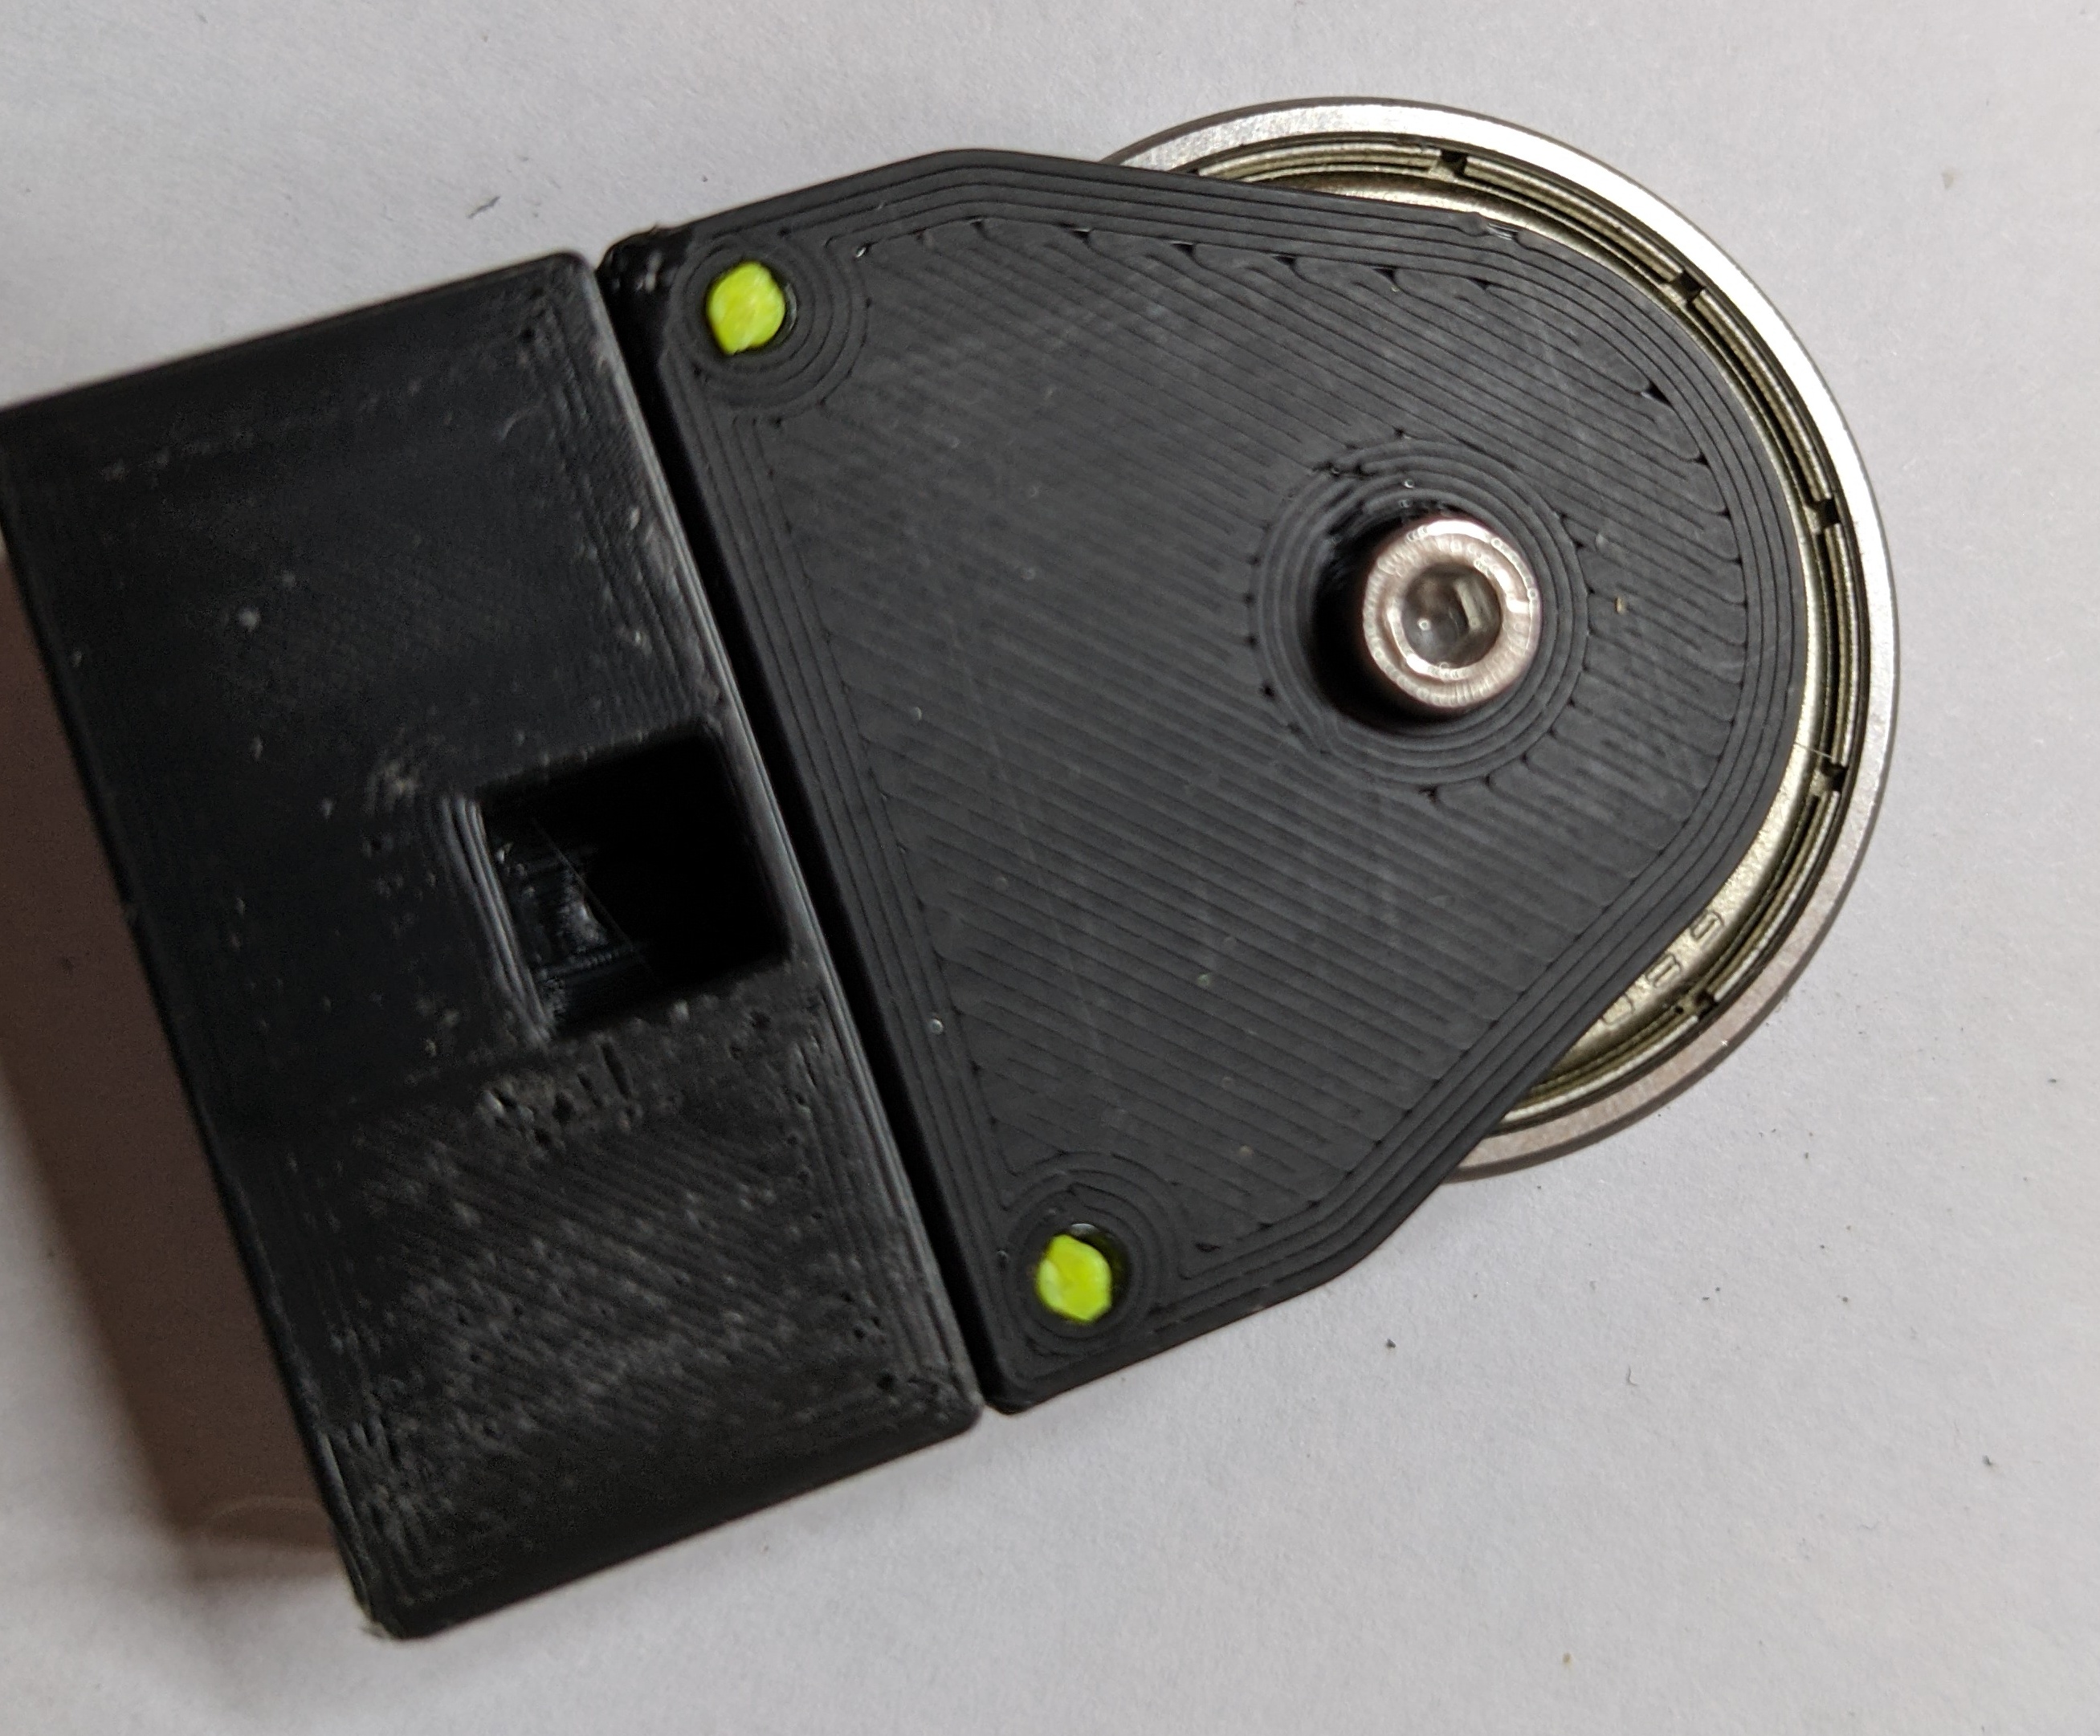
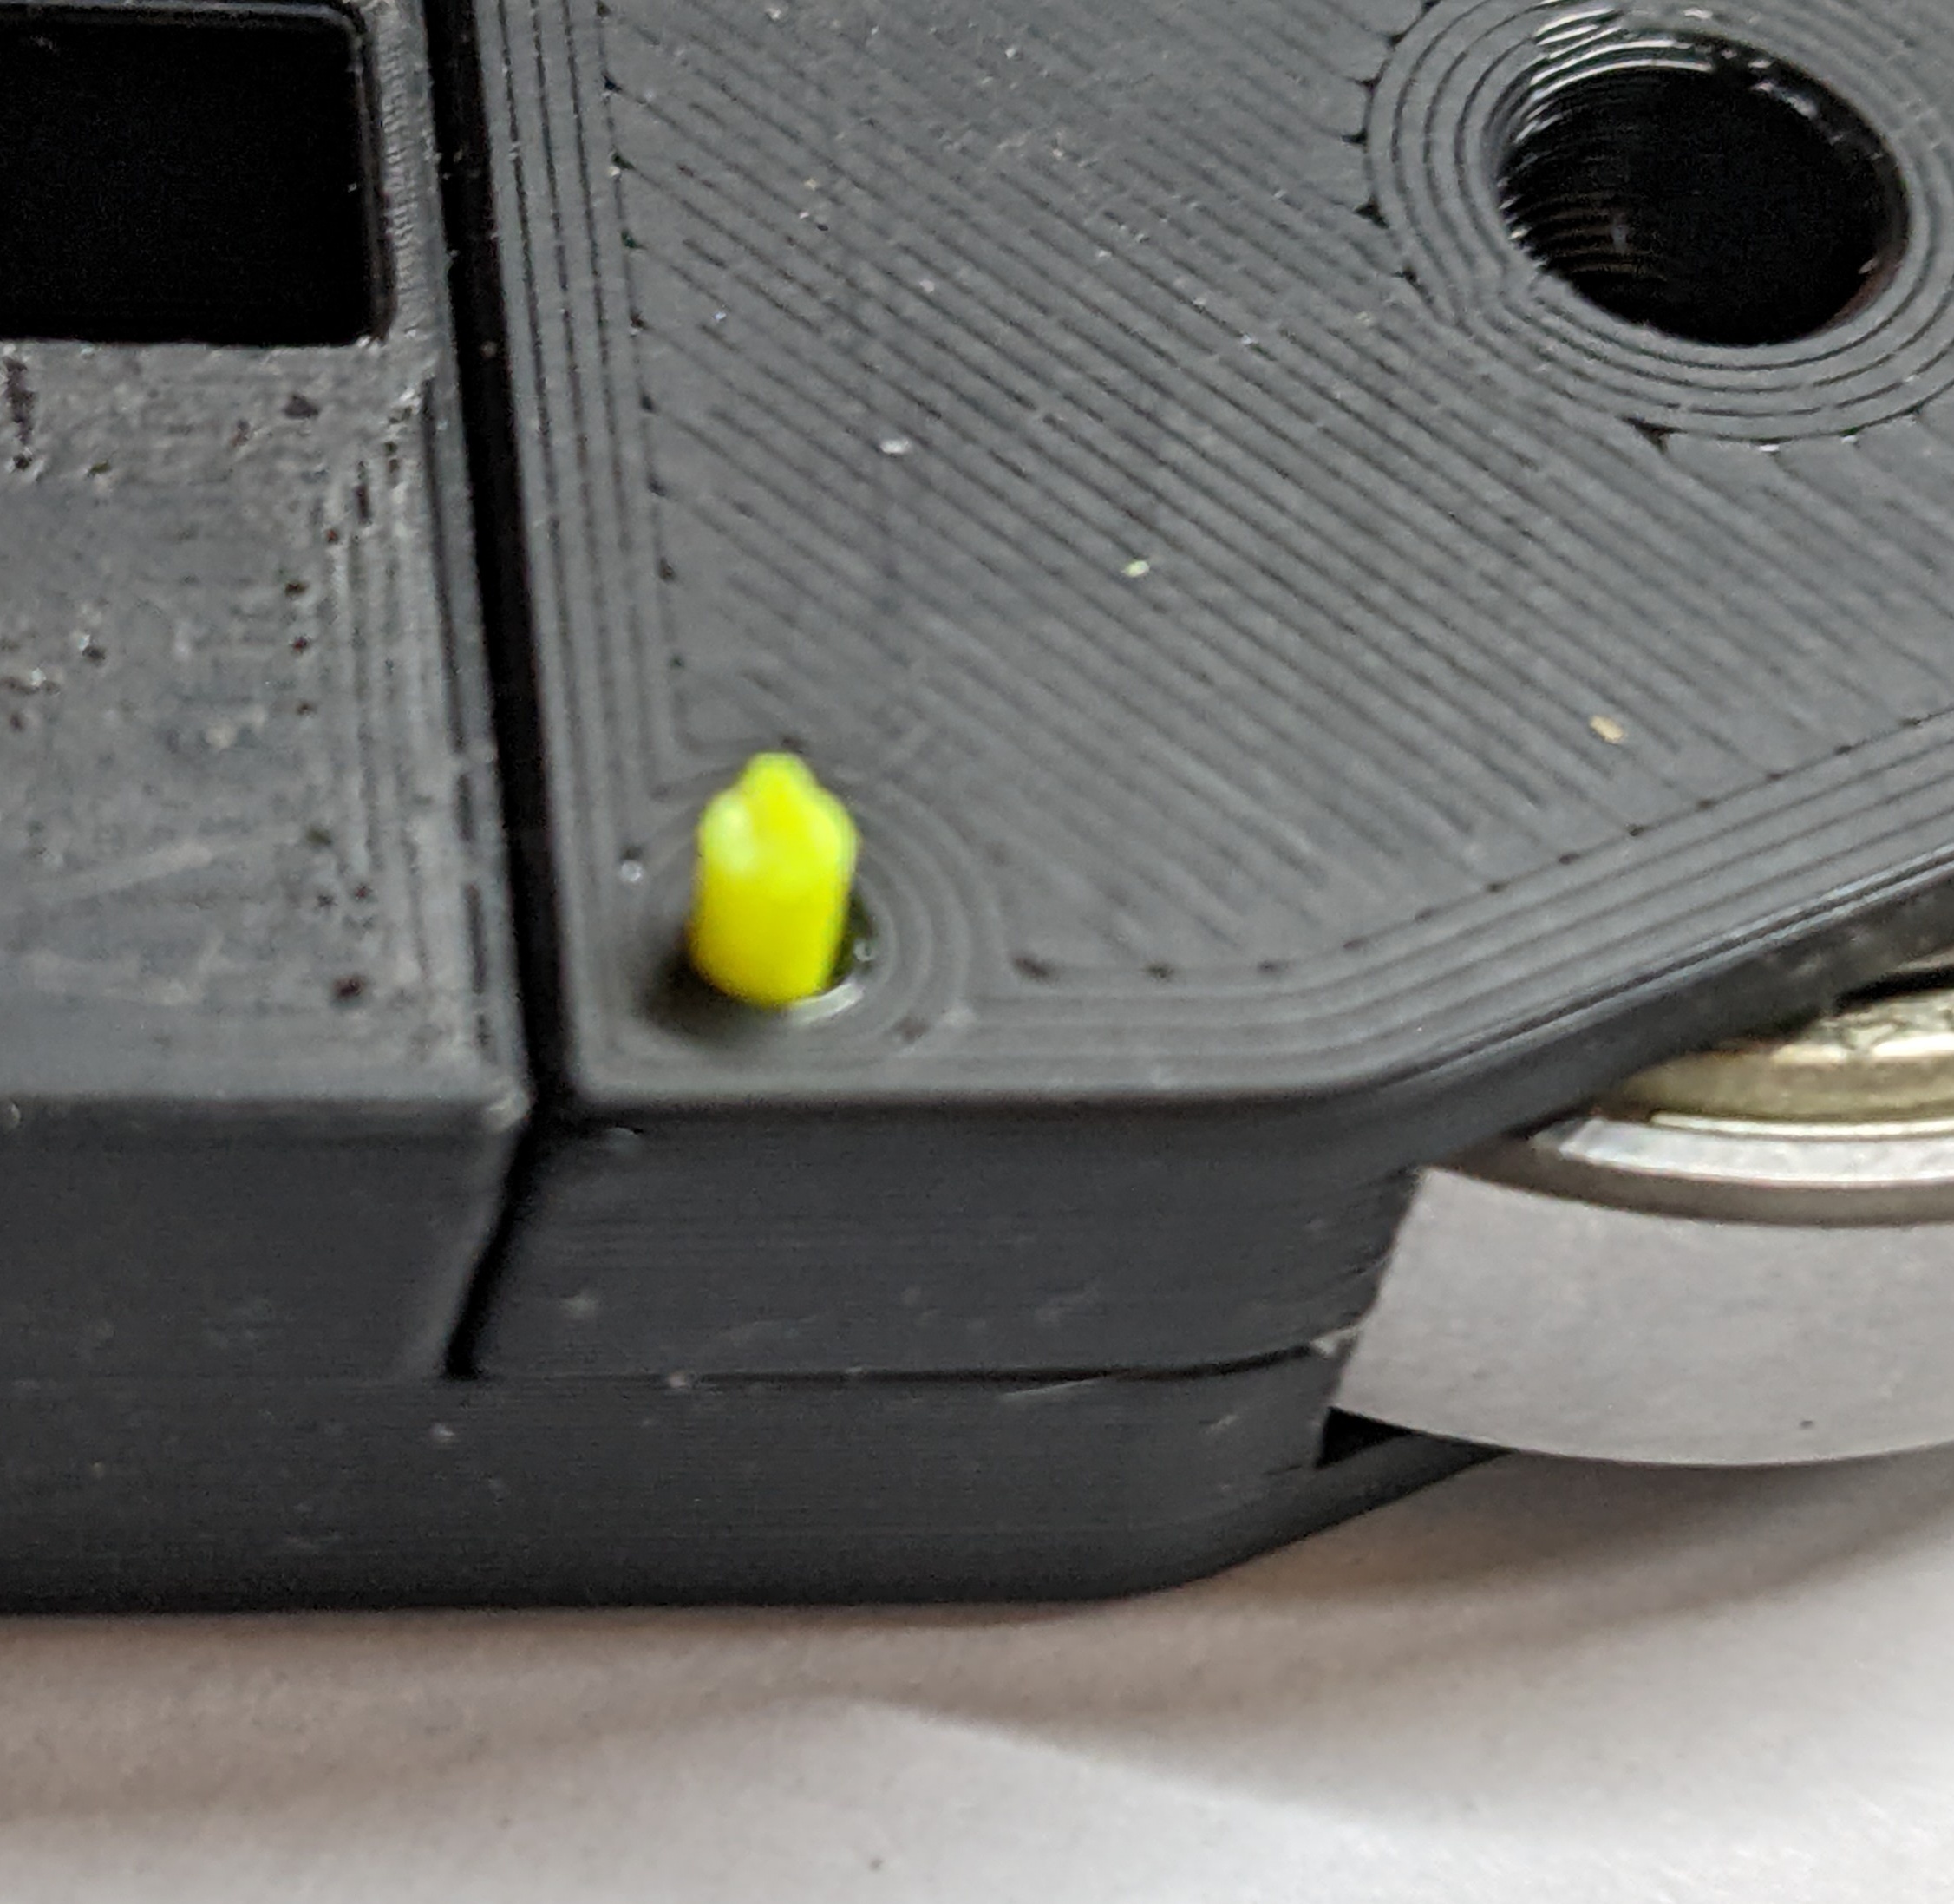 Screw the bearing down using an m3x8 screw.
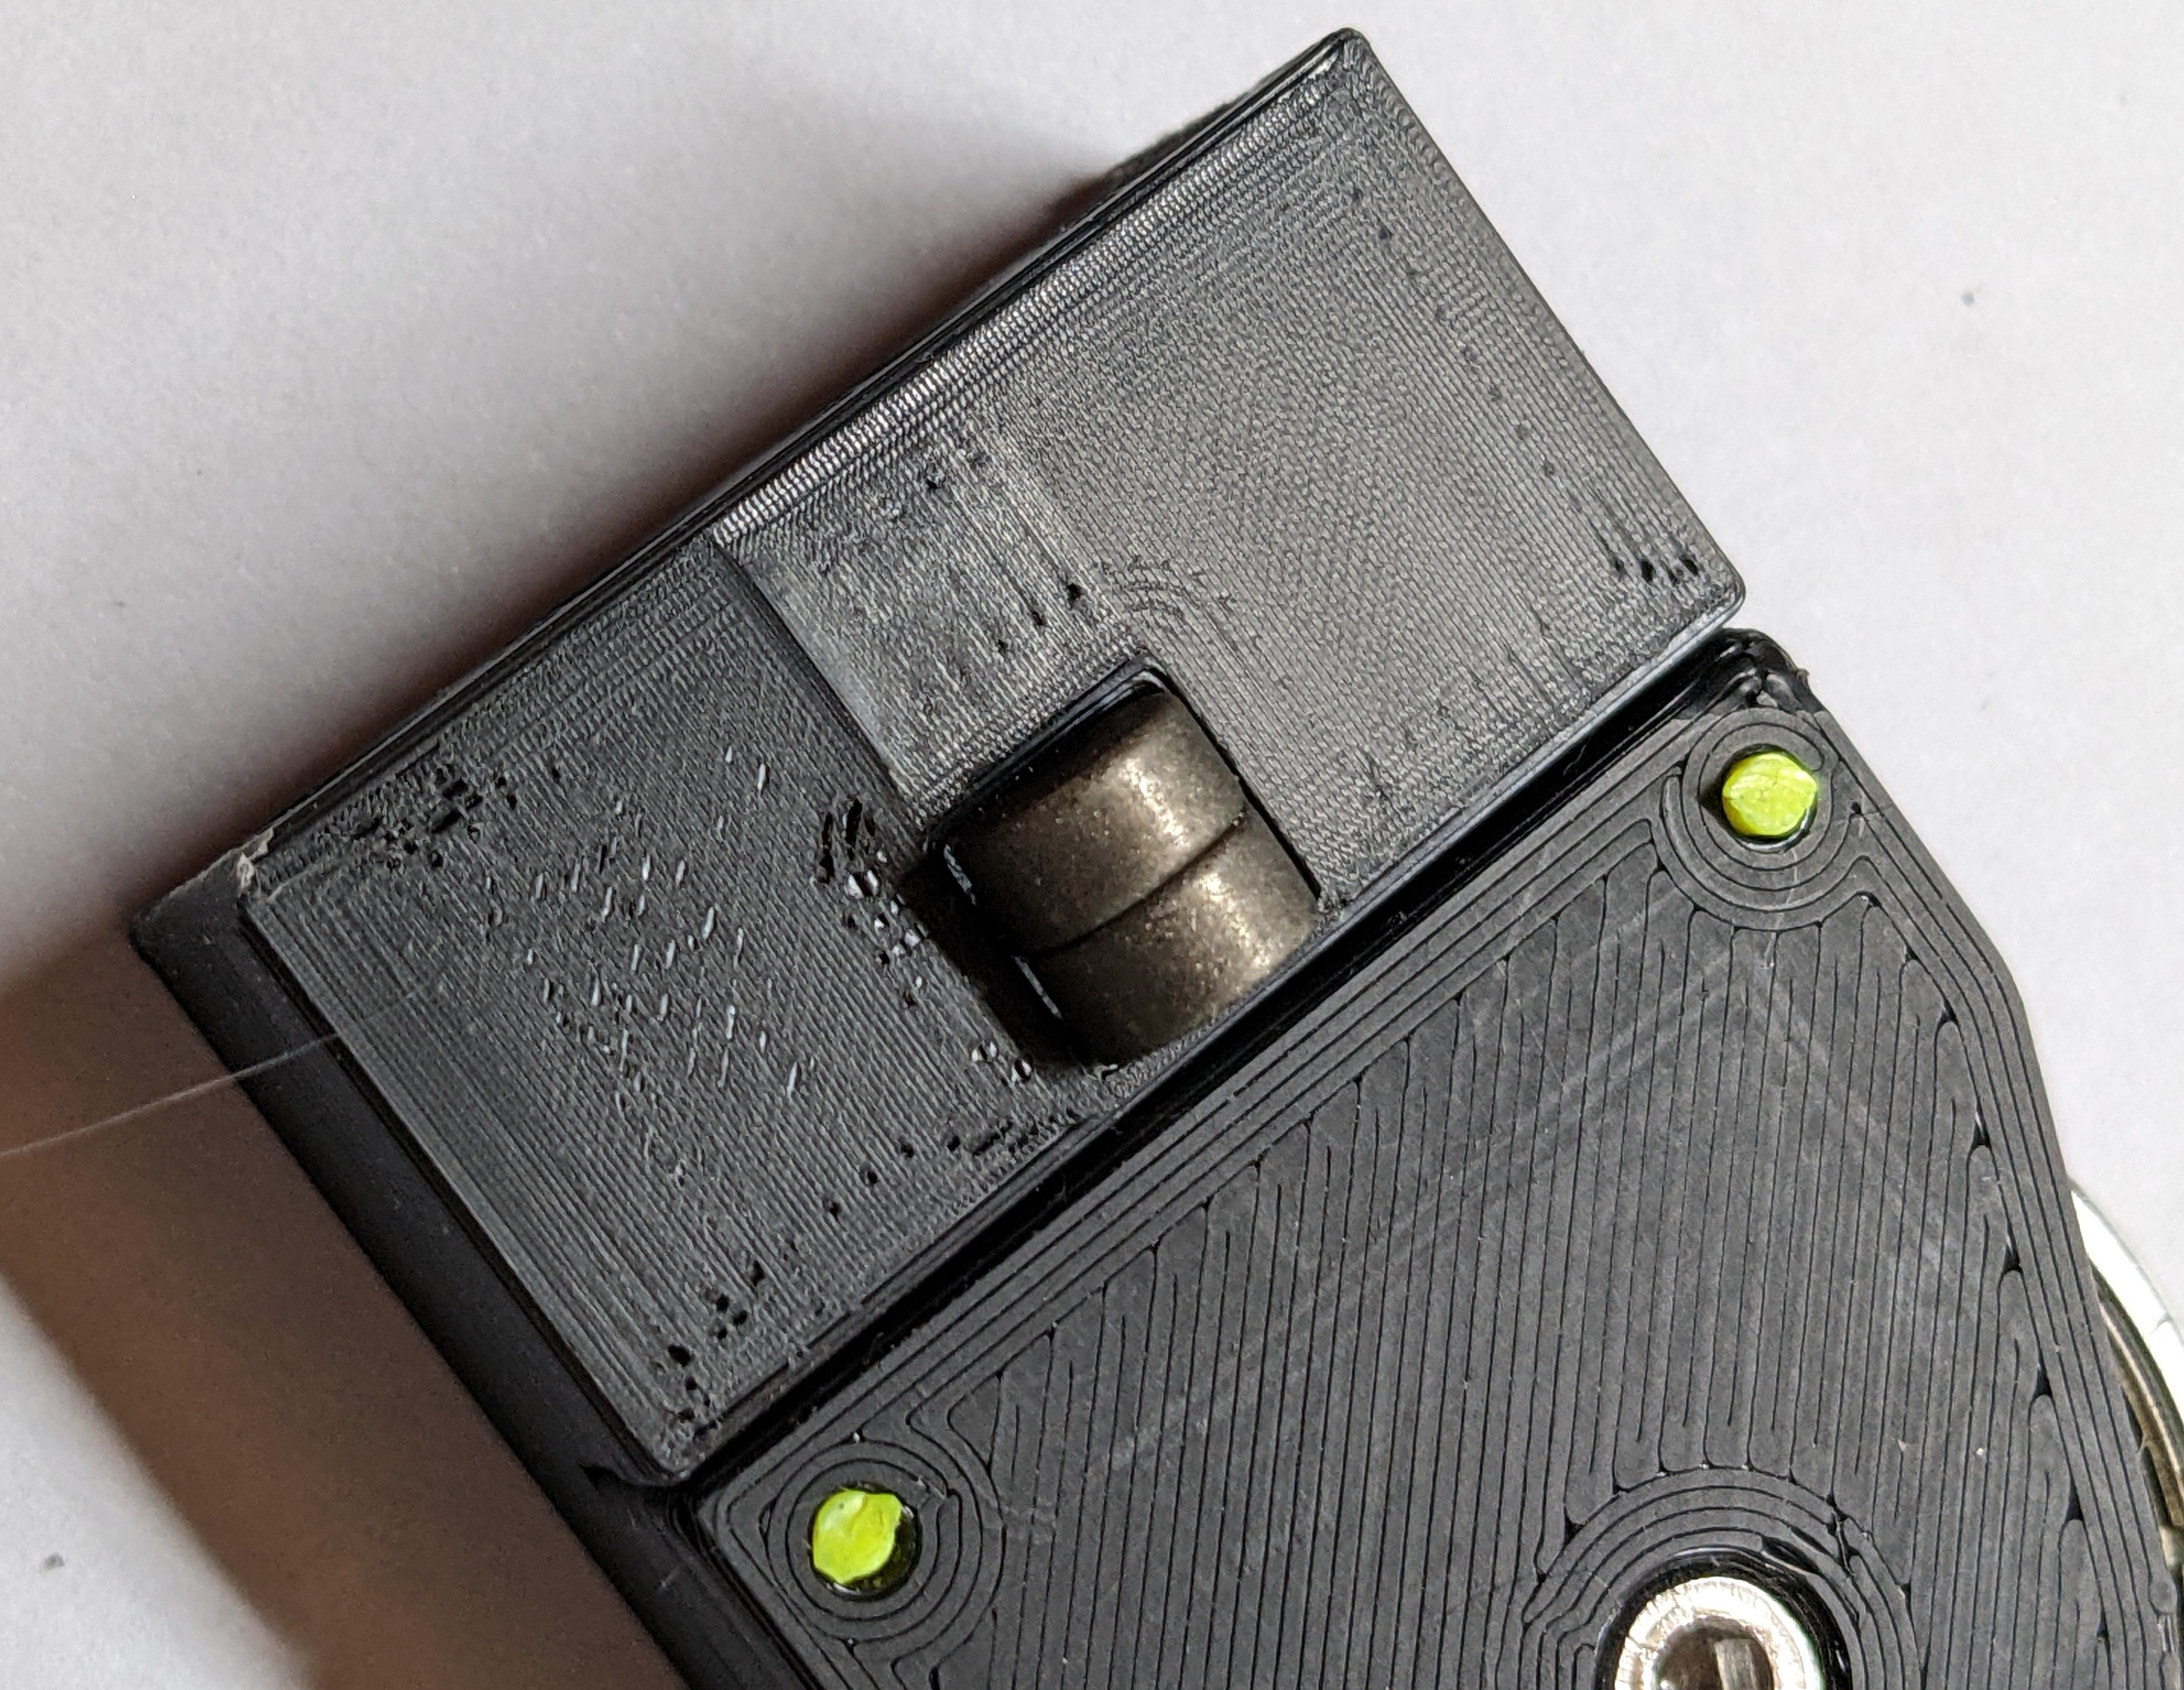
 Place your magnets (the nice ones if you got them) in the slot and gently (SmCO magnets are quite fragile and chip easily) press them all the way down, they should be a little bit below the surface of the part. They should be held in place pretty well. If they don't sit in there snugly, glue them down using epoxy or something, we don't wan't wobbly magnets.
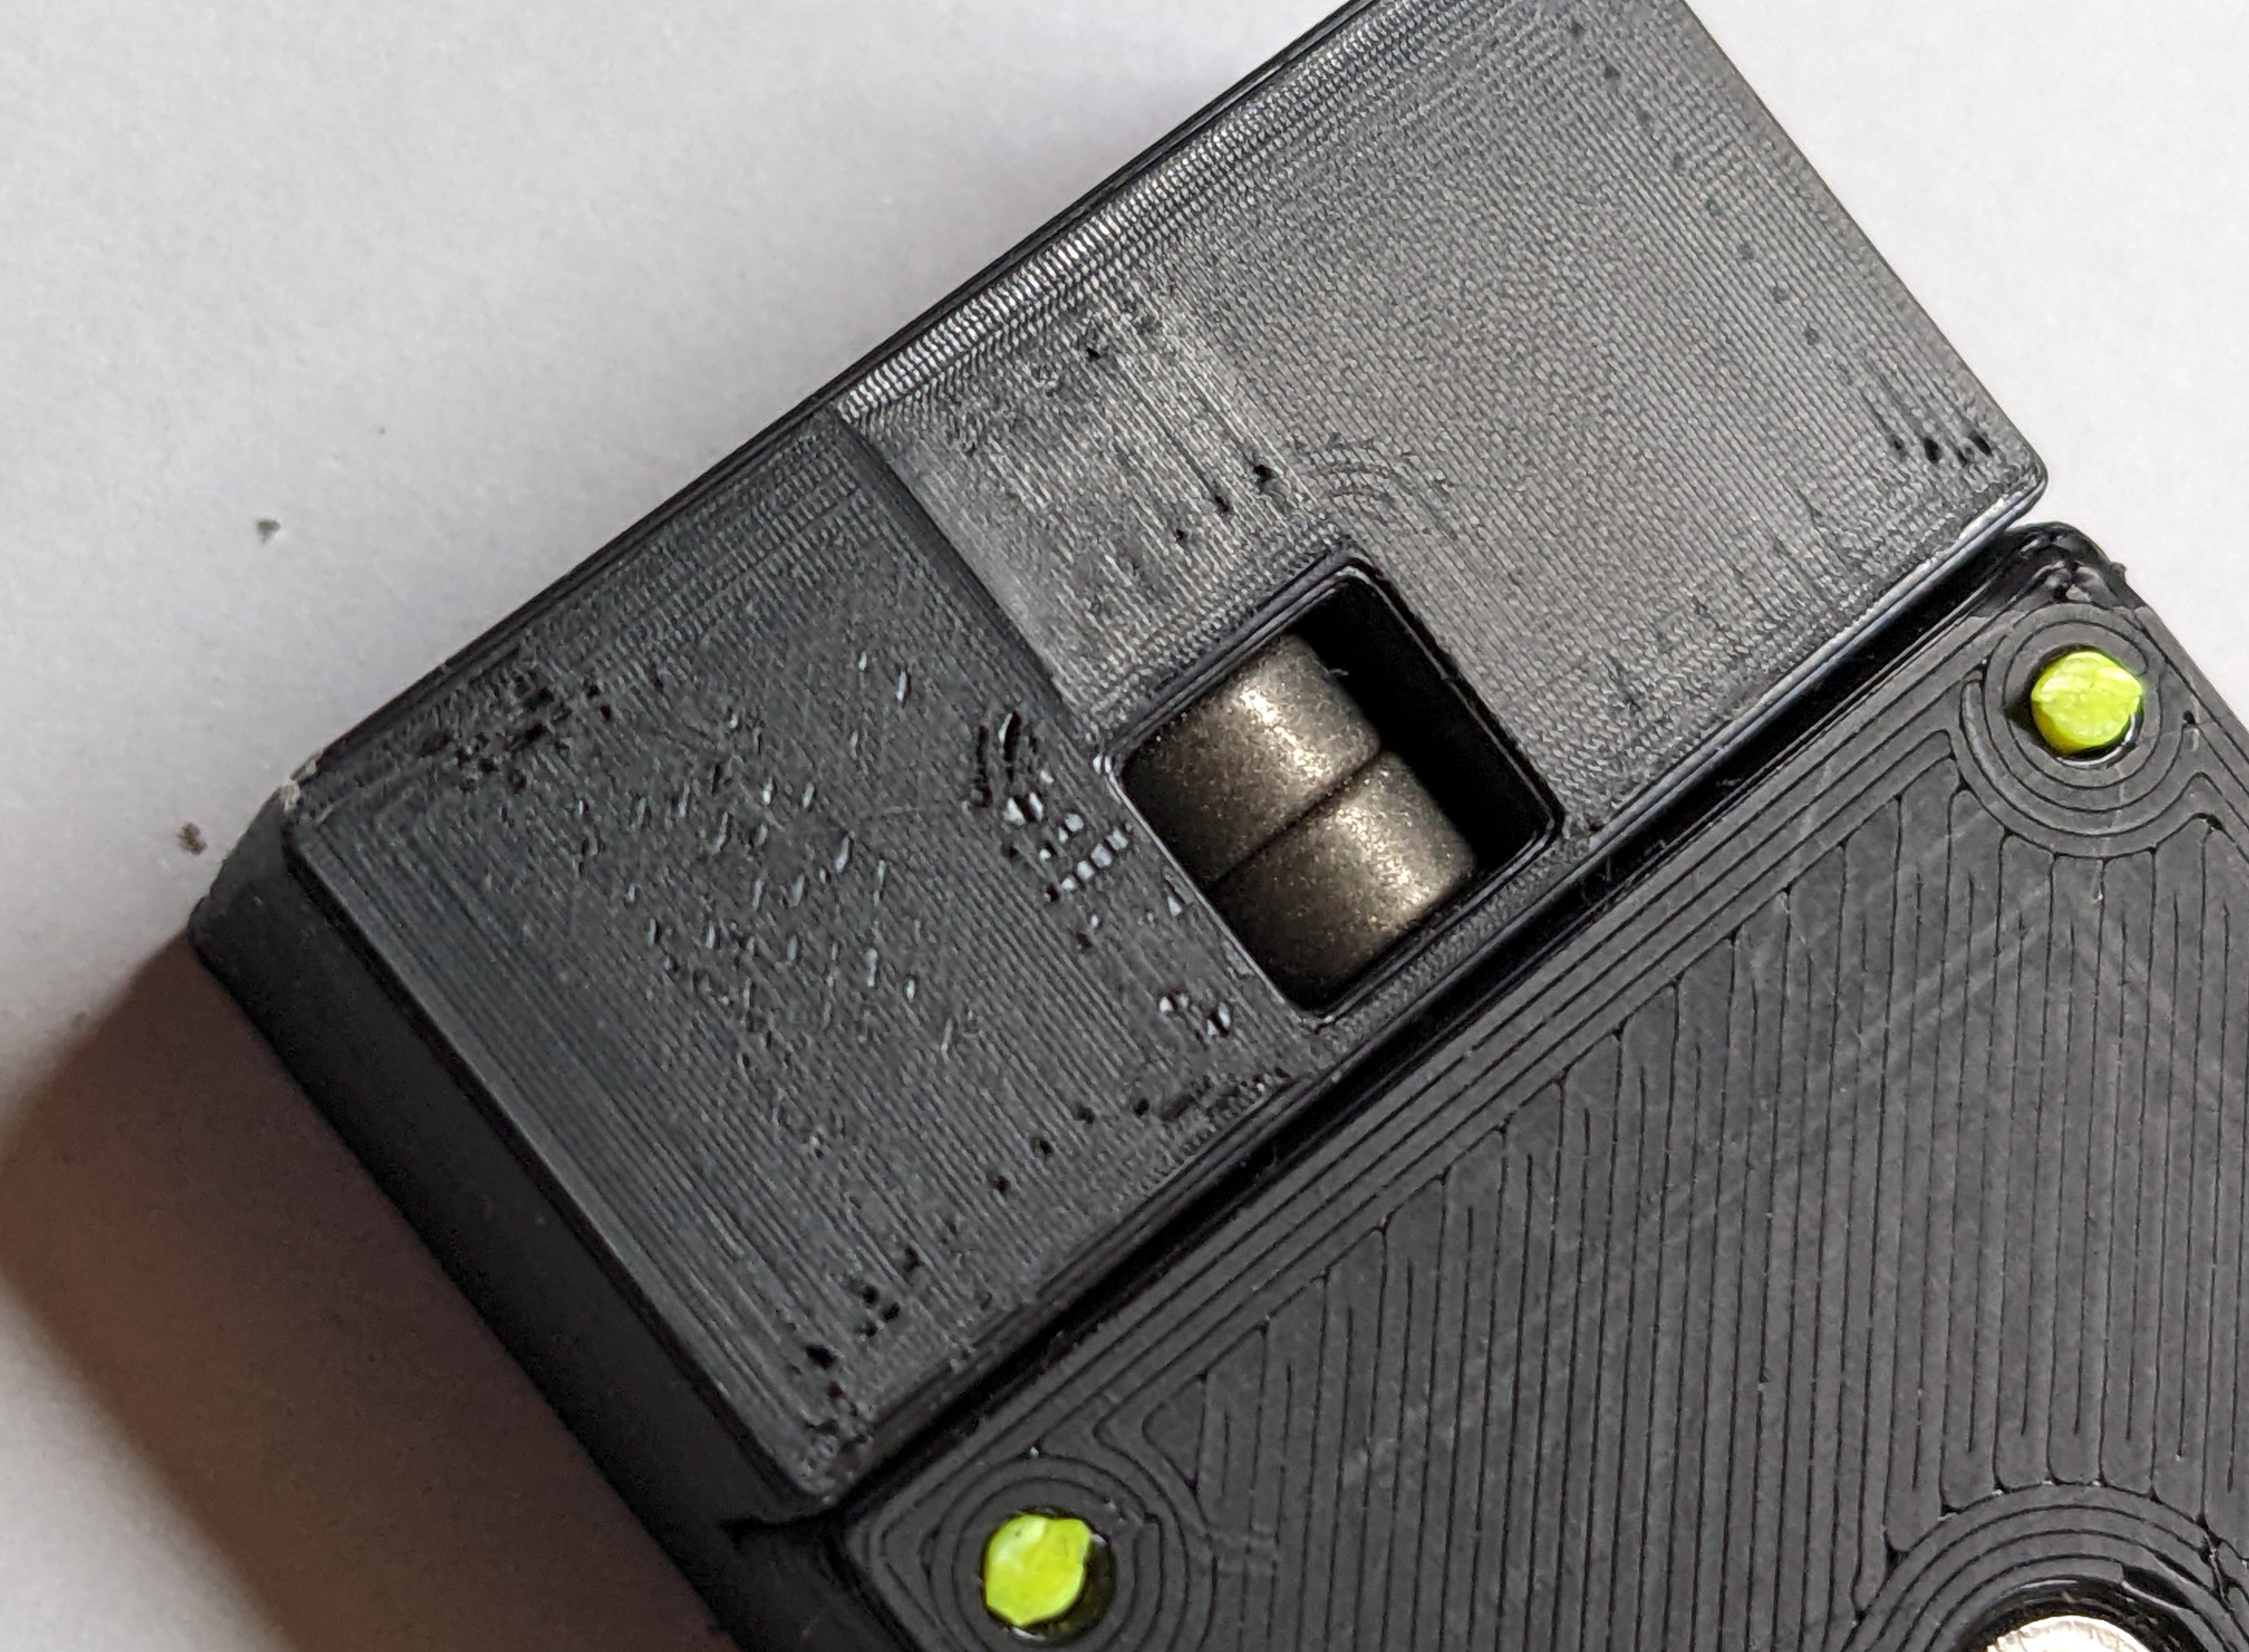
Only sand with the sandpaper below the part and avoid getting dust into the bearing, or it will seize and become crunchy. It is recommended to fix the sandpaper to a flat surface and move the part across the sandpaper. This avoids inadvertently making the part unlevel.
Sand the sides of the plunger until it slides smoothly. You don't want to sand too much otherwise you'll get side to side play.
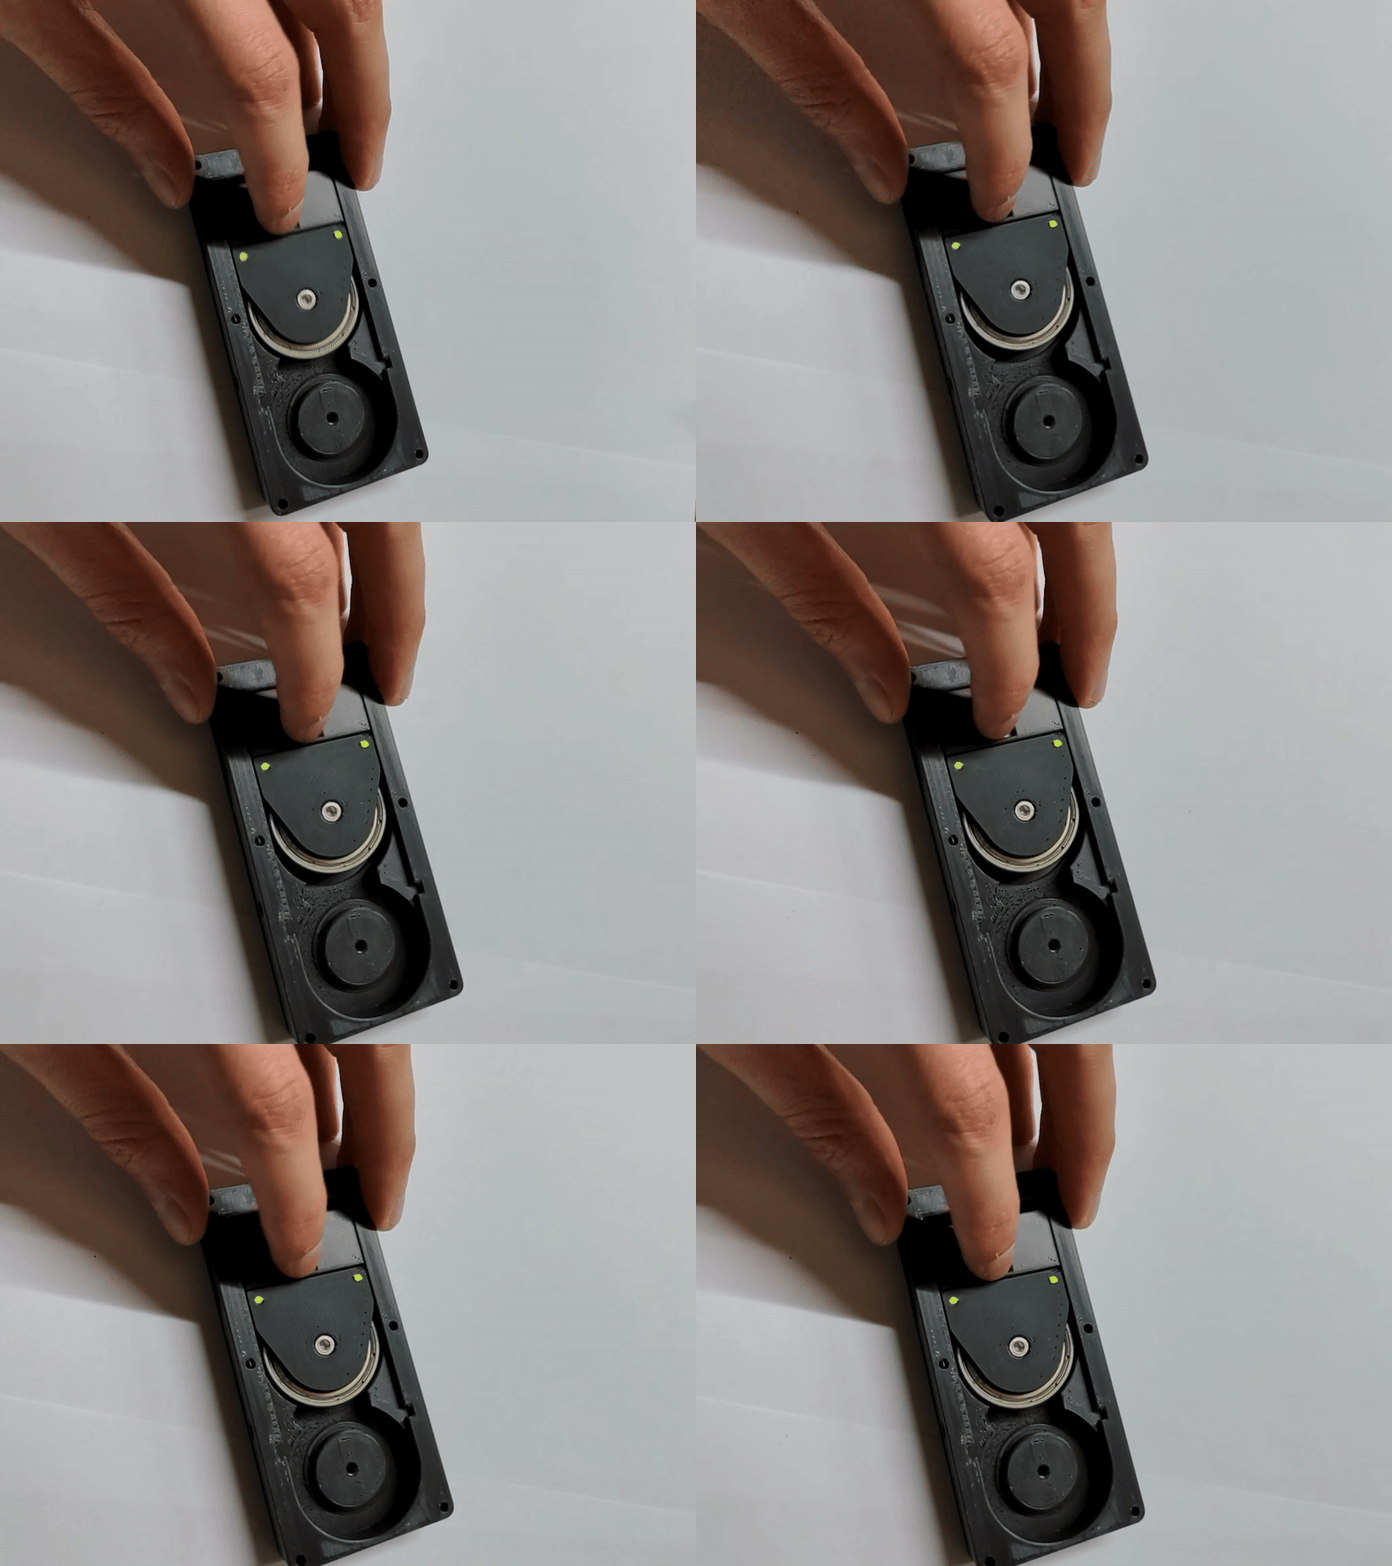
If you are using coil springs skip this step
Push 2 magnets into each of the outer holes on the plunger, both facing in the same direction. The inner holes remain unused (could be used for more magnets if for some reason more spring force is required)
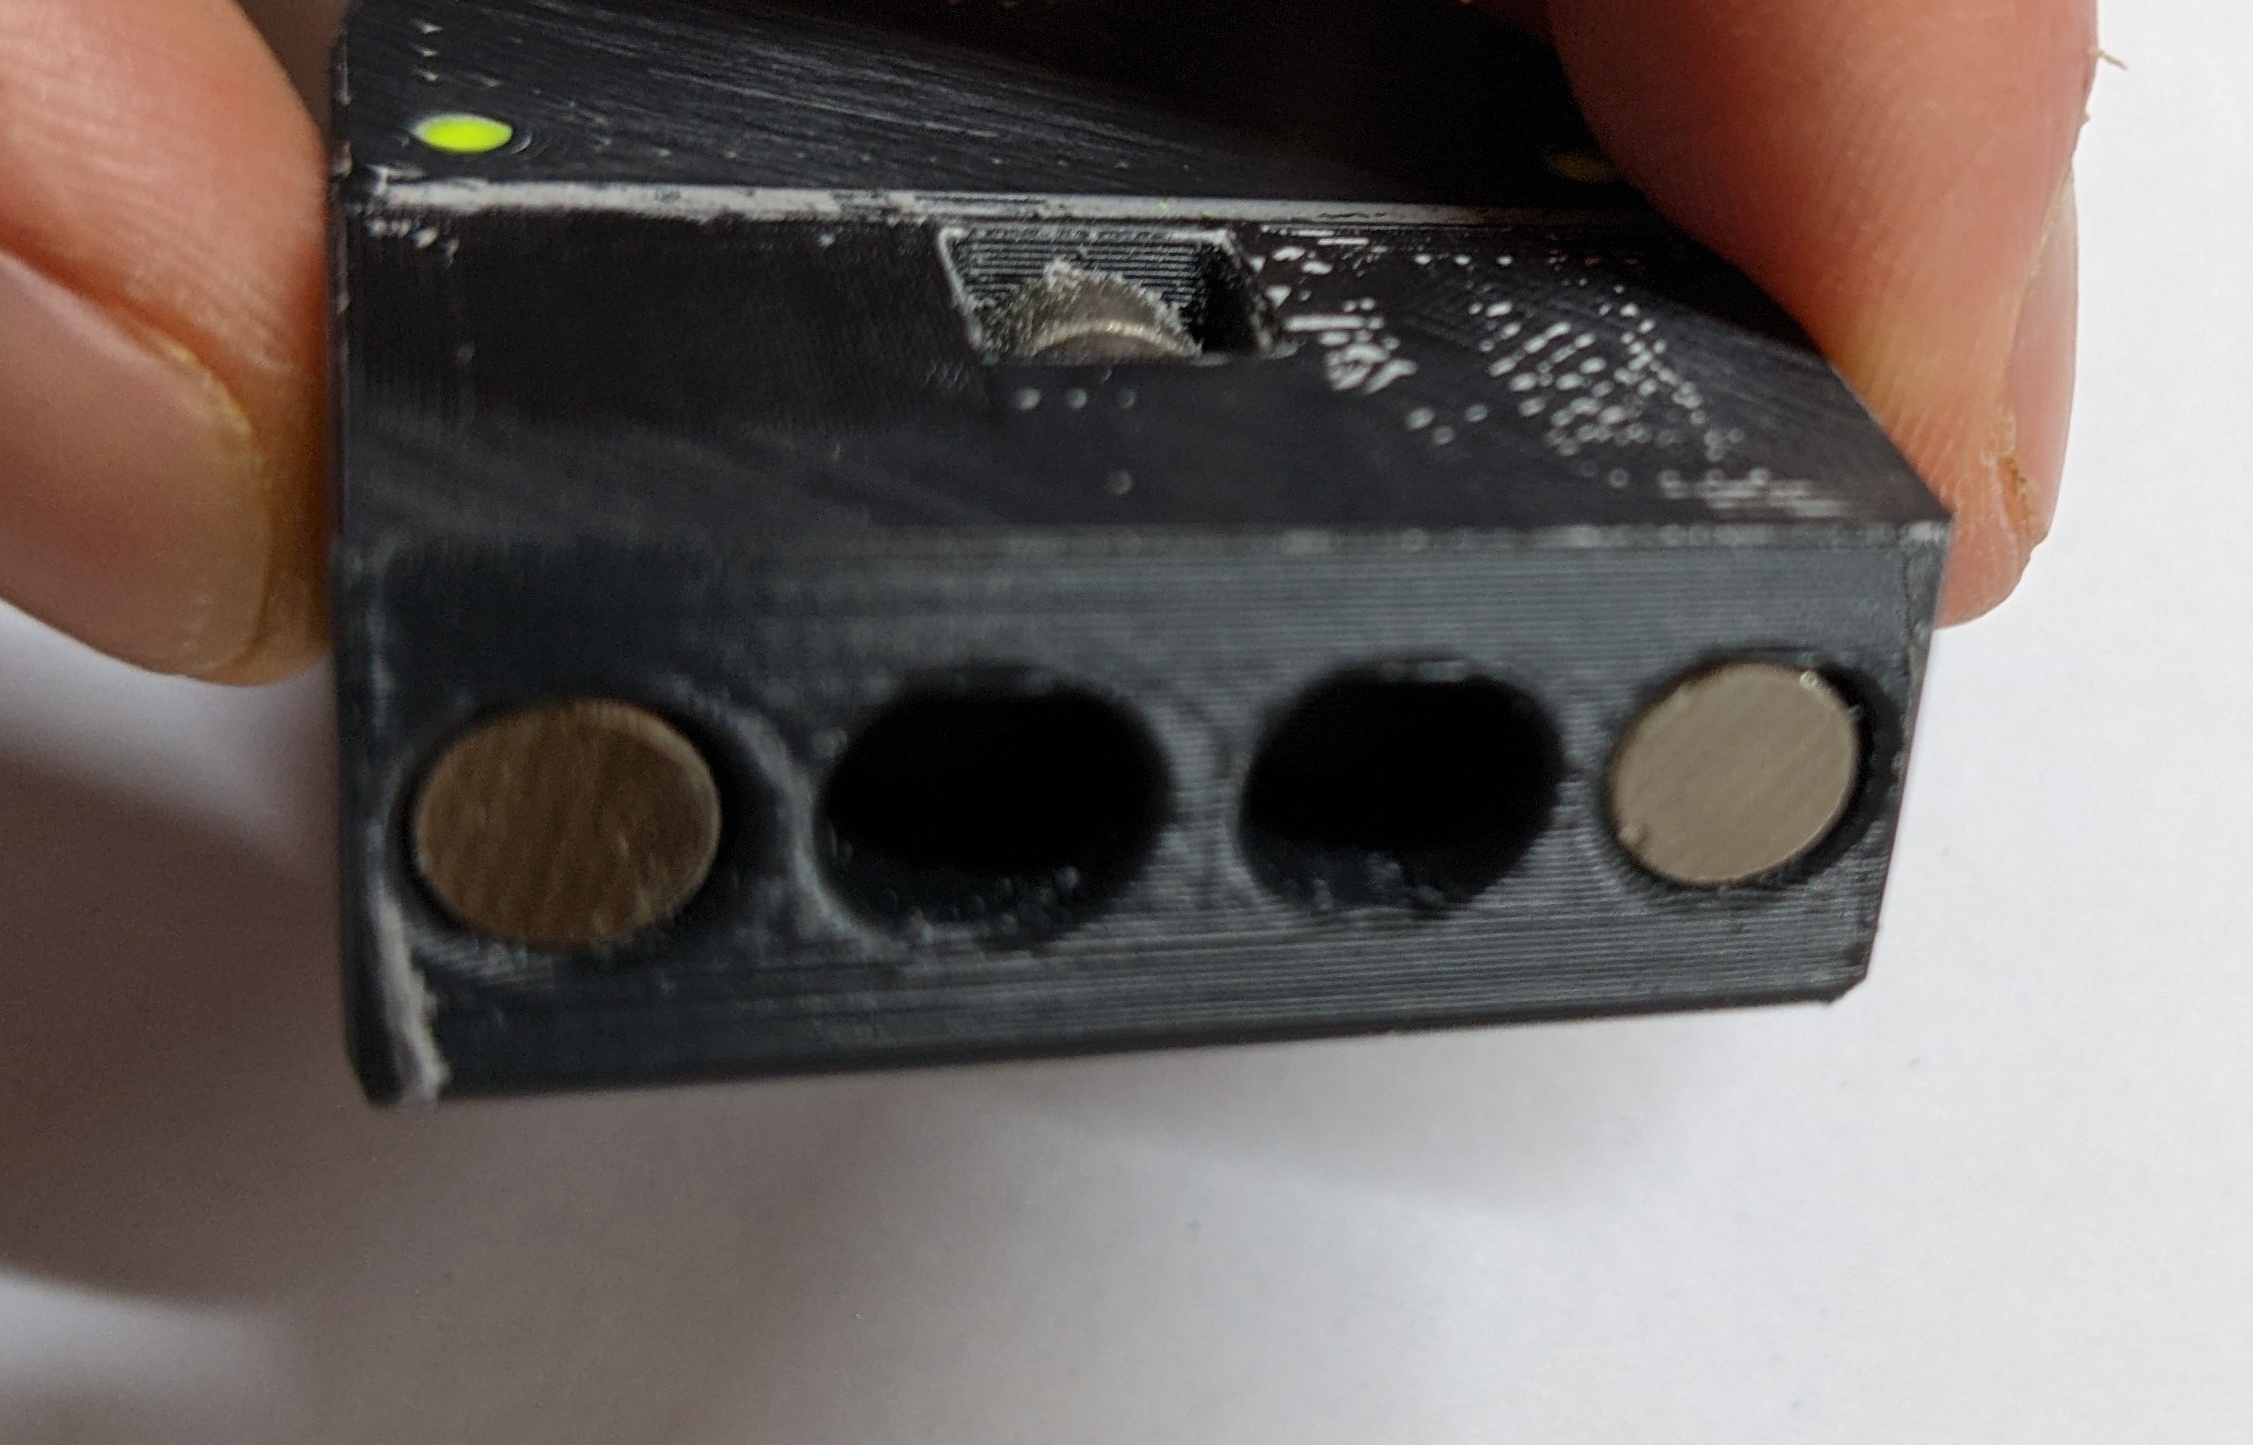 Sand down the top of the plunger (the bottom should already be smooth) until you can freely shake it around with the lid closed. Start by just holding the lid closed by hand (only grip at the corners) and then when that works screw in the 2 middle screws and check again. You want to remove as little as possible so you get smooth motion and not a lot of play.
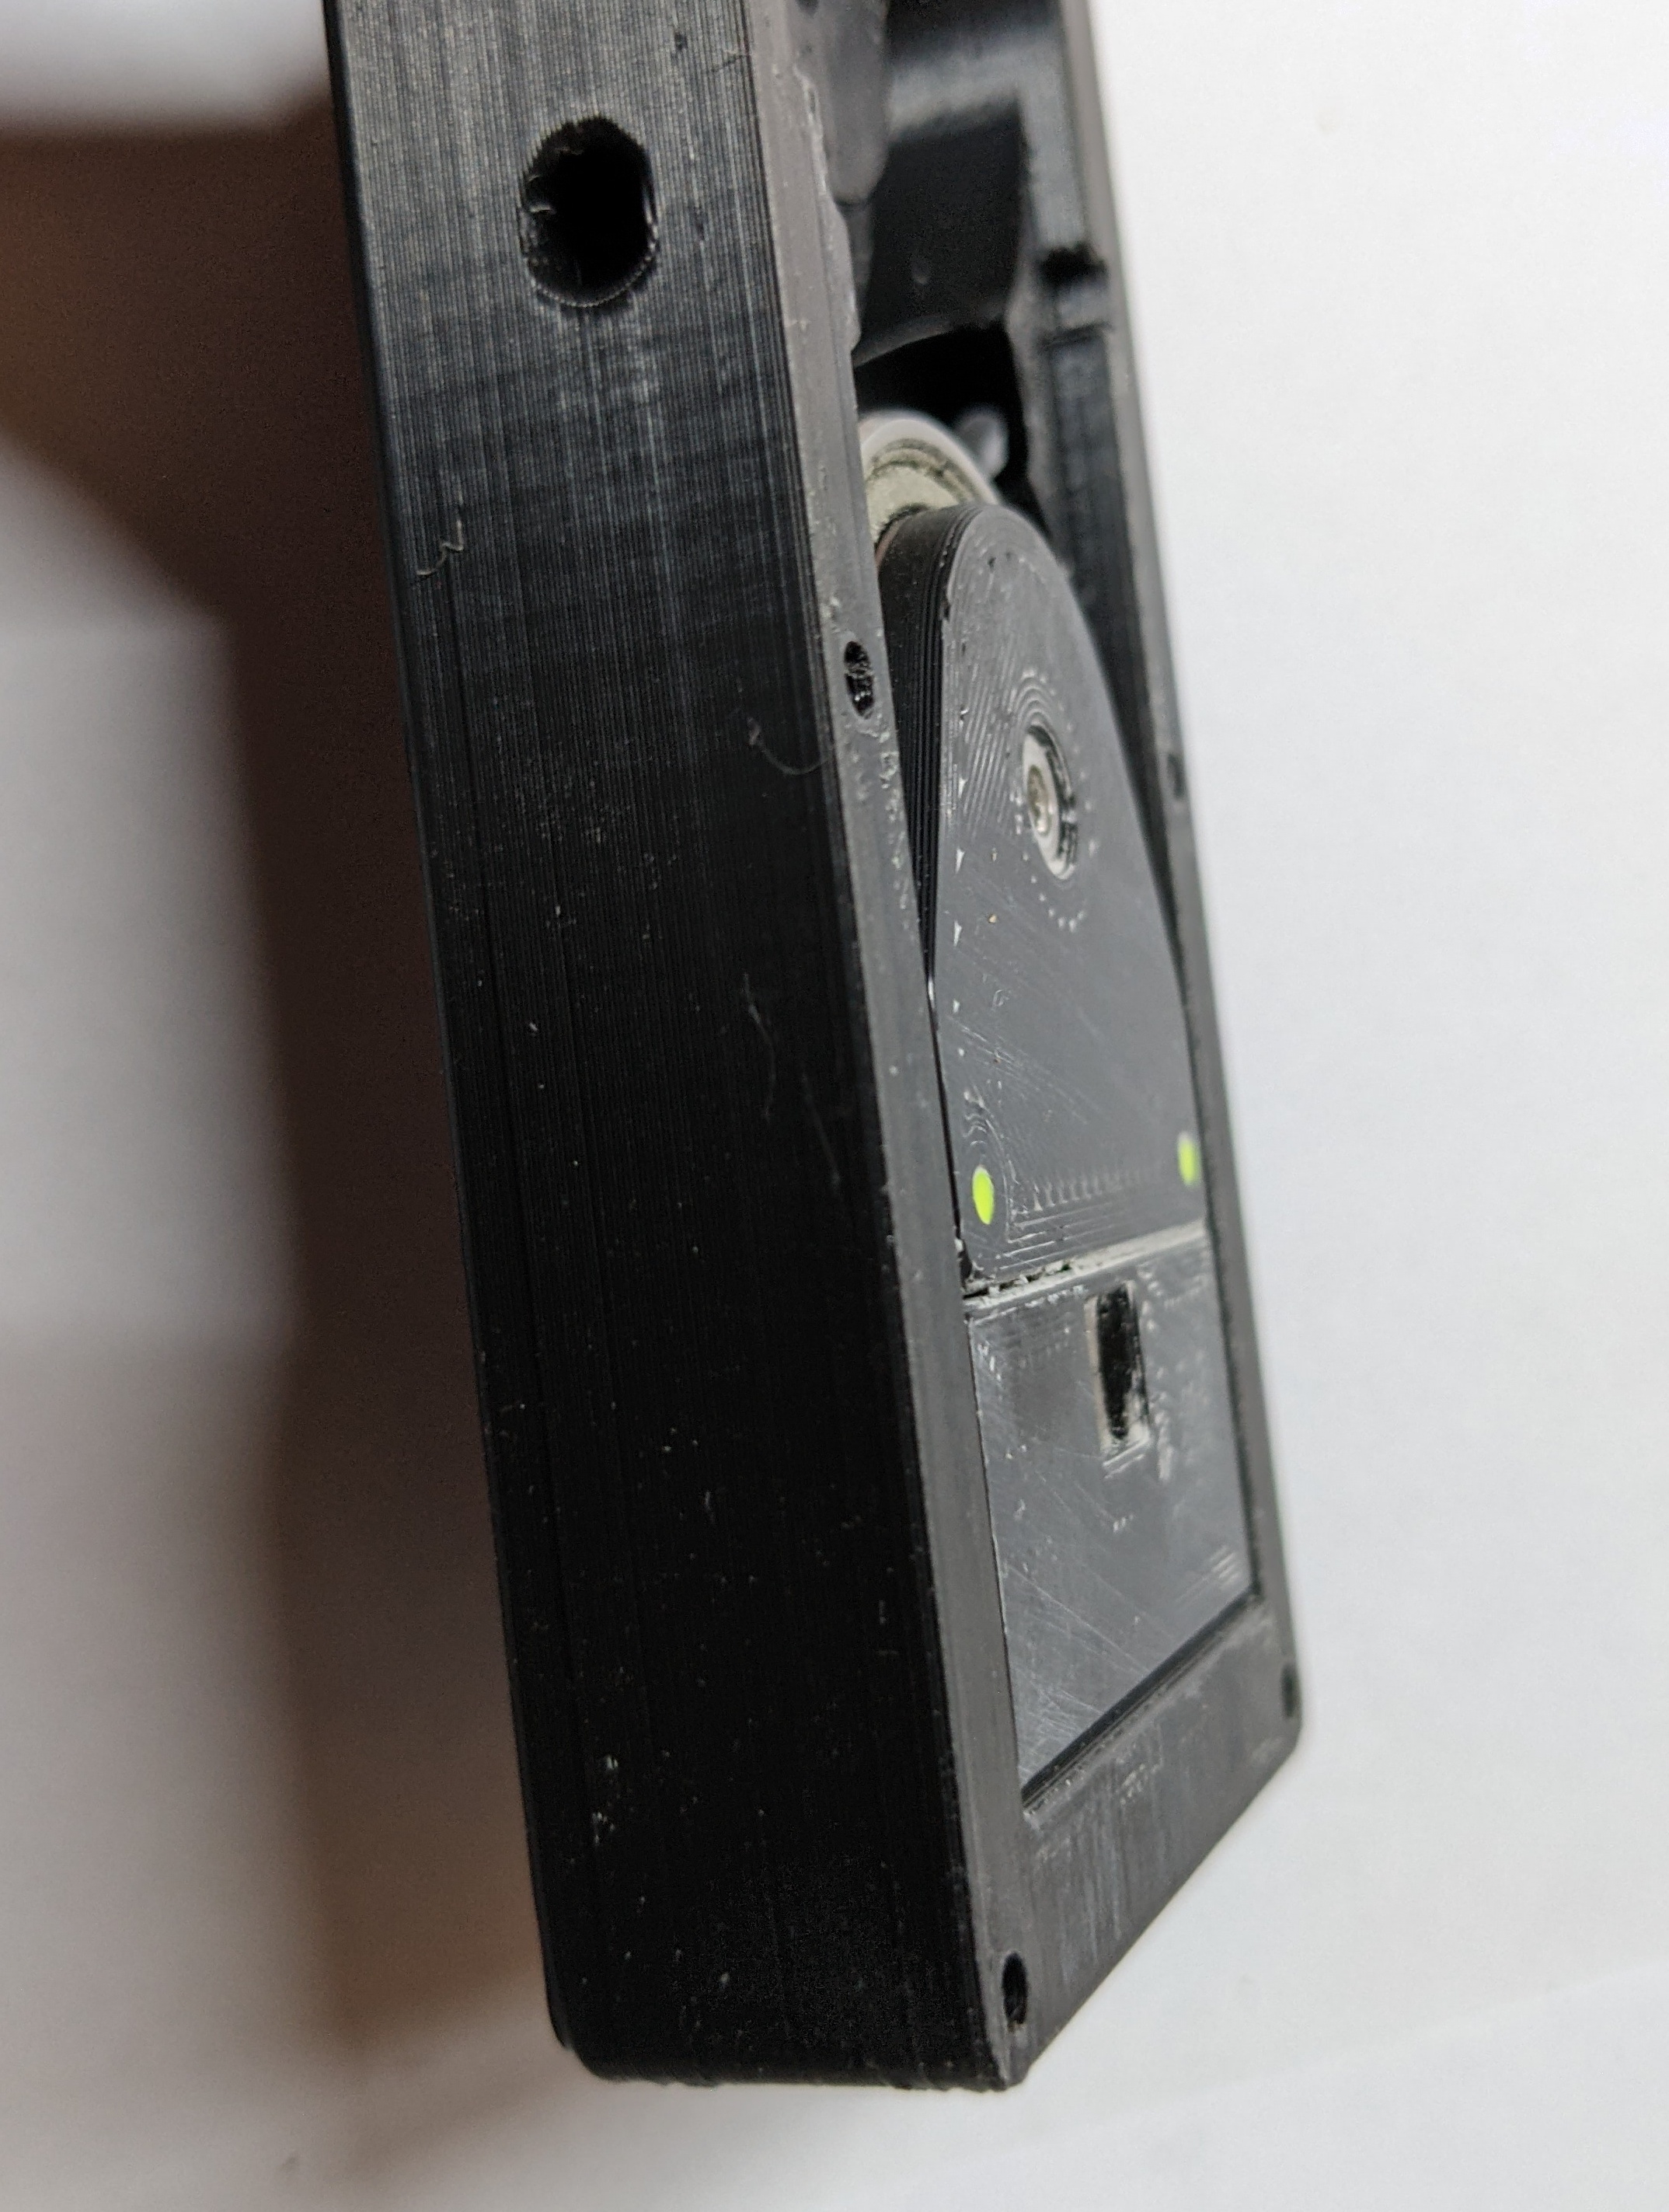
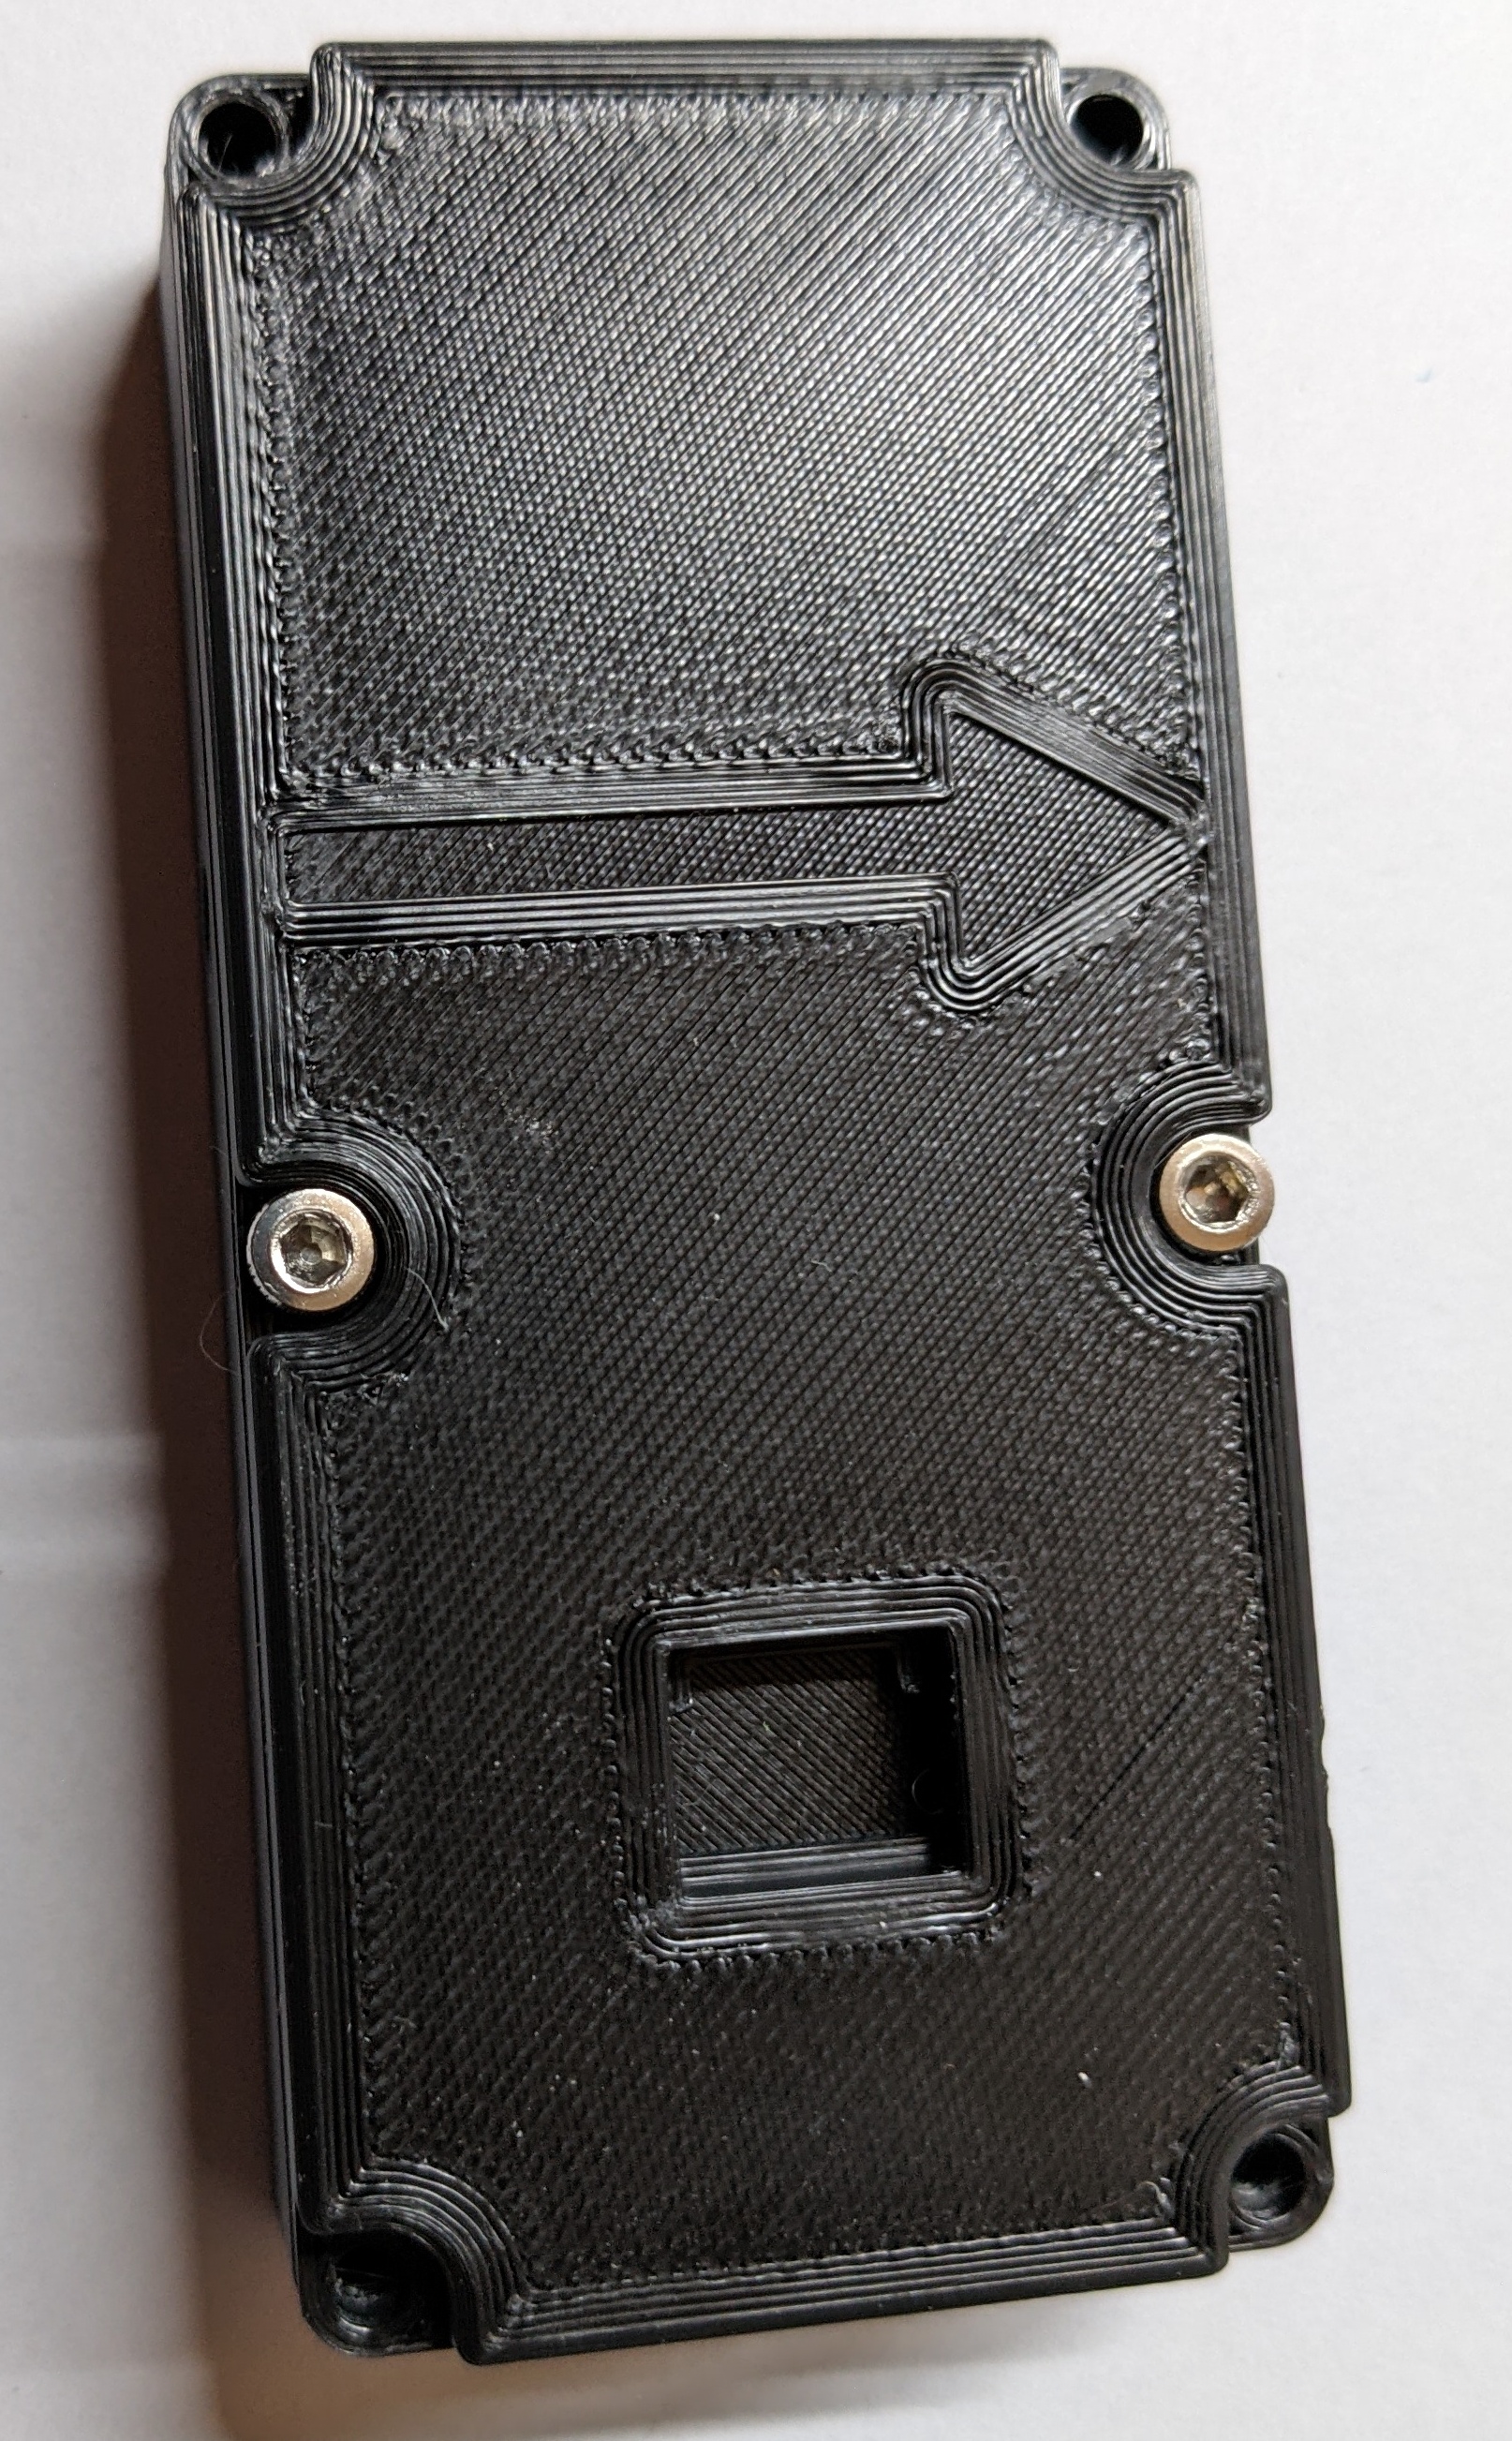
If you are using coil springs skip this step
Put the other 2 stacks of magnets into the holes as shown. The plunger should be attracted to the back of the sensor body like in the second picture. The magnets should now work as springs.
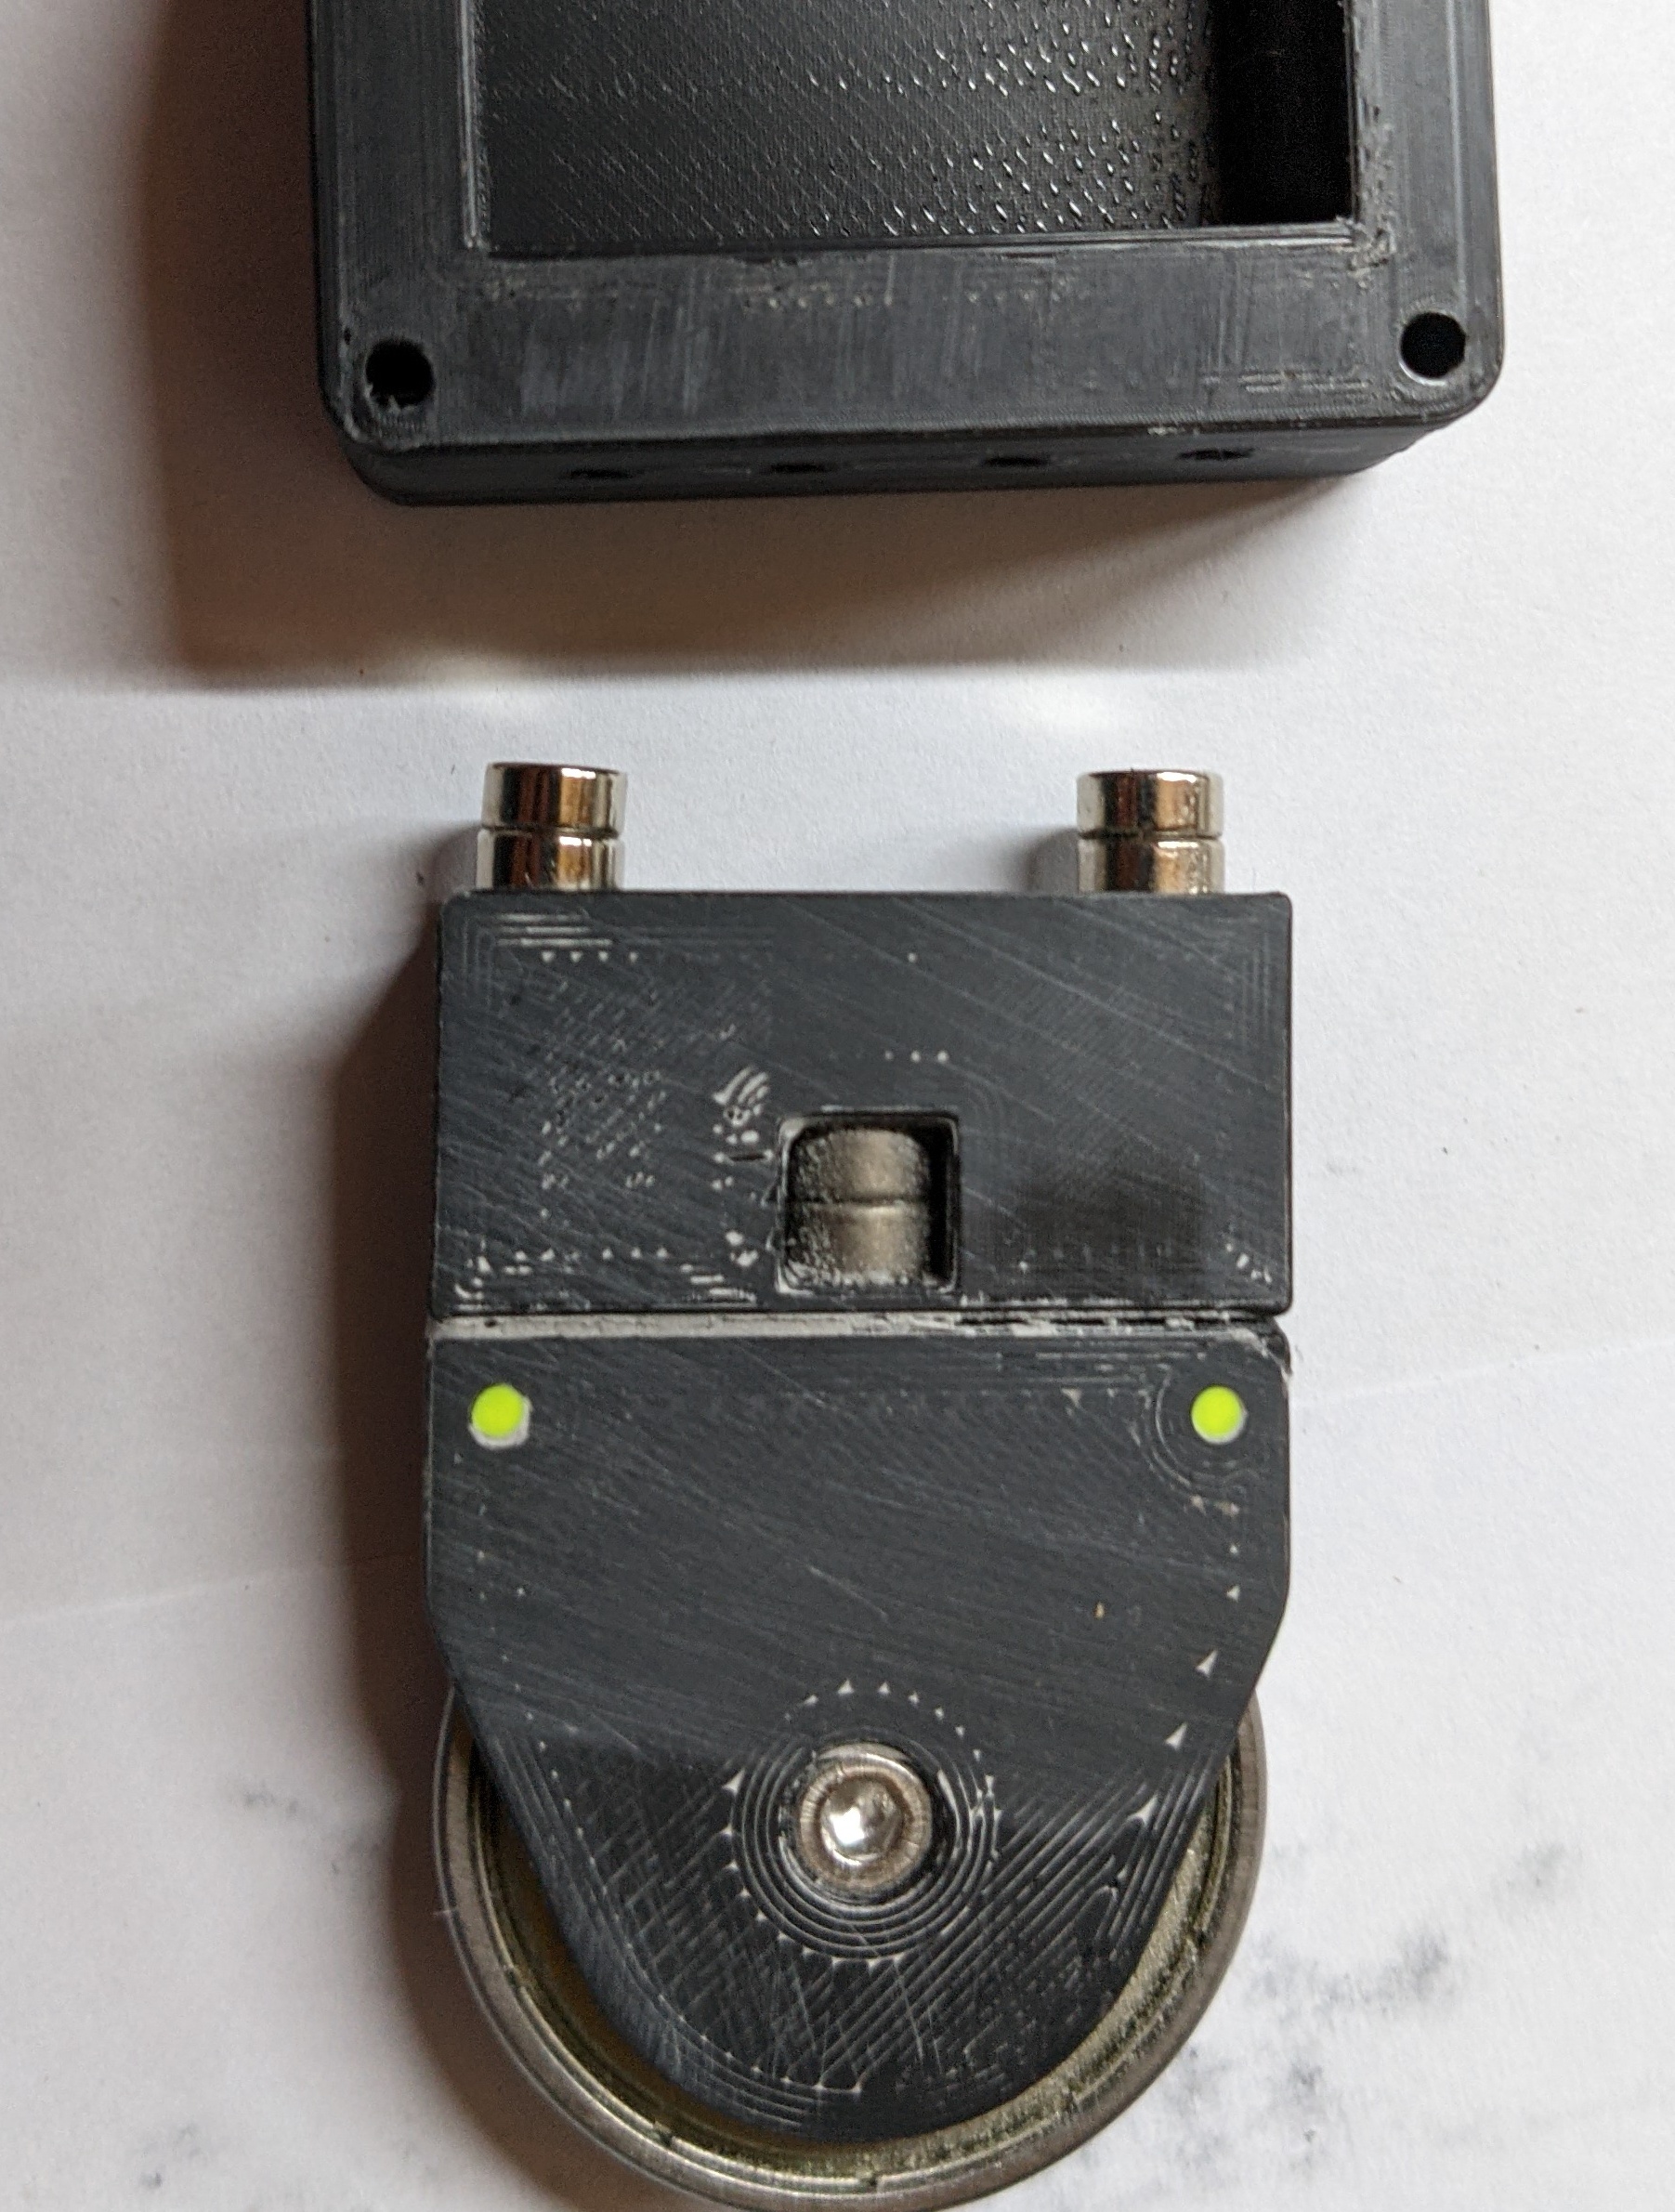
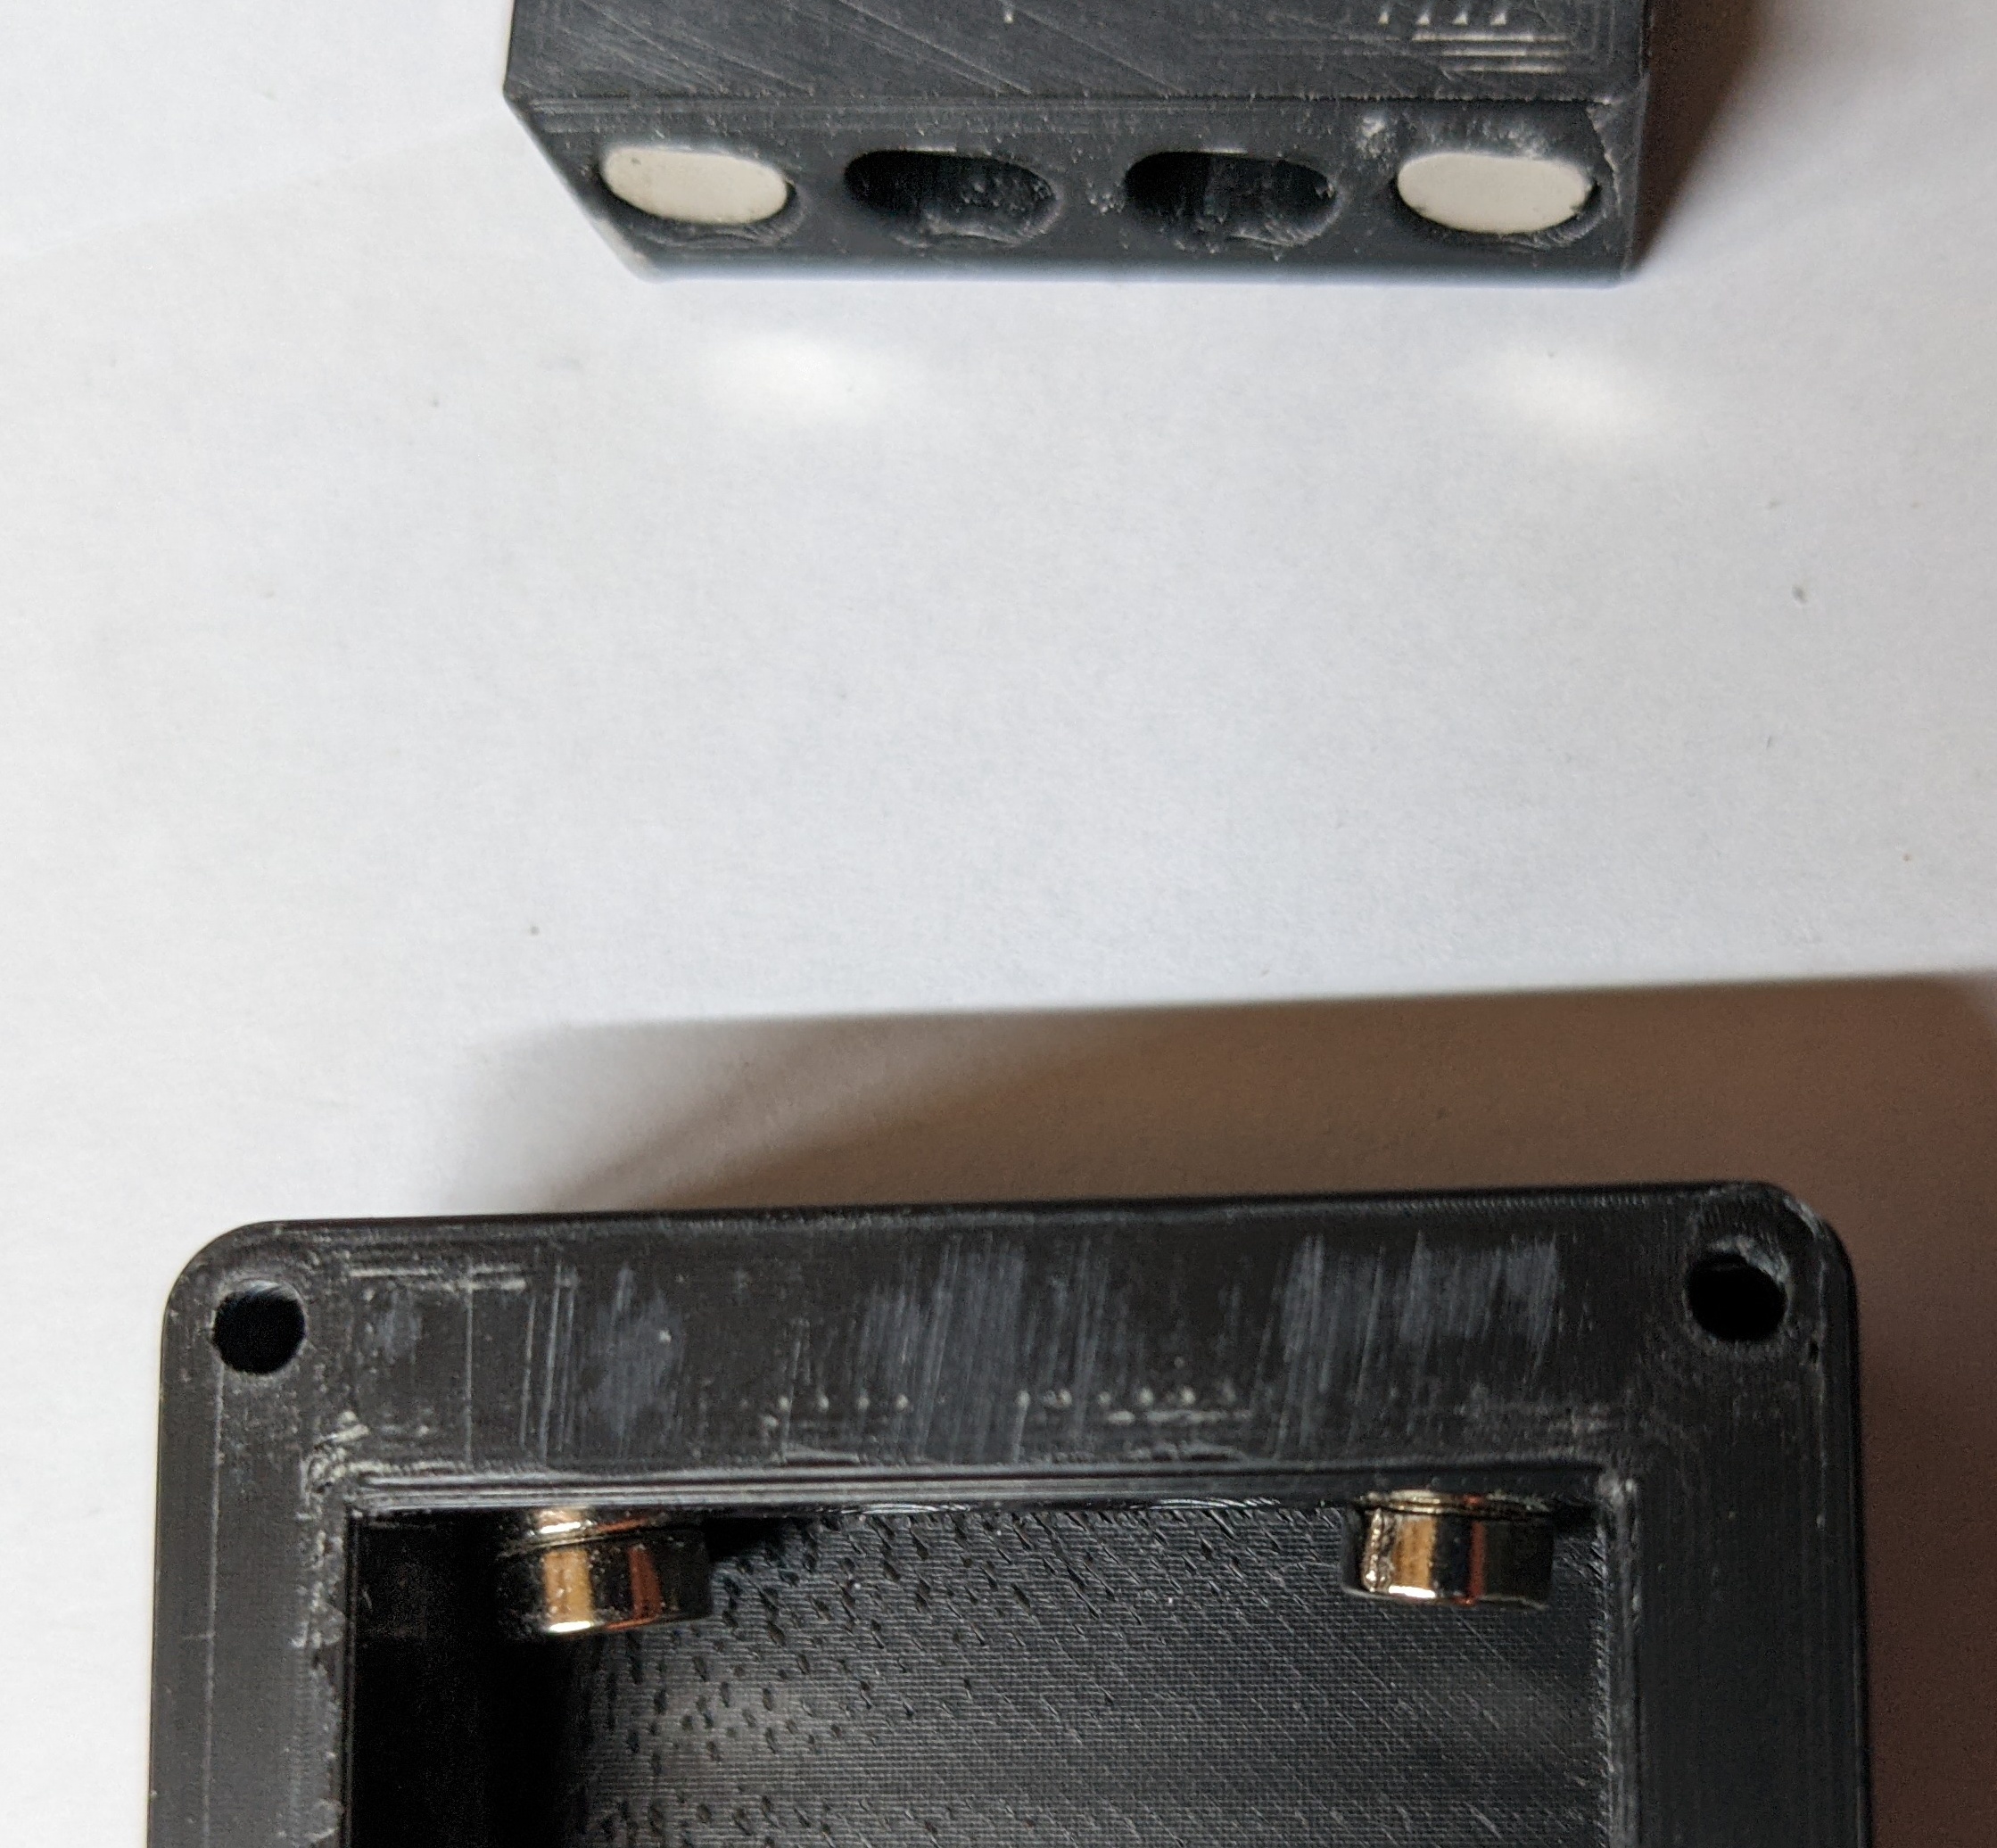
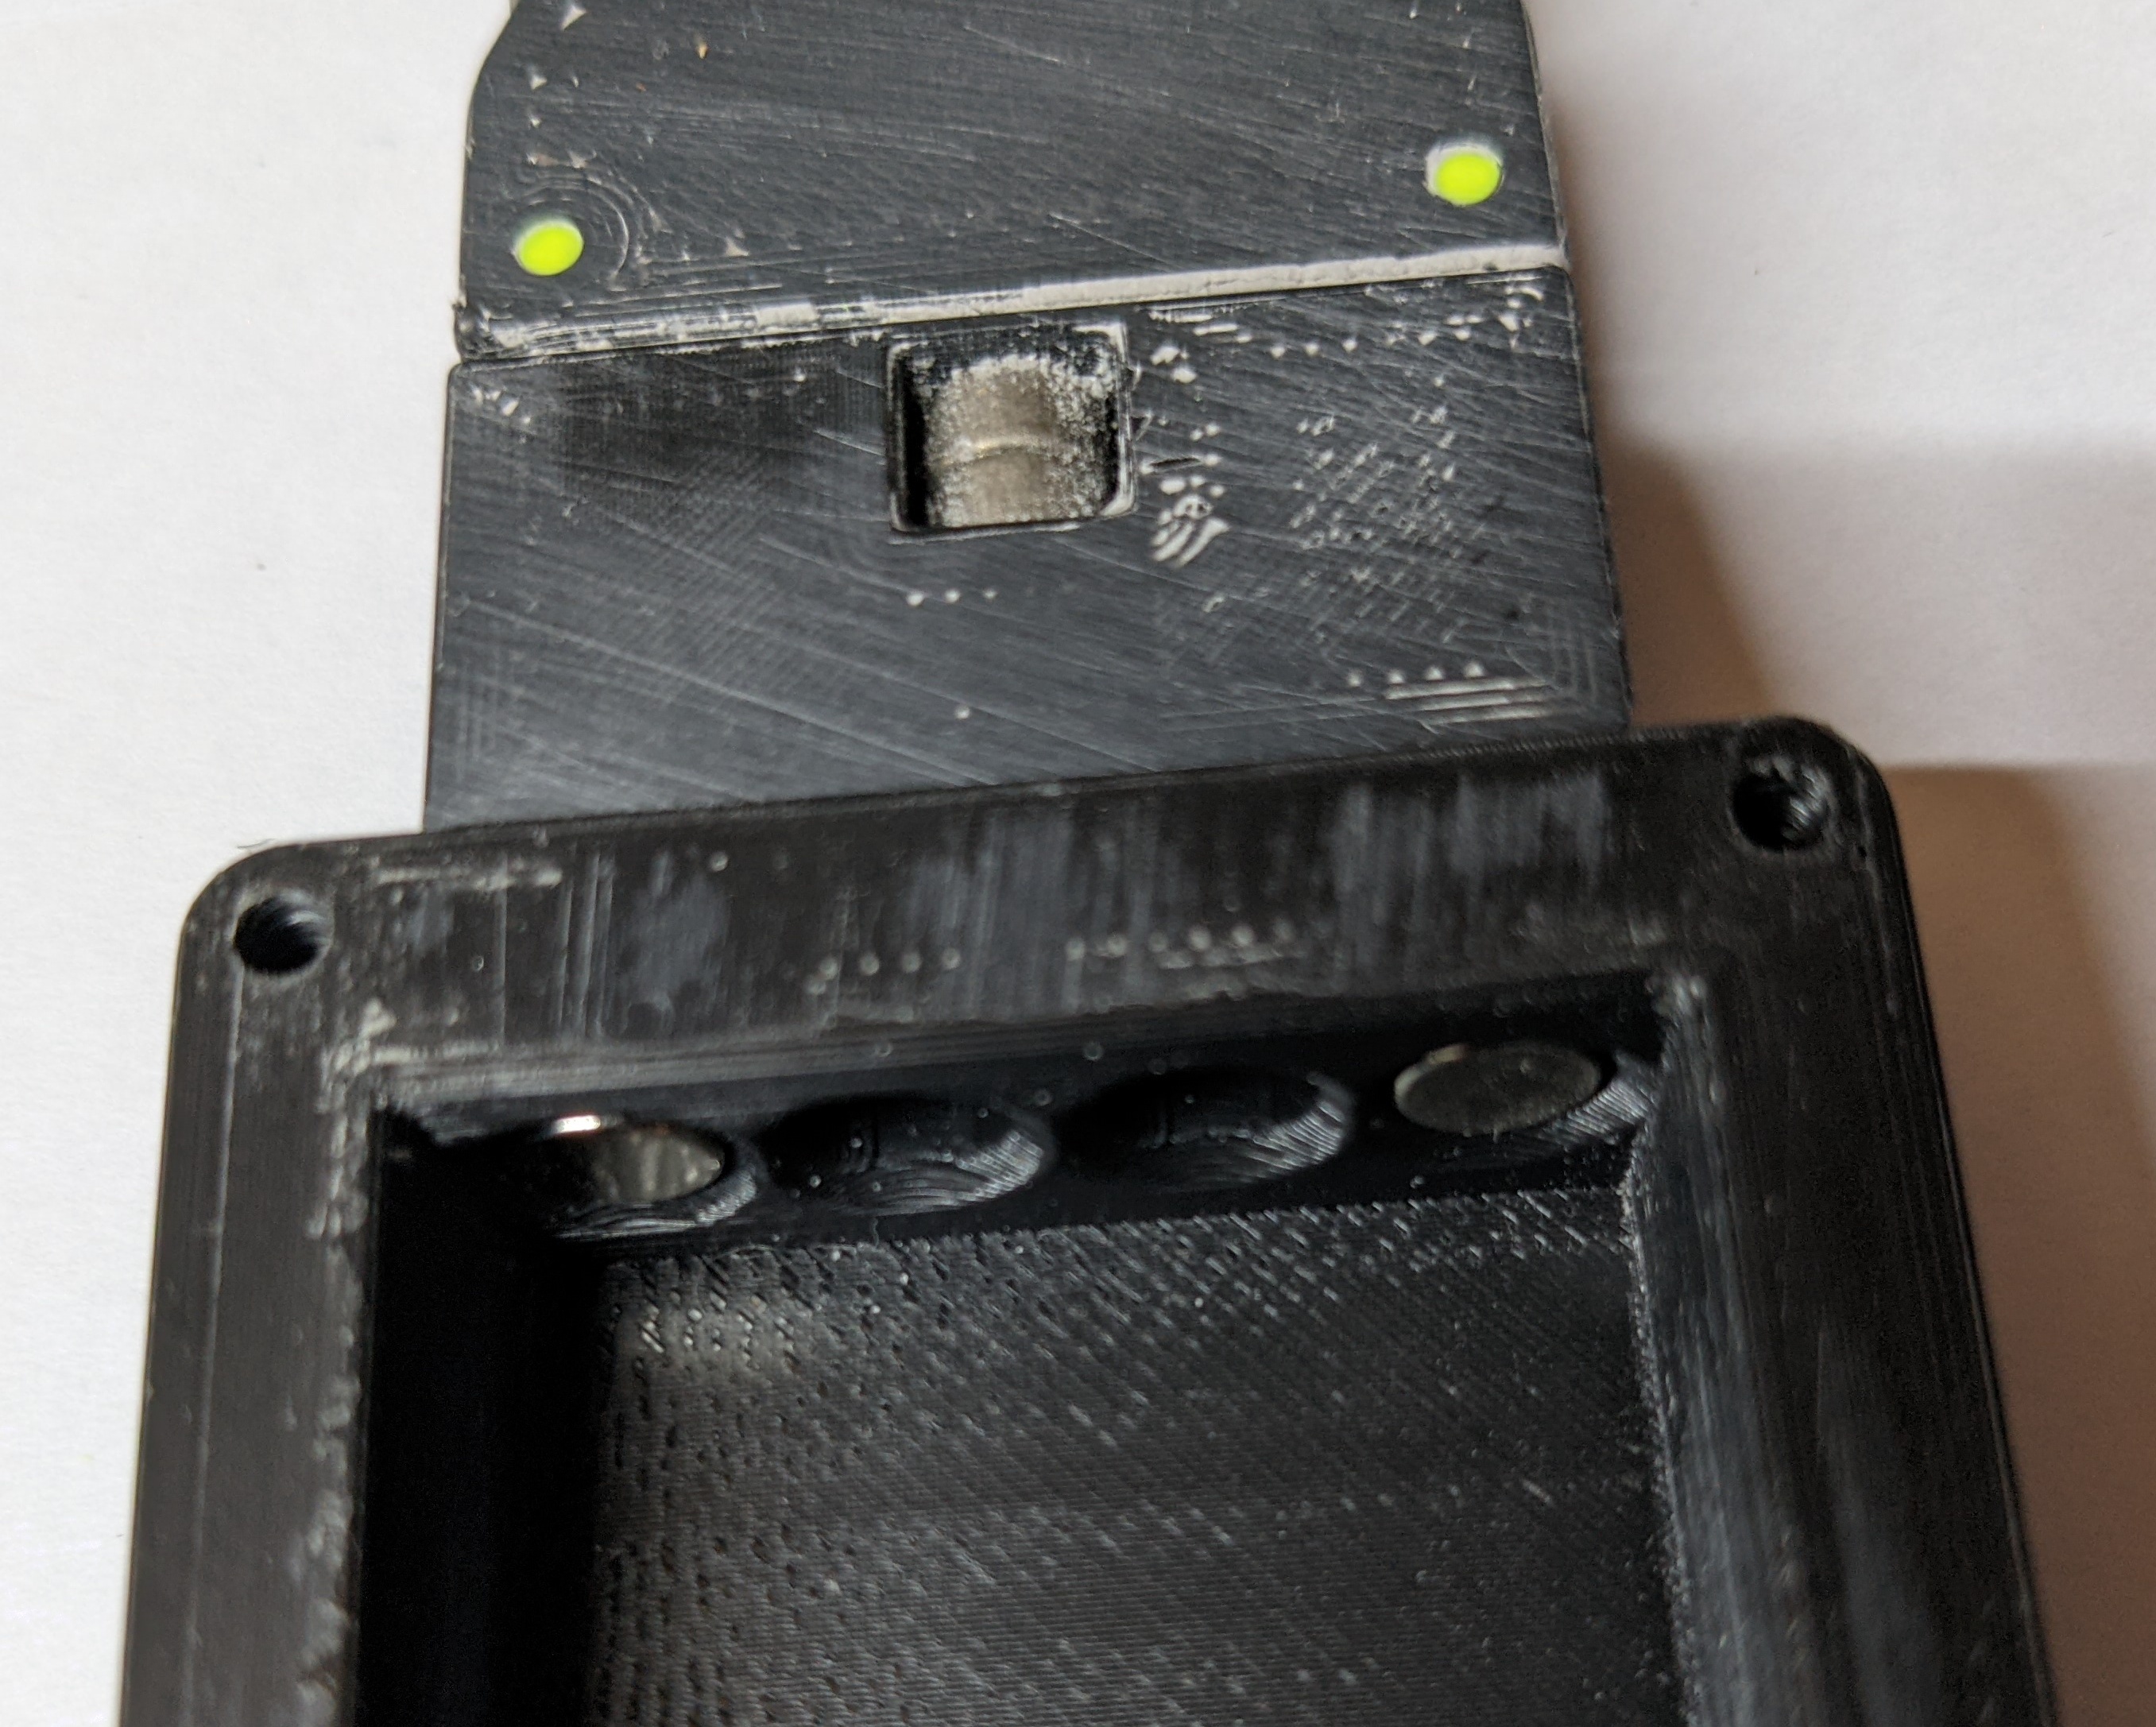
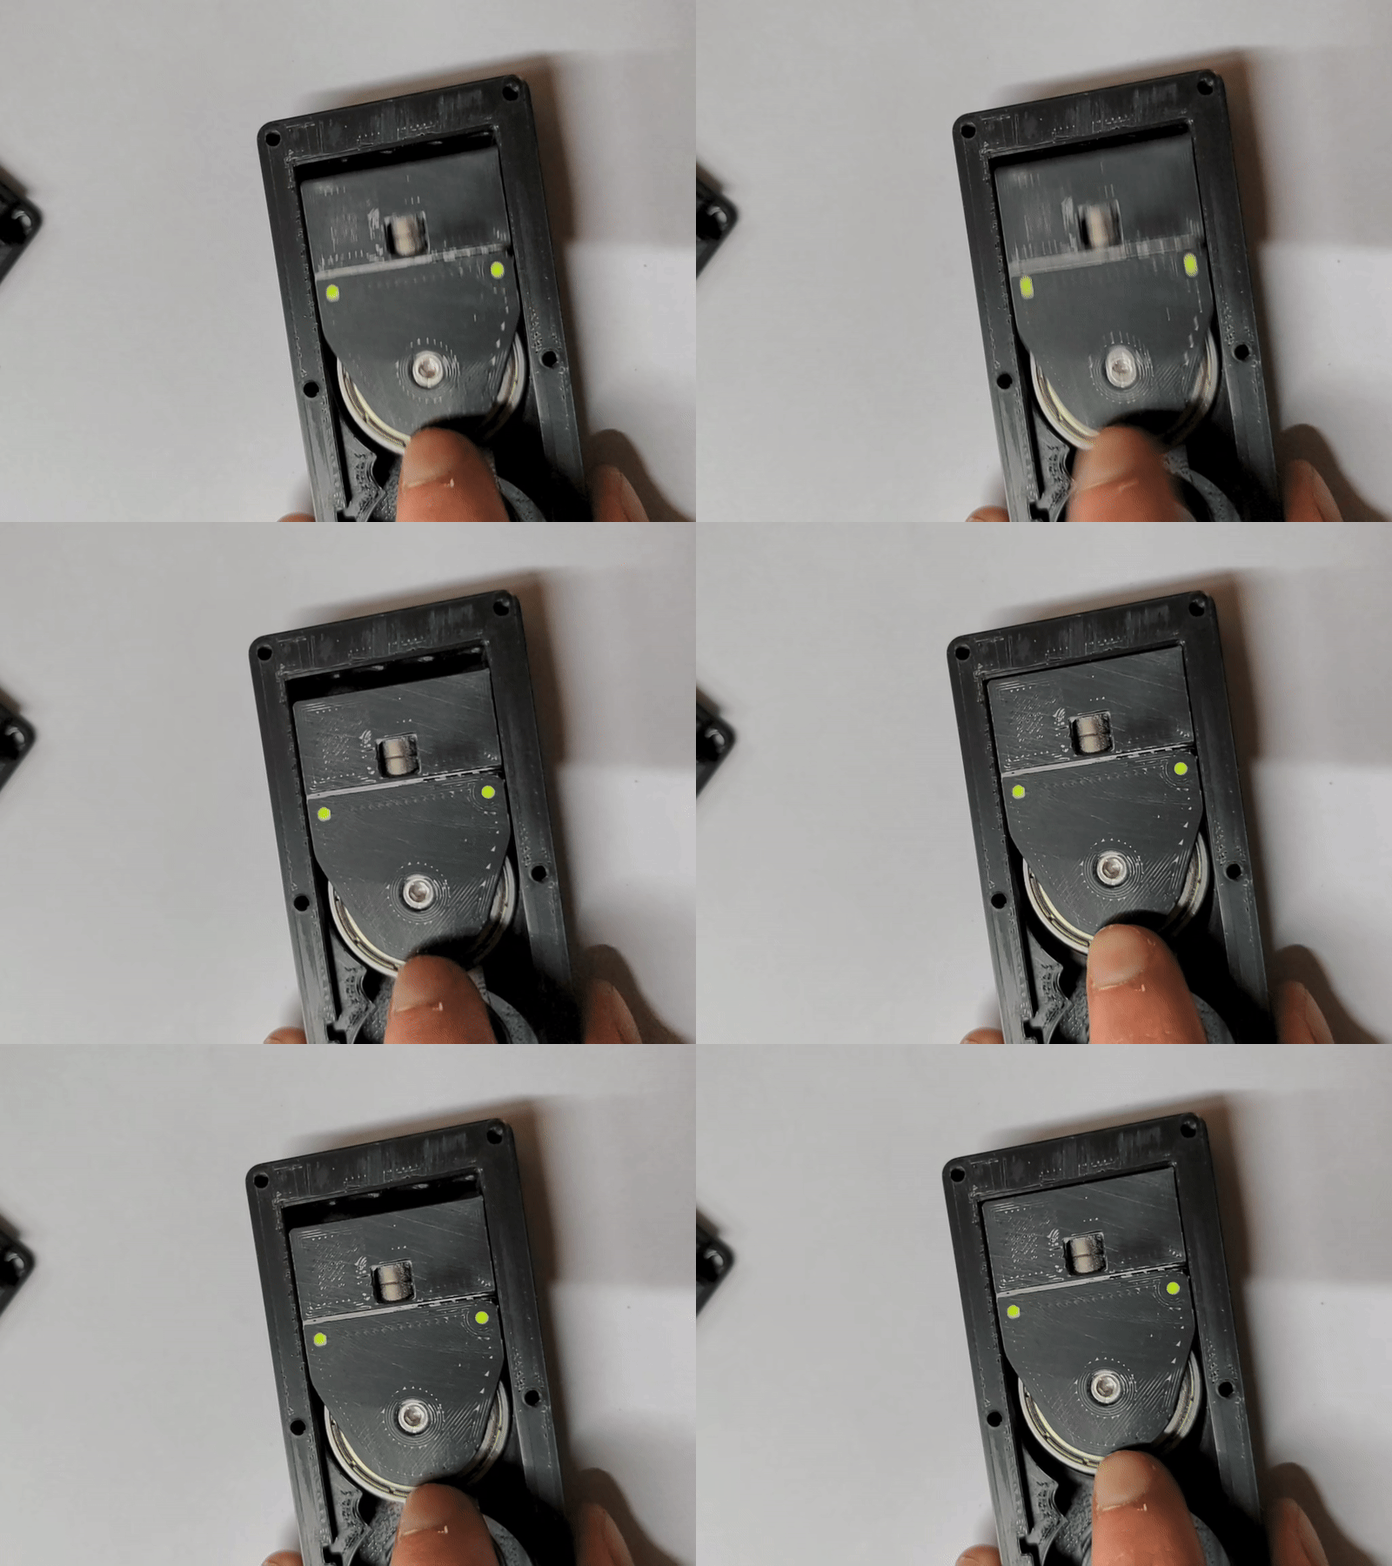 Put the second bearing into MainBody, put BodyBearingHolder on top of it and screw it down. The bearing holder should not stick out the top, if it does sand it down.
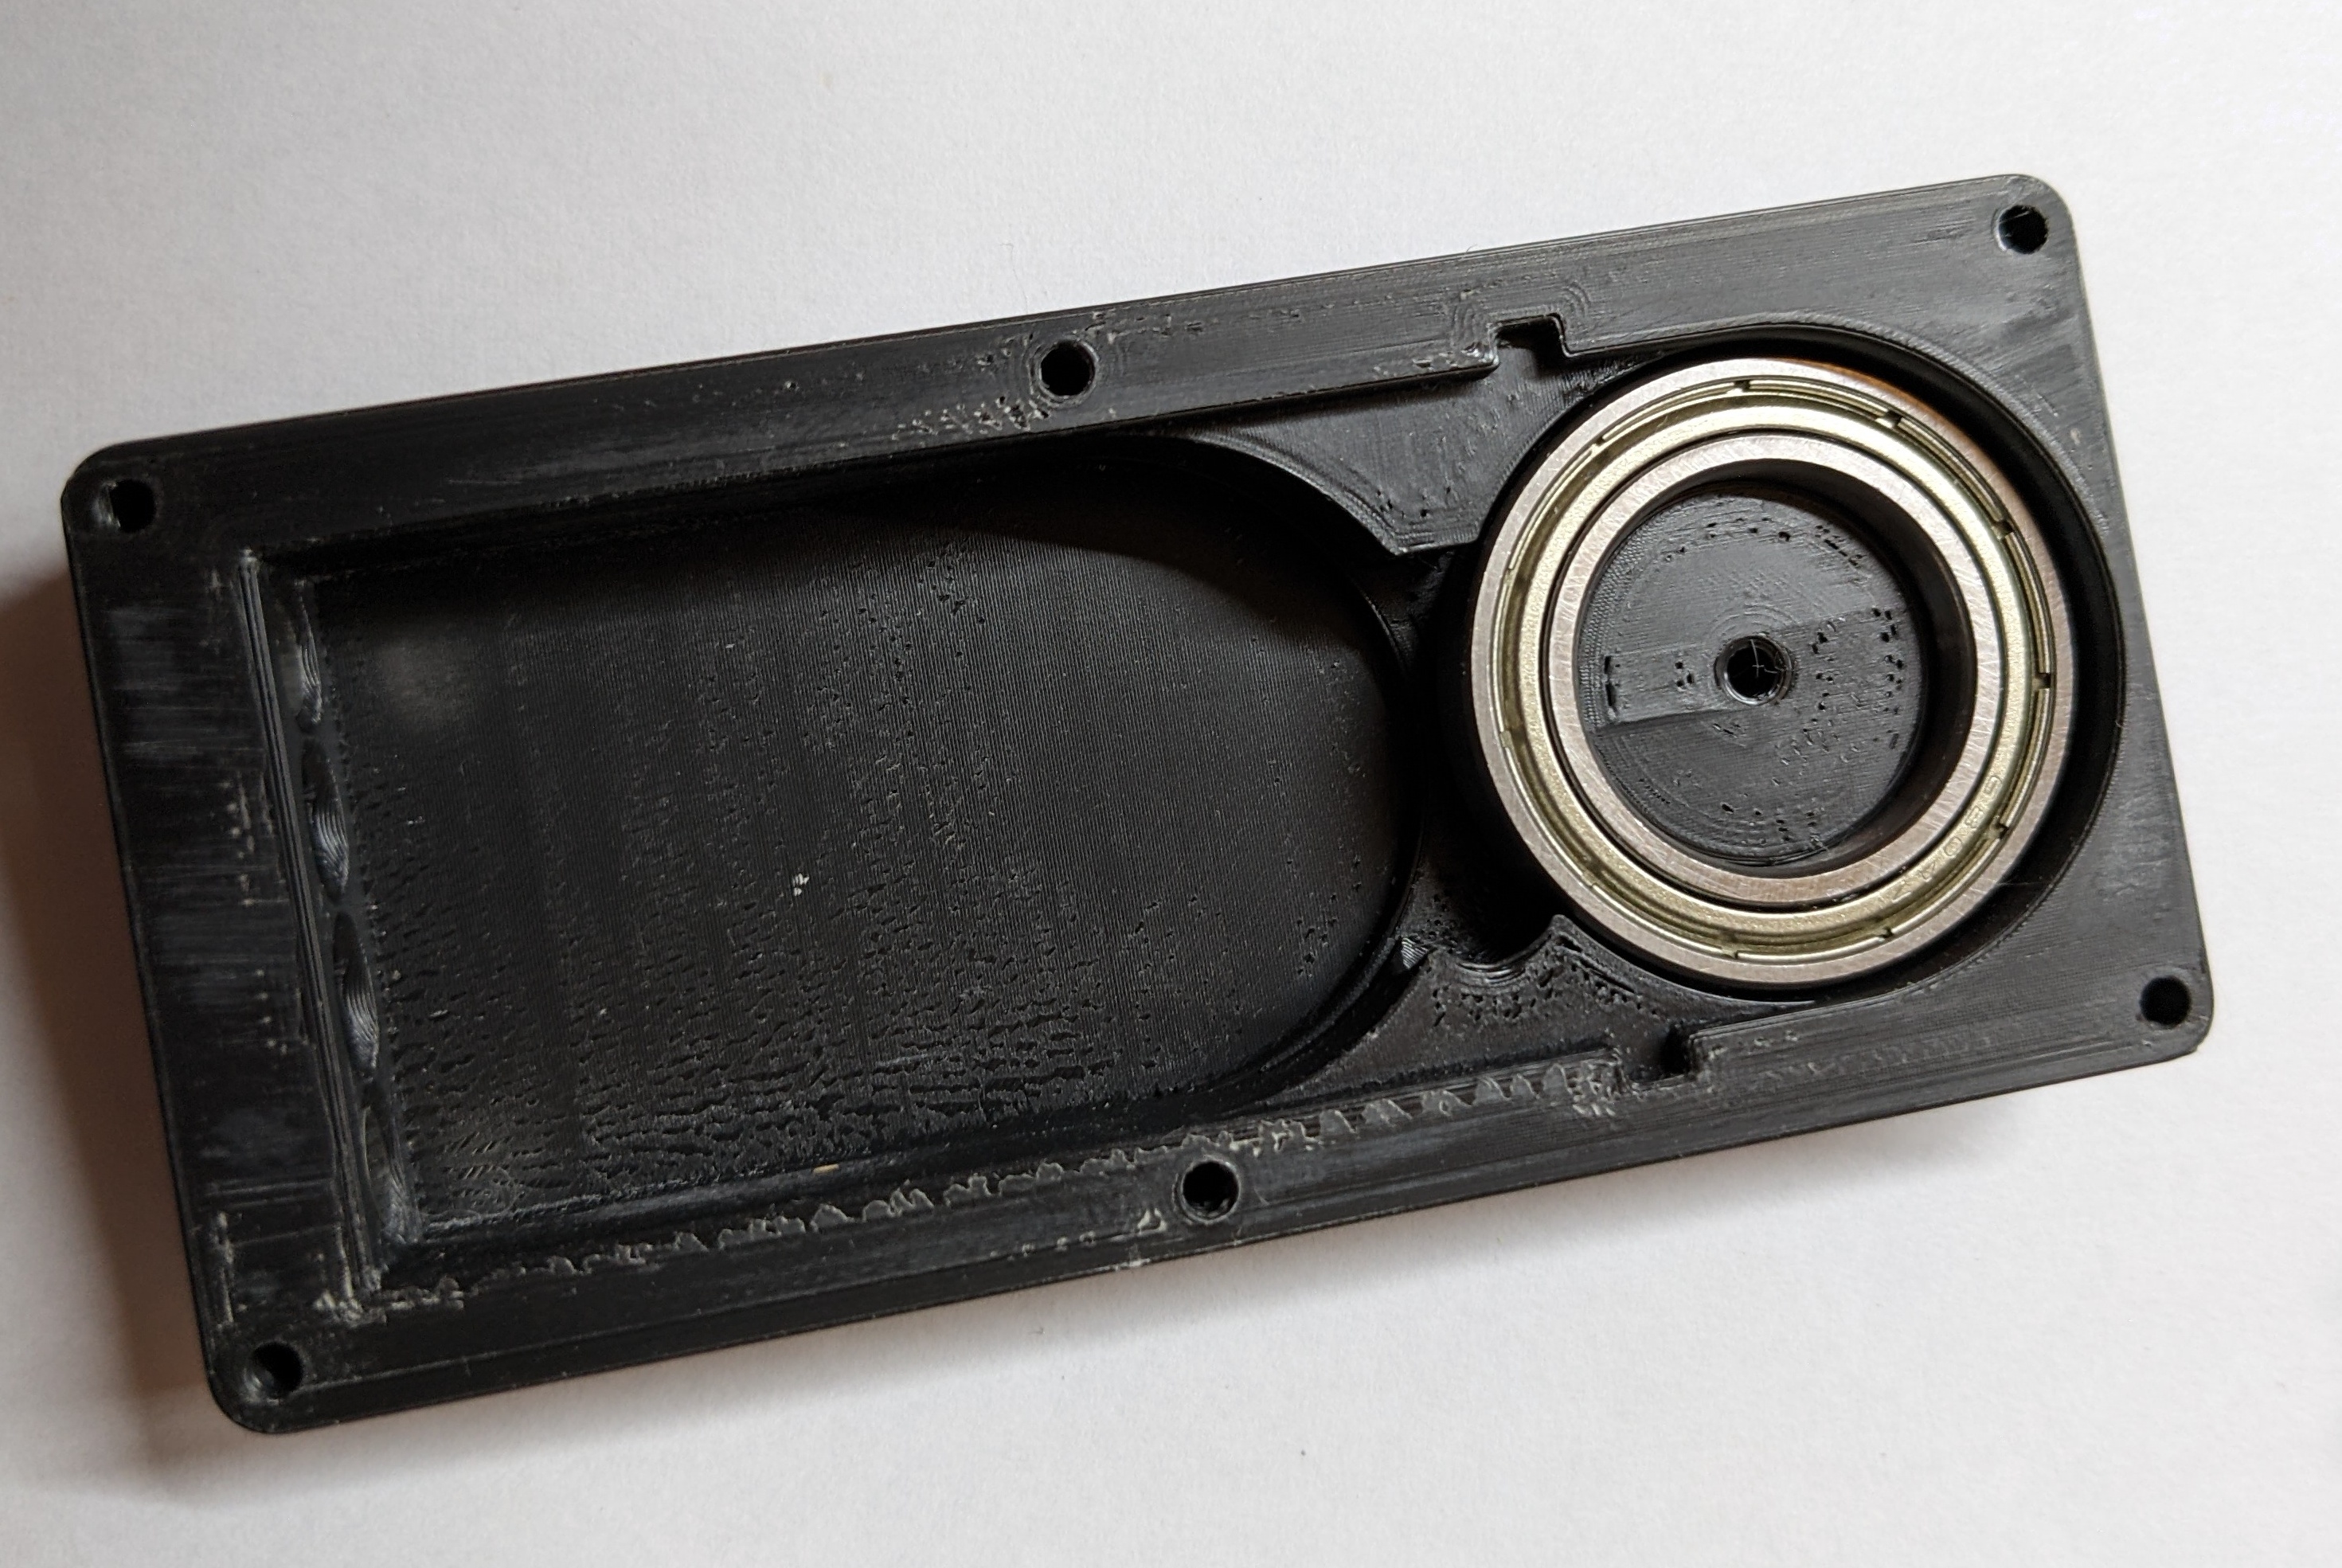
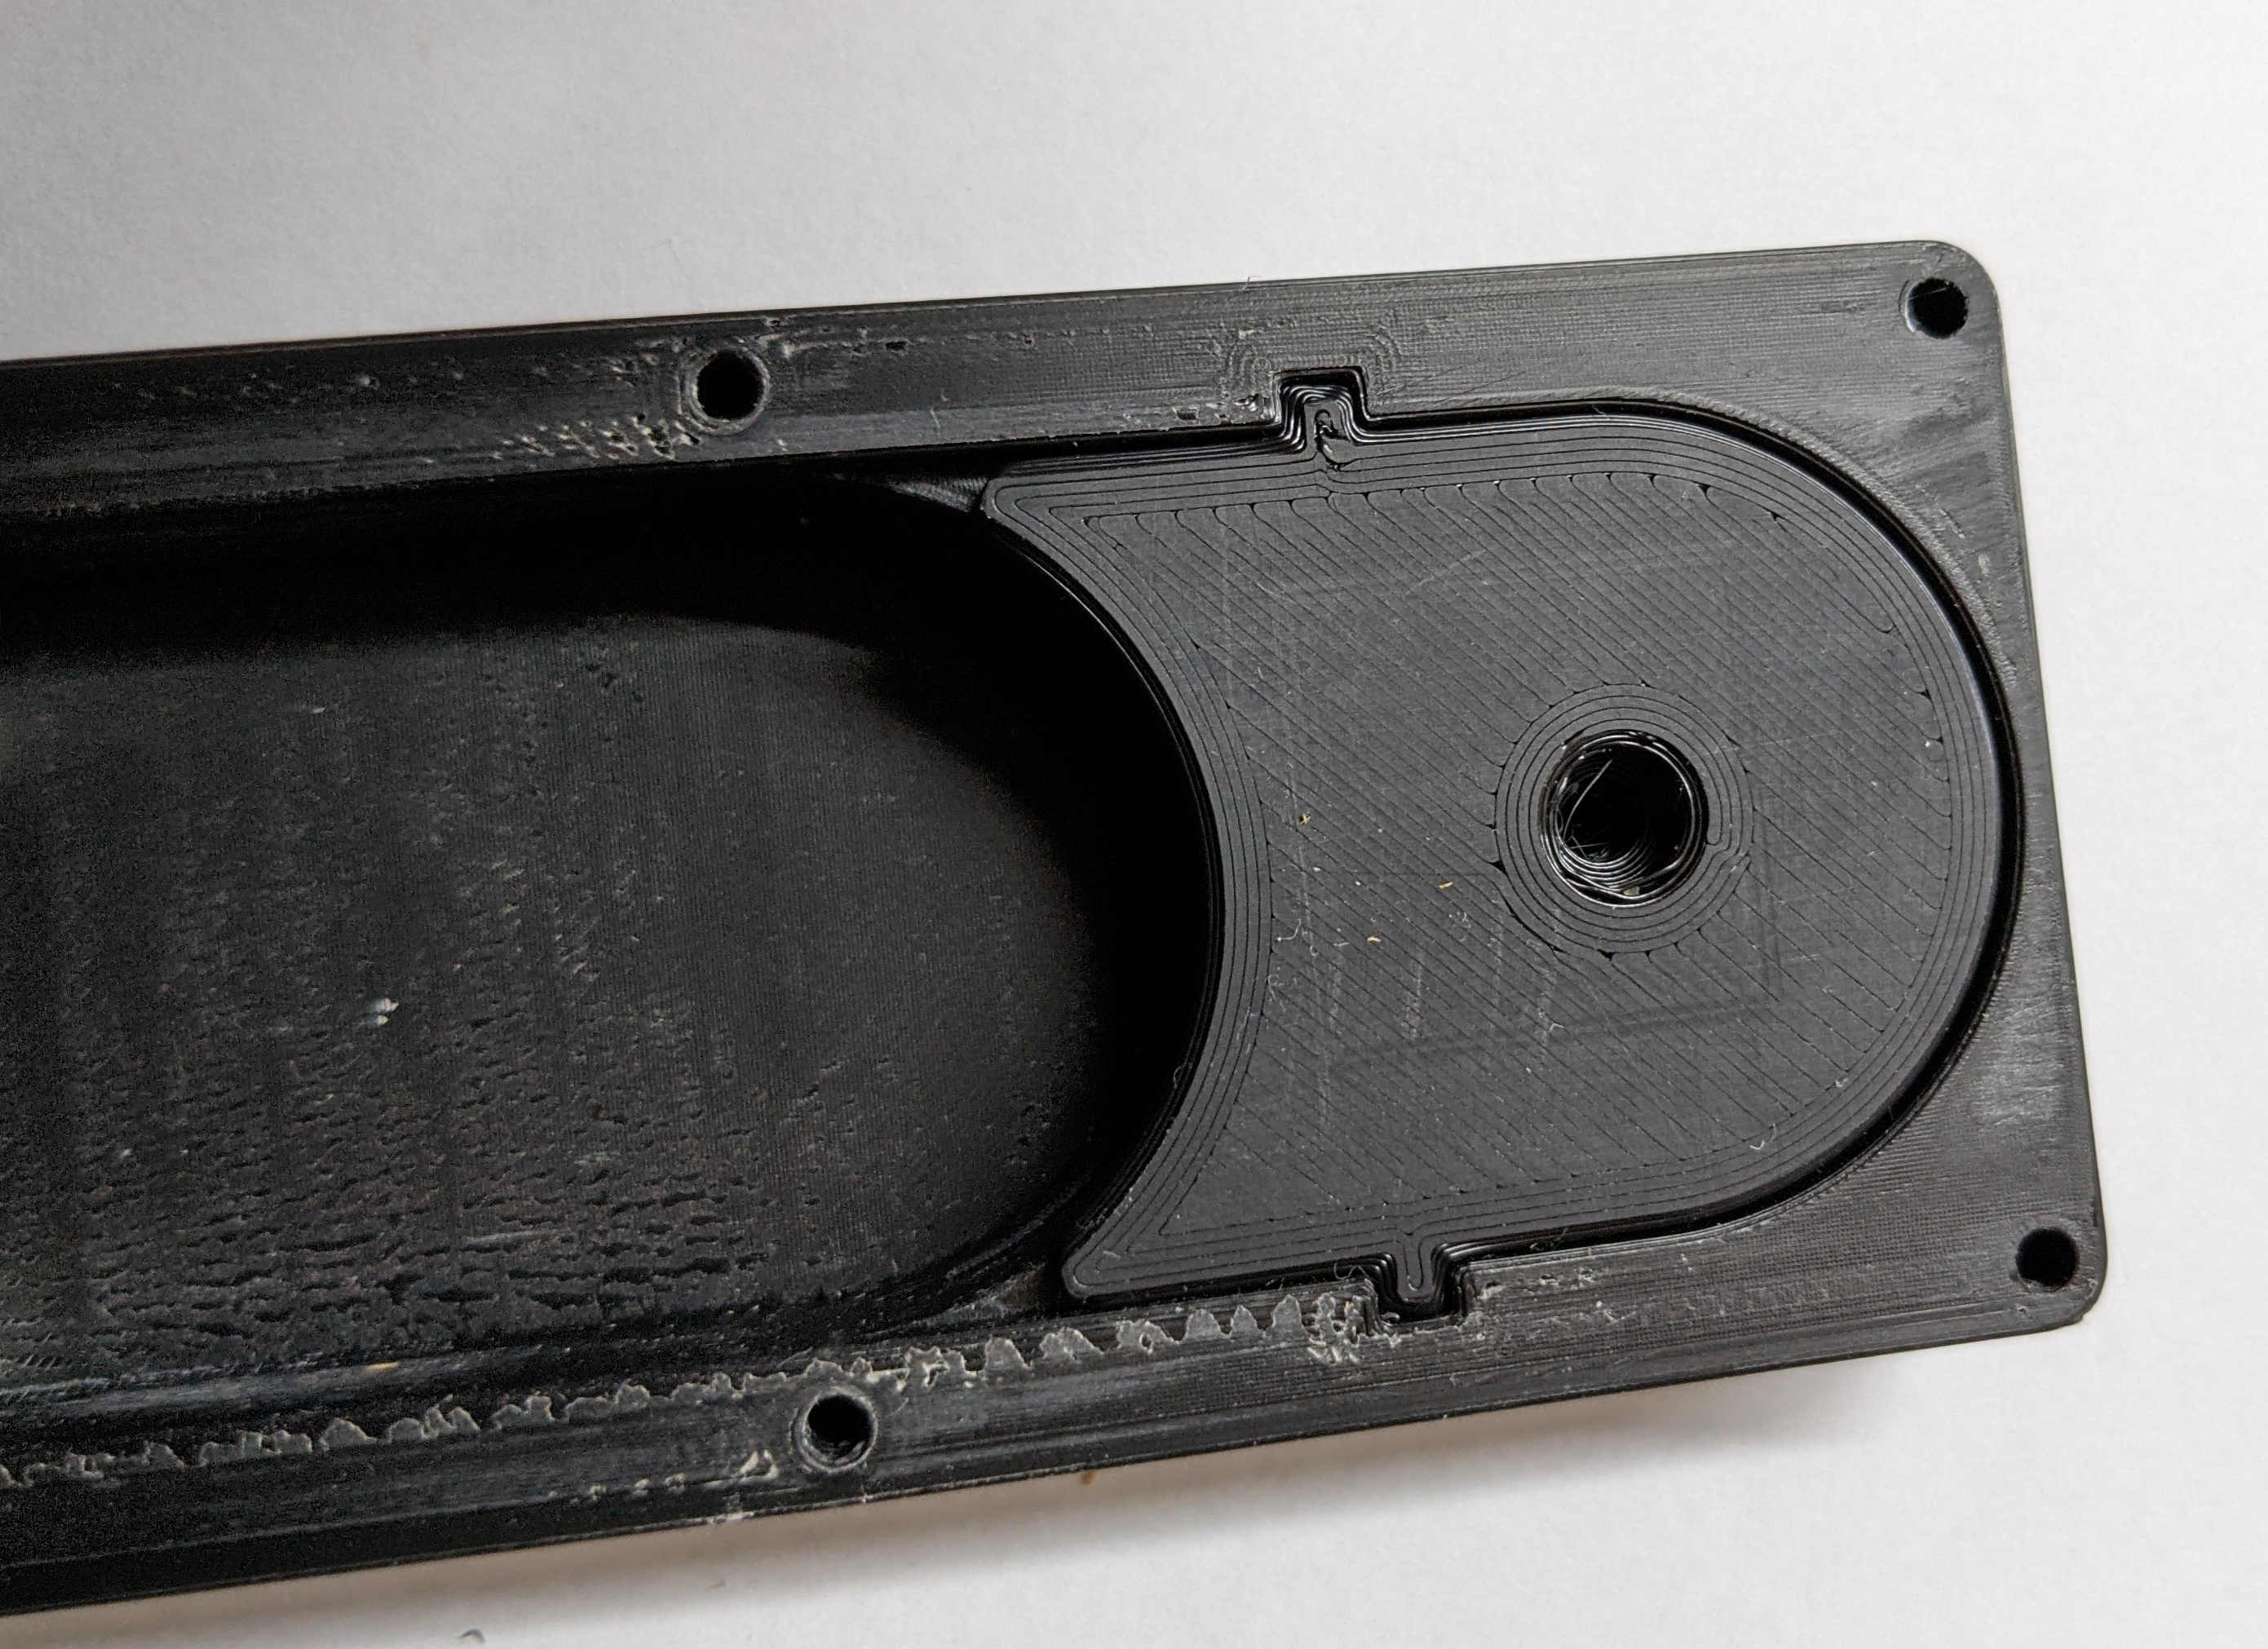
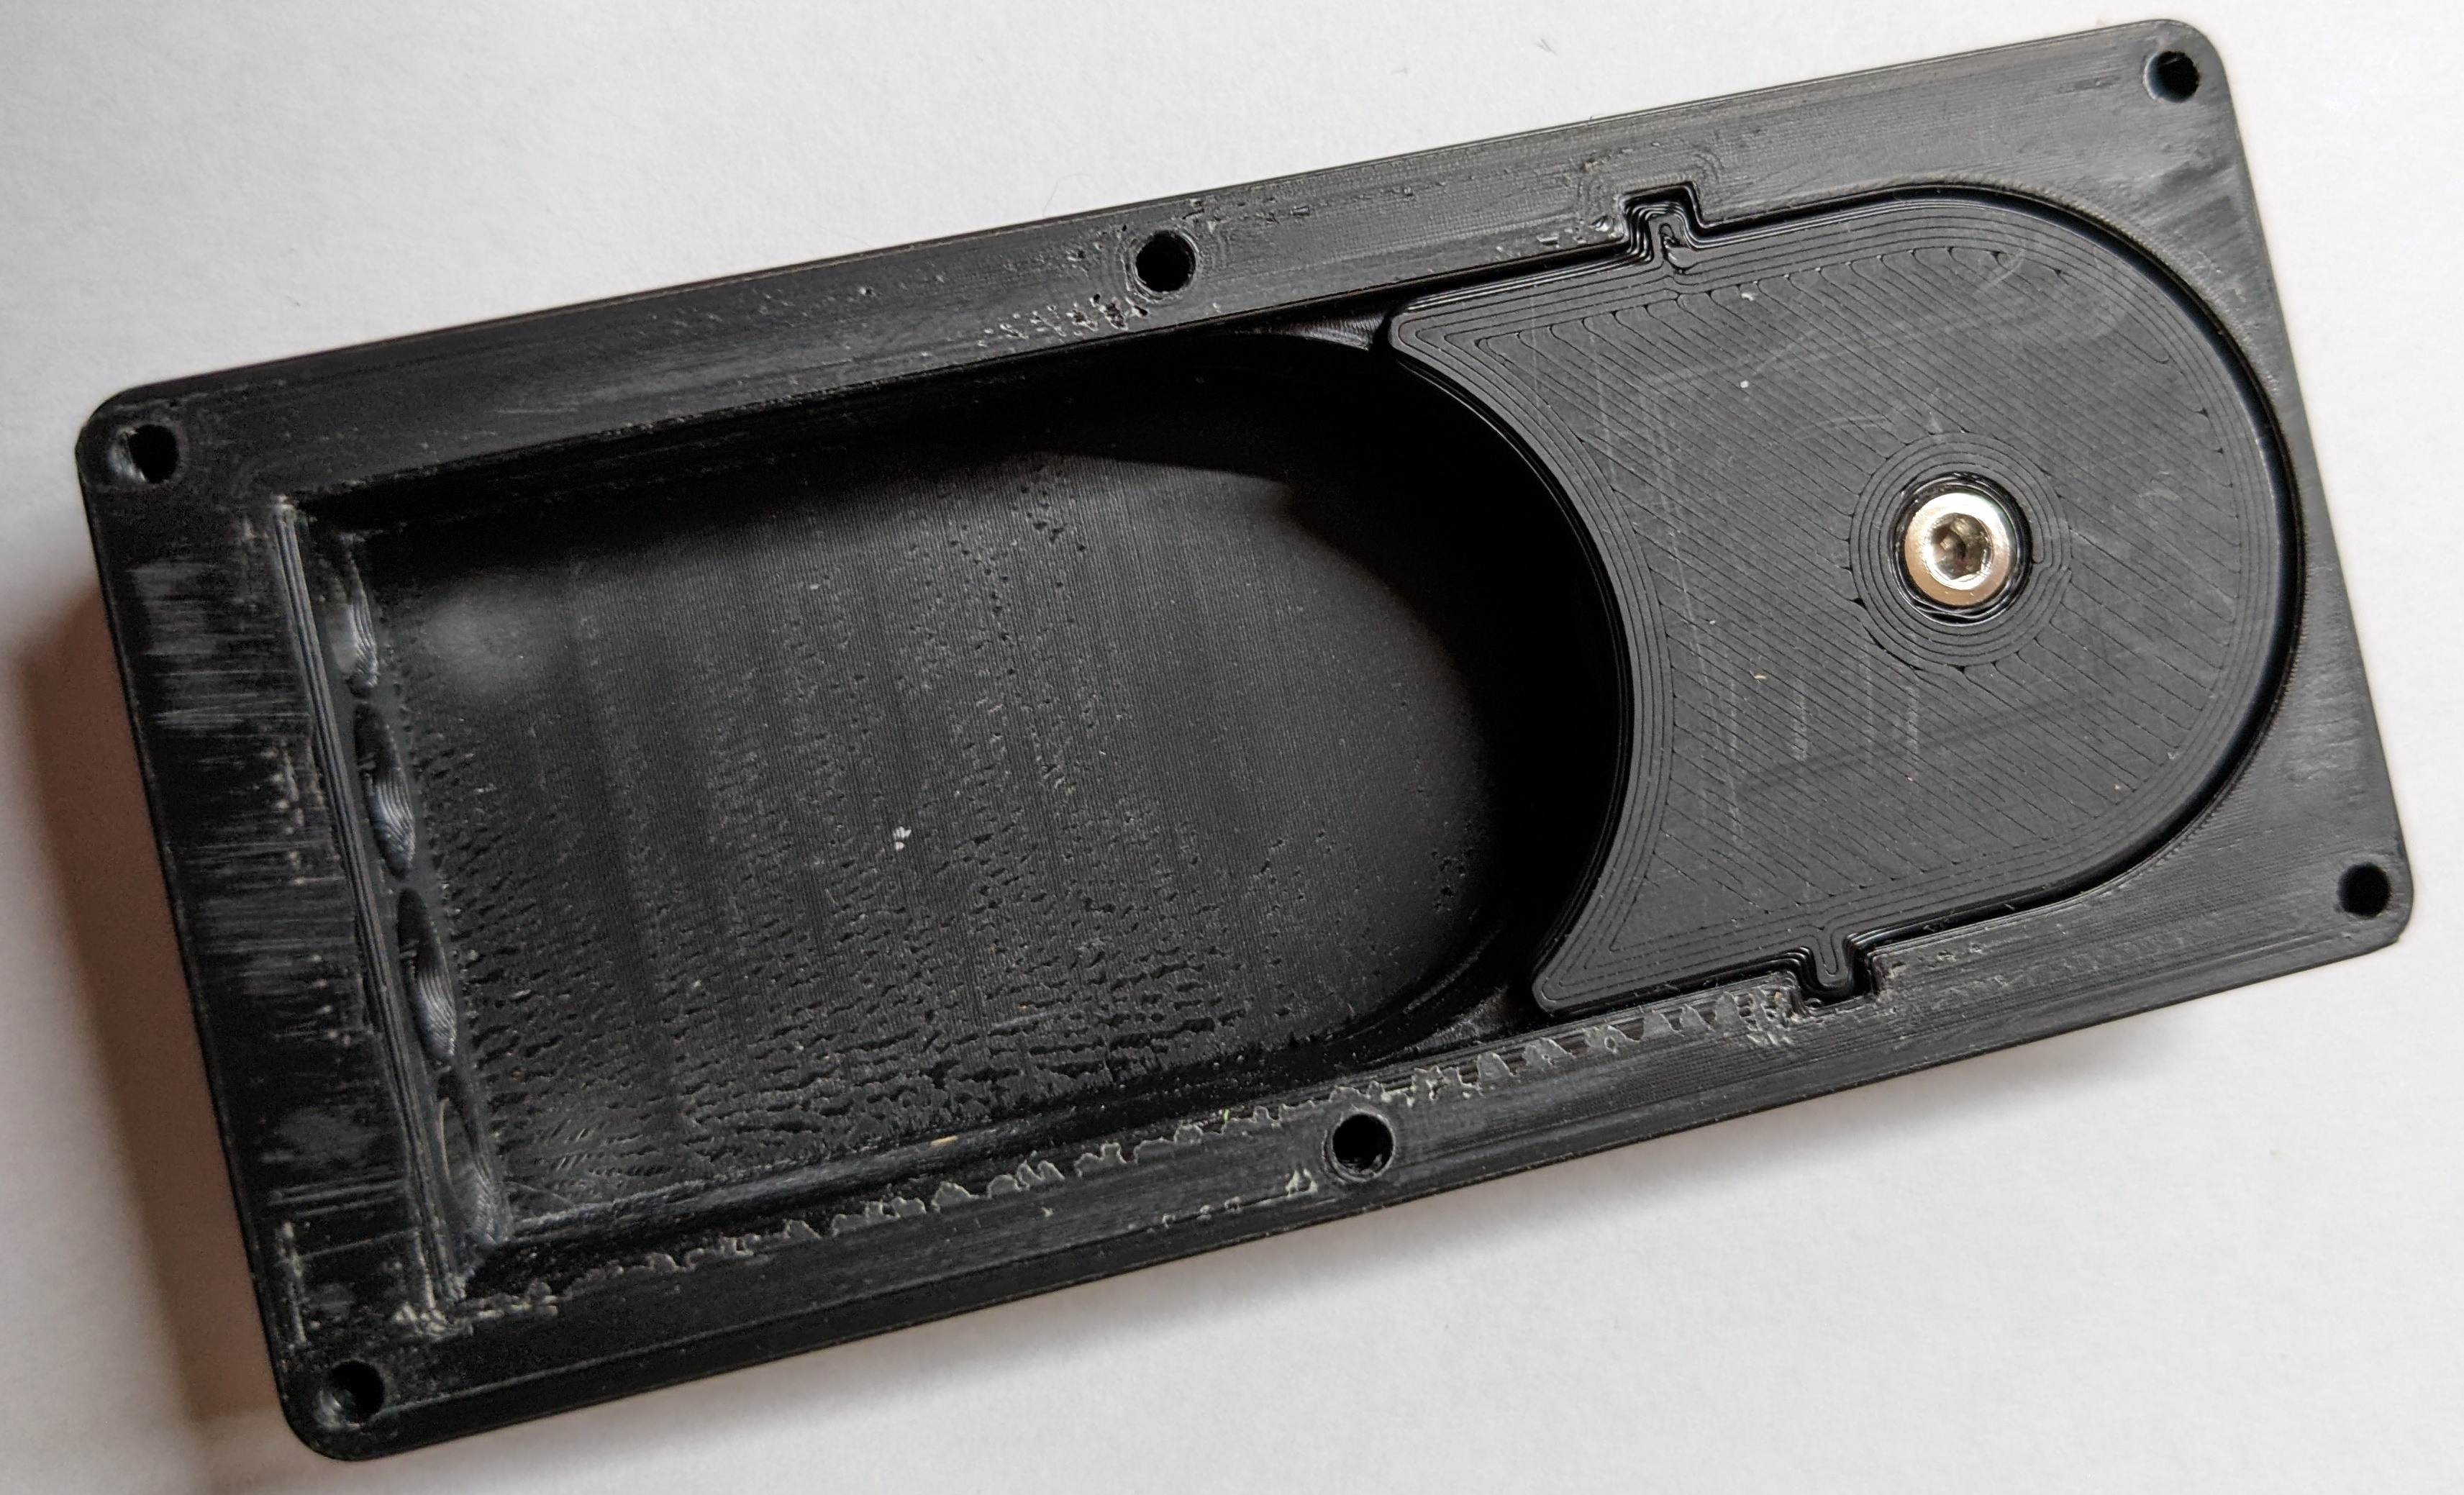
If you are using coil springs put the springs into the outer holes when putting in the plunger
Place the plunger into the body. It's normal that the bearings don't completely touch when closed but they should get within less than 1mm.
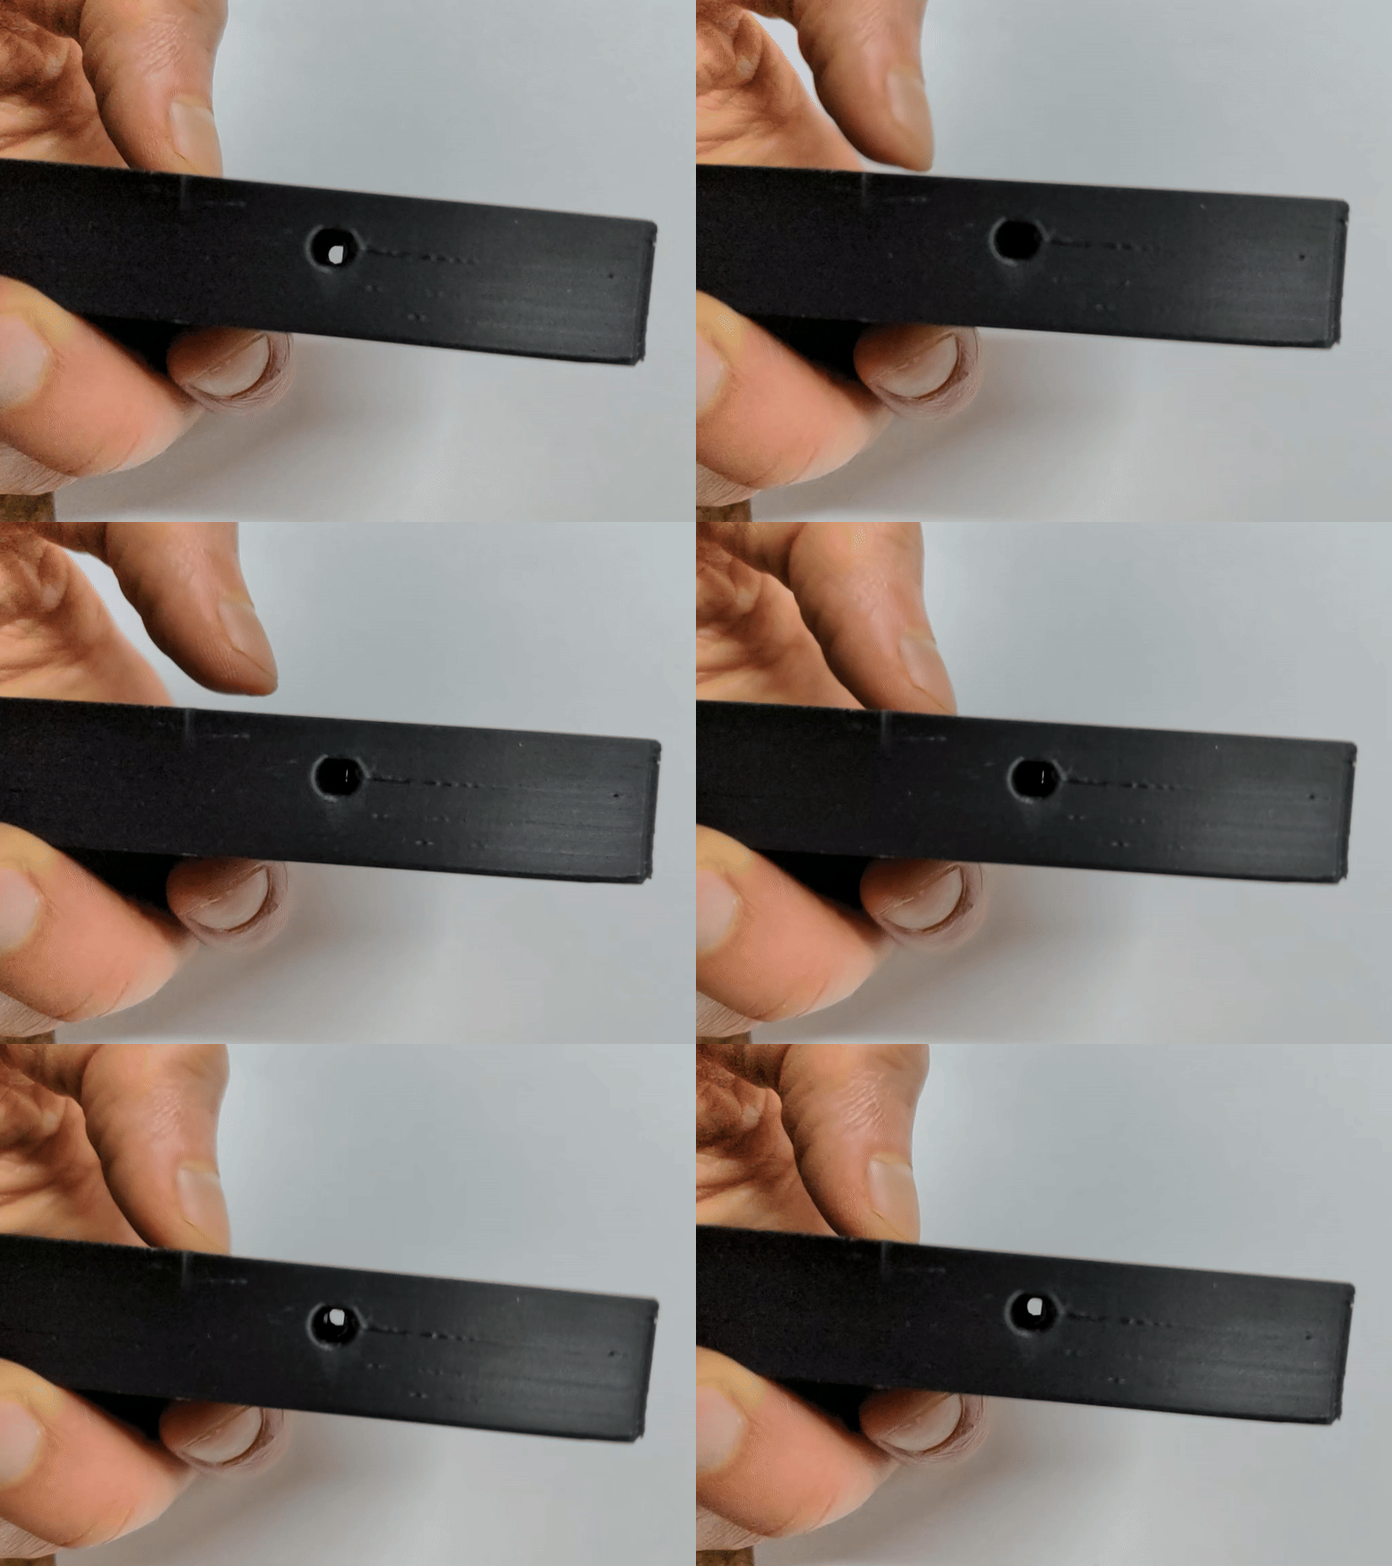
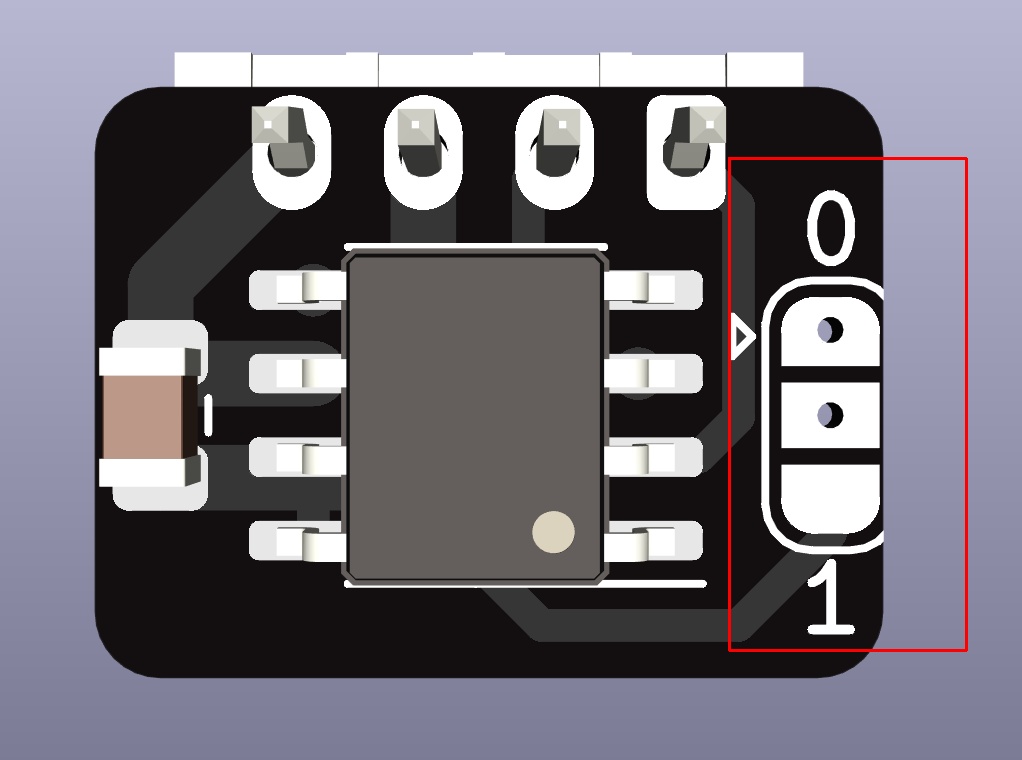
While the sensor is still free, note what jumper value is set because you won't be able to see it later, and if none is set fix that
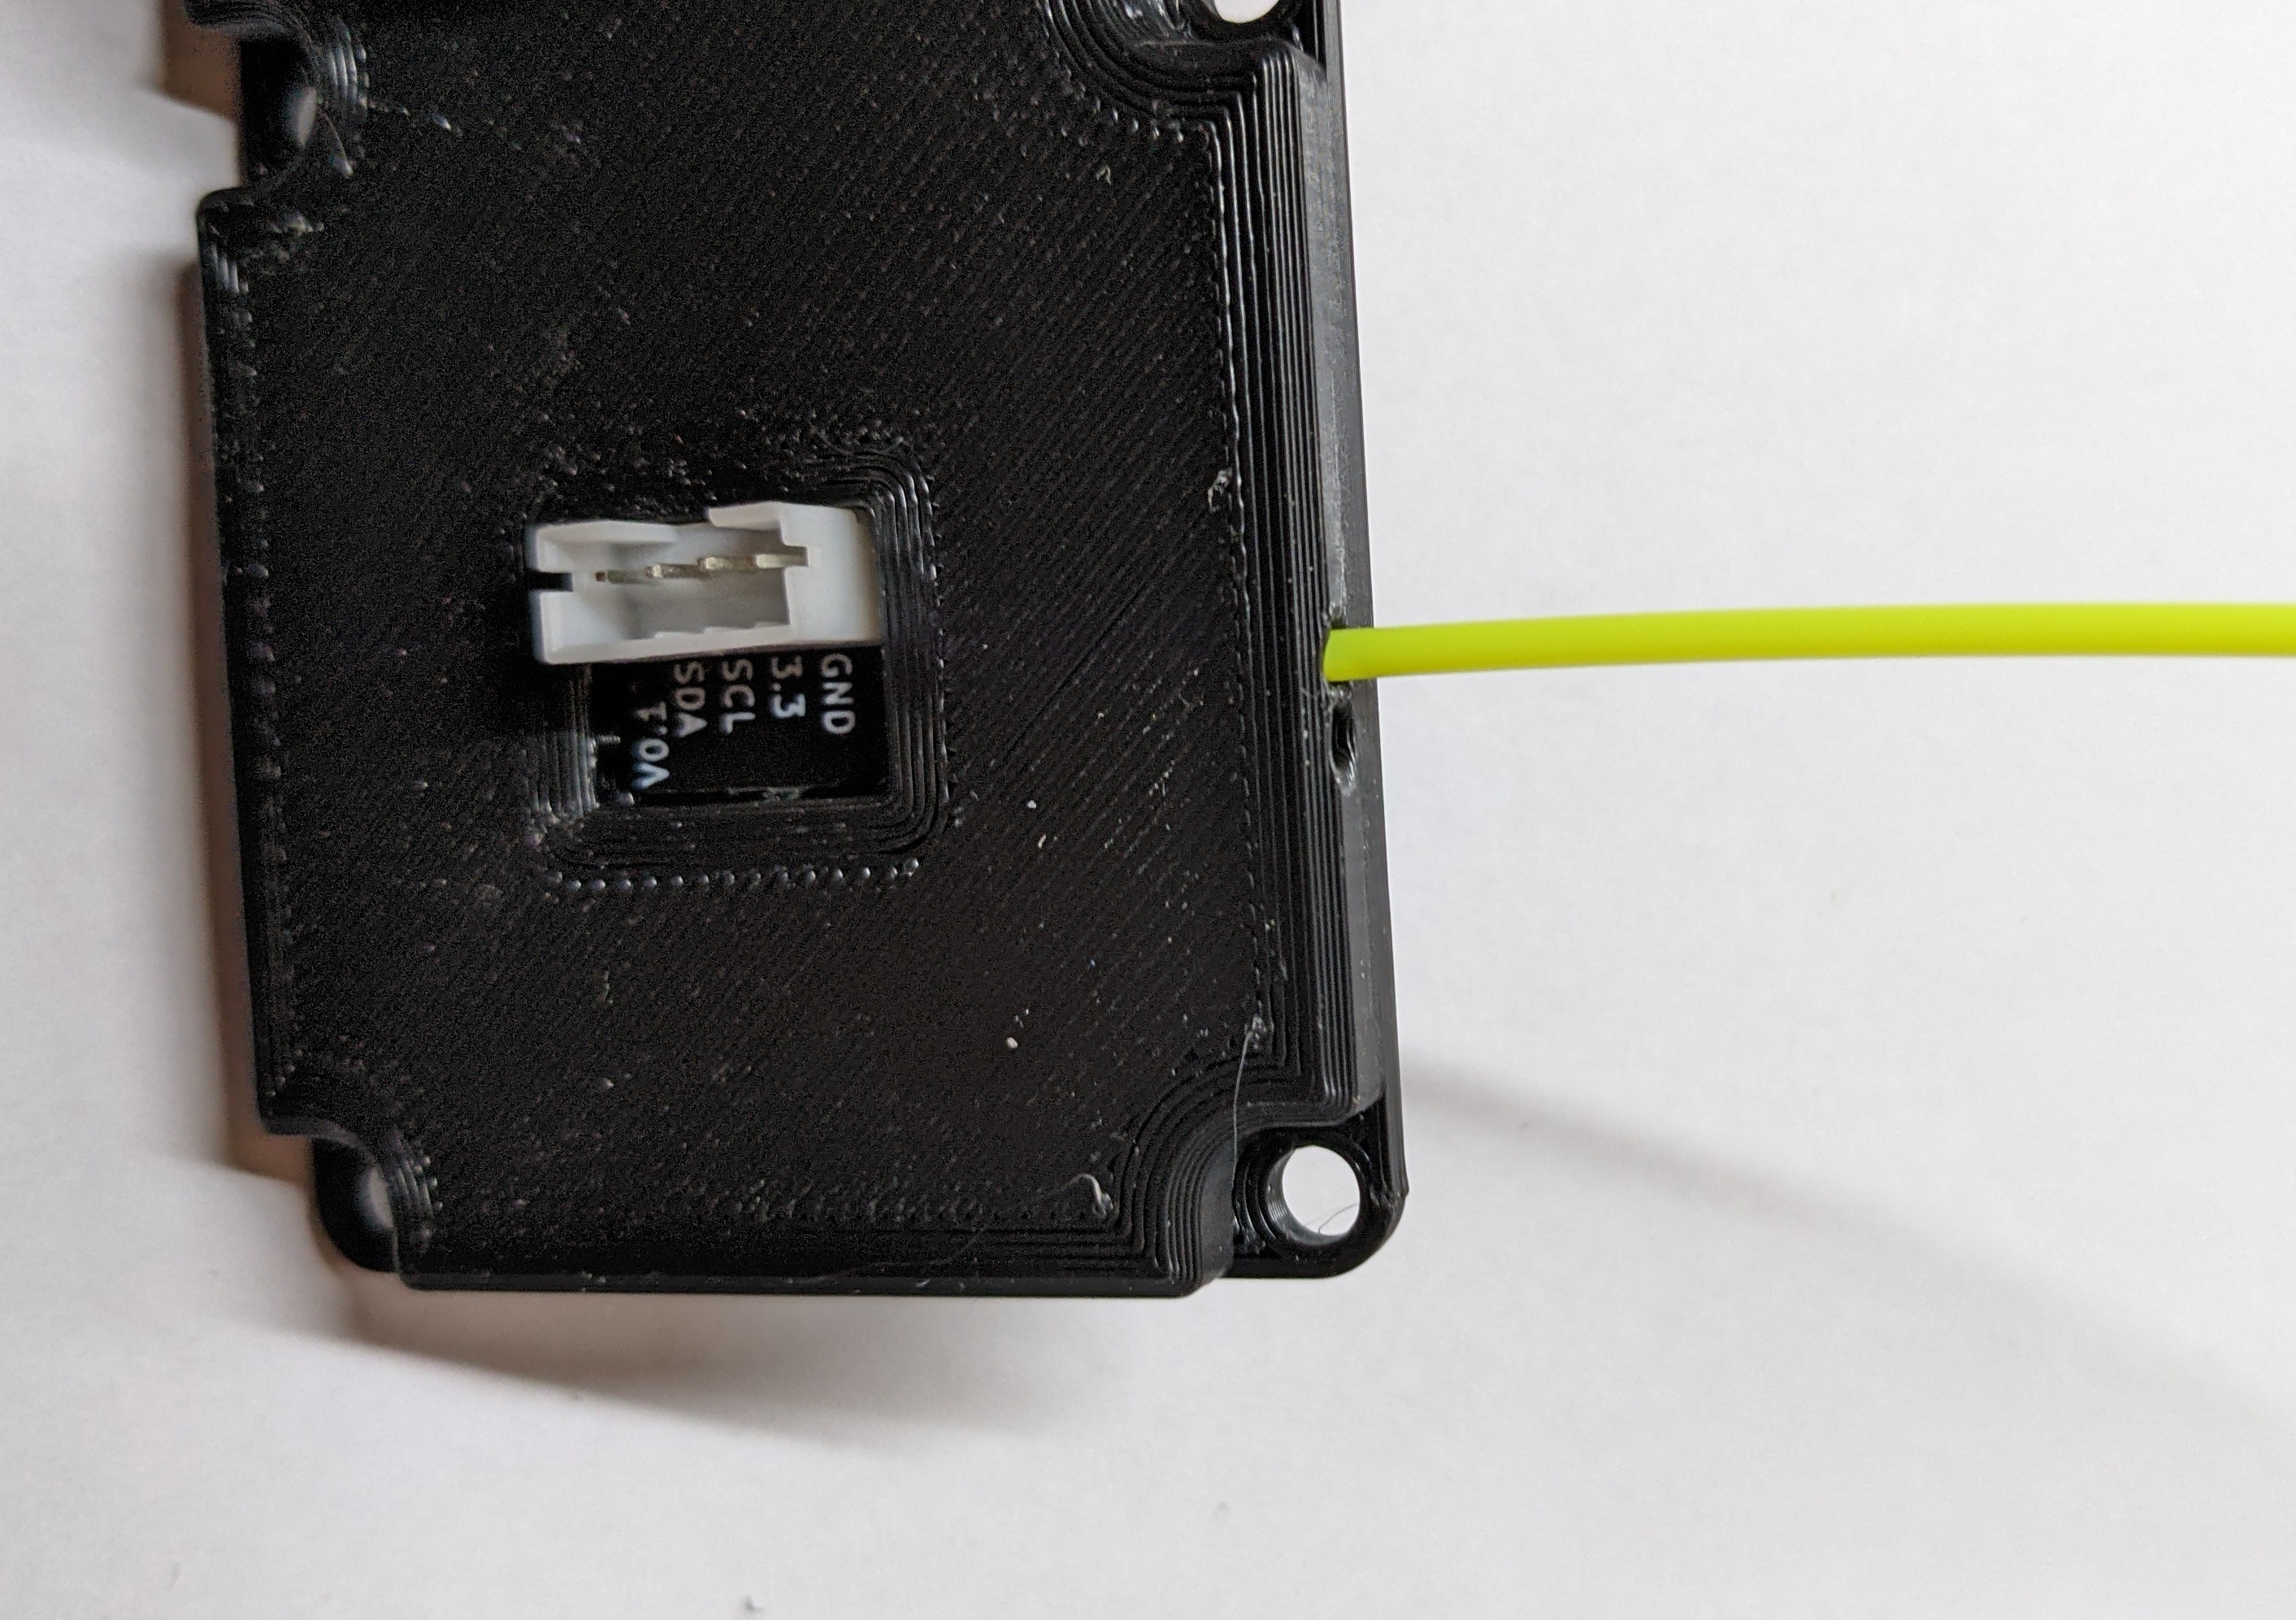
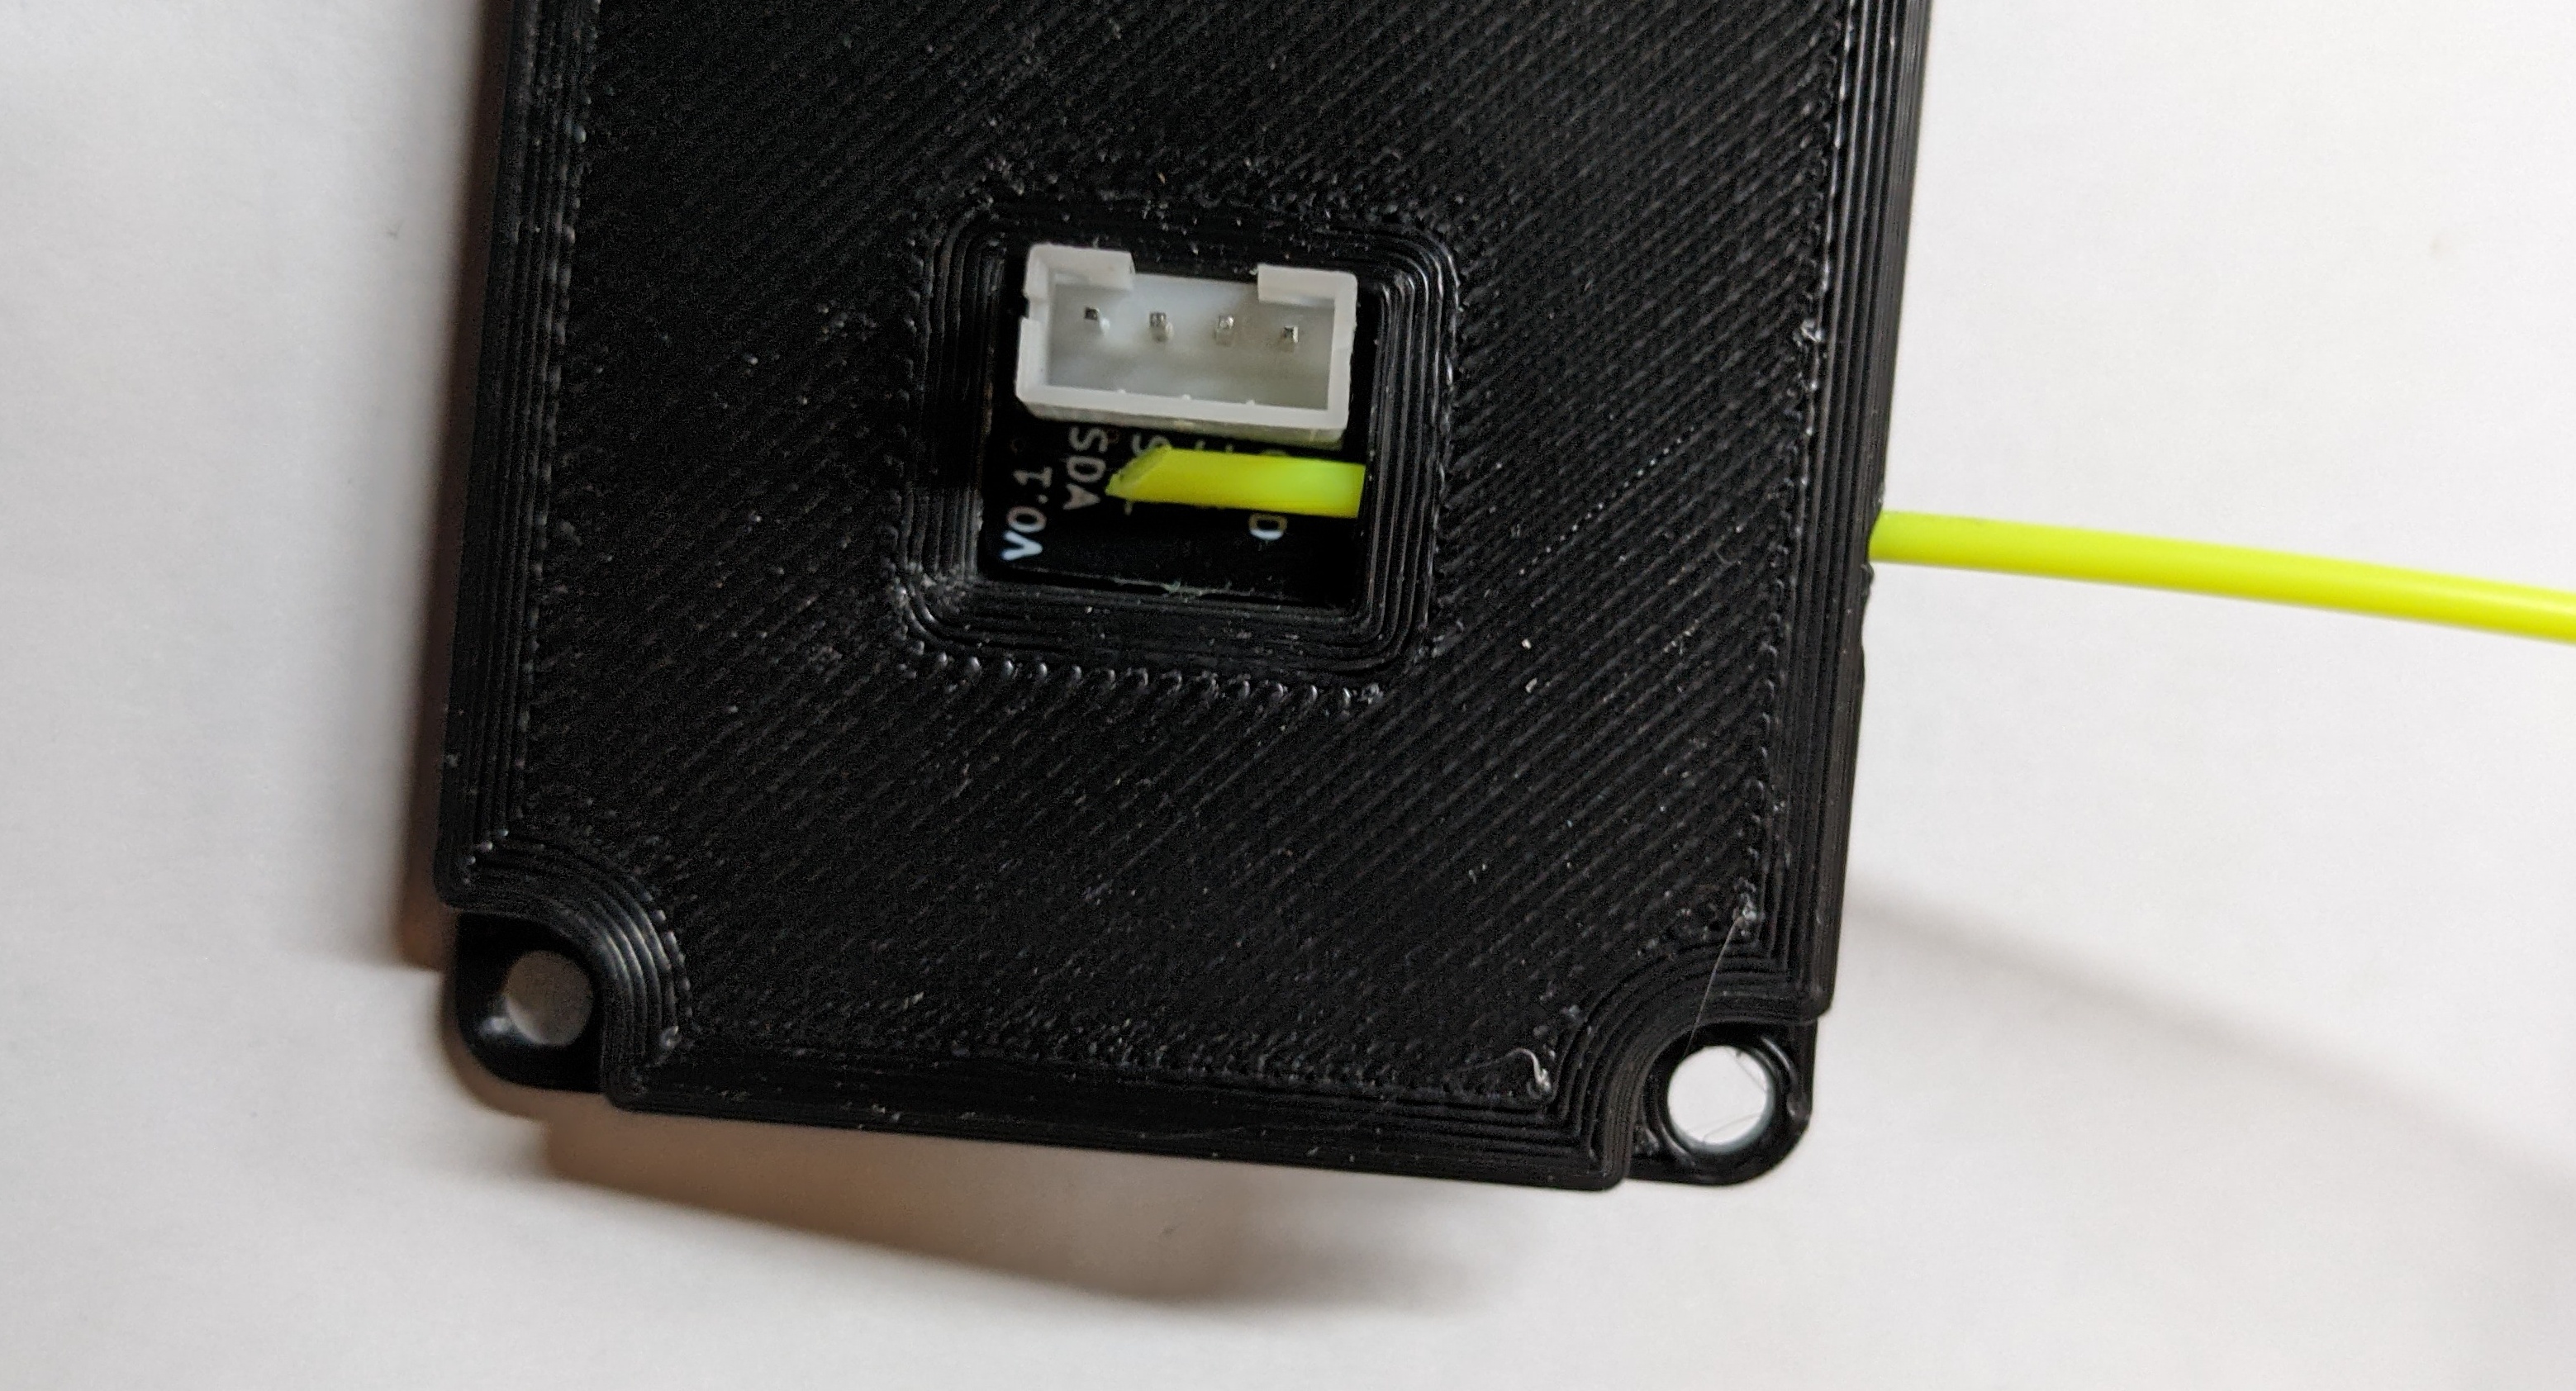
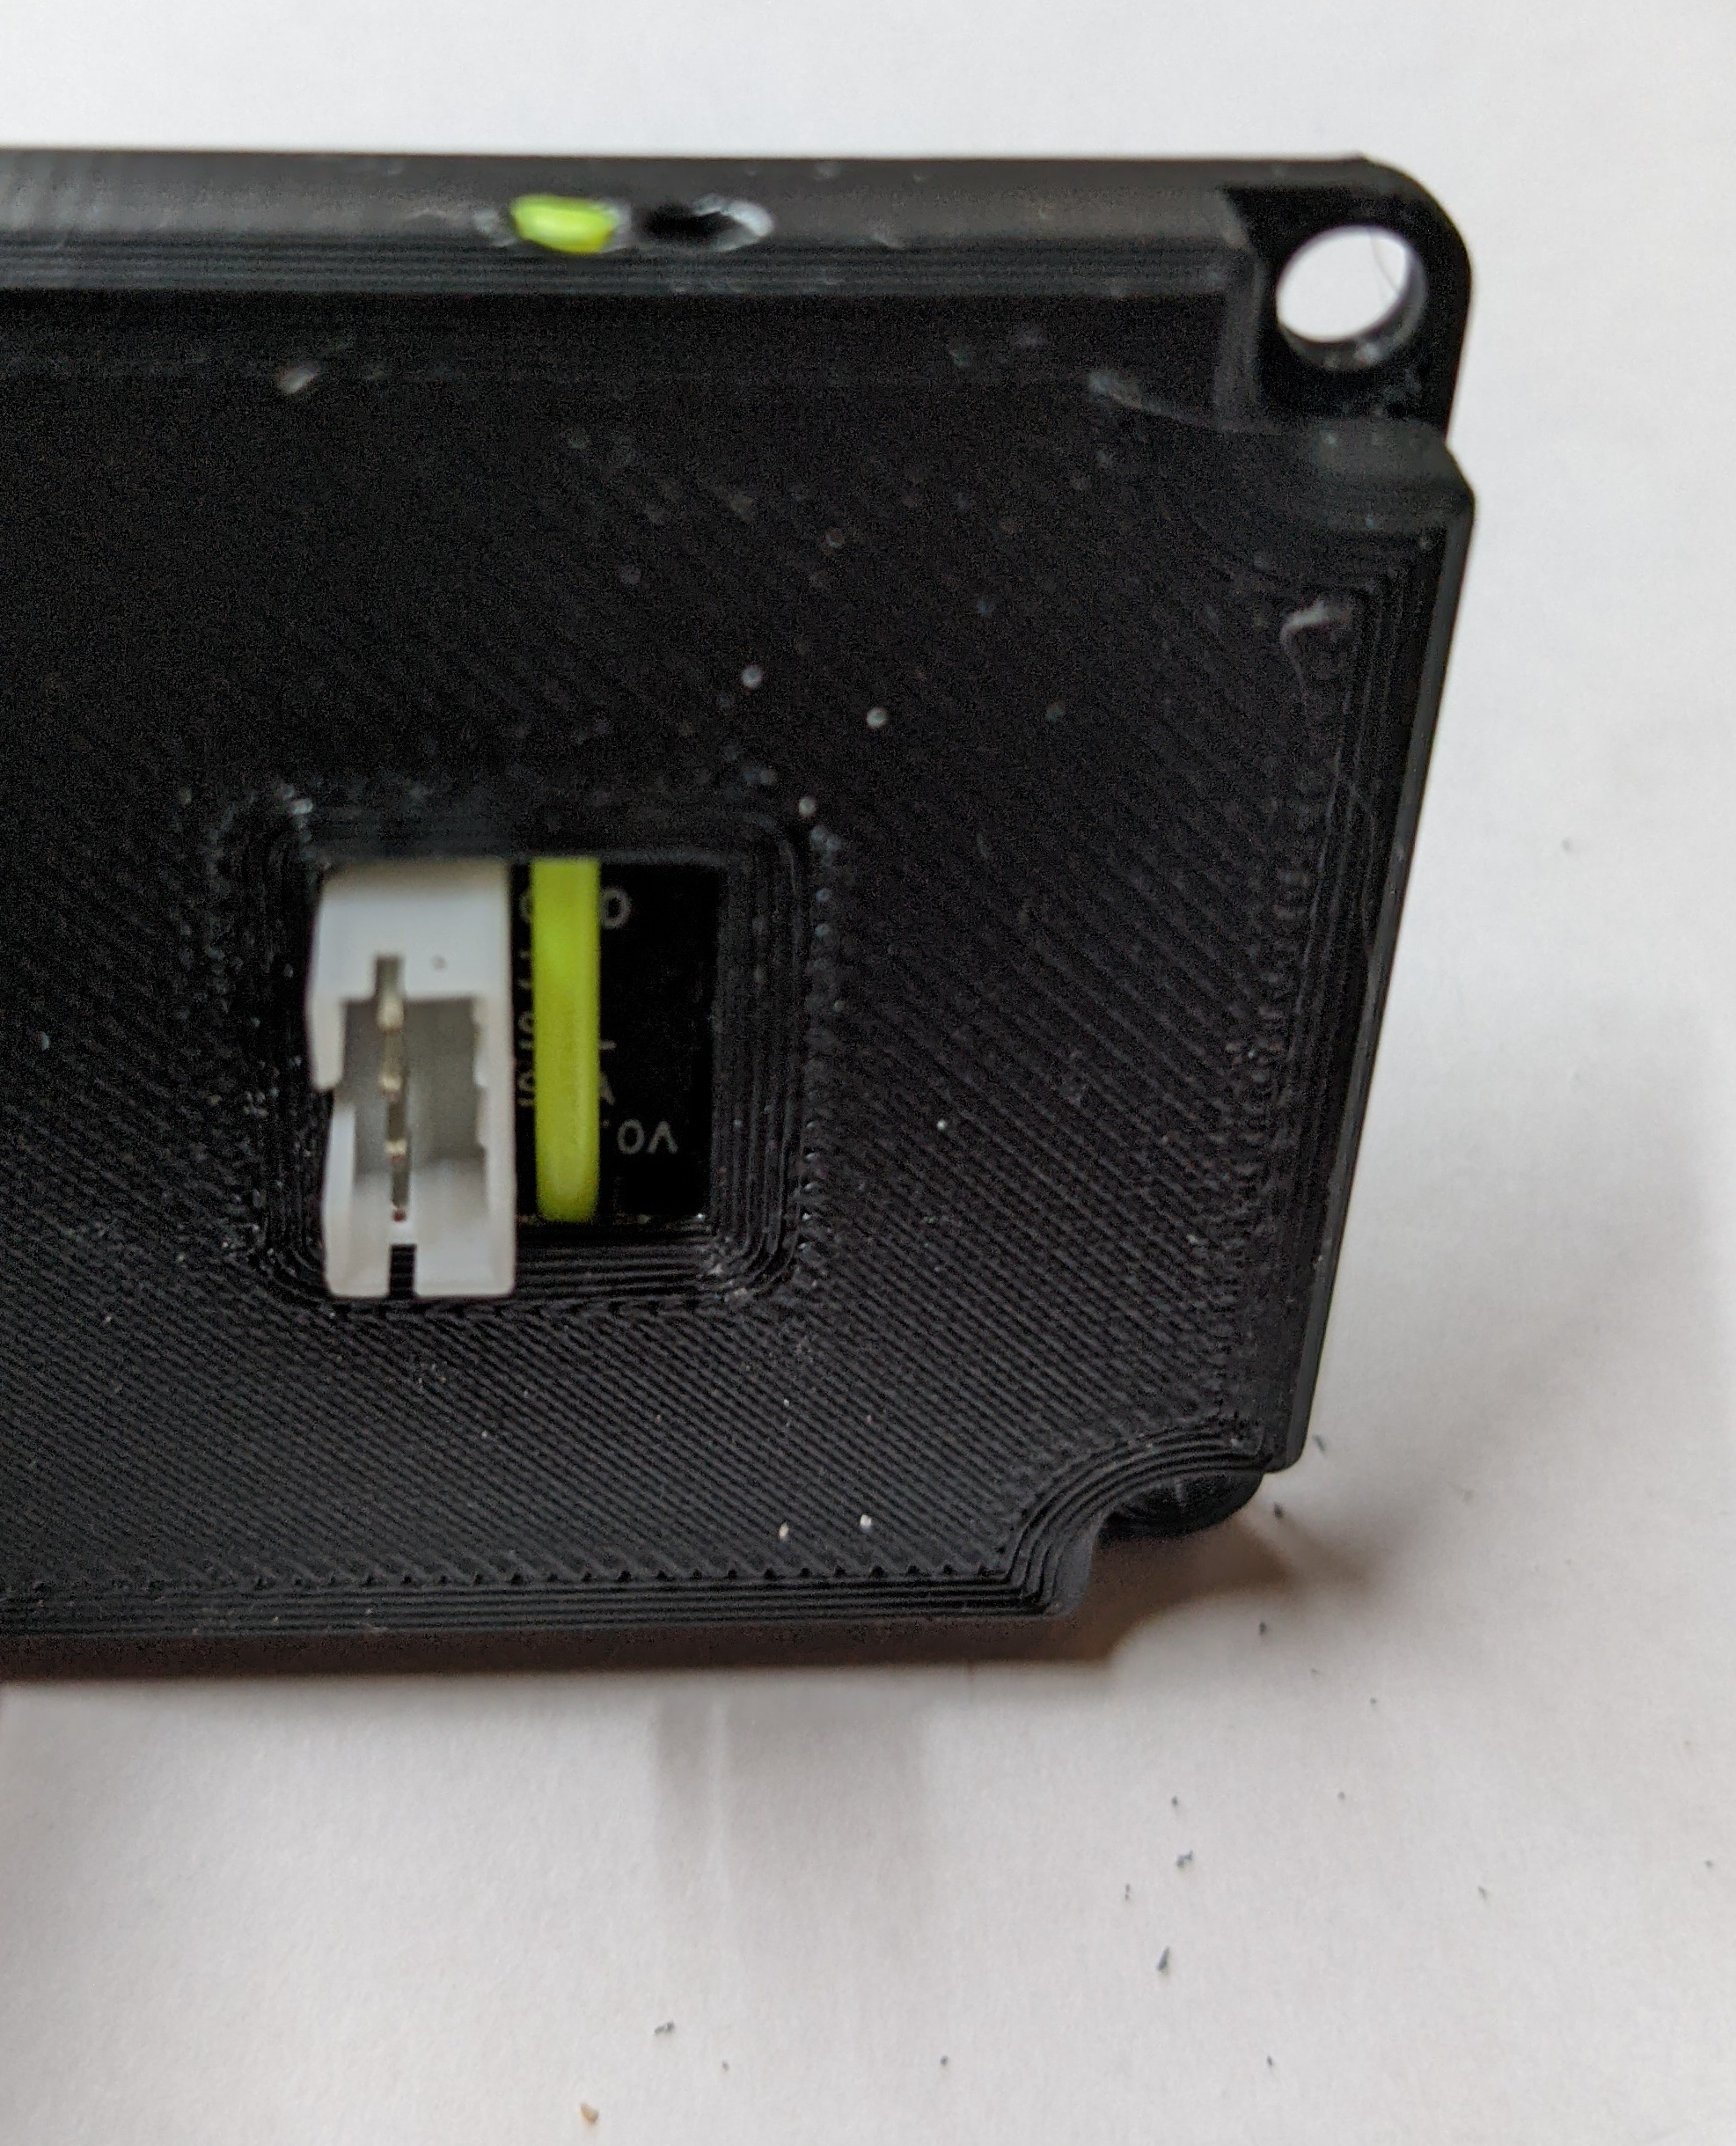
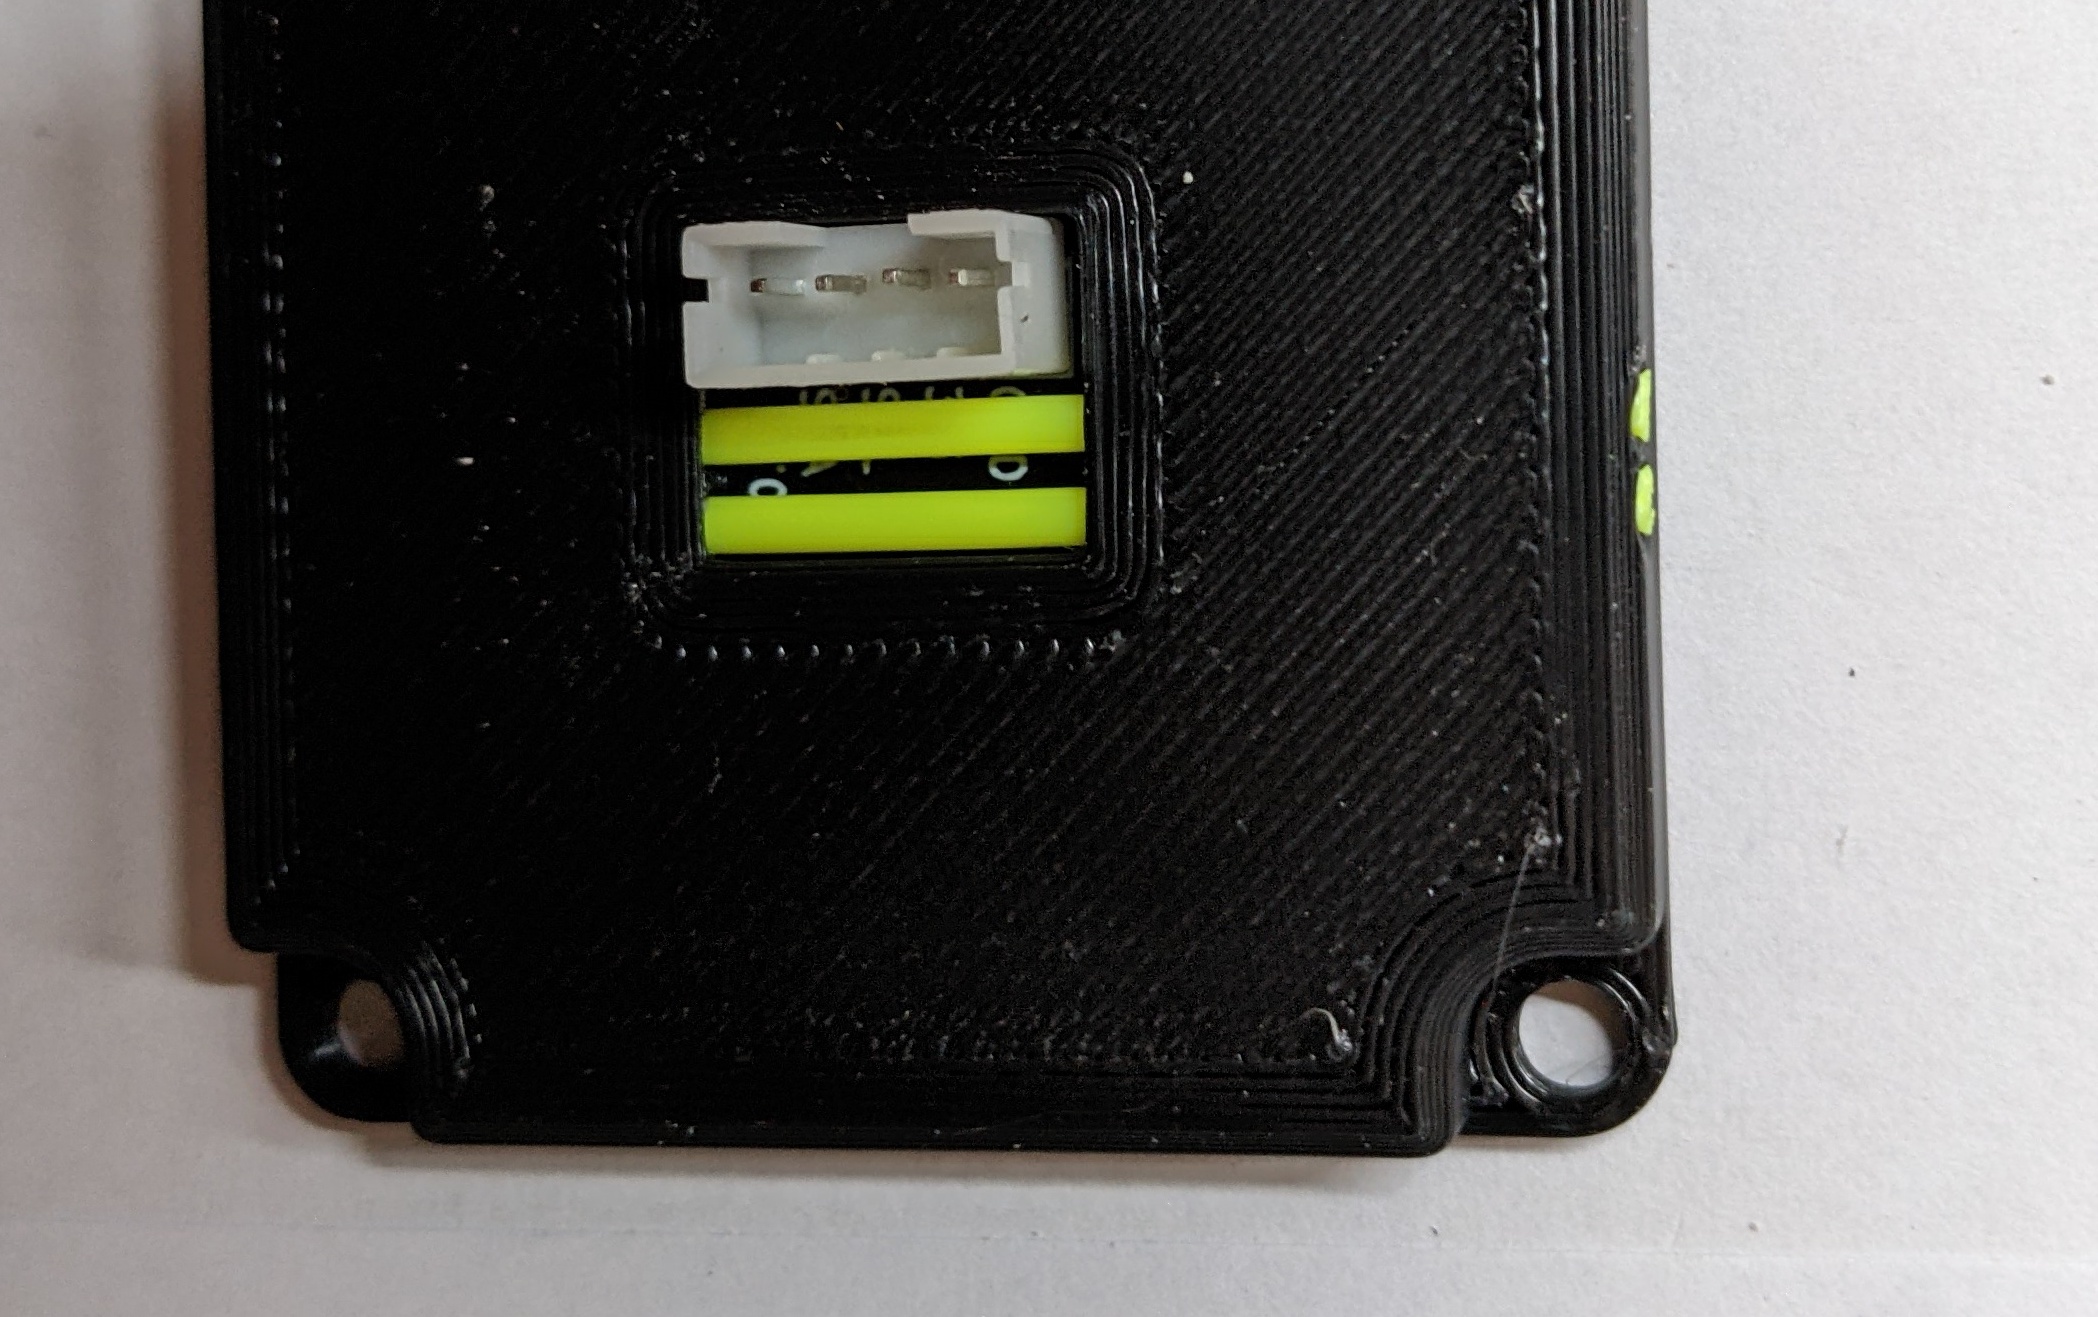
Gently push the sensor board into the hole in the lid as shown.
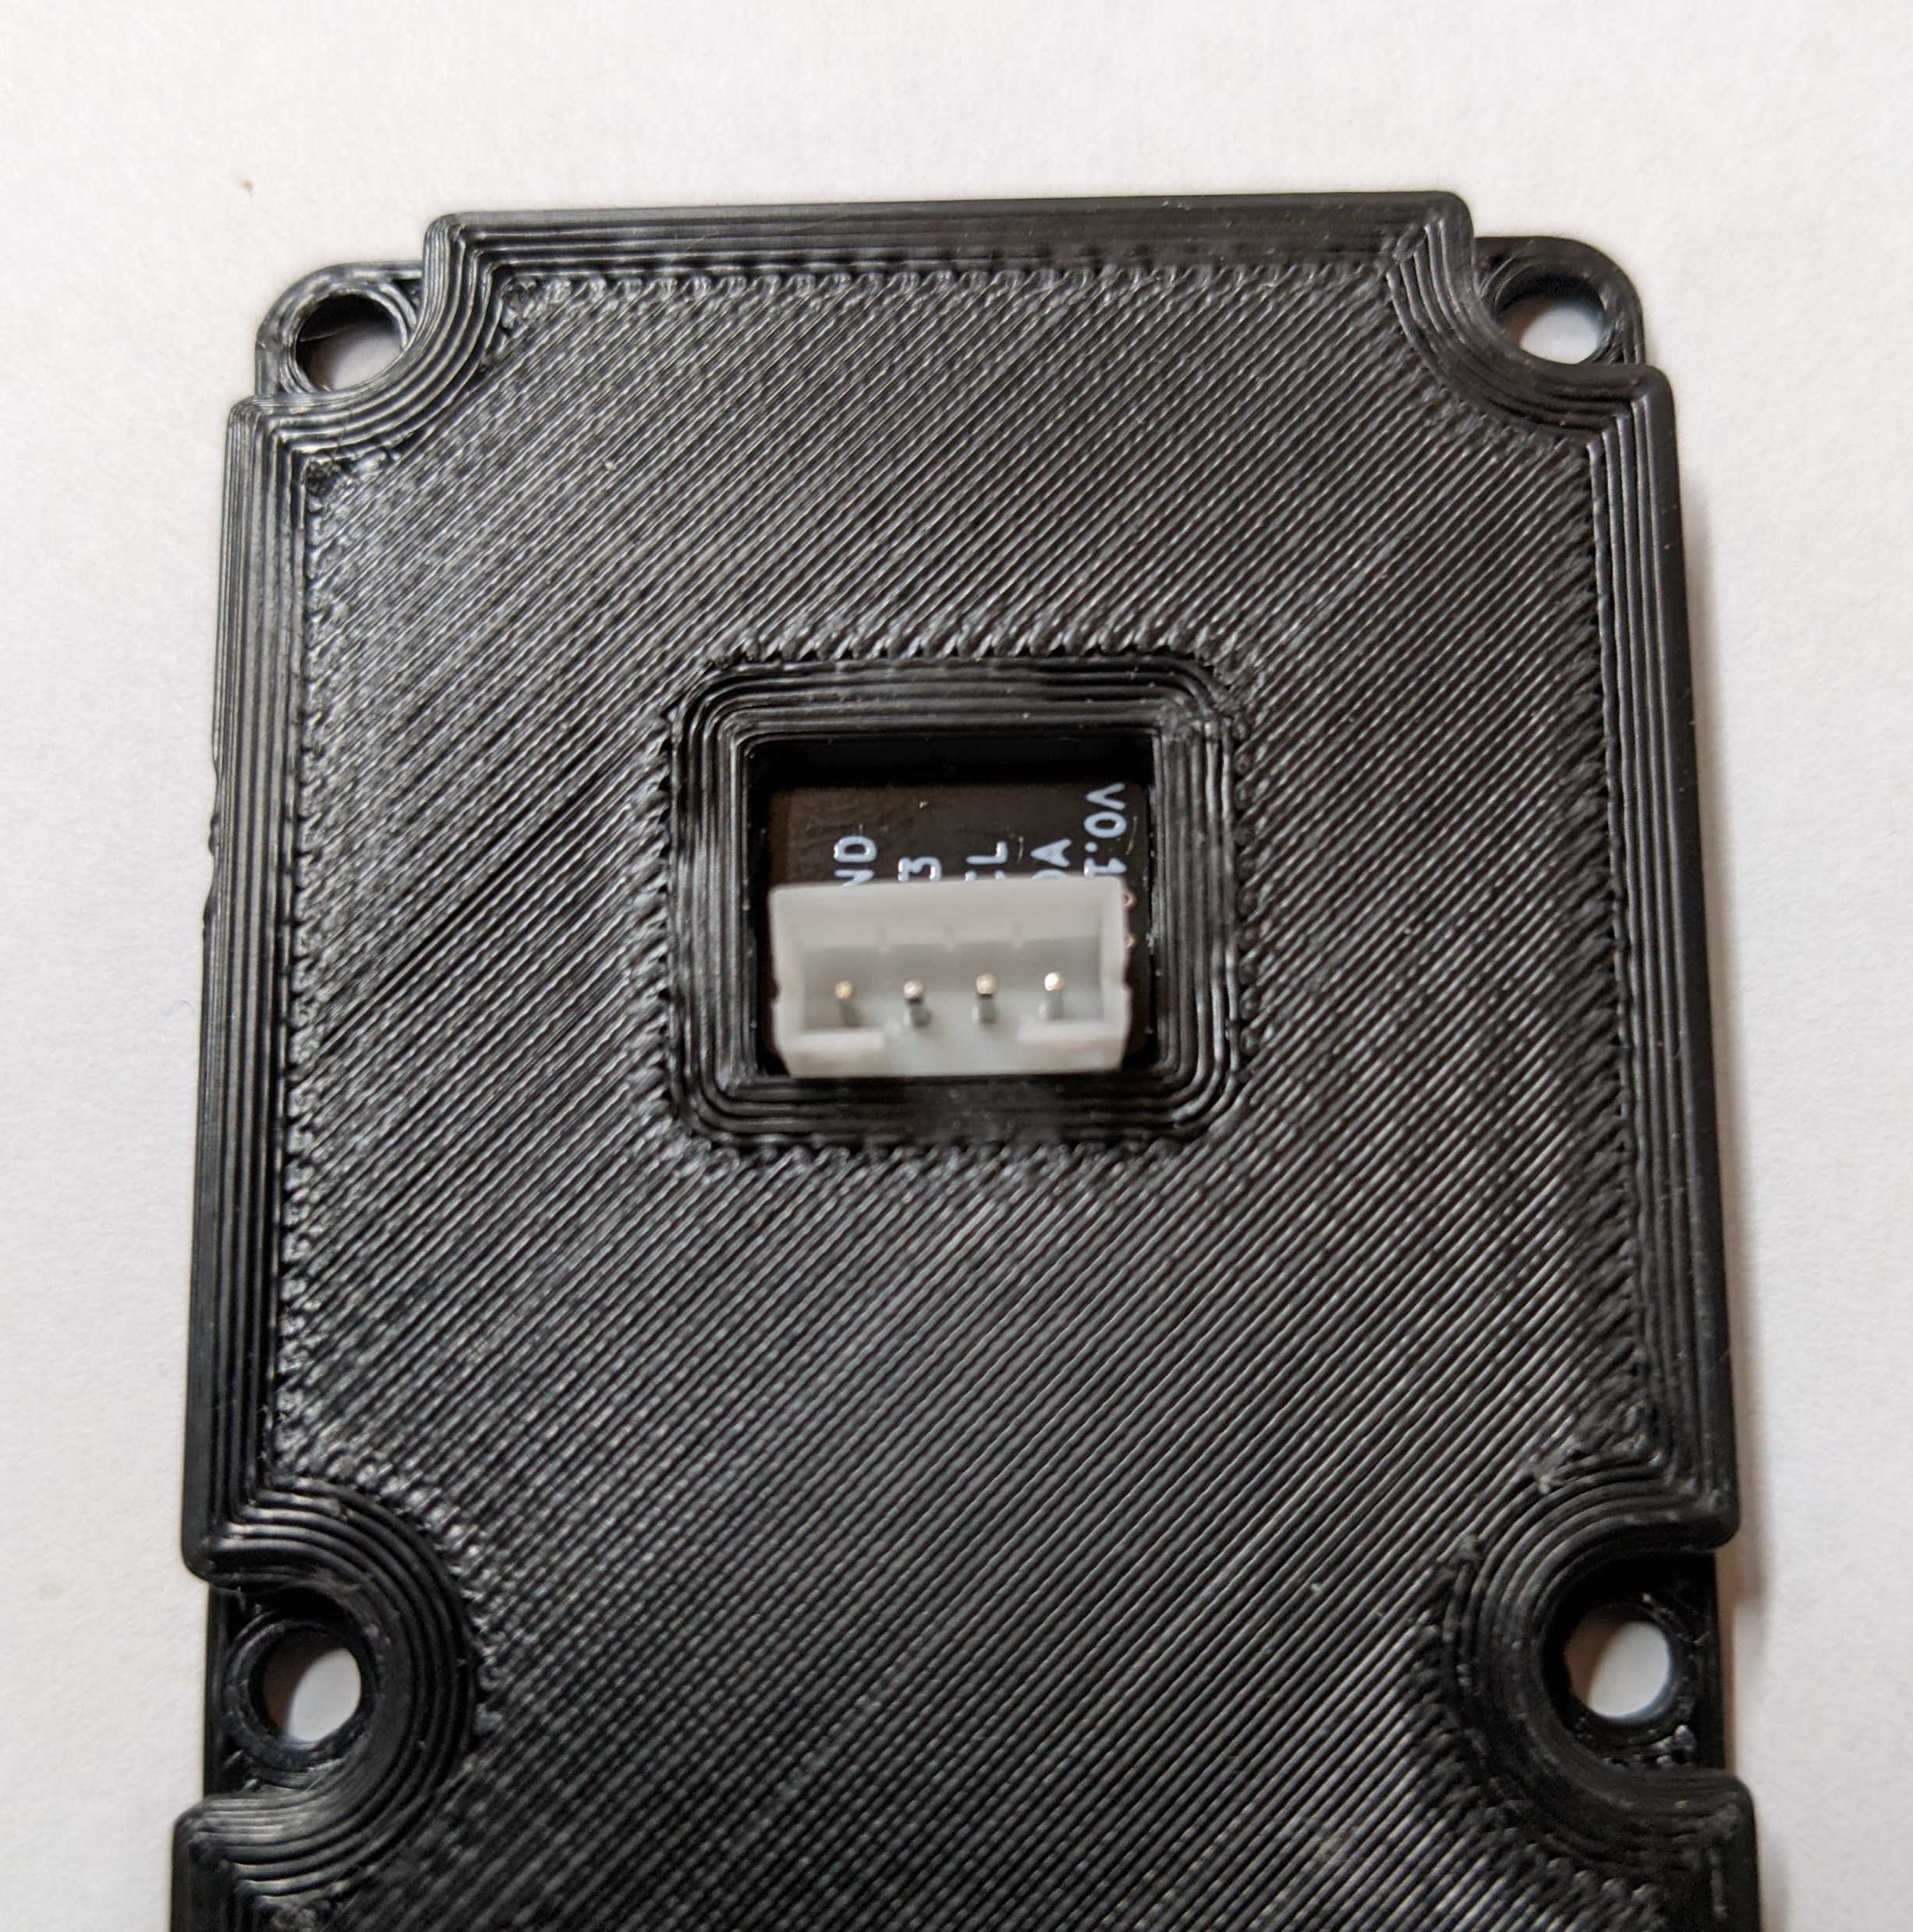
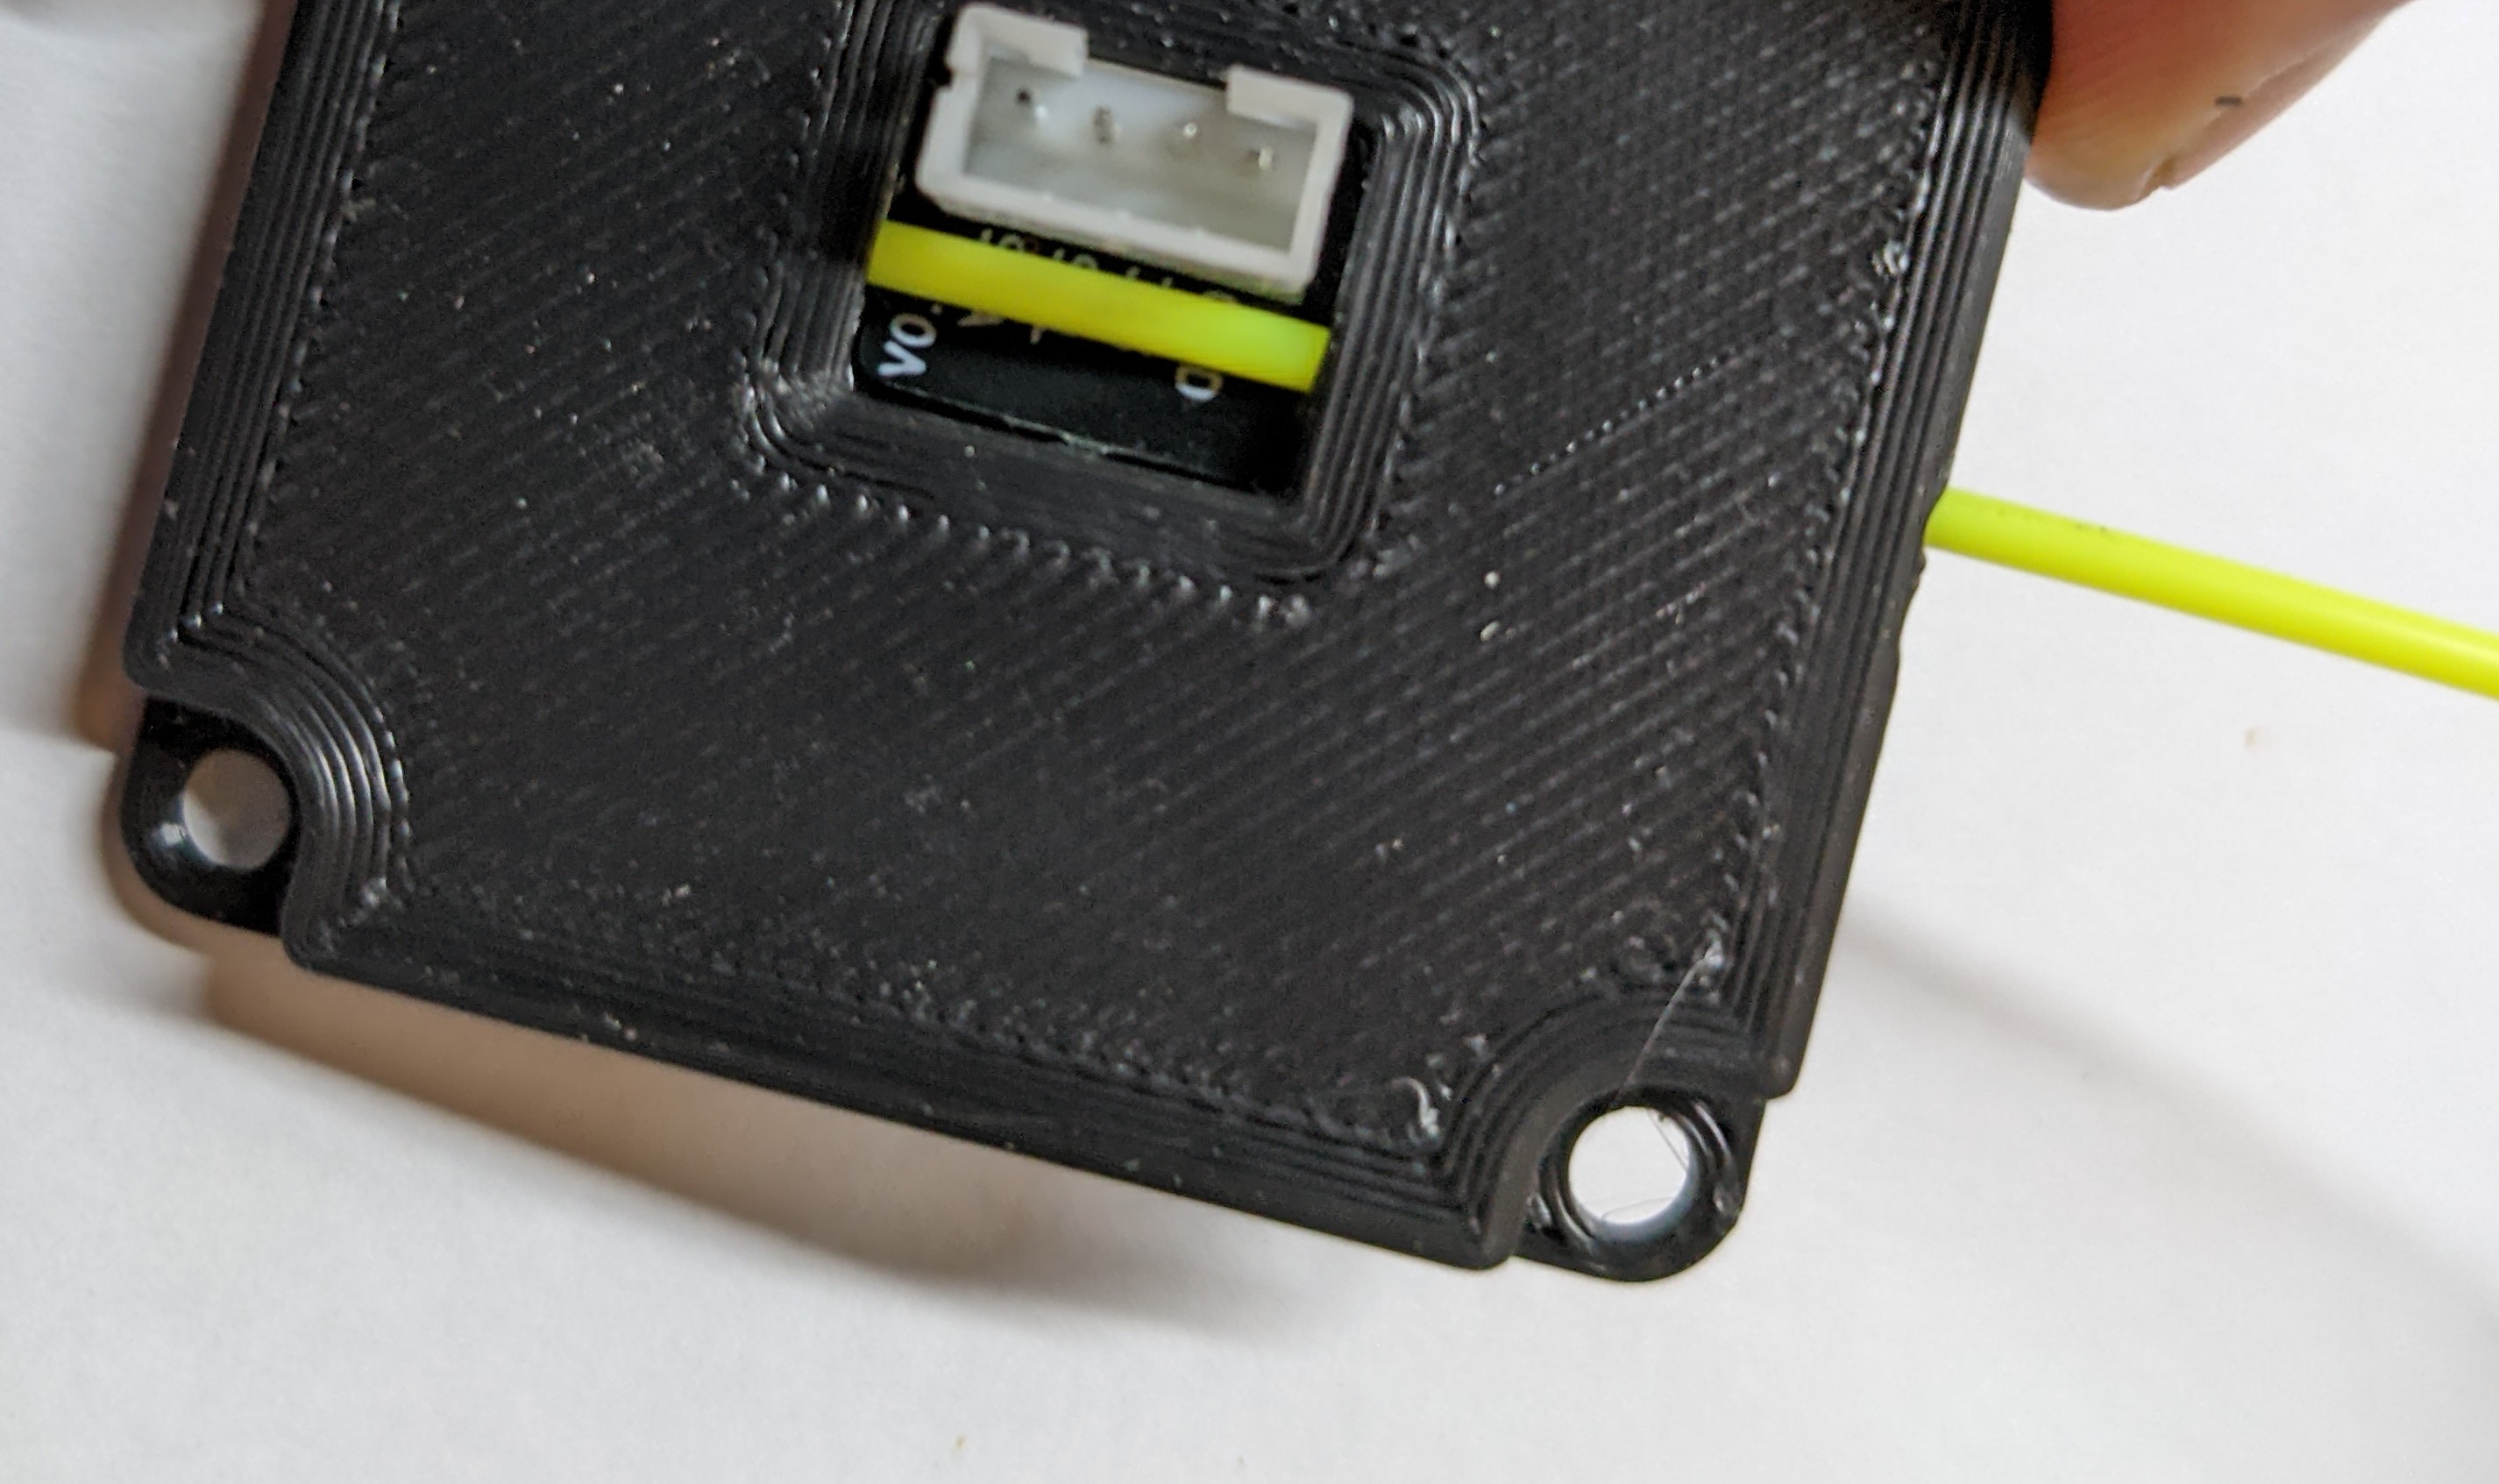
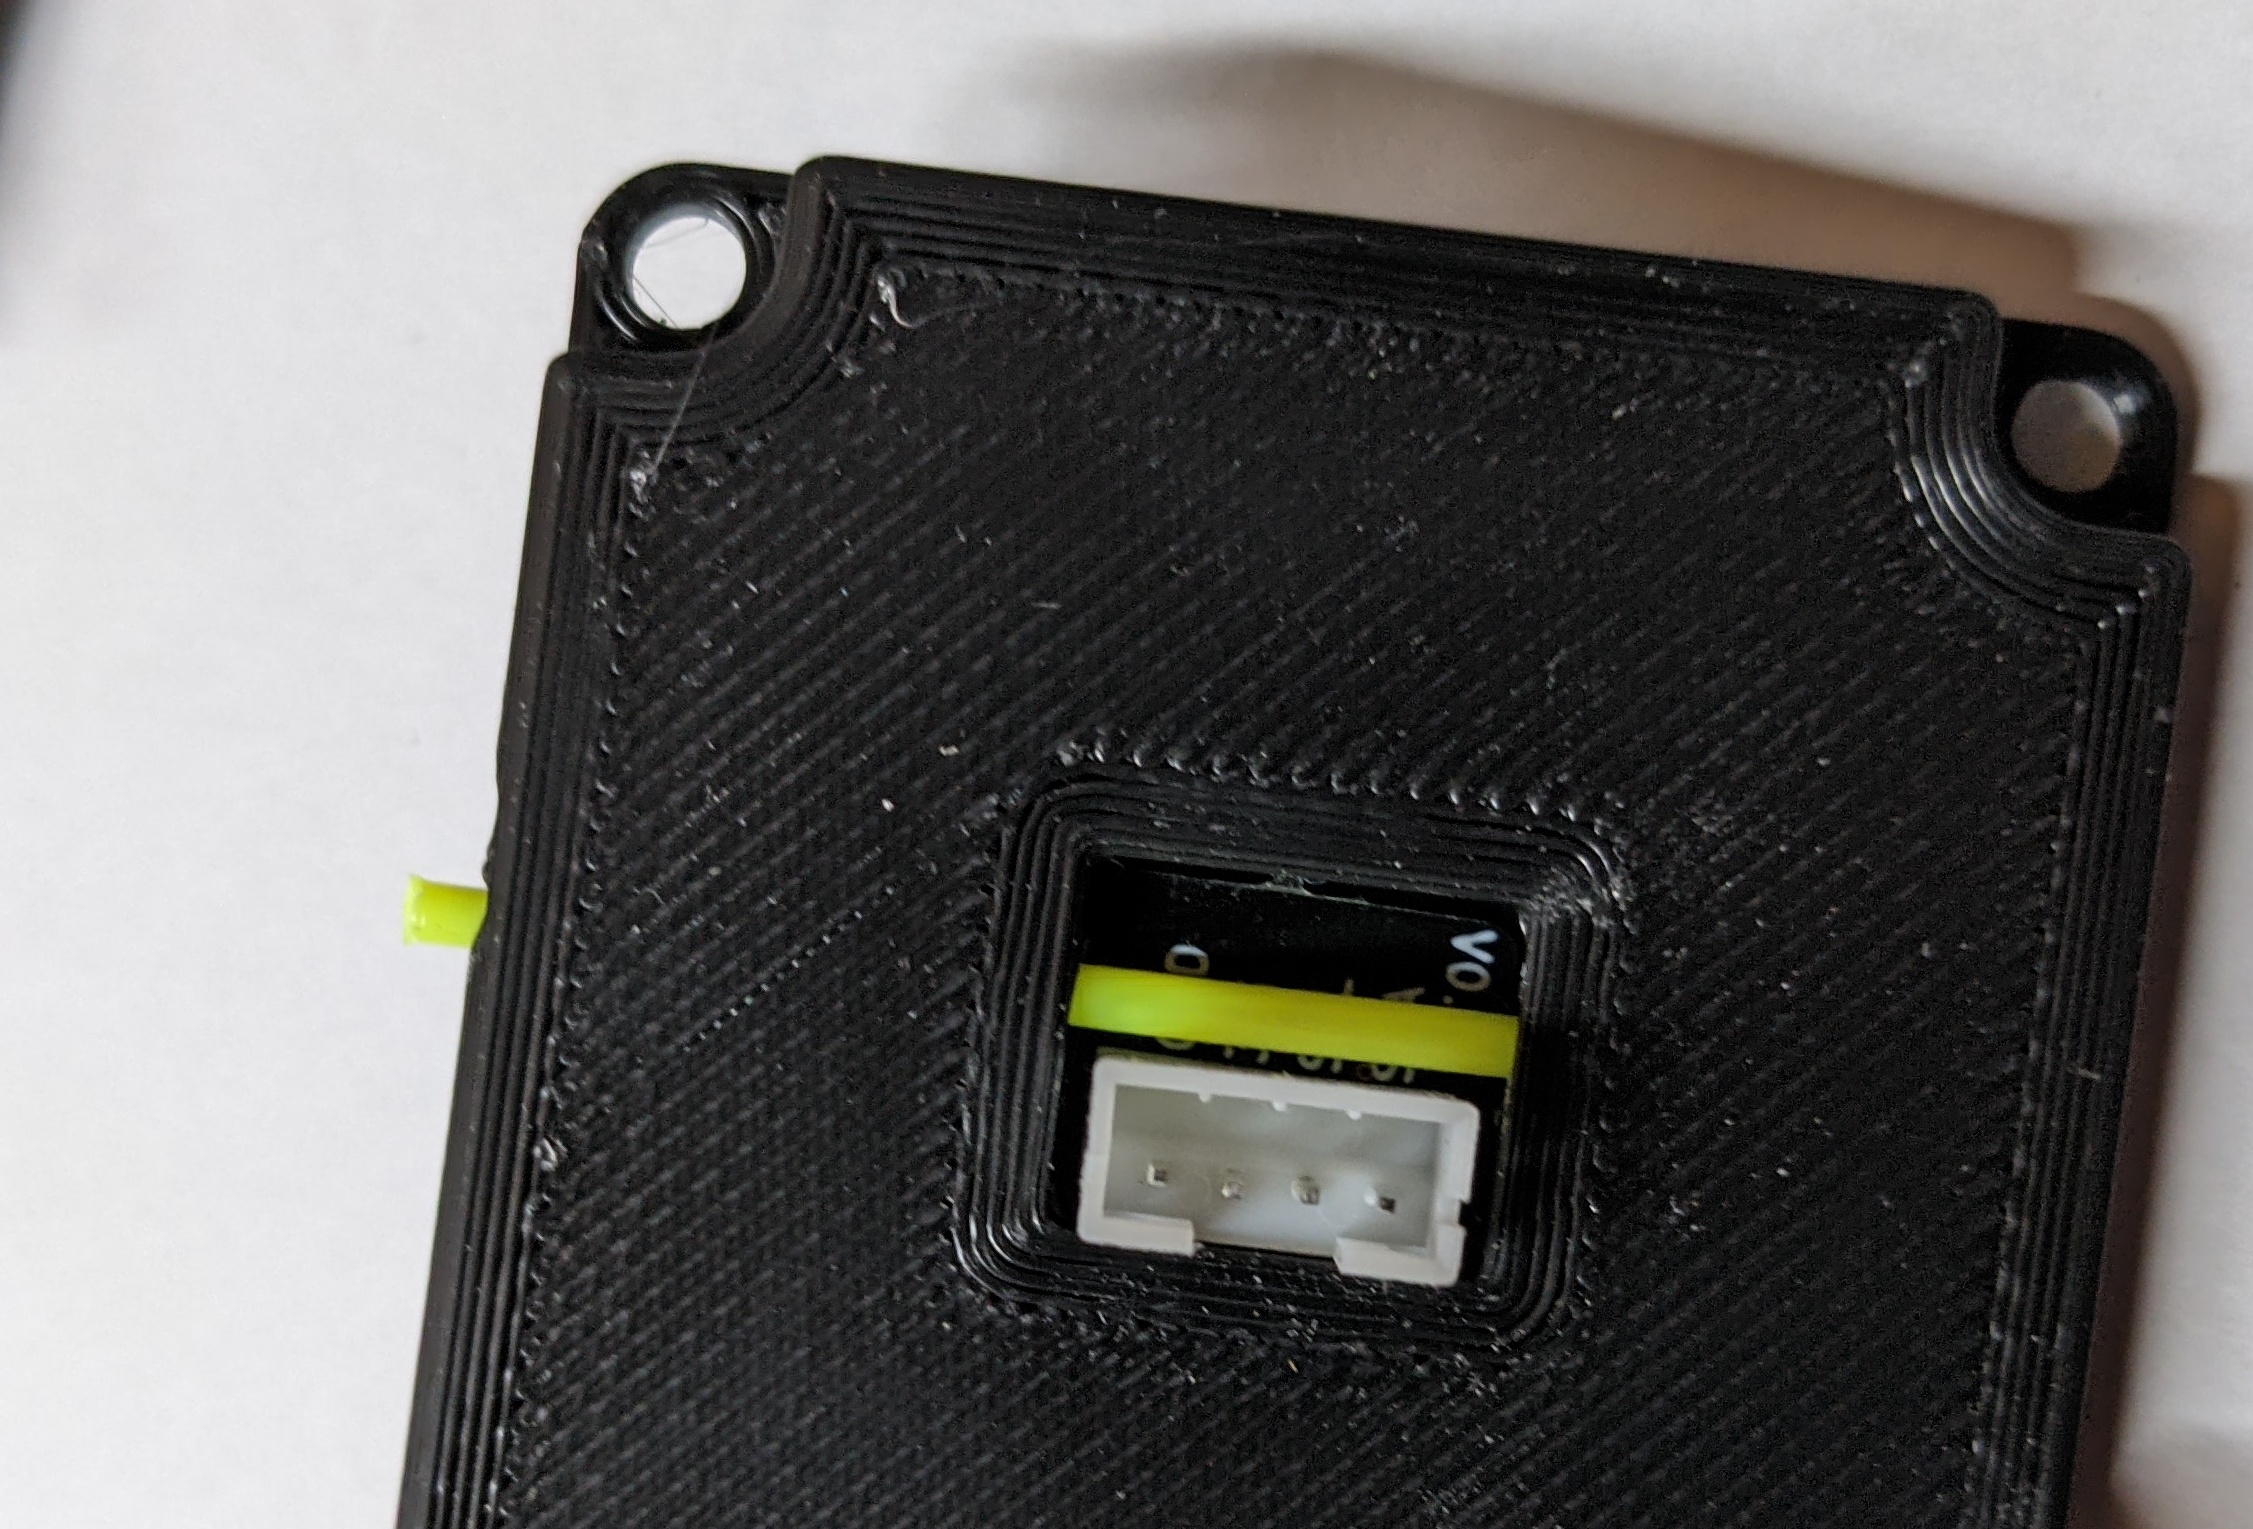
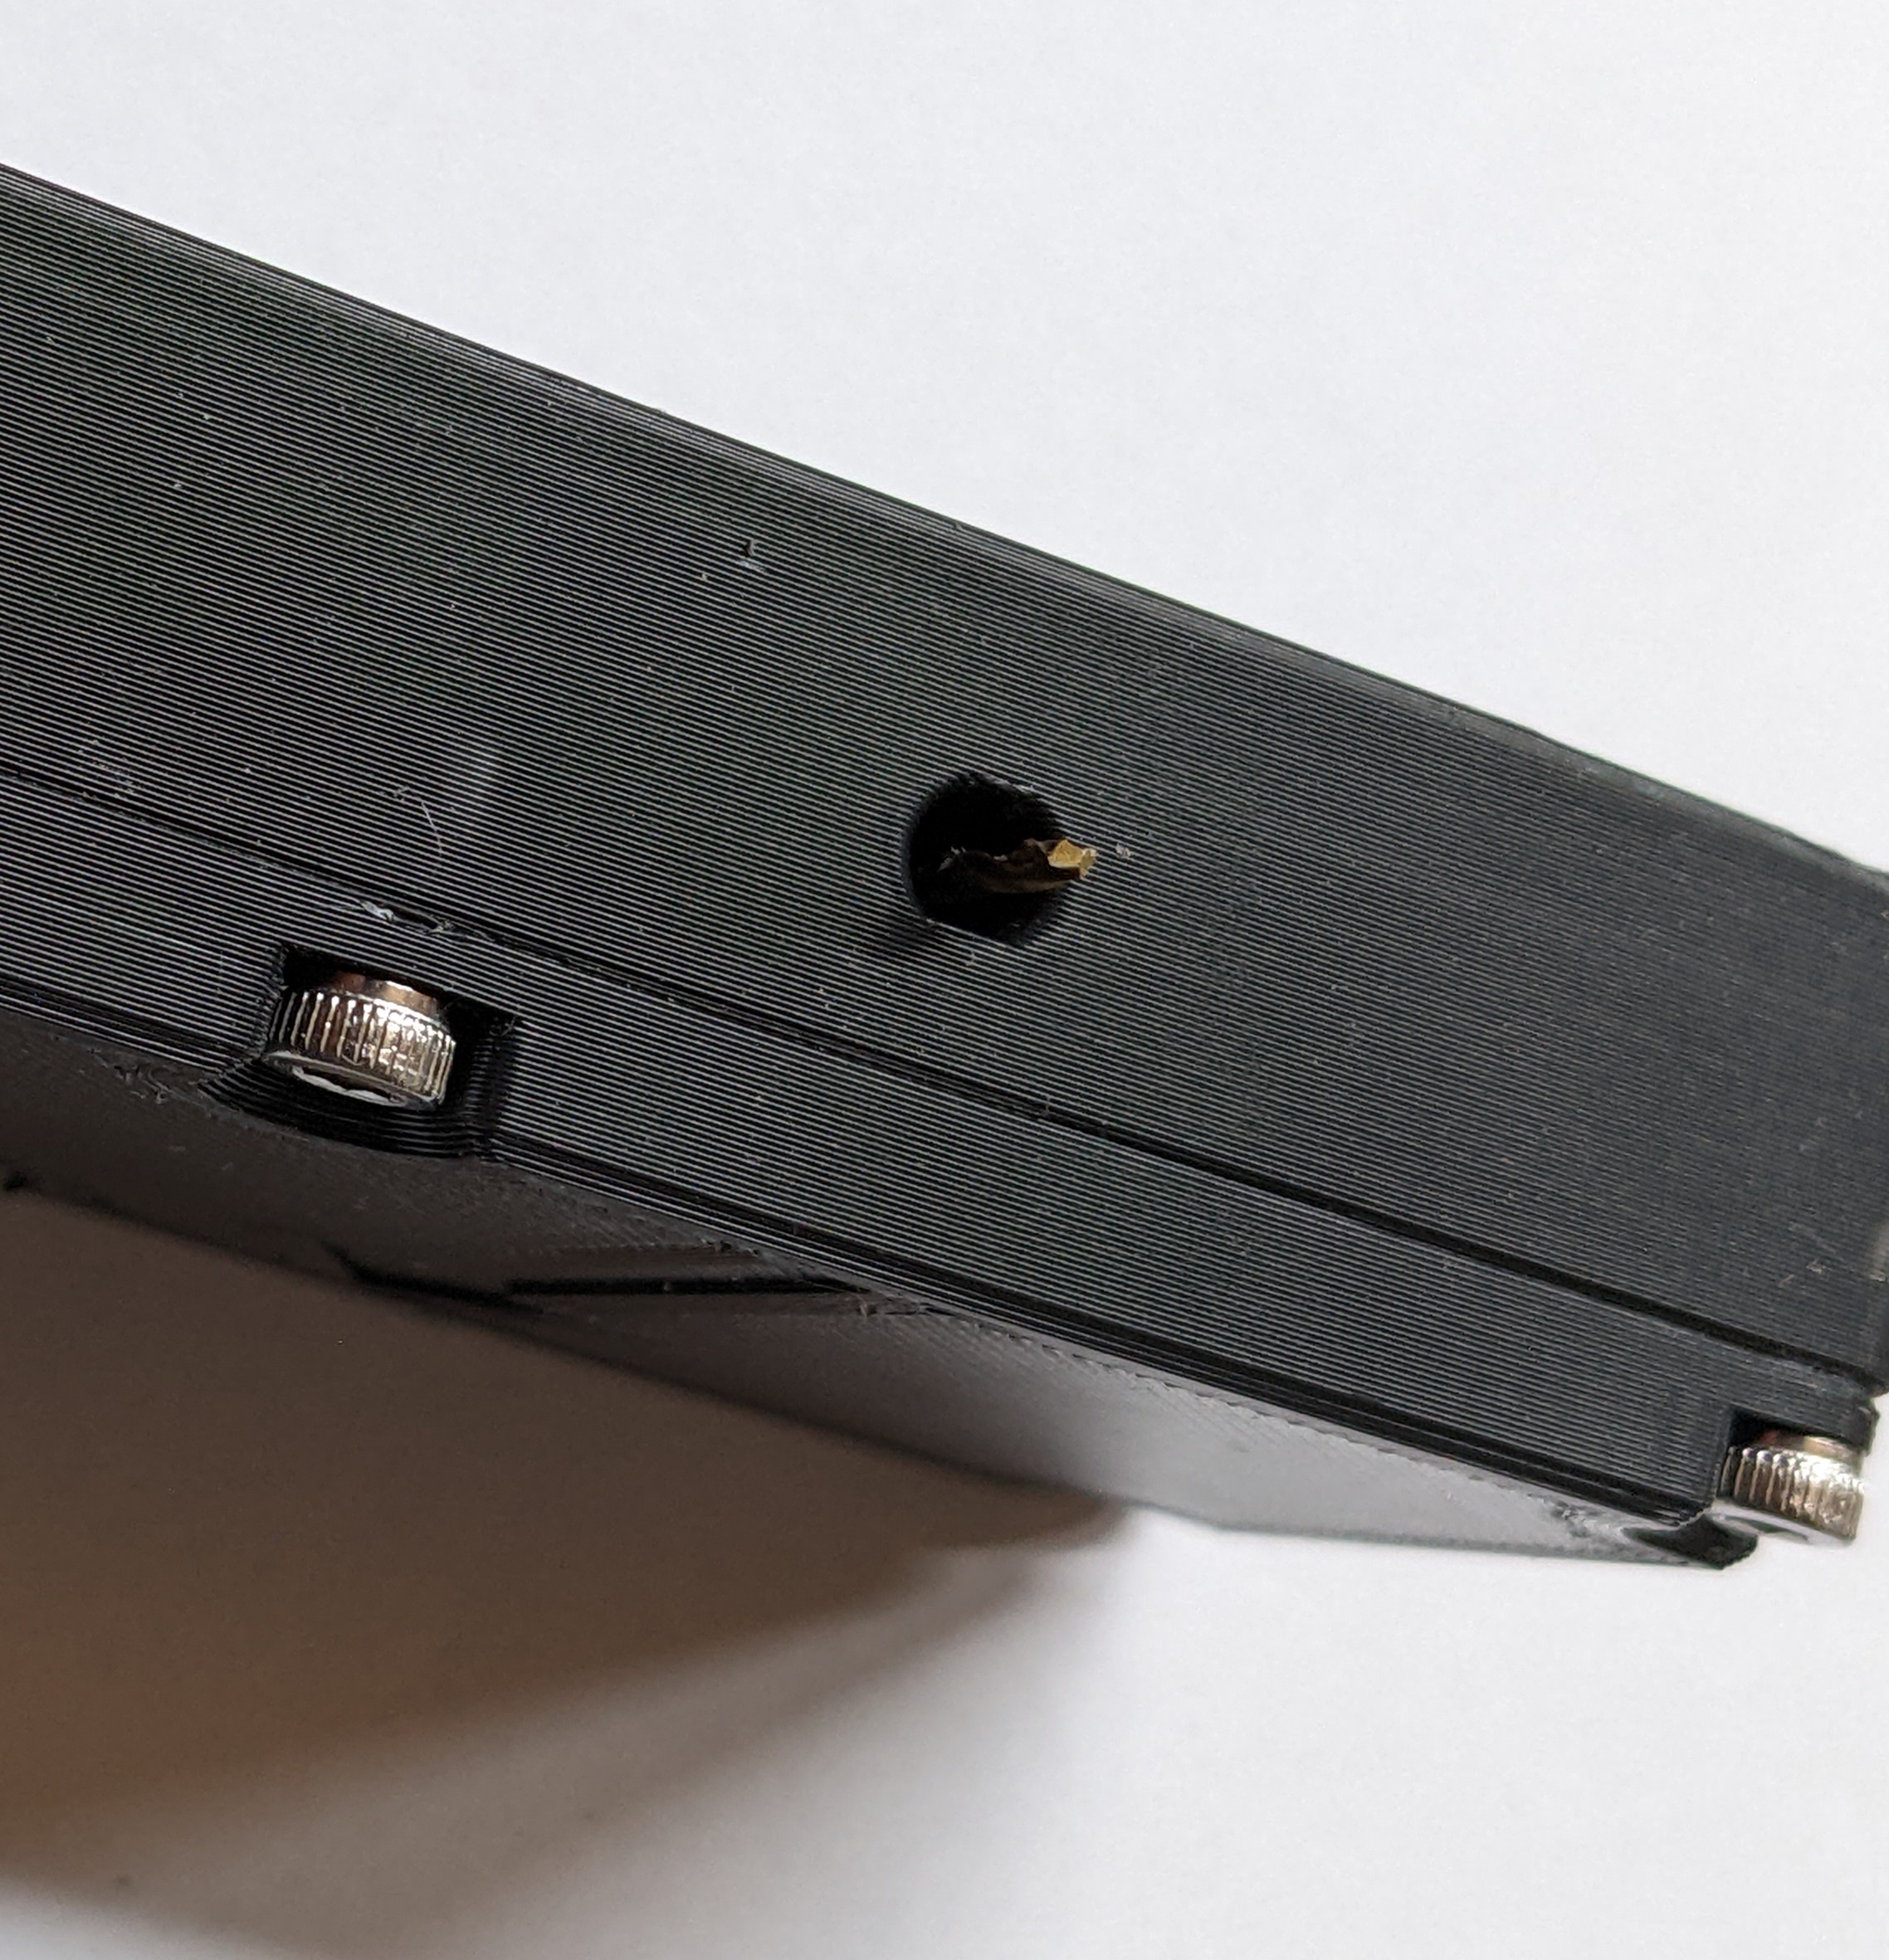
Push a sharpened piece of ABS filament into the hole on the side of the lid, over the sensor and into the hole on the other side. Once you reach the entrance of the inner hole, cut the filament about 2mm from the side and hammer it the rest of the way in, it should be flush otherwise cut the rest off. Then repeat for the second hole.
Make sure the sensor part is over the magnet in the plunger and close the lid using 6 m3x8 screws.
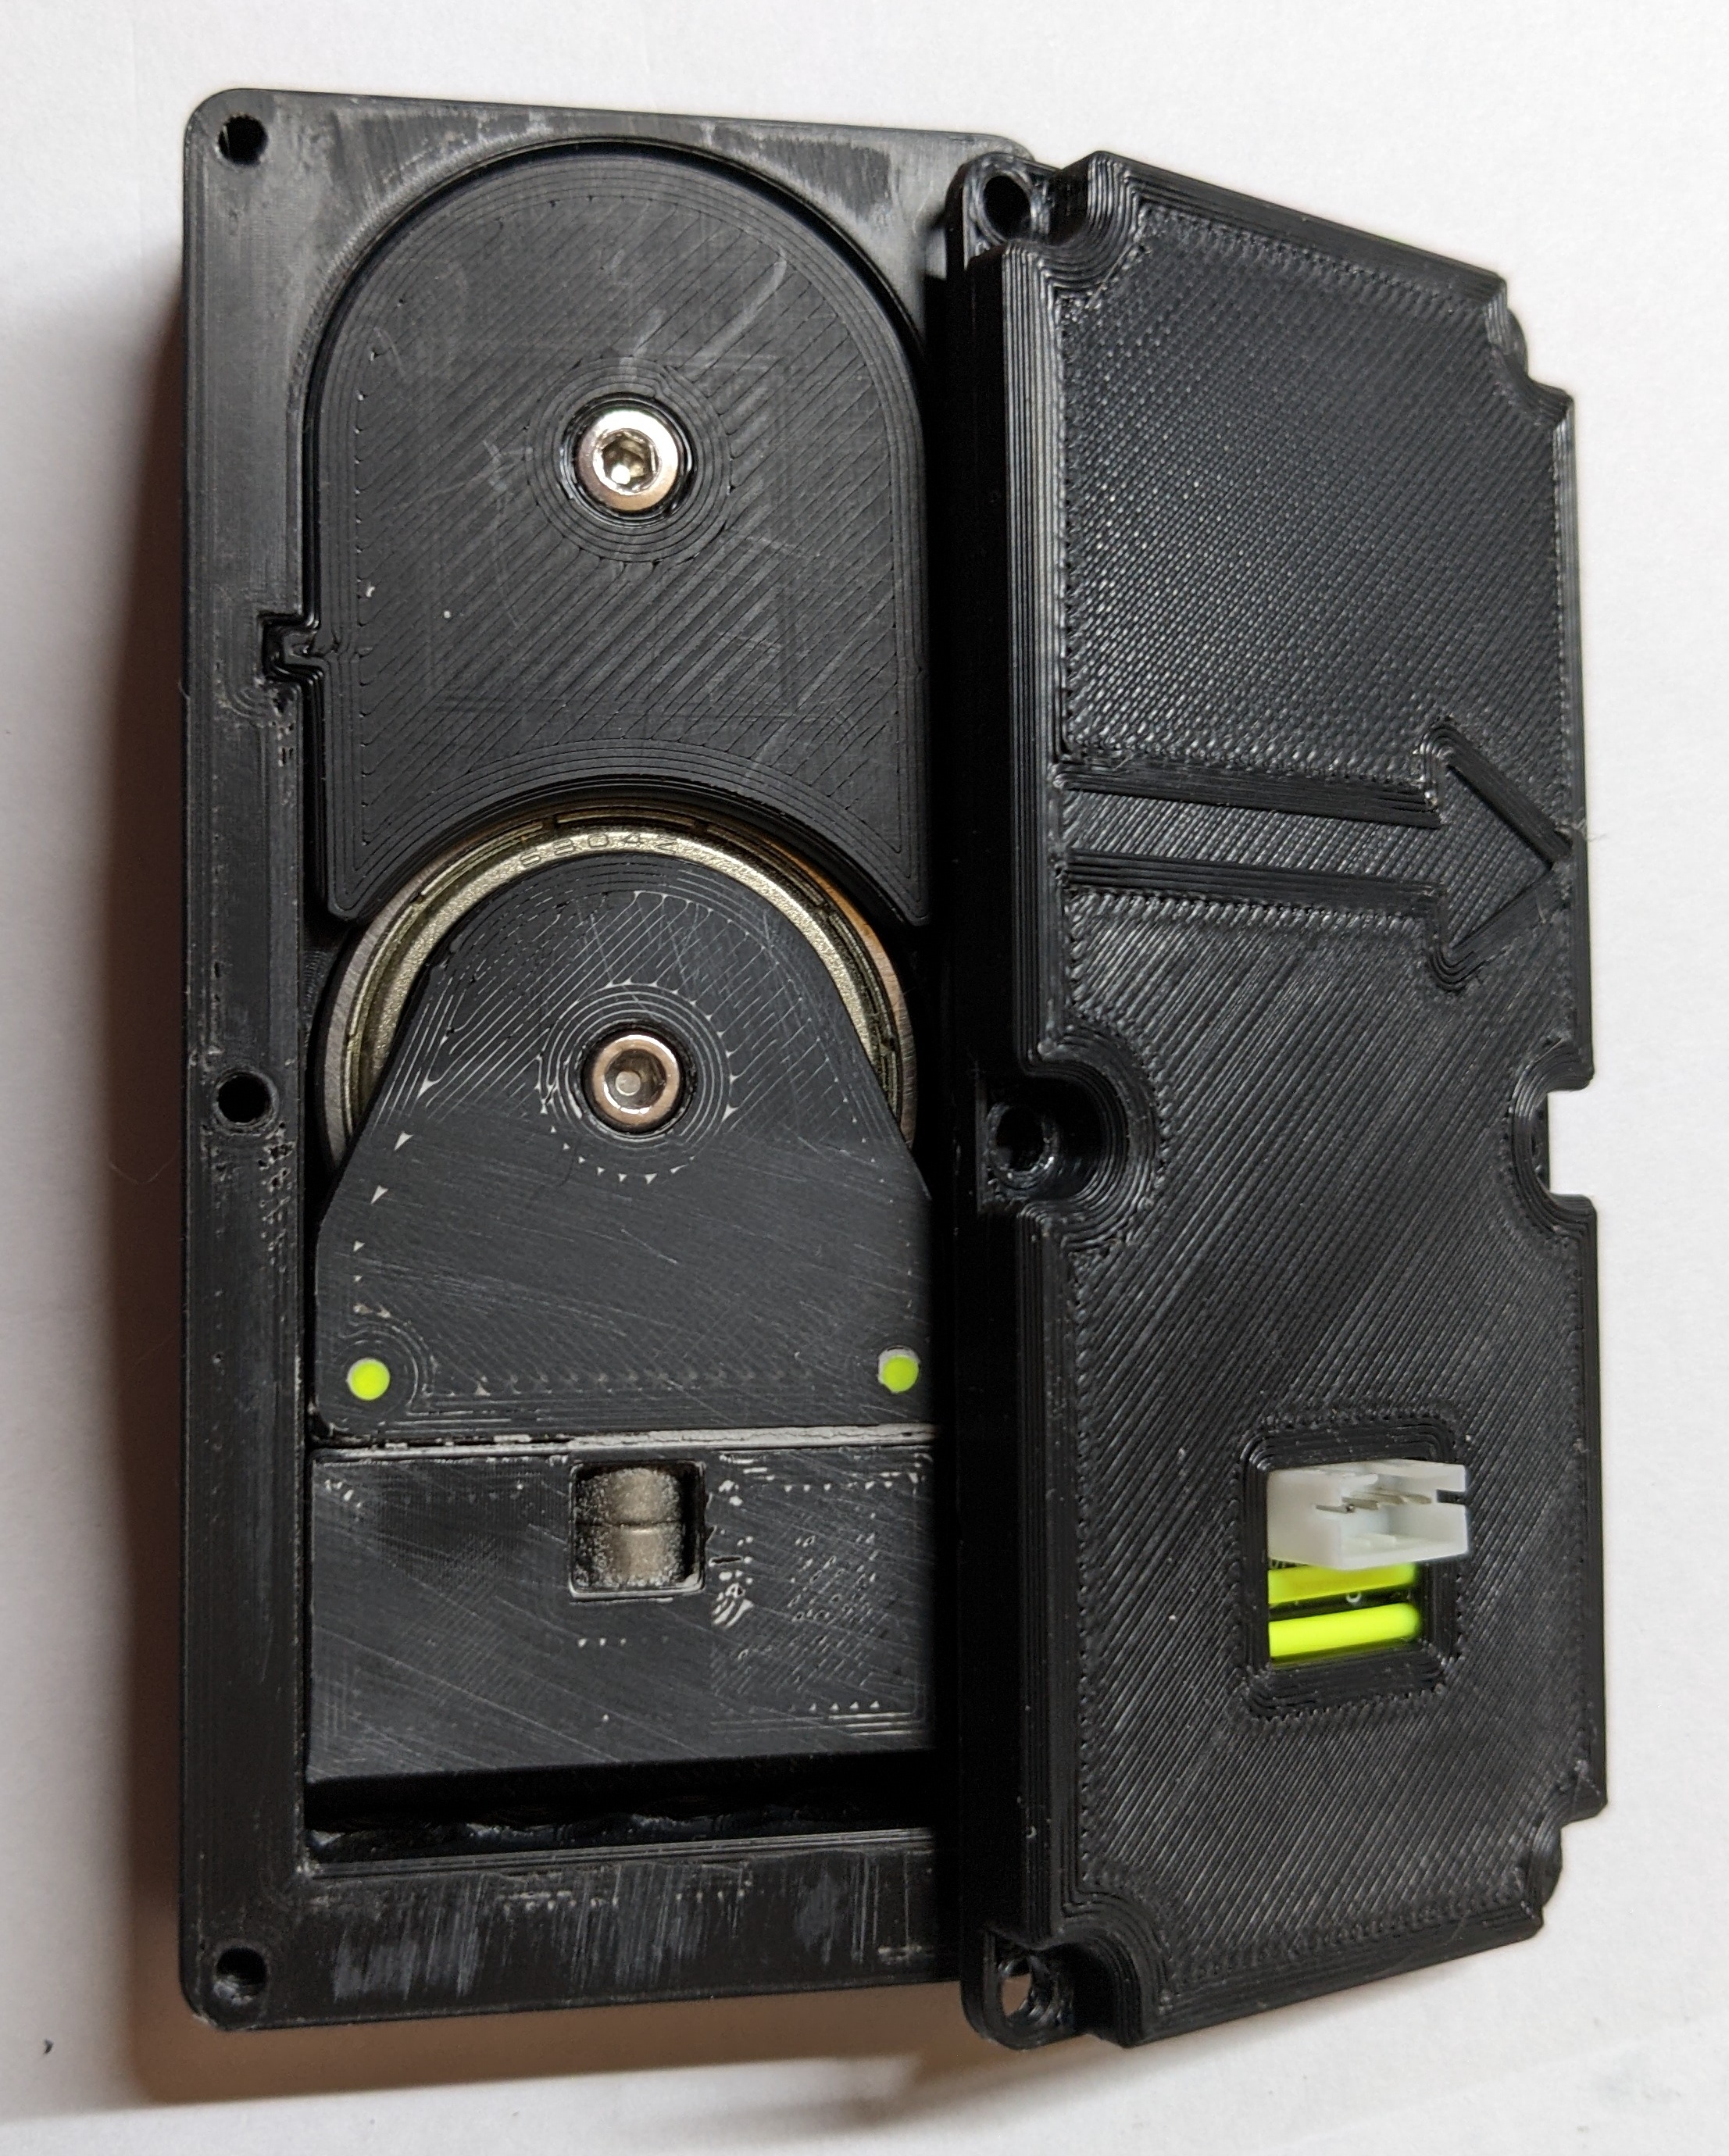
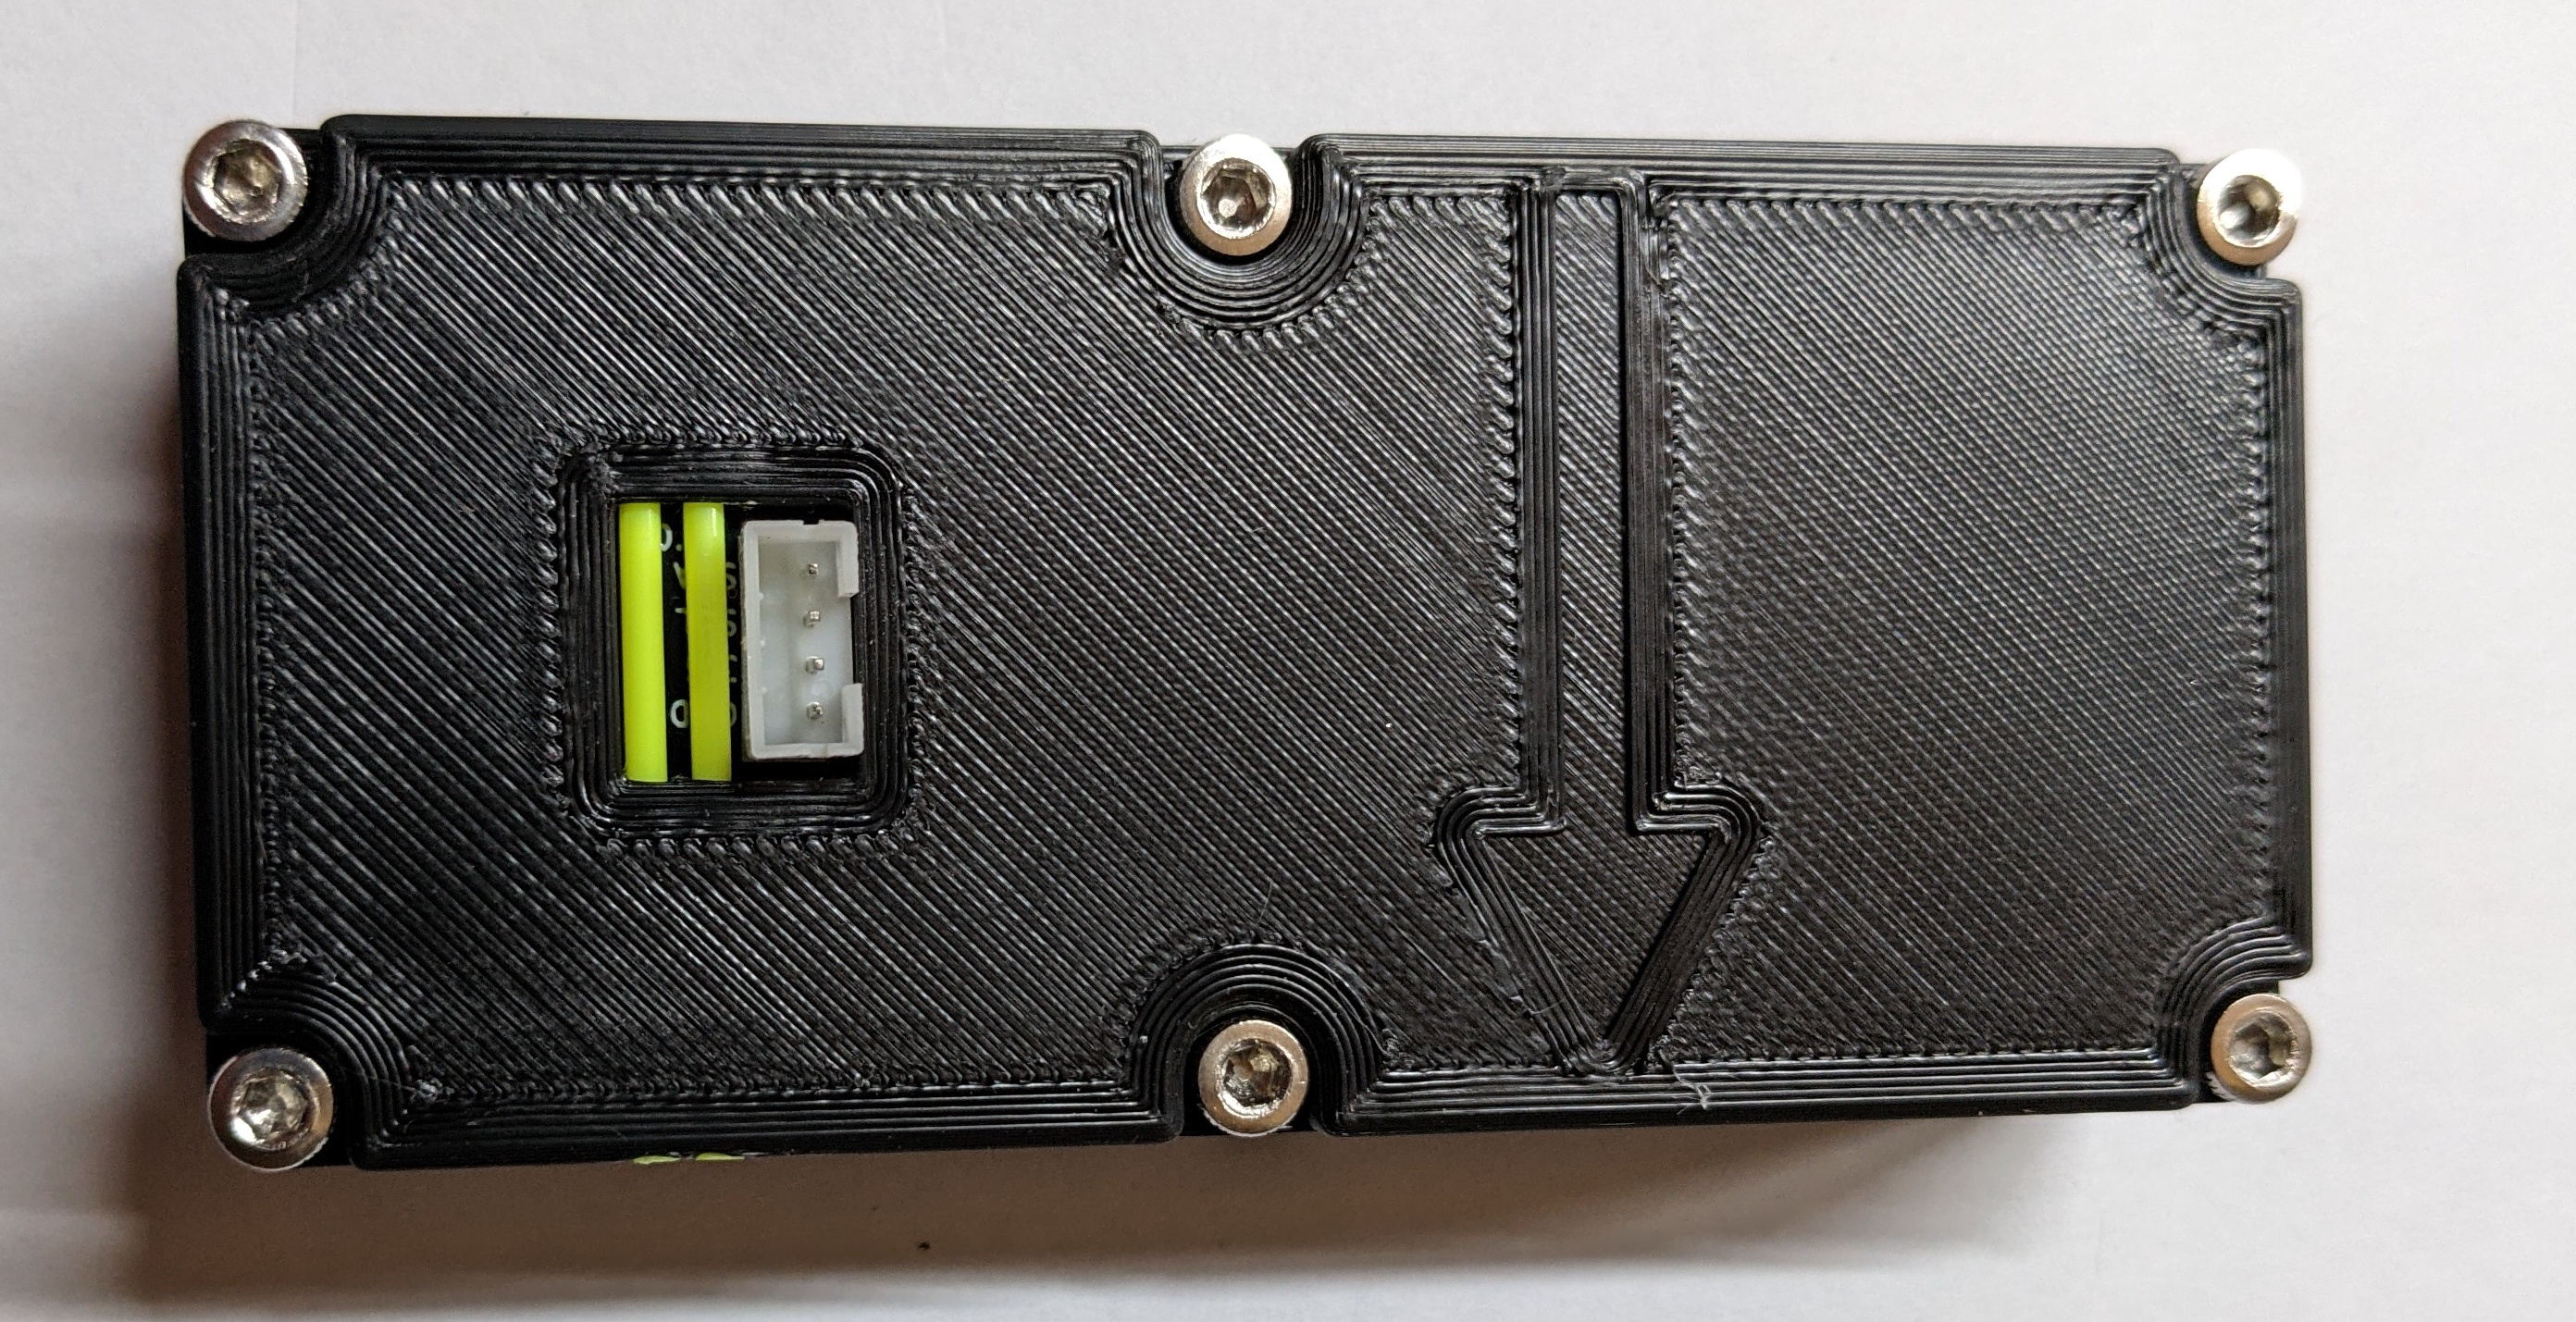
Congratulation the sensor is built
Stick some filament in it, check if the bearings are running smoothy and the plunger closes up correctly once you pull it back out.
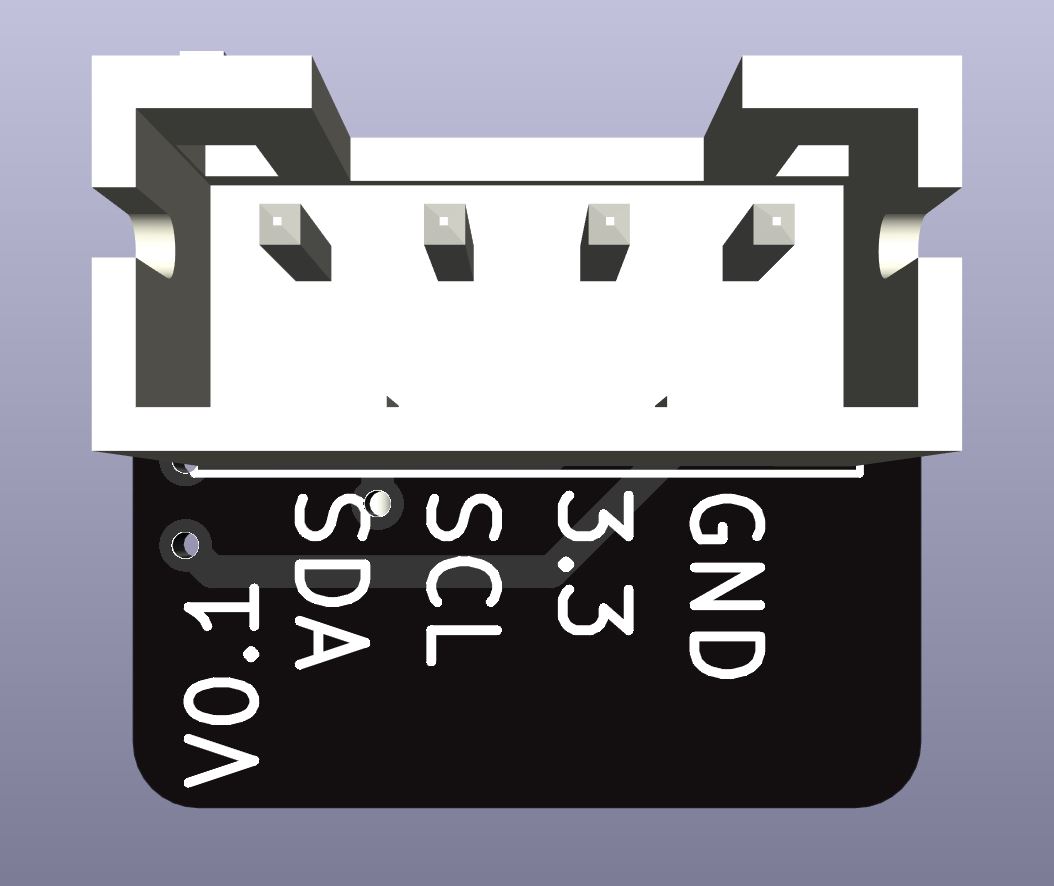 If you are somehow still on a platform with 5V IO pins you are going to need a level shifter for SDA and SCL. Examples include ATMEL based boards like ramps and the old creality boards. If in doubt measure the voltage on the SDA pin before connecting.
Find an available I2C port on yur mainboard and connect the sensor to it. While you can theoretically use any pins with software I2C, I recommend using HW I2C since the sensor produces quite a bit of I2C traffic which would take up quite a lot of the MCUs computing power.
For example I use the I2C port on PB8 and PB9 on the octopus pro.
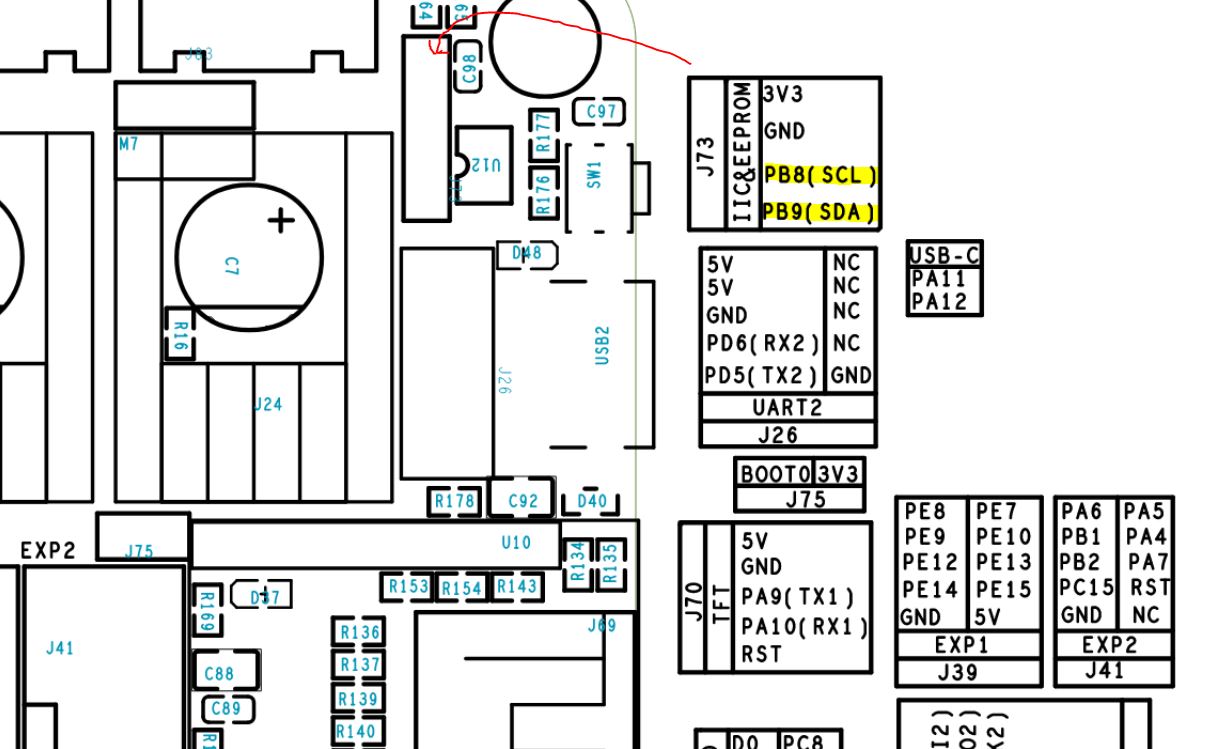
Alternatively you could use a separate microcontroller like a Pi Pico, STM32 bluepill or anything else supported by Klipper.
Simply connect the pins on the sensor to the corresponding ones on your board (GND to GND, 3.3V to 3.3V, SDA to SDA and SCL to SCL).
Make sure the wire is as short as necessary, the longer it is the more interference it will have and klipper will shut down from a single failed I2C transmission, as non-essential it may be (would be cool if someone fixed that at some point but it is what it is for now).
While I do leave mounting as a bit of an exercise for the user I do supply a known working "reference design".
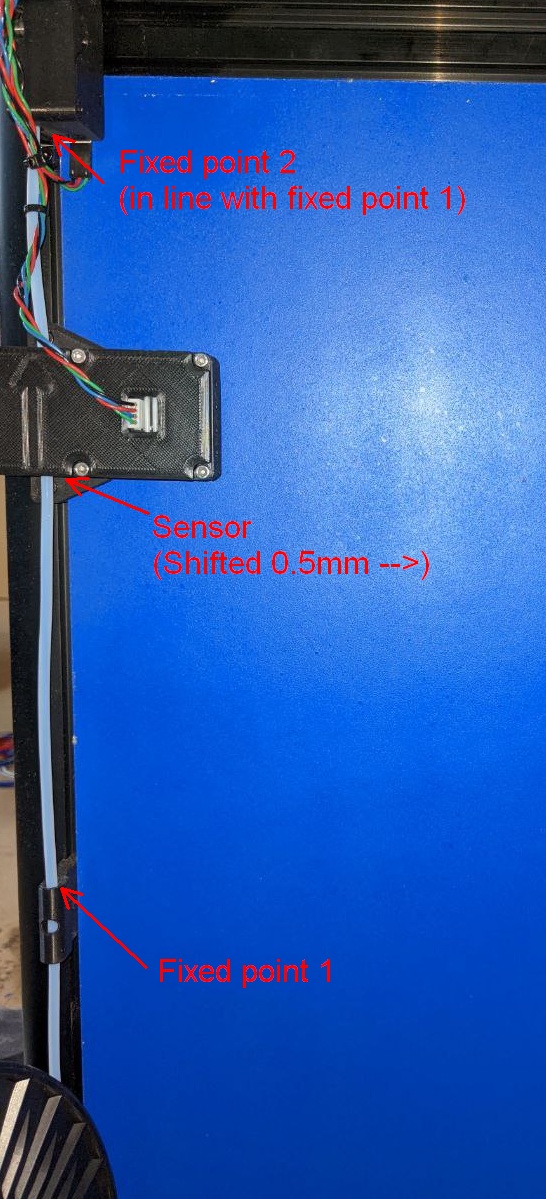
Ultimately you just need to put the sensor in the filament path but the exact mounting method makes quite a difference on the data it generates. For best results the filament path should be constrained for about 10-30cm before and after the sensor, as well as pushed slightly towards the fixed bearing on the sensor. Failing to constrain the filament path should not hinder operation, but it will add a ton of noise to the data. Confining the filament path is recommended for this reason.
I have included STLs for a 0.5mm offset mount for the sensor and tube holders that fit into 6mm wide 2020 channels as a starting point. If you design a nice mount for yourself feel free to submit it as a pull request.
Copy filament_width_sensor_hall_mlx90395.py and filament_width_compensation.py from the "Software" folder into your klipper install under "klippy/extras/" and restart the klipper service.
Add the following section to your klipper config:
[filament_width_sensor_hall_mlx90395 mlx1]
#i2c_mcu: sensorBoard
i2c_bus: i2c1a
i2c_speed: 400000
i2c_address: 12 # 12 if addr 0, 13 if add 1
cal_dia1: 1.5
cal_dia2: 2.0
raw_dia1: 32000
raw_dia2: -32000

[filament_width_compensation]
sensor: mlx1
compensation_enabled: false
runout_enabled: true
oversize_enabled: true
logging: true
default_nominal_filament_diameter: 1.75
poll_time: 0.1
measurement_interval: 1
measurement_delay: 1000
runout_delay: 0
use_current_dia_while_delay: false
max_difference:0.2
runout_diameter: 1.4
oversize_diameter: 1.9
pause_on_runout: true
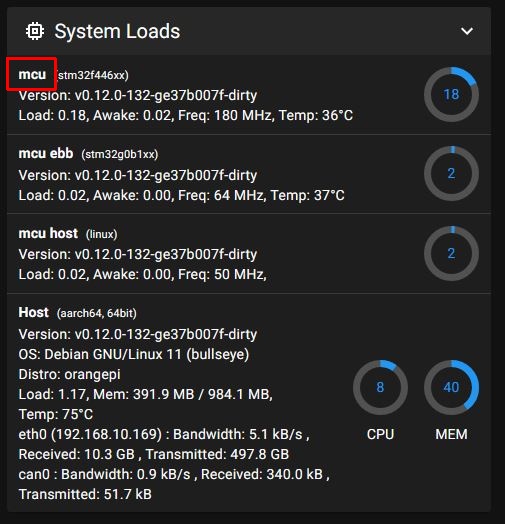
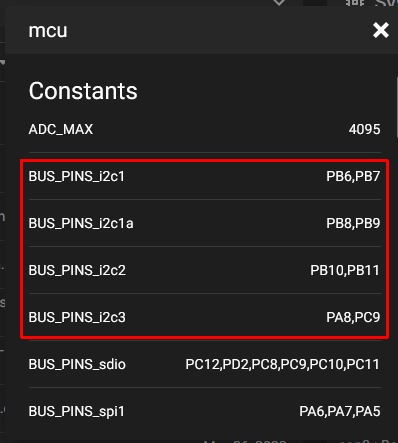
Replace i2c_bus with the one you are actually using. You can look up the names on mainsail by going to "Machine" then clicking the name of the MCU. My case turned out to be I2C1a. If your sensor isn't on the main mcu you'll also need to set i2c_mcu accordingly.
Depending on which jumper you bridged select your i2c_address (0=12, 1=13).
Set measurement_delay to the distance between the center of the sensor and about the middle of the meltzone in mm.
At this point you can restart klipper and if everything went well it should start up fine.
If you are curious you should now find the unique ID of your sensor in the logs by searching for "MLX90395 with ID:". Not sure what to do with that information but if that log line is there it definitely connected.
Check if you can read the sensor using '''MLX_QUERY_RAW SENSOR=mlx1''', this should give you a raw reading of the sensor.
For calibration you'll need 2 reference pieces around the target size, I used 1.5mm and 2mm drill bits.
First measure your reference pieces, in my case the 1.5mm drill bit measures at 1.485mm and the 2mm one at 1.995mm. Enter those values as cal_dia1 and cal_dia2 in your sensor config (no need to restart yet).
Now gently put your first reference piece into the sensor, making sure it is nicely between the bearings and not getting caught somewhere else. Wiggle it around and push and pull a bit, then take a reading using MLX_QUERY_RAW SENSOR=mlx1 AVERAGING=100, I got 30 for the 1.5mm sample. Note your value as raw_dia1. Then repeat the whole thing for your second sample (in this case I got -15612) and note that in raw_dia2.
Putting that all together my calibrated sensor now looks like this (just as an example, no value in copying any of that)
[filament_width_sensor_hall_mlx90395 mlx1]
i2c_bus: i2c1a
i2c_speed: 400000
i2c_address: 12 # 12 if addr 0, 13 if add 1
cal_dia1: 1.485
cal_dia2: 1.995
raw_dia1: 30
raw_dia2: -15612
Check if your calibration worked by putting your reference sample back in and calling QUERY_FILAMENT_WIDTH, if it worked you should get the diameter of your reference piece, repeat with the other one and some filament.
Make sure the sensor reads less than runout_diameter when empty. Adjust runout_diameter if necessary (though if the default value is too low, there may be assembly or calibration errors).
Set oversize_diameter to something below the thinnest diameter in your filament path. For dragon I would not go above 1.9mm, other hotends my be able to take more.
So far you have a really fancy filament runout sensor that knows the diameter of the filament. Next comes the interesting part, actually using filament width compensation.
You can activate it by setting compensation_enabled to true or temporarily enable or disable compensation using the ENABLE_FILAMENT_WIDTH_COMPENSATION and DISABLE_FILAMENT_WIDTH_COMPENSATION commands.
With filament width compensation you need to recalibrate your extrusion multiplier for your filaments. Keep in mind you must extrude at least measurement_delay before calibration actually kicks in, so don't try calibrating before that.
After that you should not have to worry about the actual diameter of your filament anymore.
Important: always clear the filament array after loading filament
You can clear the array using the CLEAR_FILAMENT_ARRAY. If you don't do that it'll compensate on wrong data and may actually make things worse.
If you have a filament loading macro it may make sense to add it to that.
[filament_width_sensor_hall_mlx90395 my_sensor]
#i2c_mcu:
#   The name of the micro-controller that the chip is connected to.
#   The default is "mcu".
#i2c_bus:
#   If the micro-controller supports multiple I2C busses then one may
#   specify the micro-controller bus name here. The default depends on
#   the type of micro-controller.
#i2c_speed:
#   The I2C speed (in Hz) to use when communicating with the device.
#   The Klipper implementation on most micro-controllers is hard-coded
#   to 100000 and changing this value has no effect. The default is
#   100000. Linux, RP2040 and ATmega support 400000.
#i2c_address:
#   The i2c address of the device. This must specified as a decimal
#   number (not in hex). The default is 12.#
#   12 if addr 0, 13 if add 1
#cal_dia1:
#cal_dia2:
#   The calibration values (in mm) for the sensors. The default is
#   1.50 for cal_dia1 and 2.00 for cal_dia2.
#raw_dia1:
#raw_dia2:
#   The raw calibration values for the sensors. The default is 10000
#   for raw_dia1 and -10000 for raw_dia2.
[filament_width_compensation]
sensor:
#   Name of the filament width sensor
#compensation_enabled:
#   Compensation enabled or disabled after power on. The default is to
#   disable.
#runout_enabled:
#   Runout enabled or disabled after power on. The default is to
#   disable.
#oversize_enabled:
#   Oversize runout enabled or disabled after power on. The default is to
#   disable.
#logging:
#   Filament width logging enabled or disabled after power on. The default is to
#   disable.
#default_nominal_filament_diameter:
#   The nominal filament diameter (what the "correct filament width is assumed to be").
#   needs to be provided and >1
#poll_time: 0.1
#   How long to wait between taking readings in seconds default is 1
#measurement_interval: 1
#   The minimum distance between readings in the compensation buffer
#measurement_delay: 1000
#   The distance from sensor to the meltzone in
#   millimeters (mm). The FIFO buffer keeps each sensor value and
#   position in an array and POP them back in correct position. This
#   parameter must be provided.
#runout_delay: 0
#   How much before the meltzone (based on measurement delay) it should stop on runout in mm.
#   For example 200 would mean stop 200mm in front of the meltzone, keep in mind after the runout
#   is triggered it doesn't stop instantly so leave enough extra.
#   The default is 0 (disable delayed runout entirely and stop right at the sensor)
#use_current_dia_while_delay:
#   If the compensation should use the first reading it got while the buffer catches up (after power up
#   or buffer clear). Otherwise it will use default_nominal_filament_diameter.
#   The default is false
#max_difference:
#   Maximum allowed filament diameter difference in millimeters (mm).
#   If difference between nominal filament diameter and sensor output
#   is more than +- max_difference, extrusion multiplier is set back
#   to %100. The default is 0.200.
#runout_diameter:
#   Diameter below which a runout is triggered (if runout is enabled)
#   The default is 1.0
#oversize_diameter: 1.9
#   Diameter above which a runout is triggered (if oversize is enabled)
#   The default is 1.9
#pause_on_runout: True
#   When set to True, a PAUSE will execute immediately after a runout
#   is detected. Note that if pause_on_runout is False and the
#   runout_gcode is omitted then runout detection is disabled. Default
#   is True.
#runout_gcode:
#   A list of G-Code commands to execute after a filament runout is
#   detected. See docs/Command_Templates.md for G-Code format. If
#   pause_on_runout is set to True this G-Code will run after the
#   PAUSE is complete. The default is not to run any G-Code commands.
#insert_gcode:
#   A list of G-Code commands to execute after a filament insert is
#   detected. See docs/Command_Templates.md for G-Code format. The
#   default is not to run any G-Code commands, which disables insert
#   detection.
MLX_QUERY_RAW SENSOR=<sensor> AVERAGING=<count> Allows requesting a raw reading from the specified sensor with optional averaging.
QUERY_FILAMENT_WIDTH requests a reading for the current sensor and displays it.
DUMP_FILAMENT_ARRAY dumps the current content of the filament width buffer to the console
CLEAR_FILAMENT_ARRAY clears the filament width buffer
ENABLE_FILAMENT_WIDTH_COMPENSATION Temporarily enables filament width compensation
DISABLE_FILAMENT_WIDTH_COMPENSATION Temporarily disables filament width compensation
ENABLE_FILAMENT_WIDTH_RUNOUT Temporarily enables filament width runout
DISABLE_FILAMENT_WIDTH_RUNOUT Temporarily disables filament width runout
ENABLE_FILAMENT_WIDTH_OVERSIZE Temporarily enables filament oversize runout
DISABLE_FILAMENT_WIDTH_OVERSIZE Temporarily disables filament oversize runout
ENABLE_FILAMENT_WIDTH_LOGGING Temporarily enables filament width logging
DISABLE_FILAMENT_WIDTH_LOGGING Temporarily disables filament width logging
SET_FILAMENT_WIDTH_OVERSIZE_DIAMETER OVERSIZE_DIAMETER=<dia> Temporarily sets the oversize diameter
SET_FILAMENT_WIDTH_RUNOUT_DIAMETER RUNOUT_DIAMETER=<dia> Temporarily sets the runout diameter
Turns out accurately measuring linear displacement is the easy part of this hole thing (and that already was quite a journey). Turning filament width into linear displacement accurately is where it gets really complicated. The sensor started off a lot smaller, the early development version were using 4mm pins. that worked well on the test machine and it was very useful for figuring out the magnet and sensor arrangement and testing thermal drift and stuff but once actual filament got into play it got a bit more complicated.
Filament has a natural bend to it and there is tension on it, it can bow away from the fixed side and appear too large. This can of course be mitigated by using more force but then you start to squish the filament and squish introduces a whole other non linear source of error. Also with the 4mm pins the spring force required to pass the 180 test (a piece of filament reading the same with the bend towards the fixed bit and away from it) caused extreme drag and also squished the hell out of the filament. Then came small bearings to mitigate the drag, that worked but we still had a ton of squish so the bearings got bigger and bigger (the 6909 one was initially because I ordered the wrong bearings but was my daily driver for quite a while). I did consider adding squish compensation so I could go back to a more reasonable size but that would have added another ting to calibrate per material and I didn't really want to do that. After the discovery that confining the filament path helps a lot I was able to reduce the spring force a lot which also allowed me to go back to more reasonably sized bearings. With the current version there should be negligible squish.
Leaves open the option to use more force, should not be necessary but the option doesn't hurt anyone.
When I was dealing with thermal drift, the first idea was ovenized sensors which worked but it's high complexity and would have made for a way more complicated build and configuration guide (I even had a sensor with an ovenized magnet to test the drift on those). Then I found that there are thermal compensated hall sensors and that there is a digital one for pretty much the same price as the analog ones. I tested both he analog ones and the digital one and like the digital one better. Their configurability made testing easier and it has a better adc than all the 3d printer mcus I know of that is also closer to the sensor.
At least all of the ones I know of. If that is actually a problem in practice I am not sure, deuterius reports good results with a sensor I know isn't linear but ultimately we are using cnc glue guns and even the non linear ones tend to read higher for higher and lower for lower just well not linearly so. But I want this sensor to remove variables not add new ones so I may have gone a bit overboard.
This sounds so good in theory and is one of the bigger contributors to me going down this rabbithole. Instead of just going with it my dumb ass just had to test it. Theoretically if both sensors had the exact same thermal drift (they don't unless you do some crazy binning, they don't even all drift the same direction) and the sensors were the same distance from the magnet (the sensing bit isn't centered so if you just put one flipped next to the other one of the sensors is going to be significantly further away from the magnet) it would work. As it is you just get a pretty ugly curve that warps into another ugly curve over temperature. Once you start binning sensors you may as well get a thermally compensated one.
Turns out there is a sensor magnet arrangement that gives a linear output for linear displacement, it's just not the one any onf the designs I know of use. Also turns out the people making the sensor know about it, after weeks of trial and error someone pointed me to a application note by ti that literally had a table (page 5) explaining what I was pretty much brute force mapping out by hand (I can't find who sen't it to me but still thank you).
I am looking into integrating it with a high resolution filament motion sensor as position data source instead of the motion system.
Other than that I have been using it as it is now for over a year and very similar earlier versions even longer than that.
- Deuterious for the nice blog post proving filament with compensation can be practical
- Whoever sent me the ti pdf for making magnets make a bit more sense
- MiracuruZRH for testing
- Blargedy for proof-reading this monstrosity
- My glorious local filament manufacturer for creating the reason to make this and providing extreme samples

