 Terraform is a declarative Infrastructure as Code, IaC tool. That is it a tool for provisioning resource on various providers such as AWS, Azure, GCP etc. Delarative in that you specify the end state of the resources and terraform will go ahead to generate an execution plan describing what it will do to reach the desired state, and then executes it to build the described infrastructure.
On macOS, simply run brew install terraform
To follow this tutorial you will need:
- An AWS account
- The AWS CLI installed
- Your AWS credentials are configured locally.
- With your account created and the CLI installed to configure the AWS CLI run
aws configure - Follow the prompts to input your AWS Access Key ID, Secret Access Key, default region us-east-1 and default output format json
- The configuration process creates a file at ~/.aws/credentials on macOS and Linux or %UserProfile%.aws\credentials on Windows, where your credentials are stored.
This file refers to a .tf file where you will describe the infrastructure to be provisioned by terraform.
- cd into your desktop or wherever location you like to save your project. For me, it is my Desktop
- run
mkdir terraform-project cd terraform-projectto go into the created directory.- run
touch main.tfto create the file
This refers to the cloud service provider. In our case, our provider is AWS which is responsible for creating and managing resources. A provider is a plugin that Terraform uses to translate the API interactions with the service
- first define your provider copying and pasting this block.
terraform {
    required_providers {
        aws = {
        source = "hashicorp/aws"
        version = "4.48.0"        #version is optional, u can remove this line
        }
    }
    }
provider "aws" {
    profile = "default"   #if left out, terraform automatically searches for saved API credentials to use
    region = "us-east-1"
}
The profile attribute in the "provider" block refers to the AWS credentials stored in the AWS Config File, created when we configured the AWS CLI. It is recommended that you never hard-code credentials into *.tf configuration files. We are explicitly defining the default AWS config profile here to illustrate how Terraform should access sensitive credentials.
The resource the block defines a piece of infrastructure. A resource might be a physical component such as an EC2 instance, or it can be a logical resource such as a Heroku application. Defining a resource follows this general pattern, resource "provider_resource_name" "resource_name_given_by_you" { }. Lets define an ec2 resources
    resource "aws_instance" "my-first-ec2-using-tf" {
    ami           = "ami-0574da719dca65348" #goto to the ec2 console, 'deploy inst', search for the ami u want e.g 'ubuntu' and copy
    instance_type = "t2.micro"

    tags = {                #tag is optional
        Name = "first-inst-with-tf"
        }
    }
After creating a new configuration file or check out an existing configuration from version control — you need to initialize the directory with this command terraform init. This will download and installs providers used in the configuration, which in this case is the aws provider.

- run
terraform validateIf your configuration is valid, Terraform will return a success message.
- run
terraform planterraform will go ahead to compare your infrastructure definition and resources running on your aws account if any and will output what will be created or deleted. - run
terraform applyand type yes when prompted. This will go ahead and provision the ec2 instance we have defined.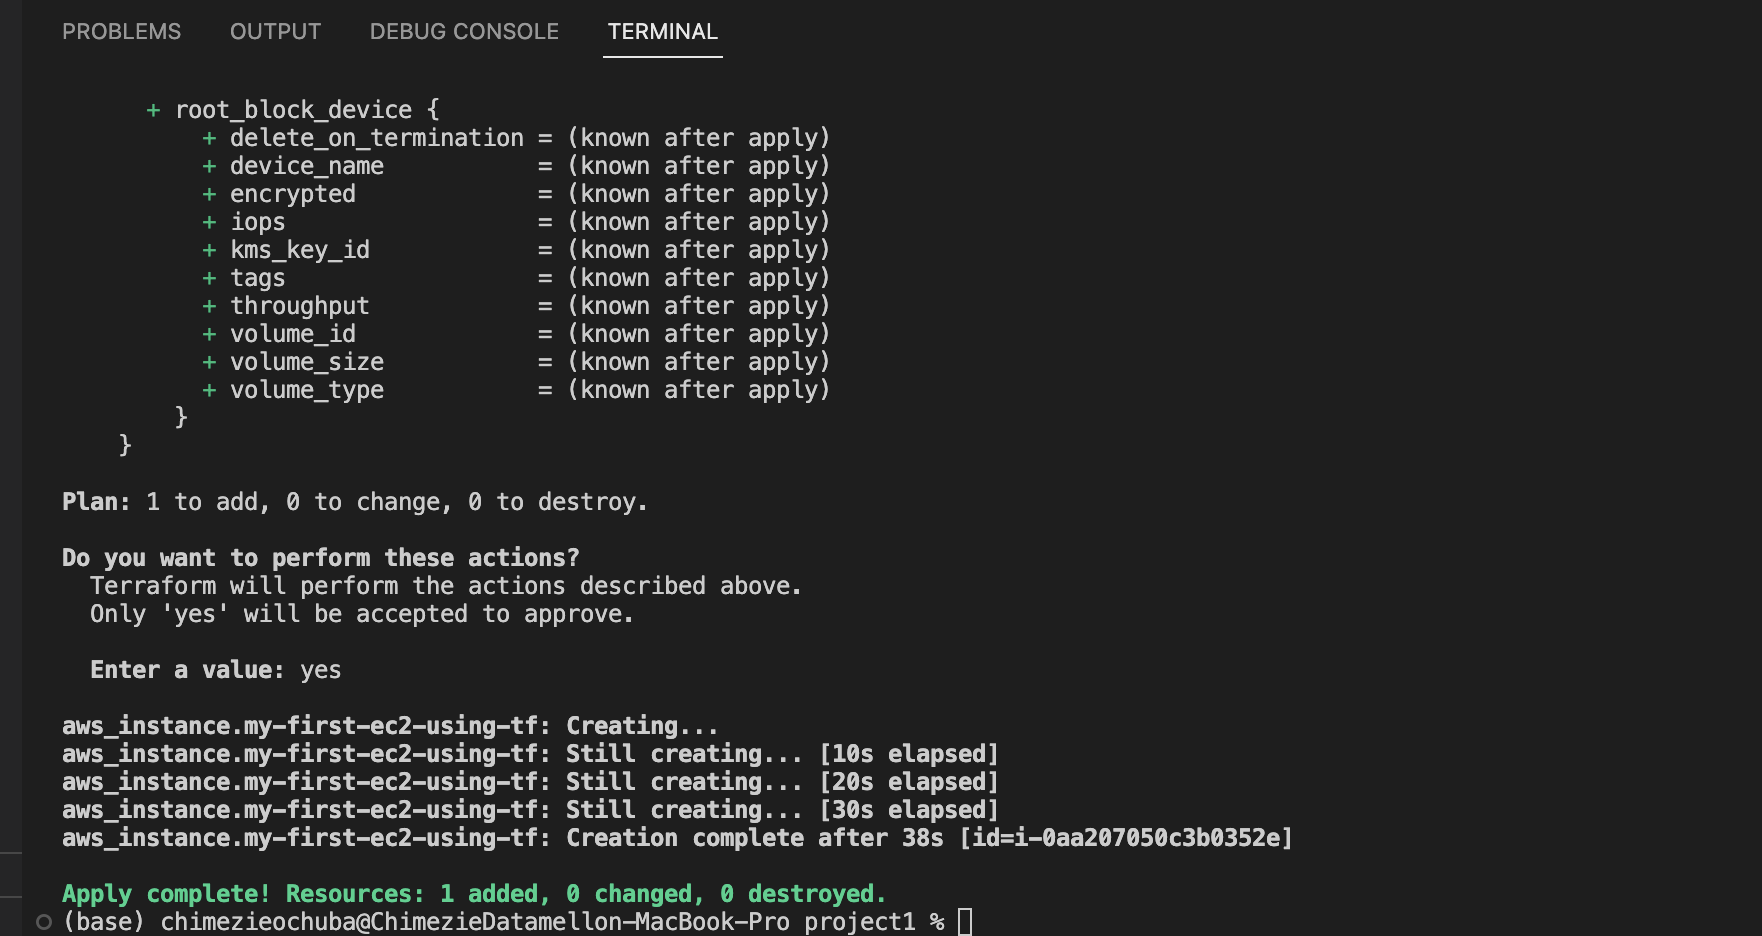
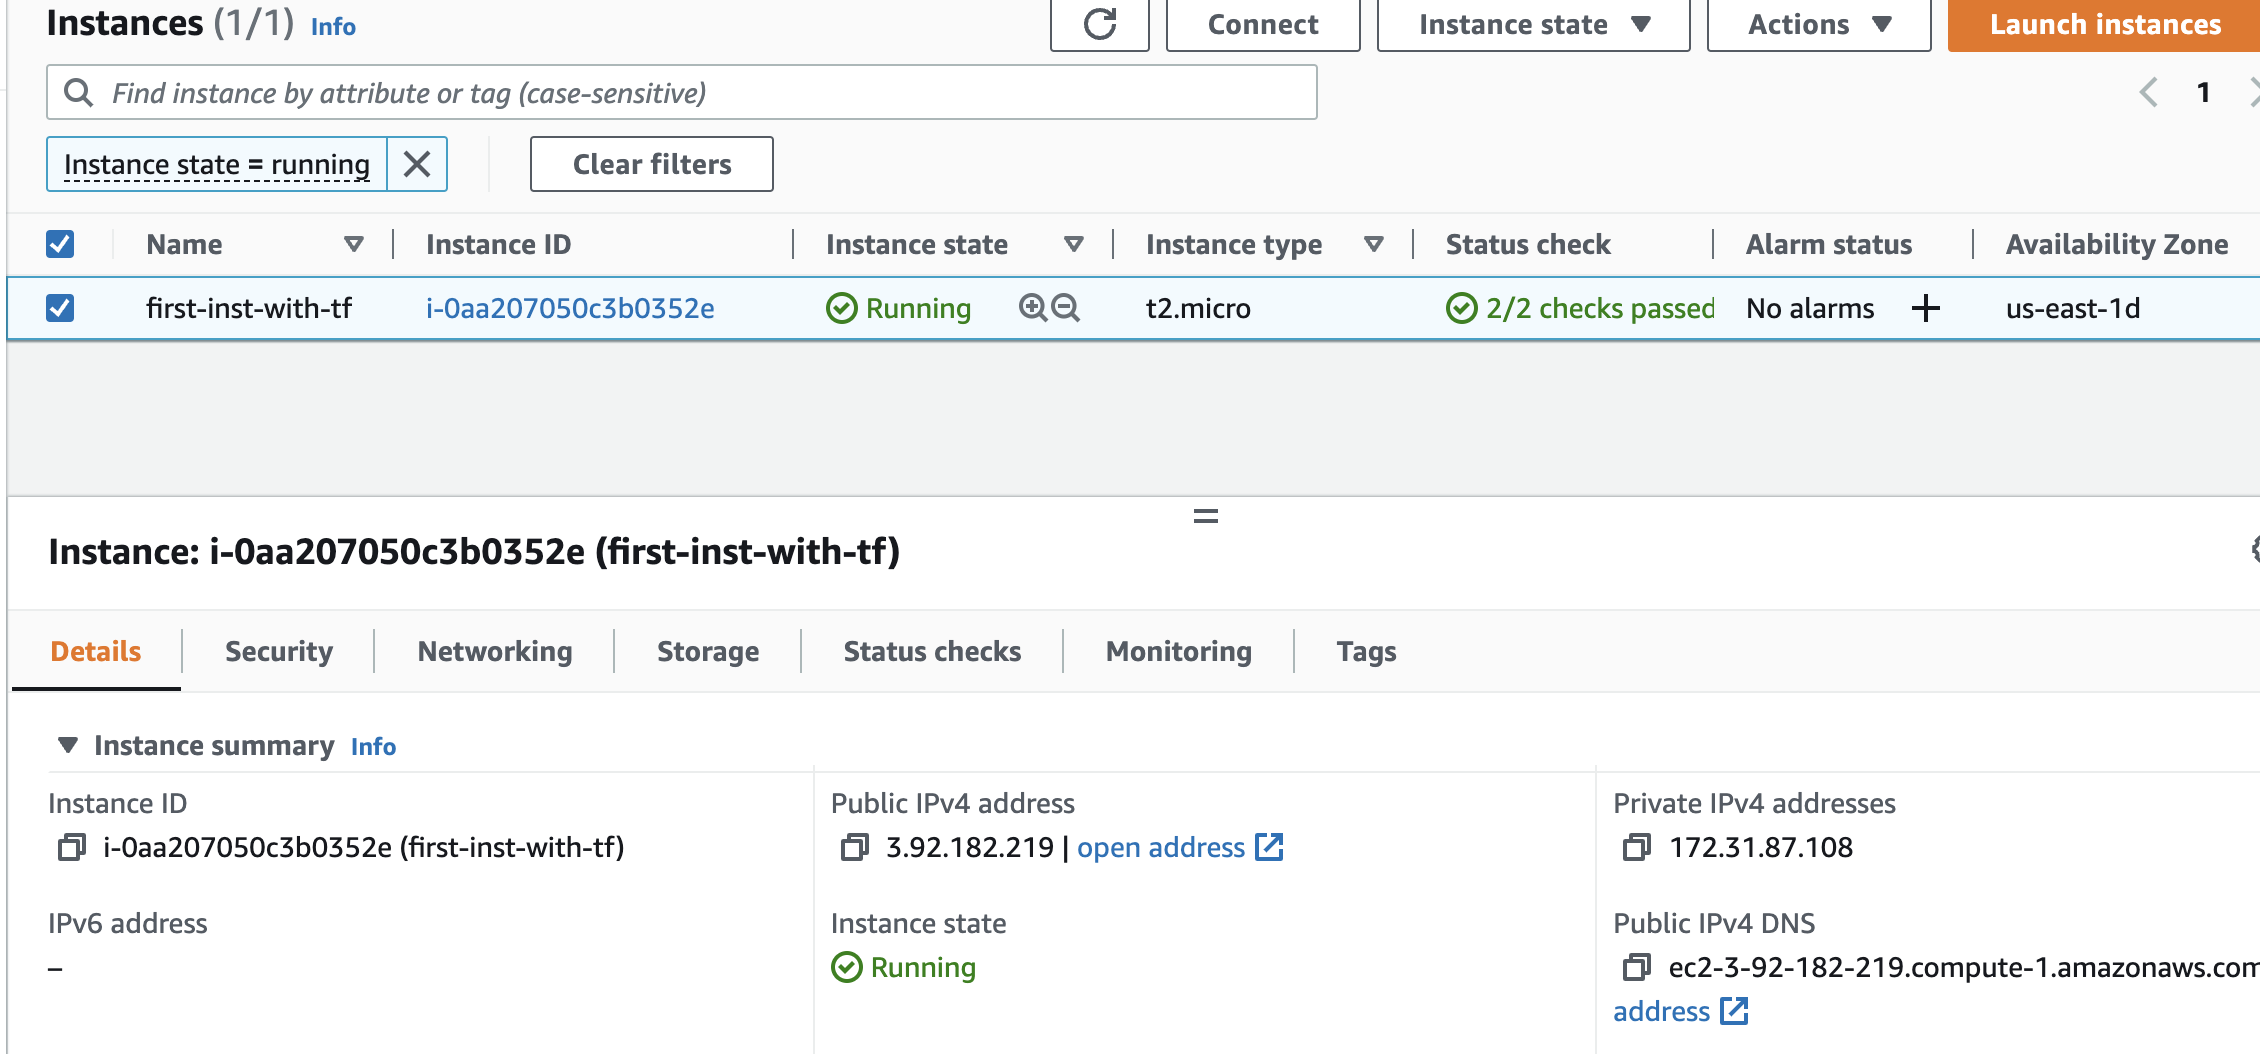


Applying your configuration, Terraform wrote data into a file called terraform.tfstate. This file now contains the IDs and properties of the resources Terraform created so that it can manage or destroy those resources going forward. Store this file securely and only share to tructed team menbers who need to manage your infrastructure.
- Inspect the current state using terraform show
- to get a resource from the state file assuming you have a long state file run
terraform state list
- to destroy all resources created by terraform run
terraform destroy
TODO
- Local backend + provider config
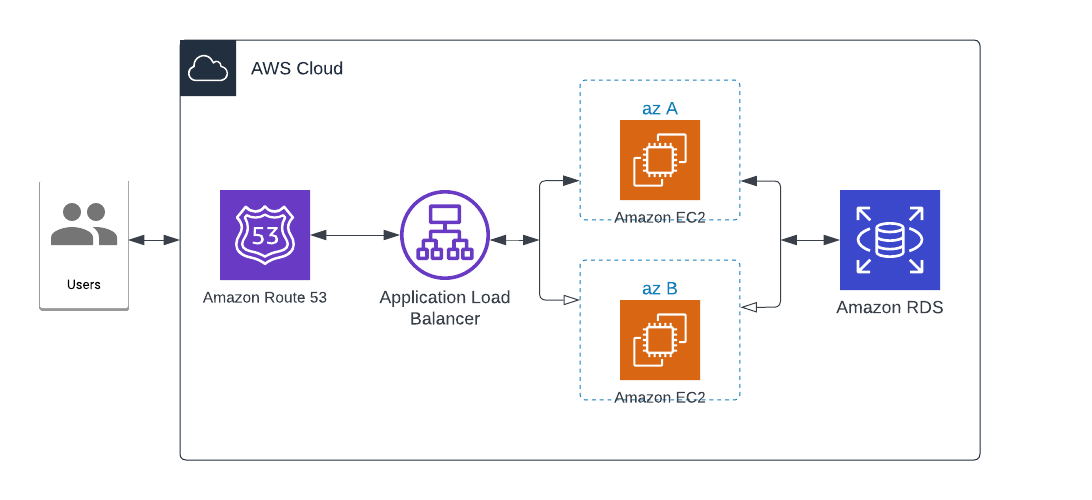
- EC2 Instances
- Default VPC
- subnet
- Security groups + rules
- Application Load Balancer
- ALB target group + attachment
- Route 53 zone + record
- RDS Instance

- define the instances as follow;
    resource "aws_instance" "terra-inst1" {
    ami           = "ami-0574da719dca65348" #goto to d ec2 console, deploy inst search for d ami u want e.g 'ubuntu' and copy
    instance_type = "t2.micro"
    security_groups = [ aws_security_group.instance.name ]
    user_data = <<-EOF
                #!/bin/bash
                echo "<h1>HELLO world from my first instance</h1>" > index.html
                python3 -m http.server 8080 &
                EOF

    tags = {
        Name = "first-inst-with-tf1"
    }
}
- notice that security_group and user_data attributes have been added
data block is used to reference existing resource on aws
    data "aws_vpc" "default_vpc" {      # data block references an existing resource on aws
    default = true
    }
    data "aws_subnet_ids" "default_subnet" {
    vpc_id = data.aws_vpc.default_vpc.id
    }
- see the main.tf file
- next define security group then attach a security group rule
- allow all traffic inbount from port 8080 over tcp protocol
resource "aws_security_group" "instance" {
  name = "instance-security-group"
}
setup load balancer listener Define target group for the load balancers attach the defined instances to the target group by defining target group attachments
resource "aws_lb_target_group_attachment" "instance_1" {
  target_group_arn = aws_lb_target_group.intances.arn
  target_id = aws_instance.terra-inst1.id
  port = 8080
}
Setup listener rule
- in our case the alb listens at all paths
Setup a slightly different security group for the alb
Define an outbound egress rule as well
Define the load balancer itself
Next is to define an actual domain if you have one registered.
running
terraform planshould now show that we have 16 resources to be provisioned if you have a registered domain name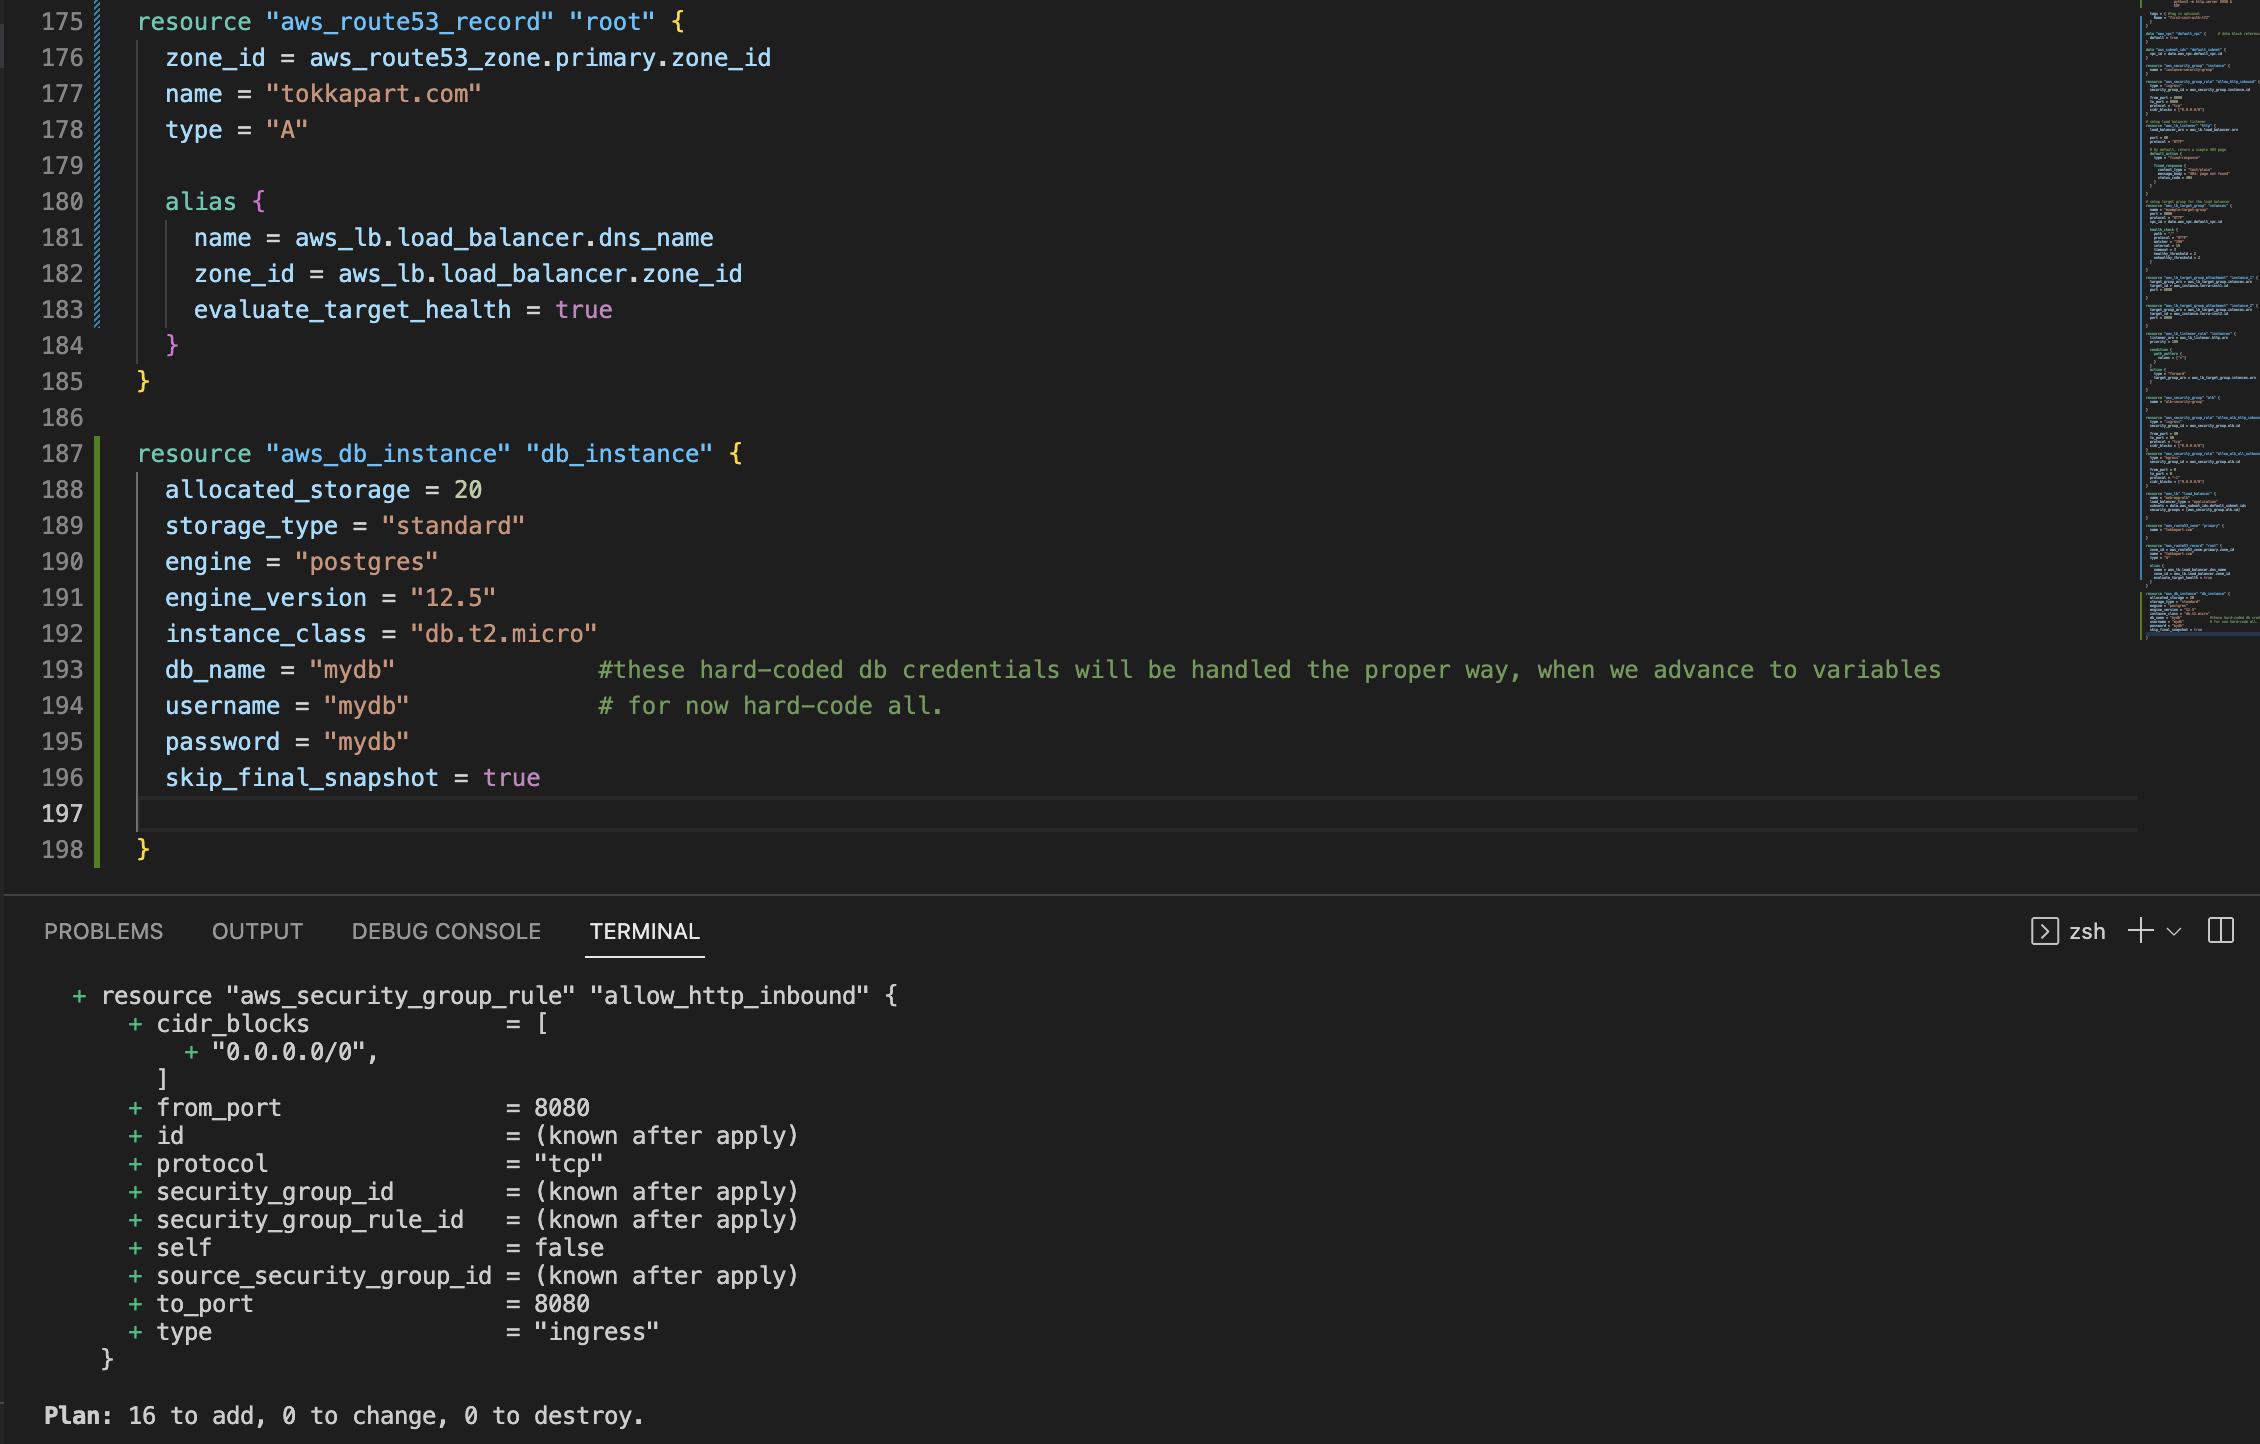
- run
terraform applyand enter yes when prompted - terraform will provision all the resources we have defined
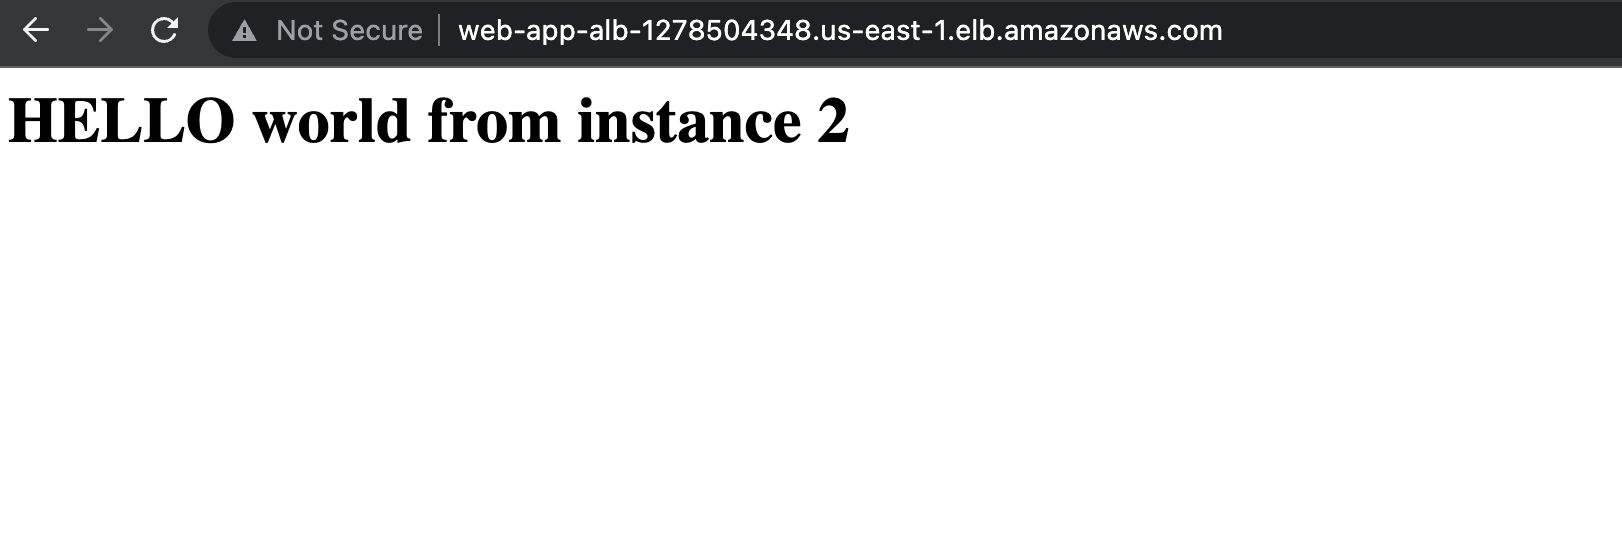
- goto the aws console and copy the load balancer DNS if the route 53 has not been set up
- load in another tab. You will be continuously sent to different instance if you keep refreshing


terraform aws provider How to Provision AWS Infrastructure with Terraform Complete Terraform Course